Overview
The Auto Testing tool is a resource kit designed to test Bizagi processes automatically in development and testing environments, in order to validate that all paths in a process workflow behave as expected.
For basic information on this feature, refer to Automatic testing.
Requirements
•Download the Auto Testing tool directly at Autotesting for Bizagi. It is downloaded as a portable .zip file.
•In order to configure the Auto Testing tool you need to install it on a supported Windows OS by Bizagi, having the 4.0 .NET and 4.5.2 .NET frameworks installed.
•It also relies on a local IIS service to publish its recording service (a set up IIS is needed).
•Set the content security policy to make requests from local sites. Set the security policy.
•Generate and install the certificate to run the Auto testing tool using the HTTPS protocol. Refer to Set the auto testing with HTTPS.
Though, you may use the same machine where you use Bizagi Studio (preferred option).
To record scenarios, the Auto Testing tool relies on HTML 5 features.
Therefore, in order to use this tool you need a browser that supports such standard.
Supported browsers which are HTML 5 compatible, are:
•Google Chrome (recommended).
•Mozilla Firefox (version 20 or higher).
|
•The Auto Testing tool is compatible with applications built in Bizagi Studio 11.x or above. |
Set the Auto Testing with HTTPS
Because the Work Portal runs with the HTTPS protocol, you must configure the auto testing tool with HTTPS. Follow these steps:
1. Download and unzip the file CertificateGeneration.zip in a local path. All the certificates generated with this tool will be saved in the same path where you unzip this file.
2. Run the following bat as an administrator: S01-CreateCA.bat. To do that right click the bat file and select Run as administrator. This bat runs a script that generates the Authority Certificate. This script will request for a password, you may use the password you like. Once you use a password, the same is needed for the following steps.
3. Run the following bat as an administrator: Run S02-CreateCertServ.bat. To do that right click the bat file and select Run as administrator. This bat runs a script that generates the Application Certificate.
4. Run the following bat as an administrator: Run S03-RegisterPort8096.bat. To do that right click the bat file and select Run as administrator. This bat runs a script that registers the port for a secure communication.
5. Enable secure access without validation from localhost.
Open a new tab on Google Chome and type the following URL: chrome://flags/#allow-insecure-localhost
Click the Enable link, to Allow invalid certificates for resources loaded from localhost.
Because the Auto Testing tool execute requests from a local computer, you need to set the Content Security Policy to enable request from local sites without considering the domain. To do so, you need to define the value of the policy as explained in Content Security Policy definition. Make sure that you include the following value of the policy:
default-src * {0} data:; script-src 'self' 'unsafe-inline' 'unsafe-eval'; style-src 'self' 'unsafe-inline'; img-src 'self' data: blob:; font-src * 'self' 'unsafe-inline' data:;
Auto testing configuration
The Auto Testing tool can be configured through 2 different alternatives: basic configuration (by using the tool's user interface), or by advanced configuration (by manually editing an XML configuration file).
The basic configuration allows for a quick start while the advanced configuration presents the possibility to manage additional settings.
Basic configuration
To configure the Auto testing tool through its user interface, follow these steps:
1. Copy and paste the Tool .zip file and extract it into a folder in your computer.
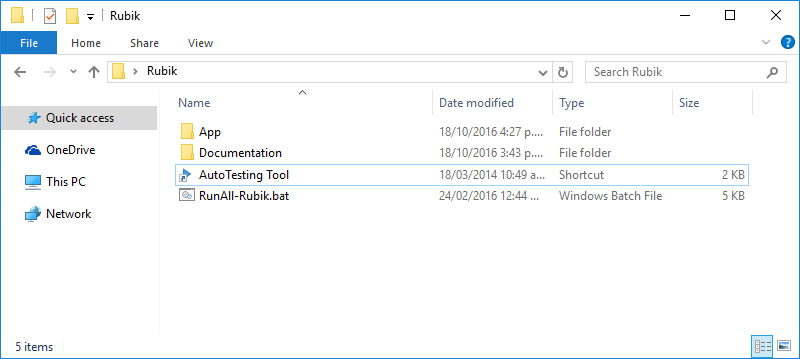
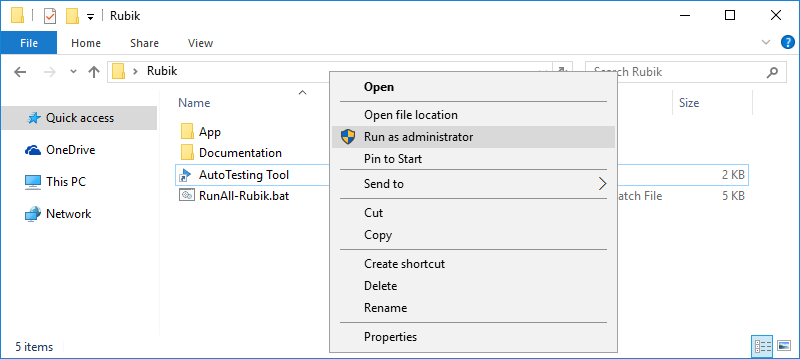
2. Execute the AutoTesting Tool.exe file with admin rights.
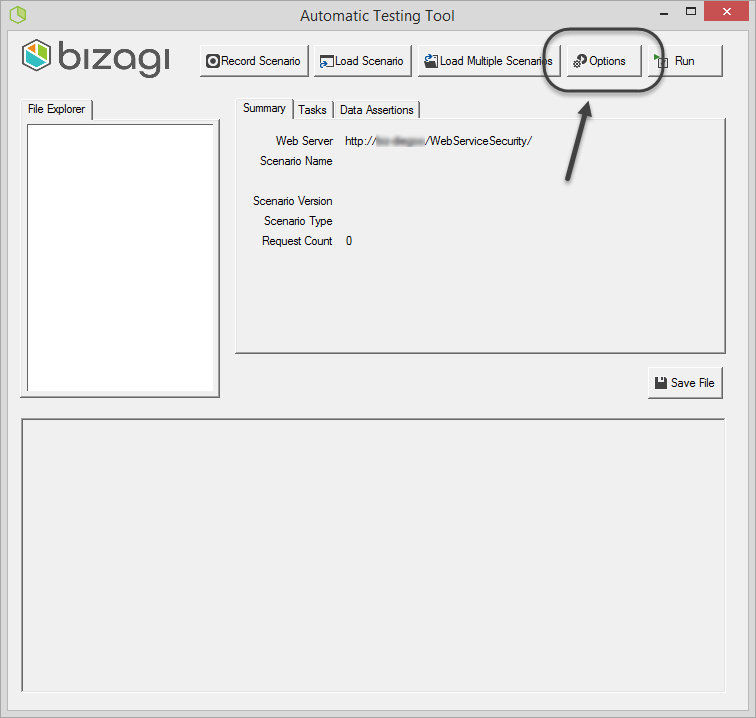
3. Click the Options button.
4. Select the Connection tab.
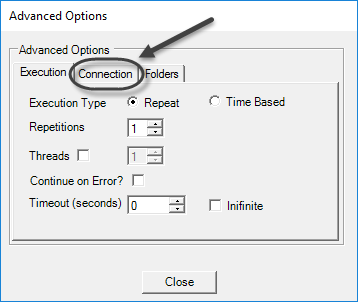
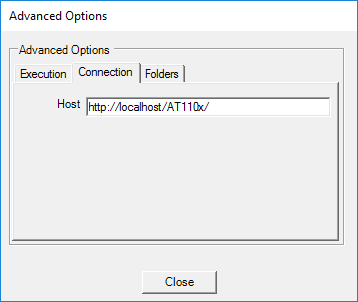
5. Enter the following information to configure the connection.
PARAMETER |
DESCRIPTION |
|---|---|
Host |
Defines the complete URL of the Bizagi Work portal is running (e.g https://[project_environment]-[your_project]-[your_company].bizagi.com).
Notice you may verify the URL by using a browser when you access the Work portal (make sure you include HTTPS).
|
6. Select the Folders tab.
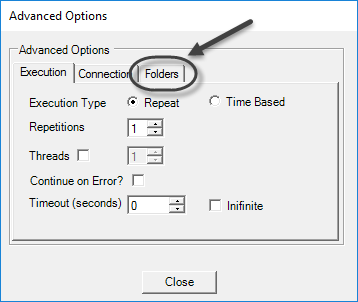
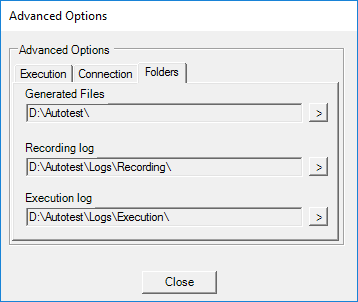
7. Enter the following information to save the generated files.
PARAMETER |
DESCRIPTION |
|---|---|
Generated Files |
Defines the folder to store the recording (relevant information regarding the recorded scenario). Use the |
Recording log |
Defines the folder to store recording logs (relevant information regarding the sent data in a recorded scenario). Use the |
Execution log |
Defines the folder to store execution logs (output with test results when running a scenario). Use the |
8. Click Close.
At this point you are set and ready to start recording a scenario.
Advanced configuration
Alternatively, you may configure the Auto Testing tool before opening it, by manually editing its configuration file.
Apart from the main parameters presented as in the basic configuration, through advanced one you may also:
•Disable logging.
•Specify the path where test scenarios are stored.
•Specify the log files format.
Note that by default the logs will be created as .txt files though you may choose to produce .csv format logs.
To carry out the configuration with this approach, follow these steps:
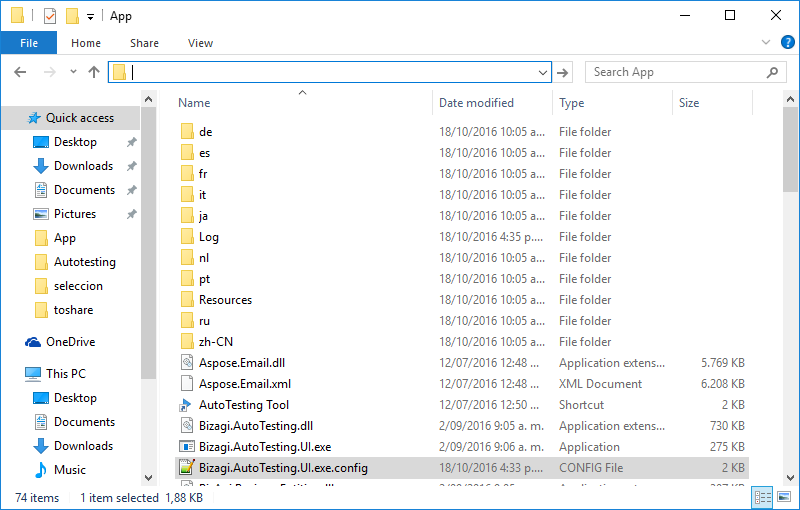
1. Browse into the App subfolder and edit the Bizagi.AutoTesting.UI.exe.config file:
2. Configure parameters in the XML-formatted file as described below.
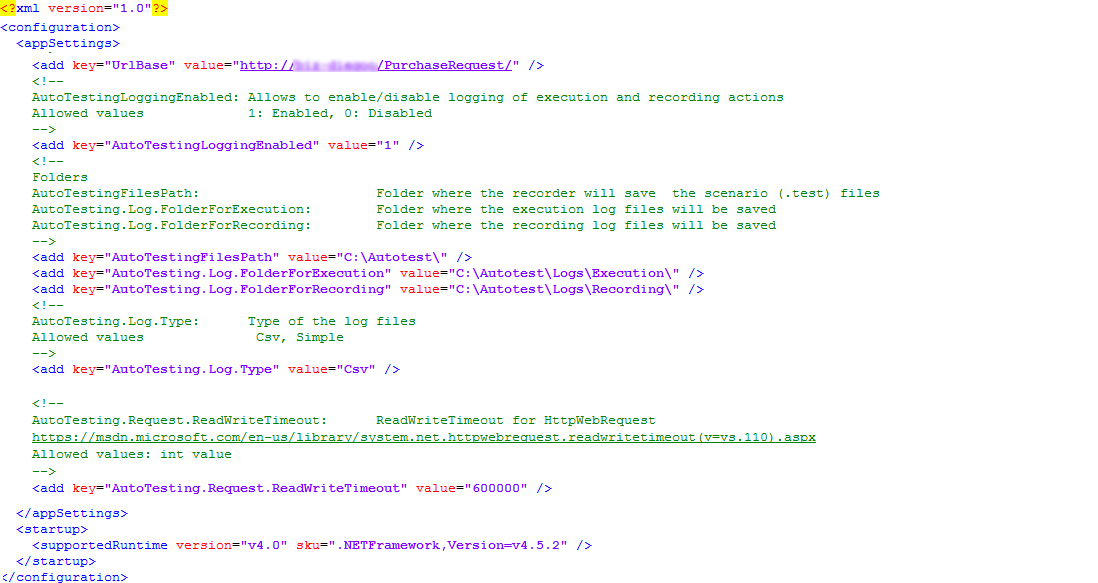
PARAMETER |
MANDATORY |
DESCRIPTION |
|---|---|---|
UrlBase |
Yes |
Defines the complete URL where the work portal is found (e.g https://[project_environment]-[your_project]-[your_company].bizagi.com). |
AutoTestingLoggingEnabled |
No |
Determines if logging for the testing scenarios is enabled. |
AutoTestingFilesPath |
Yes |
Defines the folder to store testing scenarios (testing scenarios are saved with a .test file extension). |
AutoTesting.Log.FolderForExecution |
Yes |
Defines the folder to store execution logs (output with test results when running a scenario). Has to be inside of the folder specified at AutoTestingFilesPath tag. |
AutoTesting.Log.FolderForRecording |
Yes |
Defines the folder to store recording logs (relevant information regarding the sent data in a recorded scenario). Has to be inside of the folder specified at AutoTestingFilesPath tag. |
AutoTesting.Log.Type |
Yes |
Defines the extension of the log files. Possible values are: •csv (comma separated values format) •simple (plain text format) |
3. Save your changes and close the file.
At this point you are set and ready to open the Auto testing tool (by executing the AutoTesting Tool.exe file), and start recording a scenario.
Last Updated 12/12/2024 11:28:51 AM
