Overview
Bizagi's connector editor allows you to create connectors from scratch. You can create two types of connectors: Easy REST connectors which require no code (preferred approach), and Custom connectors which allow you to include any third-party libraries and write your own code. The following article explain each section of the interface to create an Easy REST connector
User interface options explained
Either for new connectors or when opening an existing one for modifications, the work area will present the following options:
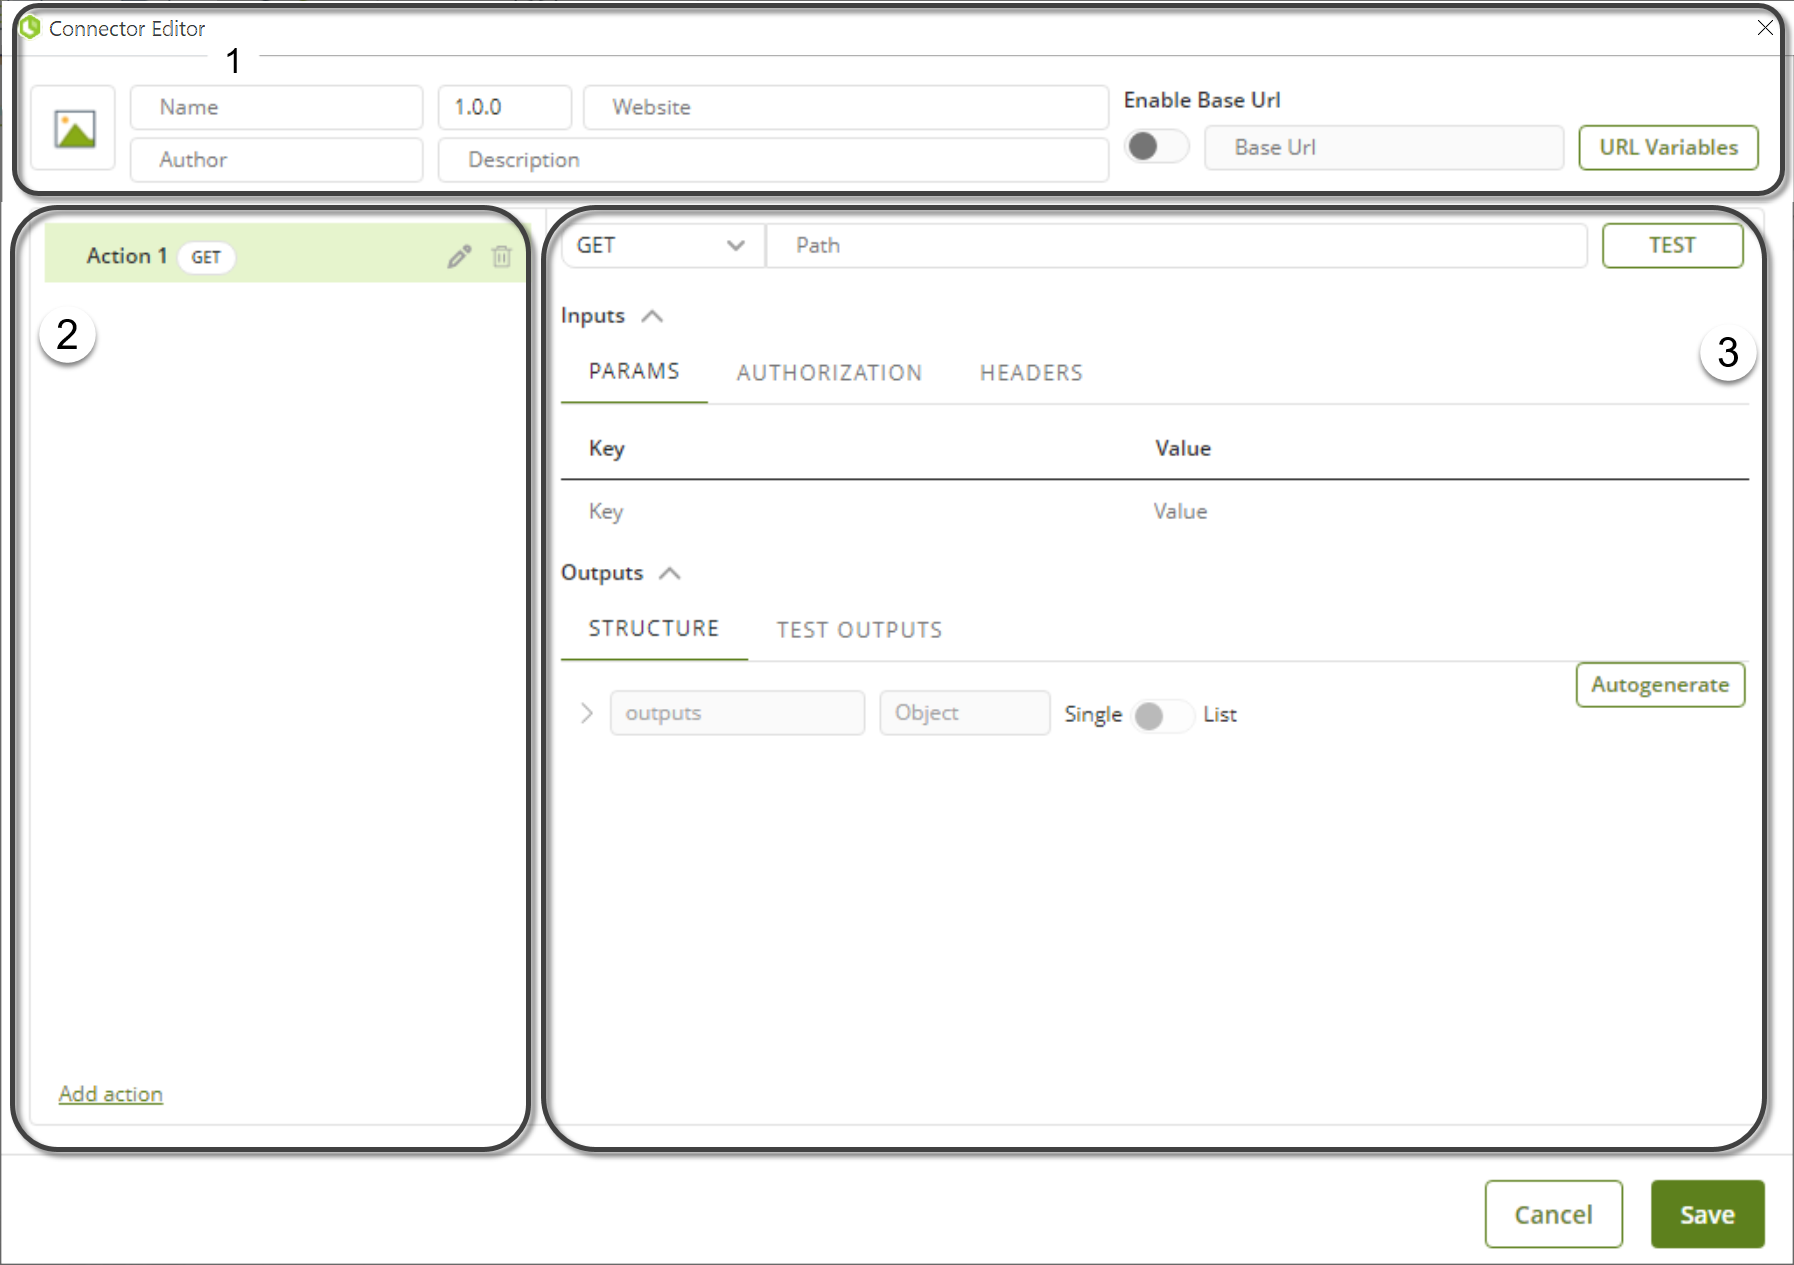
1. General Connector information
The first section contains overall information about the connector itself. That is, its icon, name, version, author, website URL, description, and base URI for all the actions. This information can be modified at any time.

In this section, you will also find the URL Variables option. This option let you define a variable that can be used to test your connector through the Test option.
2. Actions and work area
In this section, the actions defined for the connector are displayed while showing their properties. Notice that for Easy REST connectors, you can easily identify which actions use a GET, POST, PUT, PATCH or DELETE method by their title.
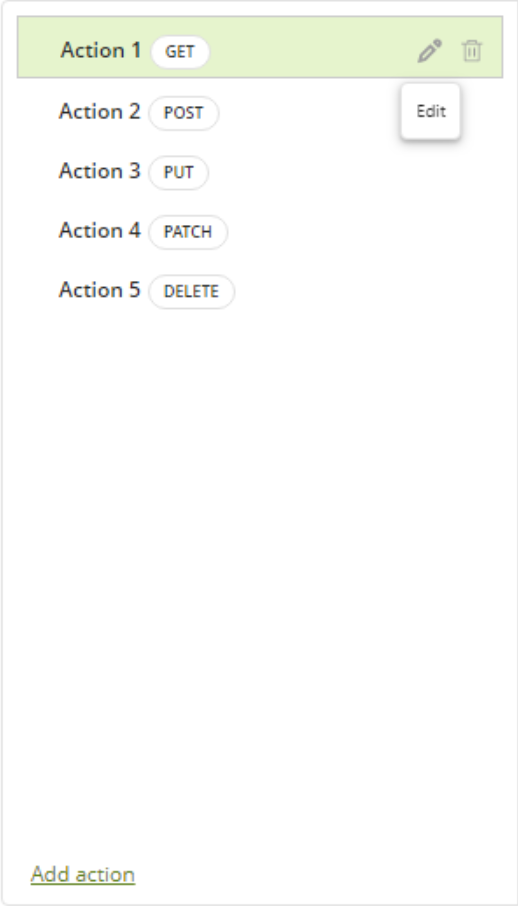
The left panel lists actions and allows you to manage them (create new ones or delete existing ones).
3. Action details
When selecting an action, the work area to its right hand displays the implementation details for that action. You can edit the name of an action by clicking the pencil icon, or delete one by clicking the trash can icon. These details are separated for the inputs and the outputs. Also, in this section you can find the action's path, along with the Test button, that lets you test your connector without having to download and configure it in Bizagi Studio.

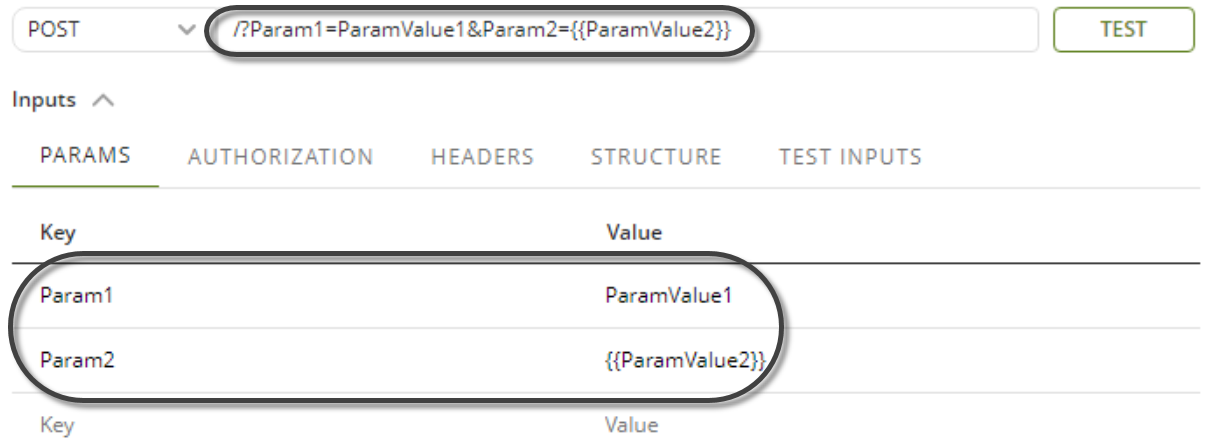
The service URL indicates where the action is available (as a REST service). Make sure you use these brackets: { } twice to enclose parameters which are variable and to be sent upon execution (e.g, {{your_parameter}} ).
![]()
The Params tab in this section is used for the query parameters. These parameters are sent in through the service URL. In this case, when the parameters are created in this tab, the service URL is completed automatically with them.
Within the Params option you can either send a default value, or a variable to be mapped. To do so, make sure to use double brackets as follows: {{your_parameter}}
The Authorization tab allows you to configure the authentication type associated to the action. Authentication types supported are Basic Auth, Digest and OAuth2.
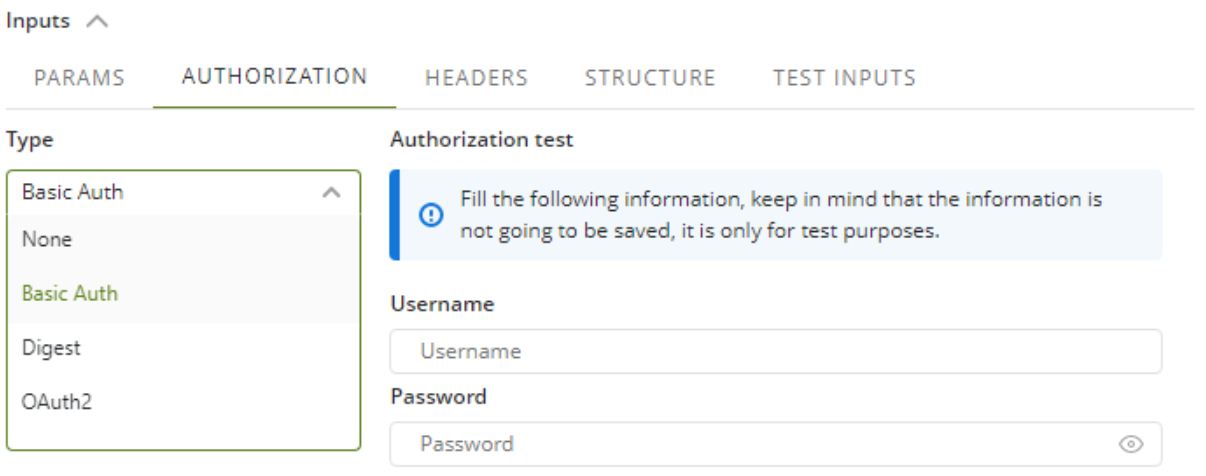
Bear in mind that you can configure a different authentication method for each action. For more information about the available authentication methods, refer to Authentication methods and REST connectors.
The Headers tab is used to configure the action headers. Select the content type according to how the external system handles information. You can choose between the following content types:
•application/json
•application/x-www-form-urlencoded
•text/plain
If you configure a default value for the header, this value will be used in case the header is not mapped when configuring the action.
The structure tab is used to define the inputs and outputs needed for the action. To do so, you have to define define a hierarchical structure (compliant to and matching a JSON or XML format) with data types applicable to your service, either as inputs received by that service or as outputs returned by it. Bear in mind that inputs are not shown for actions of Easy REST connectors which use the GET or DELETE method.
|
When mapping inputs or outputs, ensure that their names do not contain a period ("."). Bizagi interprets periods as XPath navigation elements, which can result in errors. |
|
The data types must match the ones specified by your external system or application's API. Possible simple data types are: •Boolean •Byte •Date •Decimal •Double •Integer •String
The data types which are not simple but complex, need to be defined as Object, so that it may contain inner elements which in turn are simple data types or nested Objects as well. |
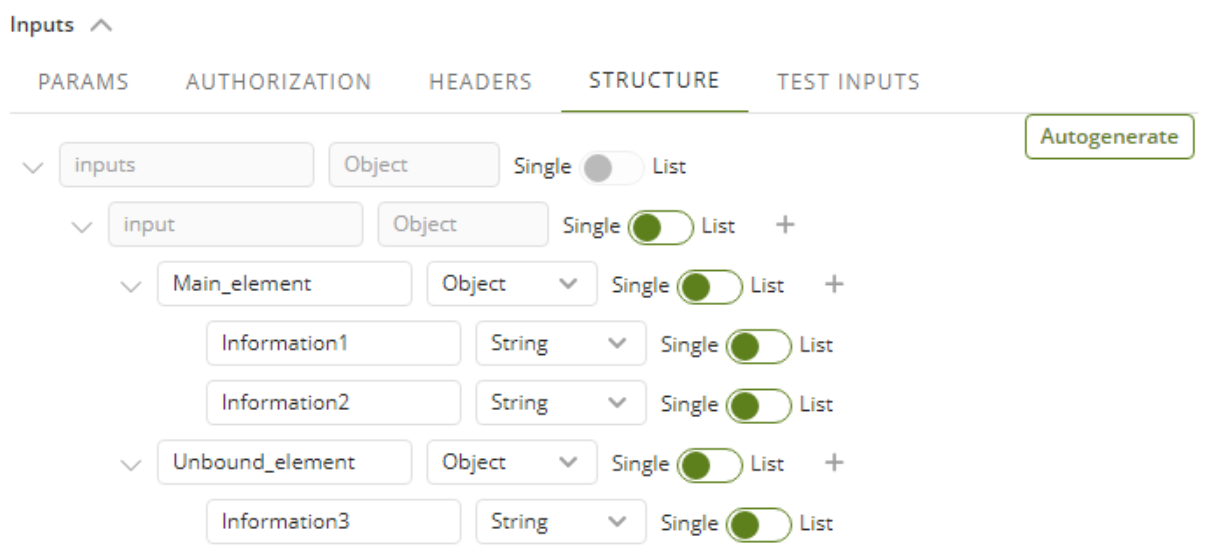
Imagine that your action must receive an input structure as the one shown in the image above:
This, viewed from a JSON would look like this:
{
"Main_element": {
"Information1": "String",
"Information2": "String"
},
"Unbount_element": {
"Information3": "String"
}
}
On the other hand, viewed from an XML would look like this:
<?xml version="1.0" encoding="UTF-8"?>
<root>
<Main_element>
<Information1>String</Information1>
<Information2>String</Information2>
</Main_element>
<Unbount_element>
<Information3>String</Information3>
</Unbount_element>
</root>
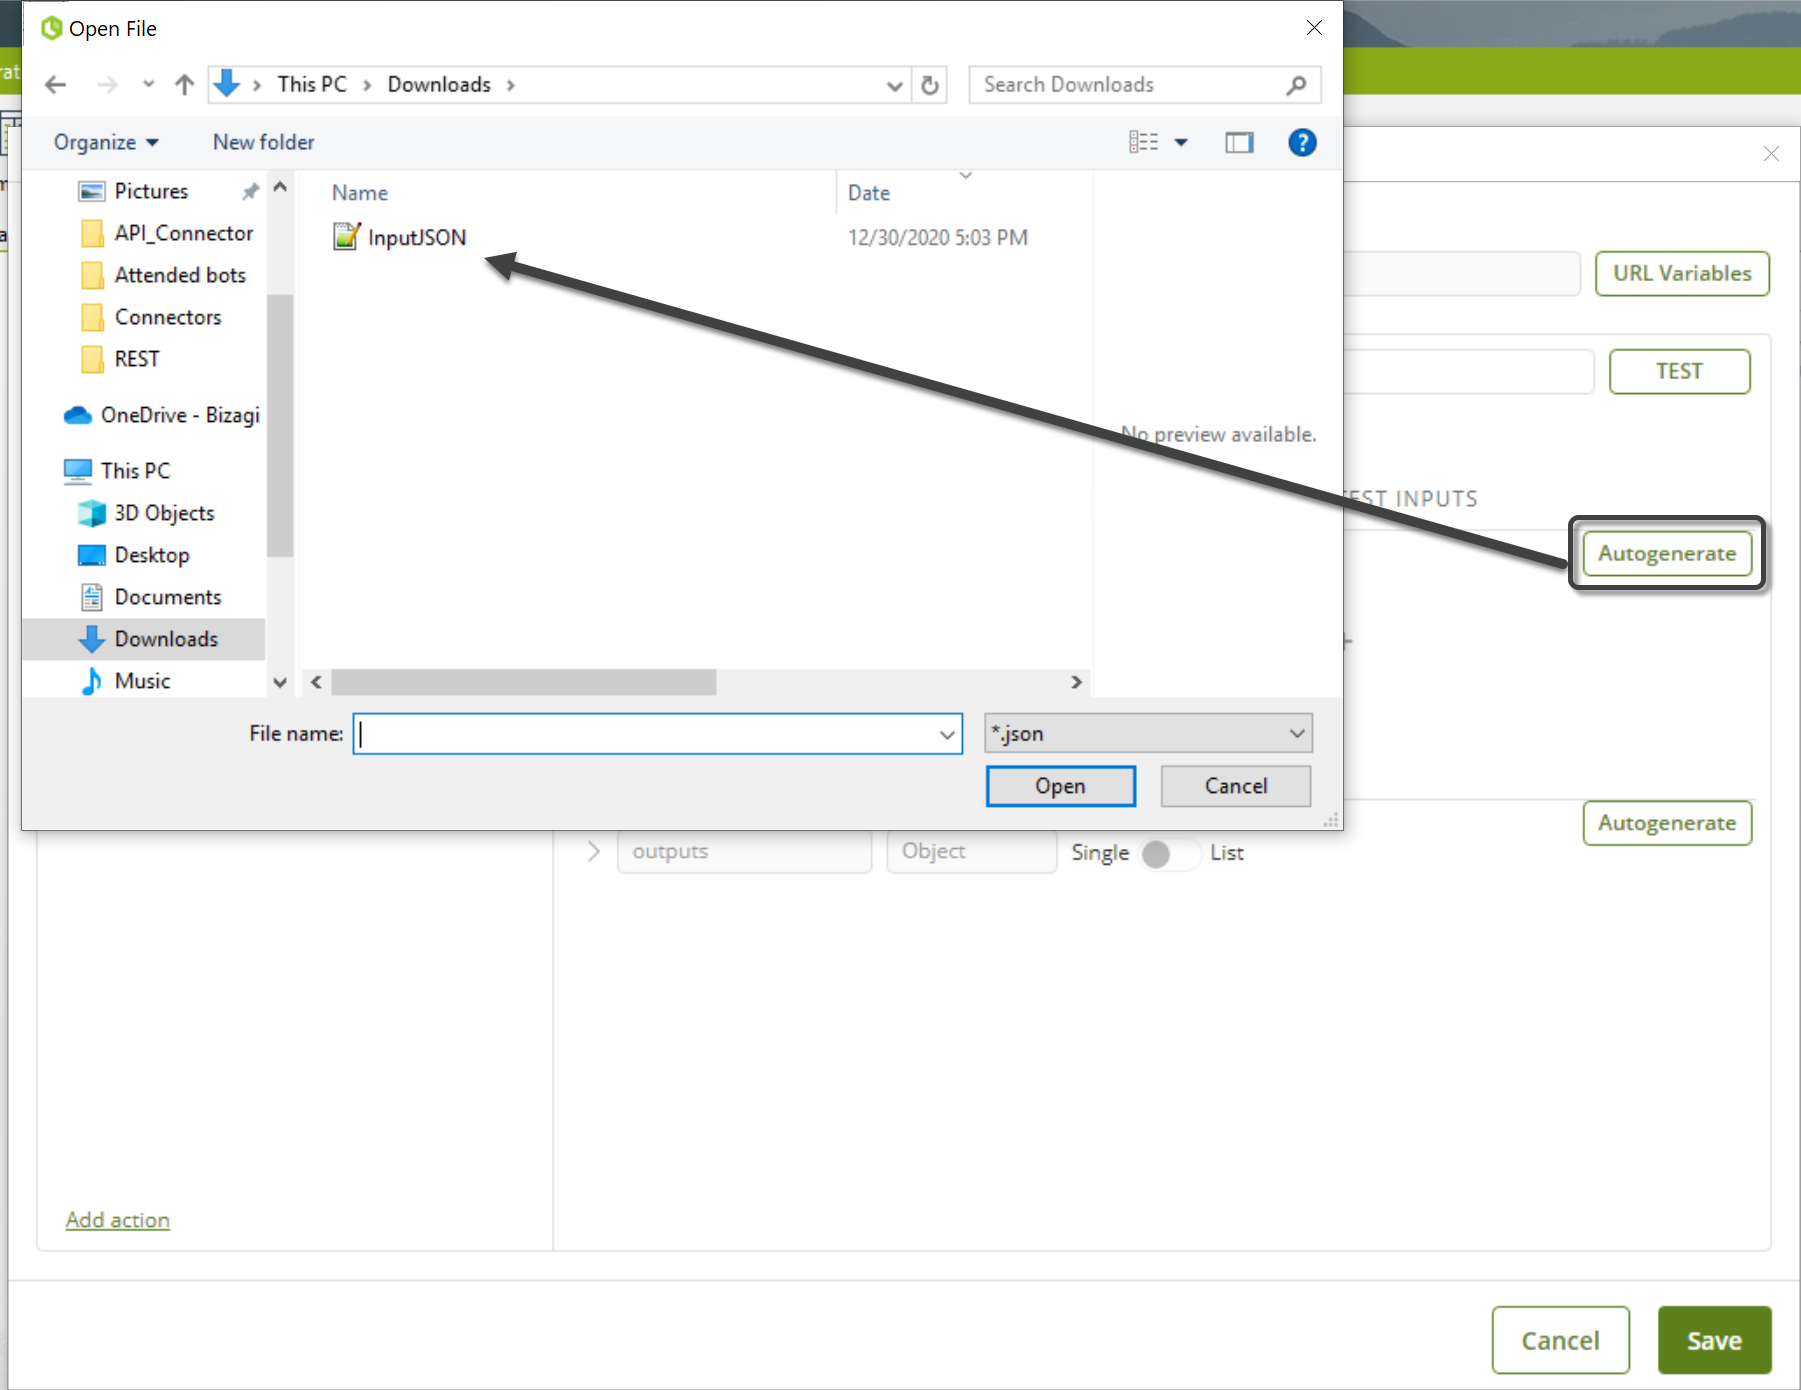
You have two options to define this structure in the connector editor. You can use the Autogenerate button, or you can enter the structure by hand.
The Autogenerate allow you to upload a JSON or XML file with the input or the output definition. To do so, click in the button, select the file that you want to upload and the connector editor automatically generates the corresponding structure.
|
When using the Autogenerate option, only Object and String data types are supported. If your structure has a different data type (e.g. Double), you must import the XML or the JSON file first, and the change the inputs or outputs that have a different data type. |
The second option is to enter the inputs by hand. The object-type elements, as they are complex, may contain additional elements. This is why for this data-type, the ![]() icon will appear on the right side. To add new elements to a particular structure, click the
icon will appear on the right side. To add new elements to a particular structure, click the ![]() icon. With this, a new element will appear, on which you can specify the name, the data type, and if it may show up more than once (list) or just one time (single).
icon. With this, a new element will appear, on which you can specify the name, the data type, and if it may show up more than once (list) or just one time (single).
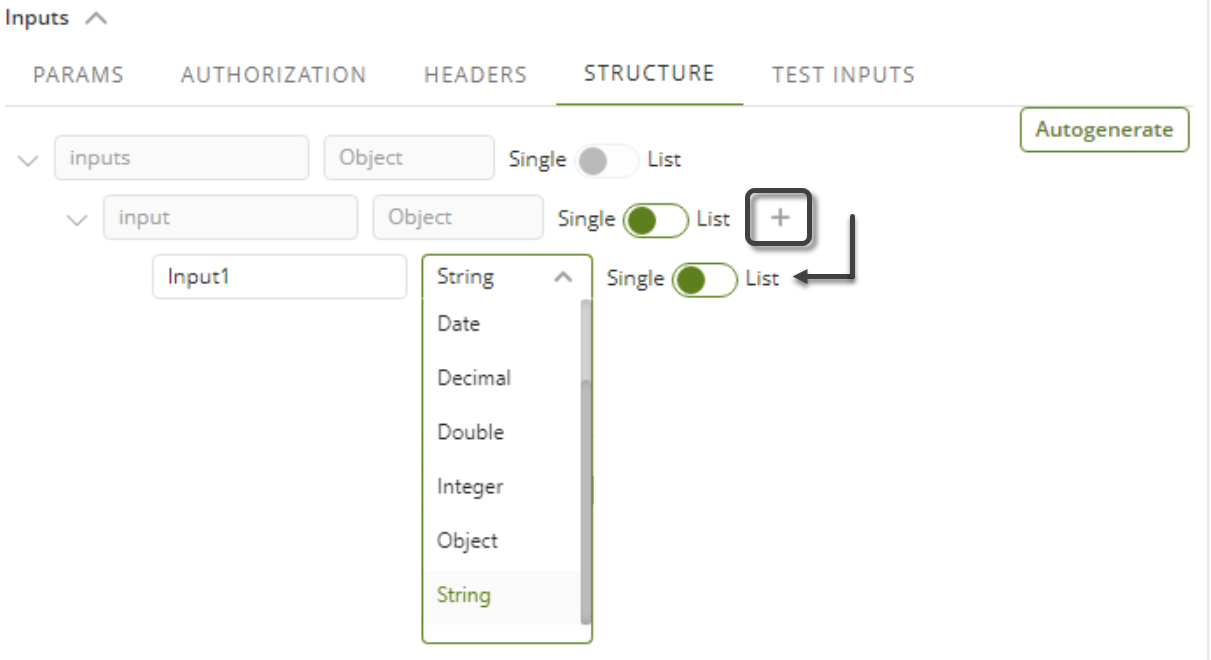
Add one by one the input parameters until you have obtained the desired structure.

How to test your connector
The Test option in the Connector editor let you test the actions of without having to download it and execute it in the Work Portal.
To test your connectors action, complete these steps:
1. Configure your connector's action. Take into account that depending on the action that you want to test, you will need to configure more parameters, such as the authentication parameters, the inputs, the outputs or the query parameters. For example, if your connector uses a Basic Authentication, you need to configure the test authentication parameters.
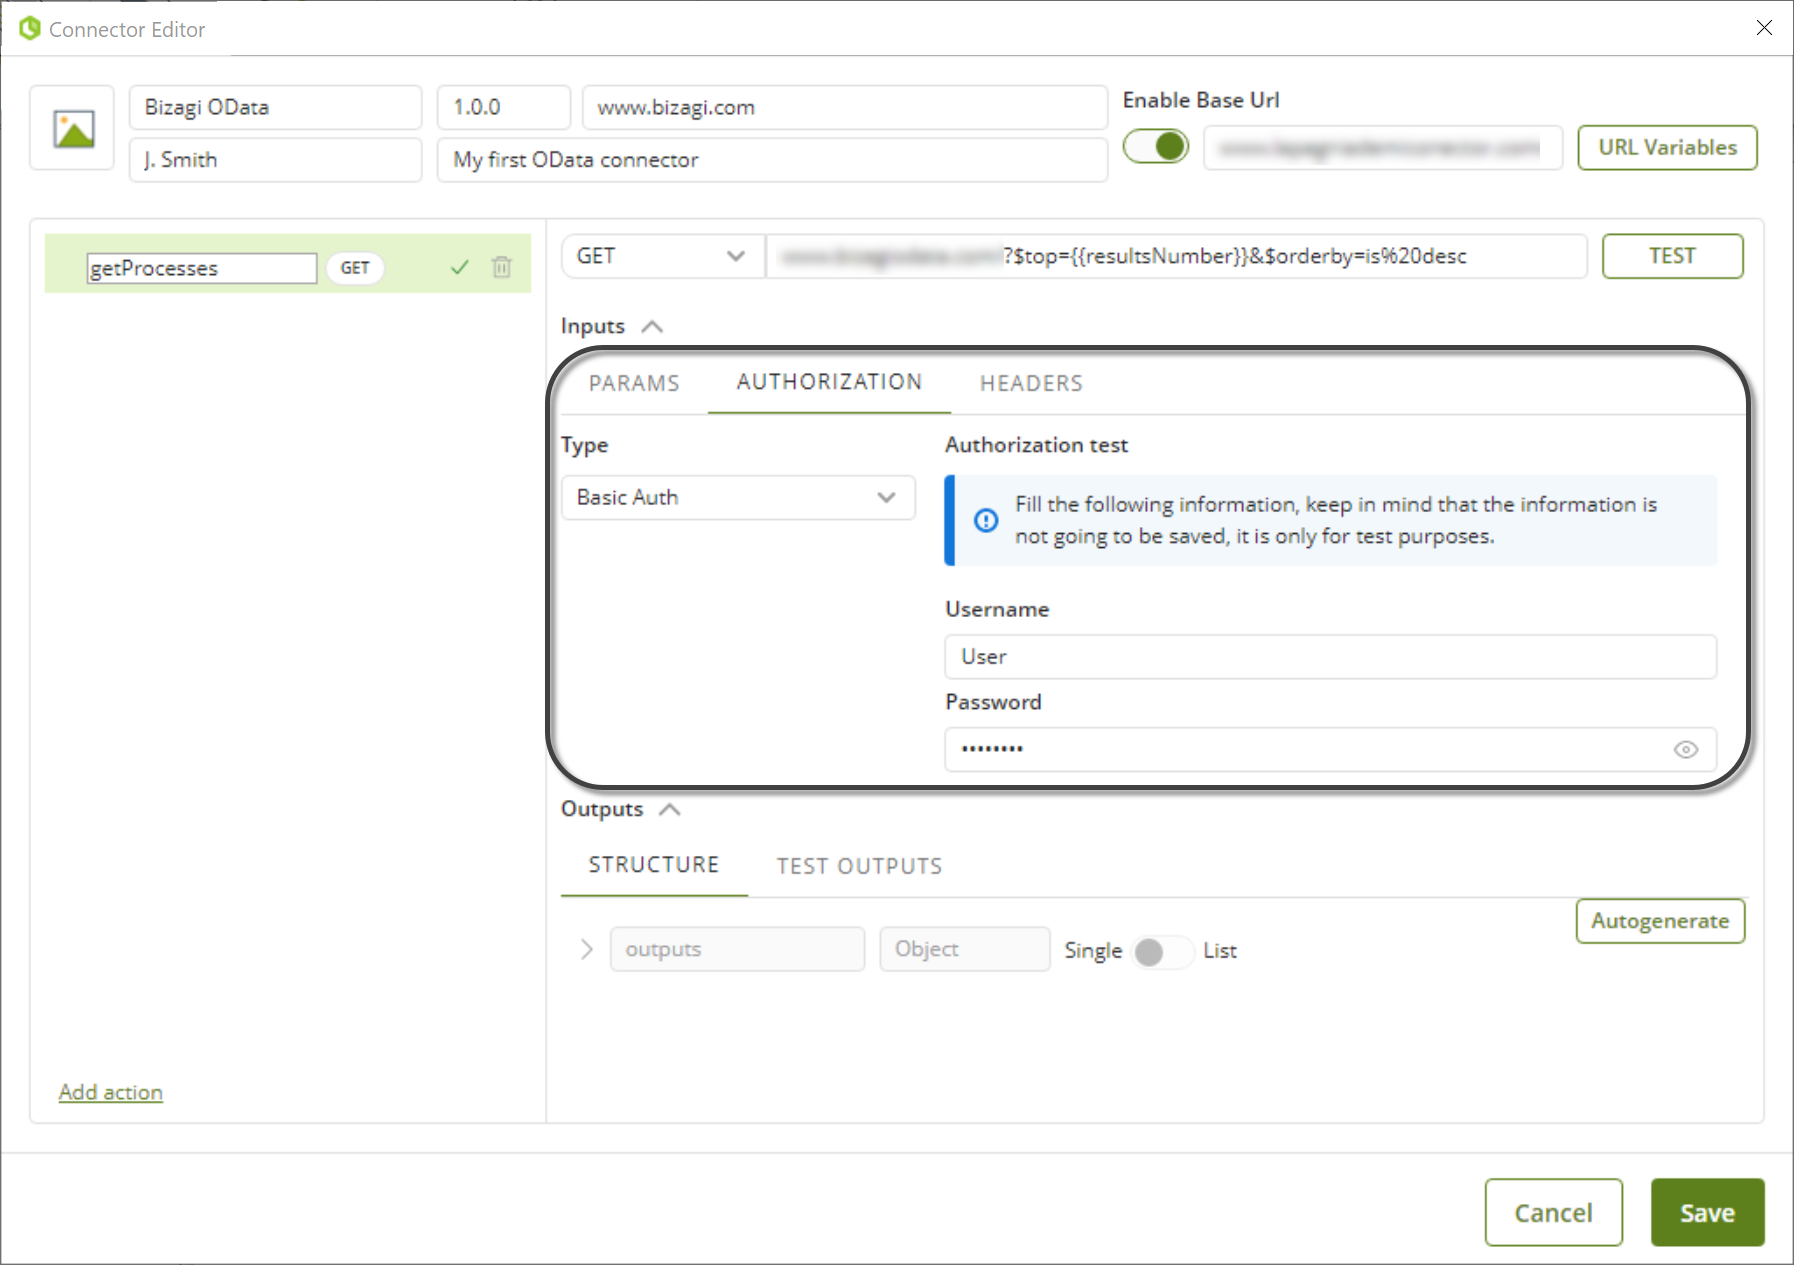
2. In this case, the action receives the parameter ResultsNumber. To test the connector, it is necessary to give a value to the parameter. This is done with the URLVariables button. Click the URLVariables button and define your parameters as follows:
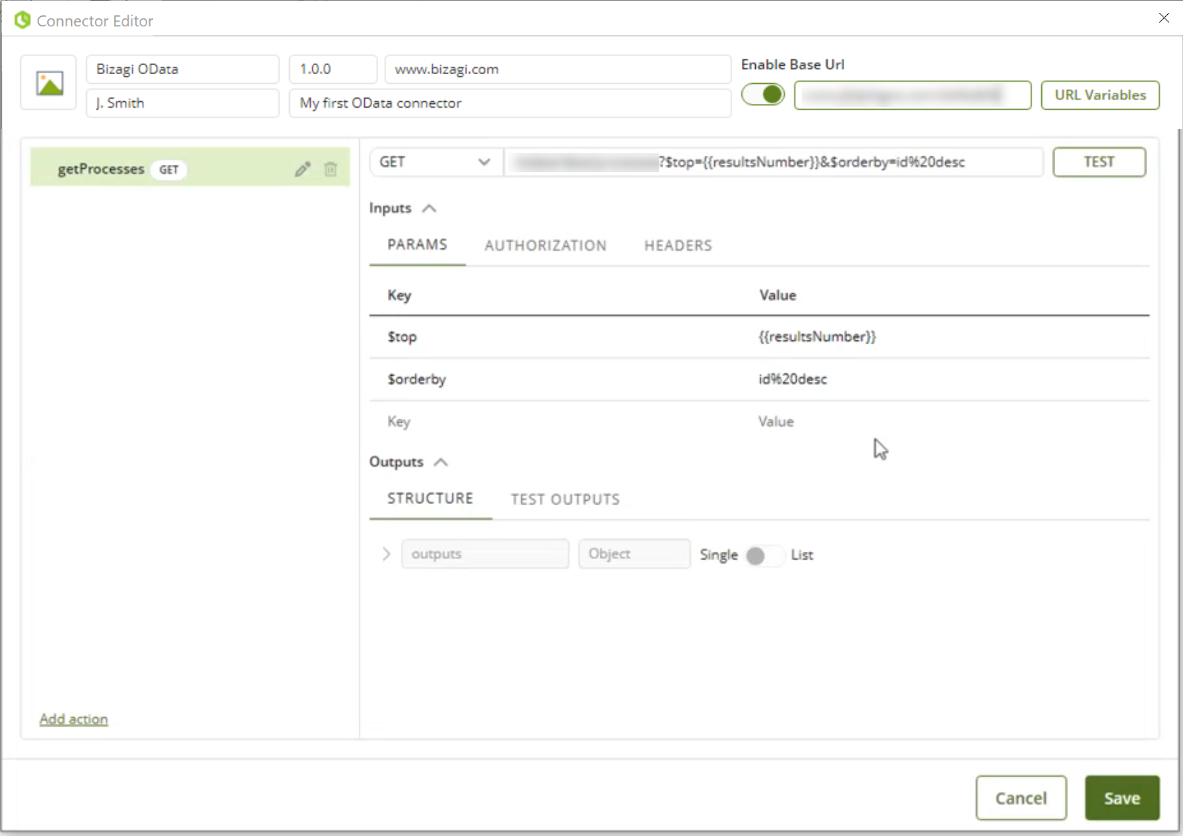
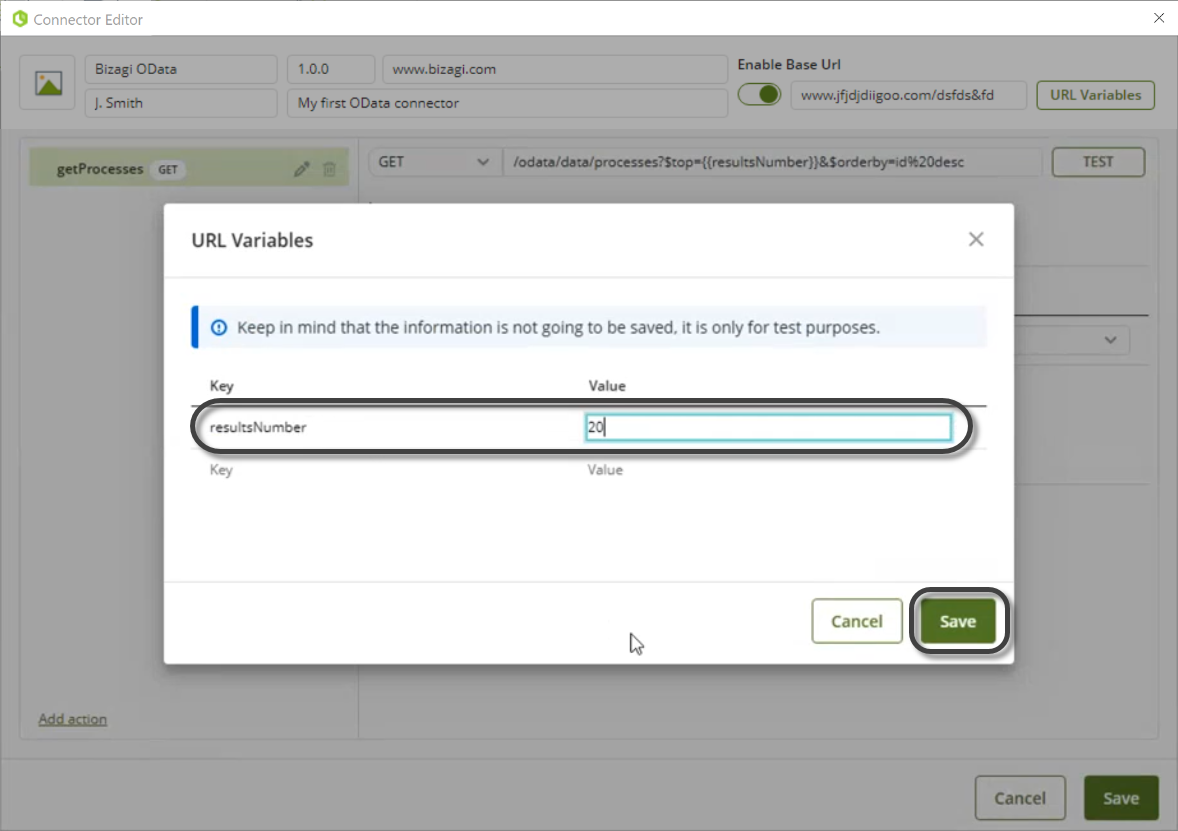
3. Click the Test button.
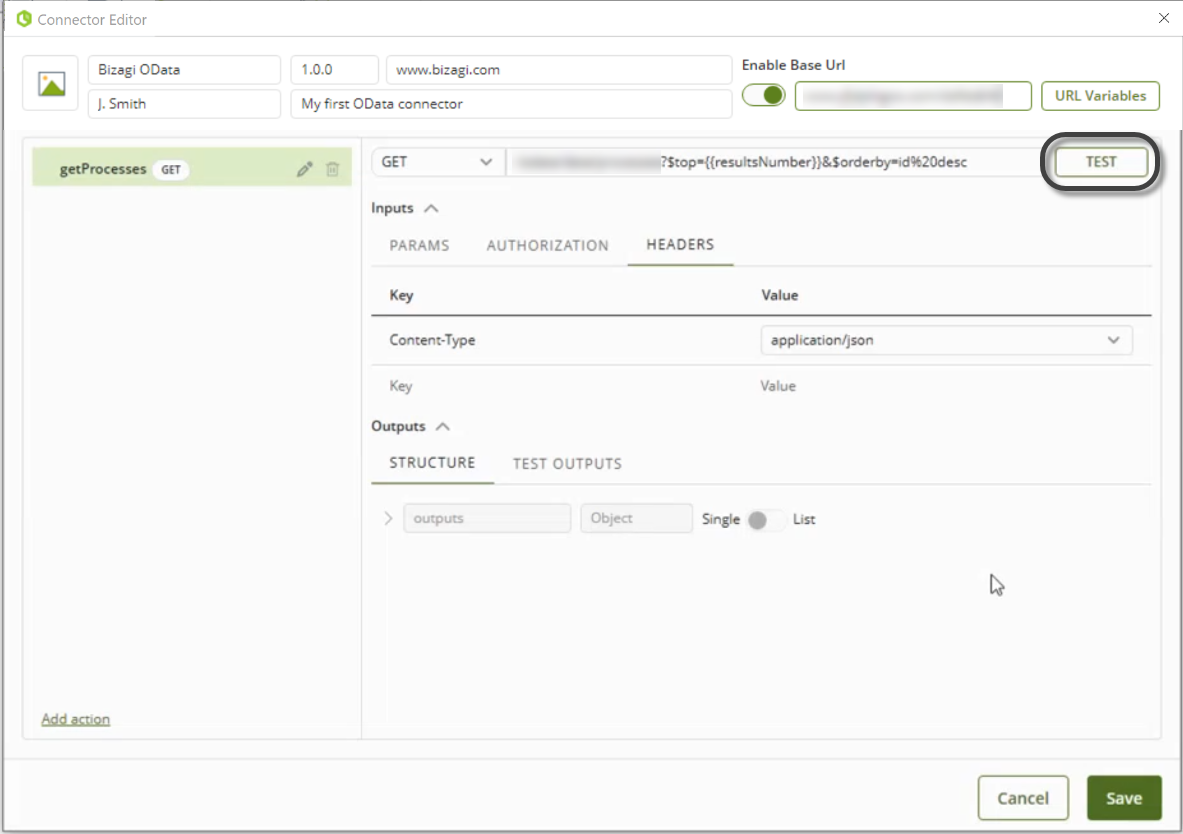
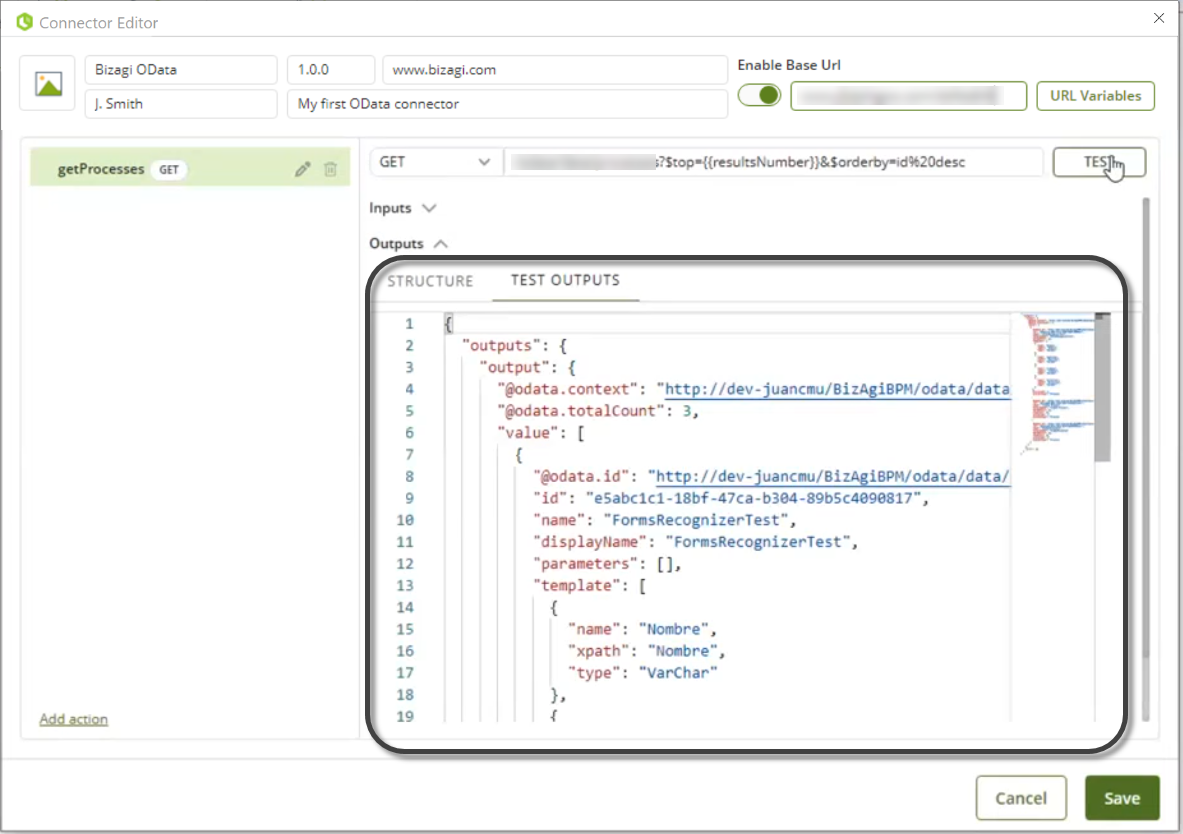
If the definition of your connector is correct, the test outputs tab opens and shows the output that would be sent by the connector during execution.
Last Updated 7/17/2024 2:35:05 PM