Using Postman
For a quick start, we strongly recommend using Google Chrome and a plug-in extension called Postman.
Extensions such as Postman (you can use a similar one such as Advanced REST Client https://advancedrestclient.com/), let you invoke OData services while being able to customize the information that gets sent in the header of the request (which is not possible through a browser).
For information about Postman, refer to https://www.getpostman.com/docs/.
Invoke OData services
Once you get the access_token, see Bizagi API Authentication, you can use it for a new invocation and test drive the OData services.
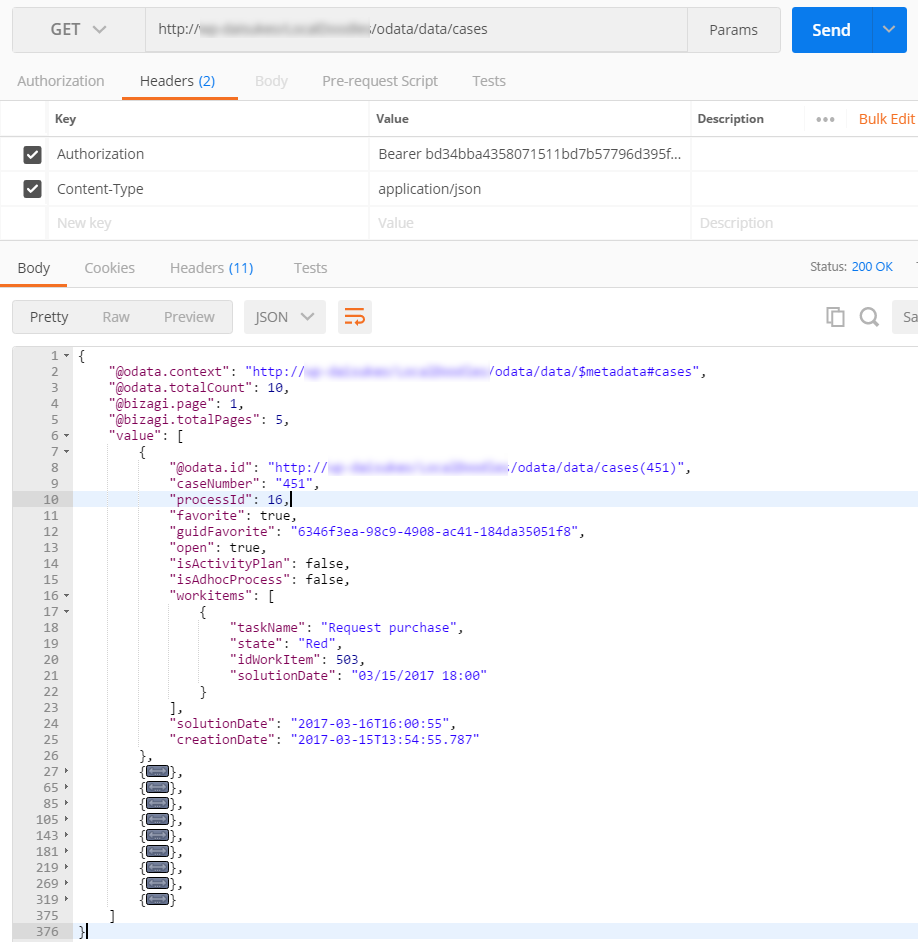
To do a quick test, you can use an HTTP GET action to fetch some basic data.
Make sure you use an OData service URL.
For a quick start, use:
Start with the following URL:
[your_bizagi_project_url]/odata/data/cases
Configure:
•Authorization: Provide the Bearer keyword, add a blank space and then add the access_token you obtained in Bizagi API Authentication.
Follow this format, disregarding the [ ] characters:
Bearer [access_token]
•Content-type: application/json

The access_token expires after the time you set for its token lifetime setting elapses, so you may need to launch a new invocation and authenticate again with the Encoded credentials.
You may of course choose to include filters or navigate data returned by the response.To learn about filters and other options to restrict which data you will work with, refer to Querying options. For additional information about properties, querying options and other useful concepts when invoking these services, browse Basic concepts.
See the complete Bizagi API Index.
Last Updated 2/26/2024 2:43:07 PM