Overview
The DocuSign connector for Bizagi is available for download at Bizagi Connectors Xchange.
Through this connector, you will be able to connect your Bizagi processes to a DocuSign account in order to use Electronic Signature services API.
For more information about this connector's capabilities, visit Xchange platform.
|
This connector uses OAuth 2.0 code grant Authentication and is only available for Bizagi Studio Cloud from the Fall 2022 version.
This connector was developed using API information provided by Docusign. Bizagi and its subsidiaries do not warrant the content nor are they responsible for any errors resulting from the use of the Docusign API services. Bizagi and its subsidiaries are not responsible for any loss, cost or damage caused by the use of the Docusign API. |
Before you start
To test and use this connector, you will need:
1.Bizagi Studio previously installed.
2.The connector installed, either through the Connectors Xchange or via manual installation as outlined in the Installing and managing connectors article.
3.A registered account of DocuSign sandbox developer.
Register an account in DocuSign as a Developer
Registering a developer account in the DocuSign Developer Center allows you to obtain a clientId and a secretId that are required to access your API.
To create an account follow these steps:
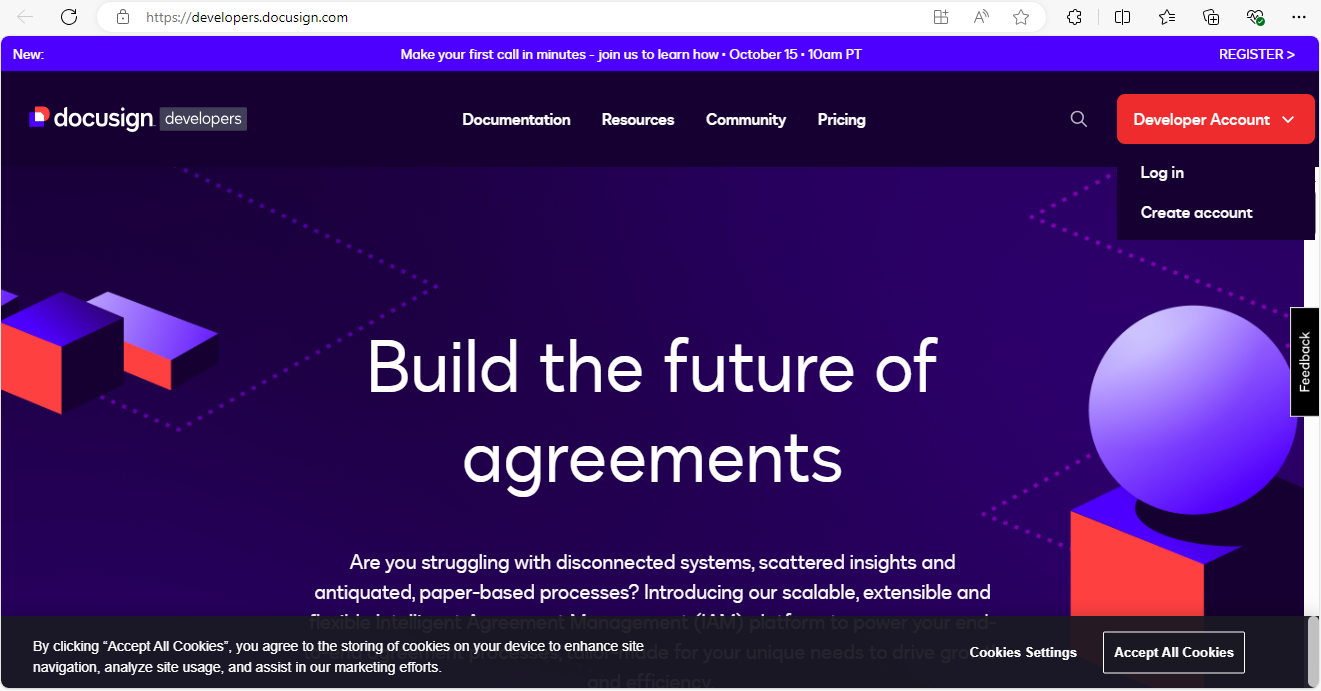
1.Log in to the DocuSign Developer Center and select the Create Account option in the Developer Account menu.
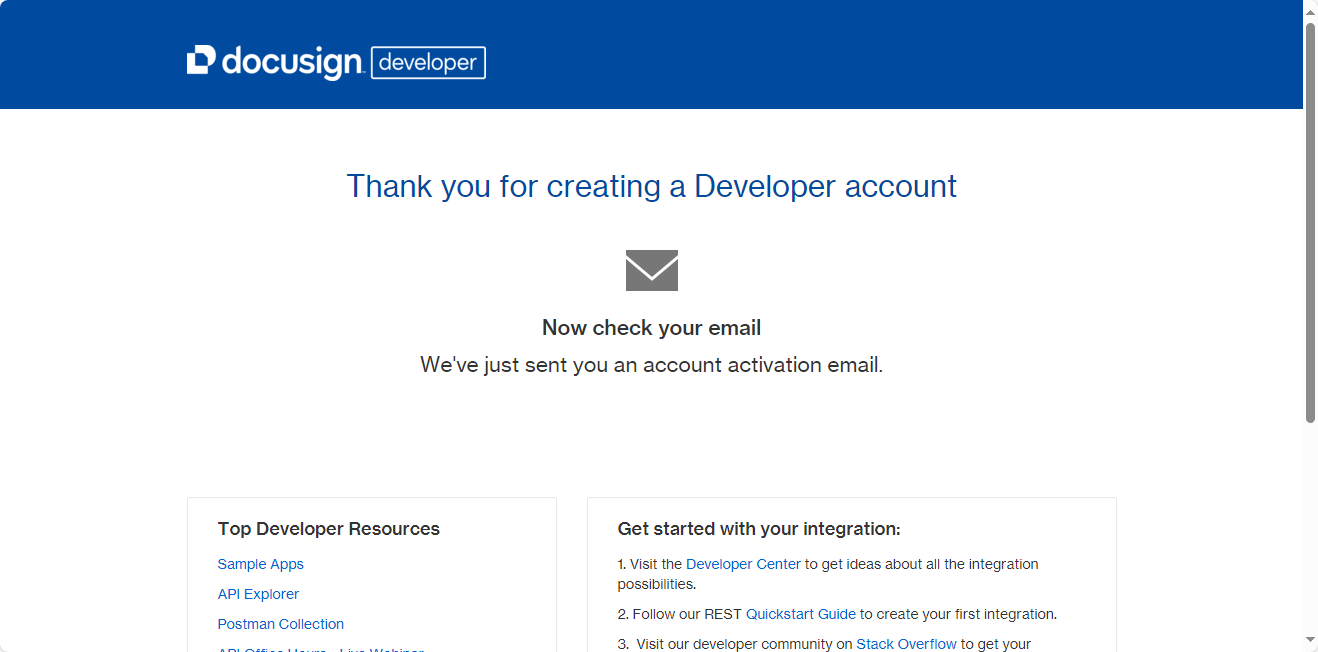
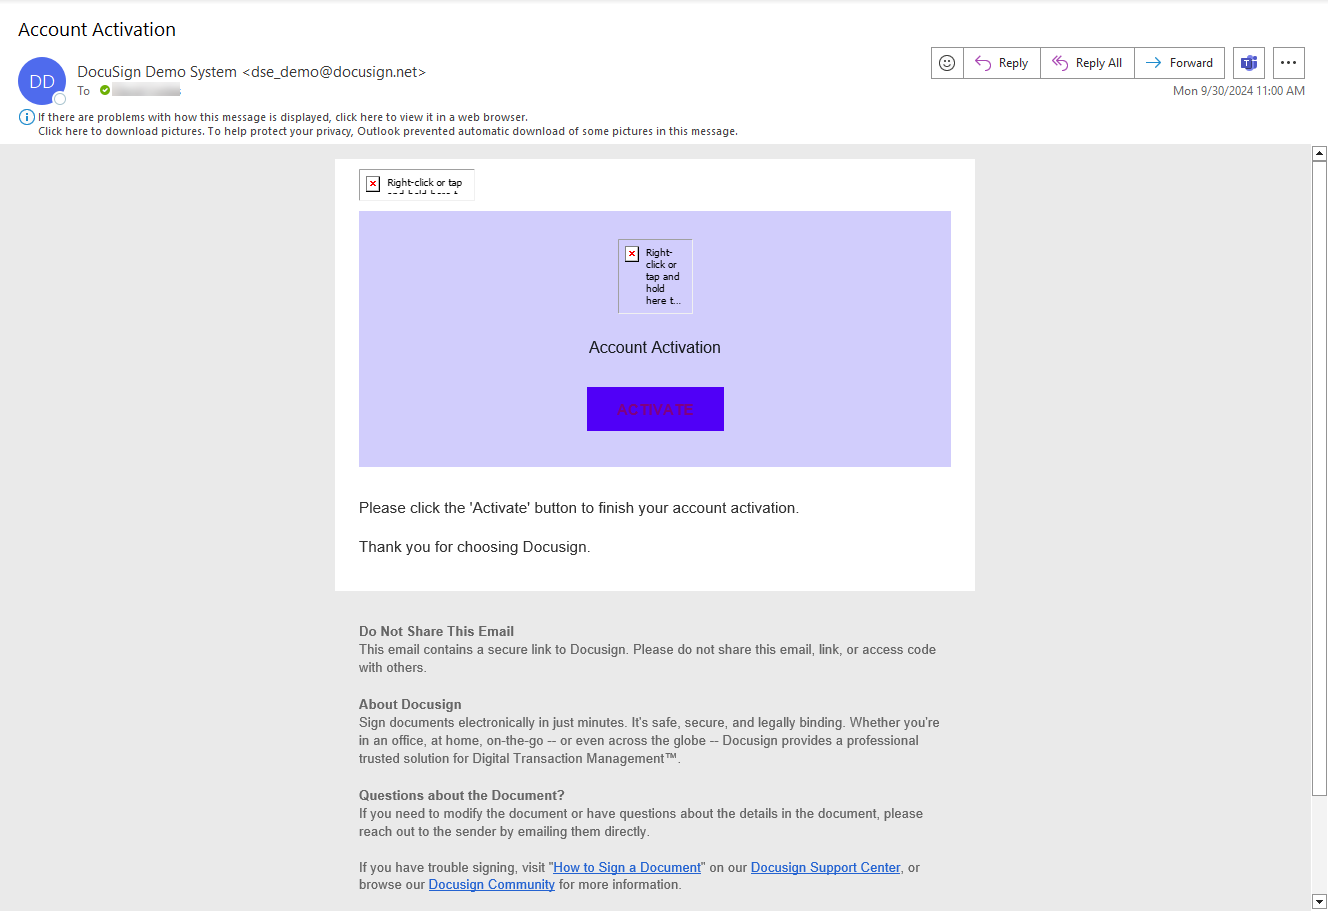
2.Once the account is created, activate your account with the confirmation email that arrives to the account you registered.
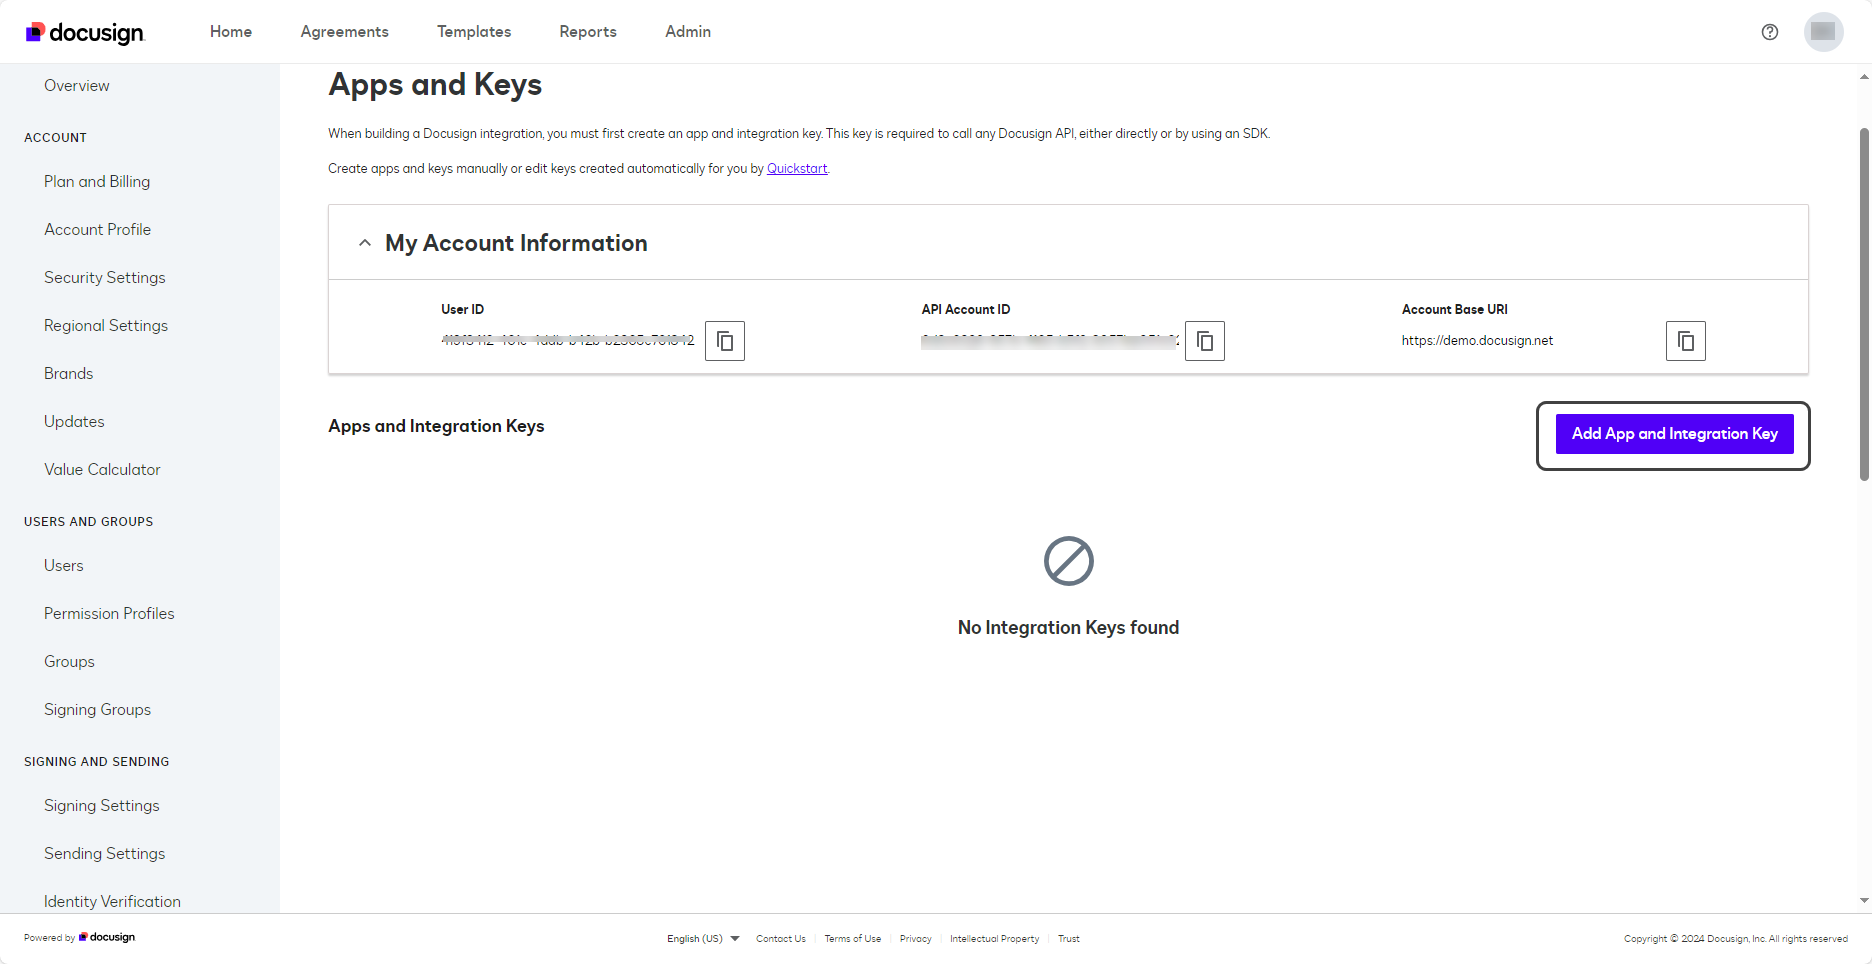
3.Once the account is activated, log back into the DocuSign Developer Center and select the My Apps and Keys option from the account menu.

4.In the Apps and Keys view, you will find you account information and the option to create your Application and Integration keys by clicking the Add Apps and Integration Keys button.
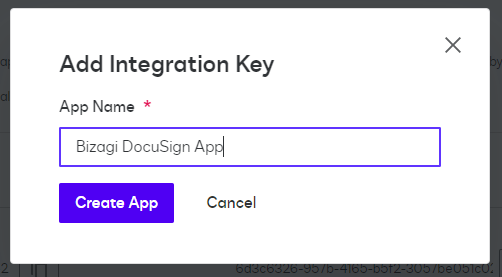
5.In the Add Integration Key window assign a name for your API Application and click the Create Application button to save your changes.
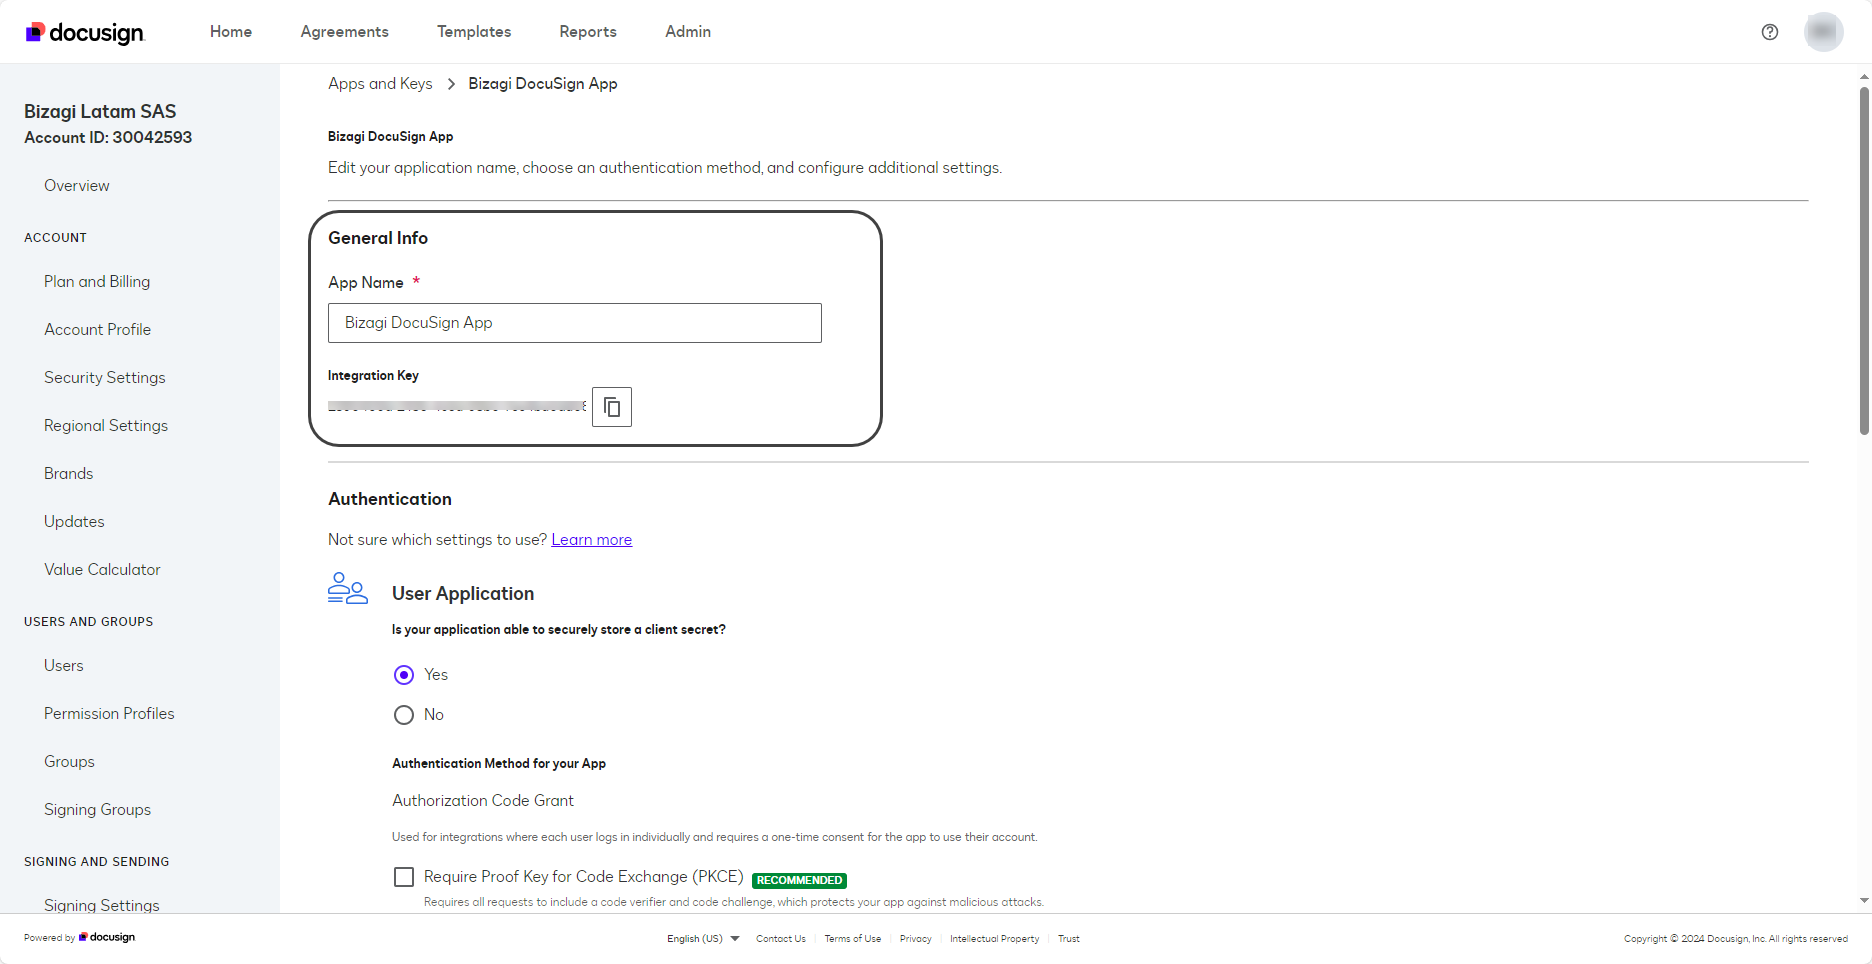
6.Once the API Application is created, you can review the Integration Key generated in the General Information section.
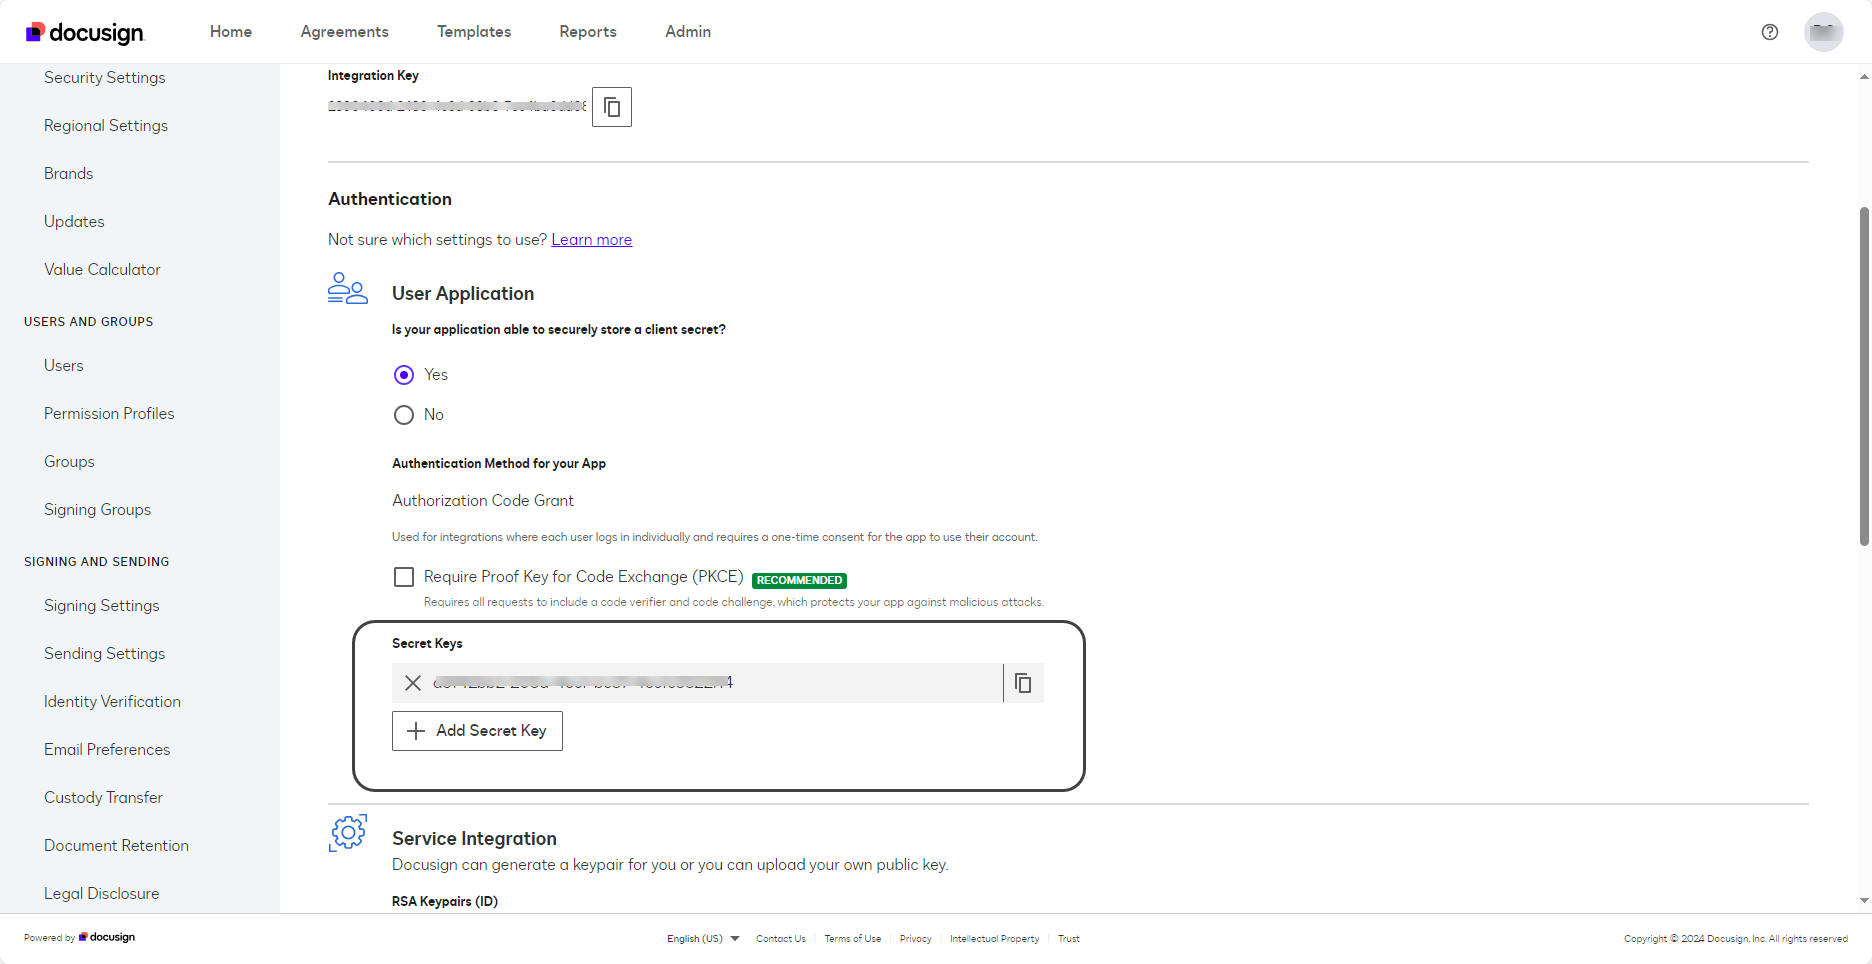
7.To generate a Secretkey (SecretId), navigate to the Authentication section and click the Add Secret keys button. A key will be automatically generated for you. You need to be able to save this key as it can only be viewed once and is necessary for the integration of the connector into Bizagi as part of the authentication process.
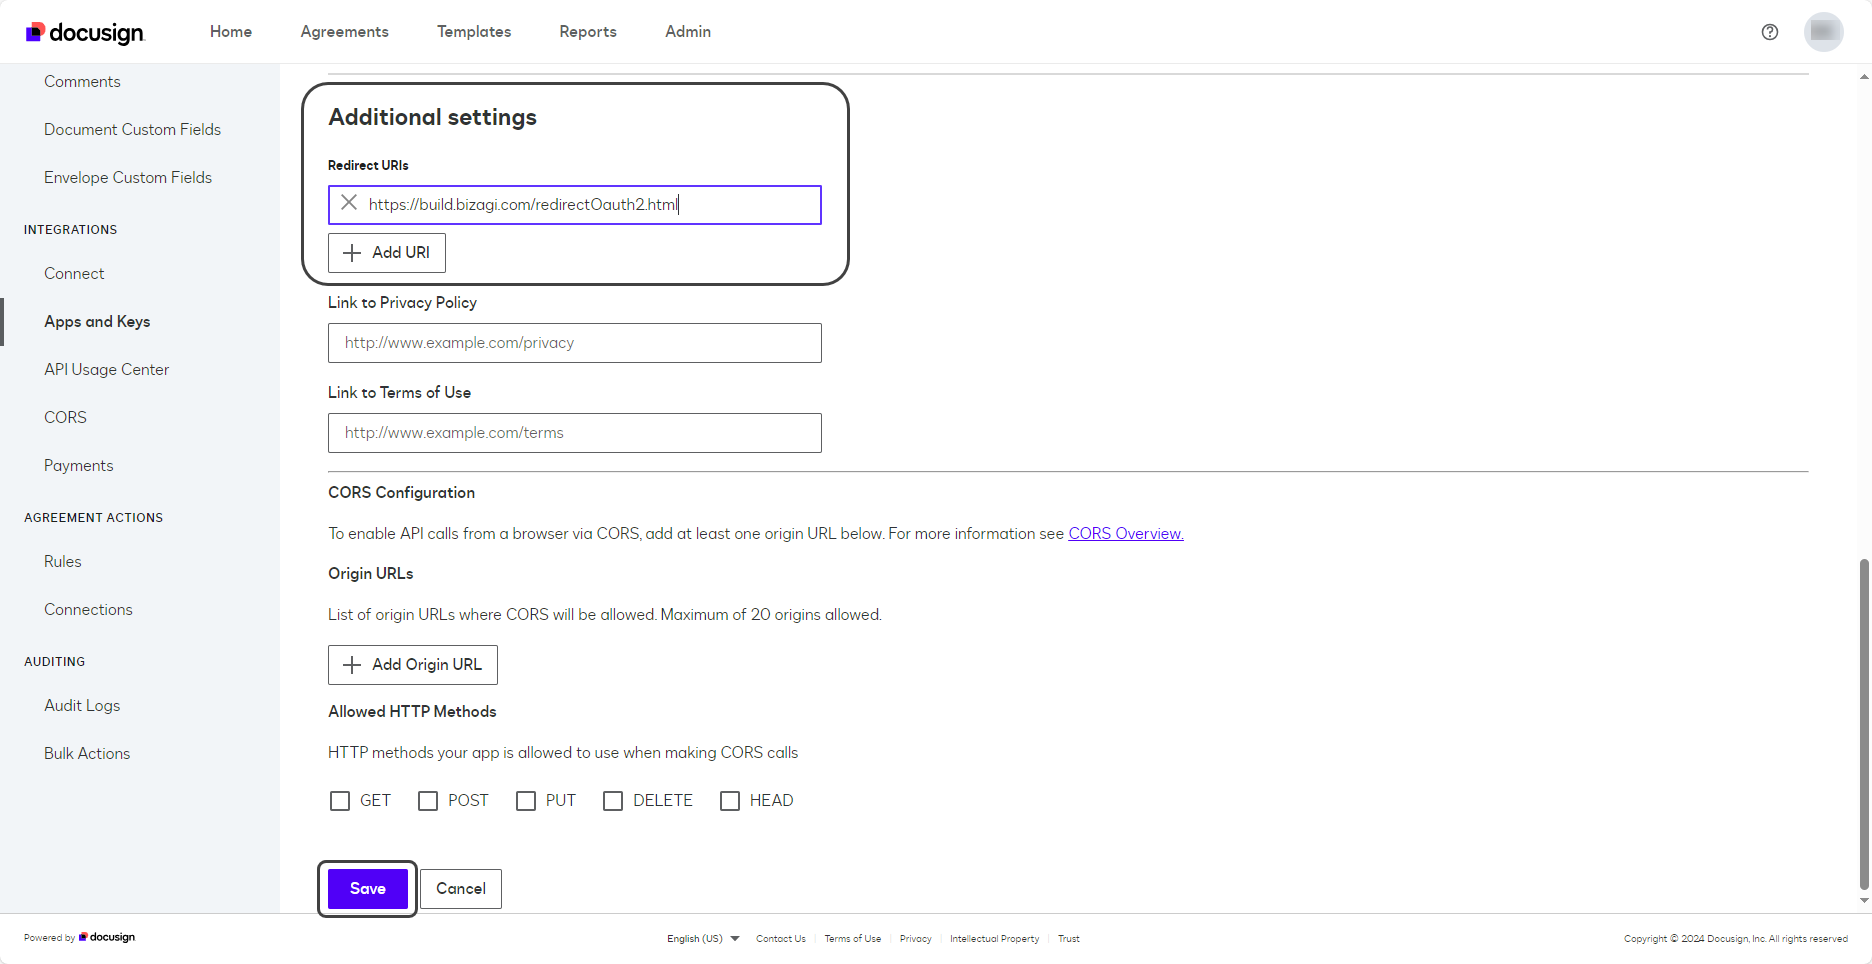
8.In the Additional Settings section, you should add the following Redirect URIs link: https://build.bizagi.com/redirectOauth2.html. To save all changes click the Save button.
Configuring the connector
To configure the connector in Bizagi Studio, follow the steps presented at the Connectors Configuration chapter.
For this configuration, consider the following authentication parameters:
•Authentication method: OAuth2 Authentication.
•OAuth2 flow: Authorization Code Grant.
•response_type: code
•redirect_uri: Bizagi sets it by default
•client_id: the integration key of your application
•client_secret: the secret key of your application
•auth_url: https://account-d.docusign.com/oauth/auth
•token_url: https://account-d.docusign.com/oauth/token
•scope: Signature
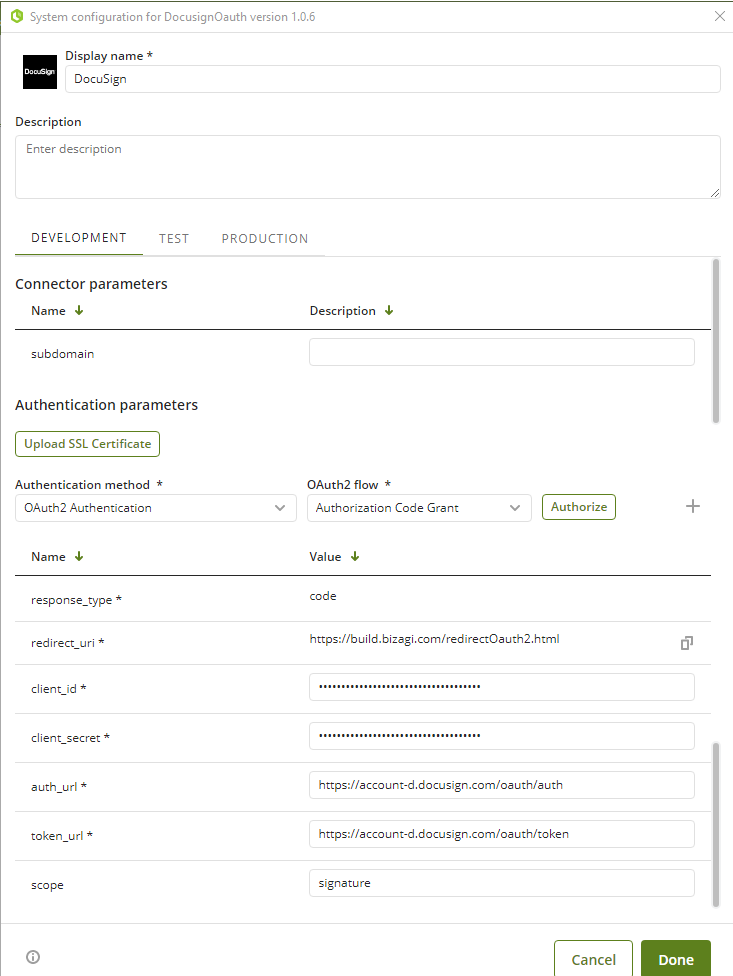

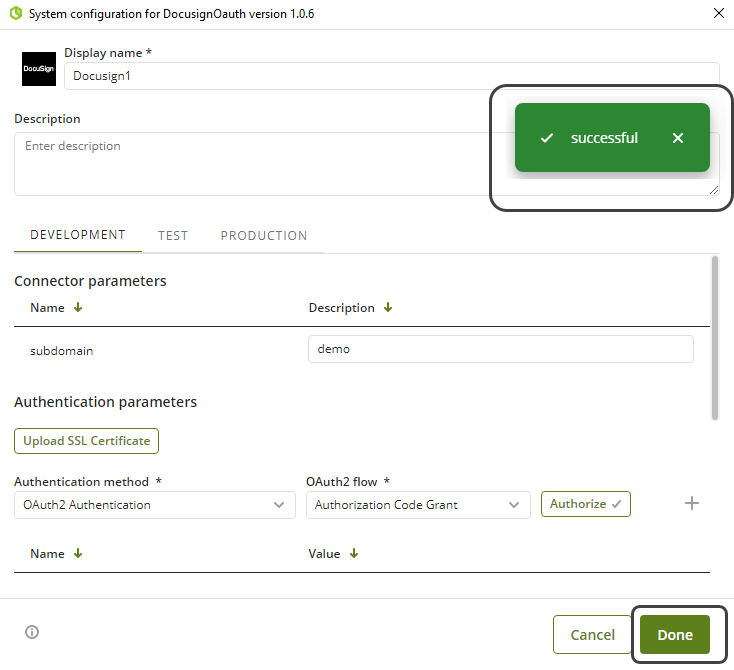
When you have entered the authentication parameters, click Authorize, and a pop-up window appears where you must enter your account details.
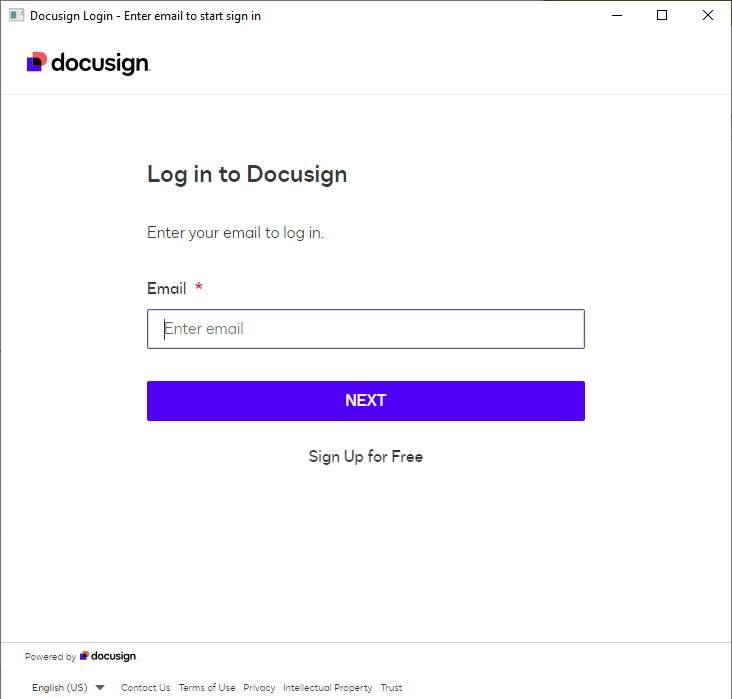
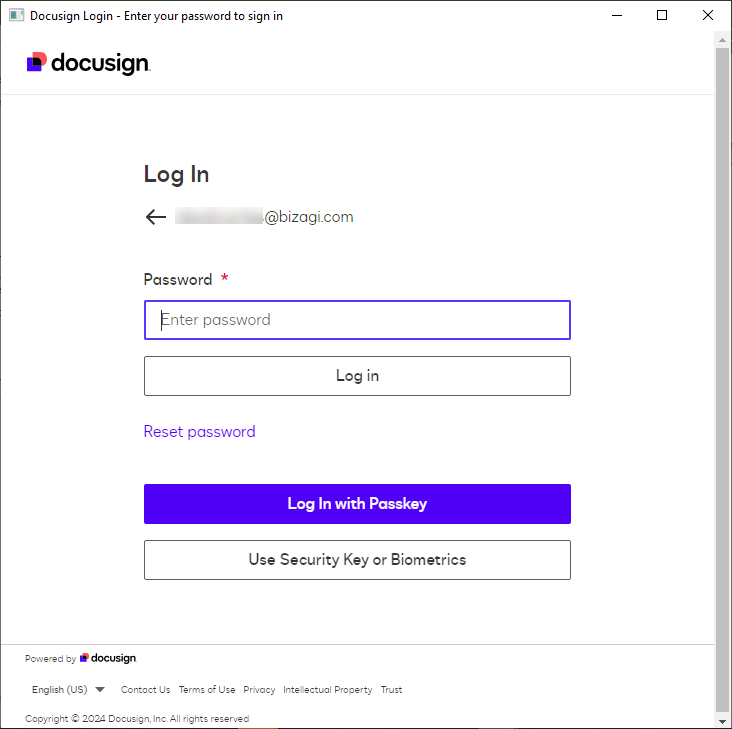
After that, a window pops up asking you for the password.
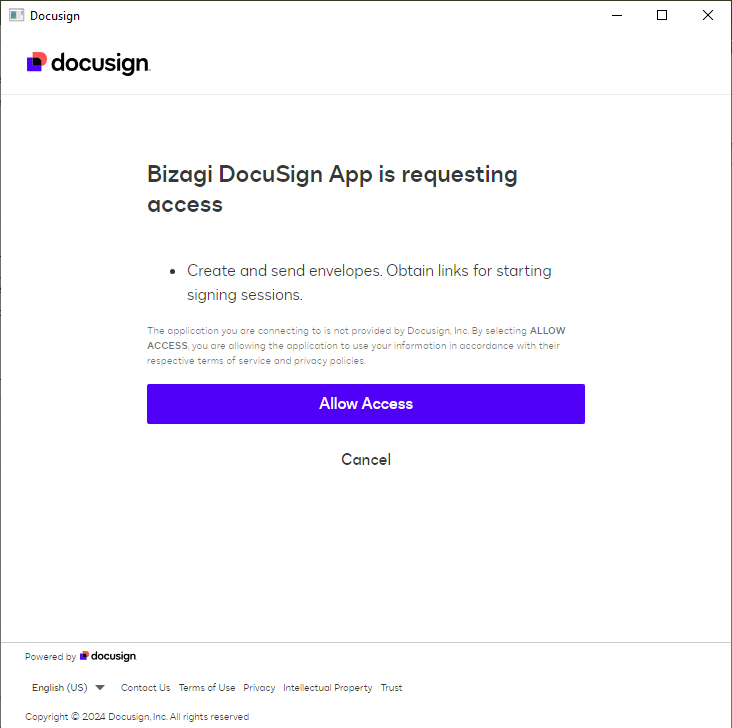
Then, to access select ALLOW ACCESS.
At the end, a successful authentication message is displayed and click Done to finish the configuration.
Using the connector
This connector features seven available methods of DocuSign services: Request Recipient View, Send Template, Create Envelope, Create Sender View, Get Envelope, Get Envelope Document, and Get Envelope Document list.
To learn overall how/where to configure the use of a connector, refer to Using connectors.
When using the connector, make sure you consider the following details for each of any of the available methods.
Request Recipient View
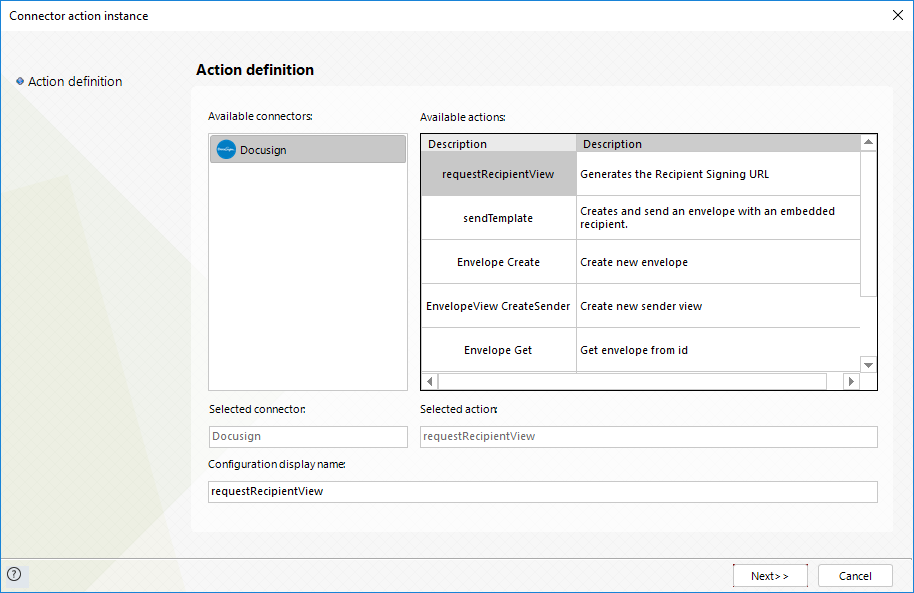
This method generates the Recipient Signing URL.
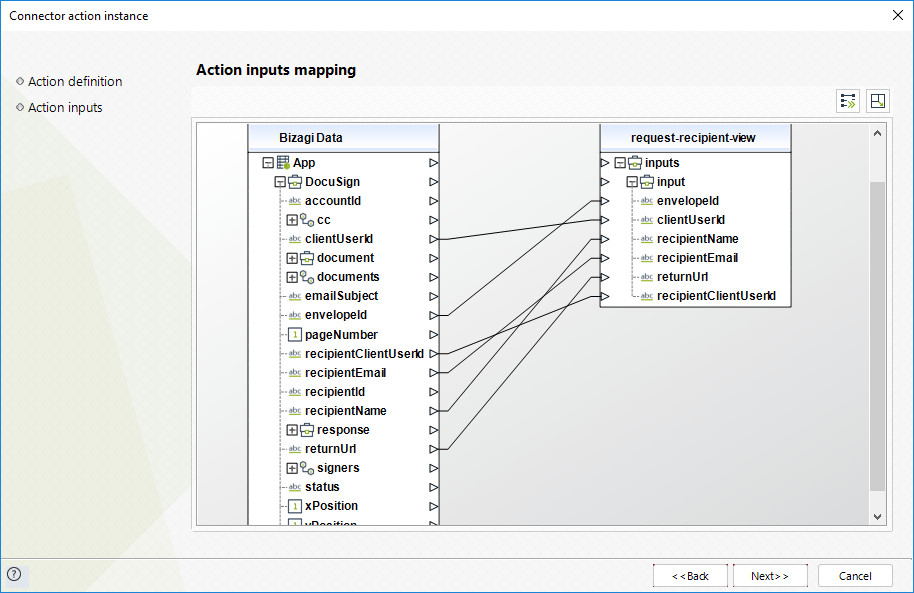
To configure the inputs, map the information as following:
•envelopeId: Unique identifier for the envelope.
•recipientName: The recipient’s full name
•recipientEmail: The recipient’s email.
•clientUserId: A sender-defined value which identifies the embedded recipient and allows a signing URL to be generated for them. This parameter expects a numeric value.
•returnUrl: URL to which the recipient is redirected once the session finishes.
•recipientClientUserId: this parameter is optional. It is the same ID sent when the envelope is created. If this parameter is not sent, a sender view will be generated instead of signer view.
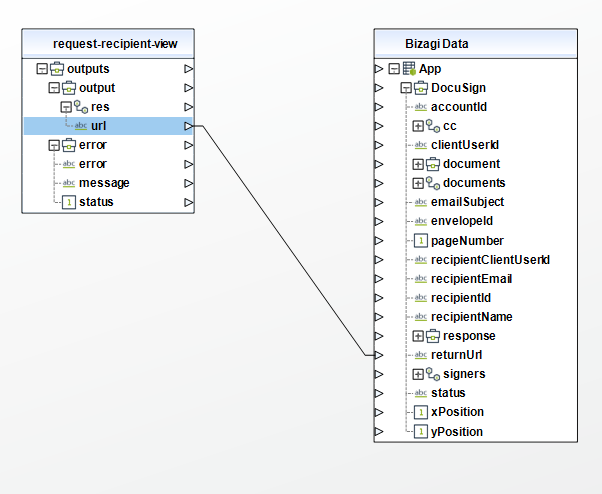
To configure its outputs when getting started and testing, you may map the response url from output:
For more information about this method's use, refer to DocuSign’s official documentation.
Send Template
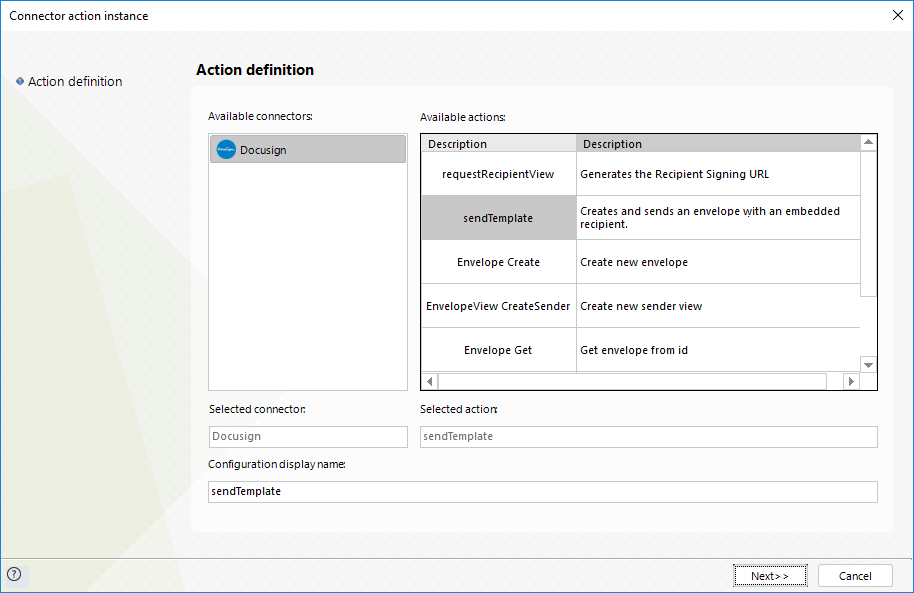
This method creates and sends an envelope with an embedded recipient.
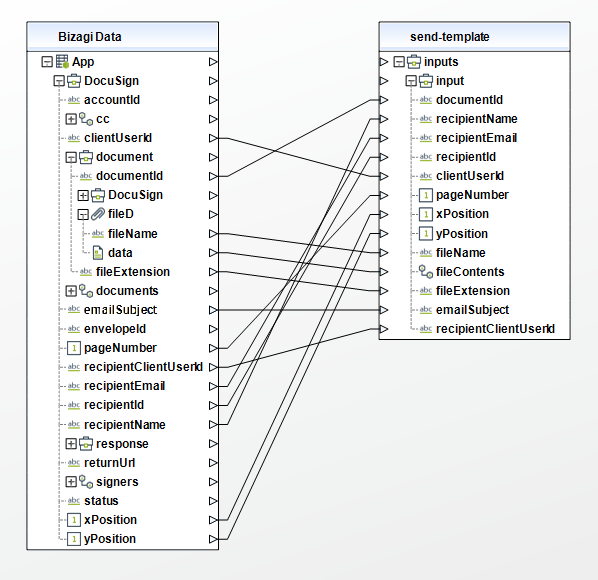
To configure your inputs, map as follows:
•fileName: The name for the new document.
•fileContents: Contents of the new document.
•fileExtension: the extension of the new document
•documentId: This value is completely up to the client. The document ID number that the tab is placed on.
•recipientName: The recipient’s full name.
•recipientEmail: The recipient’s email.
•recipientId: Unique for the recipient. It is used to indicate which recipient is to sign the Document. This parameter expects a numeric value.
•recipentClientUserId: this parameter is optional. If specified, it identifies the signer with a unique ID. This parameter is then used in the Request Recipient View action.
•clientUserId: A sender-defined value which identifies the embedded recipient and allows a signing URL to be generated for them. This parameter expects a numeric value.
•xPosition: Indicates the horizontal offset of the tab on the page (DocuSign uses 72 DPI when determining position).
•yPosition: Indicates the vertical offset of the tab on the page (DocuSign uses 72 DPI when determining position).
•emailSubject: subject that docusign sends in the email to the recipient.
•pageNumber: Specifies the page number on which the tab is located.
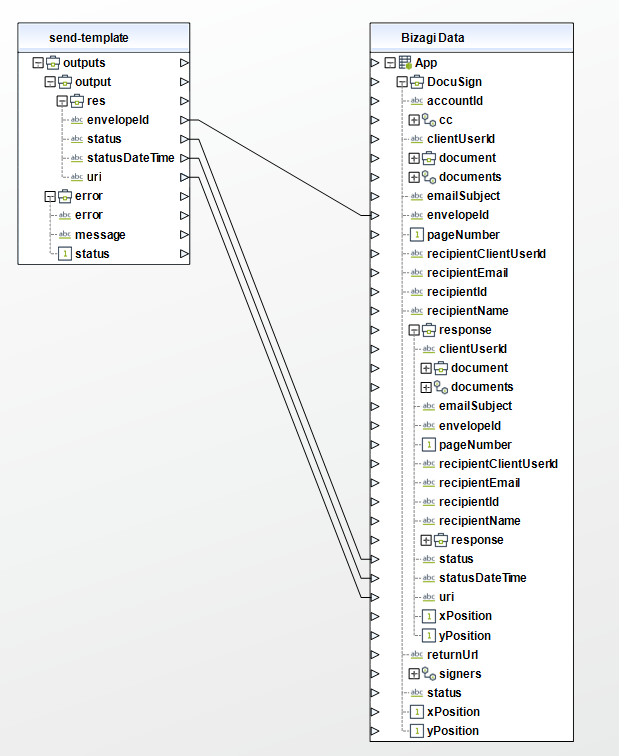
To configure your outputs and start testing, you can map as in the following image:
•envelopeId: Unique identifier for the recently created envelope.
•status: Status for the recently created envelope.
•statusDateTime: Date and time when the envelope was created.
•uri: URL generated in order to access the recently created envelope.
For more information about this method's use, refer to DocuSign’s official documentation.
Create Envelope
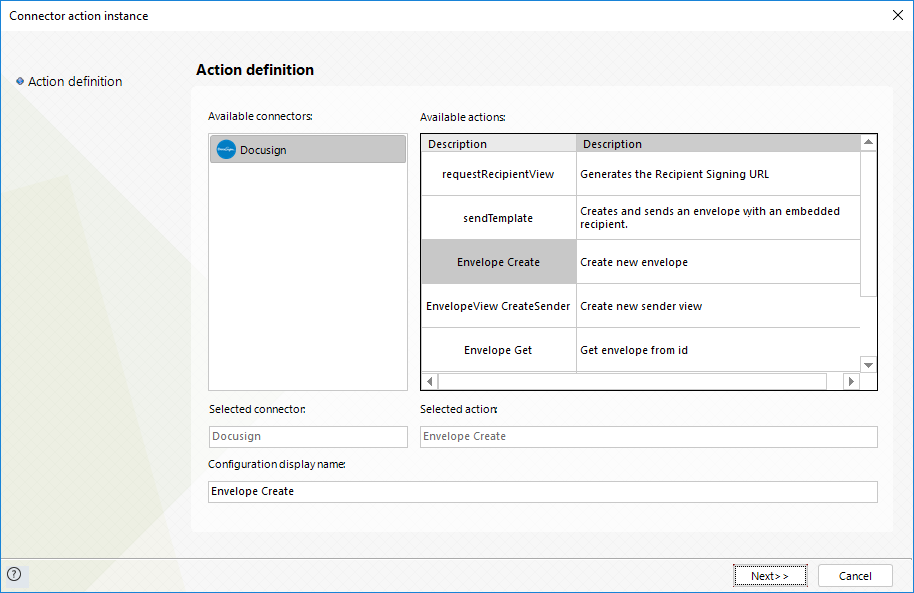
This method creates and sends a new envelope.
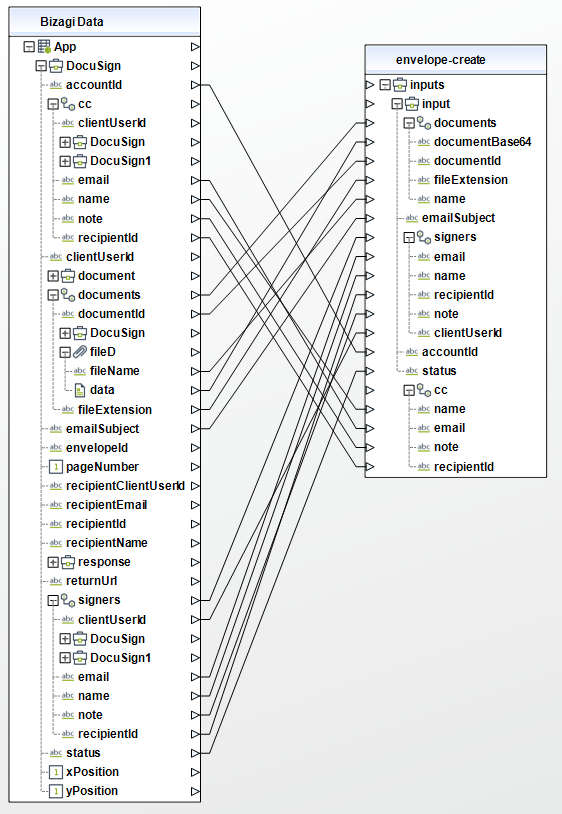
To configure your inputs, map as follows:
•documents: List of the documents to be signed in the envelope.
This way and by mapping as well its inner documentBase64, documentId, fileExtension, and name elements, you can send the list of the documents to be signed.
For fileName element, you may specify through text, a name for the file or map the fileName property from a Bizagi file attribute and for documentBase64, map the data property from the same Bizagi file attribute so that an array of bytes (byte[]) is sent with the actual content of the file.
•emailSubject: Subject of the email used to send the envelop to the recipients.
•signers: List of the users who are going to receive the envelope and sign the documents.
This way and by mapping as well its inner email, name, recipientId, and note elements, you can send the list of the signers of the documents.
•accountid: Unique identifier of your DocuSign account.
•clientUserId: this parameter is optional. If specified, it identifies the signer with a unique ID. This parameter is then used in the Request Recipient View action.
•status: The status of the envelope. Set sent if the envelope will be immediately sent to the recipients or created if the envelope will be saved and sent later.
•cc: List of the users who are going to receive a carbon copy of the envelope.
This way and by mapping as well its inner email, name, recipientId, and note elements, you can send the list of the copied recipients.
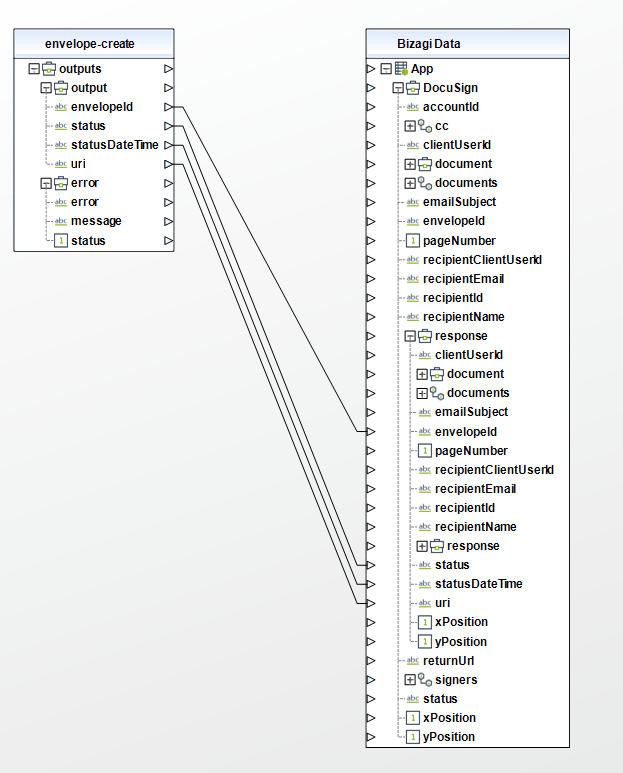
To configure your outputs and start testing, you can map as in the following image:
•envelopeId: Unique identifier for the recently created envelope.
•status: Status for the recently created envelope.
•statusDateTime: Date and time when the envelope was created.
•uri: URL generated in order to access the recently created envelope.
For more information about this method's use, refer to DocuSign’s official documentation.
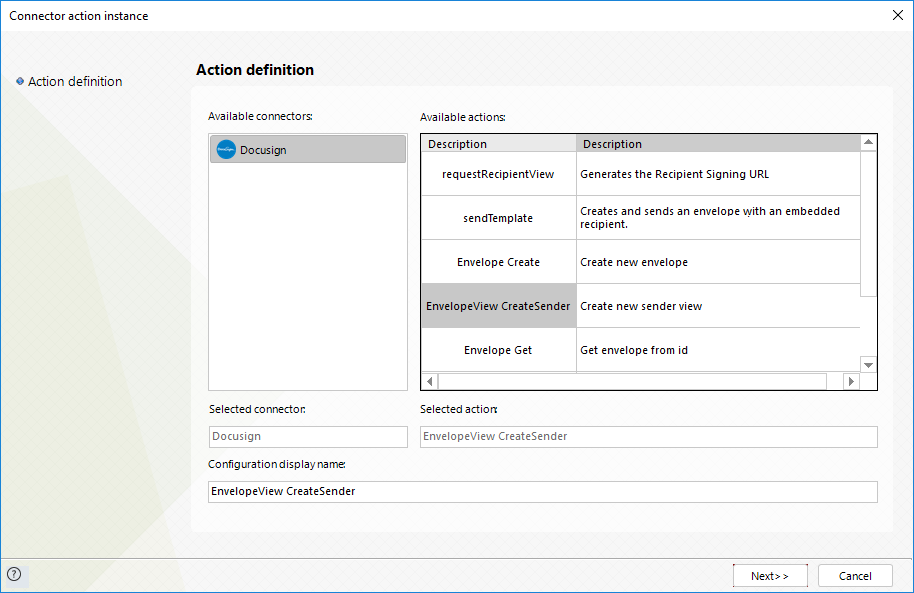
Create Sender View
This method creates a new Sender View
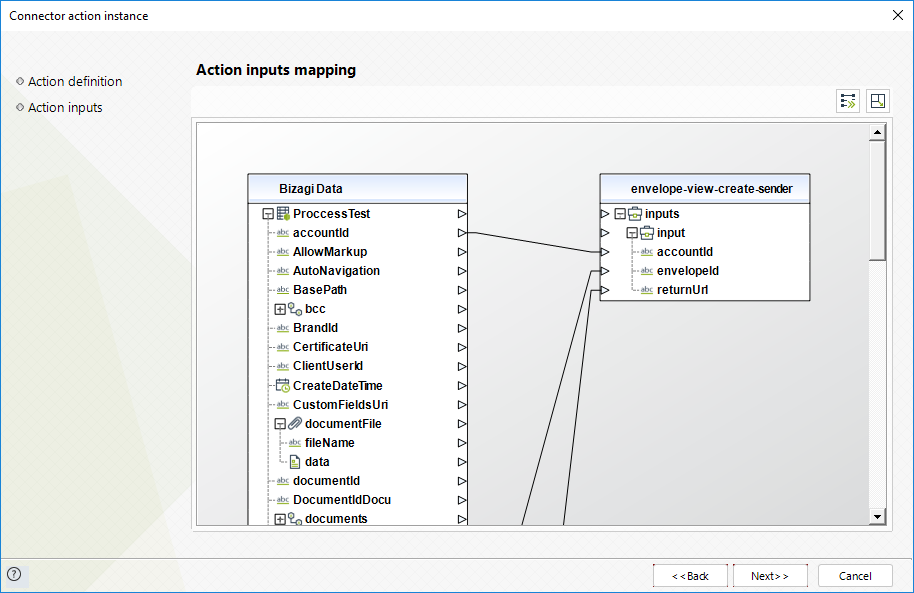
To configure your inputs, map as follows:
•accountid: Unique identifier of the DocuSign account of the creator user of the envelope.
•envelopeId: Unique identifier of the envelope.
•returnUrl: URL generated in previous actions to access the envelope.
To configure its outputs when getting started and testing, you may map the returned url.
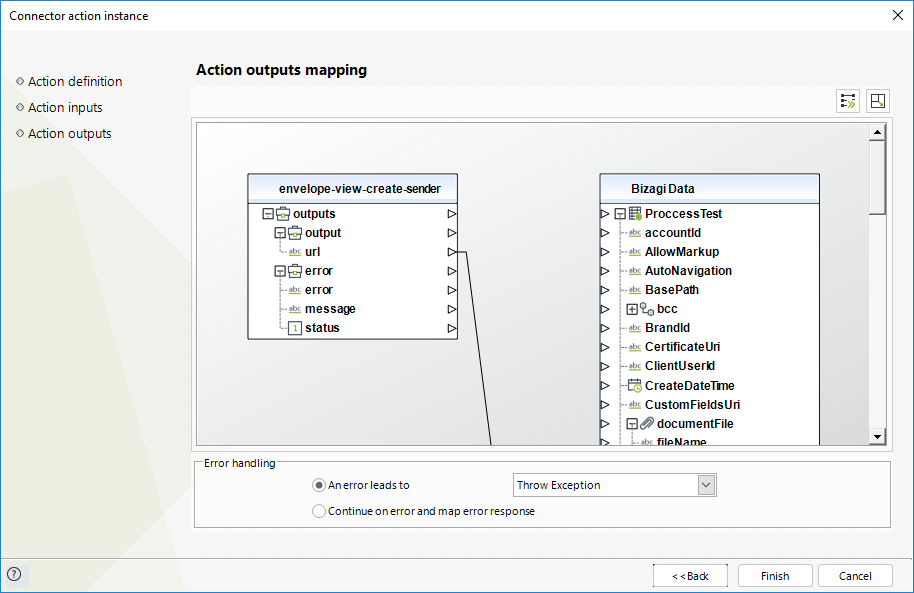
For more information about this method's use, refer to DocuSign’s official documentation.
Get Envelope
This method gets an envelope from its id.
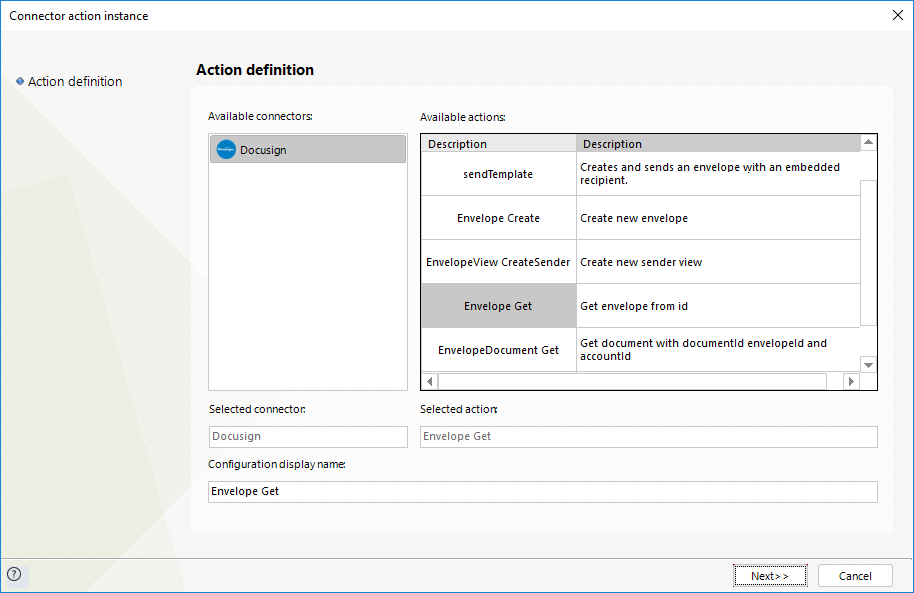
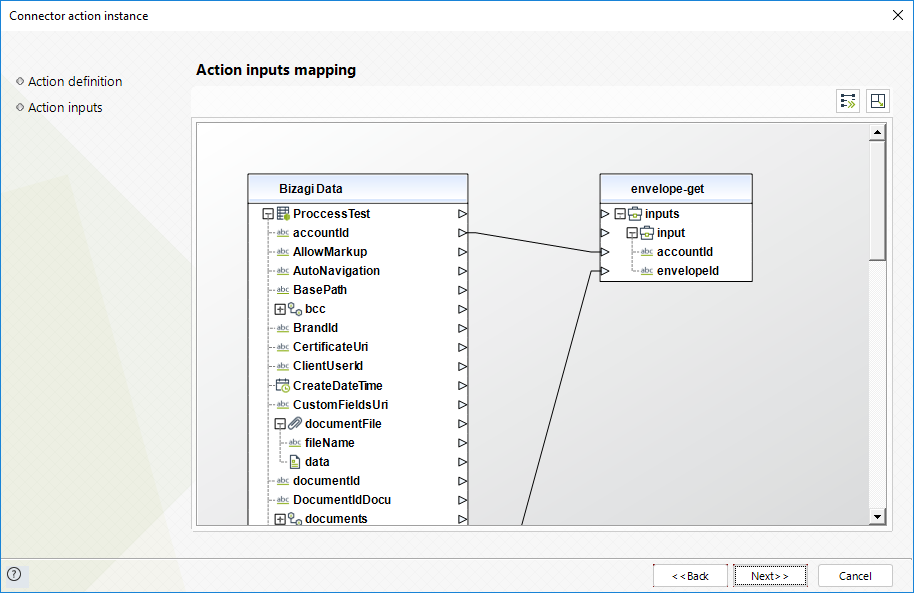
To configure your inputs, map as follows:
•accountid: Unique identifier of the DocuSign account of the creator user of the envelope.
•envelopeId: Unique identifier of the envelope.
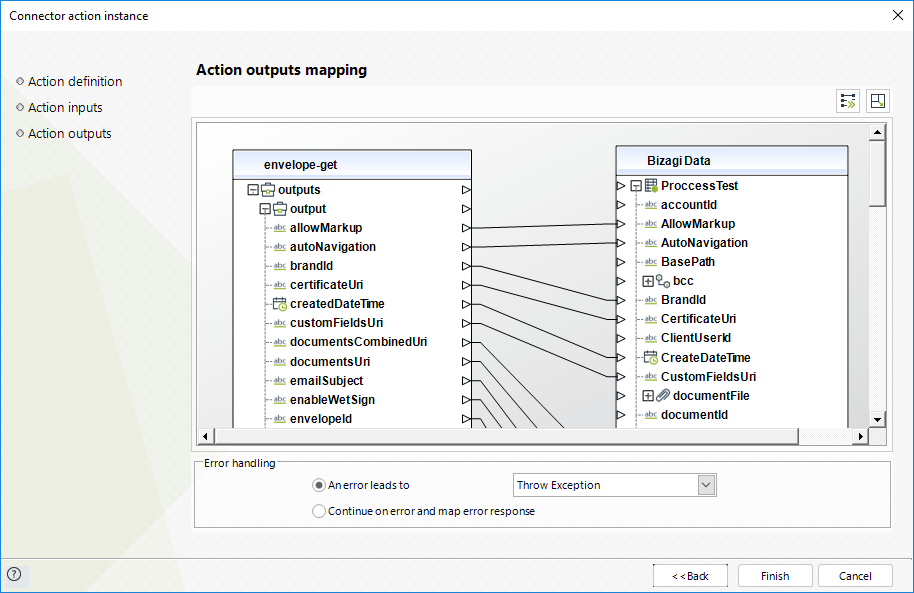
To configure its outputs when getting started and testing, you may map:
•allowMarkup: specifies whether the markup is enabled (true) or not (false).
•autoNavigation: specifies whether the user is can redirect an envelope to another recipient (true) or not (false).
•brandId: Unique Identifier of the brand of the envelope
•certificateUri: URI of the endpoint used to retrieve the certificate information of the envelope.
•createdDateTime: Date when the envelope was created.
•customFieldsUri: URI of the endpoint used to retrieve the custom fields of the envelope.
•documentsCombinedUri: URI of the endpoint used to retrieve the combined documents of the envelope.
•documentsUri: URI of the endpoint used to retrieve the documents of the envelope.
•emailSubject: Subject of the email used to send the envelop to the recipients.
•enableWetSign: specifies whether the signer is able to print and sign the document (true) or not (false).
•envelopeId: Unique identifier of the envelope.
•envelopeIdStamping: specifies whether the Envelope ID Stamping is enabled (true) or not (false).
•envelopeUri: documentsUri: URI of the endpoint used to retrieve the envelopes.
•initialSentDateTime: Date when the envelope was sent.
•is21CFRPart11: specifies whether this module is enabled on the account (true) or not (false).
•isSignatureProviderEnvelope: specifies whether the envelope is Signature Provider (true) or not (false).
•lastModifiedDateTime: Date of the last update of the envelope.
•notificationUri: URI of the endpoint used to retrieve the notifications of the envelope.
•purgeState: Current purge state for the envelope.
•recipientsUri: URI of the endpoint used to retrieve the recipients.
•sentDateTime: Date when the envelope was sent.
•statusChangedDateTime: Date of the last status update of the envelope.
•status: Status of the envelope
•templatesUri: URI of the endpoint used to retrieve the templates.
For more information about this method's use, refer to DocuSign’s official documentation.
Get Envelope Document
This method gets a document from its id, its envelope id and its account id.
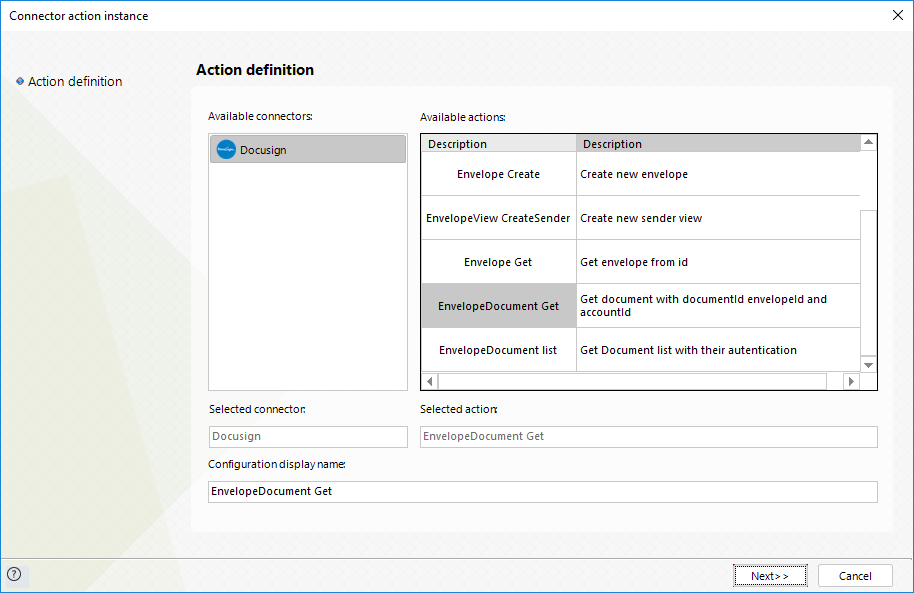
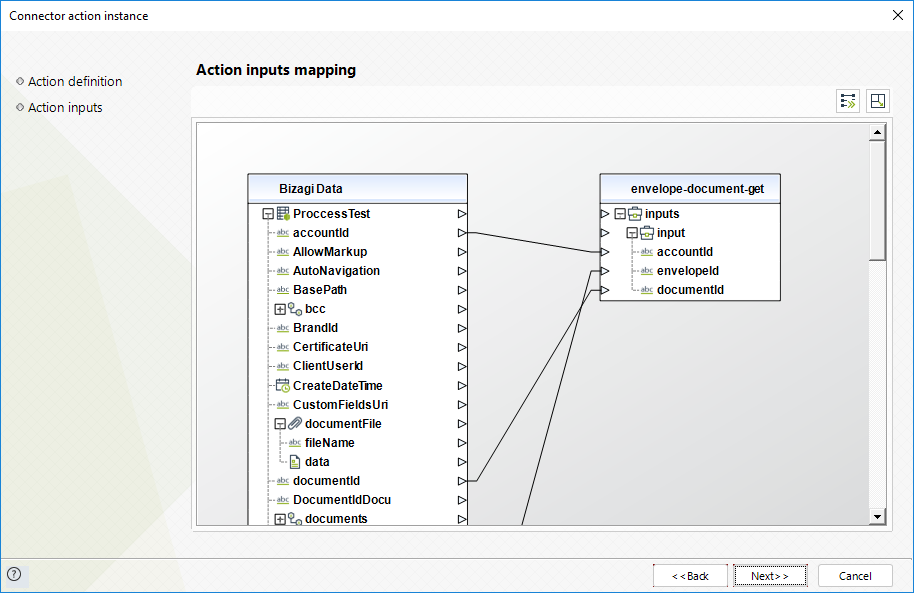
To configure your inputs, map as follows:
•accountid: Unique identifier of the DocuSign account of the creator user of the envelope.
•envelopeId: Unique identifier of the envelope.
•documentid: Unique identifier of the document.
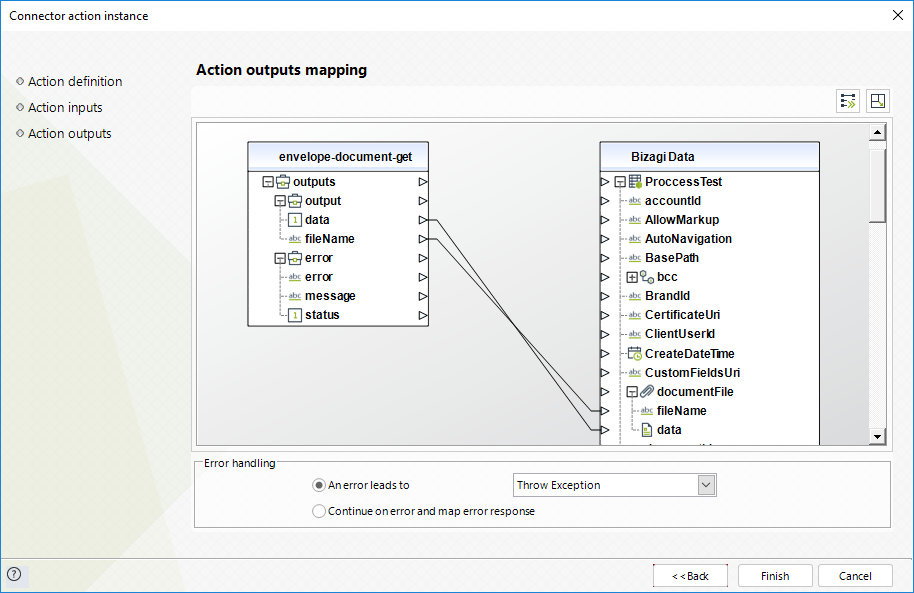
To configure your outputs and start testing, you can map as in the following image:
•data: Map the attribute to the data property of a Bizagi file attribute so that the array of bytes (byte[]) has the content of the document.
•FileName: Map the attribute to the fileName property of a Bizagi file attribute.
For more information about this method's use, refer to DocuSign’s official documentation.
Get Envelope Document list
This method gets the document list with their authentication.
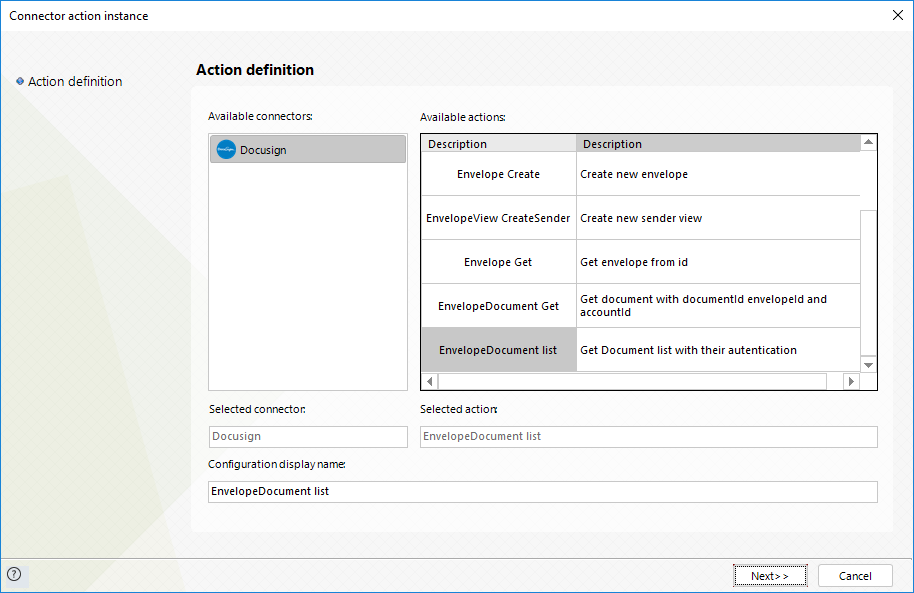
To configure its inputs, consider:
•accountId: Unique identifier of the DocuSign account of the creator user of the envelope.
•envelopeId: Unique identifier of the envelope.
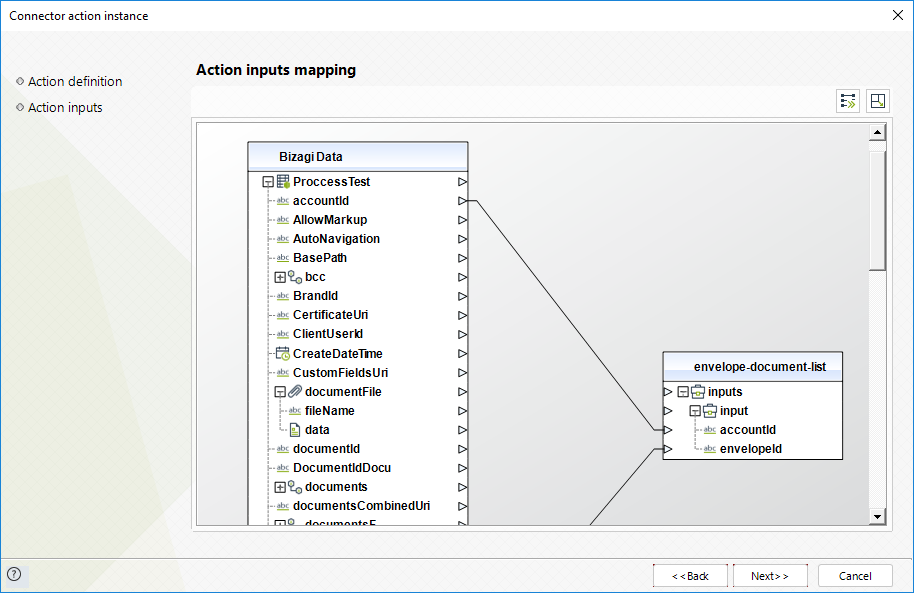
To configure its outputs when getting started and testing, you may map:
•envelopeDocuments: Map this into a collection in your data model.
odisplay: the display and behavior properties of the document.
odocumentId: Unique identifier of the document.
oincludeInDownload: specifies whether this module is included in the combined document download (true) or not (false).
oname: Name or the document.
oorder: defines whether the document is sorted ascending or descending.
opages: number of pages of the document.
osignerMustAcknowledge: shows how the signer interacts with the document.
otype: type of the user (type_owner or type_participant).
ouri: URL created to access the document.

For more information about this method's use, refer to DocuSign’s official documentation.
Last Updated 12/19/2024 2:48:48 PM
