The Working Time Schema refers to the work schedule, and is defined for each organization and each user. The durations of the Activities will depend on the working time schema and therefore, the management of case expiration illustrated on the main screen of the Work Portal.
In Bizagi there are 3 types of working time schemas created by default:
•24 hours: 24 hours from Sunday through Sunday.
•Night Shift: 11:00PM - 3:00AM and 4:00AM - 8:00AM from Monday through Friday (Saturday early morning).
•Standard: 8:00AM - 12:00PM and 2:00PM - 6:00PM from Monday through Friday.
Working Time schemas should be configured when your projects need a different working time.
Hierarchy to set a user's Working time schema
The Working time schema in Bizagi can be created at different levels according to your particular needs. Bizagi evaluates the schema's hierarchy for each user, as described below, and sets the solution date for each activity in a process.
•Individual: Individual users can have a working time schema specific to them. If an individual's working time schema is set, then Bizagi will use that one. Else, Bizagi will evaluate the following condition.
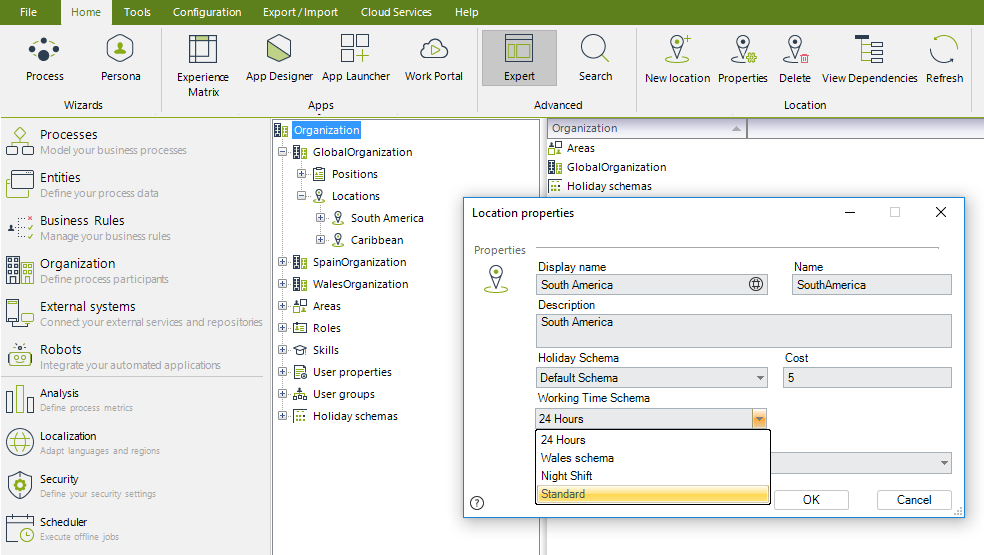
•Location: Each user may belong to one Location. A Location may or may not have a Working time schema defined. If the user belongs to a Location and it has a Working time schema defined, Bizagi will use it. Else, Bizagi will evaluate the following condition.
•Organization: Each user belongs to one or more Organizations and they have a Working time schema set by default. Bizagi will take the first organization created and use the schema set on that one.
Solution date and working time schema for task with multiple users allocated
If there are different users assigned to an activity using the assignation method Everyone taken by user, the application evaluates the following conditions to use the Working Time Schema and to define the Activities due date:
If all users have the same Working Time Schema defined, Bizagi uses that one.
If at least one assigned user has a different Working Time Schema, the system uses the Organization's Working Time Schema.
If at least one assigned user has a different organization, the application uses the default Working Time Schema.
Take into account that the solution date is not saved per each user, it is saved per task.
|
To define the Case due date, Bizagi will take always the Organization's Working Time Schema |
Configuring a Time Schema
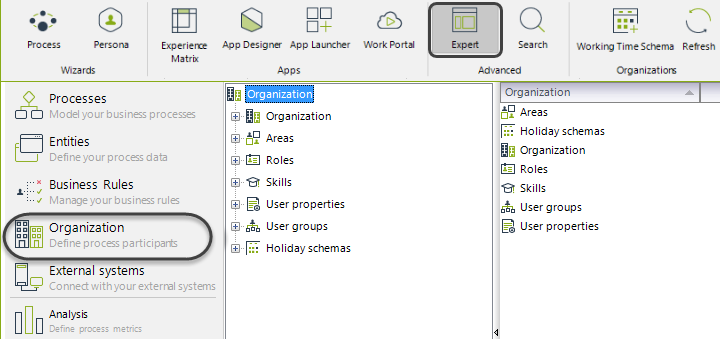
1. In the Expert View, go to the Organizations Module and click the Working Time Schema option located at the top of the screen.
2. The Working time properties menu will be displayed. Choose the desired Schema from the Working Schemas list
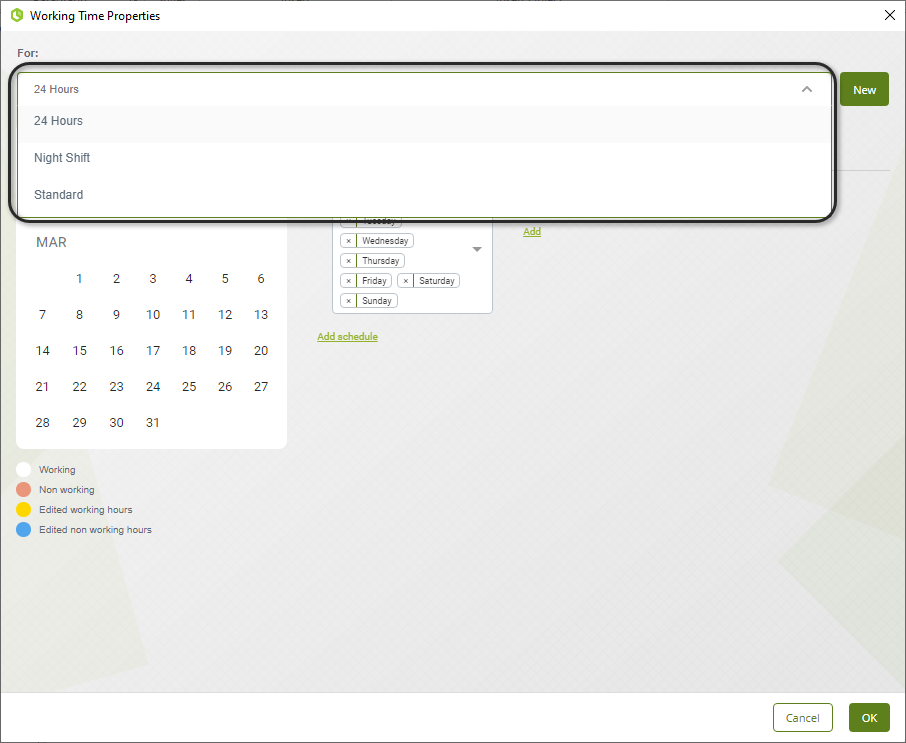
When an organization requires a customized time schema you can create a new one or edit the existing ones.
Create a Time Schema
1. In the Working time properties menu click New.
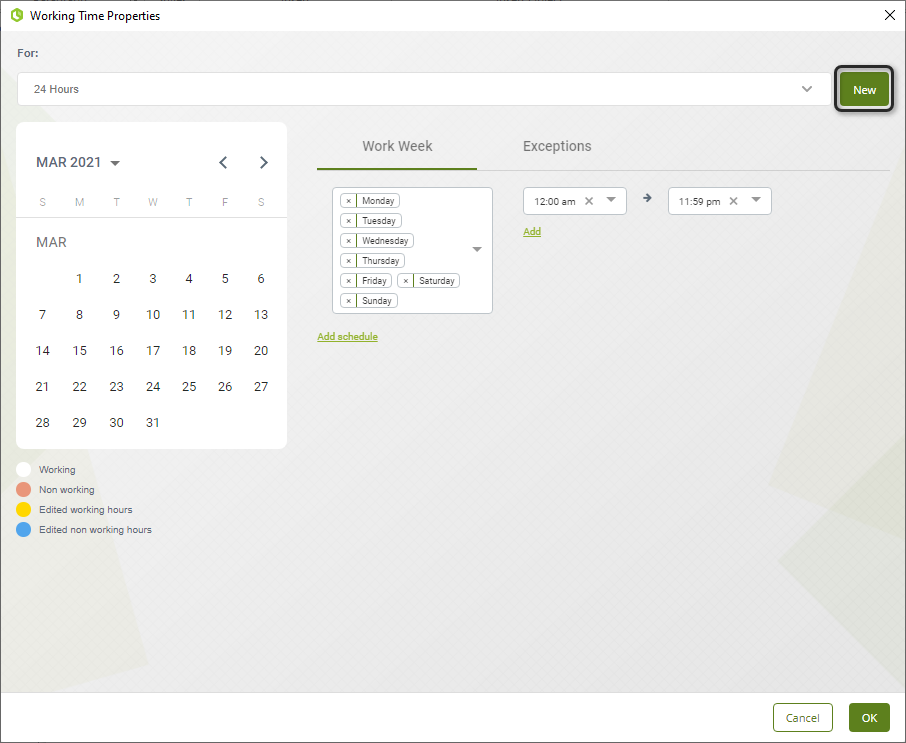
2. Type a name for the New Schema. You have two options for the calendar related to the schema:
•Create new base calendar: Creates a calendar with the schedule from Monday through Friday from 8:00 AM to 12:00 PM and 1:00 PM to 5:00 PM by default.
•Make a copy of an existing calendar: Creates a copy of the configuration (holidays, schedule, etc) of an existing calendar.
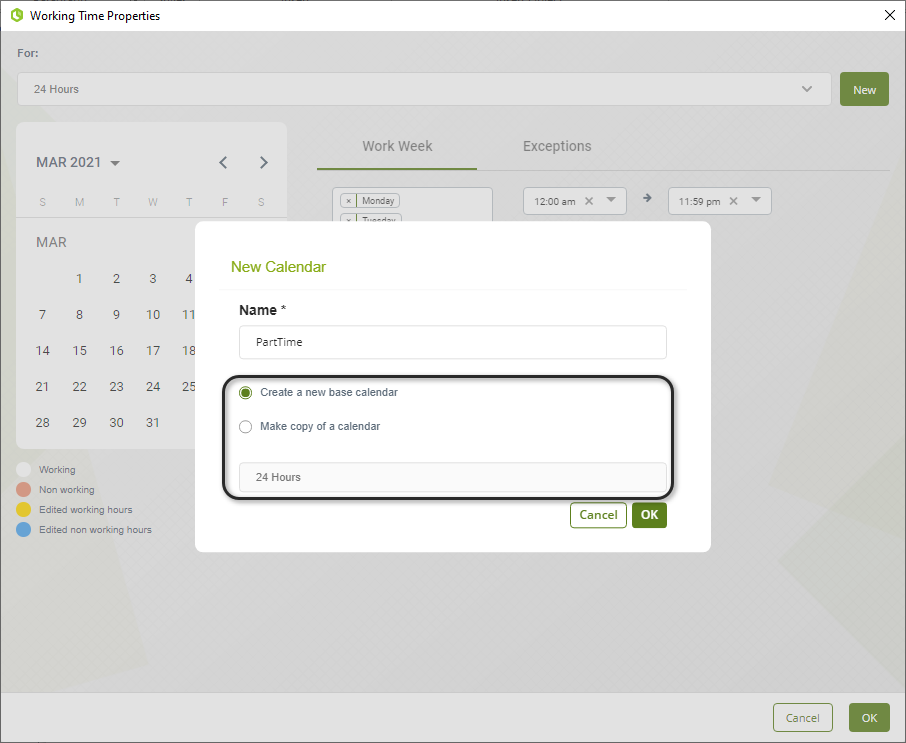
3. Finally click OK to save the changes. In order to change the configuration of an existing calendar, follow the procedure described below.
Edit an Existing Time Schema
1. In the Working time properties menu select the schema to be edited. You can create multiple schedules to customize multiple working hours, just select add schedule:
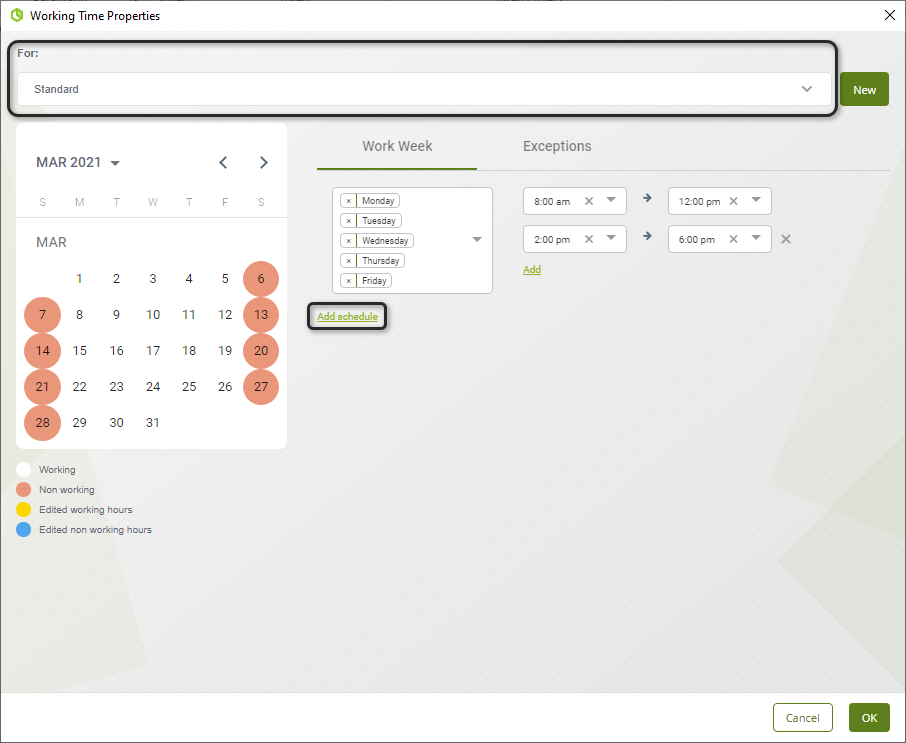
2. Within the schedule select the days the hour range will apply. The selected days will acquire the working day color (white). Additionally, you can add multiple working ranges per schedule just select add in the hours' section and set the start and end time per range:
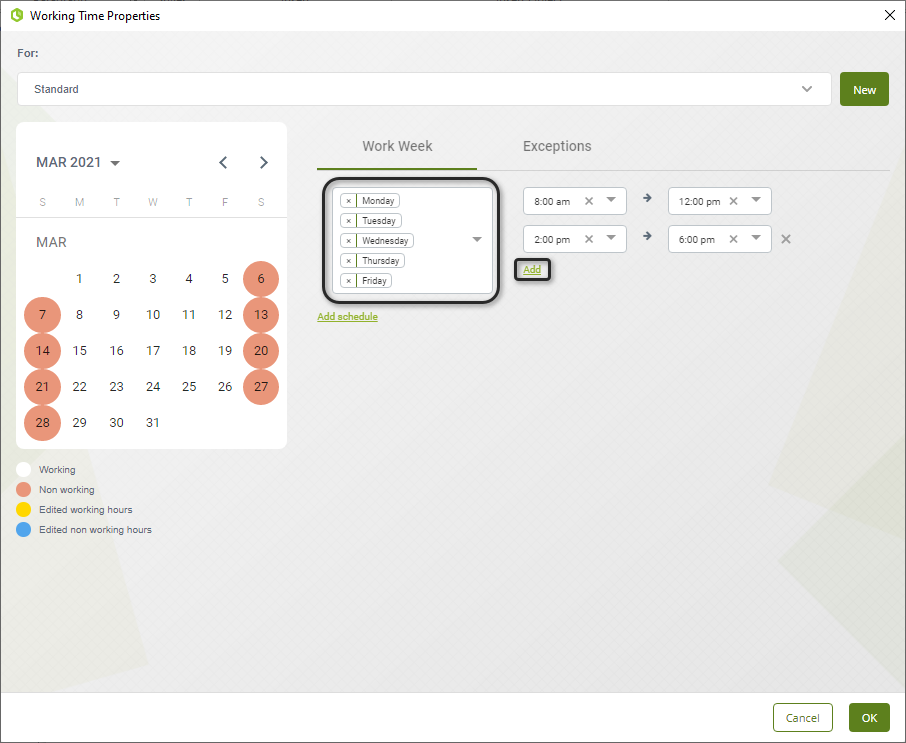
3. Modify the Time Schema according to your needs and finally click OK.
Create Exceptions in a working Time Schema
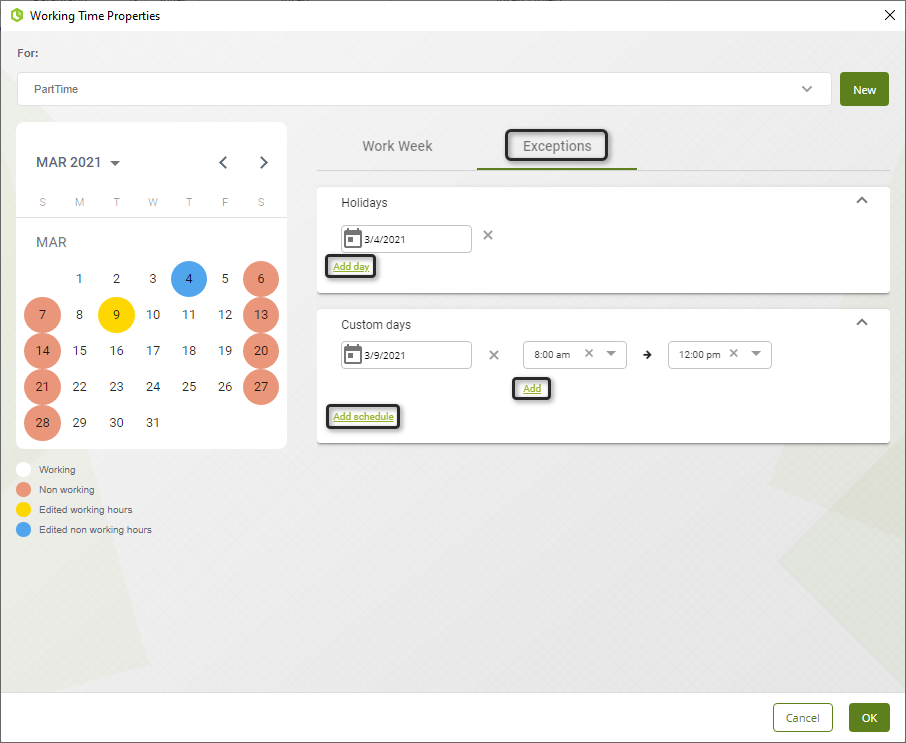
Besides establishing a weekly work routine within the working time schema you can create exceptions to these weekly routines. These can be both custom days with different working hours from those established (additional shifts or half shifts days) or non-working days (holidays). These exceptions replace the previously defined work schedule in the work week.
To create an exception go to the Exceptions section, there for holidays simply set the corresponding days, you can add more with the add day option.
For custom days set the corresponding day and the schedule you desire, you can add more custom days with the add schedule option, in the same way, you can add multiple working ranges with the add option.
Set a Working Time Schema in an Organization or a Location
Each organization has a Working Time Schema associated: either the one that Bizagi sets by default or a customized one.
Same happens to Locations: each location has a schema set by default that can be customized.
Each Organizations and each Location can have a specific Working Time Schema.
By default the Working Time Schema for organizations in Bizagi is the Standard Schema described at the beginning of this section.
In order to assign or change the Working Time Schema associated to an Organization do the follow:
1. Go to the Modules view, right-click Organization and select the option Edit Organization.
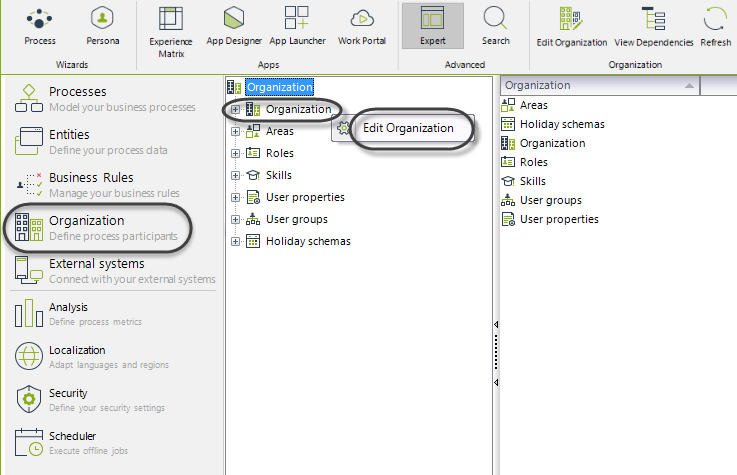
2. Select the Working Time Schema to be associated to the Organization.
Click Next until you reach the final step of the Wizard.
Finally click Finish.
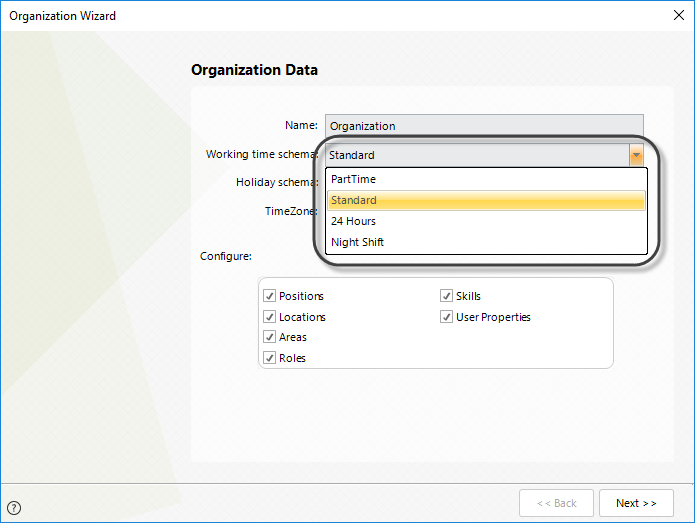
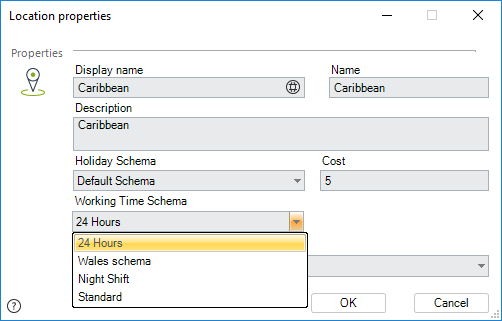
Follow the same steps to set a customized schema for Locations:
Right click the Location to set, select Properties and choose the desired schema.
Working Time Schema for a User
As explained at the beginning of this section, the hierarchy used by Bizagi to set a user's Working time schema depends on the organization or Location the user belong to.
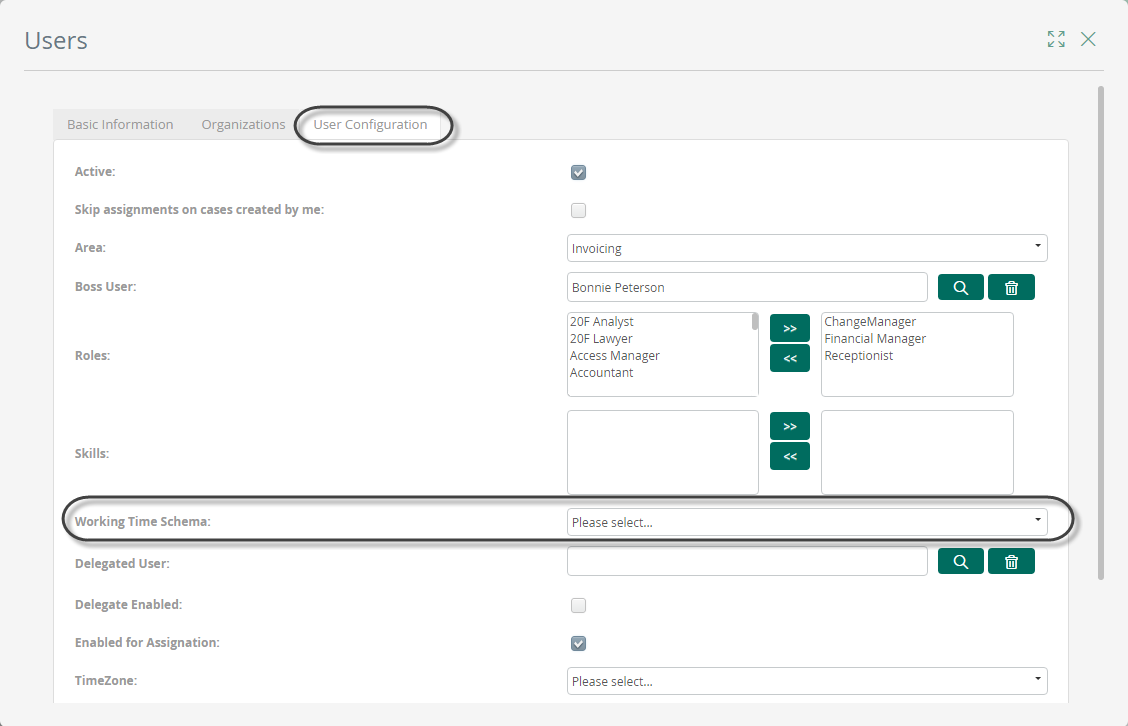
However, it is possible to associate an individual Working Time Schema for each user, through the Work Portal. This process has to be performed by an Administrator.
The Working Time Schema to be chosen must be previously defined.
1. Go to the Admin Menu in the Work Portal, and select Users.
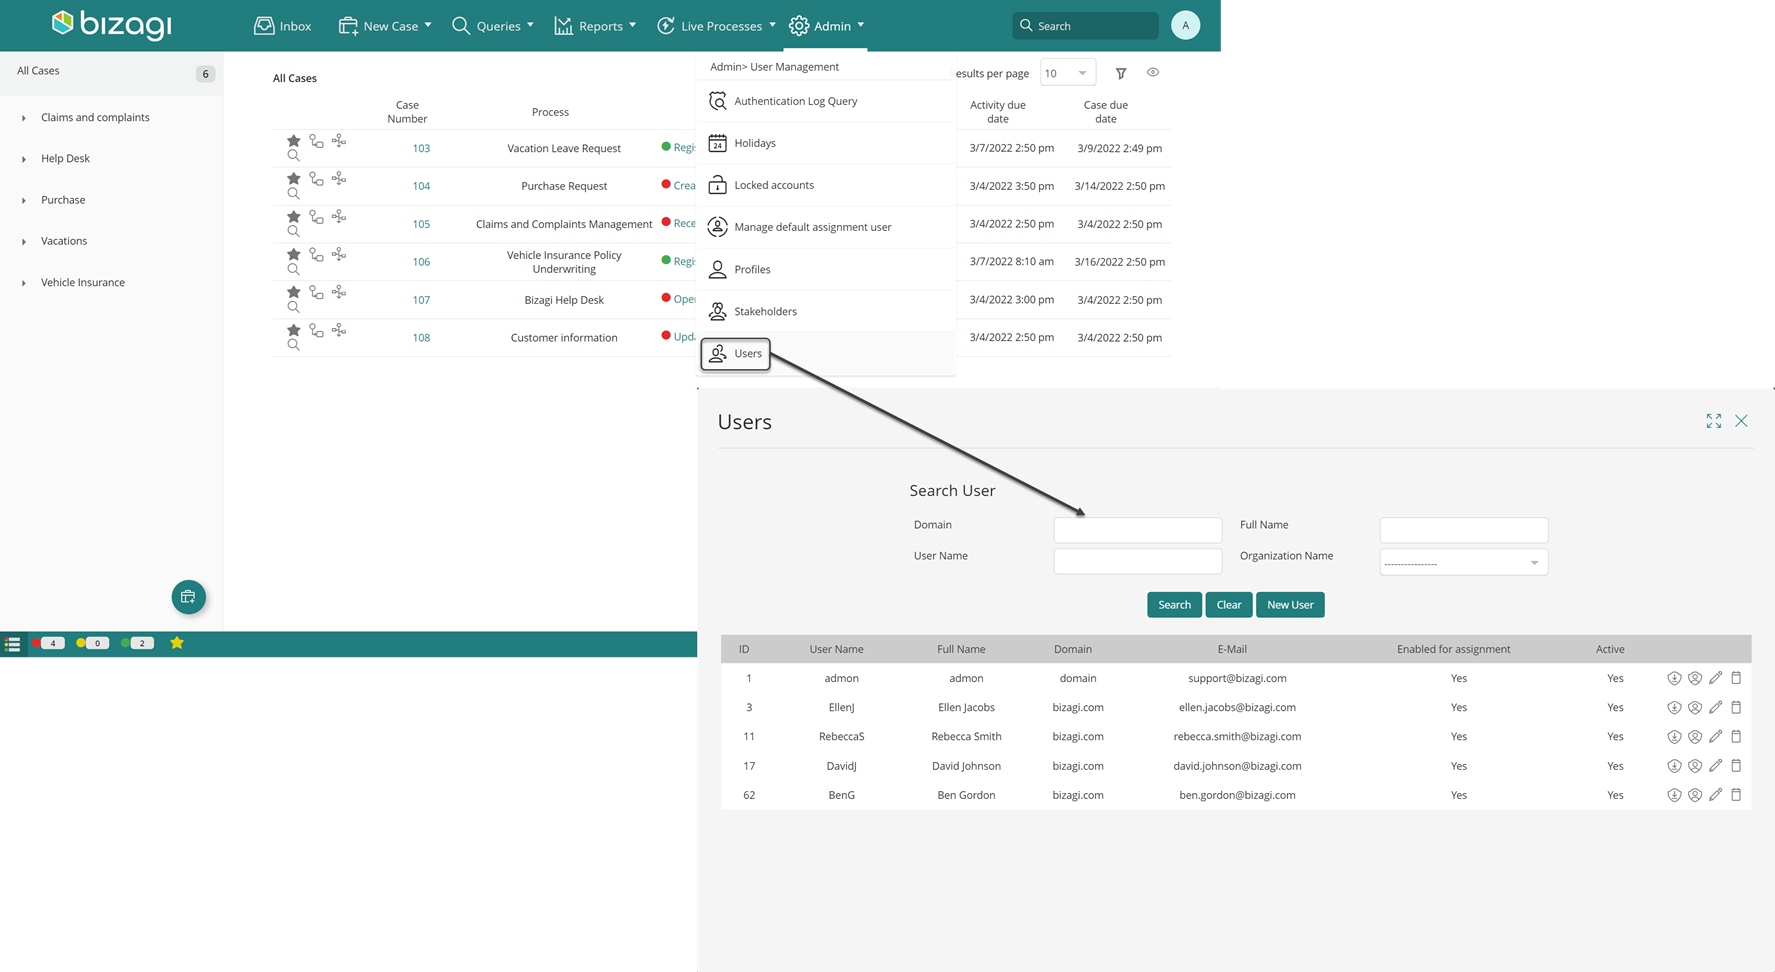
2. Search for a specific user and click the pencil button to Edit.

3. Go to the Configurations User tab. You will find the Working Time schema option near the bottom.
Select the Time Schema that applies to the user and click Update.
Last Updated 1/26/2023 4:03:34 PM
