Overview
User configured notifications are messages sent by email to any valid email address. Notifications apply to a particular Process, and specifically, to a particular Activity of a Process, and can include any of the business information implemented in the case. The message contents and sending requirements are entirely defined during the Process development.
User Configured messages are created in the Activity Actions menu in the fourth step of the Process Wizard and are called E-Mails. They can be sent when an Activity is created, saved, or exited (On Enter, On Save or On Exit action).
How to Create an Email
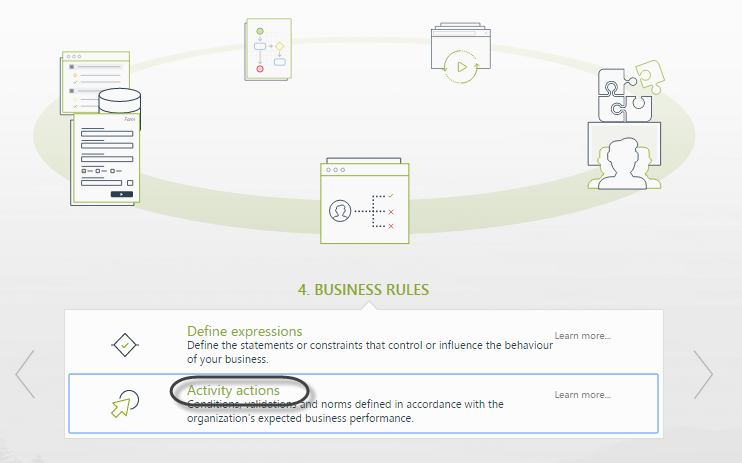
1. On the fourth step of the Process Wizard select Activity Actions. A new window will display the Process diagram.
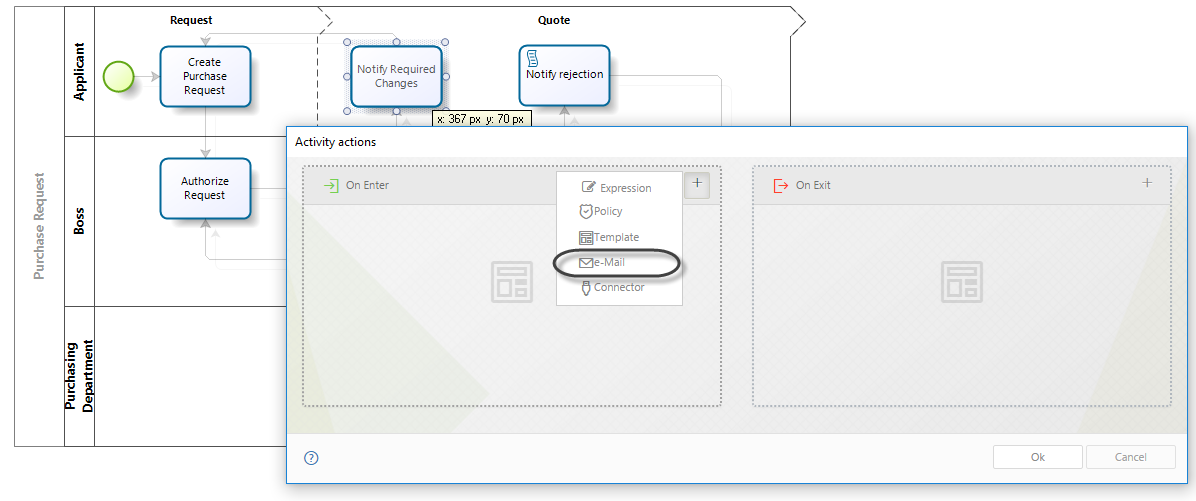
2. Select the Activity in the Process where the e-mail will be configured.
In the Activity Actions Window click the Plus symbol on the bottom left corner and select the e-mail option.
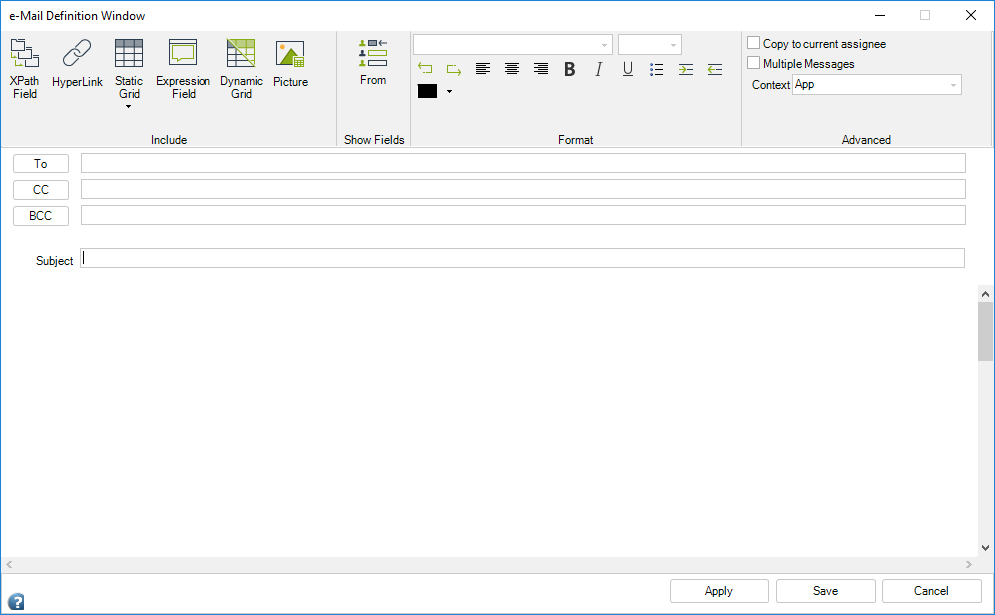
3. The following window will be displayed in order to enter the required information.
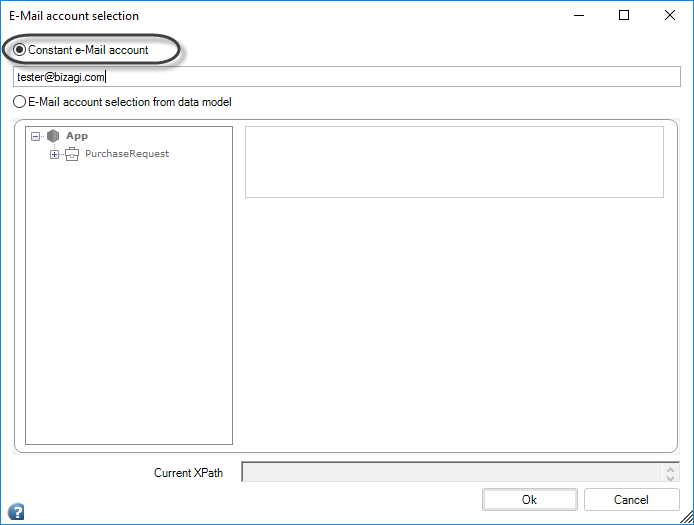
4. Select the addressees: Click the To button.
You can send the e-mail to a constant account, or you can select an attribute in your data model where an email address is saved.
•To send to one or more constant accounts, select the Send e-mail to a constant account option, and type each address separated by a semi-colon.
•Otherwise, mark the Send e-Mail to an account from data model selection option and select the attribute(s) from the data model displayed on the left.
5. Type a subject and the content.
When you are done, click Save.
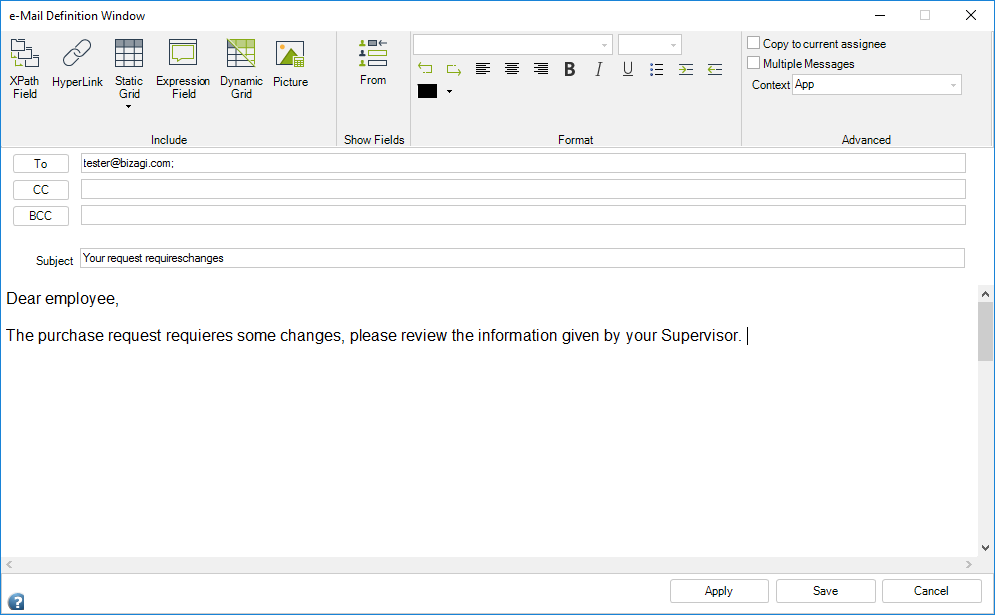
User interface explained
The e-Mail Definition Window is divided in two main groups: Ribbon and Message.
Ribbon

GROUP |
MENU OPTION |
DESCRIPTION |
|---|---|---|
Include |
XPath Field |
Allows you to navigate the data model until you reach the desired attribute. For more information, refer to Include Process and case information. |
HyperLink |
Allows you to add hyperlinks to the email. For more information, refer to Include Hyperlinks. |
|
Static Grid |
Allows you to add tables with a fixed number of columns and rows. For more information, refer to Include Tables or collections. |
|
Expression Field |
Allows you to include information returned by a rule. For more information, refer to Include information returned by a rule. |
|
Dynamic Grid |
Allows you to include tables to display the information stored in collections, or one-to-many relationships, that are displayed in the Work Portal as Tables. For more information, refer to Include Tables or collections. |
|
Picture |
Allows you to include one image in the email. |
|
Show Fields |
From |
Shows or Hides the from field. This field allows you to set the sender's email displayed. You can set a constant account, or you can select an attribute in your data model where an email address is saved.
This option is available when using Bizagi's default emailing service or when your corporate SMTP server is configured with Sendgrid and Basic Authentication is employed.
You should use the domain set for the service (@mycompany.com).
These settings do not apply if a different email server is used. For more information on how to set up your own SMTP email service, please visit: Important considerations |
Format |
Font |
Changes the font face. |
Font Size |
Changes the font size. |
|
Undo |
Erases the last action done in the message. |
|
Redo |
Reverses the last undone action. |
|
Align Left |
Aligns the message content with the left margin. |
|
Align Center |
Centers the message content. |
|
Align Right |
Aligns the message content with the right margin. |
|
Bold |
Makes the selected text bold. |
|
Italic |
Italicizes the selected text. |
|
Underline |
Underlines the selected text. |
|
Bullets |
Creates a bullet list. |
|
Increase Indent |
Moves a paragraph farther away from the margin. |
|
Decrease Indent |
Moves a paragraph closer to the margin. |
|
Font Color |
Changes the color of the text. |
|
Advanced |
Copy to current assignees |
Sends a copy of the email to the current assignee of the task. |
Multiple Messages |
Enables to option to create tabs above the Subject field where you can create templates and send many messages subject to a condition. For more information, refer to Send messages according to conditions. |
|
Set Conditions |
This options is displayed when the Multiple Messages checkbox is marked and opens a window to define different Boolean conditions in order to identify which e-mail will be sent. |
|
Context |
Changes the context of the template according to the To field. For more information, refer to Context changes in E-Mails. |
Message
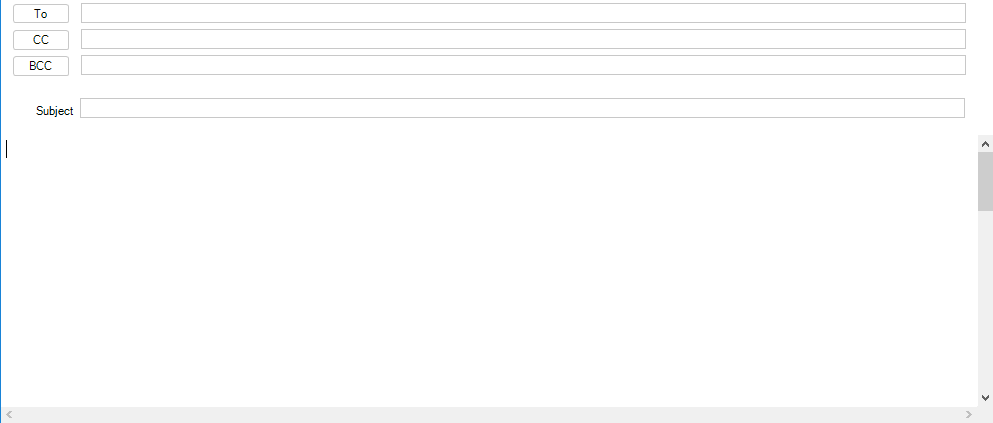
FIELD |
DESCRIPTION |
|---|---|
TO |
Select the addressees to which the email will be sent. You can send the e-mail to a constant account, or you can select an attribute in your data model where an email address is saved. |
CC (Carbon copy) |
Select the addressees to which the email will be copied. You can send the e-mail to a constant account, or you can select an attribute in your data model where an email address is saved. |
BCC (Blind Carbon Copy) |
Select the addressees to which the email will be blind-carbon-copied. You can send the e-mail to a constant account, or you can select an attribute in your data model where an email address is saved. |
Subject |
Select the Subject for the message to be sent. |
Language |
Select the language for the text of localizable tags (e.g., parameter entities' attributes and long dates: Thursday, December 1, 2012). Available languages depend on the Business configuration. If you do not select a language and leave the field configured as (Default), the text of localizable tags will be displayed in the Global culture language defined for the project. |
Message Body |
Select the body for the message to be sent. |
How to include formatted dates
Bizagi allows you to define different formats for the dates sent over emails, including the actual date and even the time values. This can be done on the Subject and the Message Body.
To format a date, it must be stored in the data model, this way you need to select the XPath to the date and select the desired the format.
To format a date in a notification, include the function: <format-date(<XPath>,"format")> on the Message Body and/or Subject field.
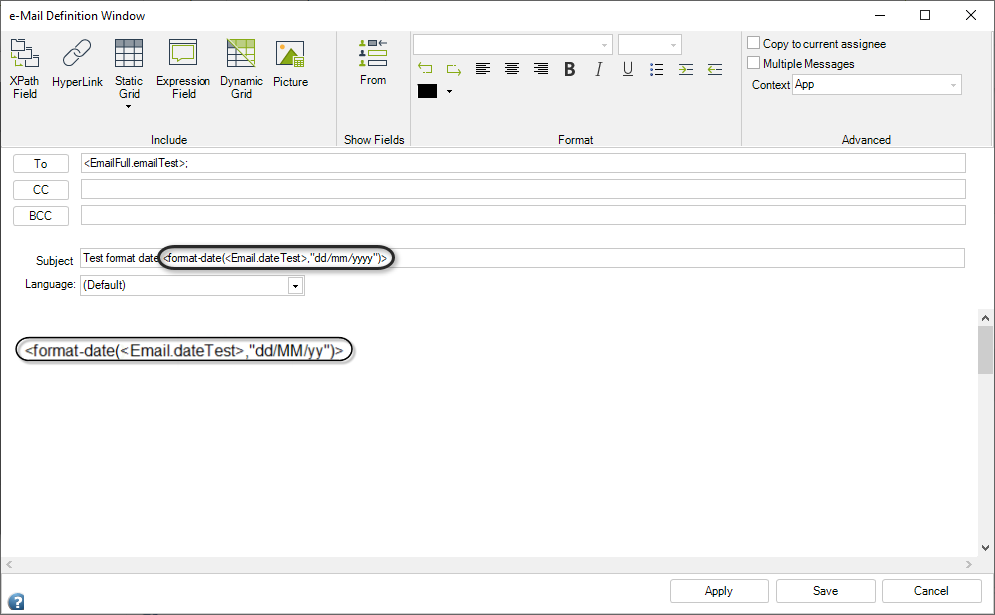
The application supports any of the following formats:
Supported Date (Day,month,year) format on the function |
|
Format |
Example |
dddd, MMMM dd, yyyy |
Thursday, October 10, 1991 |
M/yy |
10/91 |
d/M/y |
10/10/91 |
d-MMM |
10-Oct |
Supported Time (Hour, minute, seconds) format on the function |
|
Format |
Example |
HH:mm |
22:25 |
hh:mm tt |
10:25 PM |
hh:mm:ss tt |
10:25:00 PM |
Supported mixed date time format (Day,month,year) (Hour, minute, seconds) on the function |
|
Format |
Example |
dddd, MMMM dd, yyyy HH:mm |
Thursday, October 10, 1991 22:25 |
M/yy HH:mm |
10/91 22:25 |
MM-dd-yy hh:mm:ss tt |
10-10-91 10:25:00 PM |
d-MMM hh:mm tt |
10-Oct 10:25 PM |
|
•Only the mentioned formats are supported by the application. •Date formats cannot be used on Dynamic grids configuration. •XPath attribute must be a Date - time attribute. |
Last Updated 4/10/2025 3:25:50 PM