Overview
There are two types of tables that can be included in E-mails: Static and Dynamic.
•Static tables: these tables have a fixed number of columns and rows, that is defined by a user in development time. The information included in the table is fixed text or attributes from the data model with NO one-to-many relationships linked, similarly to the tables shown in the image below:
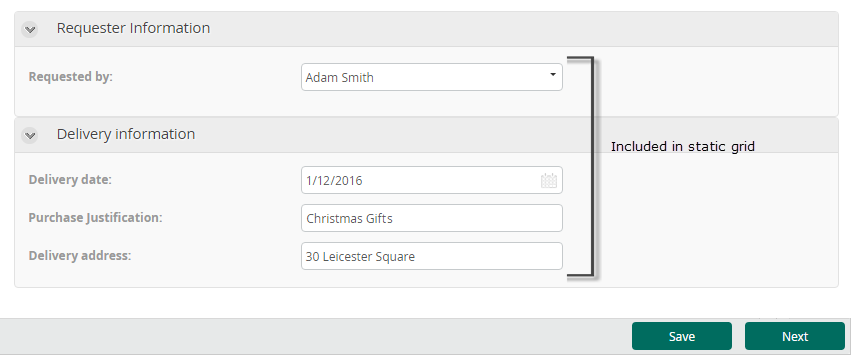
When sending this information by E-mail it will be shown as follows:
![]()
•Dynamic tables: these tables display the information stored in collections, or one-to-many relationships, that are displayed in the Work Portal as Tables.
The following image displays how a collection is shown in the Work Portal
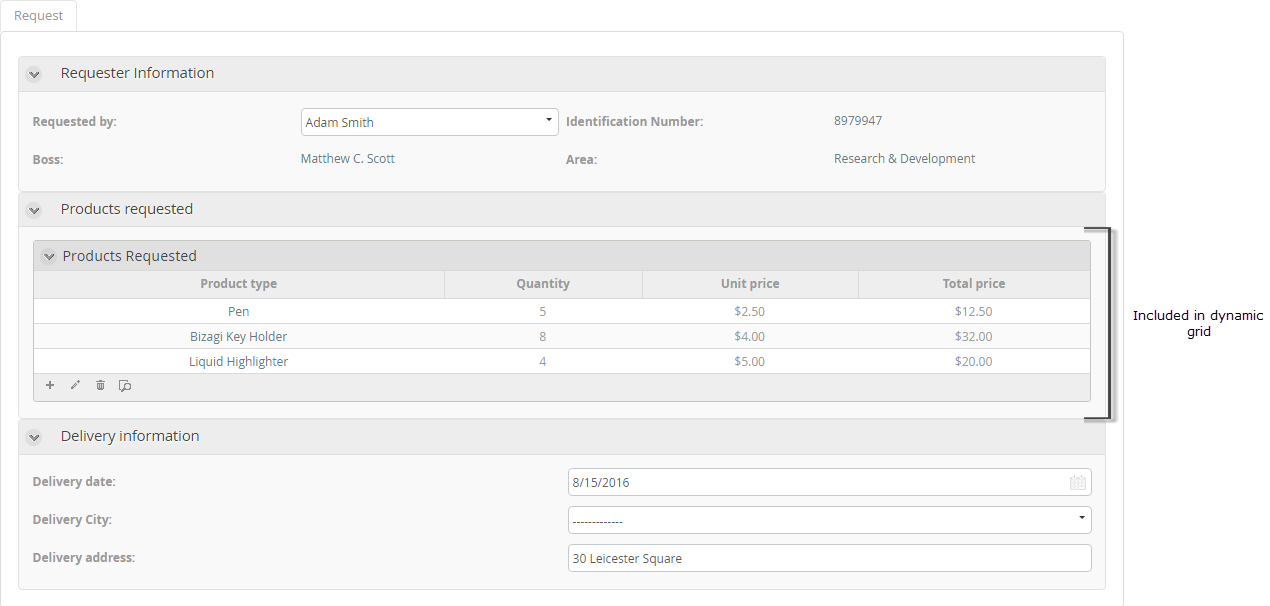
The following image displays how the collection will appear in the E-mail.

Example to include a Static Table
Suppose you wish to send an E-mail to confirm the products and delivery information of a Purchase Request, once it has been approved.
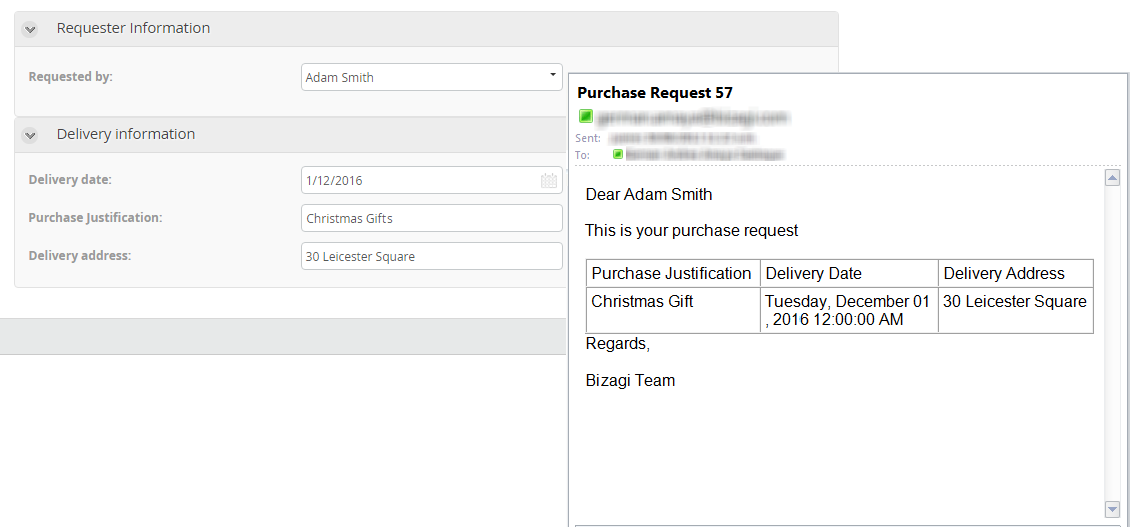
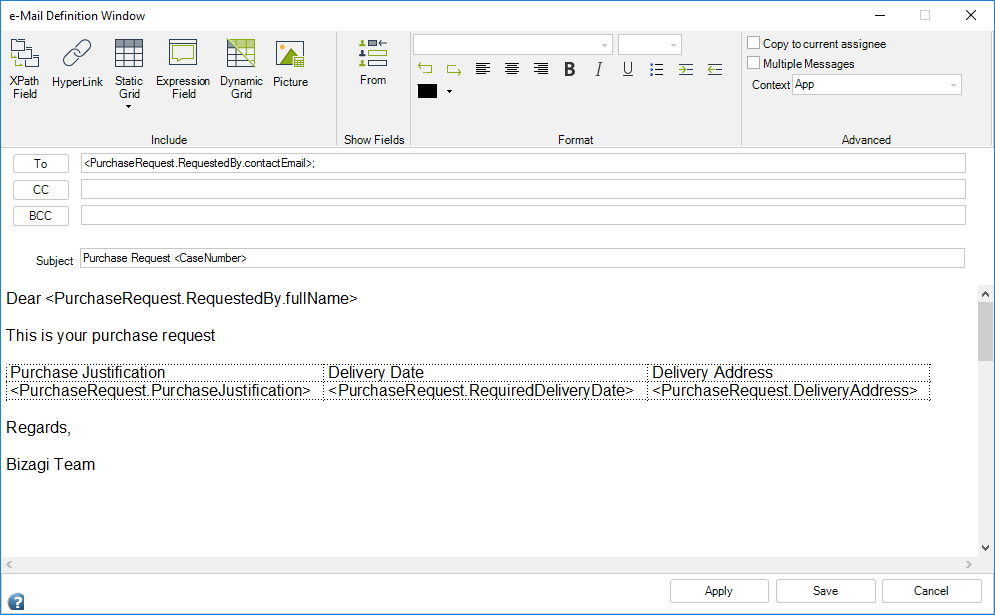
You need to include three attributes of the data model in the E-mail: the Purchase Justification, the Delivery Date and the Delivery Address. These attributes would be included in a table to achieve a structured look in the E-mail.
The following image displays how the information is captured in the Work Portal and presented in the E-mail.
1. Click the Static Table button at the top of the window and select the number of rows and columns the table will have. Select three columns and two rows.
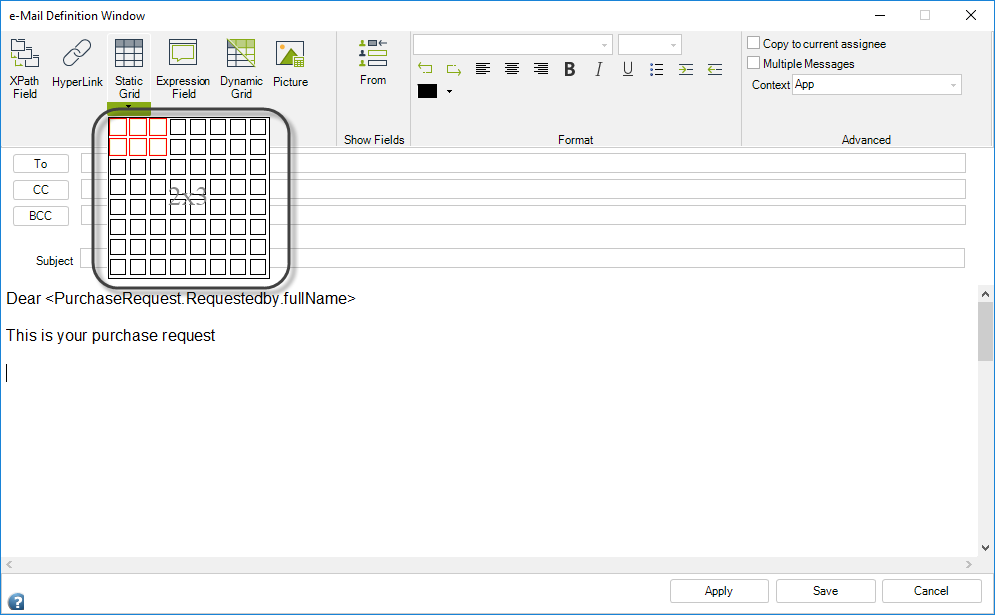
2. Create the header row of the columns as the first row of the table.
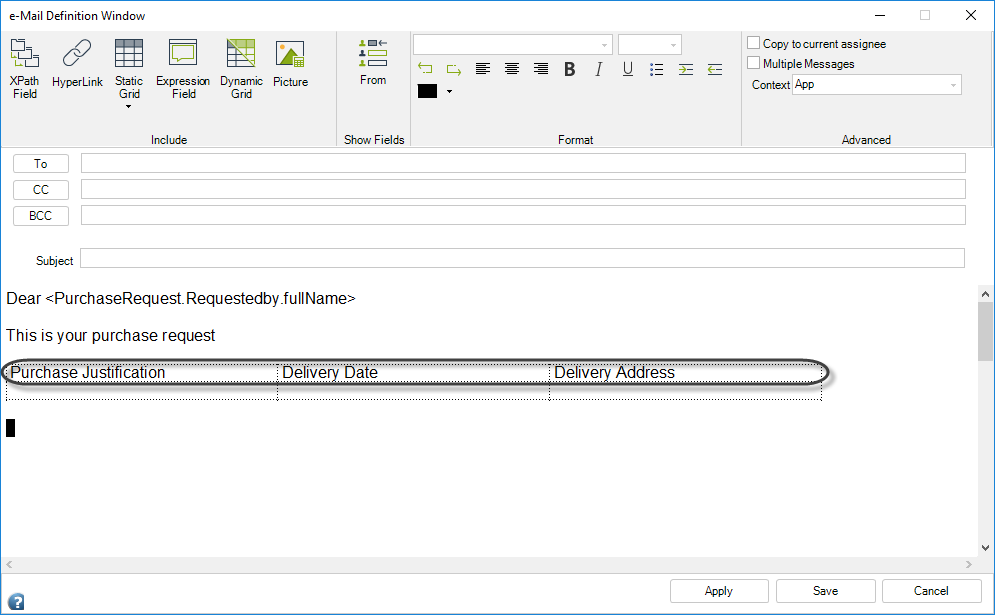
3. Include the data model information in the second row of the table.
Place the cursor in the relevant table field and use either the angle brackets "< >" or the XPath Field button to insert the attribute.
4. Click Save when the E-mail is complete.
Example to include a Dynamic Table
Suppose you wish to send an E-mail to the client when his request has been approved in a Loan Request Process. The E-mail will contain the information of the loans (products) that were approved.
The following is the data model of the Process. Notice there is a one-to-many relationship between the Process Entity, Request, and the entity Products..

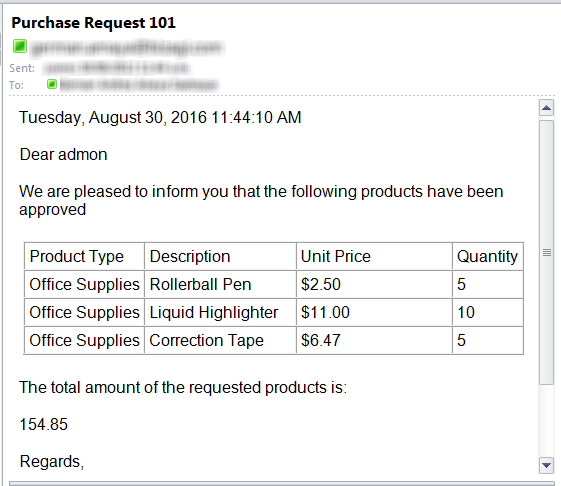
The received E-mail should present a table similarly to the one shown below:
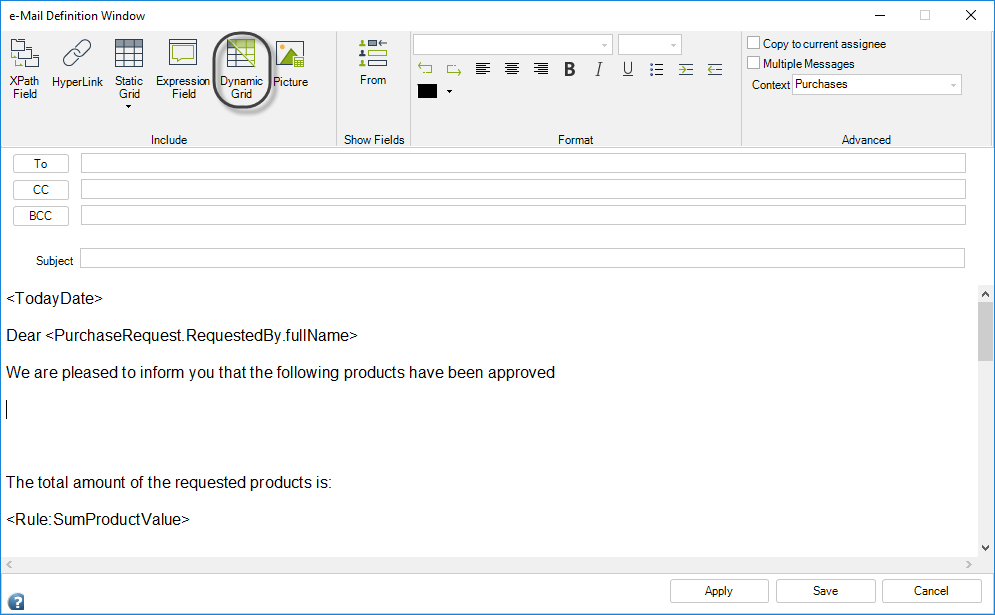
1. Place the cursor where you want to include your Dynamic Table.
Click Dynamic Table in the ribbon.
2. A new window will display the options to build the required table. There are four tabs that define the table: Grid Data, Header Style, Body Style and Table Style. The information in the Table Data tab is mandatory; the other tabs contain default values that may be customized, if desired.
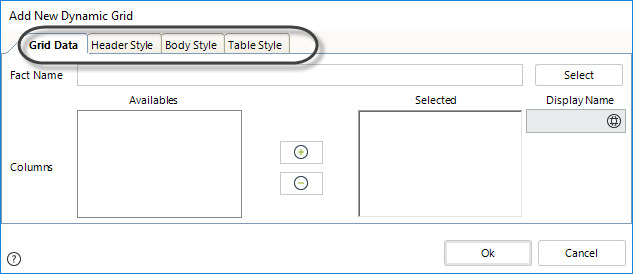
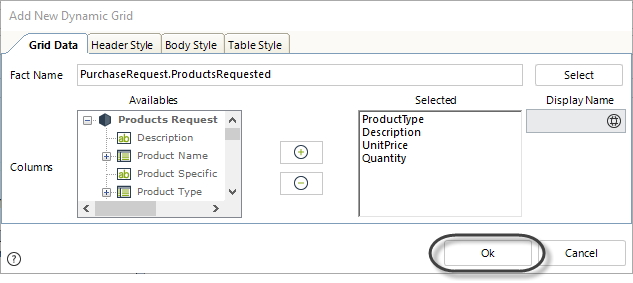
•Grid Data
This tab contains the information of the collection XPath as well as the columns that will be displayed.
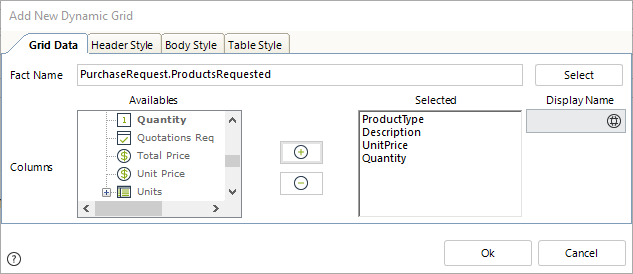
The first item is the Fact Name which is the XPath of the Collection. Click the Select button to navigate the data model and select the collection. The XPath in this case will be PurchaseRequest.ProductsRequested.
At this point, you can add filters to the collection to only include relevant records in the email.
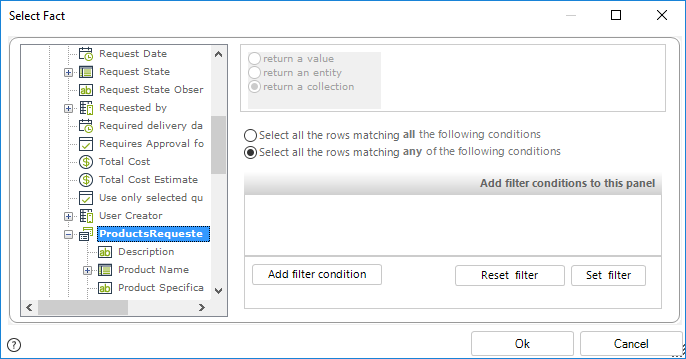
The second item are Columns. This item allows you to include the columns that will be displayed in the e-mail. You can change the default Display name of each attribute using the Display Name field, when this field is empty. Each attribute selected will be represented in one table column.
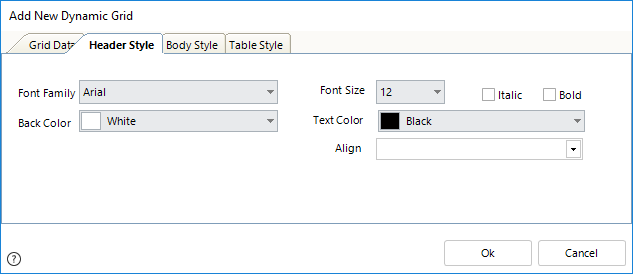
•Header Style
In this tab, you can configure the look of the table header. These values will be taken into consideration only if Use Headers has been enabled in the Table Style tab.
Header properties are:
oBack Color: Color of the background of the table header.
oAlign: Alignment of the values of each of the table header.
oFont: Font color, name, size, and style of the font of the table header.
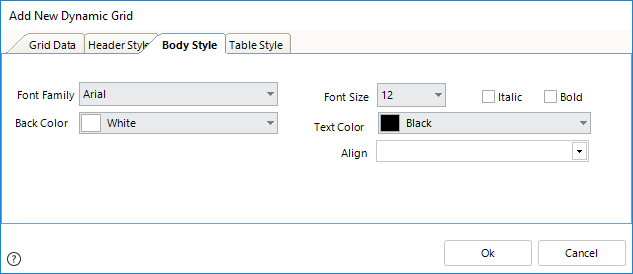
•Body Style
In this tab, you configure the following properties of the table body :
oBack Color: Color of the background of the table body.
oAlign: Alignment of the values of each of the columns of the table body.
oFont: Font color, name, size, and style of the font of the table body.
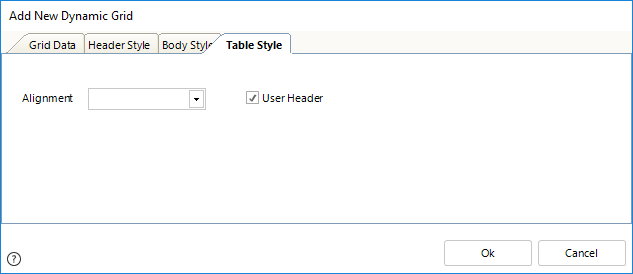
•Table Style
In this tab, you configure the following properties of the table:
oTable Alignment: Indicates whether the table will be aligned to the left, right or centered.
oUse Headers: Shows the column names as the top row of the table.
3. When the form is selected click OK.
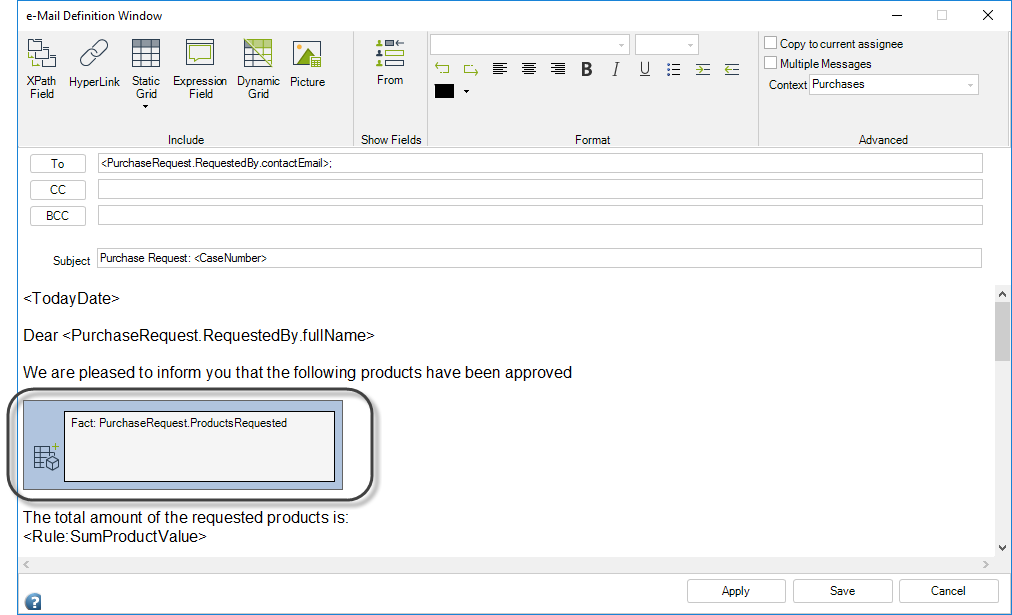
5. The Dynamic Table will be included in the E-mail body.
If you need to edit it, double-click the Table to access its properties.
To delete it, delete the icon shown using backspace.
5. Click Save.
Last Updated 7/5/2023 11:01:41 AM