Overview
Bizagi Apps allows you to embed Tableau reports in your apps. In this way, Personas can visualize your automated process' data and drive better business decisions.
In this article, we explain how to configure the Tableau connection as a new system in Bizagi Studio, and how to configure your existing Tableau reports to be displayed in your Bizagi Apps.
Before you start
Before configuring the Tableau connection in Studio, make sure you have the following:
•Have access to Tableau Cloud with Bizagi domain credentials.
•Have an already existing report in Tableau.
•If you want to Integrate Bizagi Operational Data Store (ODS) with the Tableau, refer to the Tableau connections using ODS documentation.
What you need to do
To use Tableau in Bizagi Apps you need to follow these steps:
1.Configure the App connection in Tableau for your Bizagi Apps.
2.Configure the External System connection of Tableau in Bizagi Studio.
3.In the App Designer editor, configure and customize the report. To learn about how to embed the reports in Bizagi Apps, visit the Data visualization control article.
How to configure your apps in Tableau
The connected apps in Tableau enables you to create and manage trusted relationships with external applications like Bizagi Apps.
To configure your apps in Tableau, follow these steps:
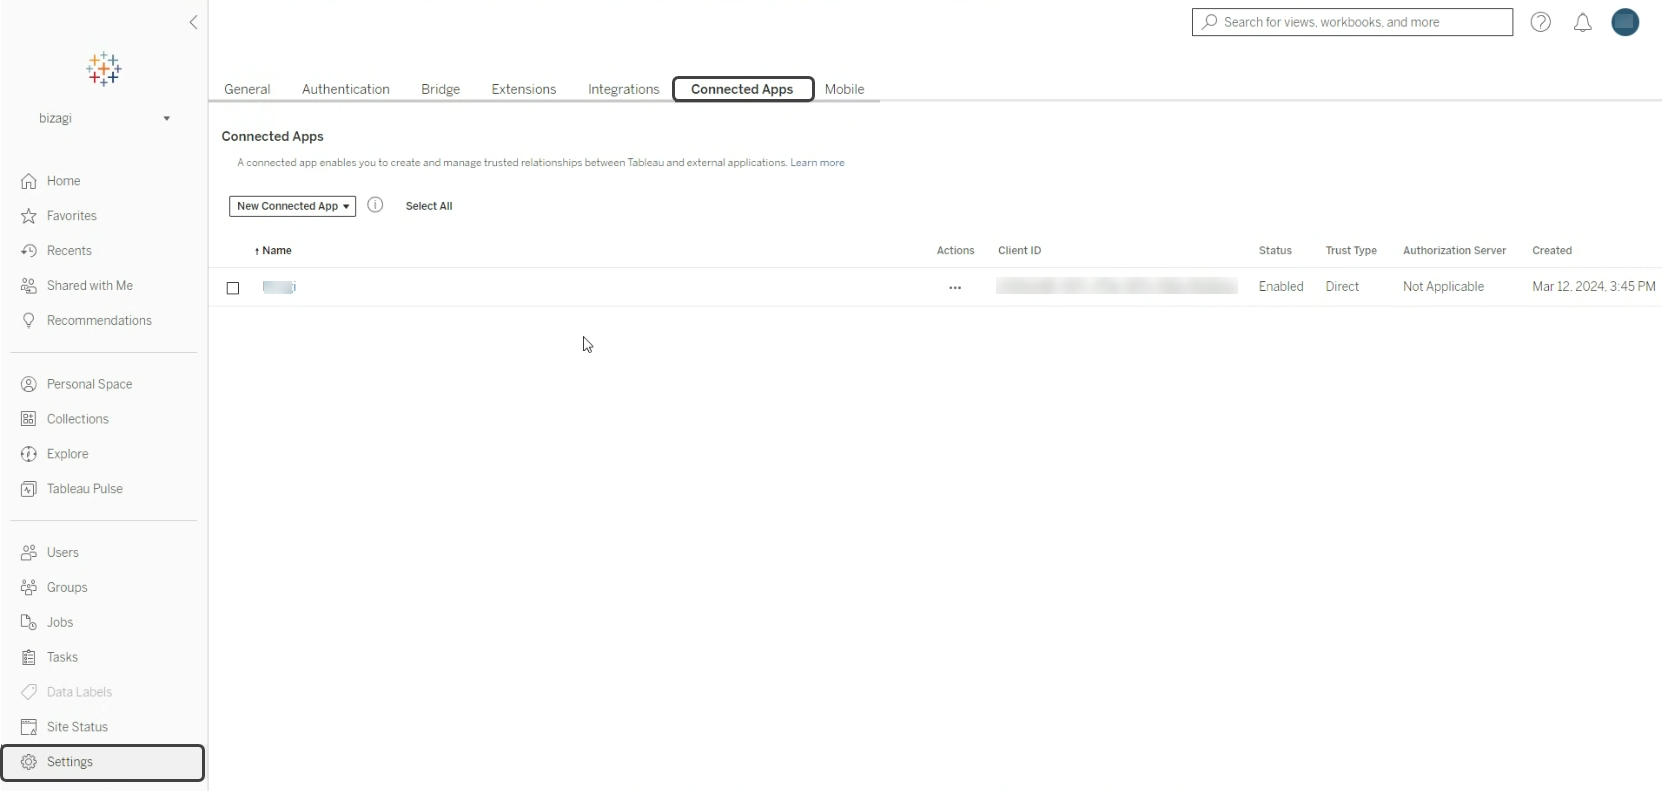
1.In Tableau, open the Settings option from the left panel menu and then, select the Connected Apps tab. Here, you can connect your Bizagi Apps or review your connected apps.
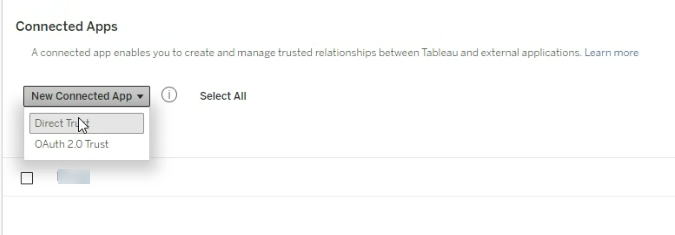
2.When connecting a new Bizagi app, select the New Connected App button, and this will drop-down two option types of connected apps(Direct Trust and OAuth 2.0 Trust). Bizagi only supports the Direct Trust, so make sure to select that option. The Direct trust type relationship implies that Tableau accepts and fully trusts the Bizagi own generated Json Web tokens aligned to your secret ID and email account.
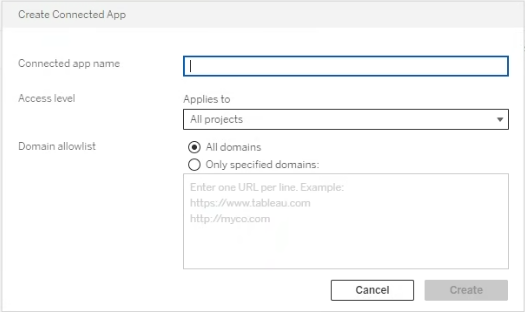
3.In the Create Connected App window, you must give a name for the new connected app and specify the Access level that indicates if the connected app has access to one or multiple projects. In the Case you select the only one project option, you must specify in the Project Name field, which project you want to grant access. Also, you are required to select in the Domain allowlist checkbox, if the app has access to all domains or only specified domains. If the Only Specified domains specified checkbox is enabled, you must include the URL domains. To save tour changes, click the Create button.
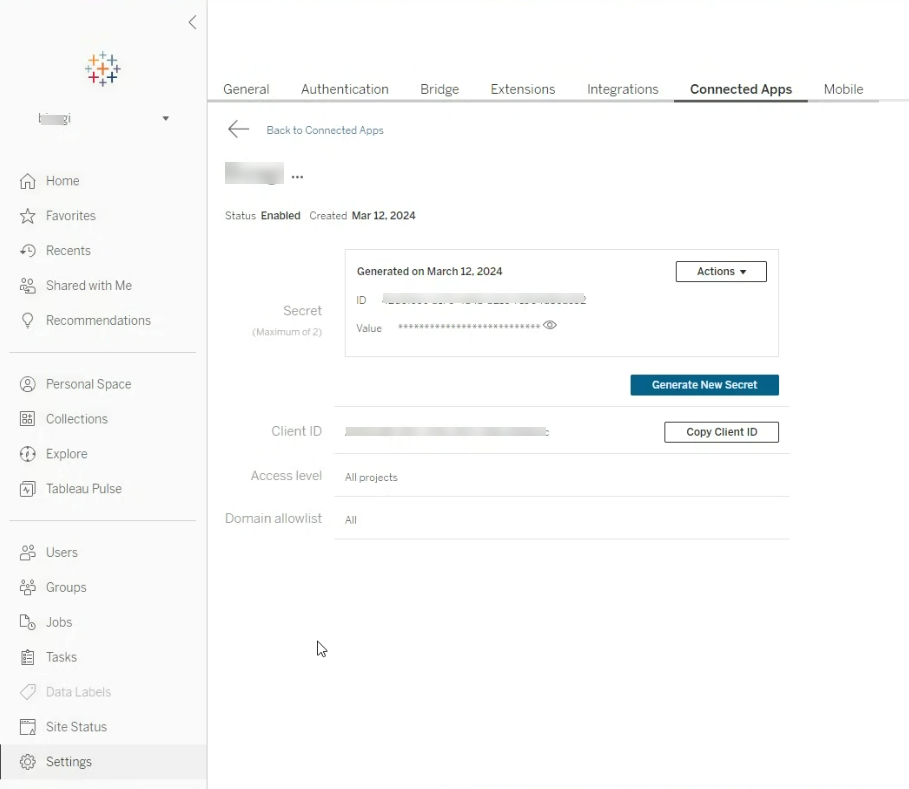
4.Now you can review your connected app details like the generated Secret ID and Secret value, the Client ID, the Access level and Domain allowlist fields. You can copy the Secret ID and value as well as the Client ID and use them in the tableau connection configuration in Bizagi Studio. The Access level is the access the app has over your Tableau projects, and in a similar way, the Domain allowlist restricts the domain access to Tableau through your account credentials.
How to configure Tableau in Bizagi Studio
To configure the connection with Tableau Cloud in Bizagi Studio, follow these steps:
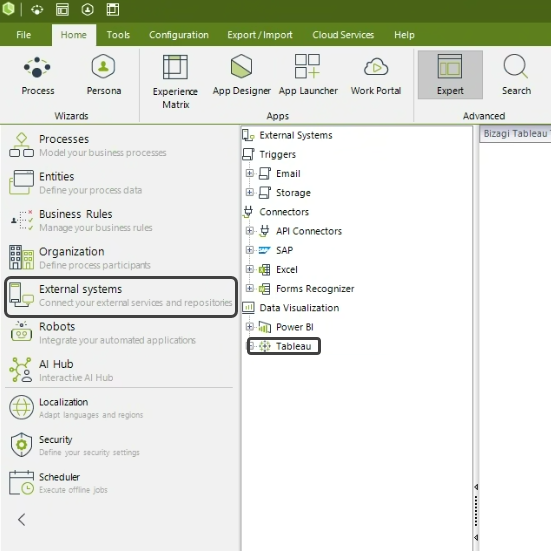
1.In Bizagi Studio, navigate to the Expert view from the toolbar. Then, select the External systems module and open the Data visualization node where you will find the Tableau node.
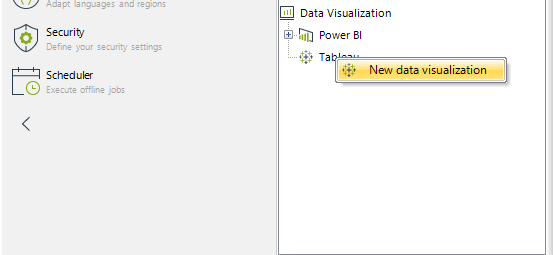
2.Next, right-click the Tableau node and select the New Data Visualization option.
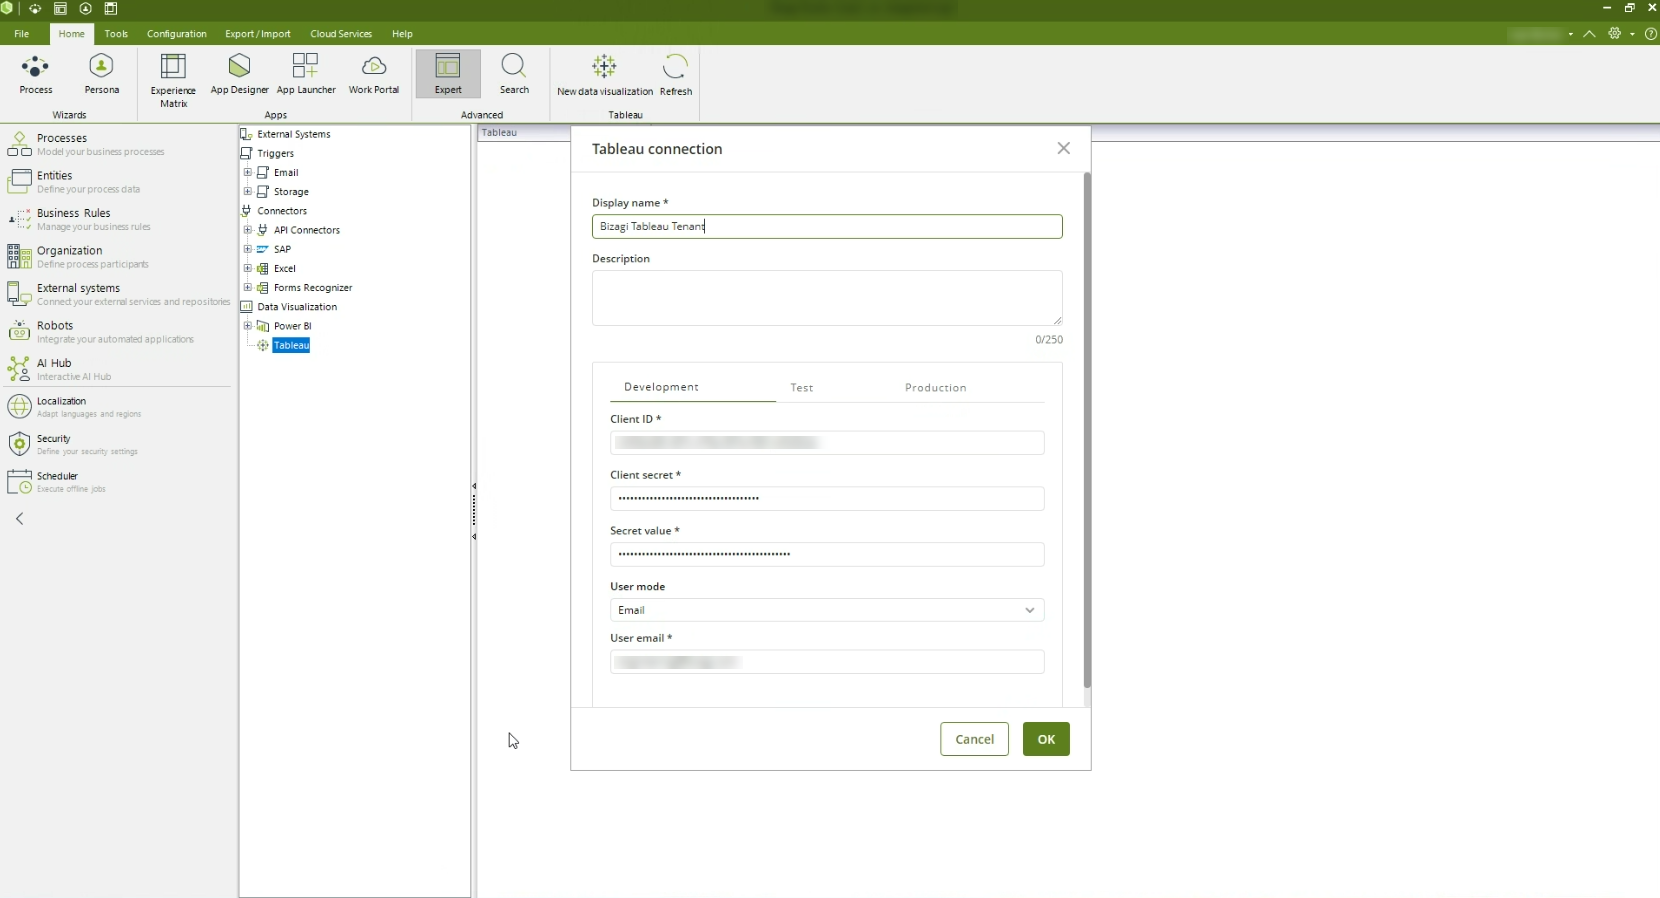
3.In the Tableau Connection window, you must give a Display Name, and depending in the type of environment you are setting up for the data visualization report, you will enter the Client ID, Client Secret and Secret value obtained from the connected app in Tableau. In the User mode field, you must select between Logged in Apps, which is the logged in user credentials from Bizagi Apps migrated in Tableau or the Email option, which is the generic user registered in Tableau and this will replace the logging action in Tableau and in Bizagi Apps Designer.
Check the Users in Tableau
To check your email is synchronized in Tableau, go to the Users option from the left panel menu in Tableau. There you can review and check what credentials from Bizagi are connected and what type of role they have.
Create a report in Bizagi Studio
To create a new report in Bizagi Studio, follow these steps:
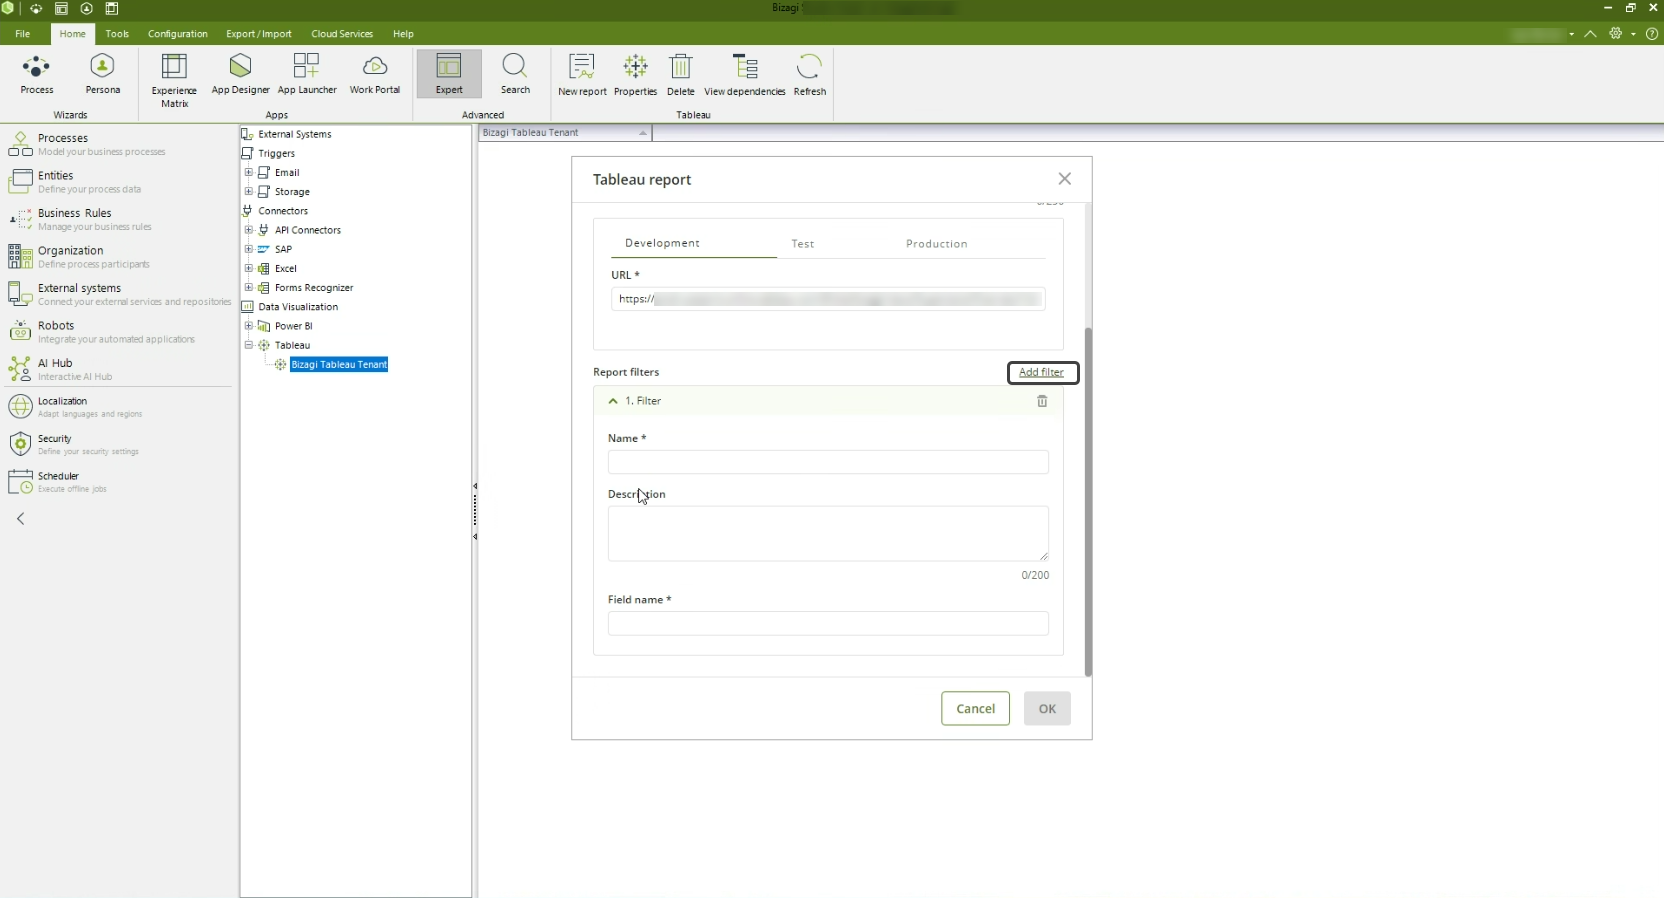
1.In the Expert view, right-click the new connection to Tableau previously created and select the New Report option. Another way to select the New Report option is available in the upper menu. In the Tableau report window, you must add a descriptive Display name and a optional Description text. Also, you must add the Tableau report URL in the corresponding environment (Development, Test, or Production). Obtain the URL from the report in Tableau.
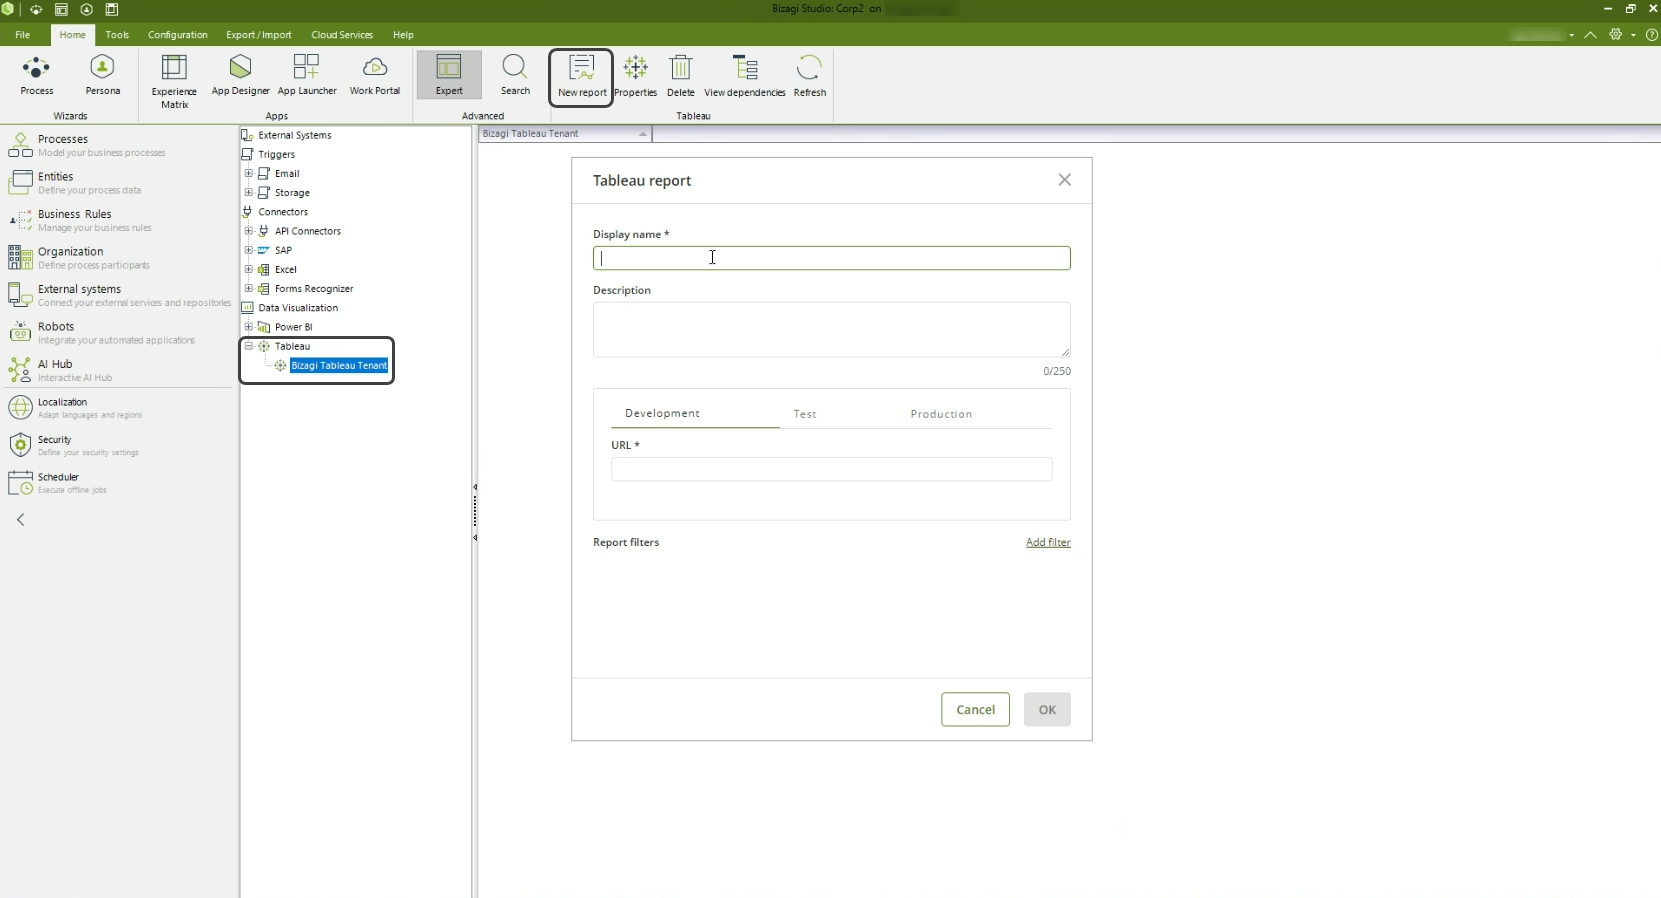
2.In the Report Filters field, you must add the same filters from the Tableau report that are visible in the data visualization control in Bizagi Apps. To set up a filter, click the Add filter link. This action enables the filter configuration where you must add a Name, a Description which is optional and a Field Name. Once you filled the required information, save the changes by clicking the Ok button.
3.To create a page that contains your Tableau report in the Bizagi App Designer editor, go to the Experience Matrix tab in the upper menu. Then, enable the Show reports checkbox and select the Persona's report section pencil icon. In the Reports window, select the report that will be related to the Persona and save your changes by clicking the Ok Button.
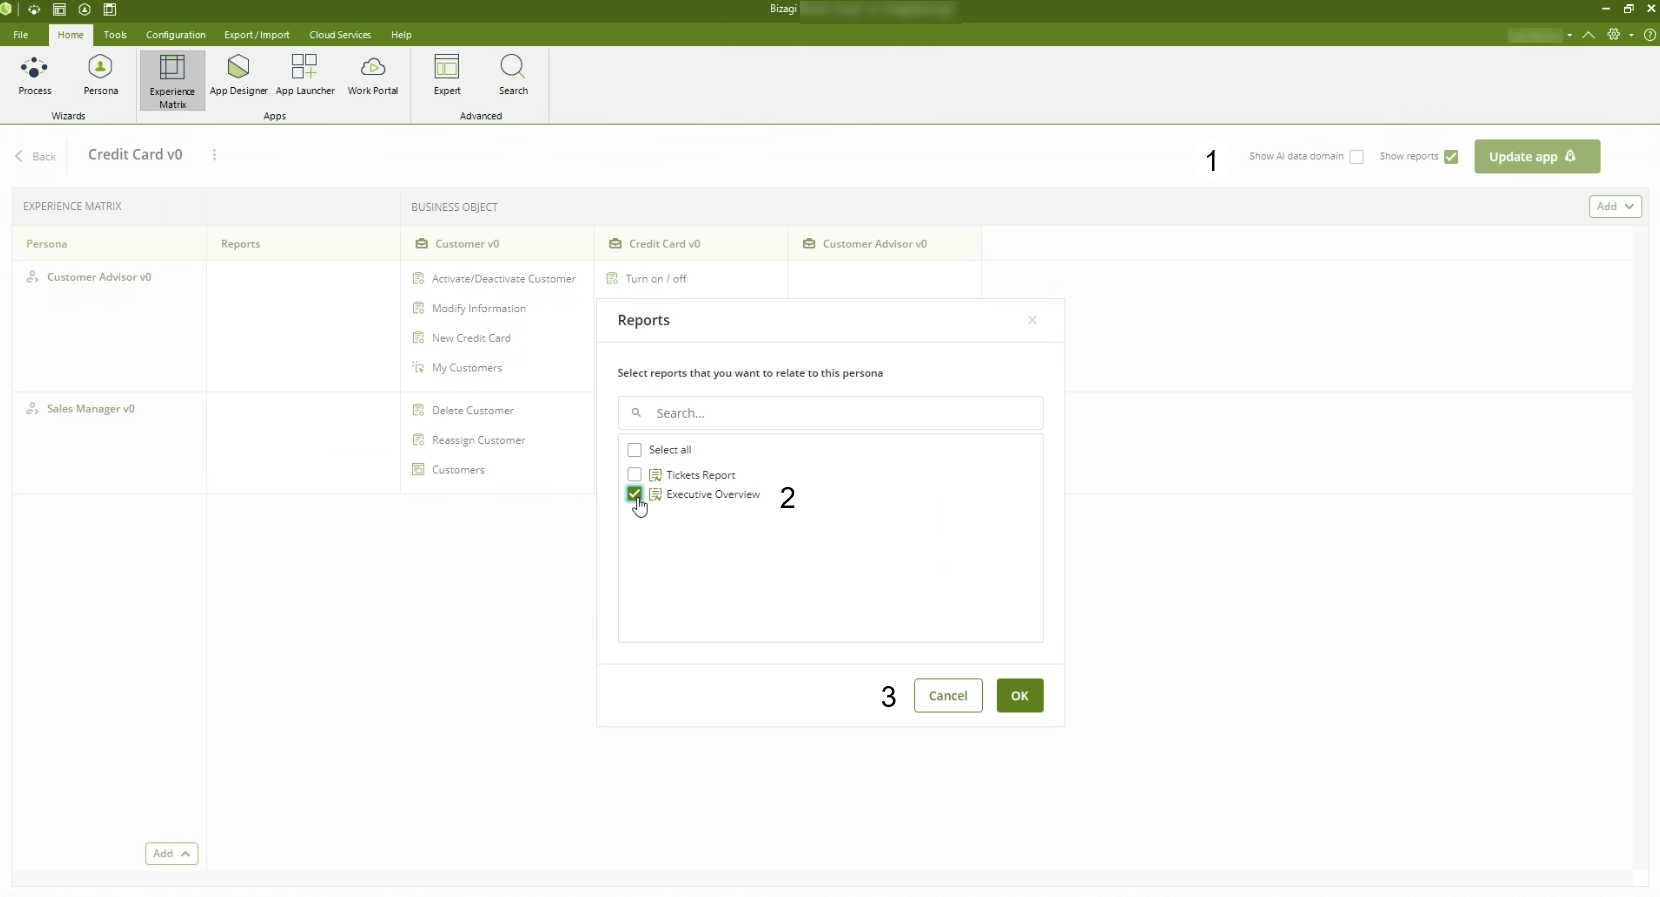
4.Now, click the Update app button and Bizagi App Designer editor will automatically create the page with your Tableau Report where you need to configure your Data visualization control.
Last Updated 5/30/2024 10:39:19 AM