Overview
Establishing a trust relationship between Bizagi and your identity provider system is a required step when configuring Federated authentication in Bizagi.
This is the first step to be carried out in order to make use of Single Sign-On capabilities, as described at Configure the Identity provider to work with Bizagi.
Before you start
To carry out the required configuration in your ADFS, previously make sure:
1. That your server certificates have already been configured and set properly for other service providers to recognize (i.e, applications such as Bizagi).
2. That you have good expertise when it comes to configuring the ADFS and Single Sign-On related aspects.
Example
In the following steps we illustrate how to configure an Active Directory Federation Services (ADFS).
You will need an ADFS version 3.0 or higher (due to previous versions such as 2.x, not providing an HTML-based login page with forms authentication support, not supporting standards such as OAuth, etc).
Keep in mind that your identity provider needs to support the WS-Federation Passive Protocol.
Recall that at this point you need to have already setup HTTPS for both Bizagi and your Identity provider.
To set the trust relationship between Bizagi (the relying party) and your ADFS identity provider, directly in ADFS create a relying party trust as presented below.
1. Launch the creation of a relying party trust
You may do this from the Relying party trust options which allows you to use its configuration wizard:
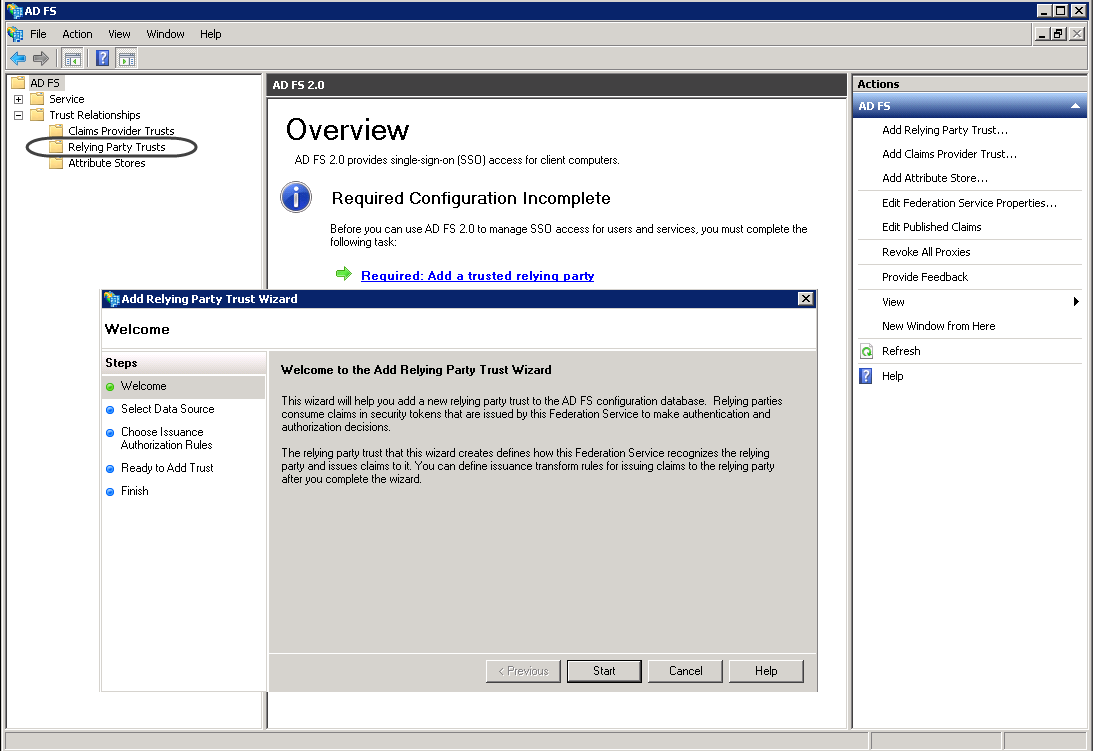
Click Start.
2. Select the data source
To configure the relying party as described in this guide, select the Enter data about the relying party manually option to specify the details in the next steps.
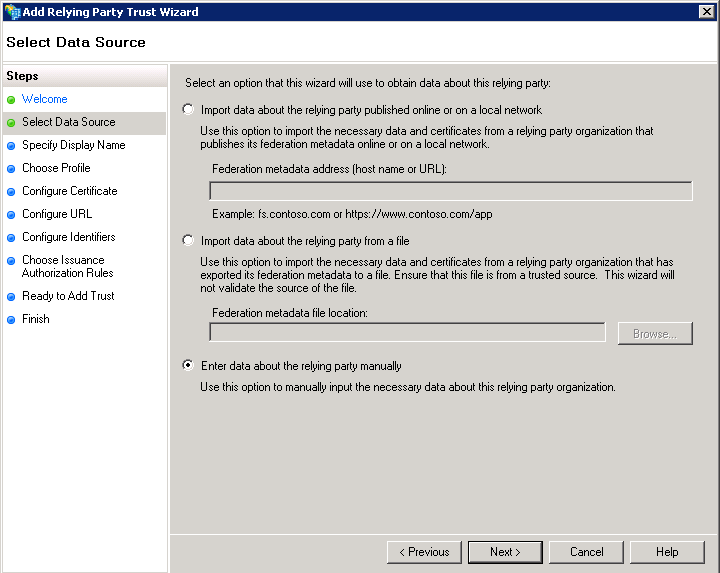
Click Next.
3. Specify the display name
Enter the display name of this relying party trust.
Enter a meaningful description as well.
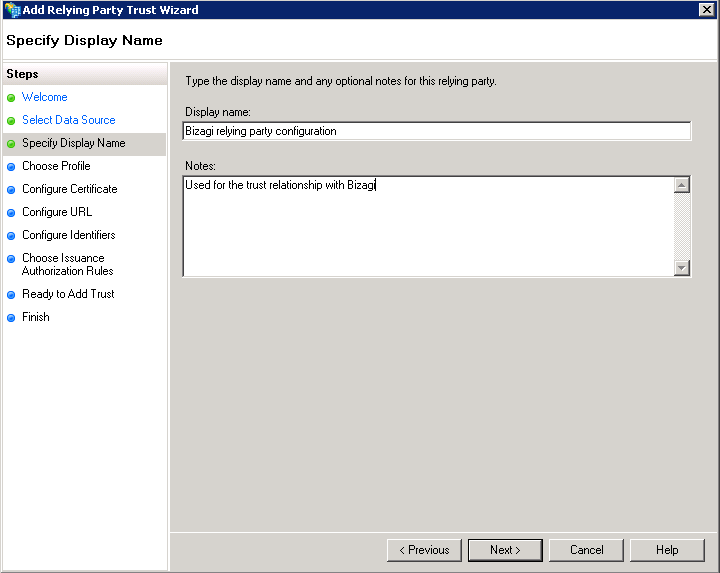
Click Next.
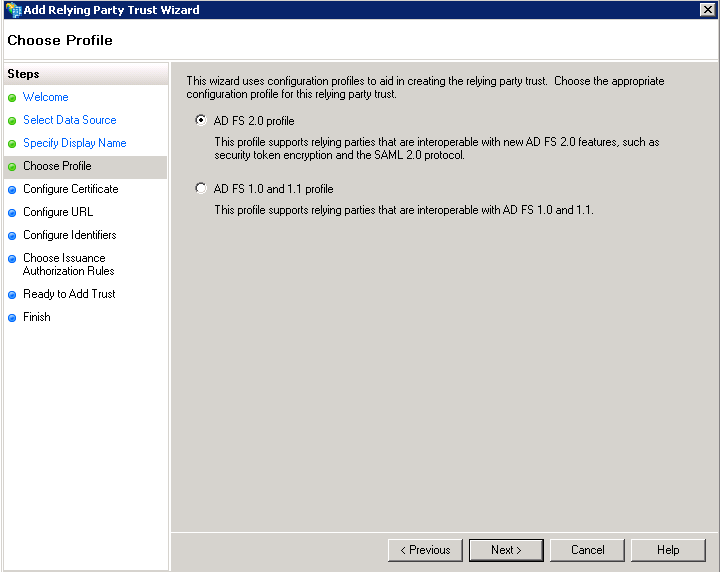
4. Choose the profile
Make sure you select the AD FS 2.0 profile (though SAML 1.1 is employed):
Click Next.
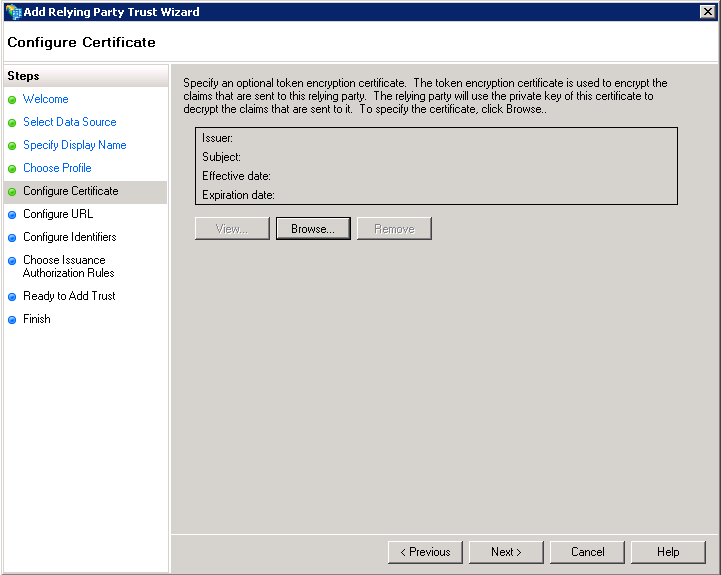
5. Configure the certificate
You may configure a certificate for token encryption purposes as an additional security measure (optional).
In this guide, we skip this step and click Next.
6. Configure the URL
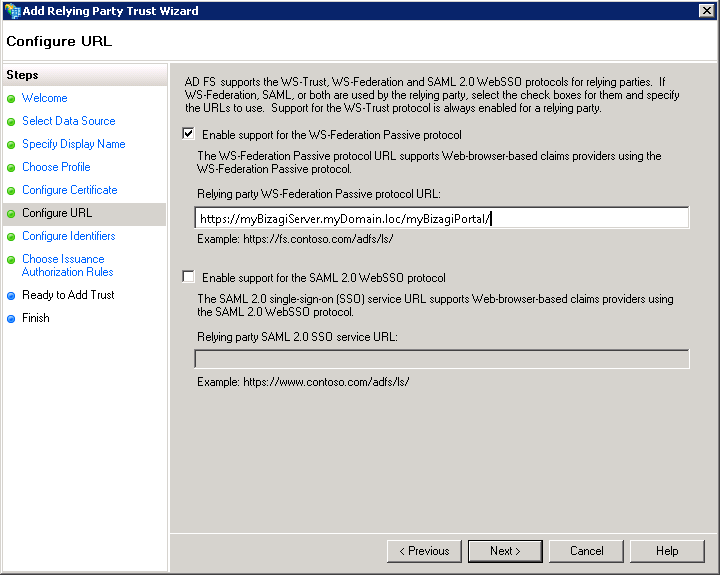
Tick the Enable support for the WS-Federation protocol to specify the URL address of your Bizagi Work Portal and it needs to be case sensitive (an exact match).
When specifying the URL of your Bizagi Work Portal, it is important to notice:
•For this feature, you need to have setup your Bizagi Work Portal supporting HTTPS (instead of HTTP).
•The WS-Federation protocol applies environments using IIS.
•The server's name may involve explicitly the domain as in: https://[BizagiServer.domain.loc]/[BizagiWorkPortal]/.
Click Next.
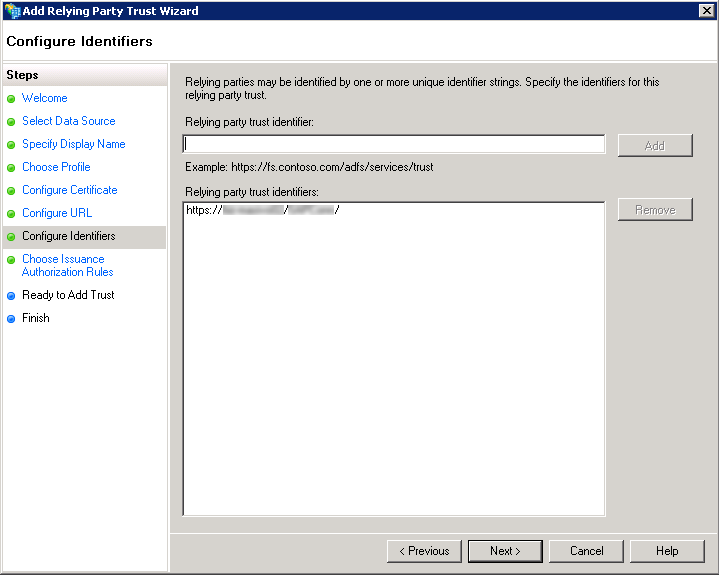
7. Configure the identifiers
In this step, notice that the URL you just specified in the step before, should appear under the identified/valid URLs.
Should you need to input another URL with a different identifier, enter this URL and use the Add button.
Click Next.
8. Configure the Issuance authorization rules
Select the Permit all users to access this relying party option.

Click Next.
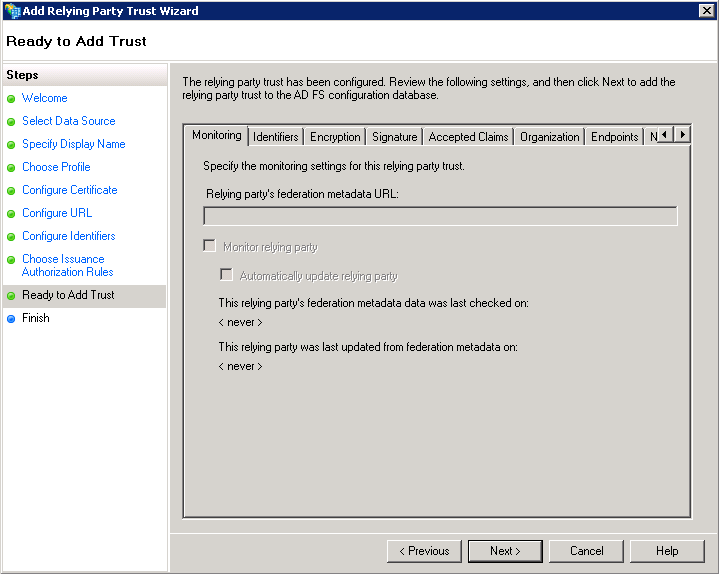
9. Review the configuration
Browse the summary of all configuration carried out for this relying party trust.
When done and completely sure that you do not need changes, click Next.
10. Create the Claim rules for this trust
Make sure you tick the Open the Edit claim rules dialog... in order to immediately create a claim rule and finish up the configuration.
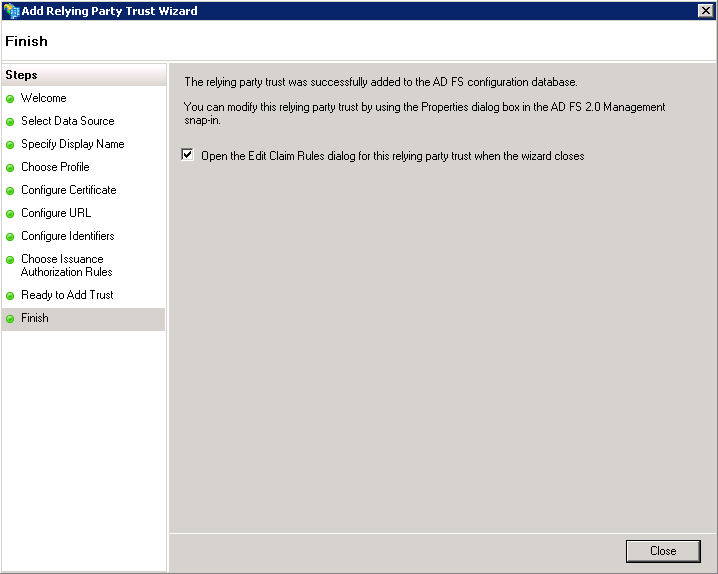
Click Close.
11. Create a claim rule
Use the Add Rule.. button to create a new claim rule and choose the Send LDAP Attributes as Claims template:
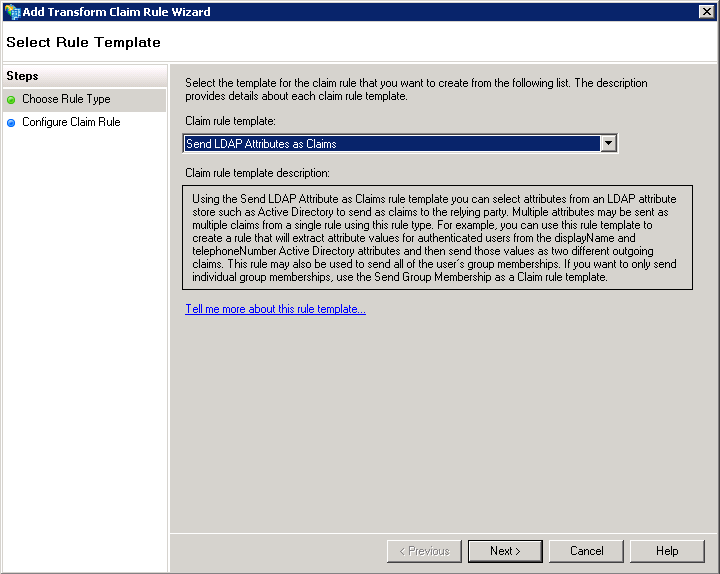
Click Next.
12. Configure the rule
Give this rule a name, and make sure you configure:
•Attribute store: Select Attribute Directory.
•Mapping of LDAP Attributes: Include User-Principal-Name mapped to the UPN claim type and E-mail-Addresses mapped to the E-mail Address claim type.
For the UPN claim type make sure that it contains both the username (unique identifier for users) and the domain. This claim will need to specify this information in either of the following formats: domain\username, or as username@domain.com (or an e-mail address for that matter).
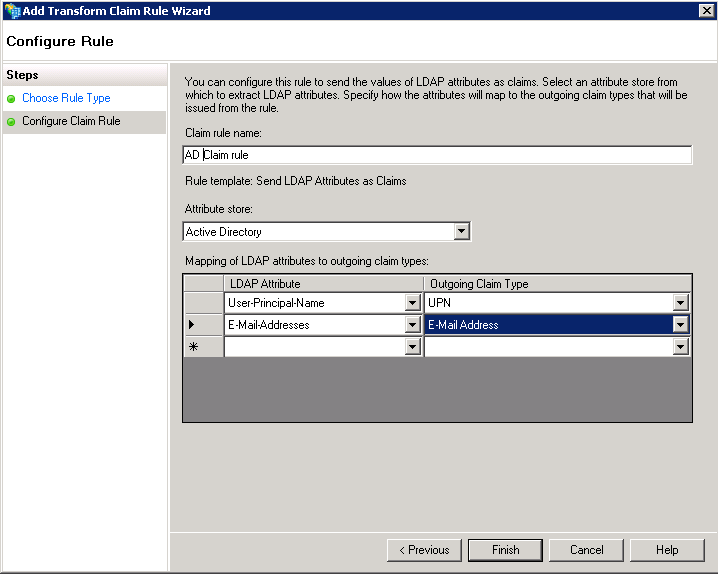
Click Finish.
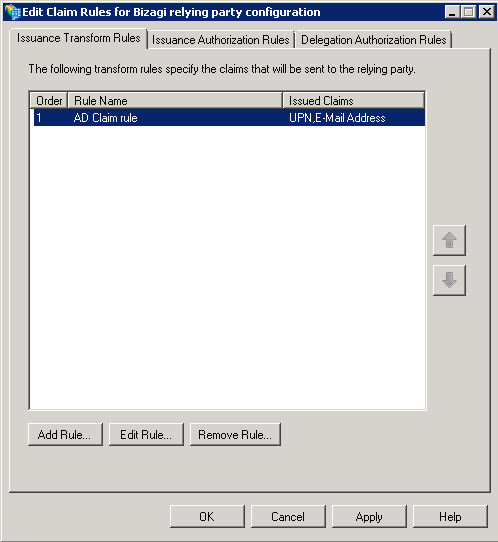
You should have a registered claim rule for your specific relying party configuration.
Once you have verified this is correct, click OK.
Important
For further configuration in Bizagi's side (e.g., through Bizagi Studio), you will need to use the following information:
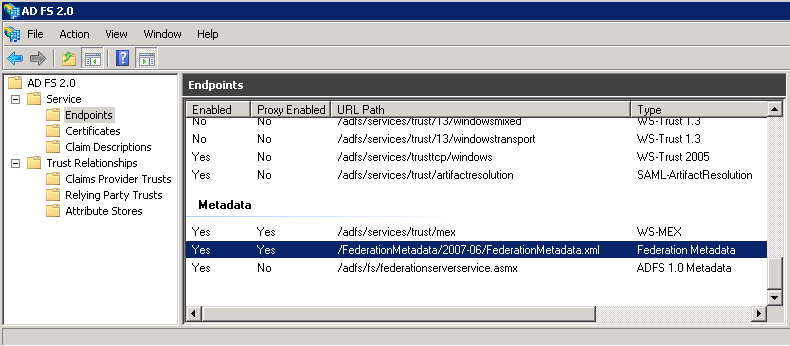
•The URL to access the federation metadata file (XML):
|
The Metadata file specifies the different values of important standard characteristics of your Identity provider, such as the bindings involved, endpoints, certificates and keys, to name a few. |
•Similarly, the URI of the trust definitions (Trusted Issuer's name).
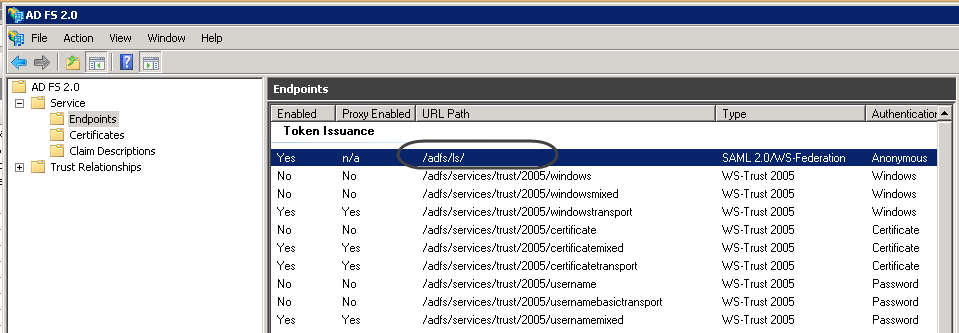
•The Issuer's complete URI (notice only the URI suffix is shown below):
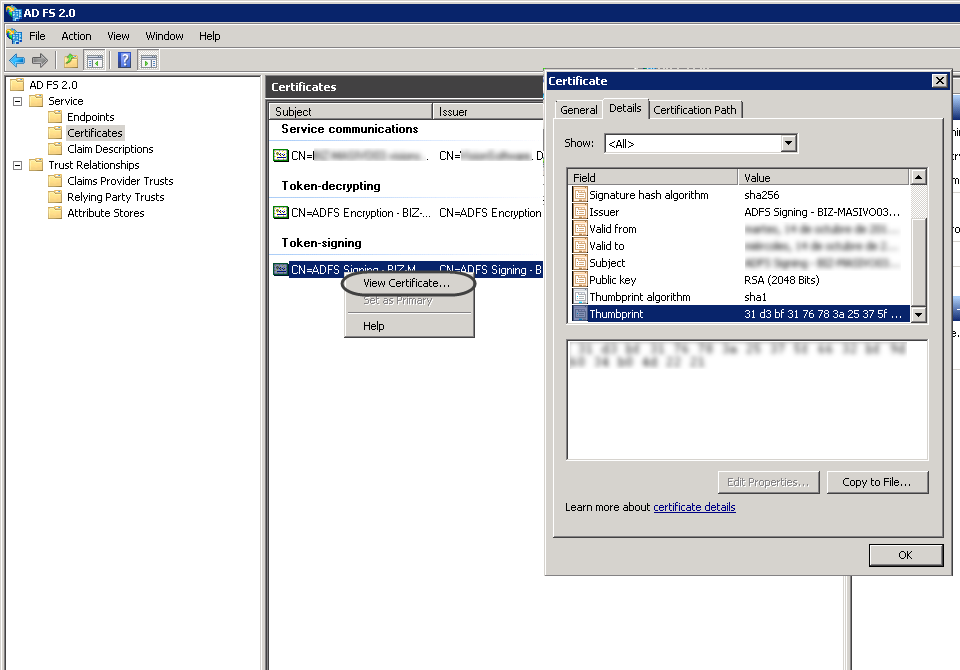
•Your signing certificate's thumbprint.
Make sure your signing certificate is valid and have the thumbprint string at hand.
|
It is important to note that such signing certificate demands management on your side, that is, specifically ensuring that these are valid to the date (you need to watch after their expiration/renewal -most often these expire on a yearly basis). |
Though, consider that you should not copy/paste such thumbprint detail and manually input this information instead (in order to avoid pasting special hidden characters which may interfere with an adequate setting).
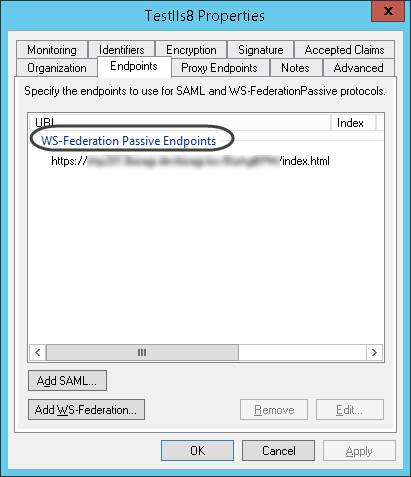
•An explicit WS-Federation endpoint.
Make sure you have a WS-Federation endpoint explicitly defined for the communication with Bizagi:
|
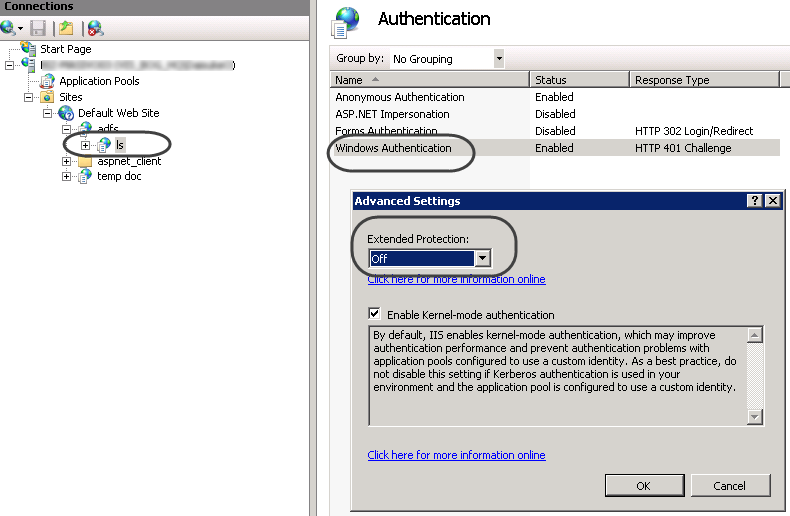
If your end users will be using Chrome or Firefox as a browser, you may need to make sure that the ExtendedProtection setting is turned off for the Windows authentication at your ADFS' ls web site. Set it as OFF at the IIS:
|
Last Updated 1/24/2025 4:50:02 PM
