Overview
The Bizagi Modeler desktop application can be used relying on Remote Desktop services if needed. For example, if Apple Mac users want to use Modeler using an installation of Modeler in a Windows server. This option is available for any plan.
The following image illustrates this concept:

Technical requirements
For the configuration regarding the project server providing Terminal services, the following technical requirements must be met:
•A Windows server operating system capable of providing Terminal services (i.e the Remote Desktop Session Host role).
Make sure this server has the necessary CAL license to support the number of users that will connect to it.
•Enabled RDP for workstations to connect to the central server.
You may configure the RDP port number used, or you may optionally involve an additional Remote Desktop Gateway service to provide HTTPS connection between the workstations and the Gateway (involves additional hardware).
•A domain admin account to install the Bizagi Modeler desktop application.
What you need to do
You will first need to explicitly define:
•The server to be the central server, hosting the Bizagi Modeler desktop application and its models.
•Defining if you need a Remote Desktop Gateway.
•Which users will be working on Bizagi Modeler , by connecting from their workstations to the central server.
To setup a remote desktop to use the Bizagi Modeler desktop application, these steps are carried out:
1. Install Modeler in the project server
2. Enable Remote Desktop services in the central server
3. Connect to the server through Remote Desktop, from each of the workstations
Procedure
Follow these steps to achieve teamwork collaboration through Terminal services.
1.Install Bizagi Modeler at the server
Install Bizagi Modeler by running the installer with administration rights at the project server.
Carry out the installation steps as described at Default installation.

2. Enable Remote Desktop services in the central server
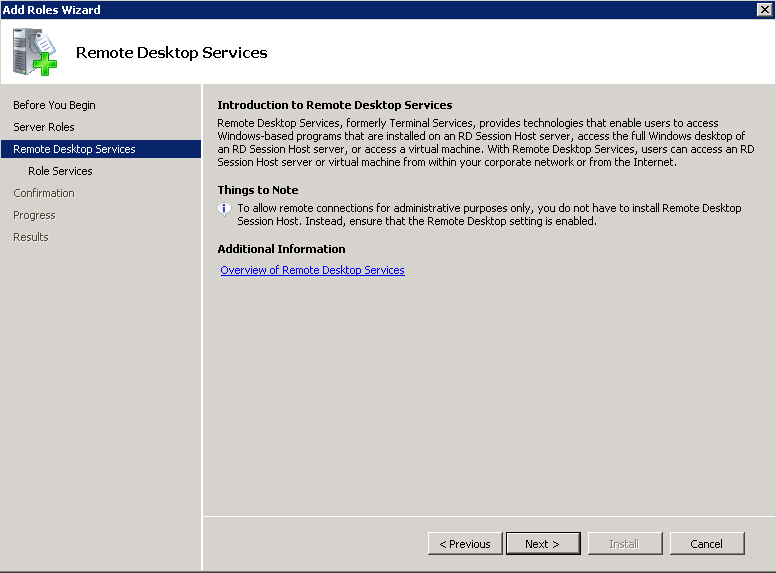
Make sure that the central server that will be hosting your Bizagi Modeler desktop application has the Terminal services role enabled (renamed as Remote Desktop Services).
To do this, use the Server management window to use the Add roles option:

Note that this scheme is not designed for the Administrators login, but only for those users to work with Bizagi Modeler.

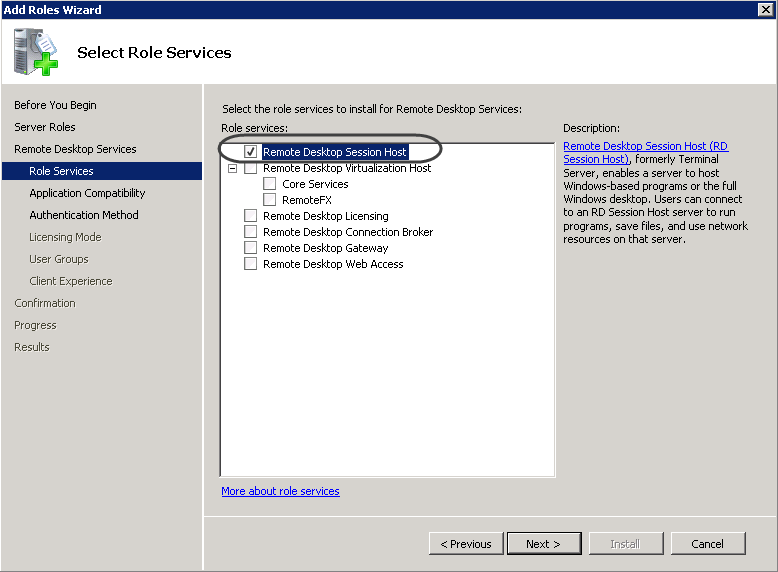
Specifically enable the Remote Desktop Session Host role.

Note that this feature is available in Windows Server operating systems (i.e Windows 2012, 2008) and that you should enable this role before having installed Bizagi Modeler.

|
Before proceeding, make sure you acknowledge the implications in this setup, such as having the CAL licenses for your users, considering if you will use a Remote Desktop Gateway additionally, and considering the supported Remote Desktop client versions. Note that you should define the authentication method, and if you will use certificates or further security settings for your environment (i.e setting authorized users who can use remote access at the server's level, using a different port number other than the default one 3389 used in RDP, etc). |
3. Connect to the server through Remote Desktop, from each of the workstations
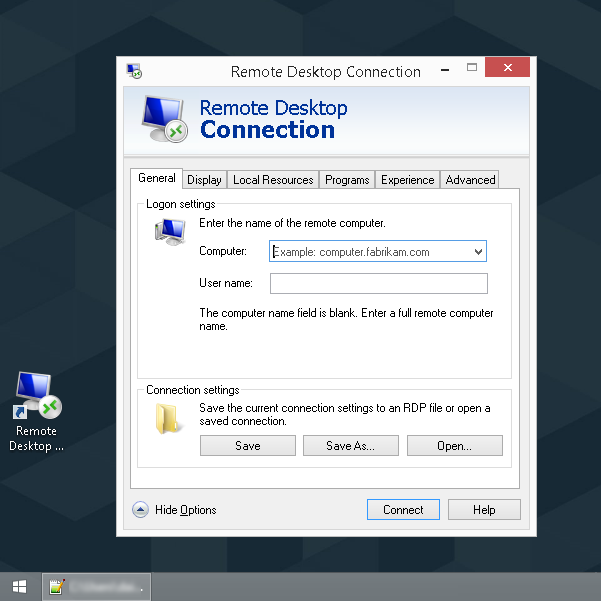
Connect to the server by using the Remote Desktop client.
Note that if you are employing a Remote Desktop Gateway, then this access is done first to the Web access options via HTTPS to connect by using from there, the specific Remote Desktop client.

Once you have entered the remote desktop you can use the Bizagi Modeler desktop application as on any computer.
Last Updated 7/3/2025 11:57:35 AM