Overview
A music company needs to design a process (called Plan Orchestra Tour) to plan the tours for their orchestra. In this process the manager must select the musicians who will be part of the orchestra and the cities that the orchestra will visit. Due to the number of members an orchestra must have, adding each musician in a table will be cumbersome. The Multi Select control makes this an easy task by letting the manager select several musicians at once from a drop down list. This can also apply to the cities.
Each musician is represented in the WFUser entity with an associated instrument.
The M-M relationships must be created in the Data Model as follows.
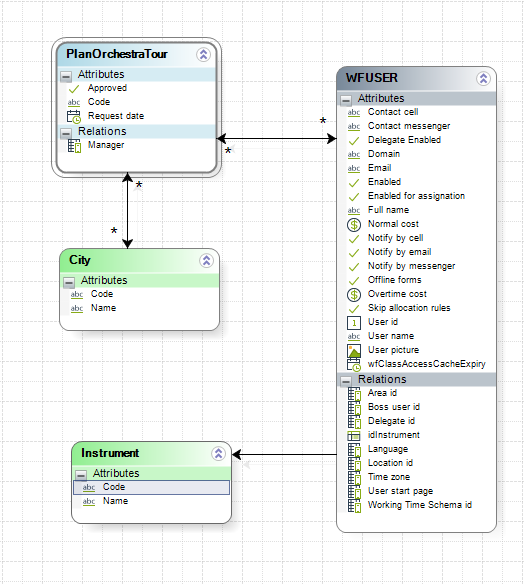
You can relate the tour to several musicians and cities by using the Multi Select control.
Follow these steps to configure it:
1. In the Forms Designer, drag and drop a Multi Select control from the Controls tab into the form.
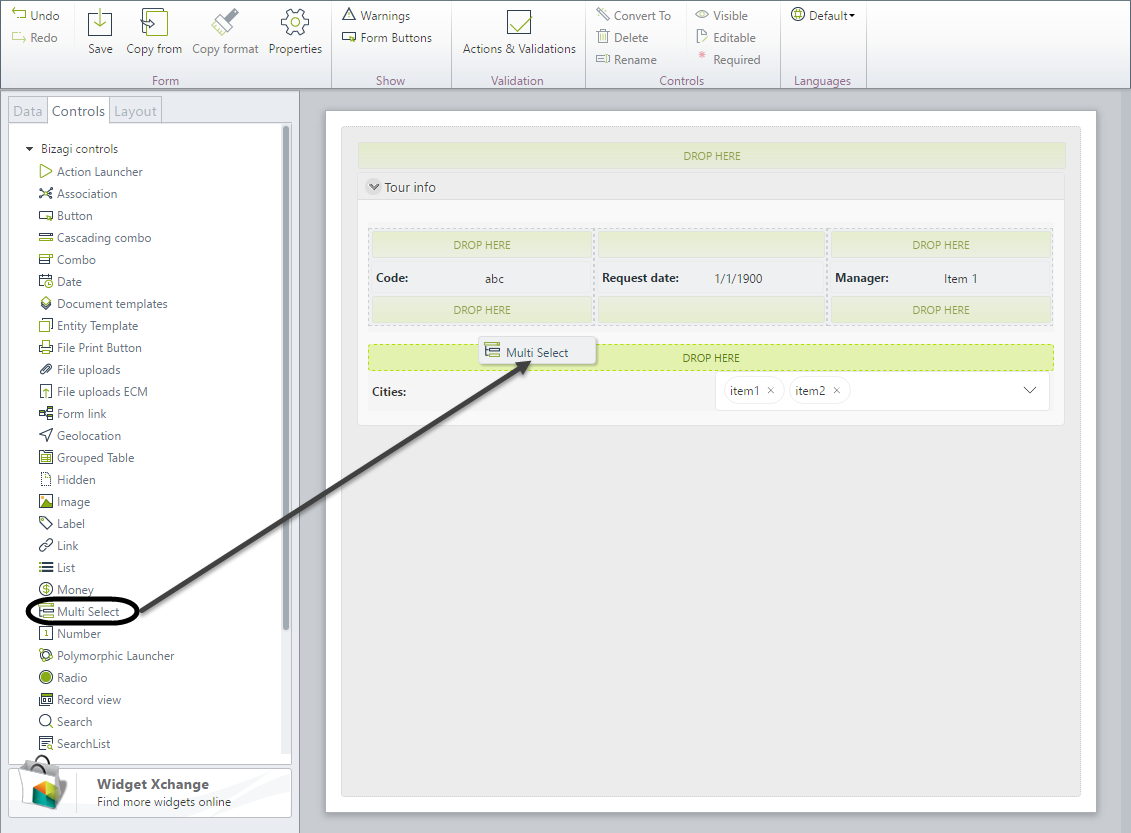
2. When the Control is dropped, a configuration window appears.
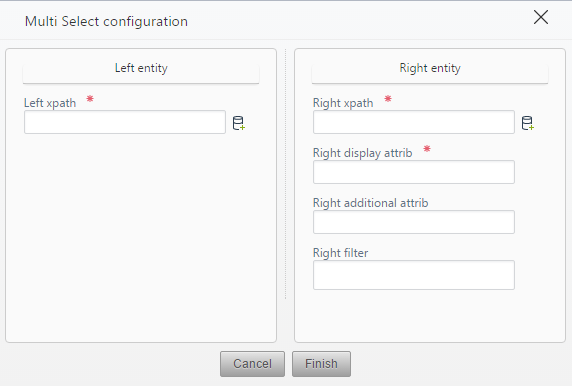
Enter the configuration information:
•Left XPath: Select the XPath to the main Entity. In this case the PlanOrchestraTour process. Keep in mind you cannot select an entity being used as context (For instance, when working in an inner form).
•Right XPath: Select the XPath from the main entity to the collection of the Secondary Entity that contains the records to be displayed. In this case the WFUSER collection.
Navigate through the main entity (PlanOrchestraTour). Select the collection to the WFUser that Bizagi has created by default when the M-M relationship was created.
•Right display attrib: Select the attribute to display from the Secondary entity. This attribute is what end users see when they select a record. In this case we will use fullName.
•Right additional attrib: Select an additional attribute to display. This lets you search for this particular attribute on the search box of the control. In this case we will use the instrument name.
•Right filter: Select a filter for the Secondary entity if necessary, this way a smaller list of records will appear in the Control for the end user to choose from. In this case, we create a basic filter to display only enabled users (enabled is equal to true).
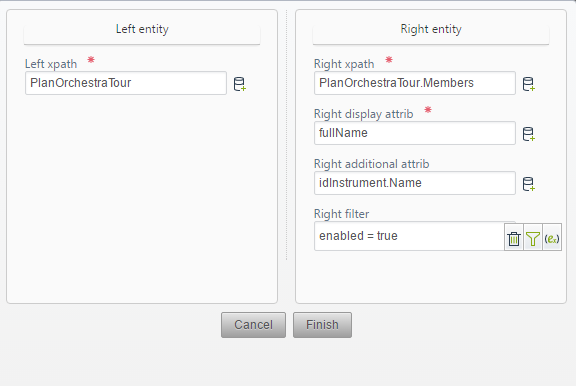
When the configuration is finished, the control appears in the Forms Designer. If the configuration is not finished, the control will not be created and thus will not be shown.
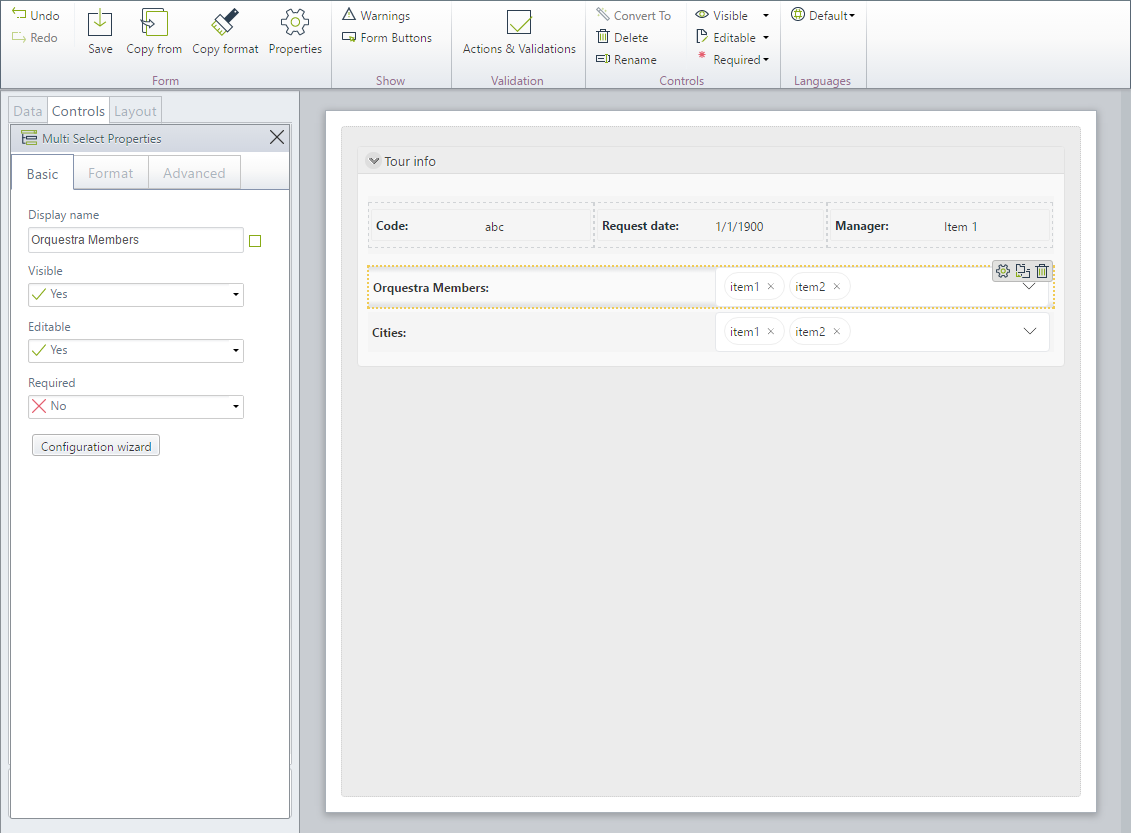
3. Go to the Work Portal to test the Control.
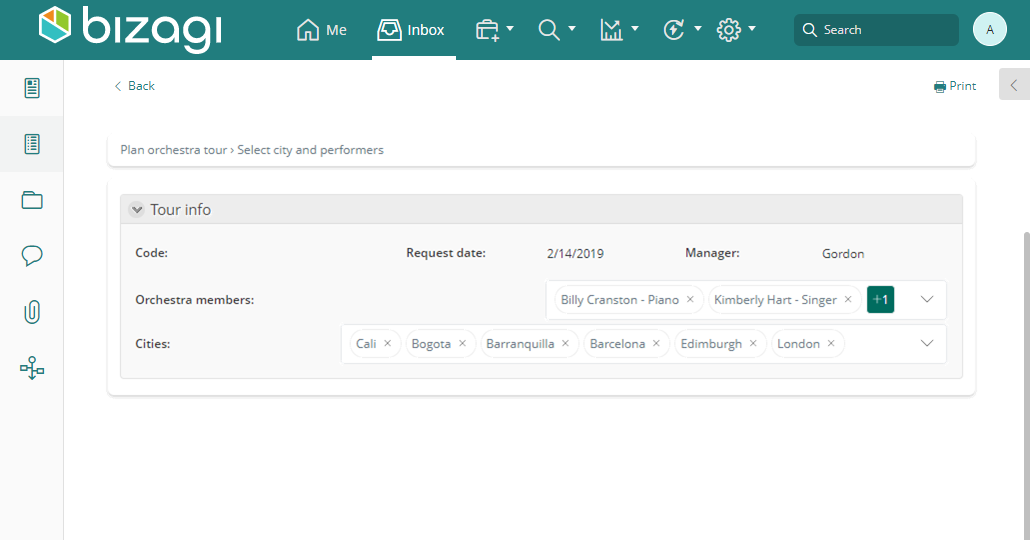
Select the names of users that you want to add to the tour from the WFUser entity. In this case we can select:
•Billy Cranston (instrument: piano).
•Kimberly Hart (instrument: singer).
•Trini Kwan (instrument: violin).
![]()
As you can see, if the available space in the control is to small to show all the selected records it will show a ![]() icon. The number displayed on the icon is the number of hidden records.
icon. The number displayed on the icon is the number of hidden records.
![]()
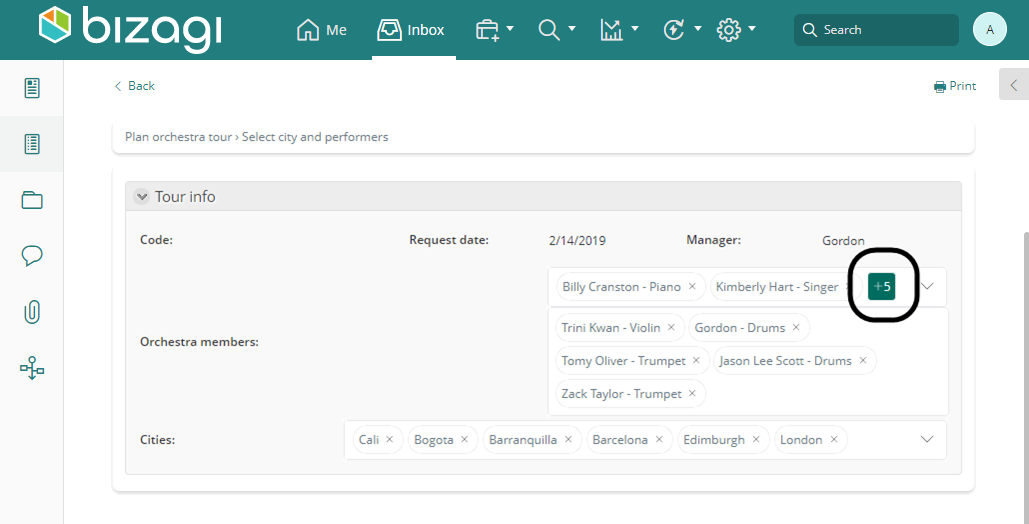
You can display all the hidden records by clicking the ![]() icon.
icon.
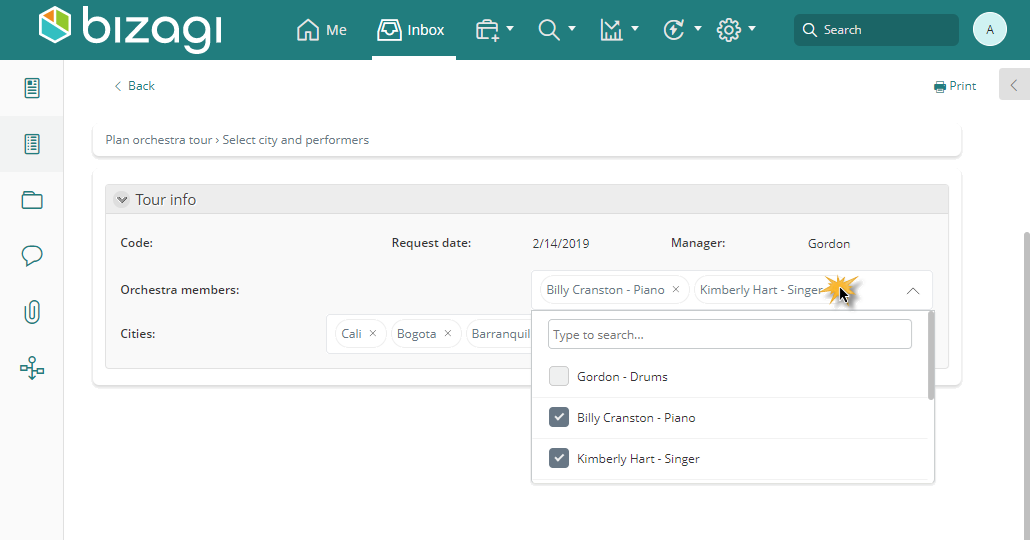
To delete associated records, click the ![]() icon on the right of the record that you want to delete.
icon on the right of the record that you want to delete.
How to use the Multi Select control from business rules
If you want to take advantage of the functionalities from the multi-select control beyond the forms, you can also configure it from business rules. Continuing with the example, if you now want to be able to add a musician with several instruments or several musicians with several instruments, it must be configured as follows:
1. Many-to-many relationships must be created in the data model. In the example, see the many-to-many relationships of users and instruments with the process.
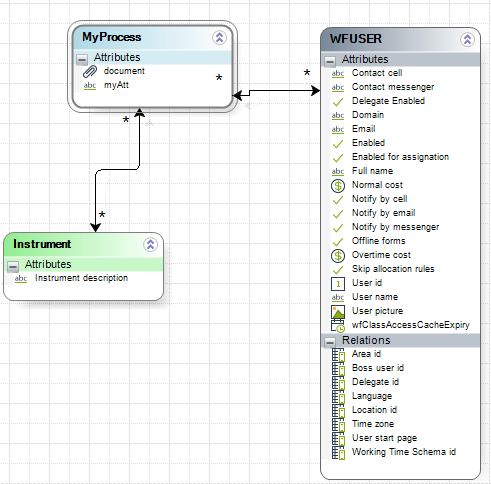
2. The multi-select control must be configured, as shown in the following images, to display this many-to-many relationship for both users and instruments:
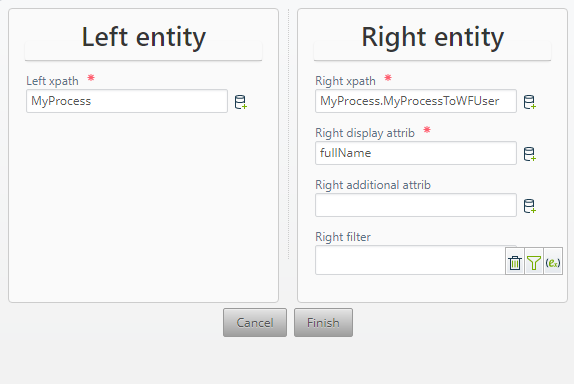
process - users configuration
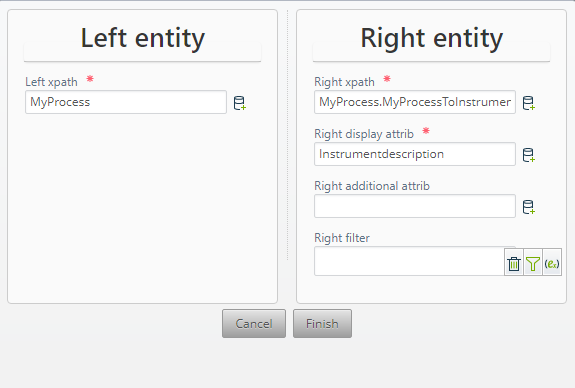
process - instruments configuration
3. From the business rule, use is made of the Me.attachCollectionItem function for users and instruments, as follows:
a. In the form task, under Activity Actions, create an expression in the On Save section. In the case of the example, it is assigned the name AddMulti.
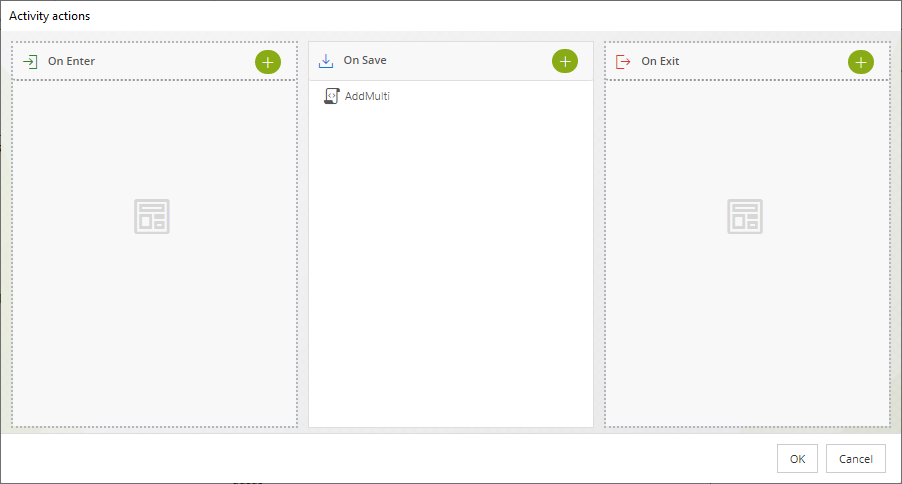
b. Once the expression is created, the code is entered where the Me.attachCollectionItem function is used to create the record automatically and without complexities for the user. In the example, in addition to using the function for users and instruments, it also has filters and XPath expressions.
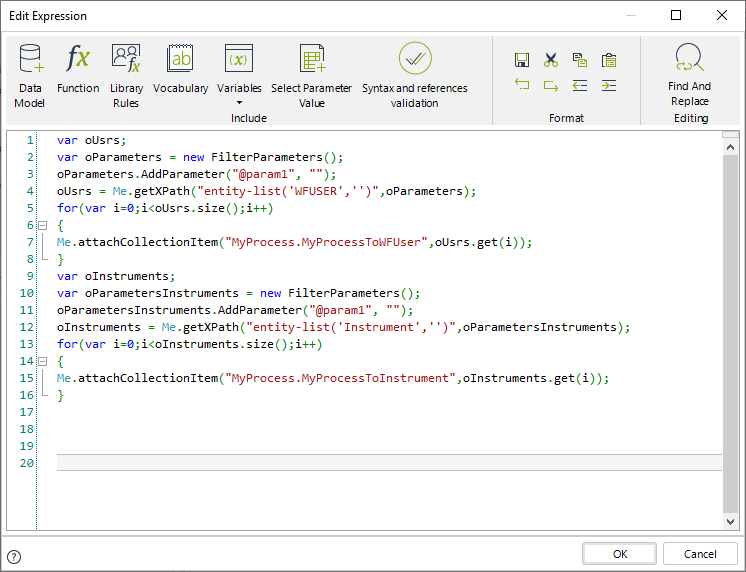
var oUsrs; var oParameters = new FilterParameters(); oParameters.AddParameter("@param1", ""); oUsrs = Me.getXPath("entity-list('WFUSER','')",oParameters); for(var i=0;i<oUsrs.size();i++) { Me.attachCollectionItem("MyProcess.MyProcessToWFUser",oUsrs.get(i)); } var oInstruments; var oParametersInstruments = new FilterParameters(); oParametersInstruments.AddParameter("@param1", ""); oInstruments = Me.getXPath("entity-list('Instrument','')",oParametersInstruments); for(var i=0;i<oInstruments.size();i++) { Me.attachCollectionItem("MyProcess.MyProcessToInstrument",oInstruments.get(i)); } |
|
For more information on filters, please refer to the following article Access entities not related to the data model.
If you want to learn more about the Me.attachCollectionItem function, you can check the article Attach items (records) to a collection. |
In this way, in the Work Portal you will be able to see the multi-selection configuration automatically:

Last Updated 7/5/2023 10:59:32 AM