Local Certificates

<< Click to Display Table of Contents >>

Navigation:  Manage platform users and authentication > Manage identity providers for Enterprise subscriptions > Single Sign On Setup > Cloud portals Authentication with SAML 2.0 > Authentication Requirements >

Local Certificates

Managing Local Certificates

Local certificates support is a feature that enables the consumption of web services deployed on sites using locally generated or self-signed certificates, accessible via the rules module and component library. Service consumption can occur directly from the Work Portal or Scheduler Web interface. In Windows environments, this functionality allows seamless integration and validation of certificates through tools like Microsoft Management Console (MMC) or PowerShell, ensuring secure and reliable interactions with web services even when using non-commercial or self-signed certificates. In OpenSSL, administrators can similarly manage and verify certificates, generating fingerprints that serve as unique identifiers for secure communication channels across platforms. This capability enhances flexibility and security, supporting robust service integration within diverse IT infrastructures. The process of enabling this service consists of two parts: the acquisition of the thumbprint and its placement in the Management Console.


Thumbprint


In Windows

To extract the thumbprint of a certificate in Windows, follow these steps:


1.Open the Run Dialog:

Press Win + R to open the Run dialog.

2.Open MMC:

Type mmc and press OK to open the Microsoft Management Console.


LocalCert00


3.Add the Certificates Snap-In:

In the MMC console, go to File > Add/Remove Snap-in....

LocalCert01


In the dialog that appears, select Certificates and click Add.

LocalCert02


Choose My user account, Service account, or Computer account depending on where the certificate is stored, and click Finish.


LocalCert03


Click OK to close the dialog.


4.Navigate to the Certificate Store:

Expand the Certificates node in the left-hand pane.


LocalCert06


Navigate to the appropriate certificate store (e.g., Personal, Trusted Root Certification Authorities, Intermediate Certification Authorities, etc.).


5.Find and Open the Certificate:

Locate the certificate you are interested in.

Right-click on the certificate and select Open.


LocalCert07


6.Get the Thumbprint:

In the certificate properties window, go to the Details tab.

Scroll down in the list of fields to find Thumbprint.

Select Thumbprint, and the thumbprint will be displayed in the lower pane.

Copy the thumbprint by selecting the text and pressing Ctrl + C.

This is an example of what a Thumbprint looks like 761f1ef0dd91880af2d3cadd571b734b89eb3fa3.


LocalCert08

LocalCert09


note_pin

In Windows, the thumbprint is displayed with spaces between each pair of characters. To use this value in the application, you must remove these spaces, ensuring not to include any prefix such as "0x" and without periods.


Using OpenSSL


OpenSSL is a powerful command-line tool for working with SSL certificates. In OpenSSL, the command to obtain the thumbprint (also known as the fingerprint) does not directly offer an option to format it without colons (:) or spaces, nor does it add a prefix like "0x". However, you can obtain the certificate fingerprint and then use command-line tools such as sed or tr on Unix-like systems (Linux, macOS) to format the output according to your needs


1.Install OpenSSL (if not already installed):

On Windows, you can download it from OpenSSL for Windows.

On Linux, you can install it using your package manager.

sudo apt-get install openssl


On macOS, you can install it using Homebrew:

brew install openssl


2.Prepare Your Certificate File:

Ensure you have the certificate file in PEM format. This file typically has a .crt or .pem extension.


3.Open a Command Prompt or Terminal.


4.Run the OpenSSL Command:

To get the SHA-1 thumbprint:

openssl x509 -in path/to/your/certificate.crt -noout -fingerprint -sha1

To get the SHA-256 thumbprint:

openssl x509 -in path/to/your/certificate.crt -noout -fingerprint -sha256


Example Commands

SHA-1 Thumbprint

openssl x509 -in example.crt -noout -fingerprint -sha1

SHA-256 Thumbprint

openssl x509 -in example.crt -noout -fingerprint -sha256

Example Output

For the SHA-1 thumbprint command, the output will look something like this:

SHA1 Fingerprint=12:34:56:78:90:AB:CD:EF:12:34:56:78:90:AB:CD:EF:12:34:56:78

For the SHA-256 thumbprint command, the output will look like this:

SHA256 Fingerprint=12:34:56:78:90:AB:CD:EF:12:34:56:78:90:AB:CD:EF:12:34:56:78:12:34:56:78:90:AB:CD:EF:12:34:56:78:90:AB:CD:EF


Removing Colons and Prefix

If you need the thumbprint without colons, you can process the output using sed or tr to remove the colons:

Using sed

openssl x509 -in example.crt -noout -fingerprint -sha1 | sed 's/://g' | sed 's/^.*=//'

Using tr

openssl x509 -in example.crt -noout -fingerprint -sha1 | tr -d ':' | sed 's/^.*=//'


This will output the thumbprint as a continuous string of hexadecimal characters without any colons or prefixes.


note_pin

It is important to clarify that only the thumbprint will be accepted; no other hash of the certificate will be validated. Additionally, only the thumbprint of the TLS/SSL certificate with which the service is published and the connection is being made will be accepted. The thumbprint of any intermediate certificate or the root certificate authority that issued the self-signed certificate will not be accepted.


In the Management Console


You now need to add the thumbprint with the name AllowedLocalCertificatesWhitelist in the Properties of your Environment in the Management Console.


Refer to the Custom Parameters documentation if you have any doubts about this process.


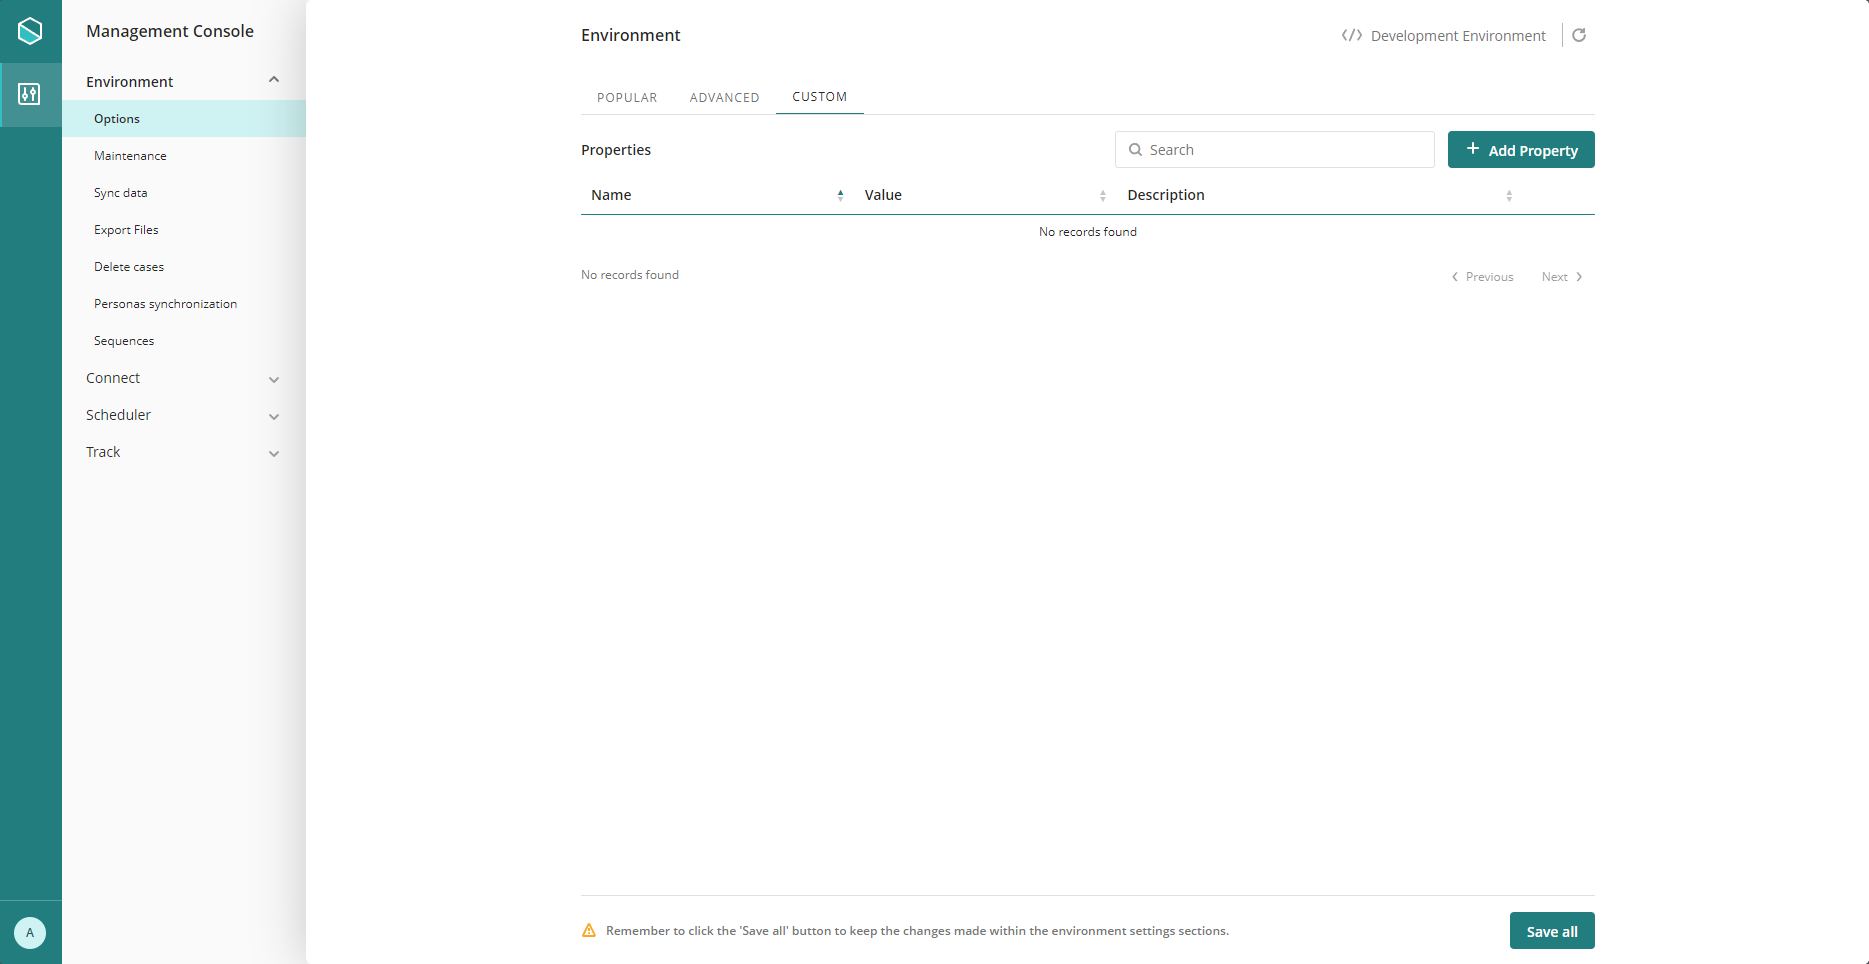
1.Under the Environment tag, click the Options label.

2.Click the Custom tag.

3.Click the Add Property button

LCMCW00


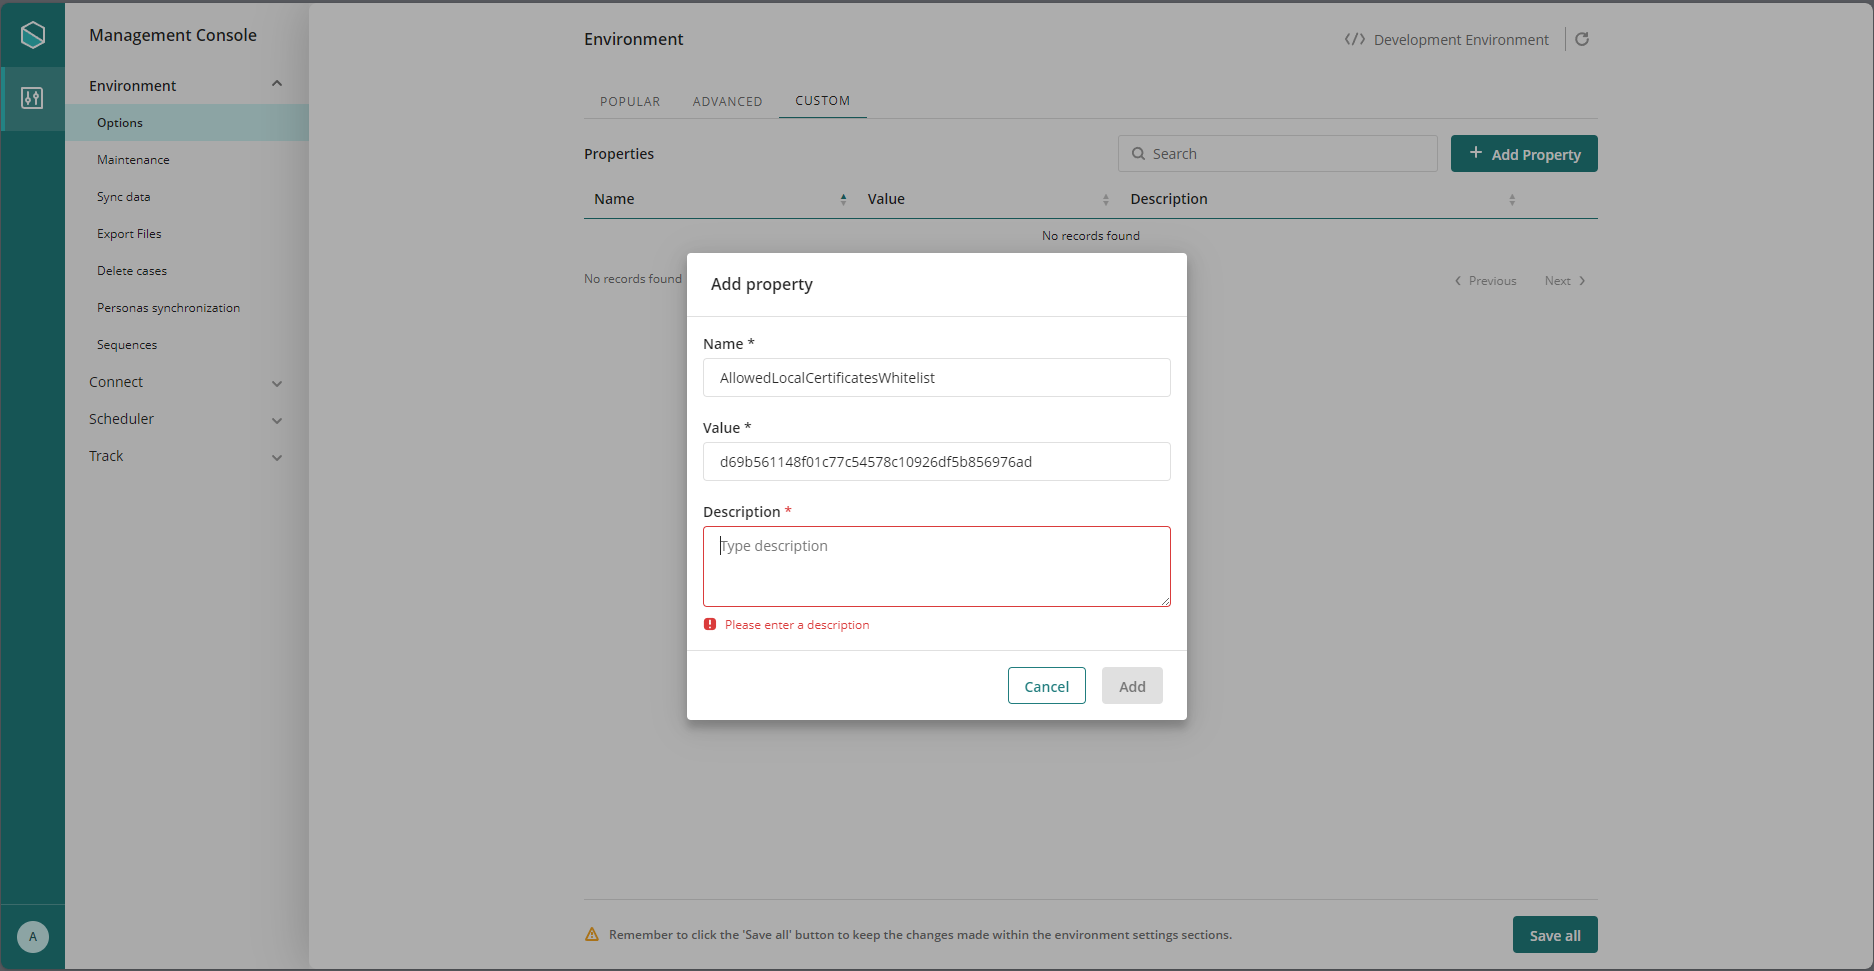
4.In the Add Property window enter the following values:

Name: AllowedLocalCertificatesWhitelist

Value: your Thumbprint

Description: The description that you want to give to this property.


LCMCW01


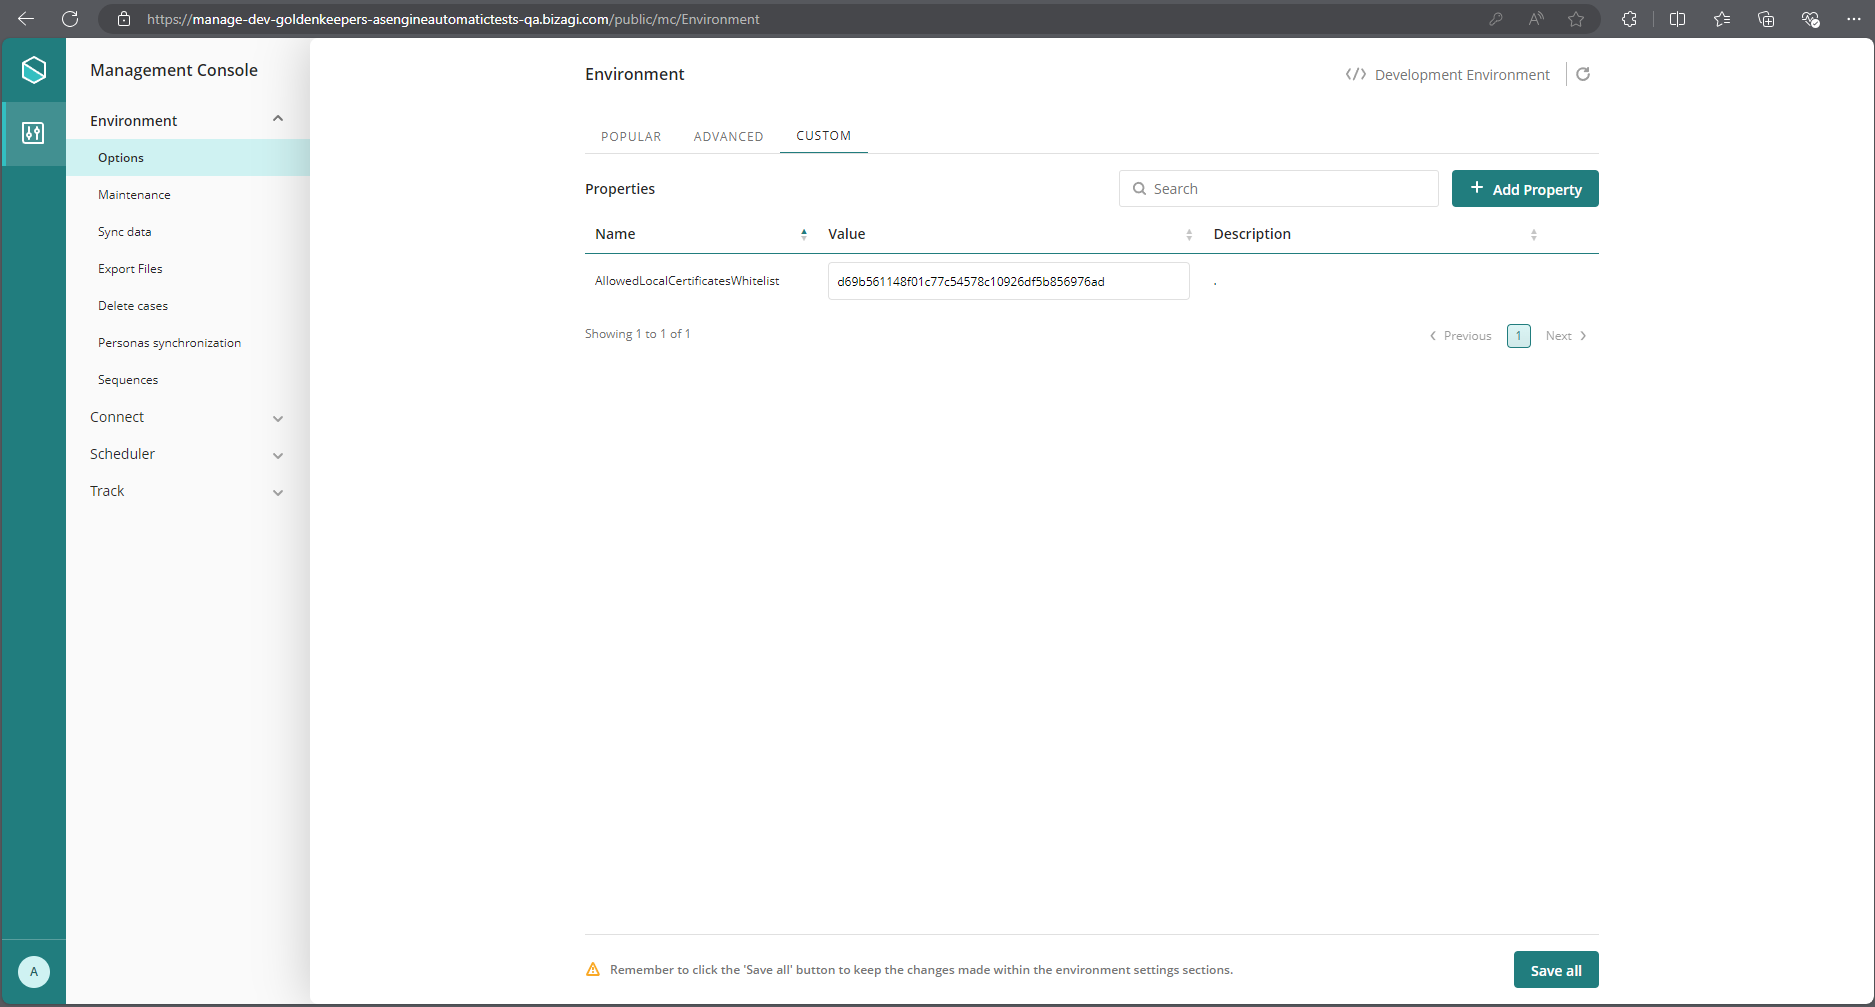
5.Click the Add button.


LMCCW02


Last Updated 12/10/2024 8:57:08 AM