Overview
Manage Personas throughout the RPA lifecyle management to match your UiPath resources in Bizagi. Follow the steps below to Import your UiPath resources to Bizagi.
Considerations:
•Add and/or import UiPath's resources to Bizazgi following the steps described below in the order they are given.
•To create a new Orchestrator in Bizagi it must exist in a previously created UIPath Orchestrator. You must know your UIPath credentials.
•When filling in the URL field of the Orchestrator process, make sure it has the protocol contained (http, https).
•Modifications to a user's settings must be performed on UiPath.
Add or import your UiPath's resources following the structure below:
•Import UiPath Users in Bizagi
•Delete Environments (if required)
Do not perform any action if you have not performed all the previous ones.
Involved Persona(s) |
Description |
|---|---|
This process lets you create a new Bizagi orchestrator to match with your UI Path one. Then, define tenants. |
Access the Me menu and start a new process by selecting the New Orchestrator button under the Relevant to me panel.

Fill in the Orchestrator section mandatory fields in with the corresponding information:
Field |
Description |
|---|---|
Name |
Give a name to the Bizagi Orchestrator. |
Orchestrator type |
Select an environment from the drop-down list: Development, Test, or Production. |
URL |
Provide your UIpath orchestrator's URL. |
Orchestrator Manager |
Choose the user to be the Orchestrator Manager. Select yourself or another user. |
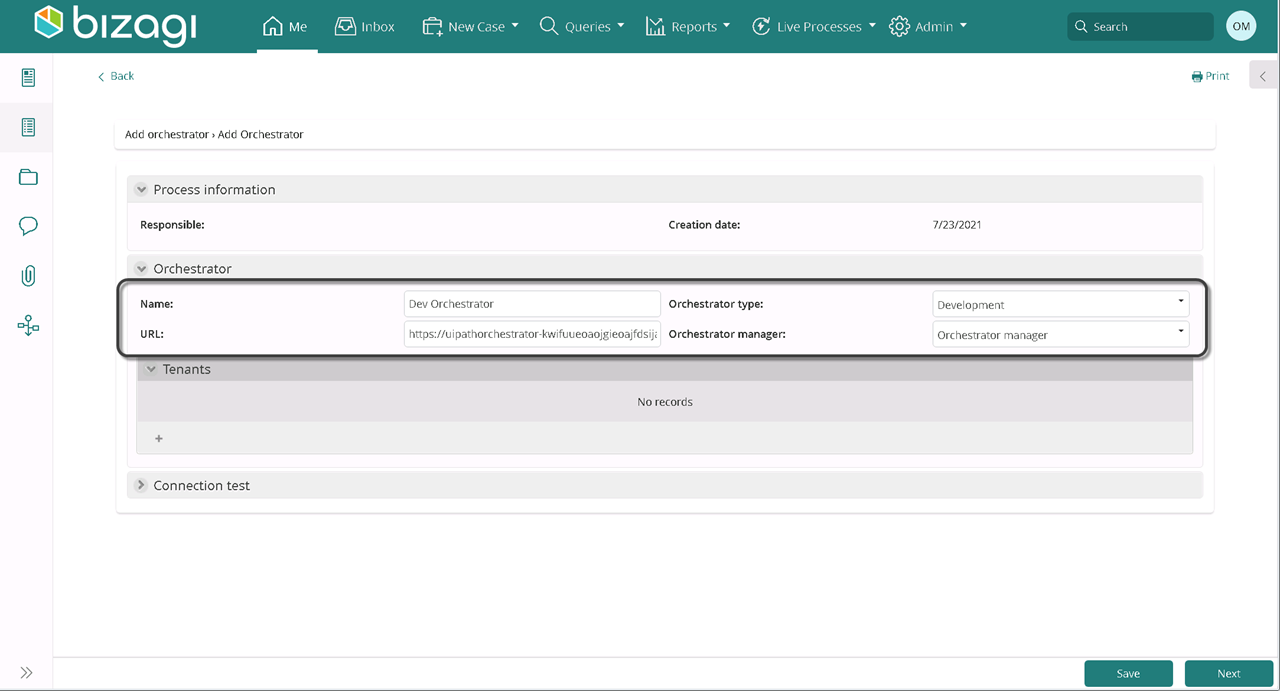
Click the addition button on the Tenants collection.
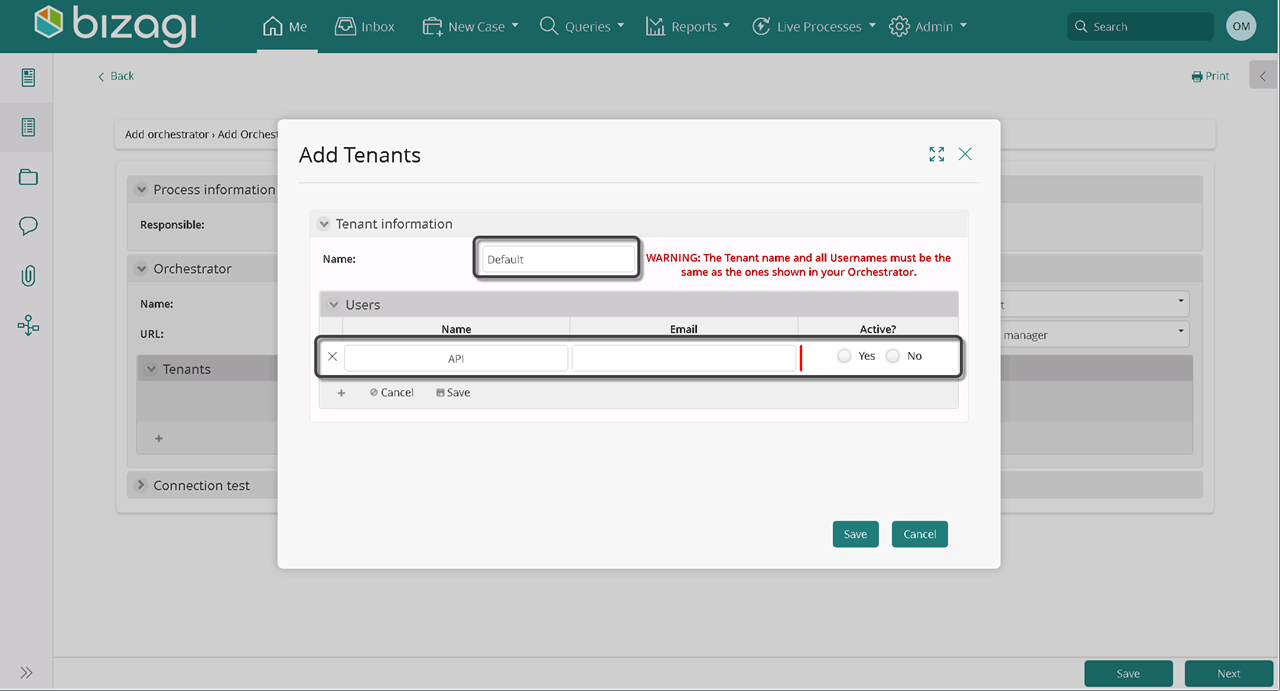
Fill in the corresponding fields with the mandatory information. Keep in mind that the tenant's name and users you provide must be the same as your UI Path's Orchestrator ones.
Select Save, both on the Tenant and the collection.
Field |
Description |
|---|---|
Name |
Provide your UIPath's orchestrator name. |
User Name |
Provide your UIPath's user name. |
If required, include your UiPath's user email. |
|
Active |
User's state on the Orchestrator. |
Select a Tenant from the list as default by choosing yes in the Default column.
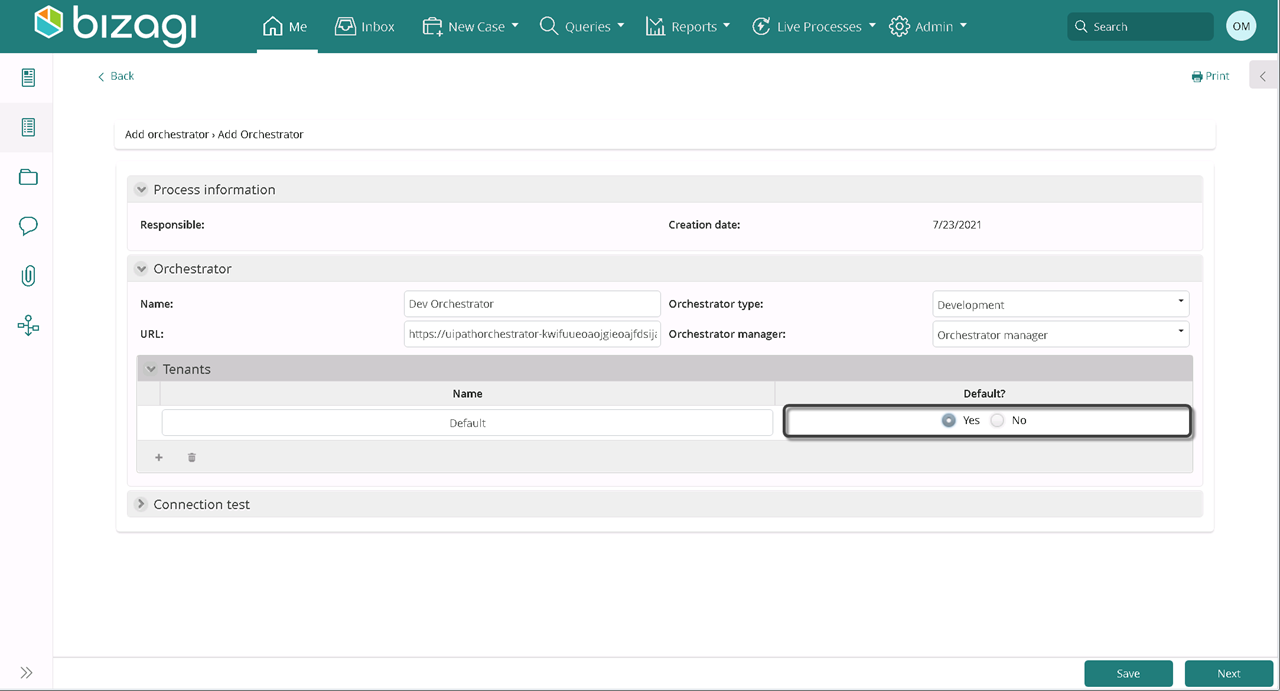
When you are done and click Next.
Involved Persona(s) |
Description |
|---|---|
Manage your Orchestrator. This user can update it, view its log, deactivate it, add Tenants or select a default tenant. |
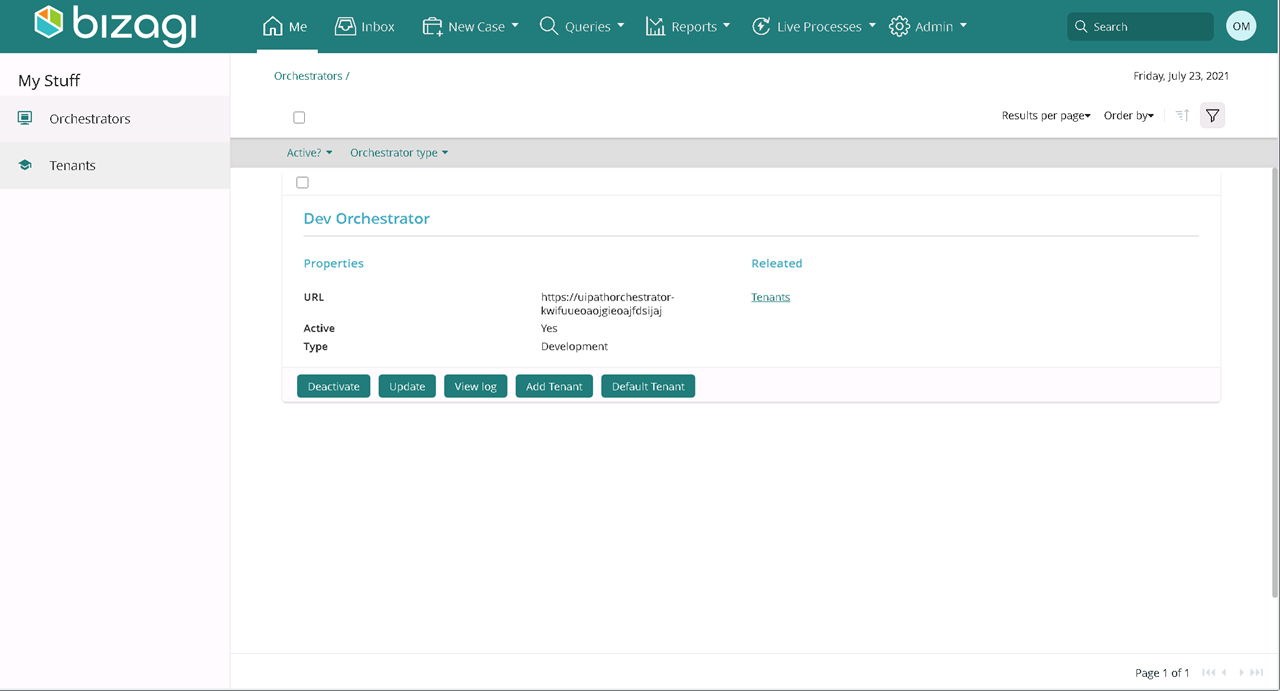
An Orchestrator can be selected from the My Stuff menu of the Orchestrators Responsible (defined on the Create Orchestrator section). First , from the Me menu, select Orchestrator.
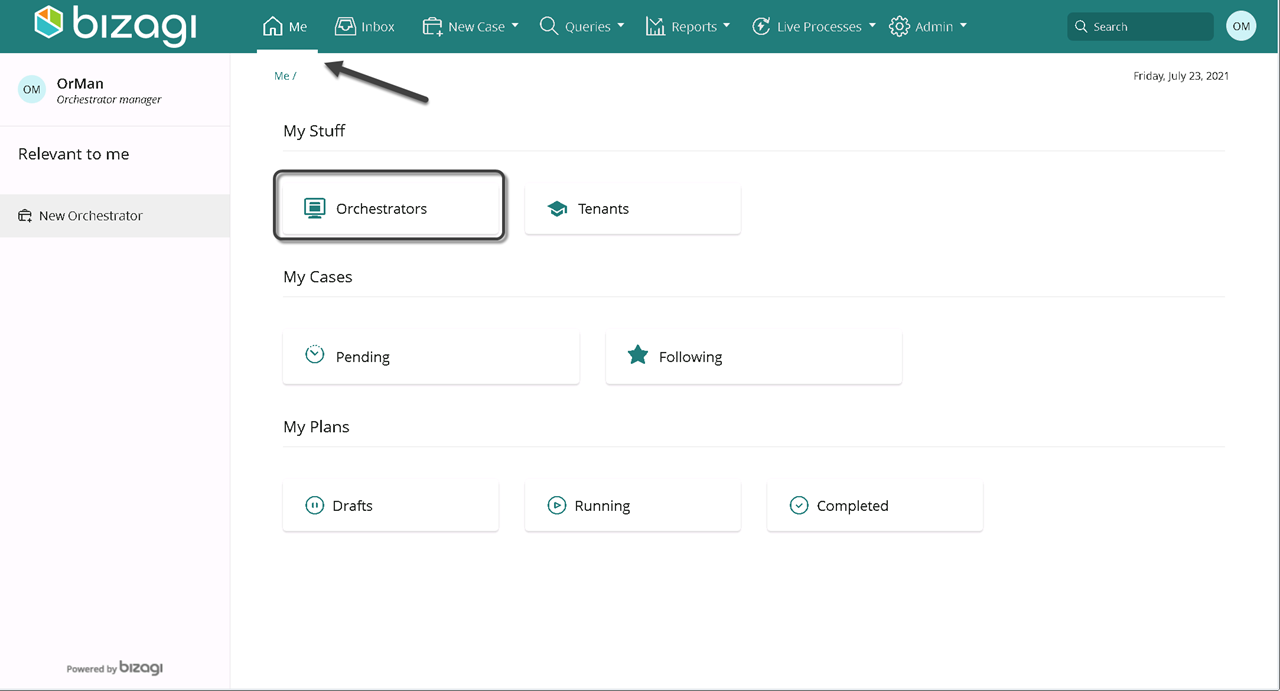
Manage your orchestrator by selecting one of the following options:
Option |
Description |
|
|---|---|---|
Deactivate |
The Orchestrator no longer appears on any process, even though it remains listed on the Orchestrators menu. When it is deactivated, an activation button appears instead. |
|
View Log |
Entry type |
Can be either: Process event, entity event, error, warning. |
Date |
Displays the orchestrator creation date. |
|
Responsible |
Displays the user defined as Orchestrator Manager |
|
Log entry |
Displays the process activity log and the case number. |
|
Update |
Let's the Orchestrator Manager modify the orchestrator type and/or URL. |
|
Add Tenant |
Send a Tenant creation request to the Orchestrator Manager. |
|
Default Tenant |
Default tenant settings. |
|
Involved Persona |
Description |
|---|---|
Import users from your UiPath Orchestrator to Bizagi. Provide your UiPath credentials and select the users you wish to import. |
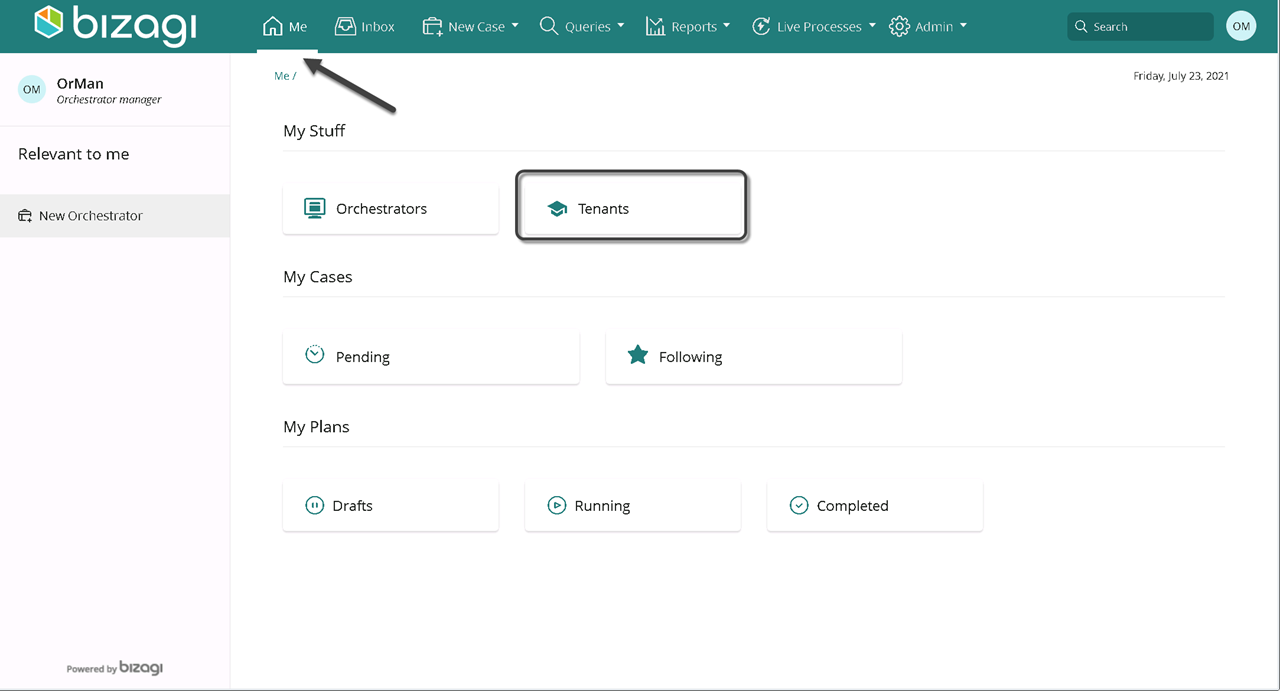
Access your tenants. On the Me menu, select Tenants.
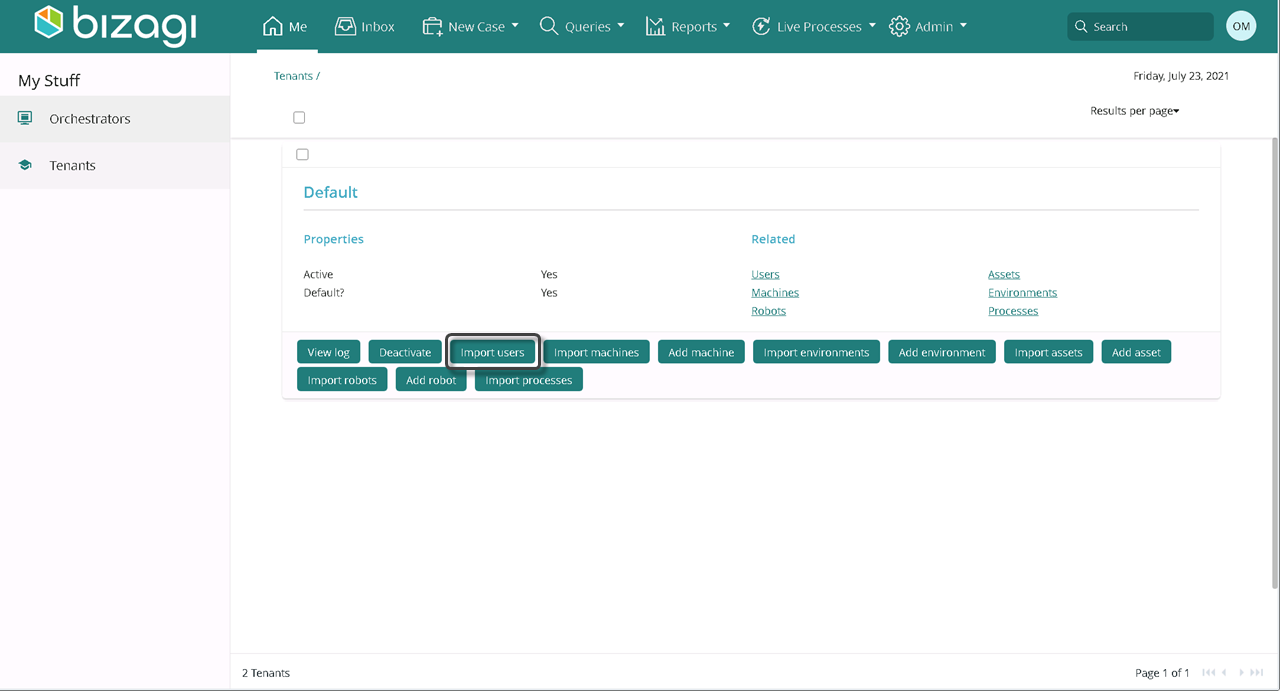
Select Import users.
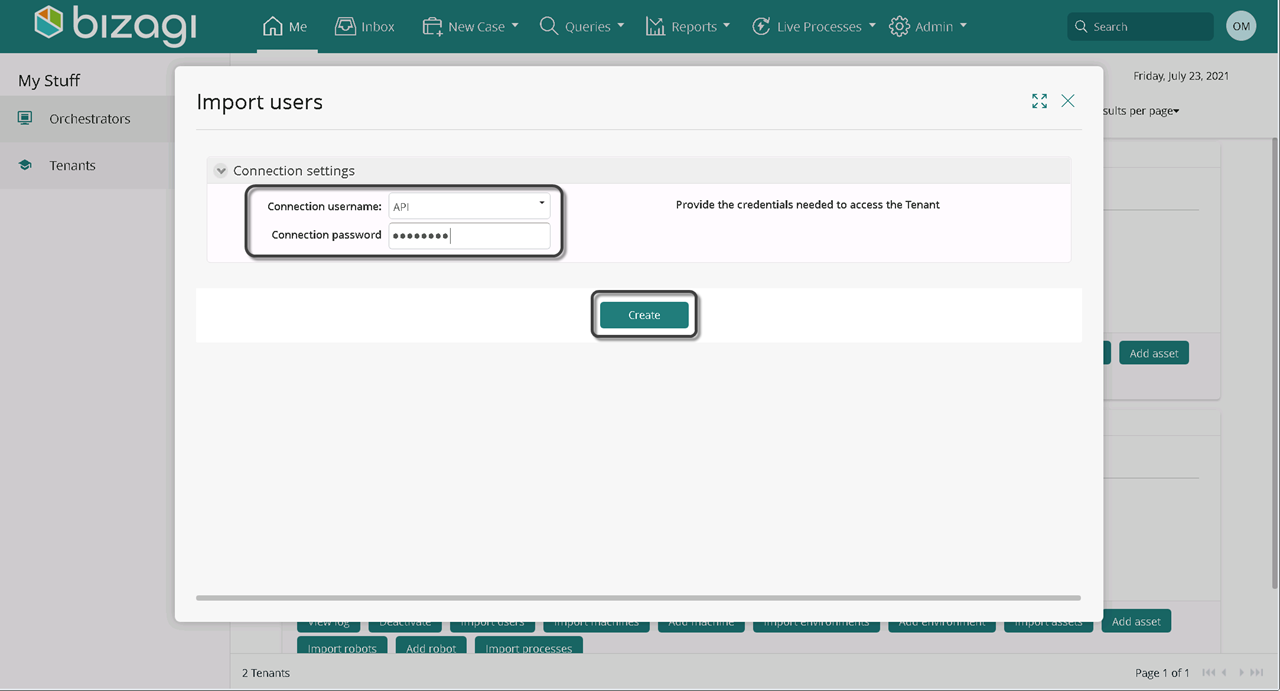
Provide the credentials to access the Tenant. Click create.
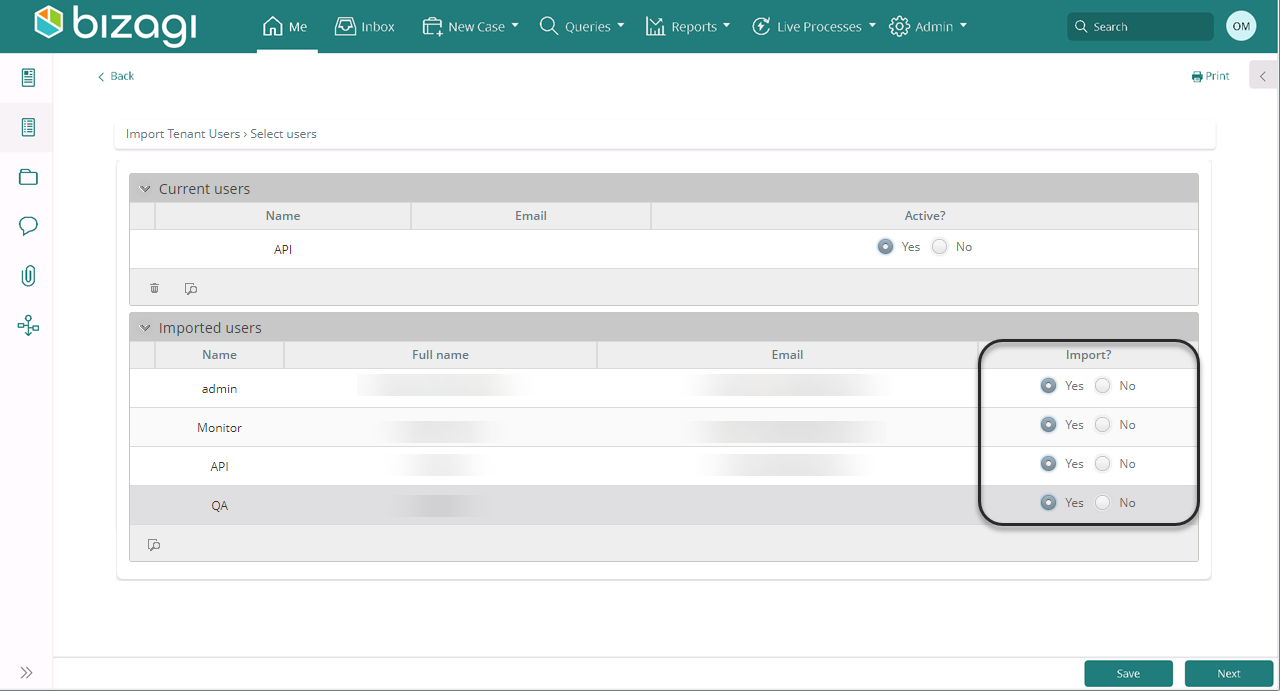
Find a list of UiPath's Orchestrator users, select the ones you want to import by selecting Yes under the corresponding Import column. Click Next
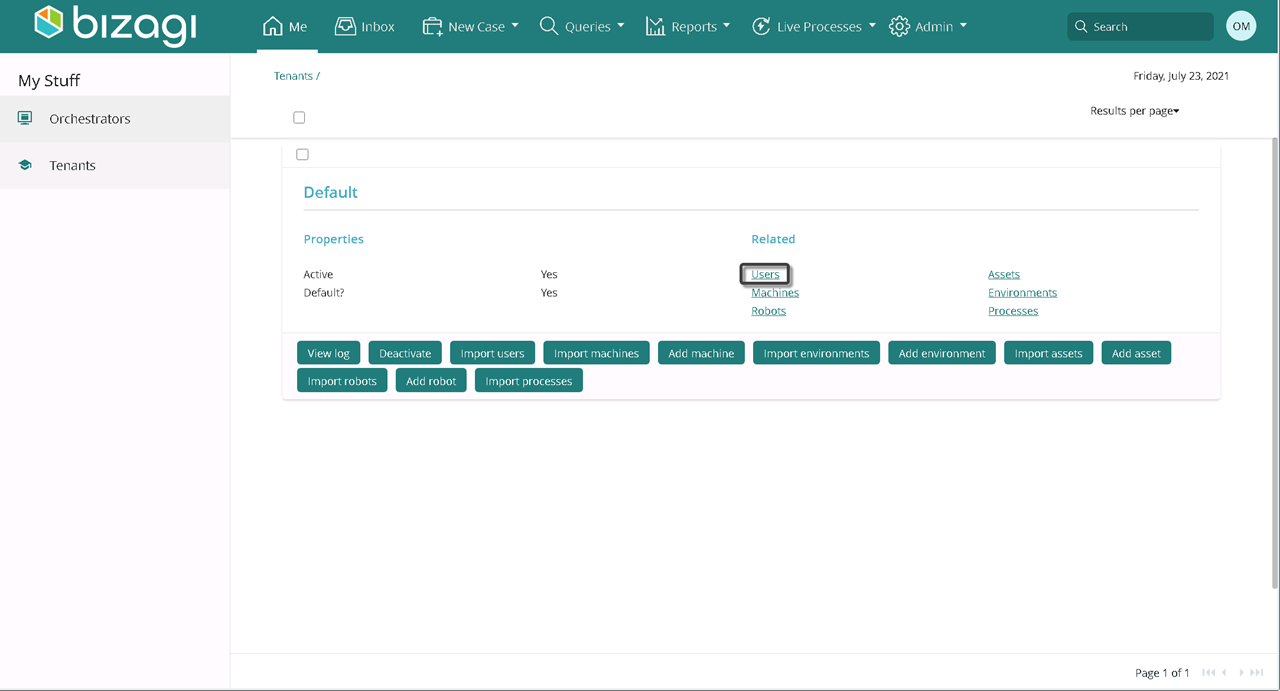
To access to your tenant, select Users.
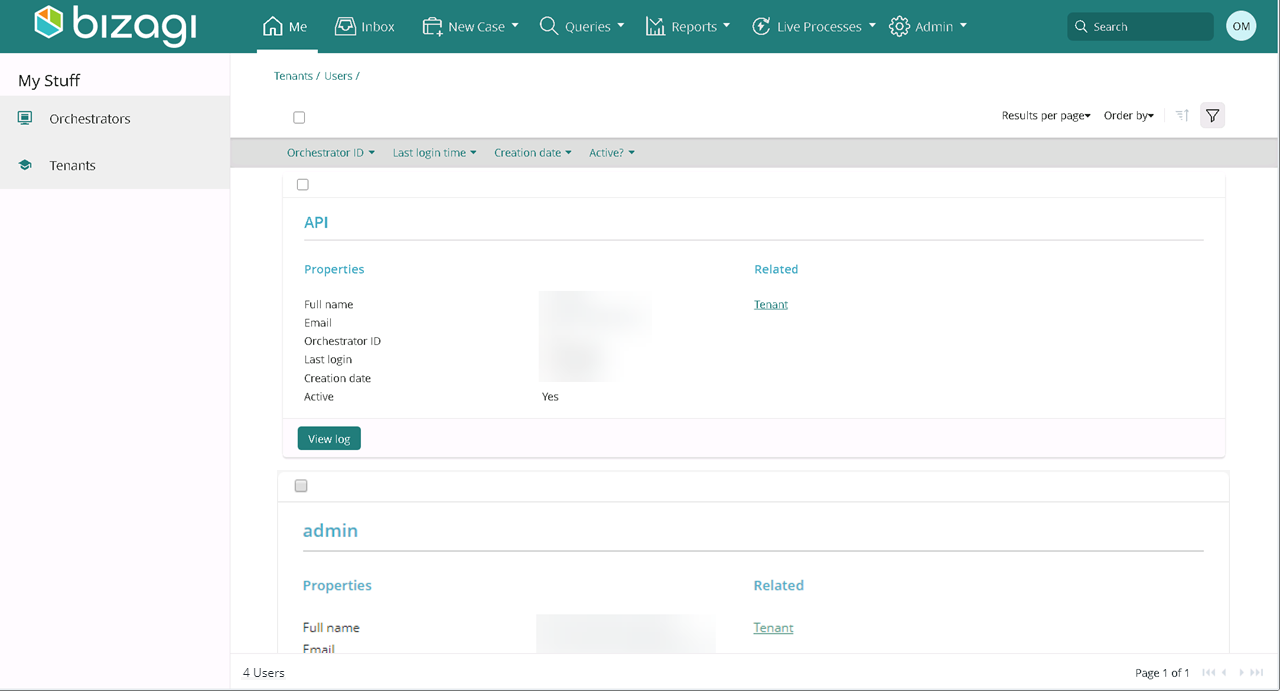
Find the list of imported users.
Involved Persona |
Description |
|---|---|
Import machines from your UiPath Orchestrator to Bizagi. Access with your UiPath credentials, select from a list of machines the ones you wish to import and assign a Machine Manager to each of them. |
Import the users associated to the machines you want to import. To import users, follow the steps in the previous section.
Access your tenant. On the Me menu, select Tenants.

Select Import machines.
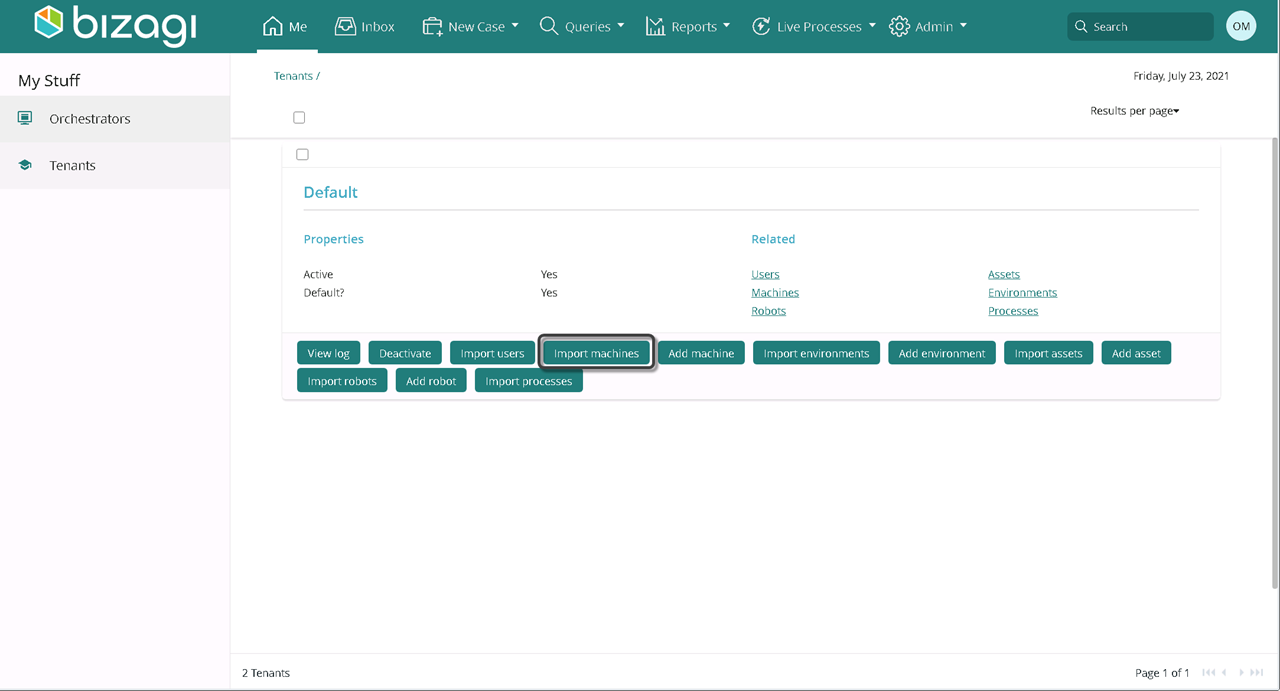
Provide the credentials to access the Tenant. Click Create.
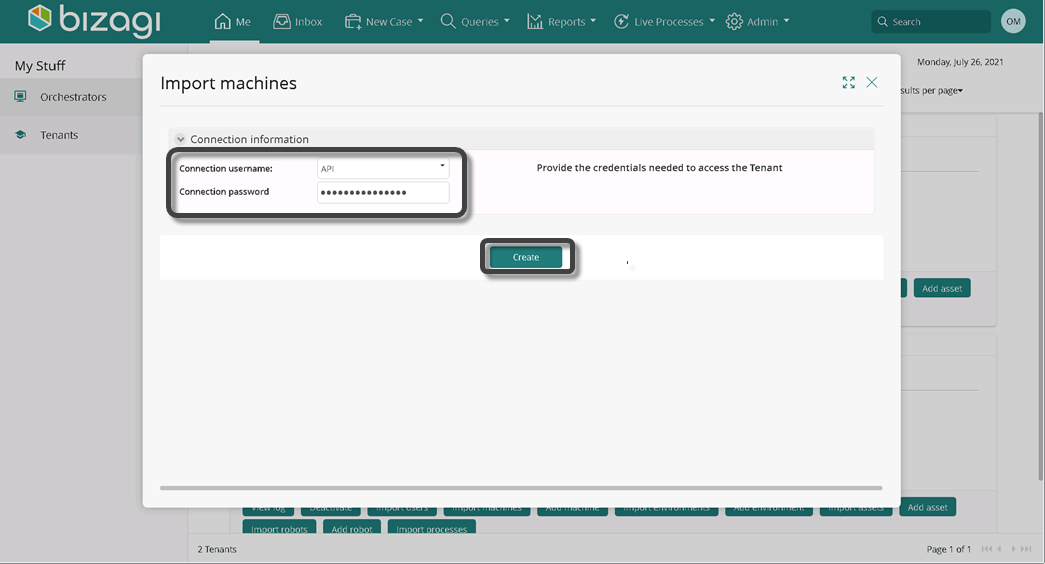
Import machines

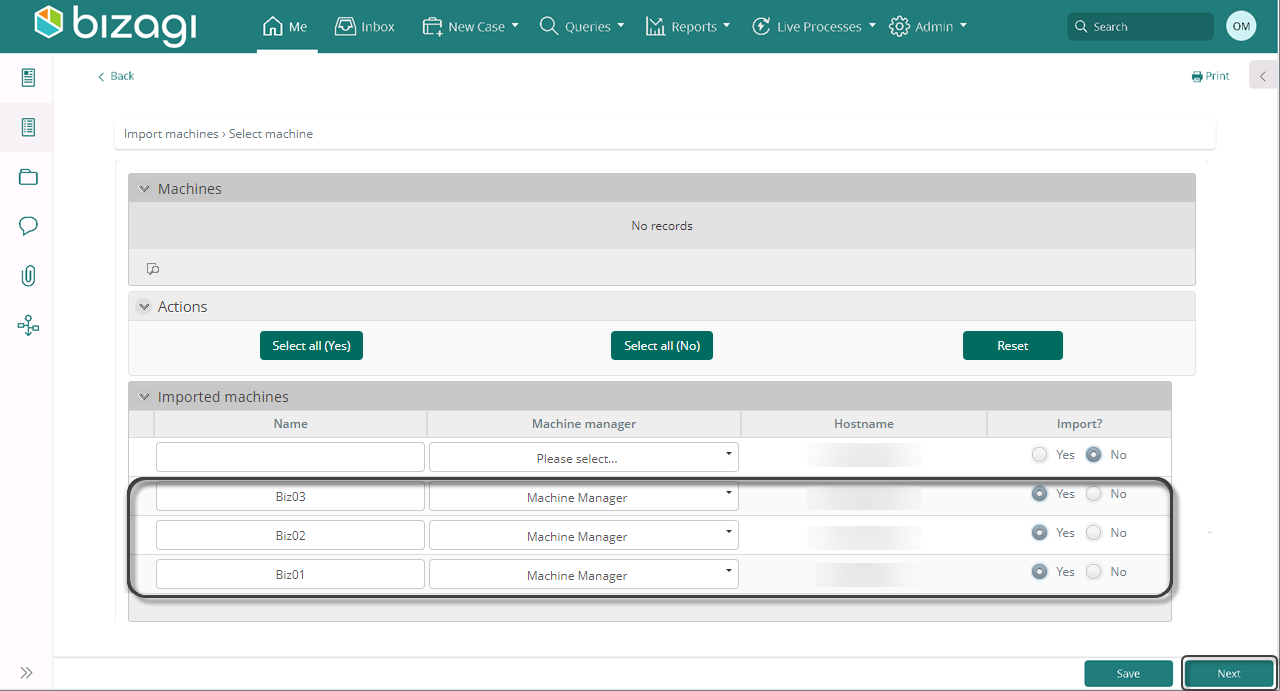
Fill in the columns of the machines you want to add, with the corresponding information:
Field |
Description |
|---|---|
Name |
Provide a name for the machine. |
Machine Manager |
Select a user from the drop-down list to be in charge of installing or uninstalling applications. |
Hostname |
Displays the UiPath Orchestrator name |
Import |
Select Yes if you want to import a machine; otherwise No. |
Click Next.
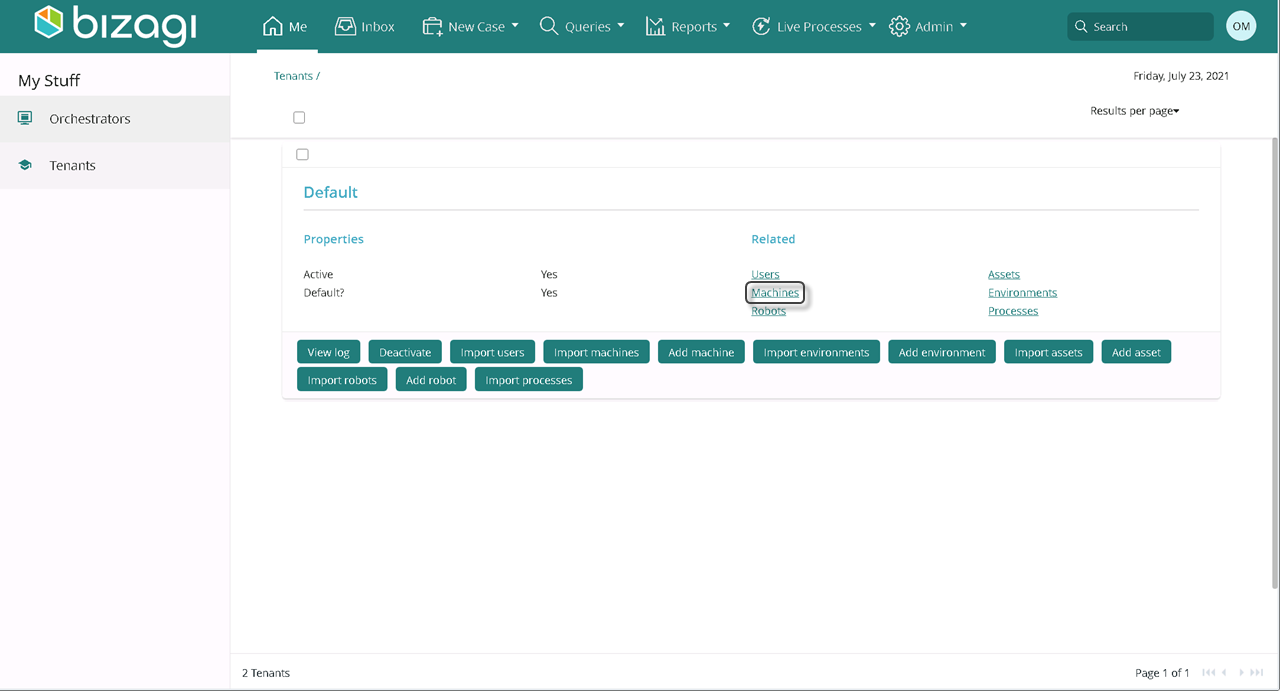
To access your tenant, select Machines.
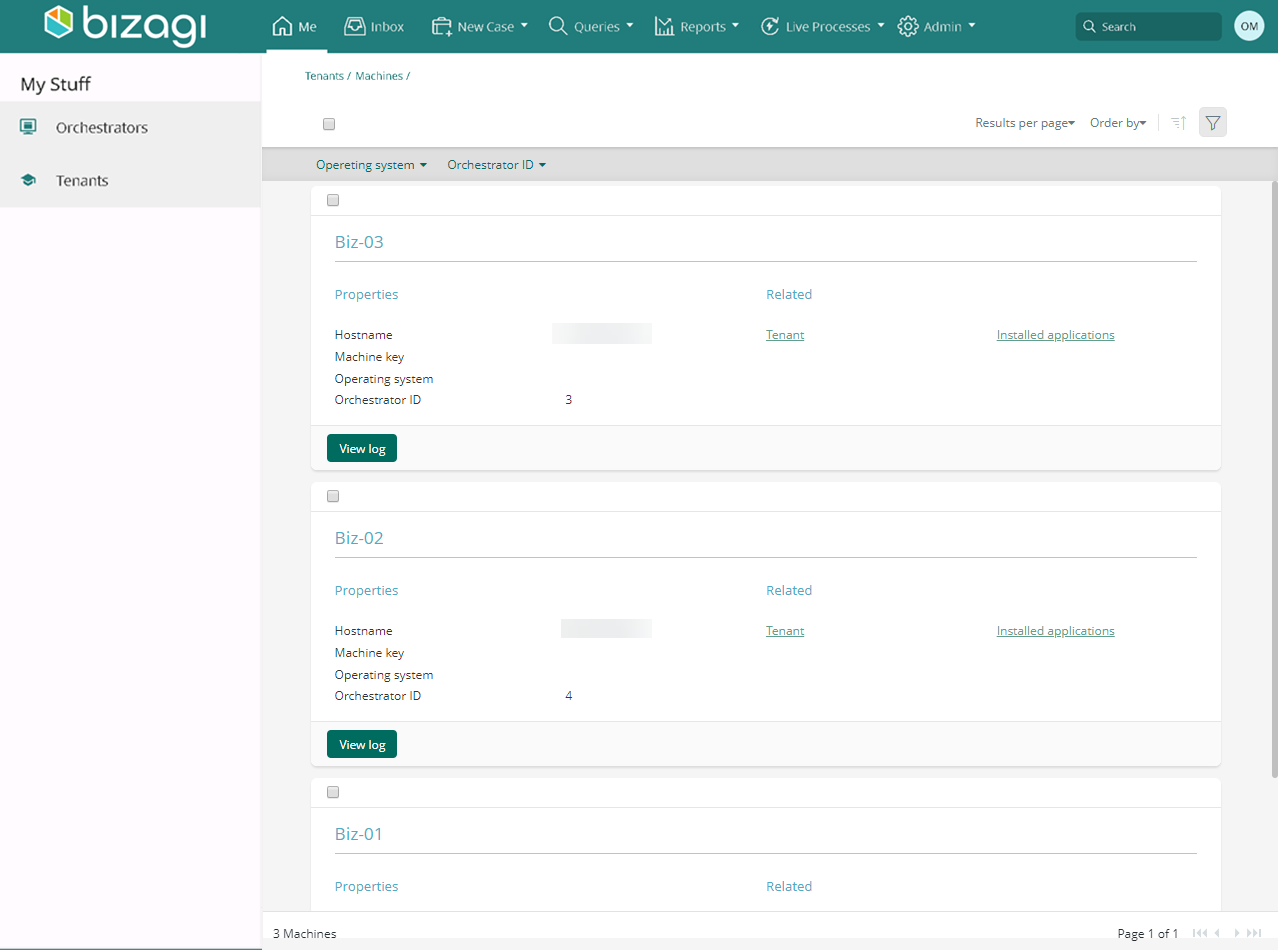
Find the list of imported machines.
Involved Persona |
Description |
|---|---|
Import environments from your UiPath Orchestrator to Bizagi. Access with your UIPath credentials and select within a list of environments the ones you wish to import. |
Access your tenant. On the Me menu, select Tenants.

Select Import environments.
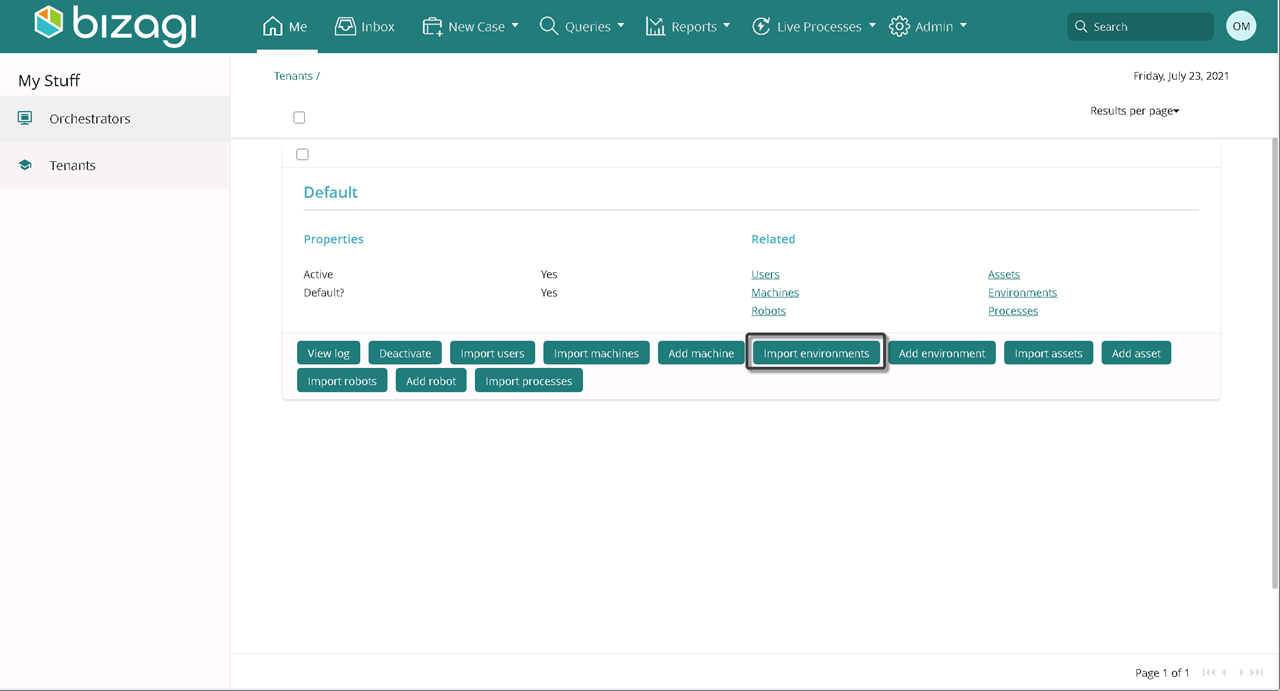
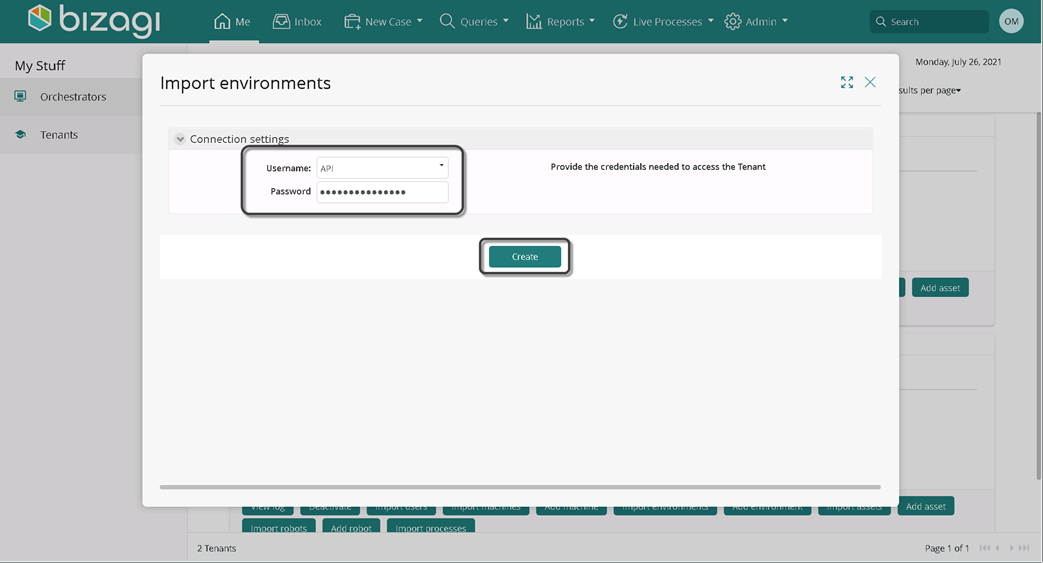
Provide the credentials to access the Tenant. Click Create.
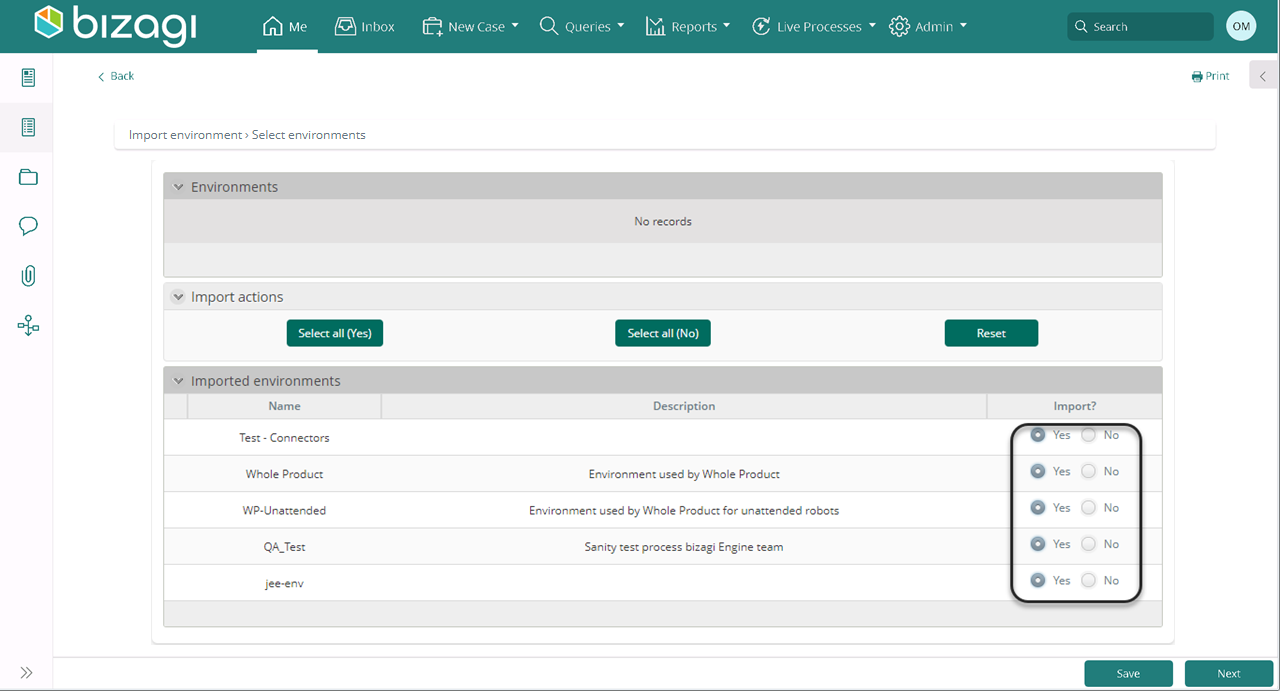
In the Import? Column, select Yes to import the environment; No otherwise. To import all the environments listed, check Select all (yes). Keep in mind you must check all the import? column fields to advance the case.
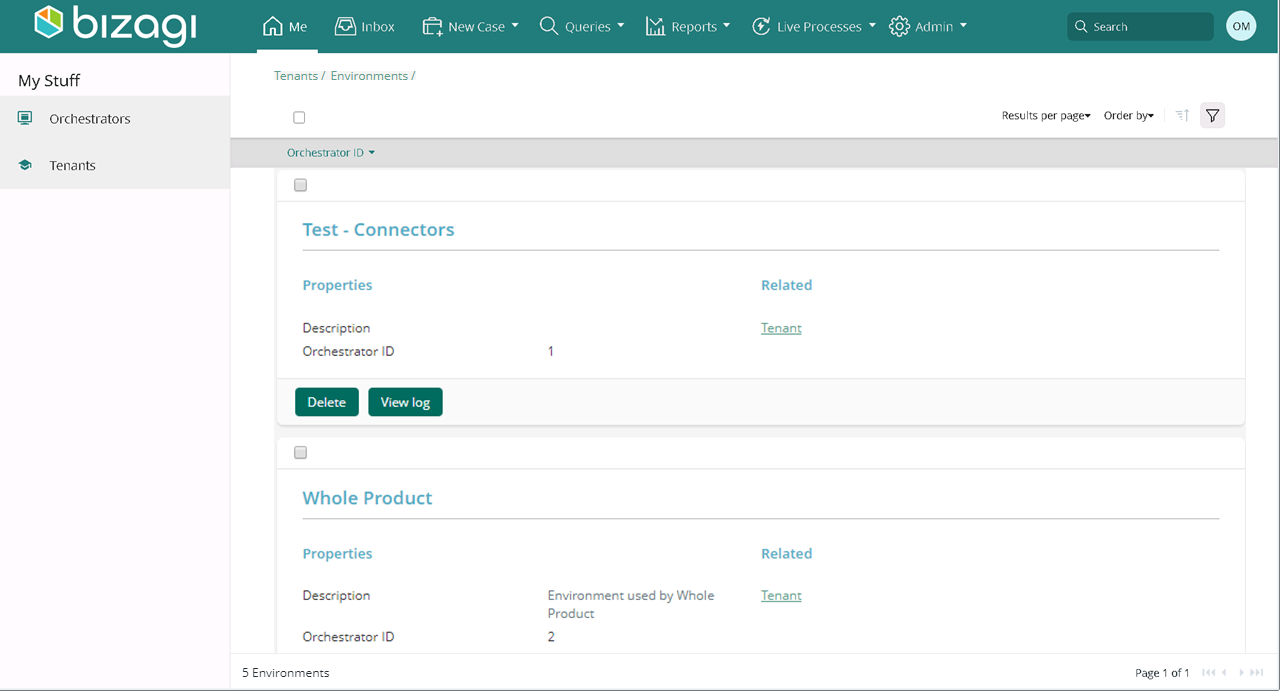
Access your tenant and select Environments.
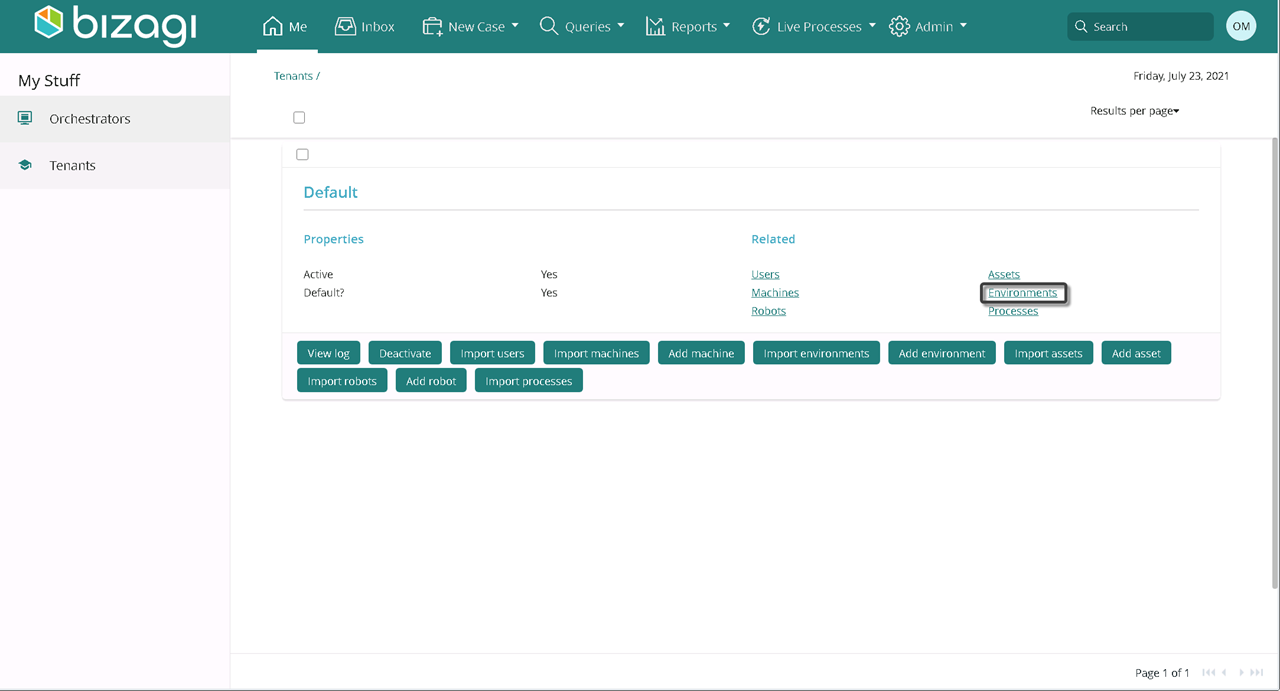
Find the list of imported Environments.
Involved Persona |
Description |
|---|---|
Create an environment in the Orchestrator Manager's Work Portal and visualize it on UiPath. |
Access your tenant. On the Me menu, select Tenants.

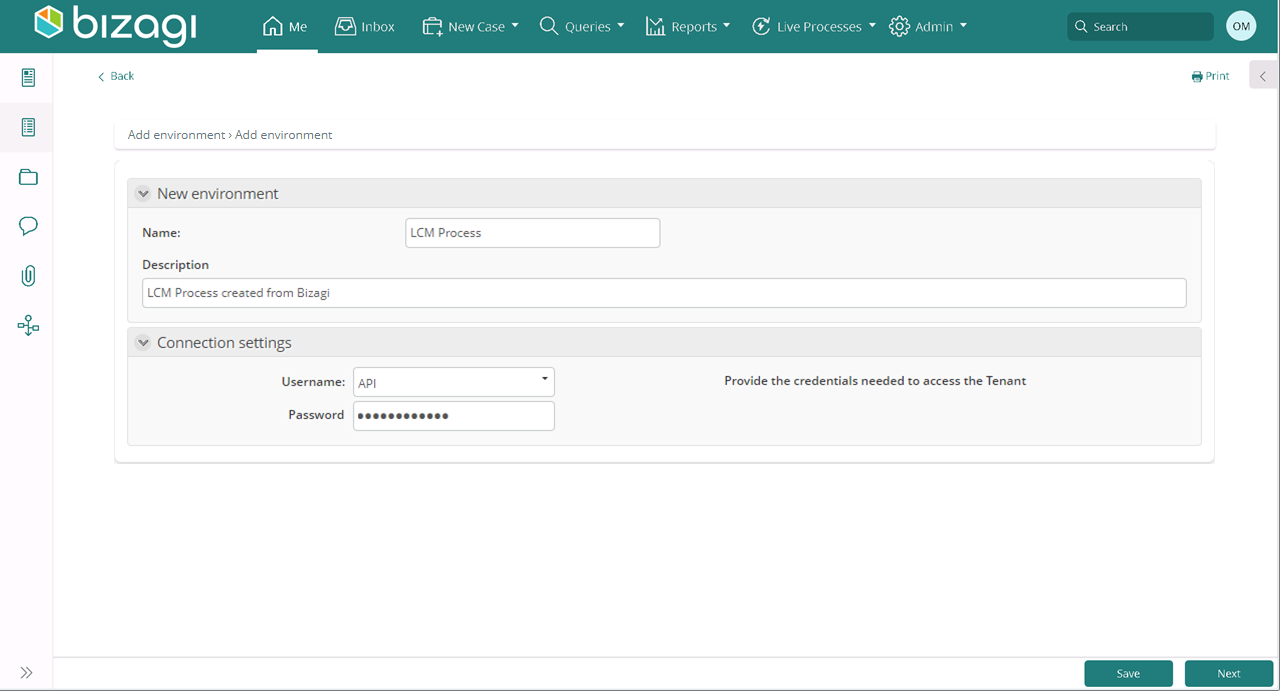
Select add environment.

Fill in the fields. Keep in mind you must fill in the Name and Description and provide the correct credentials to access the Tenant to advance the case, otherwise the system notifies you to do so.
Field |
Description |
|---|---|
Name |
Enter the new envirionment's name |
Description |
Provide a brief description of the environment |
Connection settings |
Provide the credentials needed to access the Tenant. |
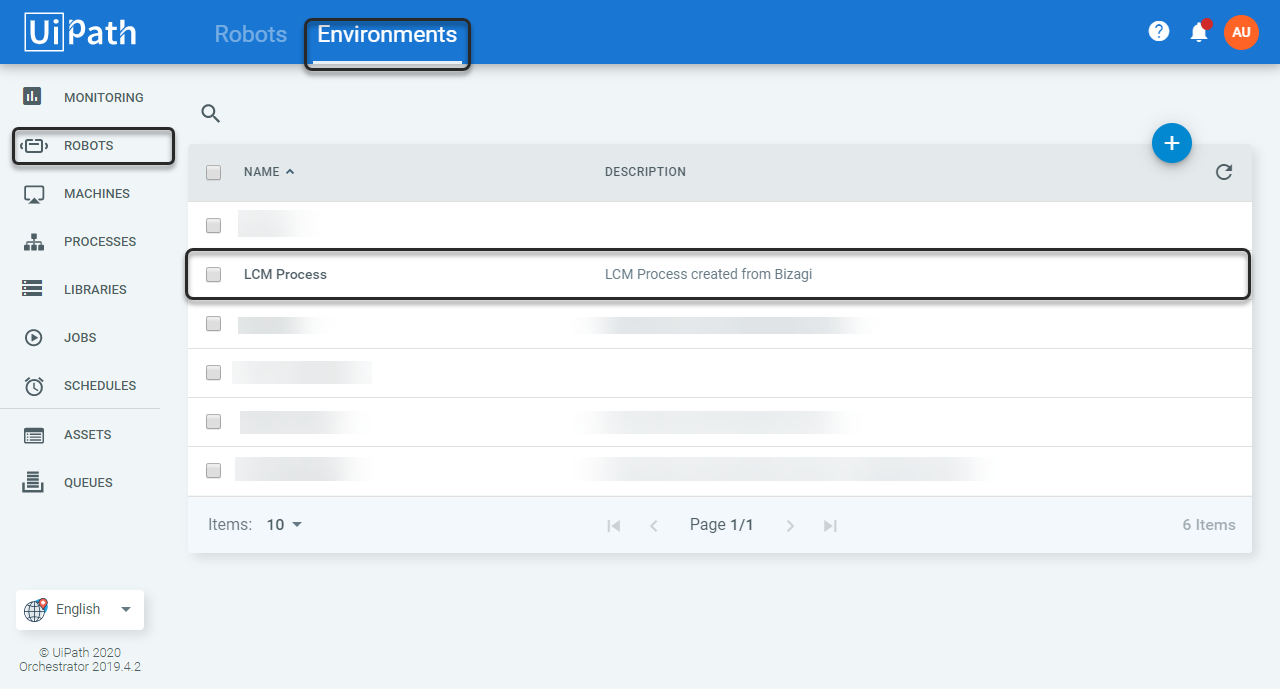
Find the created environment on UiPath in the Environments section of the Robots field.
Involved Persona |
Description |
|---|---|
Delete the Orchestrator's environment from the Orchestrator Manager's Work Portal |
Access your tenant. On the Me menu, select Tenants.

Select Environments.

Select delete on the bottom lef of the environment to be deleted.
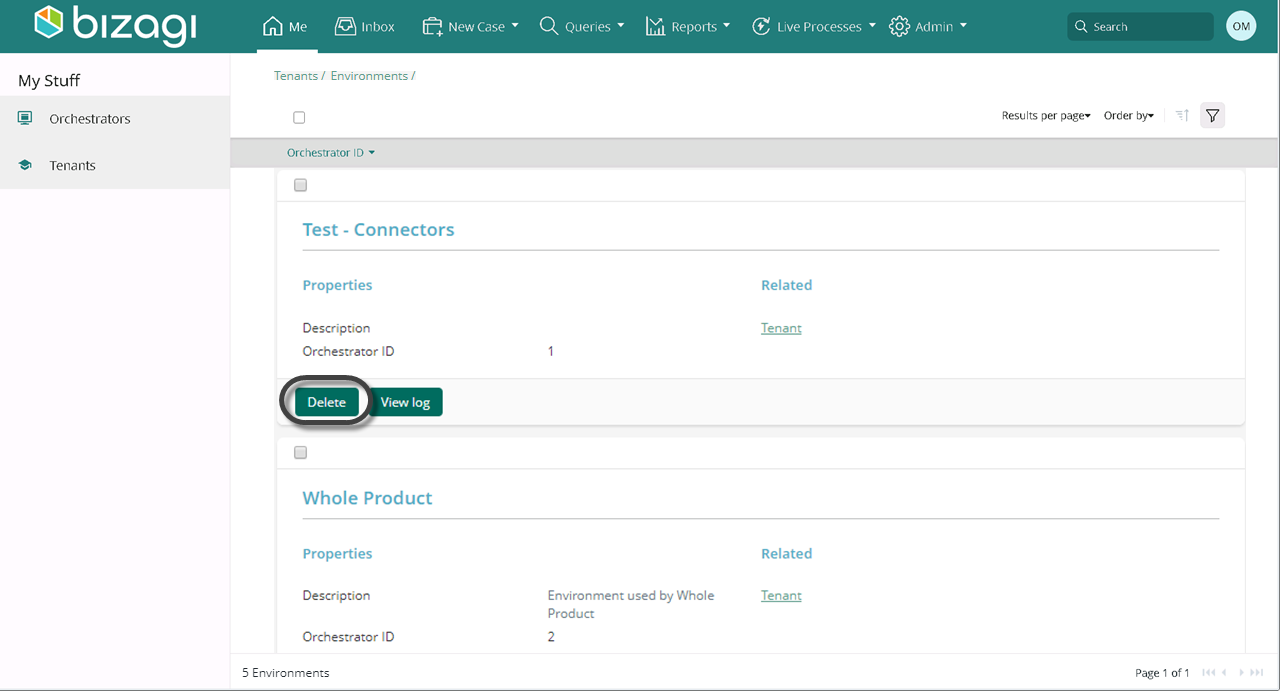
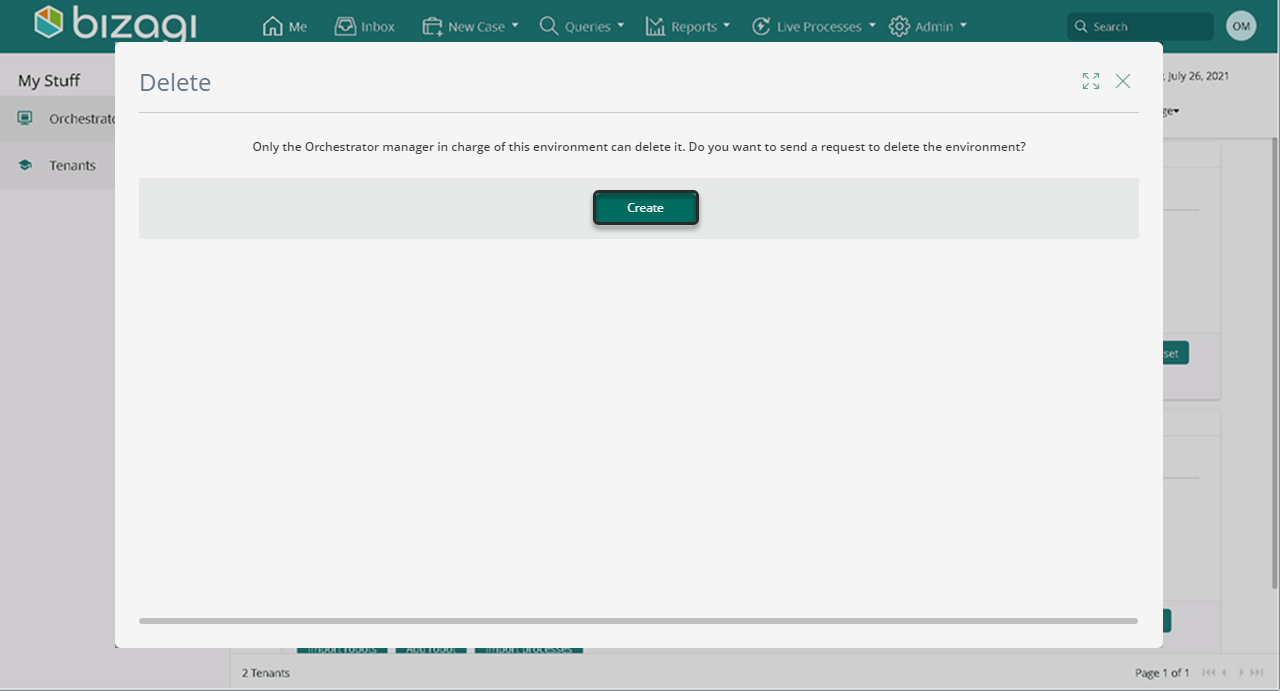
Keep in mind, only the Orchestrator Manager in charge of the environment can delete it. Select Create to start a request.
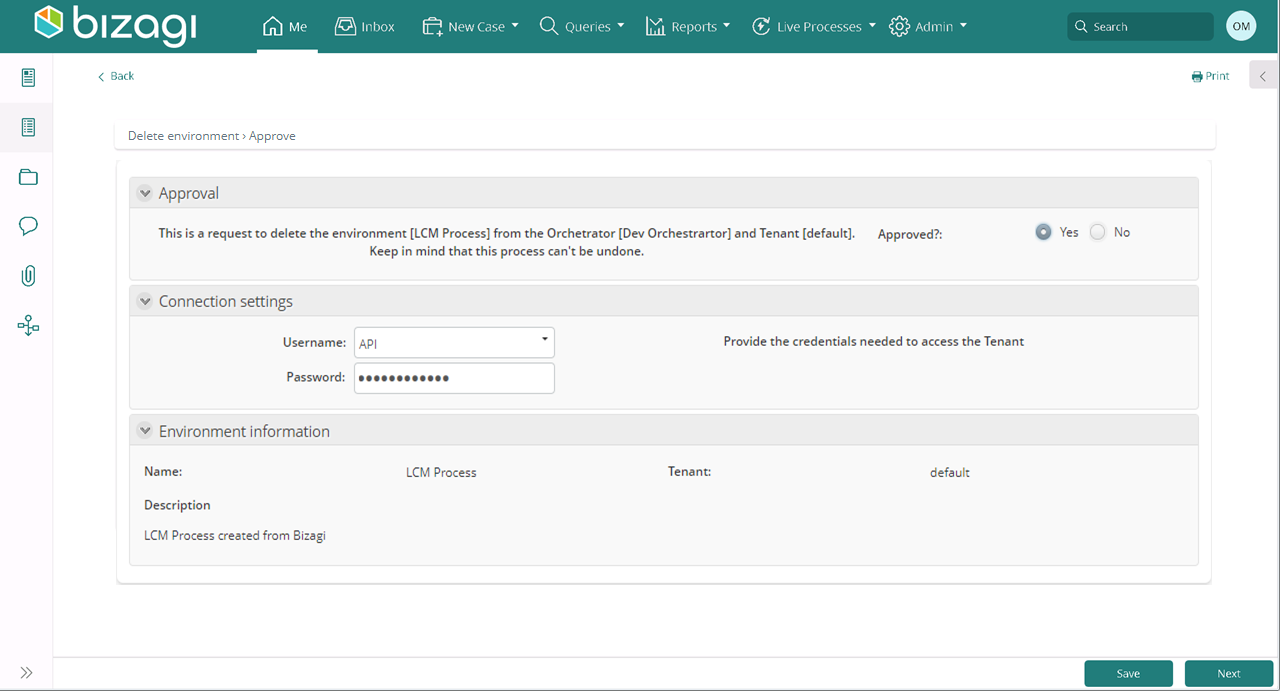
Select Yes on the boolean control to approve the chosen environment deletion. Then, provide the credentials needed to access the Tenant. Select Next.
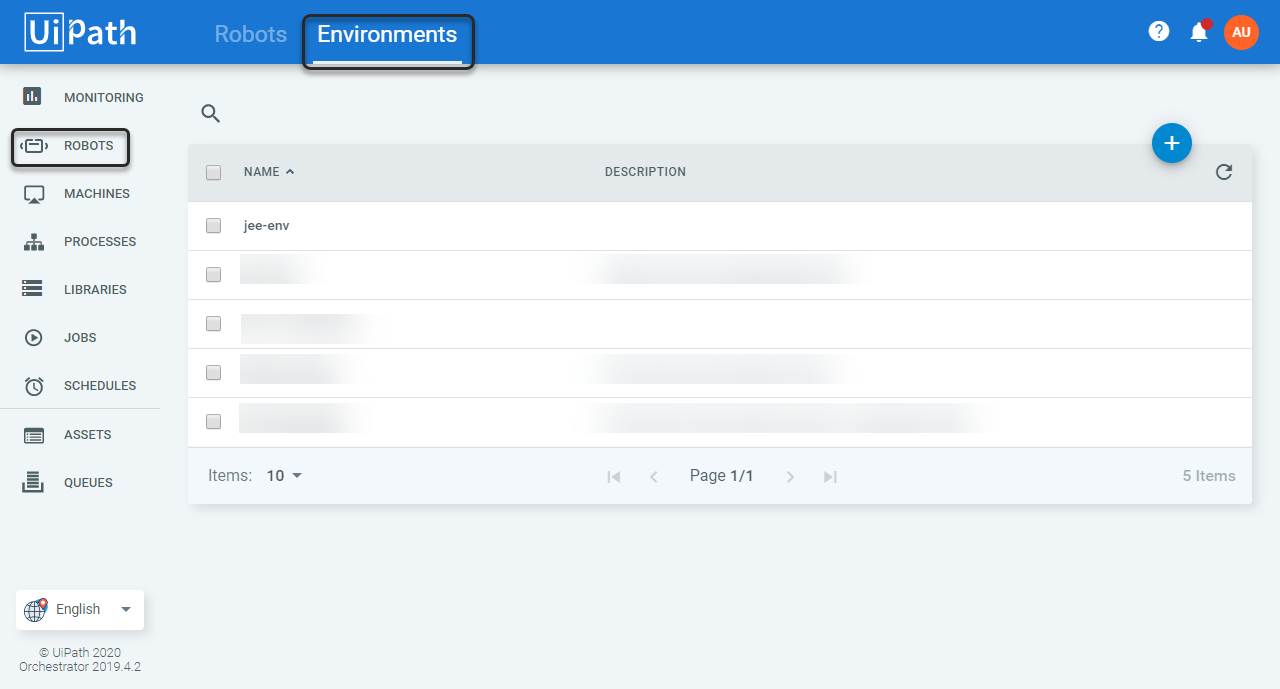
Access UiPath and select the Robots section, then environments. Notice the deleted environment appears no more.
Involved Persona |
Description |
|---|---|
Create Robots. Keep in mind to create Robots there must exist machines and environments regarding the Robot. |
Access your tenant. On the Me menu, select Tenants.

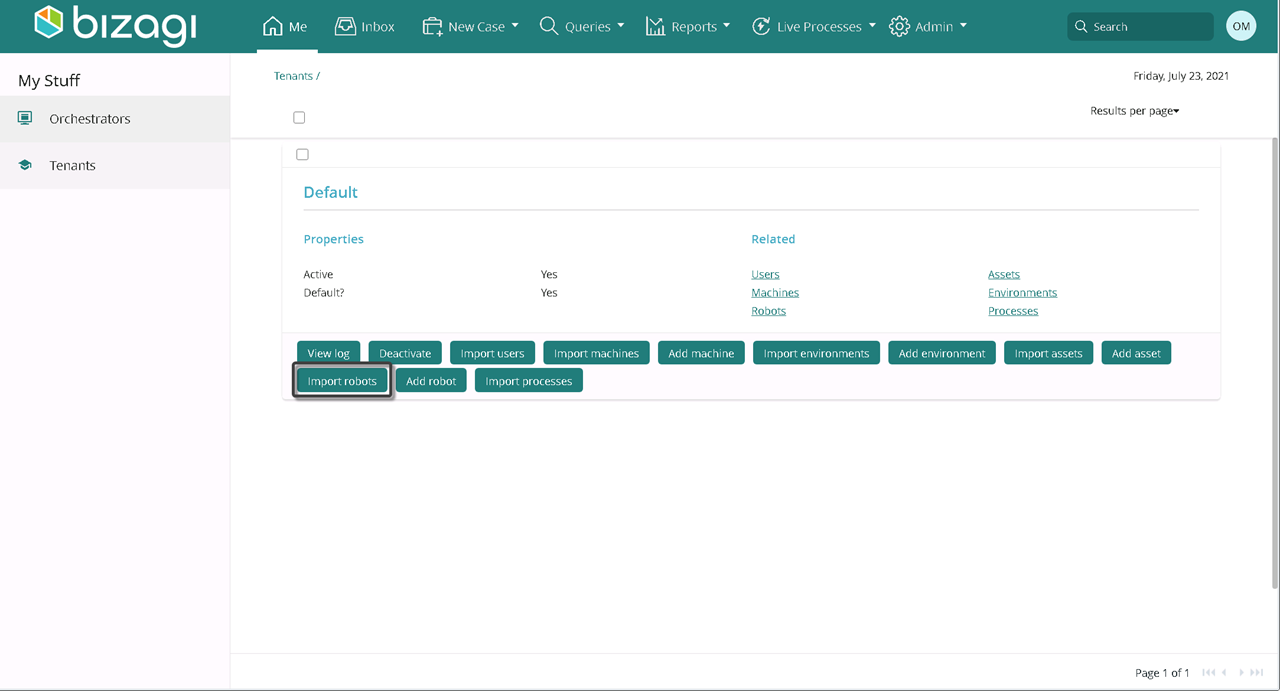
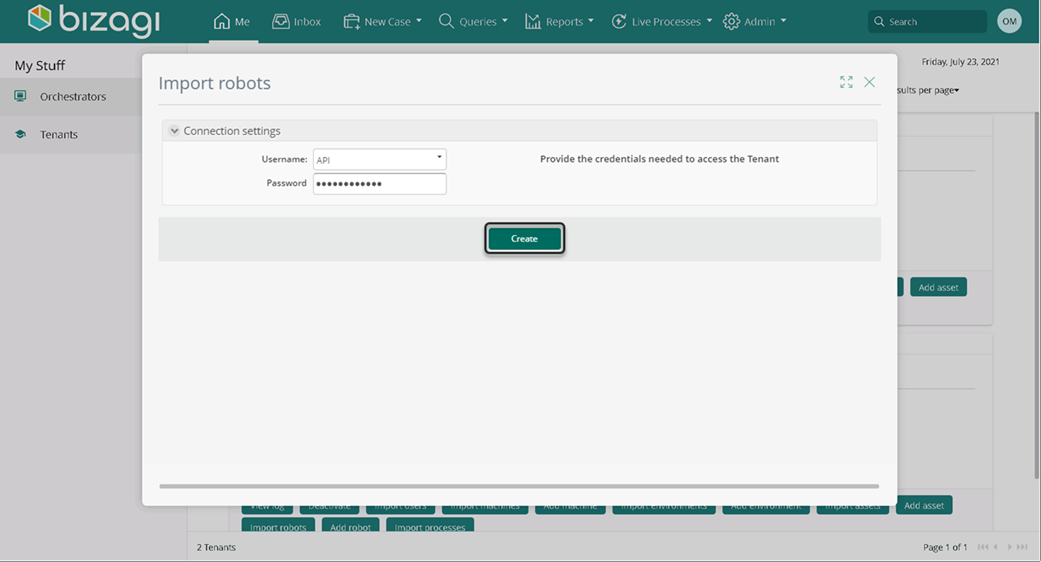
Select Import Robots.
Provide the credentials to access the Tenant. Click next.
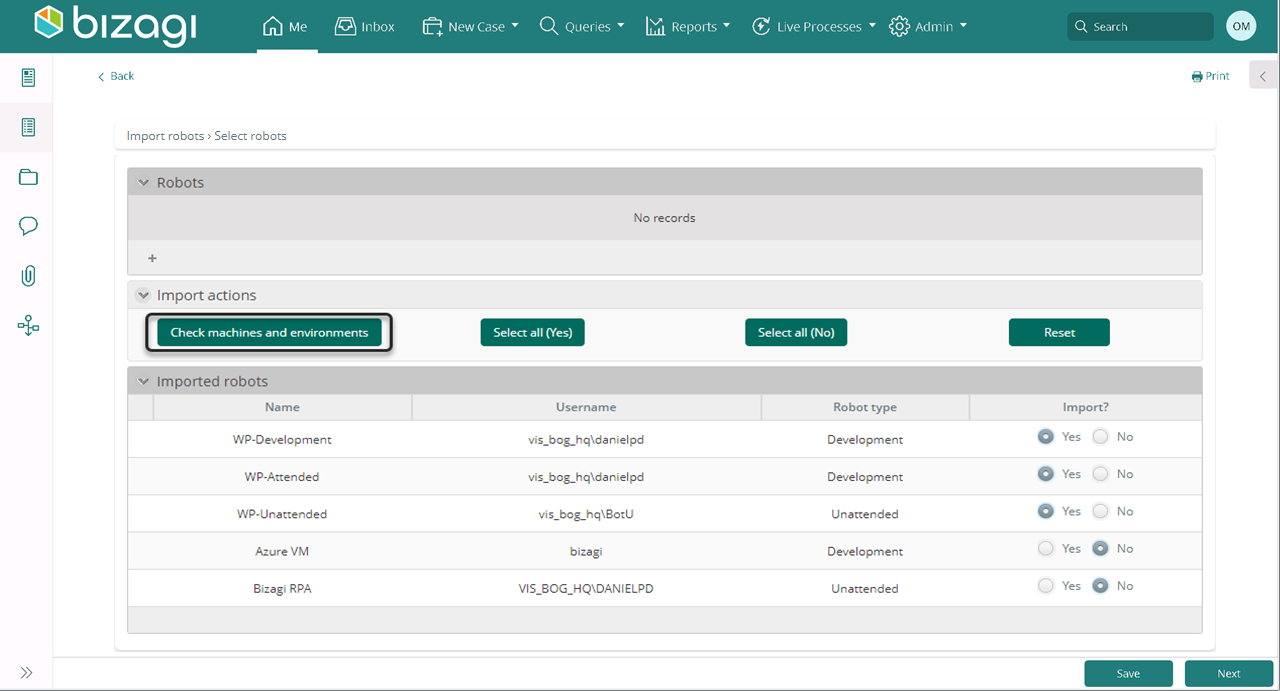
Select Yes on the Import? column of the robot you want to import. Otherwise select no. Check machines and environments regarding the robots to import, already exist. Select Check machines and environments.
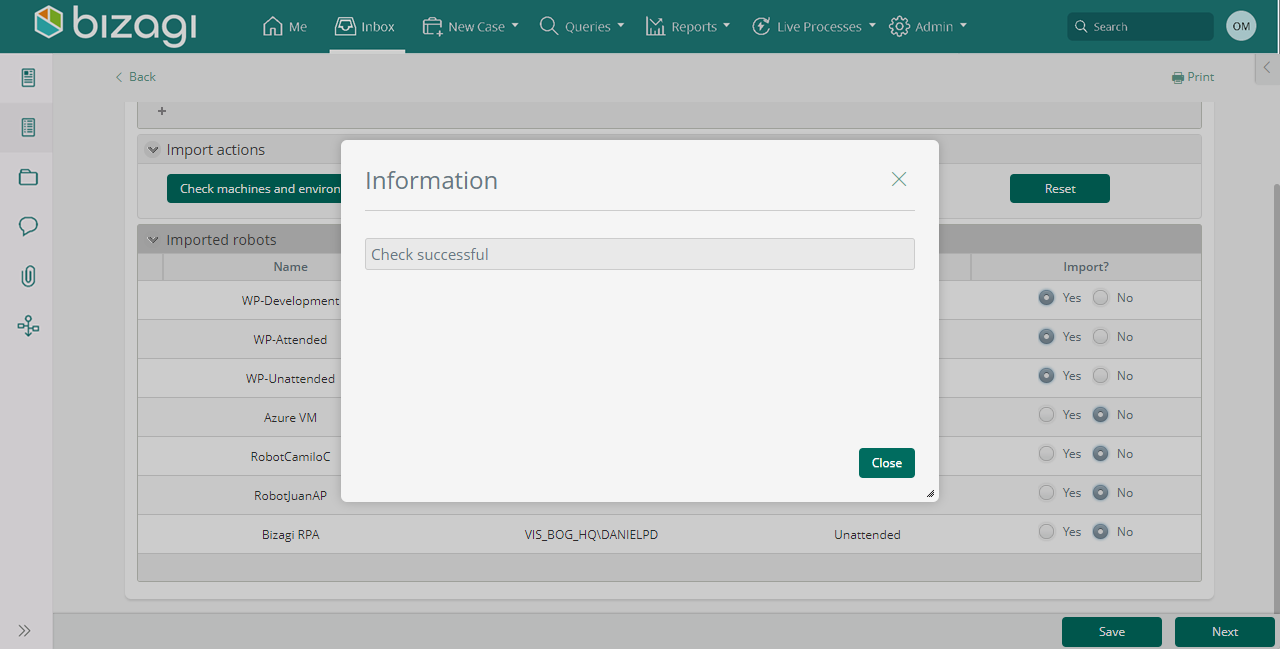
When succesful, the system returns a message of completion. Otherwise the system throws a validation message indicating the machines / environments which have not been imported to bizagi yet. Then click Next.
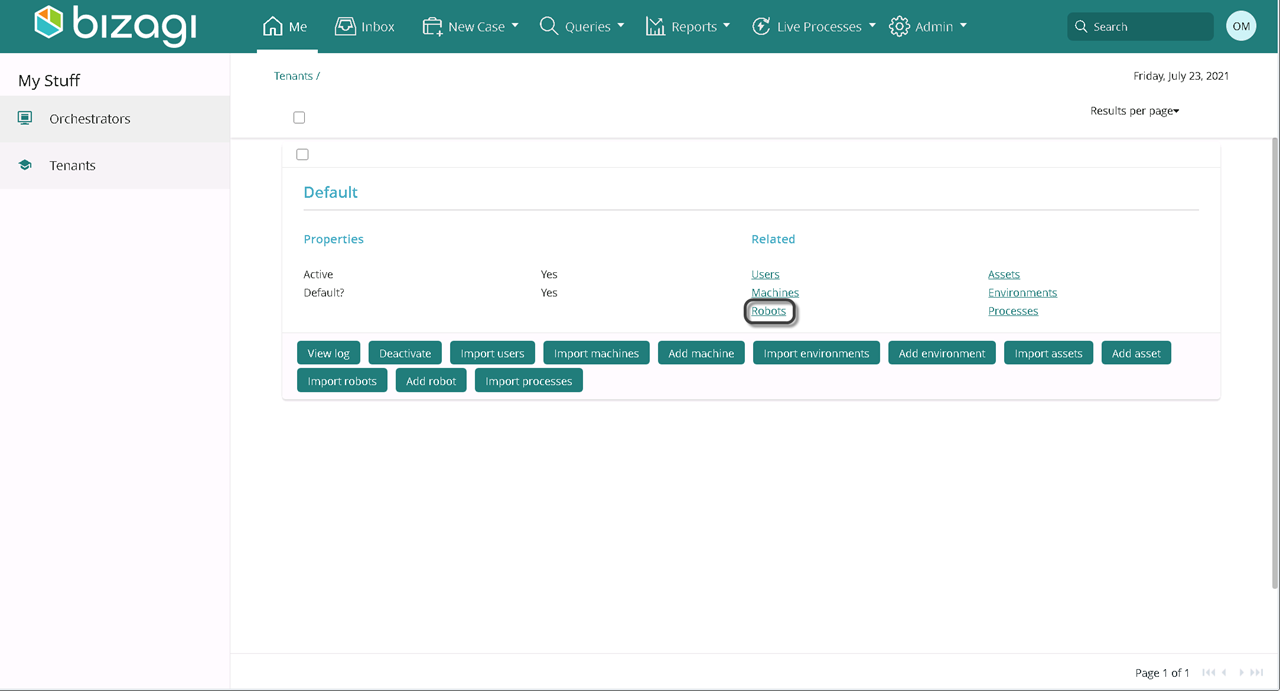
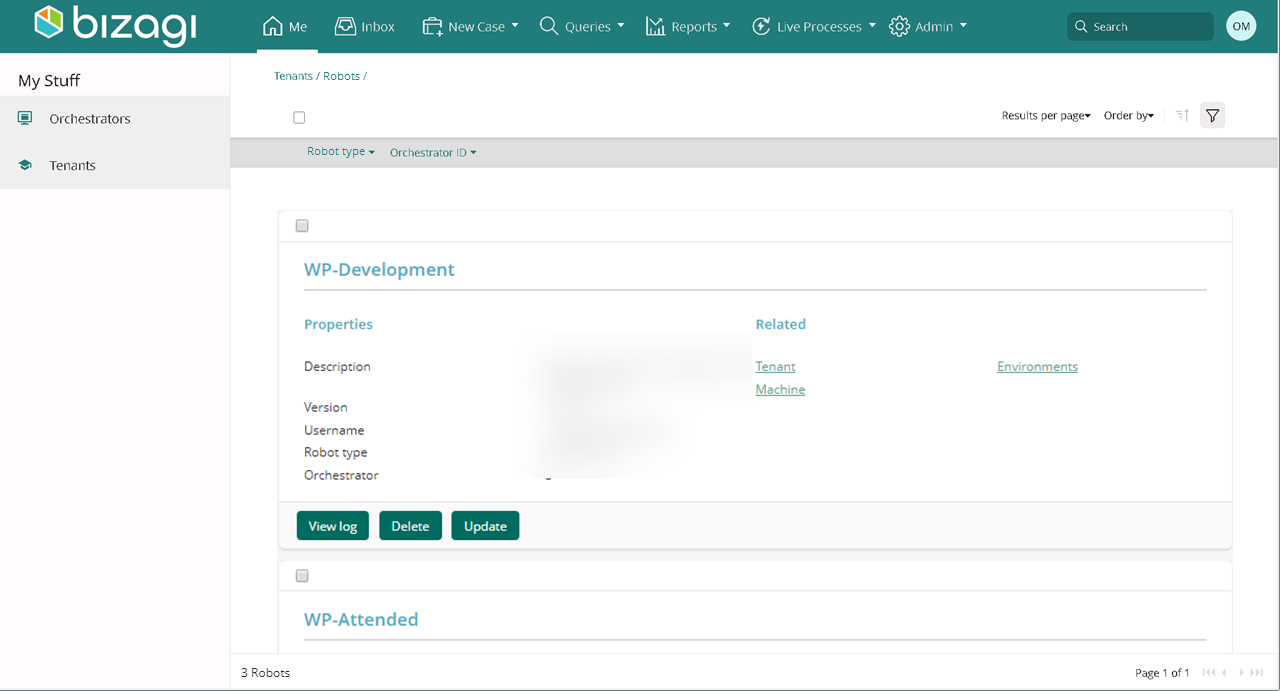
Access your tenant and select Robots.
Visualize the list of imported Robots.
Persona |
Description |
|---|---|
Import Processes to Bizagi. |
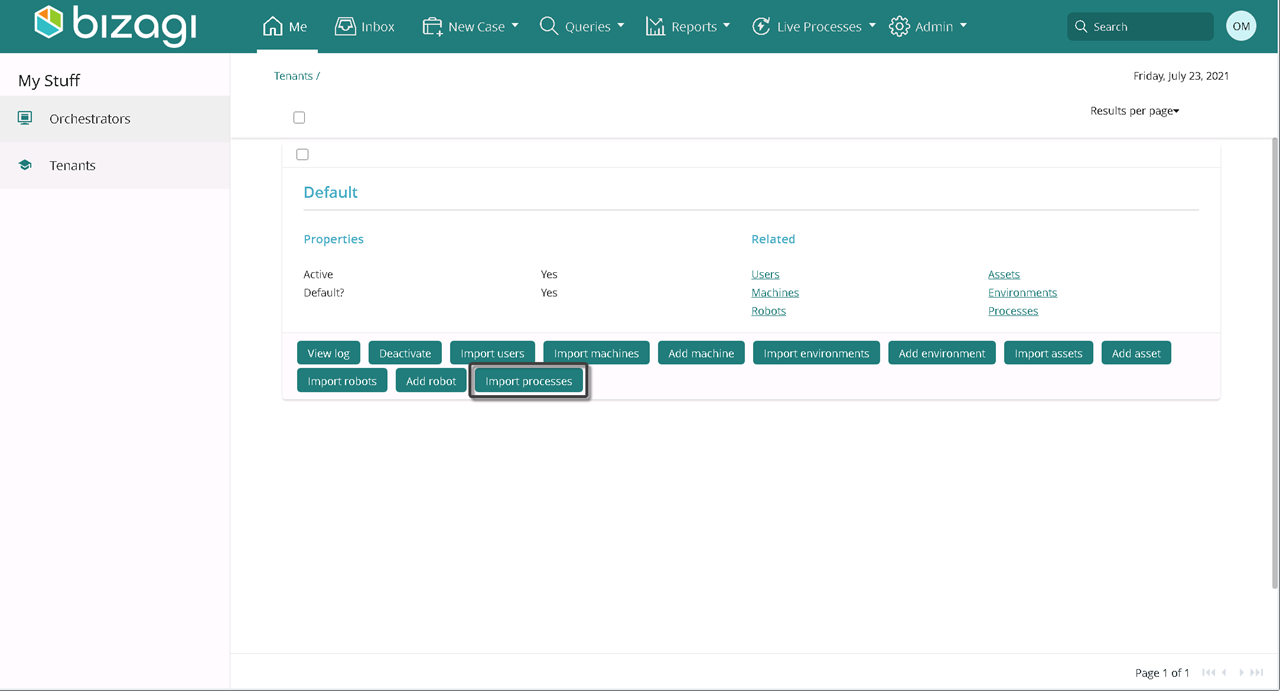
Access your tenant. On the Me menu, select Tenants.

Select import processes
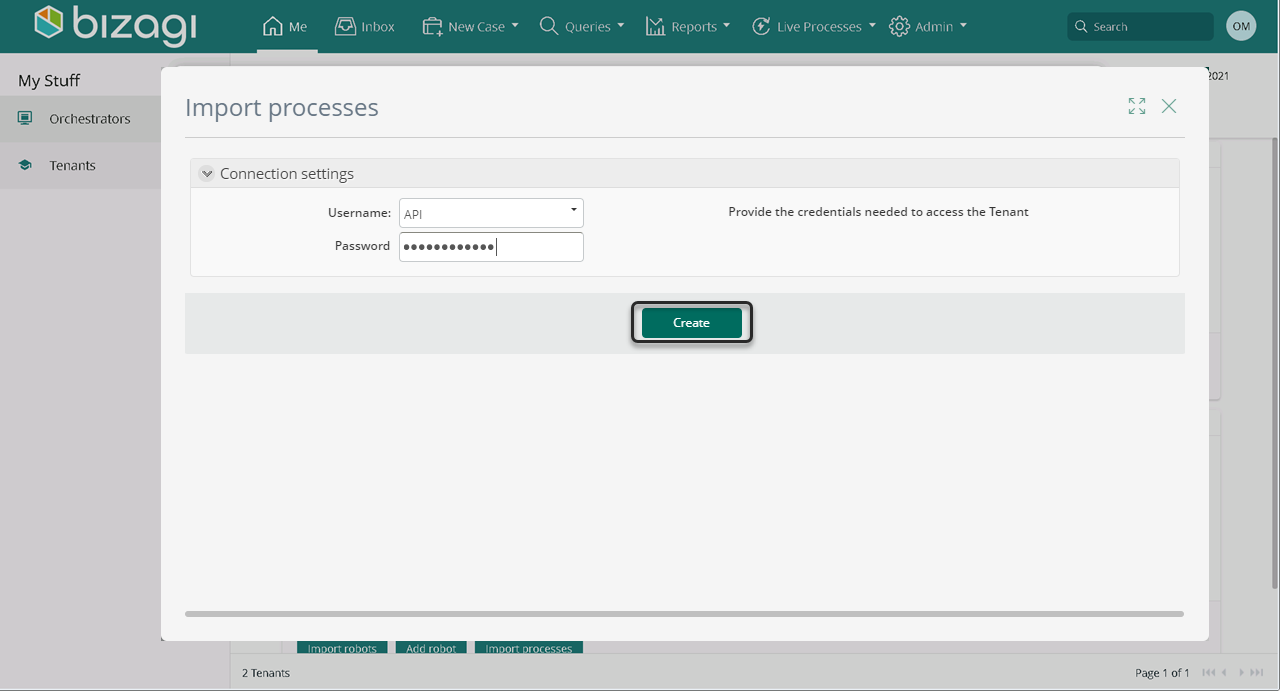
Provide the credentials to access the Tenant. Click Create.
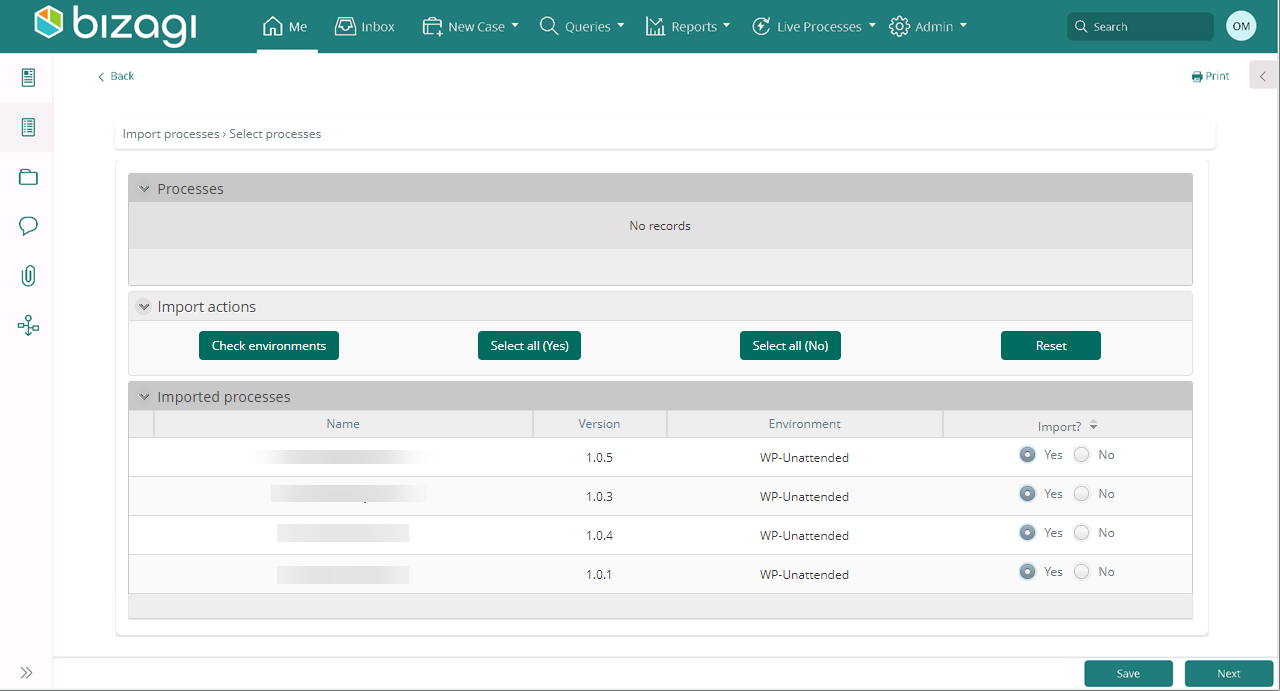
Select yes or no. Yes for the processes you want to import. Otherwise no. Then click next
Involved Persona |
Description |
|---|---|
The application manager creates an application using Bizagi Studio. Then sets the application credentials. |
Select the Me menu, then New application on the left.
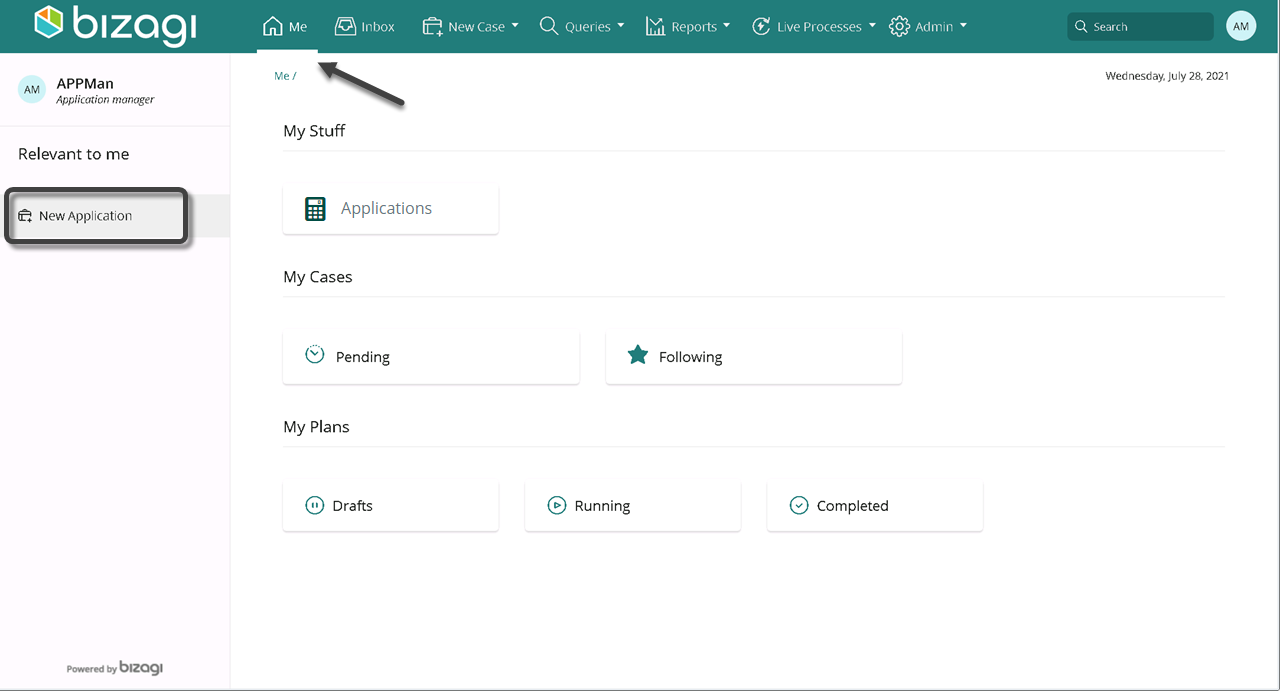
Fill in the corresponding fields:
Field |
Description |
|---|---|
Name |
Type the name of the application. |
Code |
Type a code regarding the application. |
Application Manager |
Select the user in charge of the application. |
Description |
Type a brief description of the application. |
Image |
Upload an image to identify the application. |
Select Next.
Access the Me menu, then click applications.
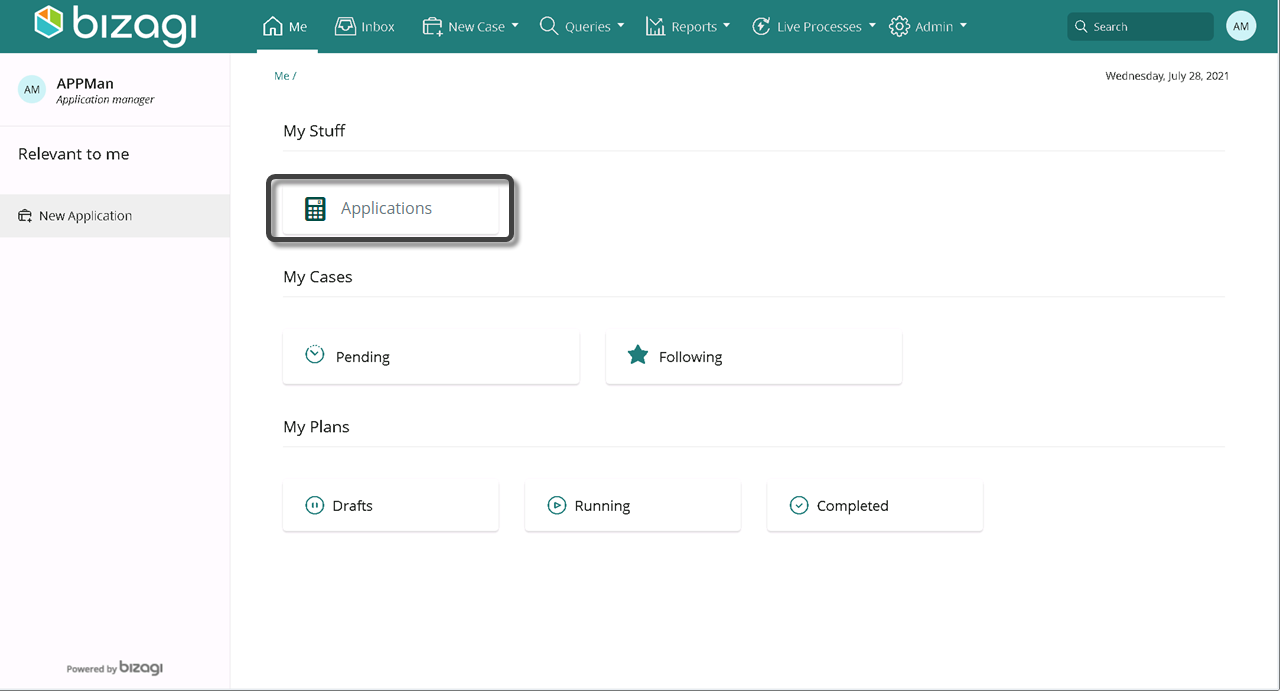
Find your applications listed.
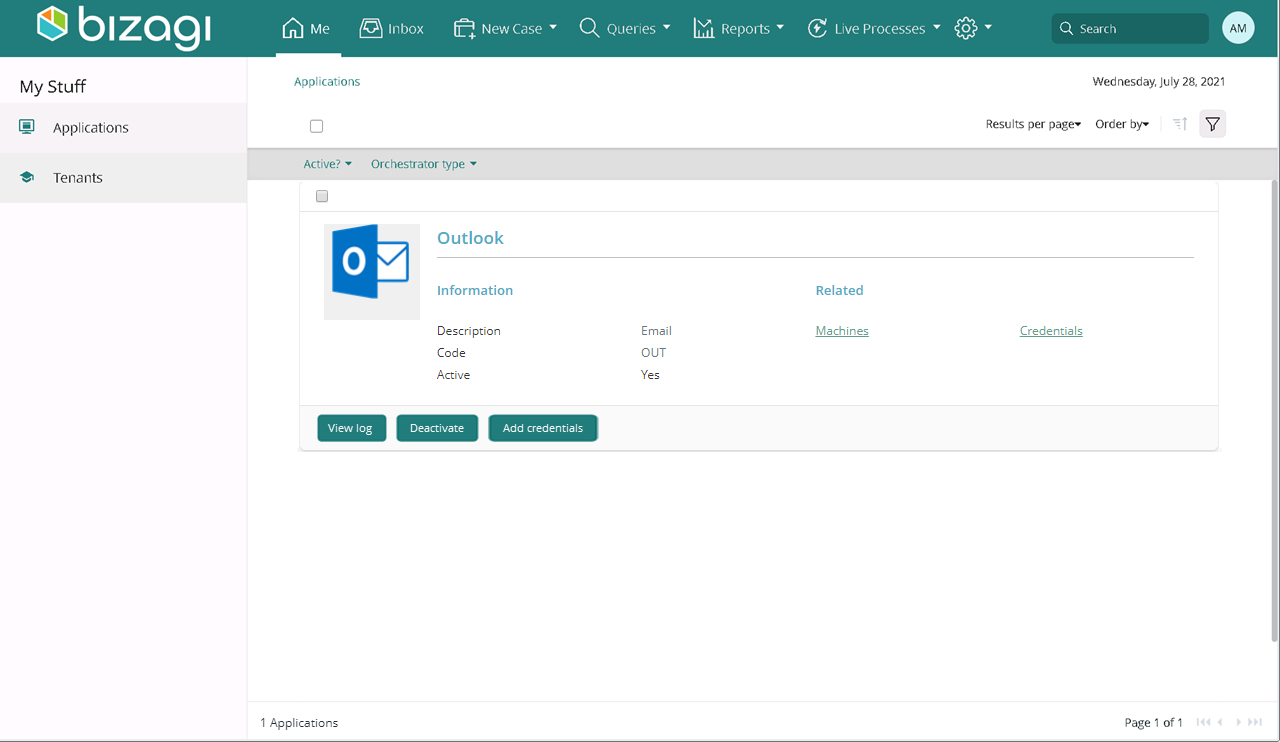
If required, set the application credentials. Select Add credentials

Field |
Description |
|---|---|
User name |
Type the name of the user in charge o the application or his/her Email. |
RPA asset manager |
Choose the user in charge of the application management from the drop-down list. |
Description |
Type a brief description of your application credentials. |
Persona |
Description |
|---|---|
Import Assets to Bizagi. Keep in mind you must have previously configured applications. |
Access your tenant. On the Me menu, select Tenants.

Select Import assets.
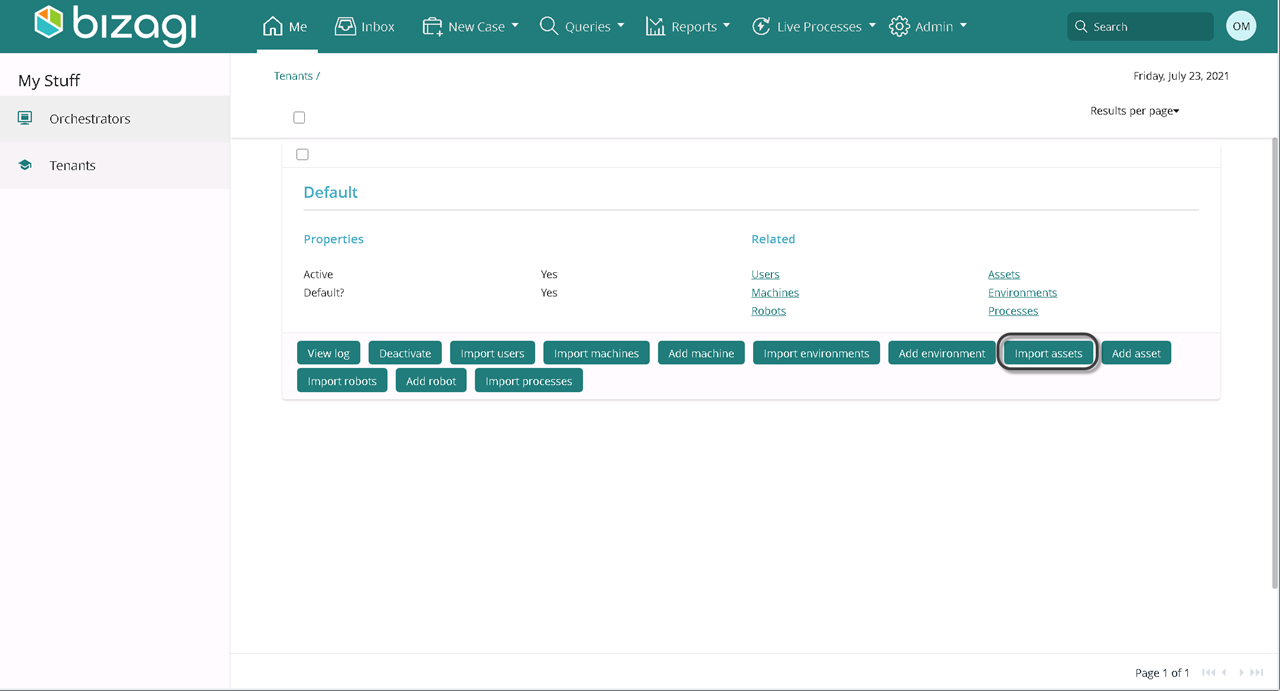
Provide the credentials to access the Tenant. Select Create.
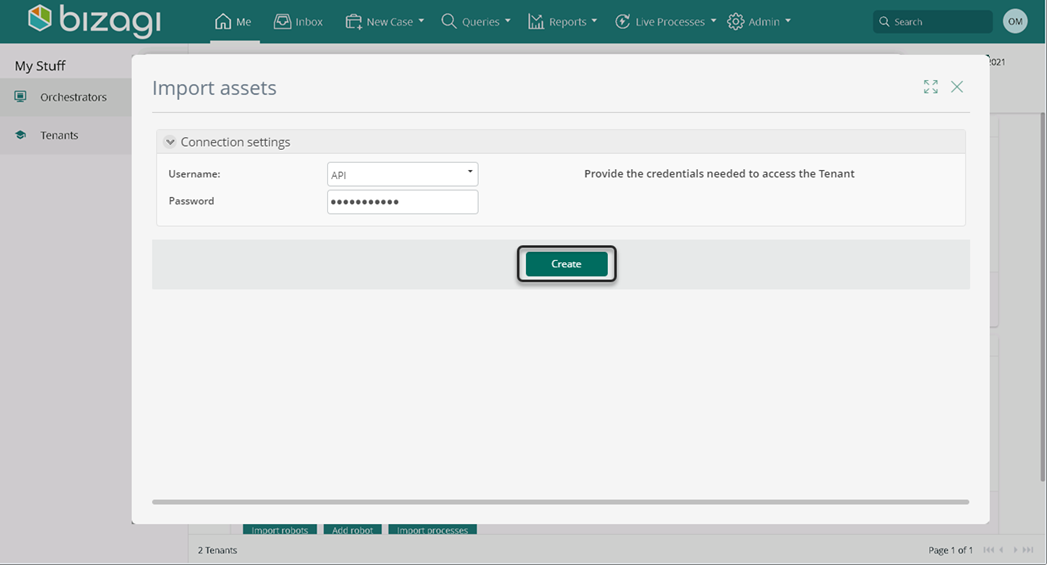
Fill in the fields with the corresponding information:
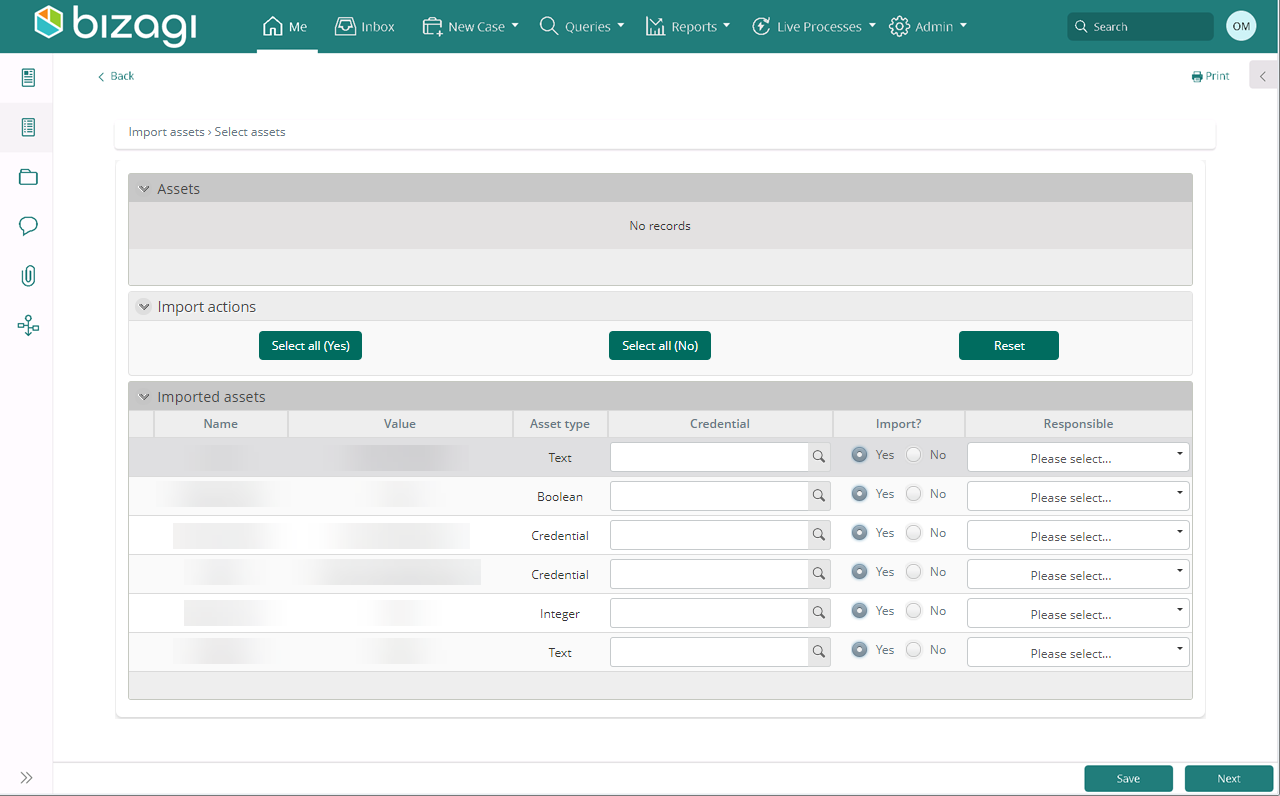
Field |
Description |
|---|---|
Credential |
Associate the credentials to the account by searching the application credential. |
Import? |
Select yes or no. Yes to import the asset, otherwise no. |
Responsible |
Select a responsible user to manage the asset. |
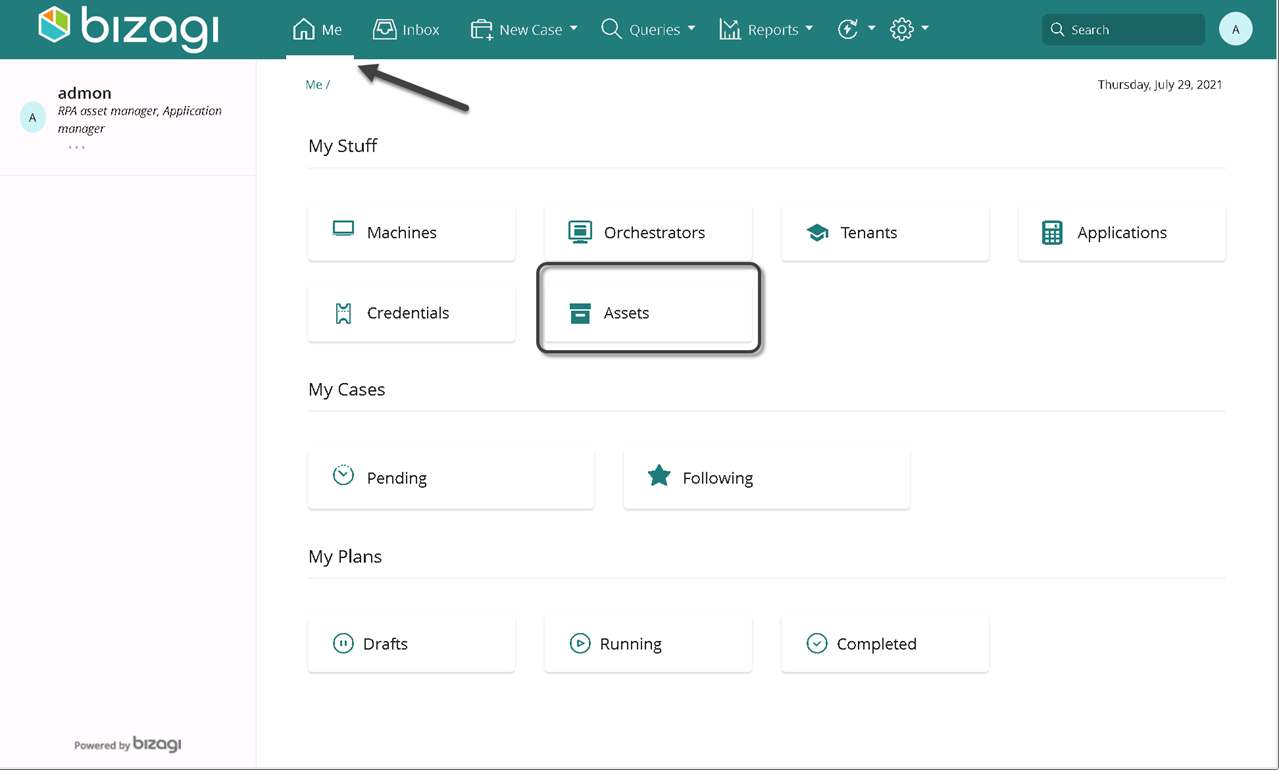
Select the Me menu, then select Assets
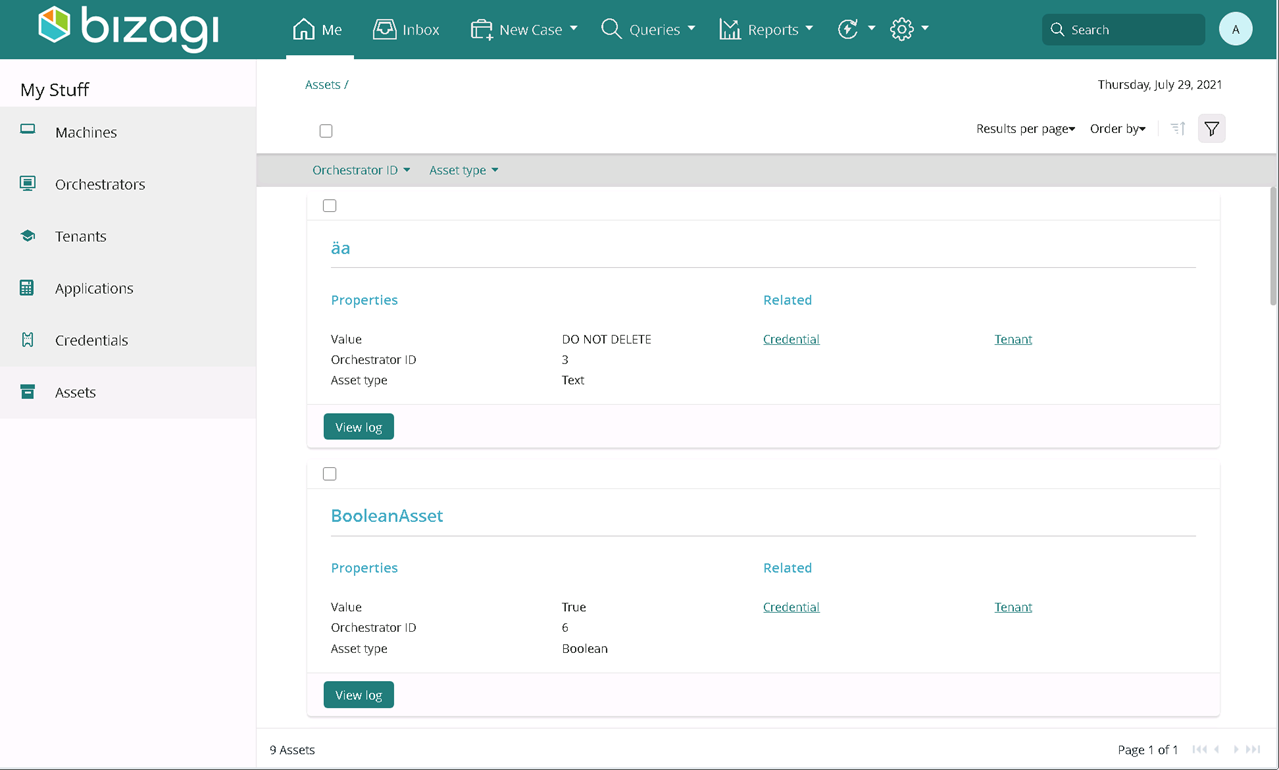
Visualize all your assets:
Last Updated 6/9/2023 3:28:50 AM