Overview
UiPath provides an API that exposes several actions that let you take control of your resources in the orchestrator. Bizagi has created in the RPA life cycle management project a connector that uses the UiPath API. This section explains how you configure your connector, and how you can use it in other projects.
|
You can use this connector with cloud-based licensed UiPath orchestrators. Trials, non-licensed and on-premises versions cannot be integrated using the connector of this project. |
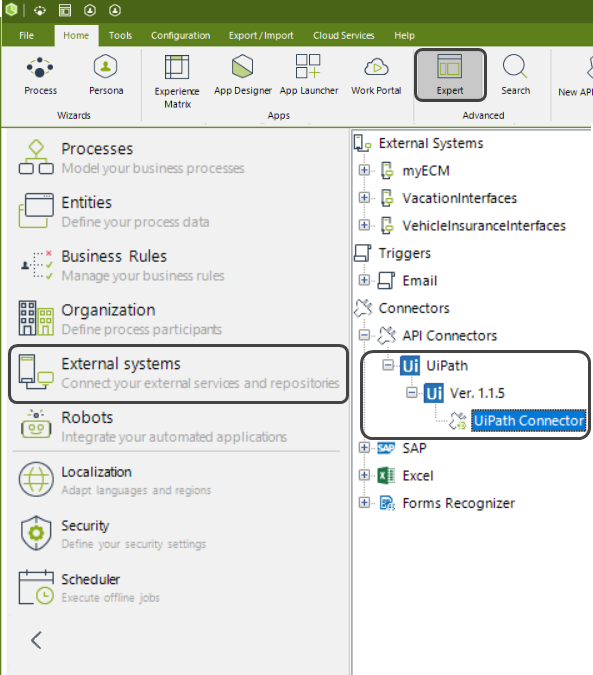
In Bizagi Studio, open the Expert view. Select the External Systems module to find a UiPath connector:
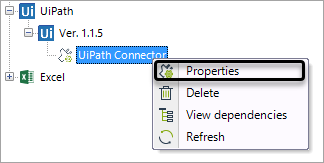
Right-click the connector to display the context menu and select Properties:
Here you can set the following global parameters:
•Orchestrator URL: URL of your UiPath orchestrator.
•Tenant: Name of the tenant where you have your UiPath infrastructure.
•User name: Name of the super admin user of the orchestrator.
•Password: Password of the orchestrator user.
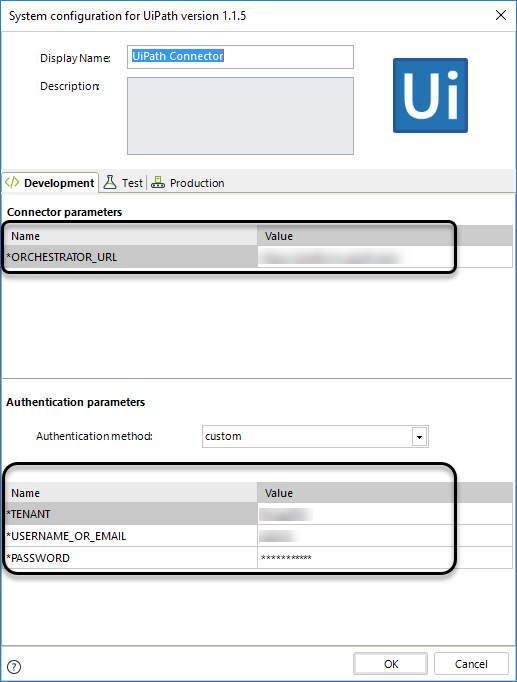
When you are ready, click OK to save your settings.
In processes that need to invoke the connector, there are services tasks with a configuration for the connector, depending on the method needed. For example, when you create a new machine, Bizagi uses this connector to register this machine in your UiPath orchestrator:
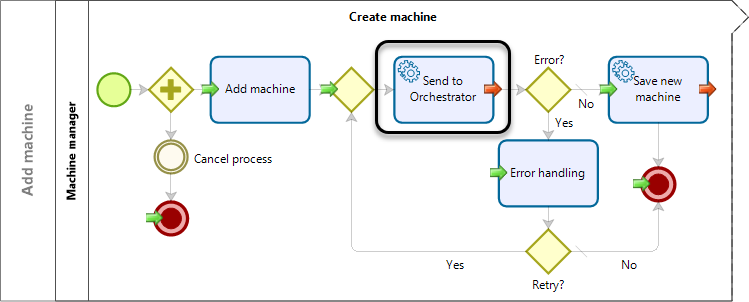
When you open the configuration of the service task, it invokes an action included in the connector. This example uses the Add machine action:
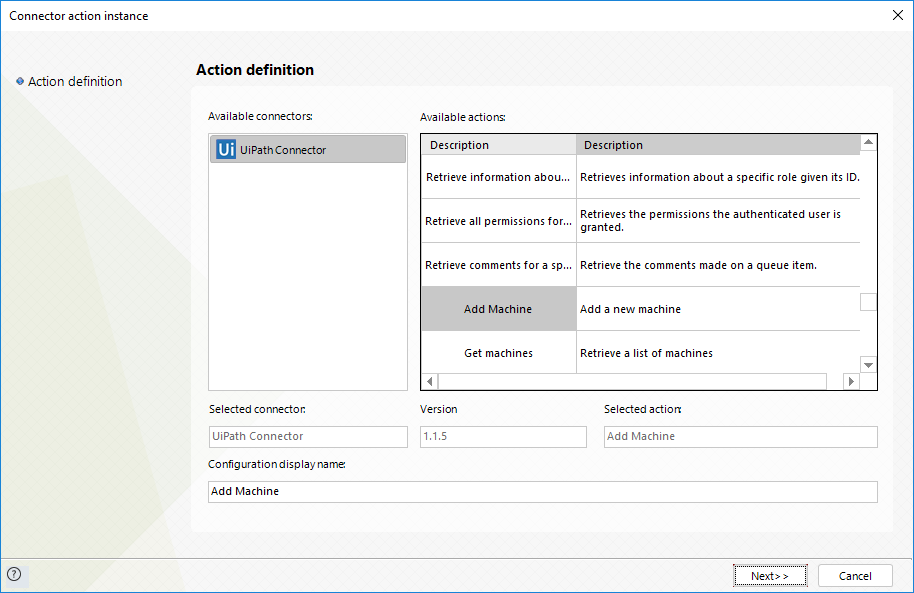
Each action has some inputs depending on the action type. However, each action also includes the orchestrator parameters:
•Orchestrator URL
•Tenant
•User name
•Password
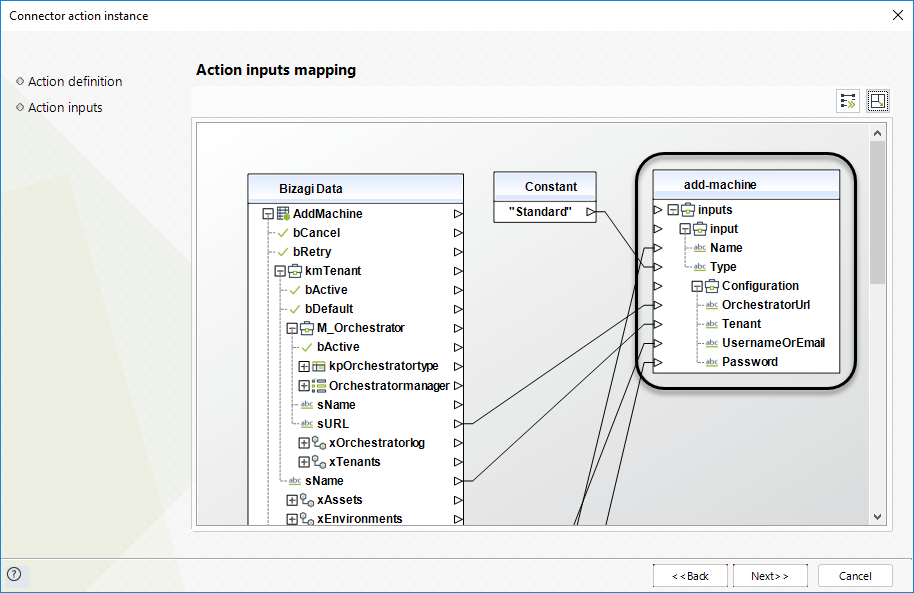
Because you can have multiple orchestrators or tenants in the same project, you can send these parameters in the invocation of the connector in each process. When you map these parameters in the action configuration, Bizagi overrides the global configuration of the connector.
|
When you use the connector, you can send it different orchestrator, tenant or user credentials than those in the global configuration. In that case, the information sent in the mapping configuration is considered before the global configuration. |
Connector Actions
The connector includes several actions that cover most of the methods exposed by the UiPath API. You can edit the connector if you need to make changes to its logic, or if you need to include more methods. See download the connector. The following table contains the most important methods used by the RPA life cycle management project:
Action |
Description |
|---|---|
Add environment |
Create a new environment in UiPath within the tenant of an orchestrator. |
Add machine |
Create a new machine in UiPath within the tenant of an orchestrator. |
Add robot to environment |
Associate an existing robot with an environment. You need to send the ID of the Robot. |
Create robot |
Create a new robot in UiPath |
Create an asset |
Register a new asset in UiPath that a robot can use. |
Delete asset |
Delete an existing asset. |
Delete environment |
Delete an existing environment. You need to send the ID of the environment. |
Delete machine |
Delete an existing machine. You need to send the ID of the machine. |
Delete robot |
Delete an existing robot. You need to send the ID of the robot. |
Get environments |
Get all the environments associated with a tenant in a UiPath orchestrator. |
Get machines |
Get all the machines in the orchestrator, or based on filter conditions. For example, get information about a machine with a specific name. |
Upload package |
Uploads the development package created in UIPath studio in an orchestrator. |
If you want to make changes to the connector, or see how it is built, you can see it using Bizagi's Connector Editor. To do this, select the connector's version and click the Edit button:
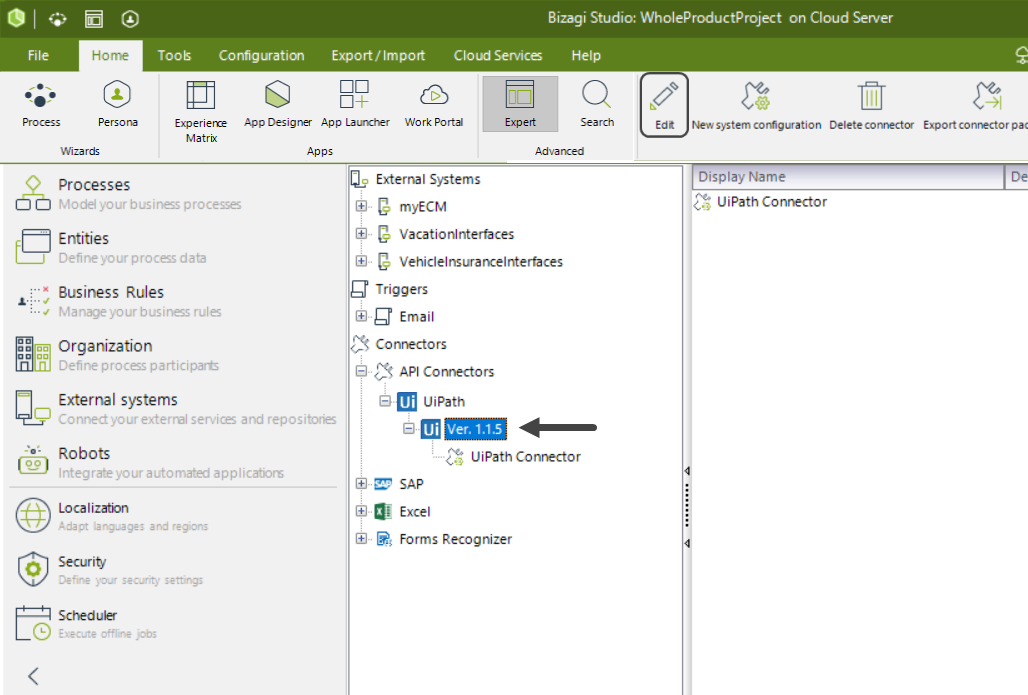
This will open the Connector Editor's window, where you can review each method code and configuration:
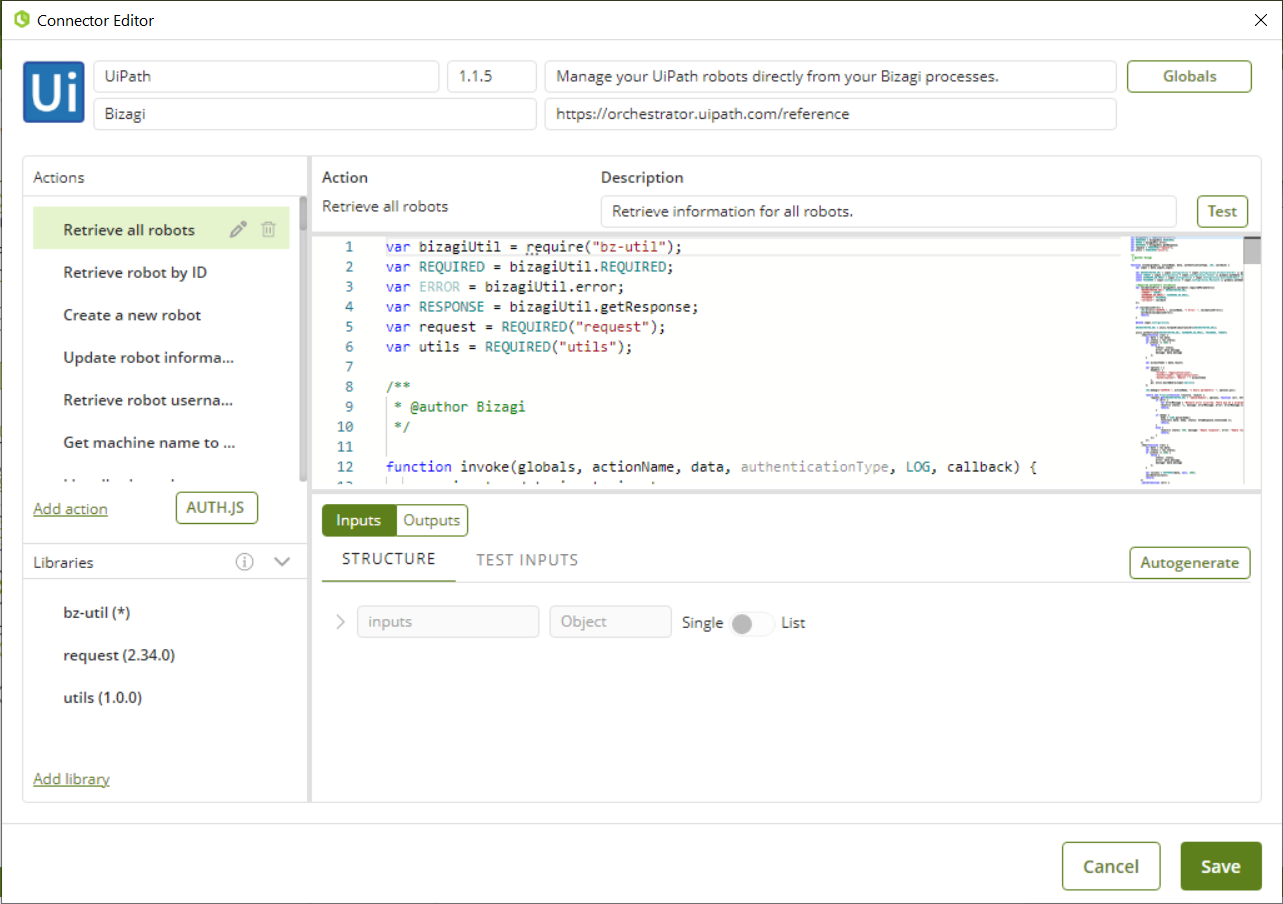
Last Updated 2/1/2023 4:21:41 PM