Overview
This article presents tips and tricks that will aid in improving the look and feel of your diagrams.
Diagramming and naming recommendations
It is important that Processes are uniformly described, for the sake of being more easily understood by users.
Therefore, special care must be taken in the naming and layout of all diagram elements.
The following are best practice recommendations that will make processes more readable and organized.
•All words should be capitalized to aid readability.
•Always name Tasks using an infinitive verb, to denote an action being executed e.g.: Create request, Authorize request, Deliver package.
•Name Processes and Sub-processes indicating their main purpose.
•Always attempt to lay out the Process model in a left to right direction, as it is an intuitive design choice for left-to-right readers.
•Name Sequence Flows that follow after a decision Gateway. For example, if a gateway is called "Request authorized?" then the sequence flows are named "Yes" and "No" respectively.
•Name non-decision Gateways as well. For example, a Process that contains three parallel Gateways can be named "Parallel1", "Parallel2", "Parallel3" respectively. This will allow you to easily distinguish one from another in generated documents.
Move and resize text
You can move and resize text in the following elements: Sequence Flows, Events, Sub-processes and Gateways.
To move any of the mentioned text, select and drag-and-drop it where you desire.
To resize the text, select the text and drag the border of the frame.

Reset text position
When the text of an element has been repositioned, you can revert it back to its original position by selecting the Reset text position option on either the element, or the text itself.
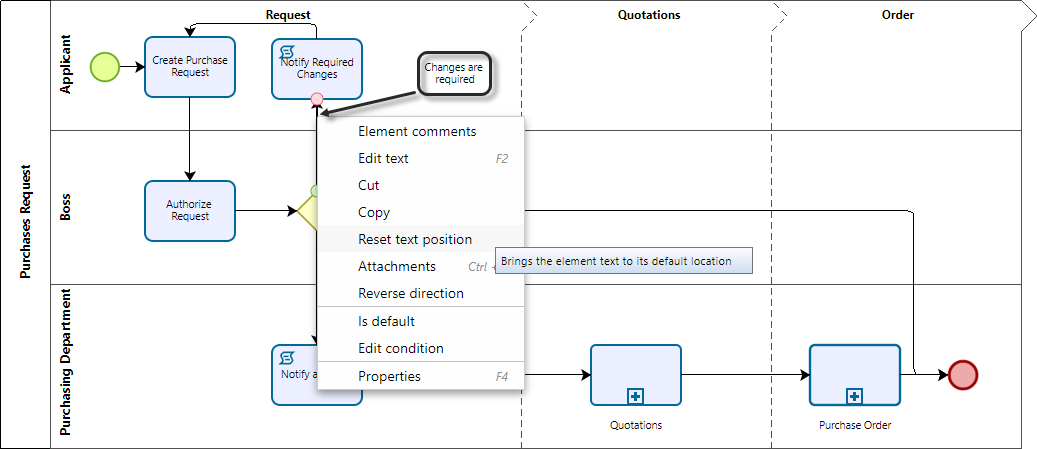
In the following image the Changes required caption was moved too far away from the Sequence Flow it references.
To revert to its original position, right-click the Sequence Flow and select Reset text position.
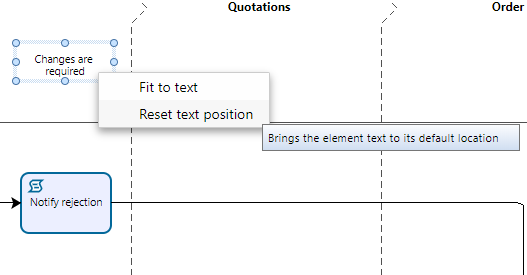
Note that this option is available at the text (caption) as well:
Change text background color
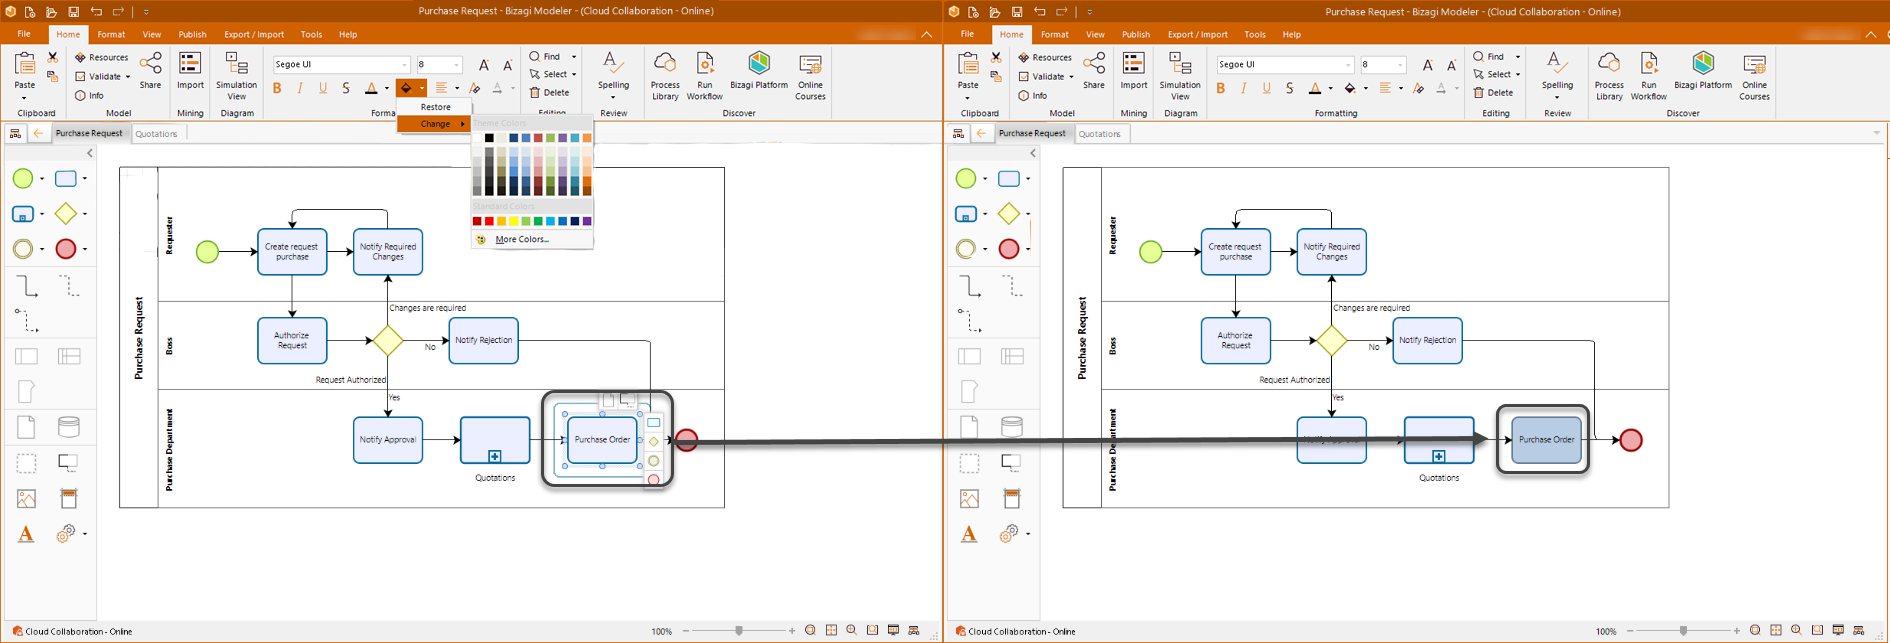
When designing your diagrams, you can find a situation where elements such as process flows overlap its text fields and its not desirable to visualize it. You can give the text field background a color for it to be visible and to enhance the diagram look and feel. To do so, select a text field of the diagram and from the ribbon click the Home tab, then on the Formatting options select Color and the option change. A colors palette appears, select your preferred one.
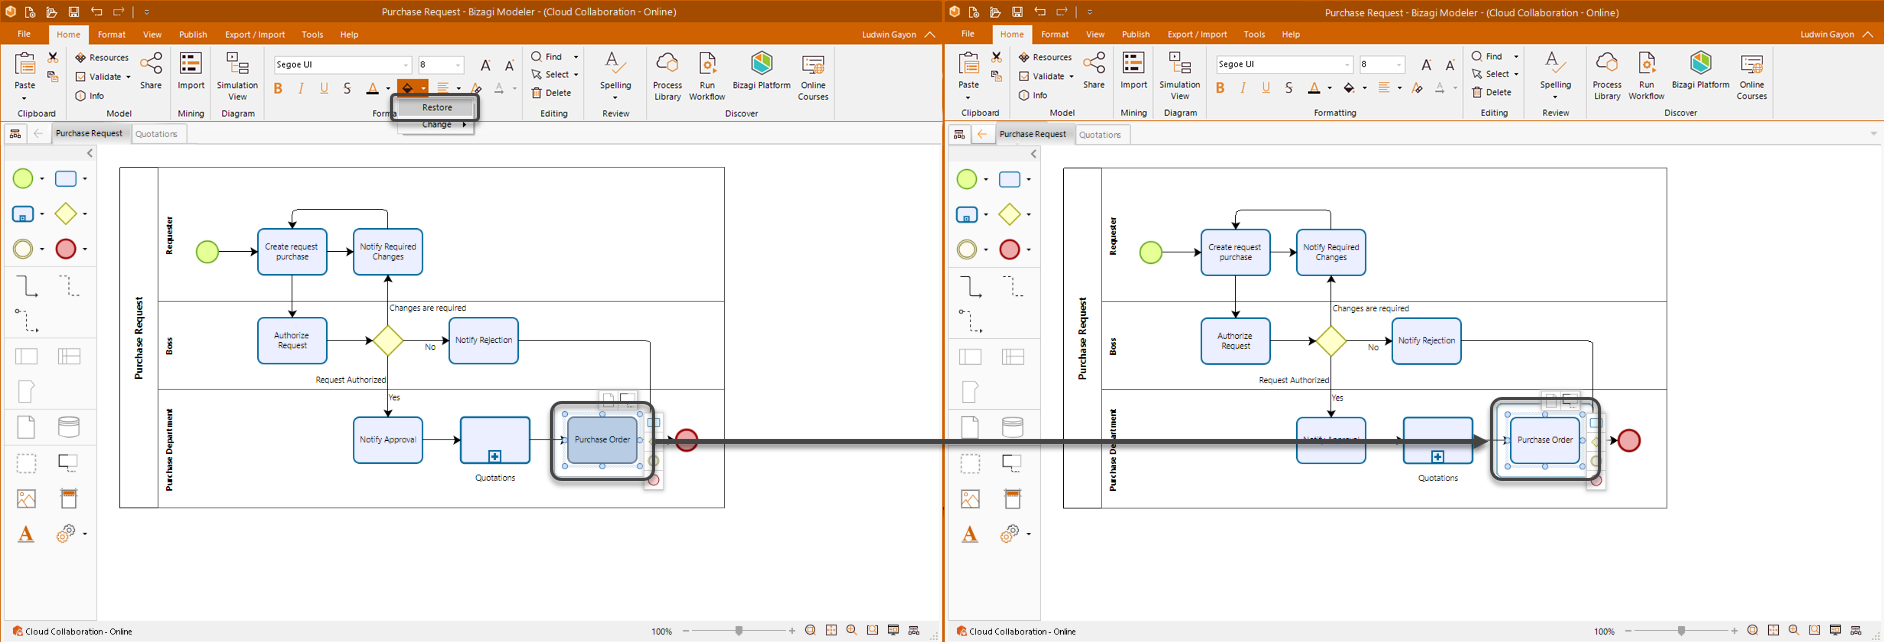
If you want to restore the text field background color to the default formatting, repeat the procedure described above but when selecting the Color option choose restore instead.
Fit to text
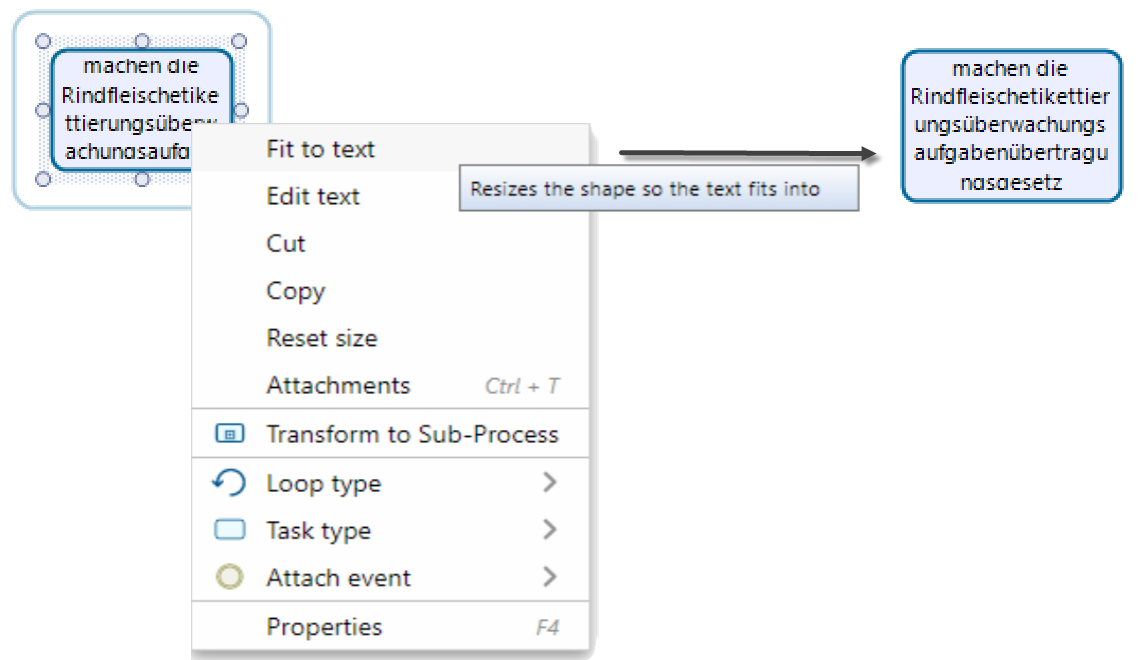
In the course of modeling your diagrams, you may come across a situation where the element is much bigger than the text within it and you need to make it fit the text. A similar situation may arise where the horizontal space of the element is smaller than the text within it, causing the text outside the object boundary to be cut off. You can manually drag one of the element's corners to size or make use of Bizagi's Fit to text design shortcut.
To automatically resize the object to fit the text, use the Fit to text option right clicking the element you want to resize.


|
The maximum number of characters for tasks' text is one hundred. |
Reset to original size
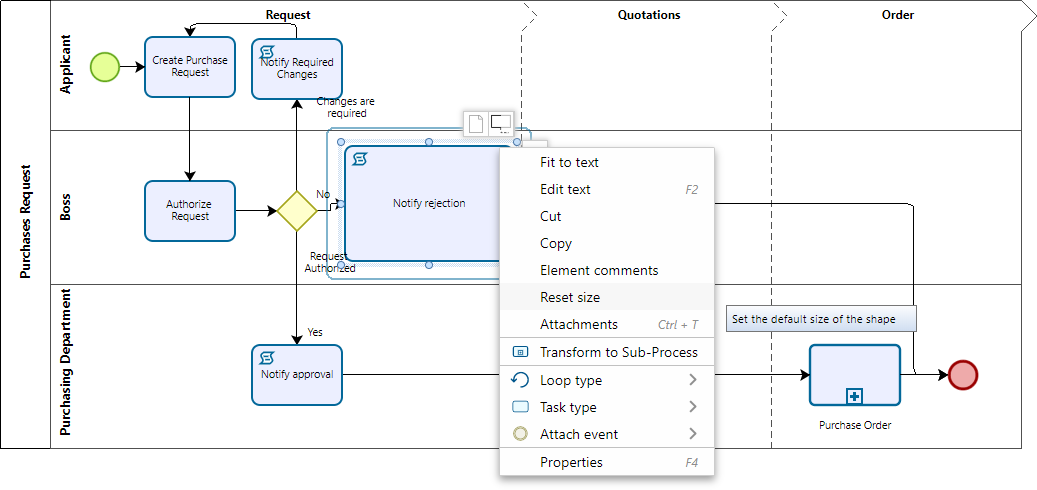
When the size of an element has been changed (either enlarged or shrunk), it can be reverted to its original size by selecting the Reset size option on the element.
In the following image, the Notify Rejection element was enlarged.
To revert to its original size, right-click the element and select Reset size.
Using the grid
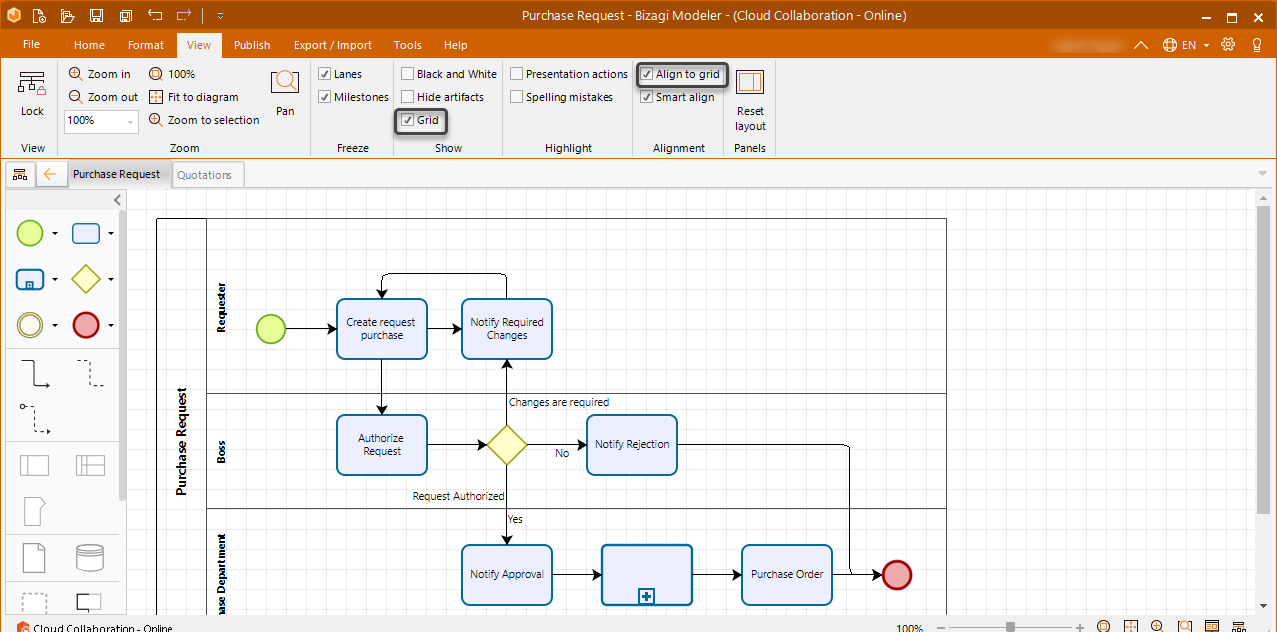
We recommend always showing the grid to facilitate the alignment of elements.
If you select the Align to Grid option, the Modeler will auto-align elements to the grid. Essentially, once the element is dropped, it snaps to the nearest intersection of lines in the grid.
To utilize this option, in the Show group of the View tab, check both the Grid and in the in the Alignment group, Align to grid boxes.
Aligning elements
Align all elements both vertically and horizontally, to present a structured layout of your Process.
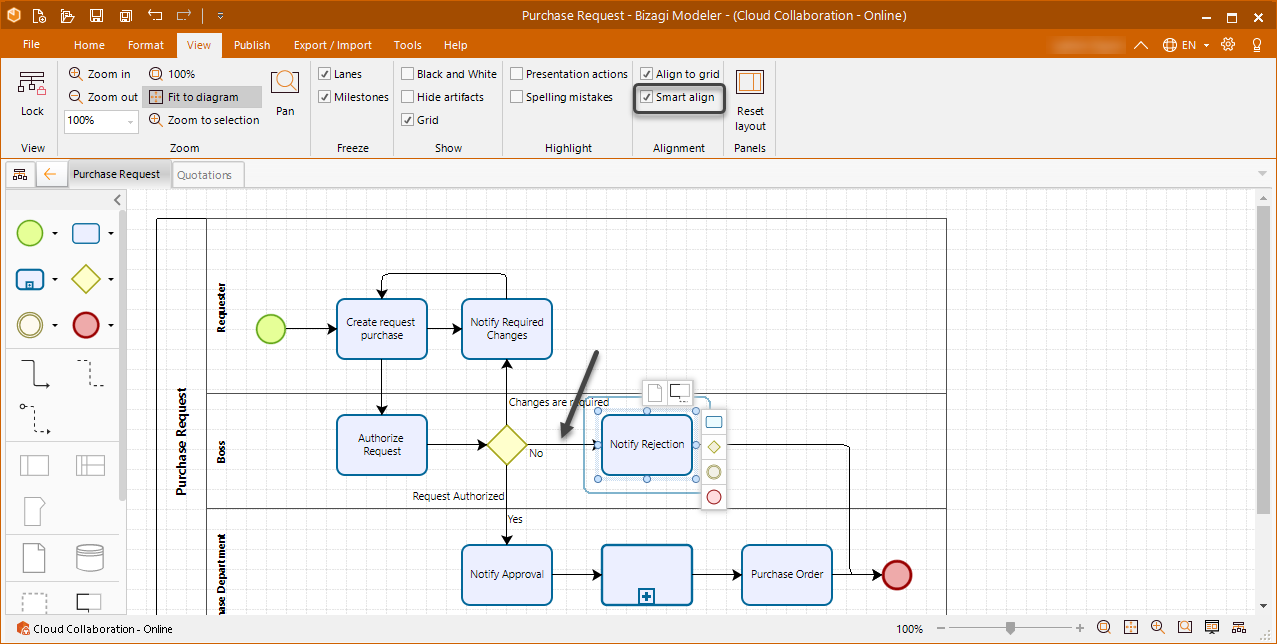
Bizagi offers a functionality called Smart align whereby the sequence flows will be automatically aligned to each other. To utilize this functionality select Smart align in the Alignment group on the View tab.
The following image shows the process without Smart Align selected.
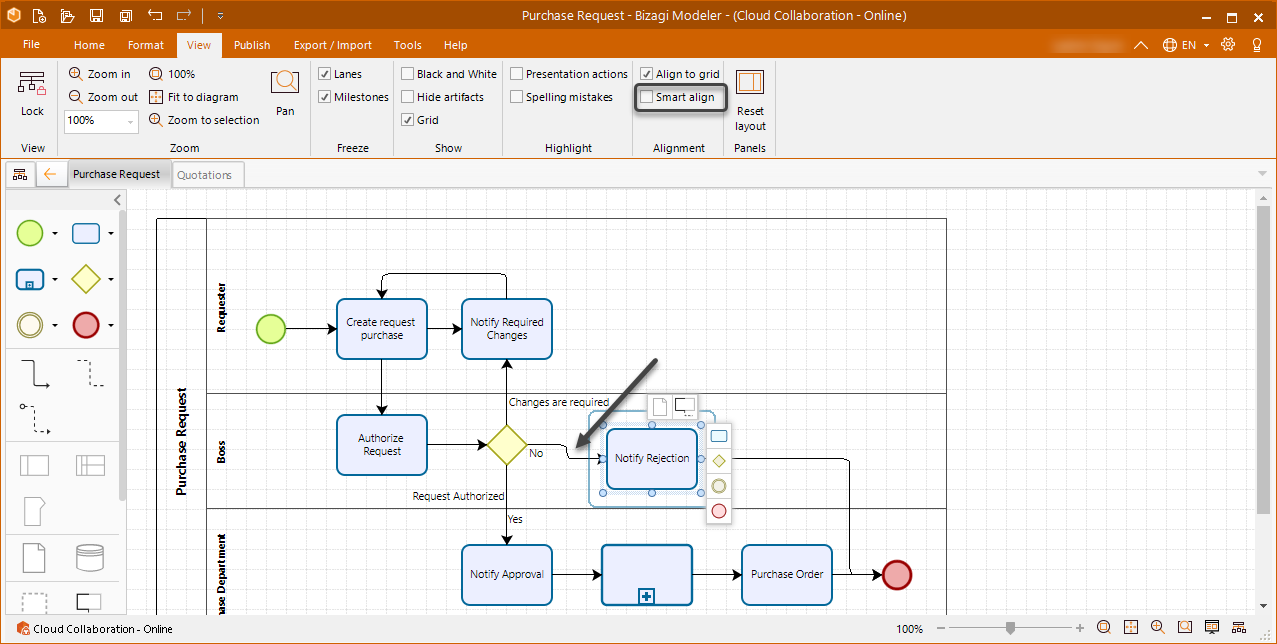
The following image shows the process with Smart Align selected.
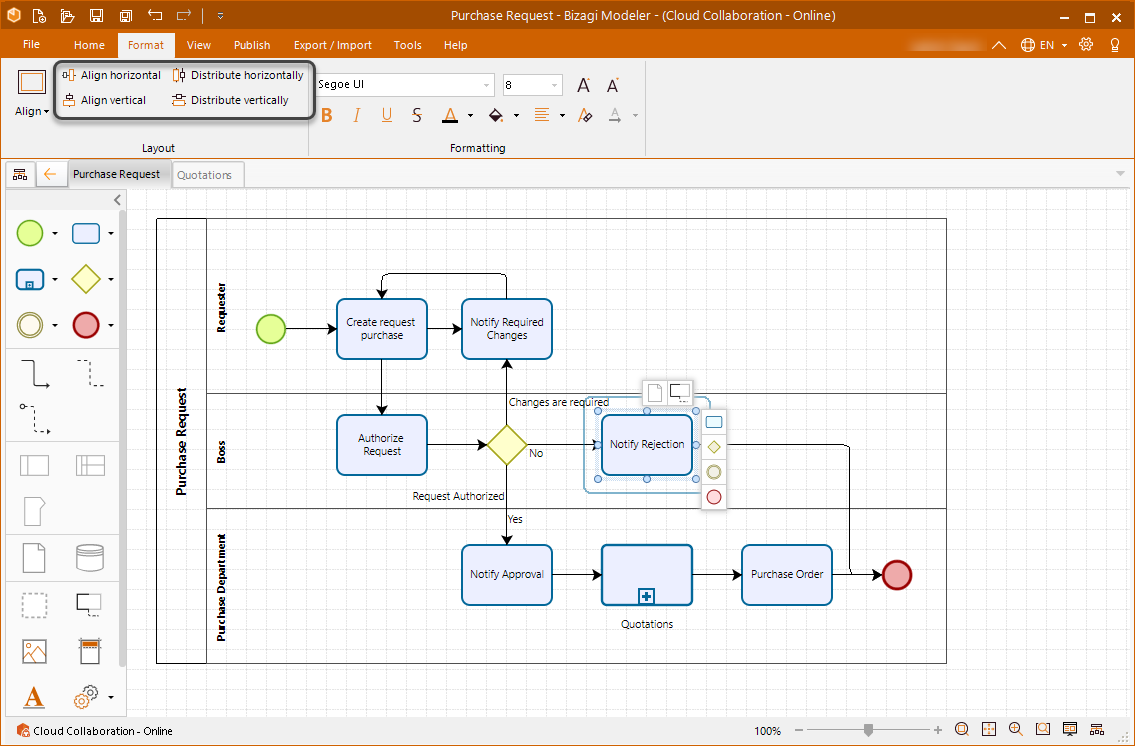
Rather than align all Sequence Flows of a diagram, you can also align selected diagram elements to each other.
Click each elements for alignment while holding down the Shift key. In the Layout group of the Format tab, click Align Horizontal, Align Vertical, Distribute horizontally or Distribute vertically according to your design requirement.
Connecting sequence flows
To connect a Sequence Flow, drag the red circle (which coincidentally is the arrow head) onto the diagram element you want to connect to.
Hover the pointer over the element until the green circle appears indicating that it will connect correctly.

Last Updated 1/7/2022 8:56:58 AM