In an organization it is common practice to use employee classification for the purpose of work allocation or permission settings. Bizagi allows you to obtain a list of users classified by categories of Position, Role and Skill.
•Users with a specific Position
You can obtain a list of the users who hold a certain Position within the organization using the getUsersForPosition function.
This function will return a list of user's identifiers that comply with the Position.
The syntax of the function is:
CHelper.getUsersForPosition(posName)
The parameter is the name of the Position.
•Users with a specific Role
You can obtain a list of the users who hold a certain Role within the organization using the getUsersForRole function.
This function will return a list of user identifiers that comply with the Role.
The syntax of the function is:
CHelper.getUsersForRole(roleName)
The parameter is the name of the Role.
•Users with a specified Skill
You can obtain a list of the users who have a certain Skill within the organization using the getUsersForSkill function.
This function will return a list of user's identifiers that comply with the Skill.
The syntax of the function is:
CHelper.getUsersForSkill(skillName)
The parameter is the name of the Skill.
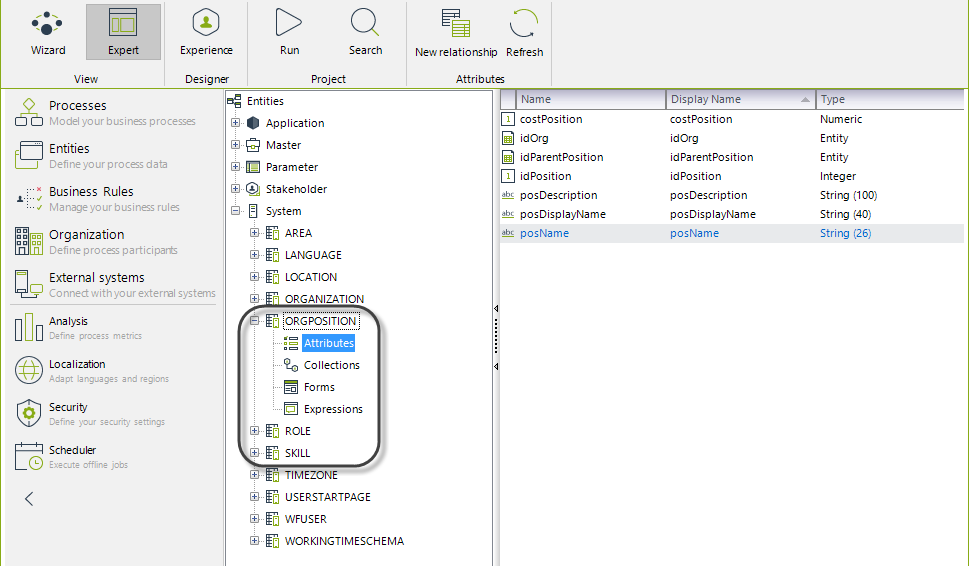
To obtain the desired Position, Skill or Role name, navigate within the expert view to the attributes node of the table (orgposition, role or skill) found in the System node of the Entities tab. Bear in mind that the Name column is the one called posName, roleName, skillName; contrary to Display Name.
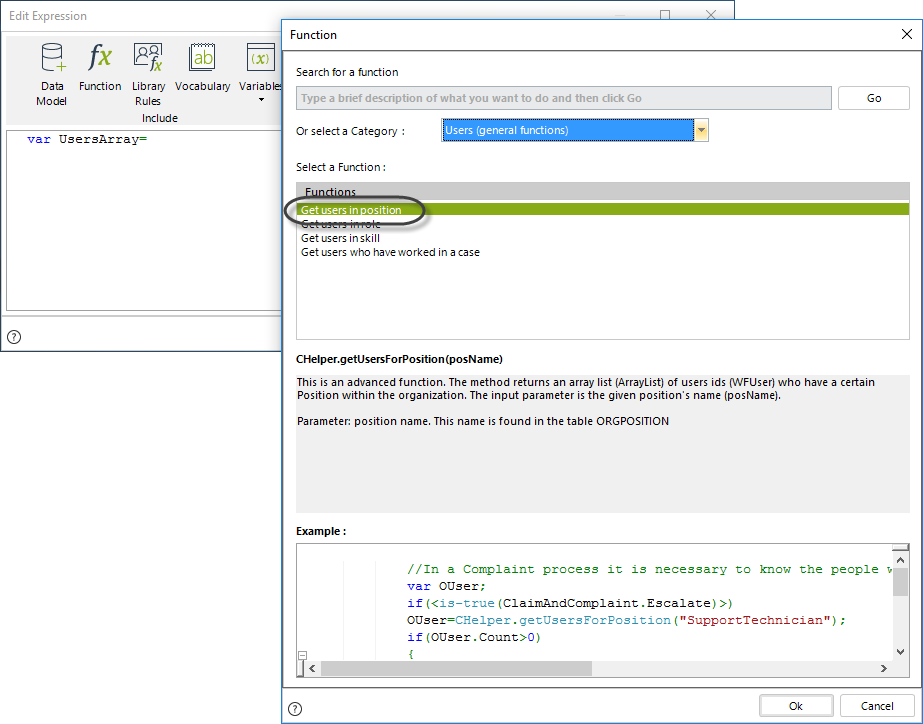
To use any of the functions mentioned above, in the Expression editor go to the Functions option and select the Users category.
Click on the desired function to include it in the code.
Examples
The following examples will illustrate how to use these functions.
•Get users with a specific Position
•Get users with a specific Role
•Get users with a specific Skill
Get users with a specific Position
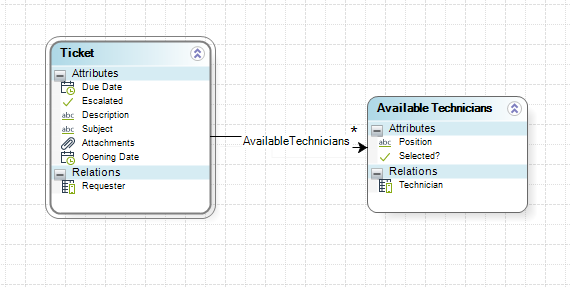
Suppose in a Help Desk Process the support person who receives a Ticket must assign it to one of the available technicians. The case references a collection called Available Technicians that contains the users who hold a Support Technician Position.
To fill the collection we need to obtain the qualified technicians from the WFUser Entity, based on their Positions.
The GetUsersForPosition function will return all users that match the position provided in the parameter of the invocation, which is received as a String.
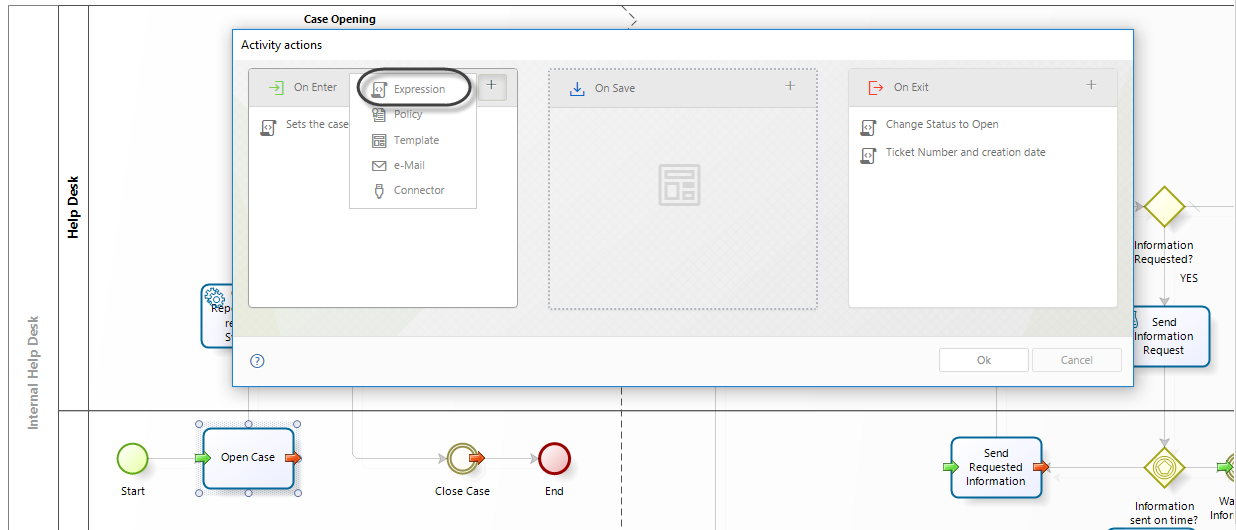
1. Go to the fourth step of the Bizagi Process Wizard (Business Rules) and select Activity Actions.
Click the first Task of the Process and create an On Enter Expression.
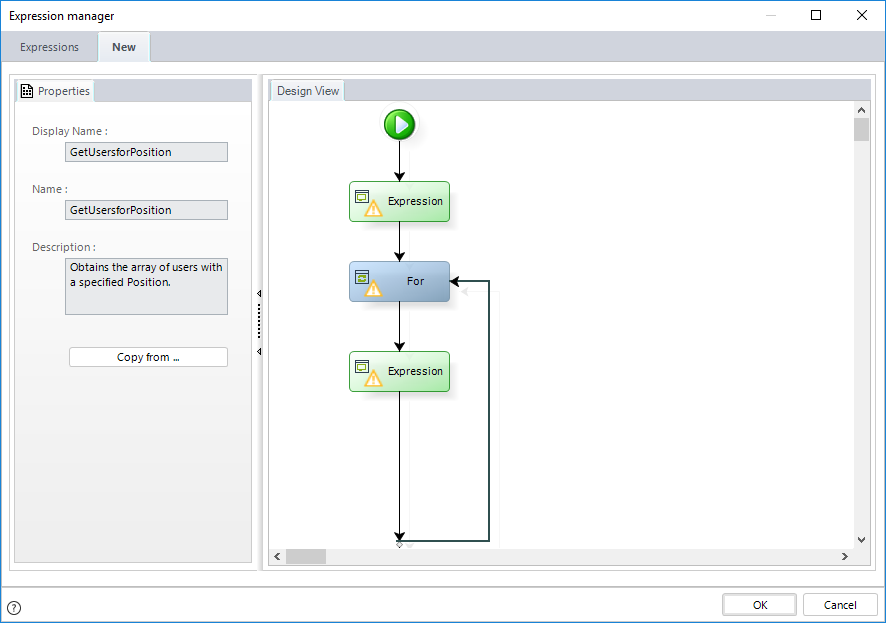
2. In the main expression, create two Expression modules and one For module as shown below.
In the first Expression module, declare the variables and obtain the list of users with the specified position.
Use the For module to iterate over each record of the list.
In the final Expression module, include each record in the AvailableTechnitians collection.
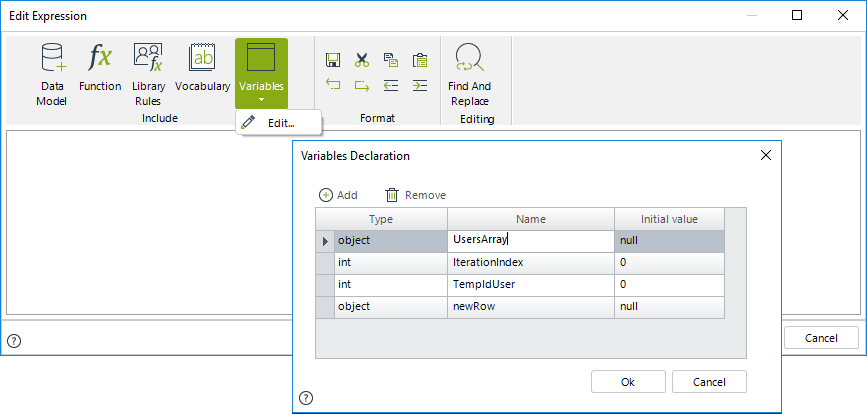
3. In the first Expression module declare the following variables.
•UsersArray: stores the list of the users that belong to the specified Position.
•IterationIndex: is the counter for the FOR cycle.
•TempIdUser: temporally stores a specific record of the users list.
•newRow: creates the new record in the relationship where the users will be included.
4. Obtain the list of users with the desired Position using the Get users in Position Function found in the Users category.
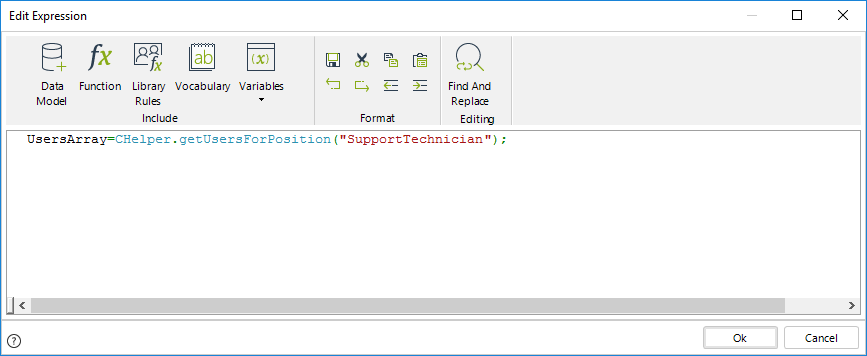
//Obtain the list of users with the specific position and store it in the variable
UsersArray=CHelper.getUsersForPosition("SupportTechnician");
This function returns all the users with the Position regardless whether they are active or not. If you wish to get only the active users, we recommend using the following function with the parameter filterActive as true.
CHelper.getUsersForPosition(posName, filterActive)
For example: CHelper.getUsersForPosition("Technician", true); |
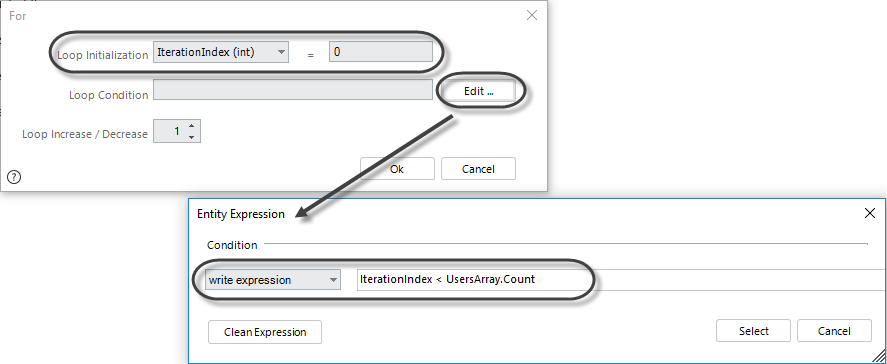
5. Iterate the list using the For module. The cycle starts at zero (0) and ends at the last index of the list.
The sentence UsersArray.Count will return the total number of users found (i.e., counts all elements in the array)
Then, the loop will be executed as long as the index of the collection is less than the total number of array elements.
6. Include the following code in the second Expression module to obtain the user's identifier.
Then, create a new row in the Available Technicians collection.
Value the Technician ID in the new row created.
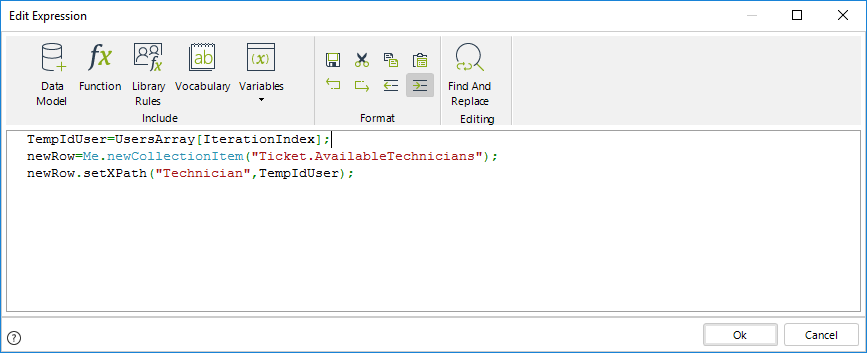
//Obtain the user identifier of the current iterated record in the array
TempIdUser=UsersArray[IterationIndex];
//Add a new record to the AvailableTechnicians collection
newRow=Me.newCollectionItem("Ticket.AvailableTechnicians");
//Set the column Technician to the userid obtained previously
newRow.setXPath("Technician",TempIdUser);
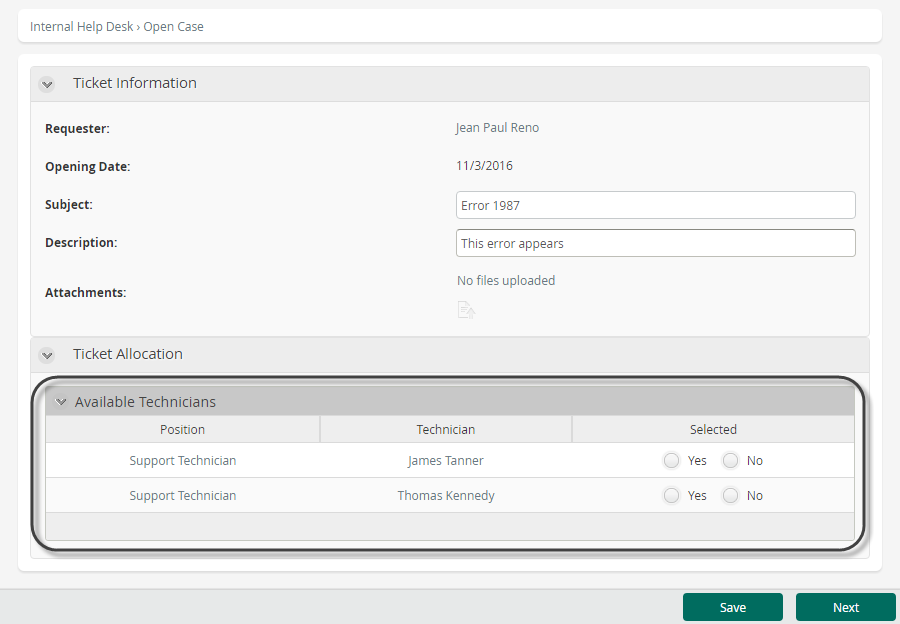
Once filled, the collection will display in the Work Portal as follows:
Get users with a specific Role
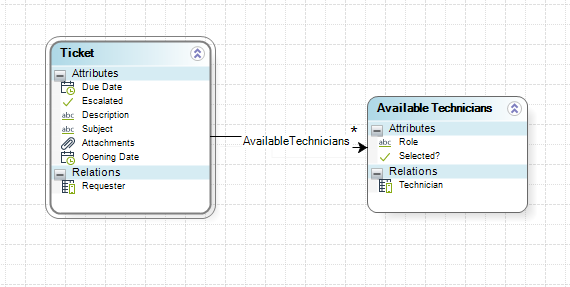
Suppose in a Help Desk Process the support person who receives a Ticket must assign it to one of the available technicians. The case references a collection called Available Technicians that contains the users who hold a Role of IT Technician.
To fill the collection we need to obtain the qualified technicians from the WFUser Entity, based on their Role.
1. Go to the fourth step of the Bizagi Process Wizard (Business Rules) and select Activity Actions.
Click the first Task of the Process and create an On Enter Expression.

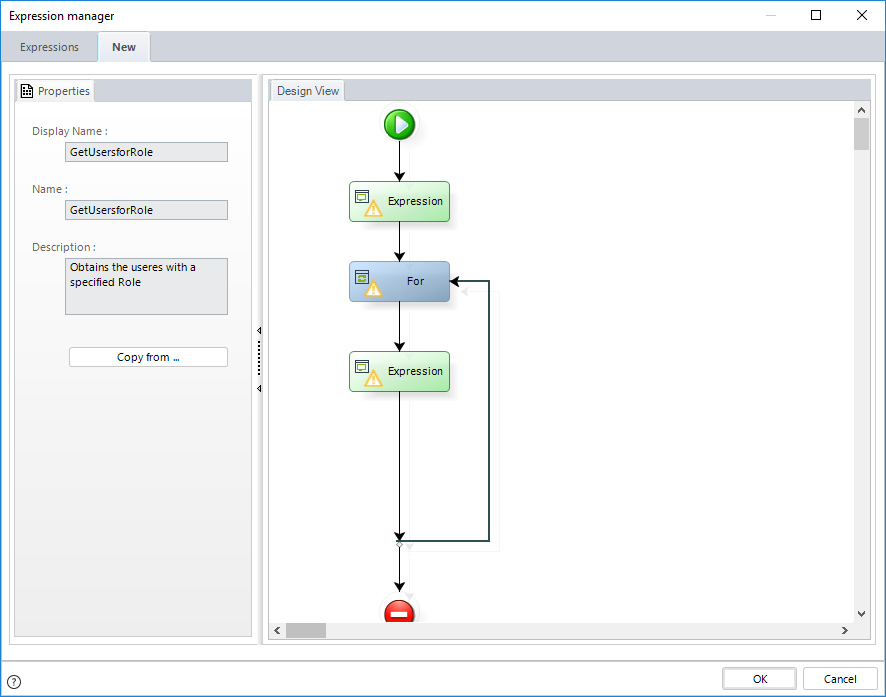
2. In the main expression, create two Expression modules and one For module as shown below.
In the first Expression module declare the variables and obtain the list of users with the specified Role.
Use the For module to iterate over each record of the list.
In the final Expression module, include each record in the AvailableTechnitians collection.
3. In the first Expression module declare the following variables.
•UsersArray: stores the list of the users that belong to the specified Role.
•IterationIndex: is the counter for the FOR cycle.
•TempIdUser: temporally stores a specific record of the users list.
•newRow: creates the new record in the relationship where the users will be included.

4. Obtain the list of users with the desired Role using the Get users in Role Function found in the Users category.
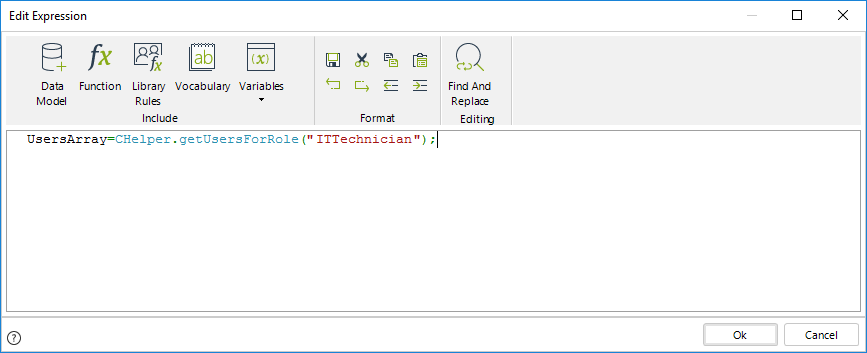
//Obtain the list of users with the specified Role and store the collection in the variable
UsersArray=CHelper.getUsersForRole("ITTechnician");
This function returns all the users with the Role regardless whether they are active or not. If you wish to get only the active users, we recommend using the following function with the parameter filterActive as true.
CHelper.getUsersForRole(roleName, filterActive) |
5. Iterate the list using the For module. The cycle starts at zero (0) and ends at the last index of the list.
The sentence UsersArray.Count will return the total number of users found.
Then, the loop will be executed as long as the Index of the collection is less than the total number of users in the list.

6. Include the following code in the second Expression module to obtain the user's identifier.
Then, create a new row in the Available Technicians collection.
Set the Technician id in the new row created.

//Obtain the user identifier of the current iterated record in the array
TempIdUser=UsersArray[IterationIndex];
//Add a new record to the AvailableTechnicians collection
newRow=Me.newCollectionItem("Ticket.AvailableTechnicians");
//Value the column Technician with the userid obtained previously
newRow.setXPath("Technician",TempIdUser");
Click OK to save the changes.
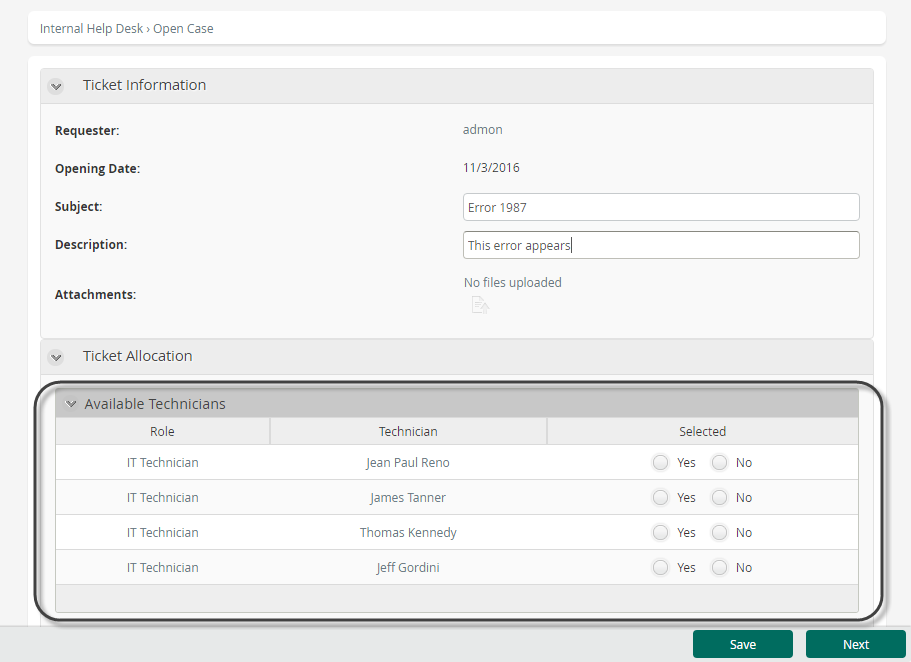
Once filled, the collection will display in the Work Portal as follows:
Get users with a specified Skill
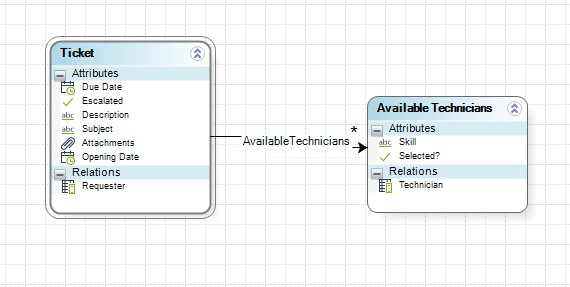
Suppose in a Help Desk process the support person who receives a Ticket must assign it to one of the available technicians. The case references a collection called Available Technicians that contains the users who have a IT and Networks Knowledge skill.
To fill that collection we need to obtain the qualified technicians from the WFUser Entity, based on their Skills.
1. Go to the fourth step of the Bizagi Process Wizard (Business Rules) and select Activity Actions.
Click the first Task of the Process and create an On Enter Expression.

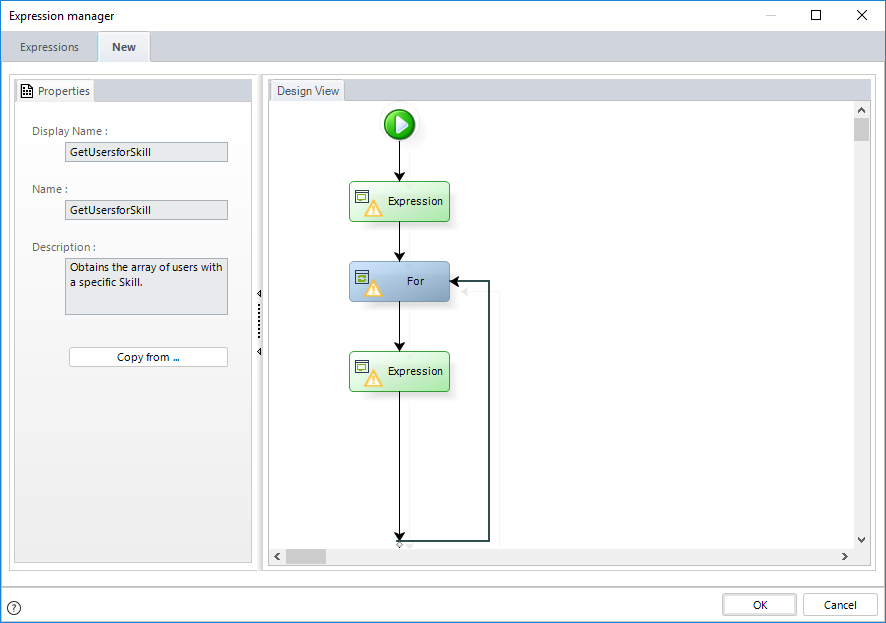
2. In the main expression, create two Expression modules and one For module as shown below.
In the first Expression declare the variables and obtain the list of users with the specified Skill.
Use the For module to iterate over each record of the list.
In the final Expression module, include each record in the AvailableTechnitians collection.
3. In the first Expression module declare the following variables.
•UsersArray: stores the list of the users that belong to the specified Skill.
•IterationIndex: it is the counter for the FOR cycle.
•TempIdUser: temporally stores a specific record of the users list.
•newRow: creates the new record in the relationship where the users will be included.

4. Obtain the list of users with the desired Skill using the Get users in Skill Function found in the Users category
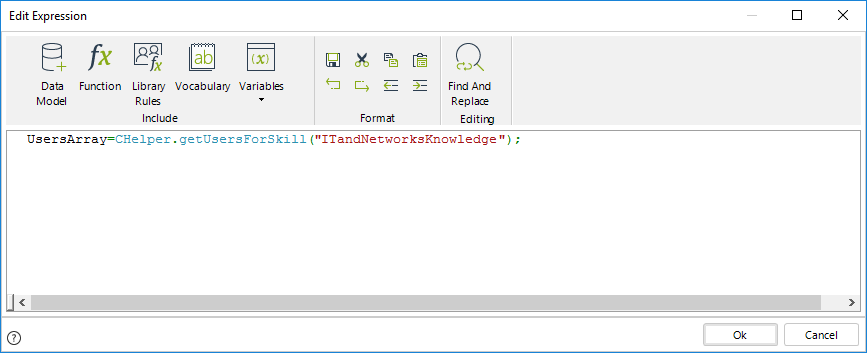
//Obtain the list of users with the desired Skill and store it in the variable
UsersArray=CHelper.getUsersForSkill("ITandNetworksKnowledge");
This function returns all the users with the Skill regardless whether they are active or not. If you wish to get only the active users, we recommend using the following function with the parameter filterActive as true.
CHelper.getUsersForSkill(skillName, filterActive) |
5. Iterate the list using the For module. The cycle starts at zero (0) and ends at the last index of the list.
The sentence UsersArray.Count will return the total number of users found.
Then, the loop will be executed as long as the Index of the collection is less than the total number of users found.

6. Include the following code in the second Expression module to obtain the user's identifier.
Then, create a new row in the Available Technicians collection.
Value the Technician id in the new row created.

//Obtain the user identifier of the current iterated record in the array
TempIdUser=UsersArray[IterationIndex];
//Add a new record to the AvailableTechnicians collection
newRow=Me.newCollectionItem("Ticket.AvailableTechnicians");
//Value the column Technician with user obtained previously
newRow.setXPath("Technician",TempIdUser);
Once filled, the AvailableTechnicians collection will display in the Work Portal as follows:

Last Updated 1/26/2023 10:59:43 AM