Overview
In this article we will have a hypothetical Business Scenario where the Excel Connector comes in handy to simplify a business process. This article is not a step by step guide, it is rather a showcase of what the Excel Connector is able to do.
Case Scenario
Agility Corp has opened a a new business branch where they offer financial products. Before opening a financial product to a customer, a risk assessment has to be performed, since Agility Corp only wants to provide a customer with a product that he can manage and is able to maintain.
The assessment receives the following inputs:
•Client Status: status of the client with Agility Corp.
The possible values for this field are:
oBlocked: This means that the user has caused problems in the past with something related to Agility Corp.
oRestricted: This means that the user is prone to have problems with Agility Corp.
oAlert: Means that the customer has had no problems with Agility Corp but further information is needed.
oNone: This status is assigned to new customers or to people that have been associated with Agility Corp and have had no problems whatsoever.
•Activity Code: Activity from which the customer makes a living from.
For the sake of this example, the possible values are:
o1 - Business Administrator
o2 - Engineer
o3 - Doctor
o4 - Farmer
o5 - Software Developer
o6 - Unemployed
•City: City of residence of the customer.
For the sake of this example, the possible values are:
oNew York
oOklahoma City
oSeattle
oMurfreesboro
oGreen Bay
•Occupation: Current Occupation of the customer.
For the sake of this example, the possible values are:
oUnemployed
oEmployee
oStudent
oIndependent
oRetired
Agility Corp has defined a coefficient and an importance scale for each of the mentioned criteria. Upon providing this information calculation should be made to assign a score to the customer and provide an answer to his financial product request.
Since the business logic of this calculations is complex, Agility Corp decided to develop an Excel tool in which you provide the corresponding inputs of a customer, and after making its calculations, Excel provides the corresponding score and derived action.
Such tool looks as follows:

Some notable sections of the image have been numbered, the following enumerations explain each one of them:
1. Client Status input
2. Activity Code input
3. City Input
4. Occupation input
5. Calculated Score
6. Derived Action from the assessment: Depending on the calculated score, the tool yields a different action, it could be More information required, Do not open product, or Open Product.
The Model of the process looks as follows:
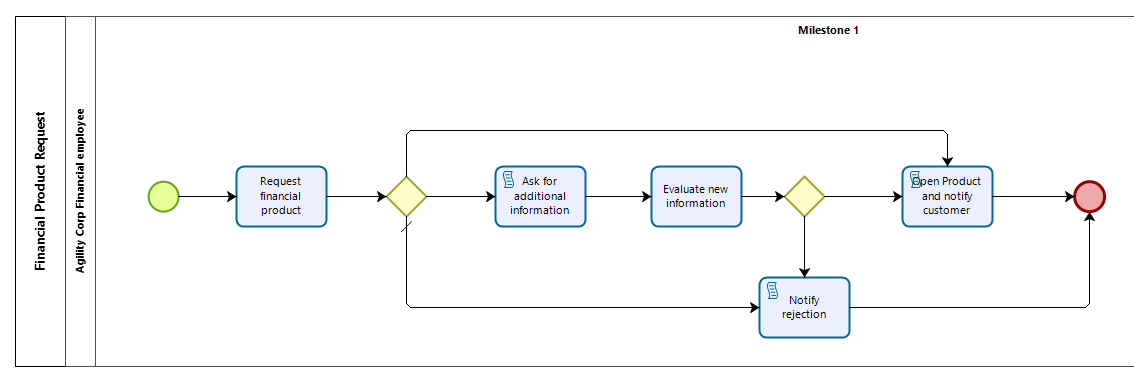
We will configure a connector to execute as an On Exit Activity of the Request Financial Product task. One of the results of the execution of the conector is a Derived Action, the process has been set up in such a way that depending on the resulting Derived Action a different path is followed, each path will notify the user via email of what was the decision regarding his request.
Incorporation of the tool in a Bizagi Process
In the Financial Product Request process, there is a task where the call center employee provides the information of the customer. Lets add an On Exit Activity Action on that task to trigger the execution of an Excel Connector which inputs the corresponding information to the tool, and then reads and persists the calculated result and derived action into the Data Model.
Configuring the Excel Connector
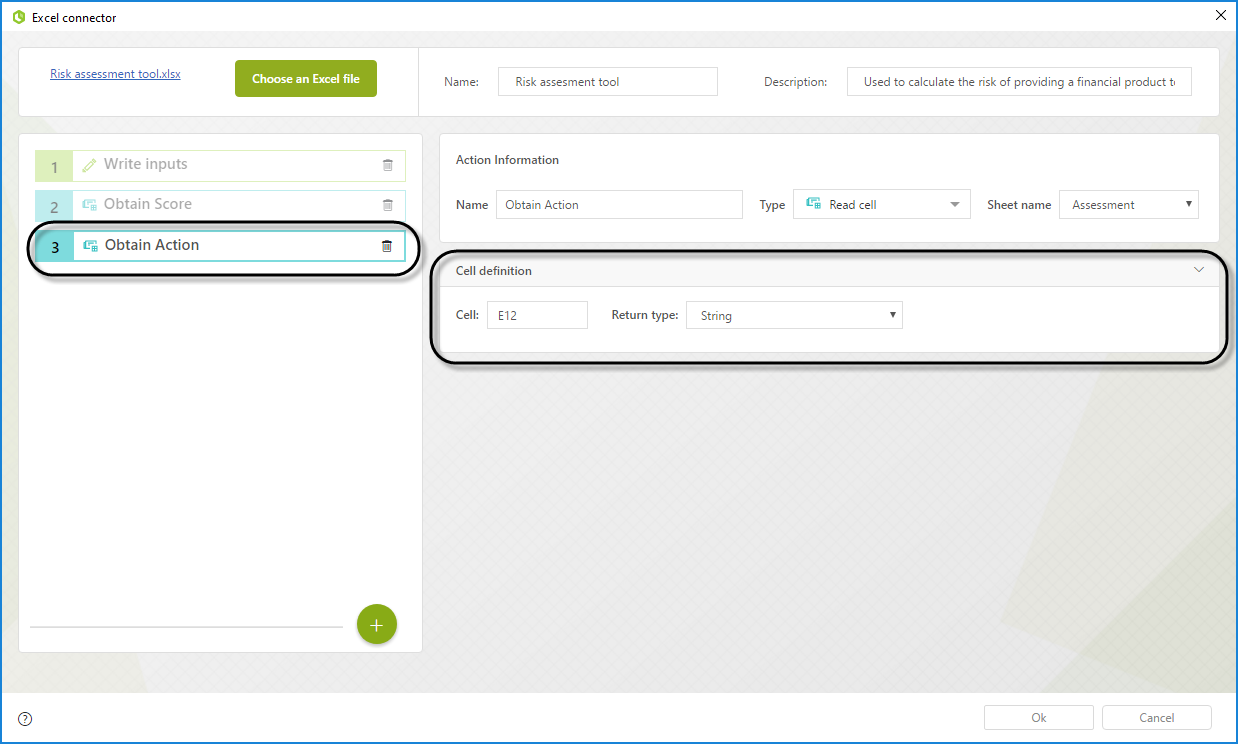
Create a new Excel Connector by going to the Expert View, selecting the External Systems option, and adding a new Excel Connector. Select the Excel file that has been previously configured to assess the risk, provide a name and a description to the new connector.
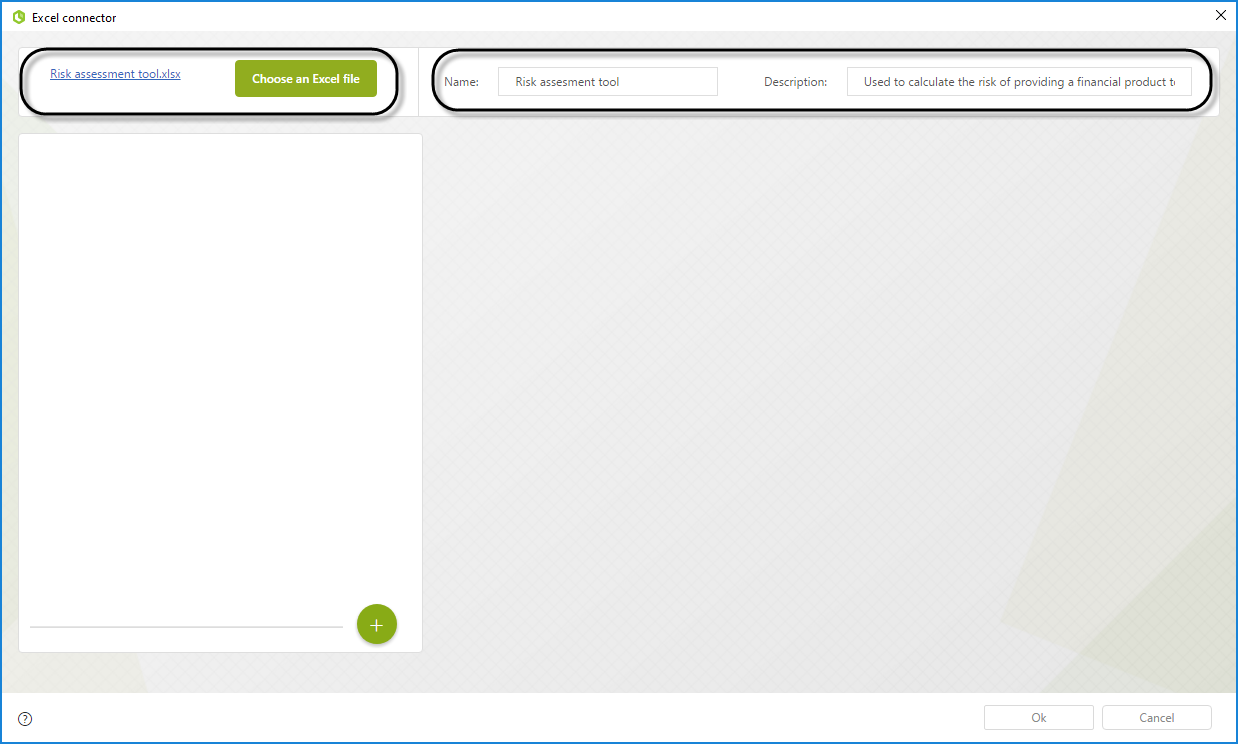
To perform what is needed, we have to set up 3 actions:
1. Write the inputs from our Data Model into their corresponding cell of the Excel file. Once done, Excel will perform all the calculations it is configured to do.
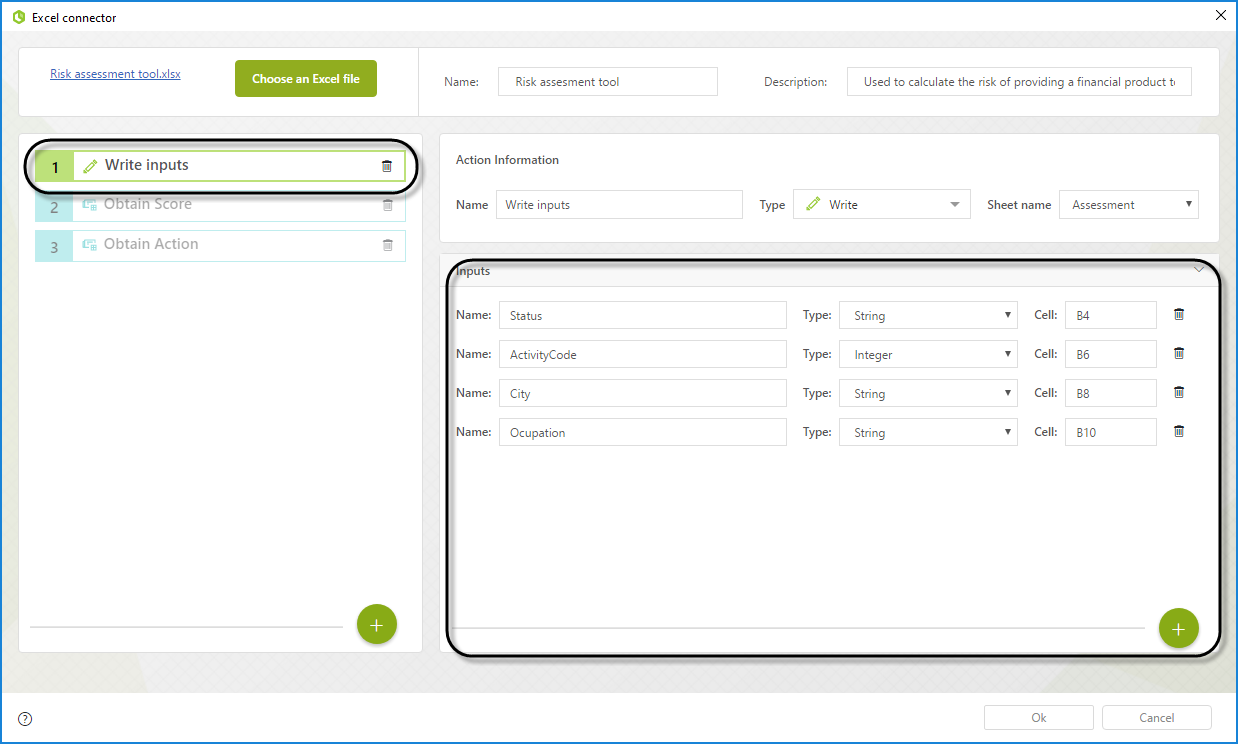
2. Read the calculated Score from its corresponding cell and persisting it in the Data Model.
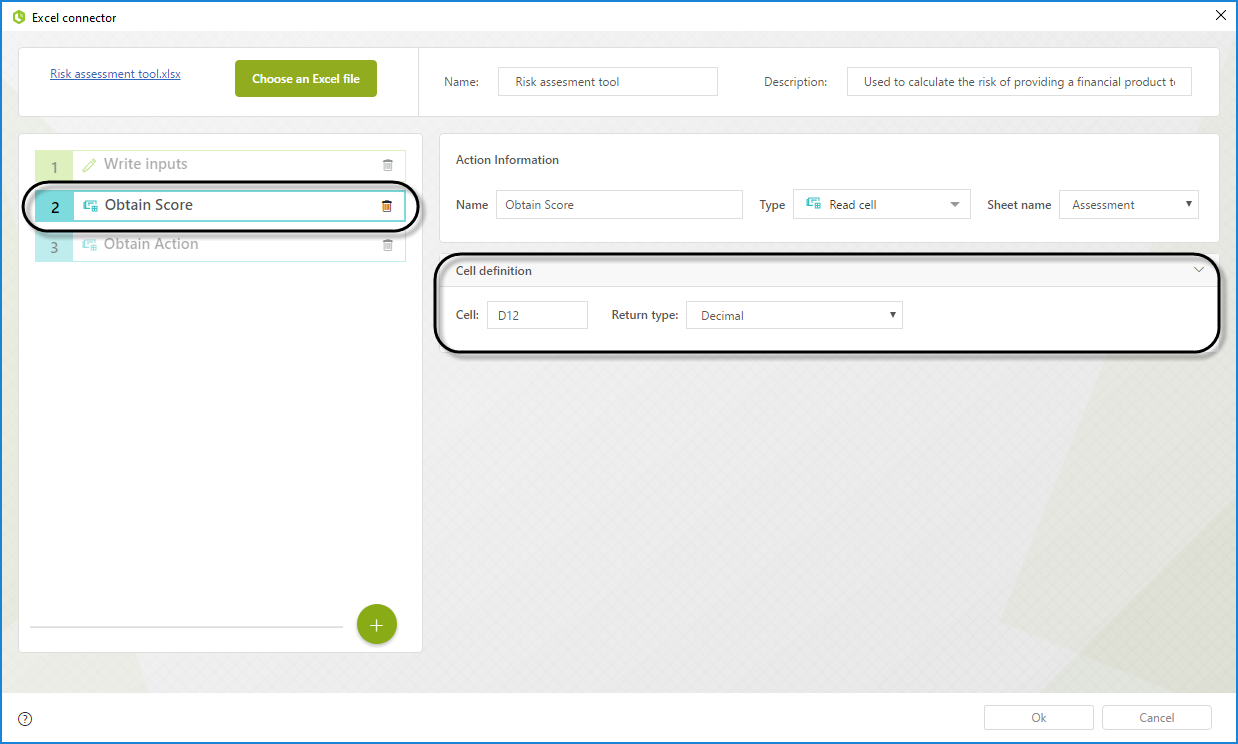
3. Read the calculated Derived Action from its corresponding cell and persisting it in the Data Model.
Triggering the Execution of the Excel Connector
In order for the connector to be executed each time the Request Financial Product task, lets add an On Exit Activity Action.
Head to the fourth step of the Process Wizard, and select Activity Actions. Then hover over the plus icon and select Excel Connector.
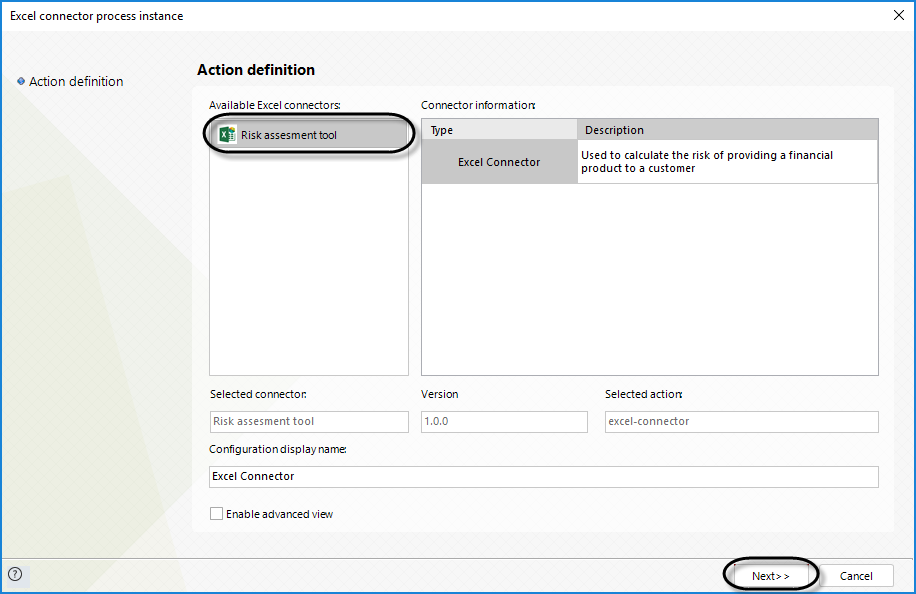
On the configuration wizard, select the corresponding connector that was previously configured and then click Next.
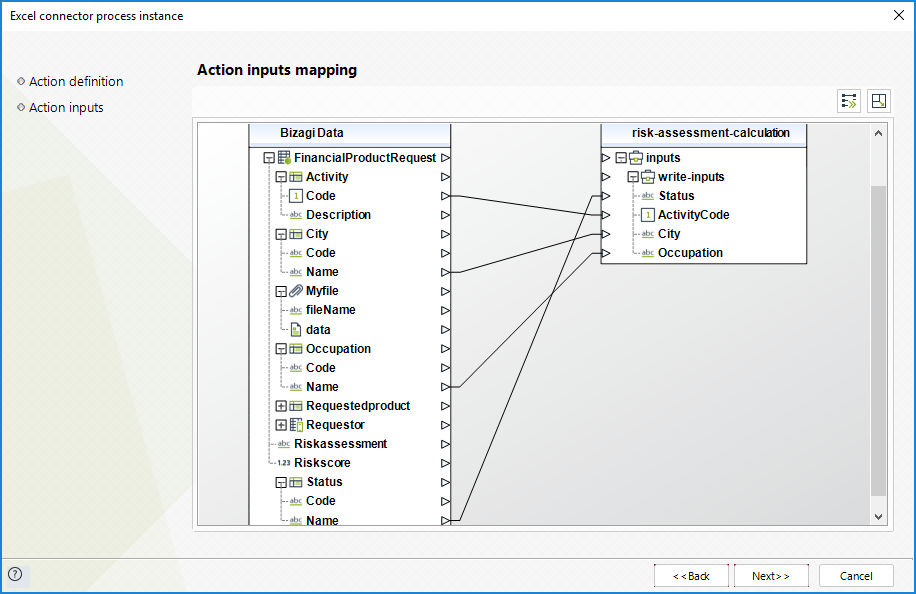
After that configure the input mappings. Match the corresponding values from your Data Model to that of your Excel Connector inputs.
Similarly, map the output values to the intended attributes of your data model to do so.
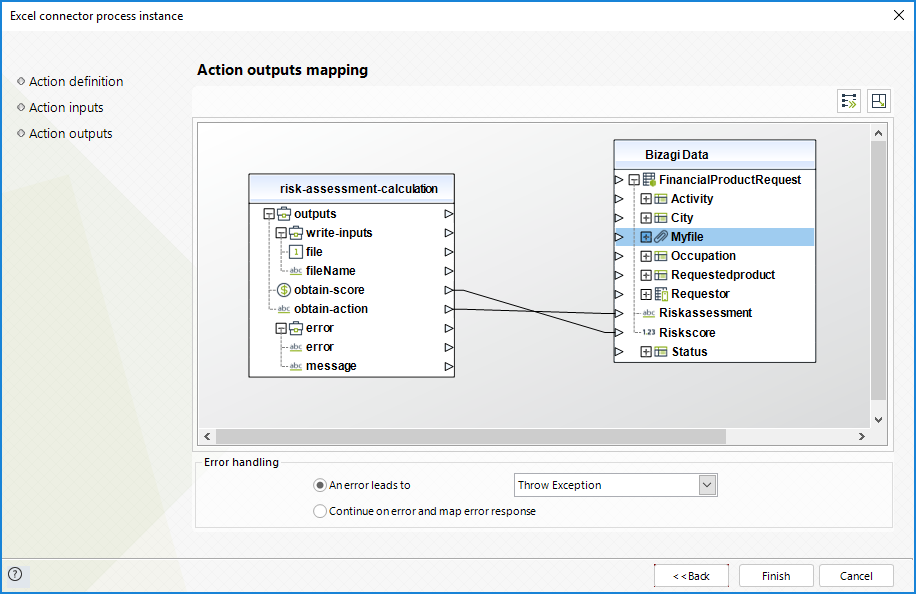
Click Finish when you are done configuring the mappings.
At this point, your Excel tool is now completely incorporated into your Bizagi Process, eliminating the need of manually inputting the values into the file, and then bringing the results back to your case. This reduces time and the probability of committing errors, as well as delegating the Business Logic to Excel instead of building intricate Business Rules and expressions.
Execution
Lets create a case for each of the alternative flows of the process so that we can confirm that our Excel Connector is running smoothly.
Open Product path
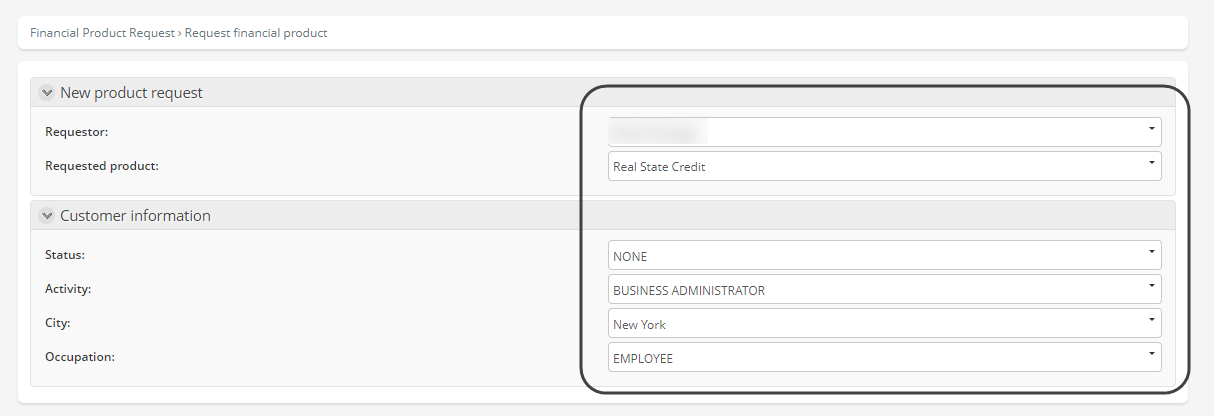
First, lets create a case where all the information provided causes the tool to give a Green Light to Open the product for a customer.
As it is evidenced in the image below, the Excel assessment tool would recommend to Open this product.

The model is designed to take the highlighted path in such cases.

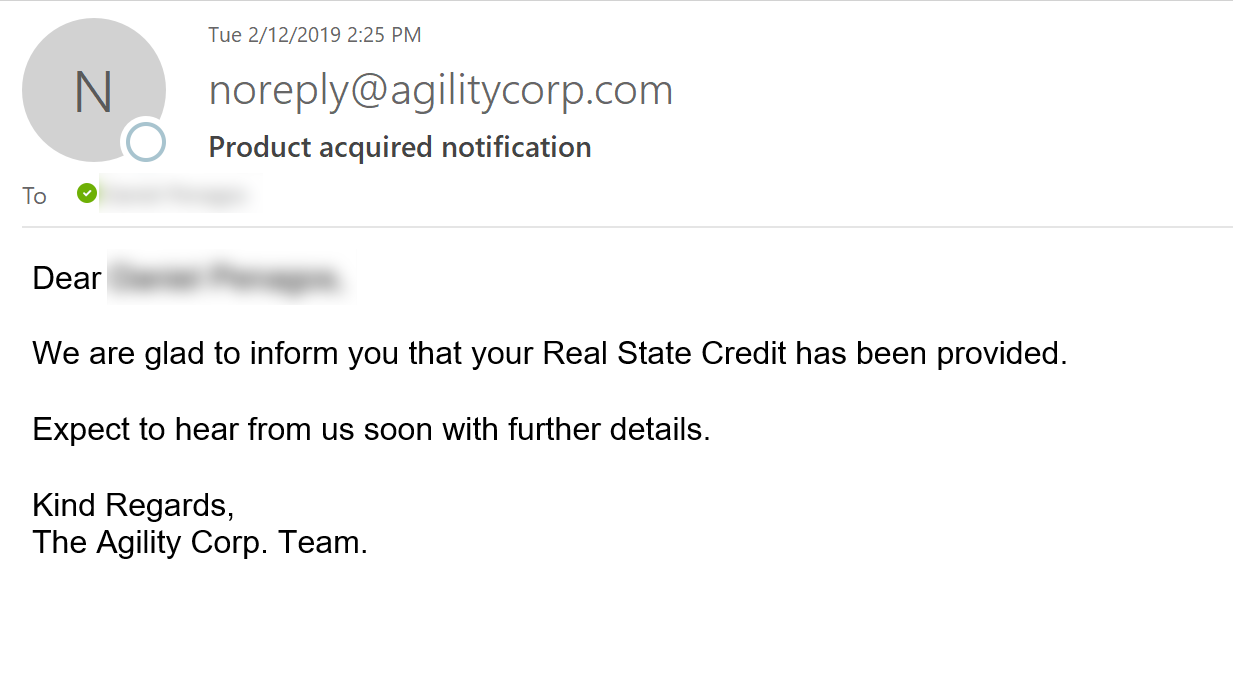
As soon as you click Next in the form on the Work Portal, the connector starts executing, yields the results, and then the execution takes the highlighted path. This task sends an email to the requestor informing him of the situation.

Do not Open product path
Our second test consists of providing information that the tool would reject.
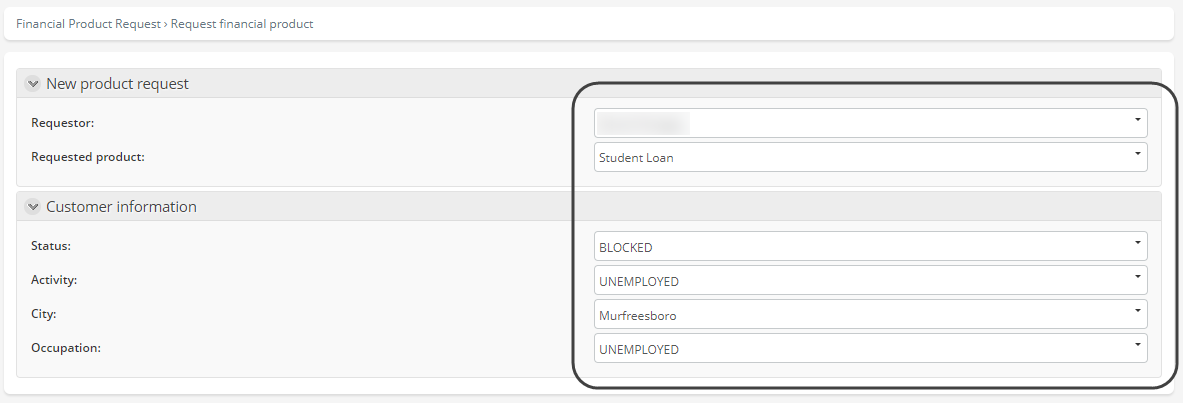
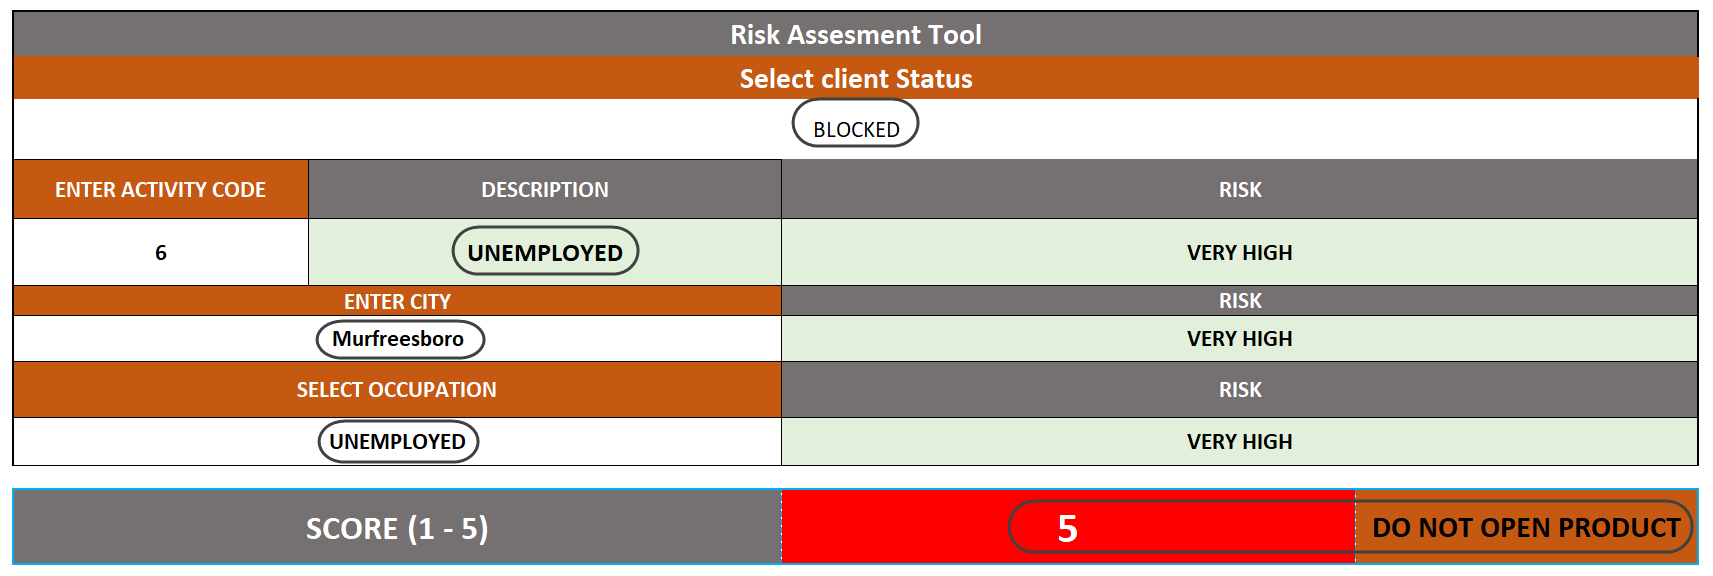
The image below evidences the result of inputting this information in the risk assessment tool.
The model is designed to take the highlighted path in such cases.
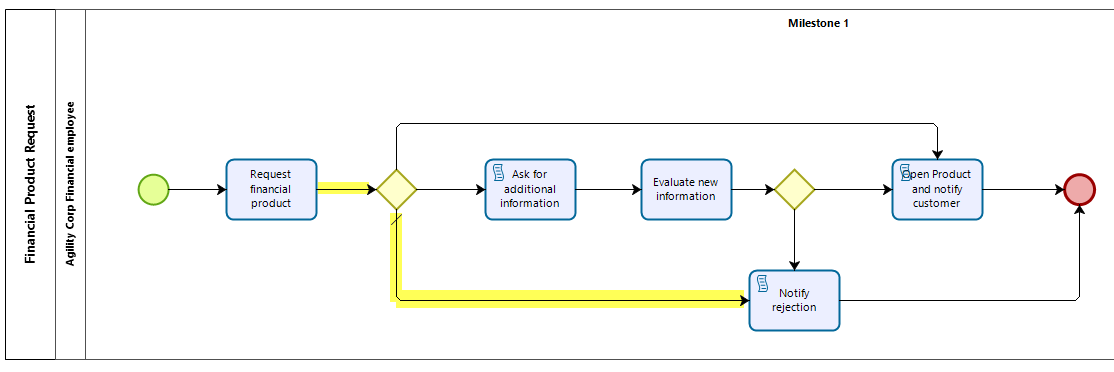
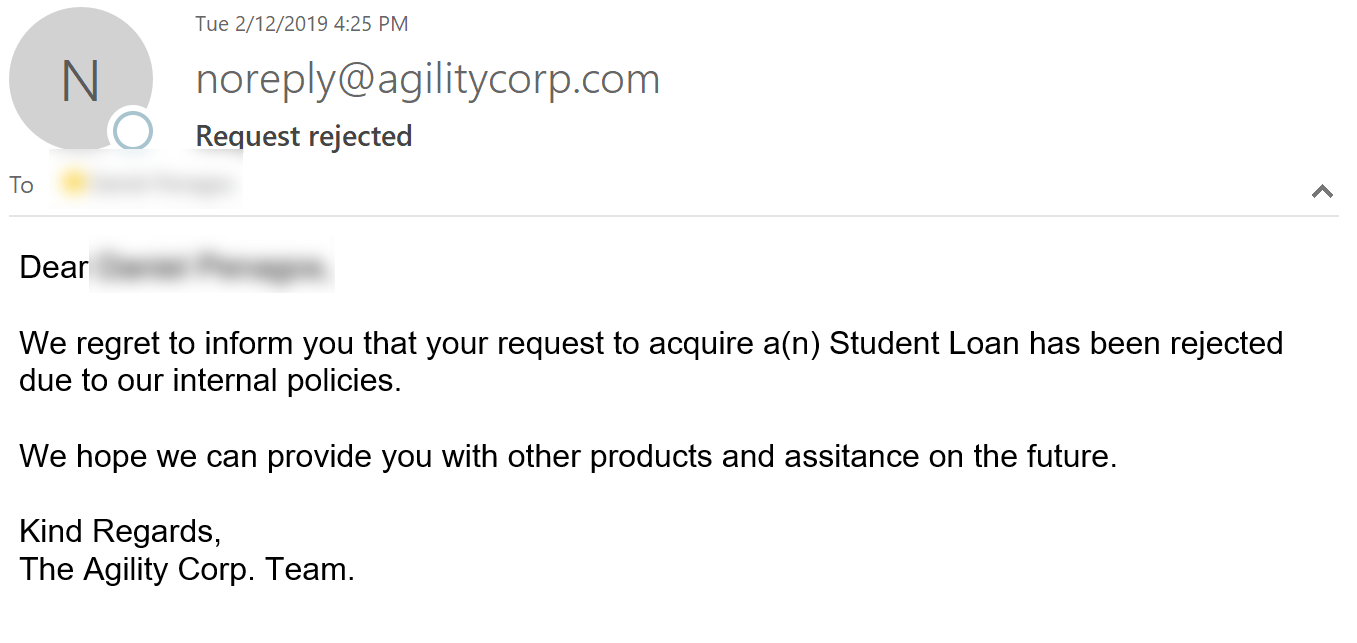
As soon as you click Next in the form on the Work Portal, the connector starts executing, yields the results, and then the execution takes the highlighted path. This task sends an email to the requestor informing him of the situation.

More information Process path
The third possible scenario is to provide information that results in More information needed.

The image below evidences the result of inputting this information in the risk assessment tool.
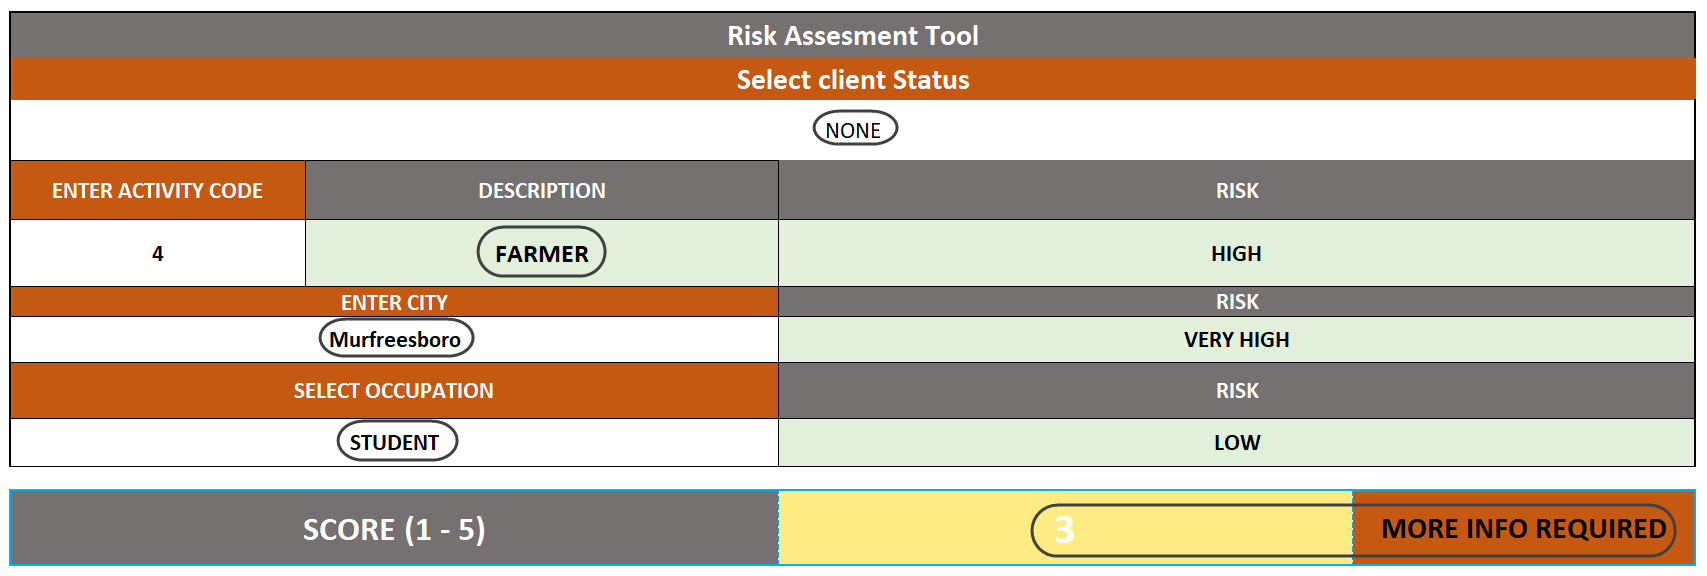
The model is designed to take the highlighted path in such cases.

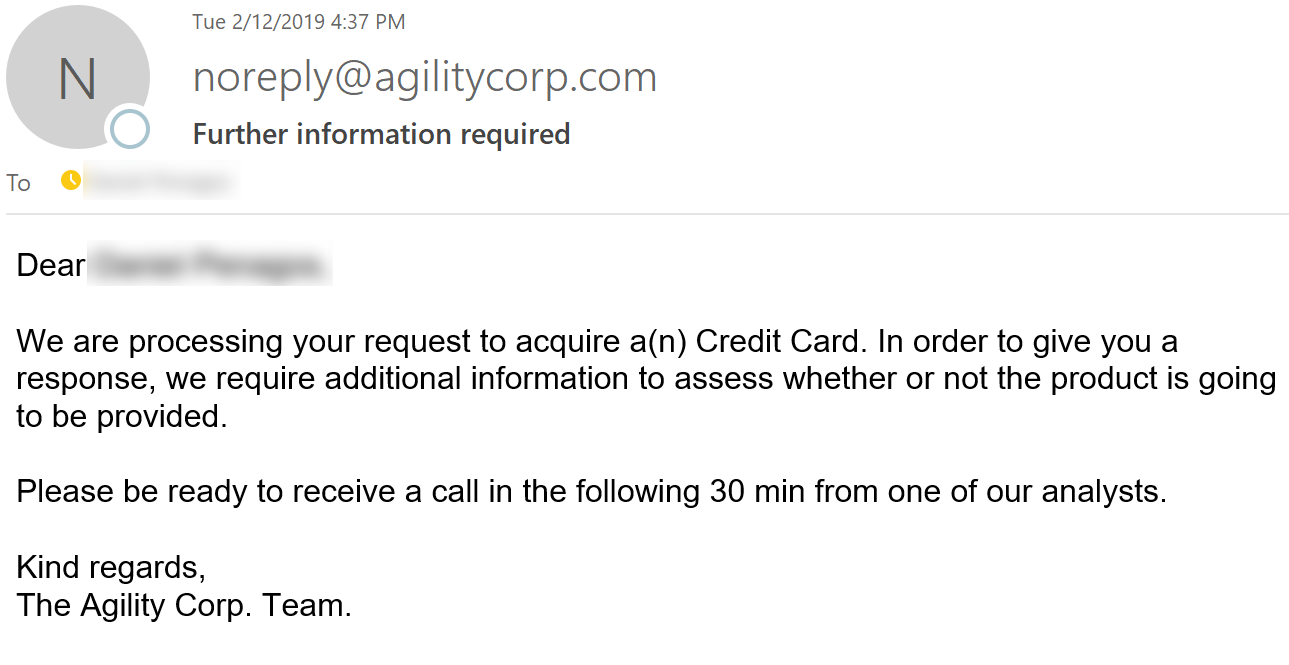
As soon as you click Next in the form on the Work Portal, the connector starts executing, yields the results, and then the execution takes the highlighted path. This task sends an email to the requestor informing him of the situation.

Last Updated 2/27/2024 4:17:55 PM