Overview
The following examples refer to the option as described at Customize columns.
Recall that there are 4 different levels offering different possibilities for including additional information according to the context where these are used.
Examples
Refer to the examples below for each of the 4 levels in which you may customize columns (Globally, per business application, per process or per Sub-Process).
1. Globally (applies to all applications and all processes)
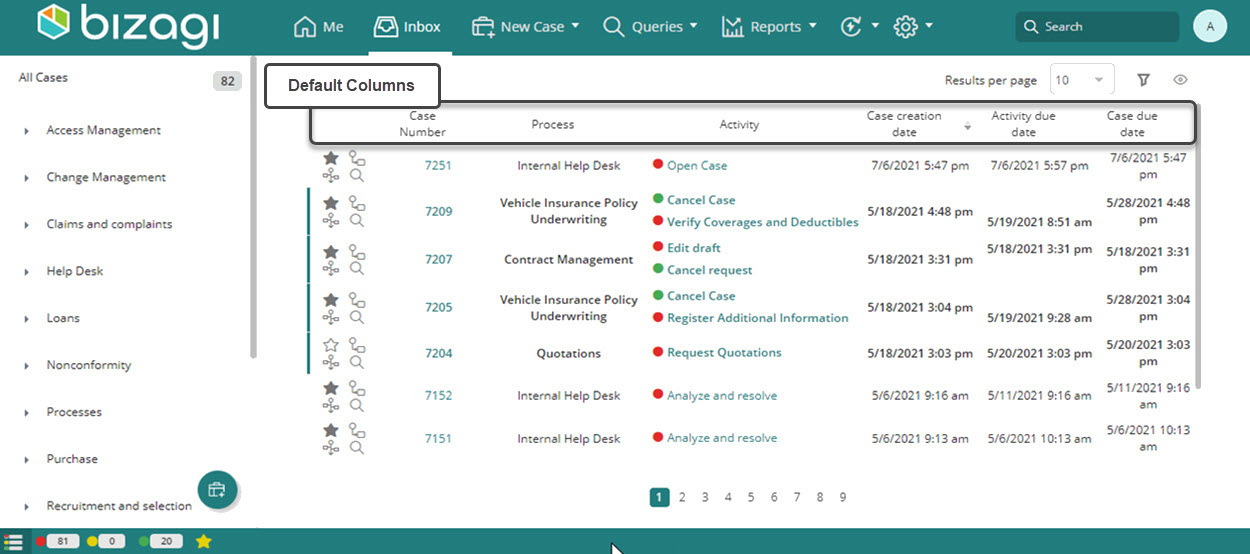
By default Bizagi shows the case number, process, activity, creation date, task due date and process due date columns for the activities displayed in the Work Portal Inbox.
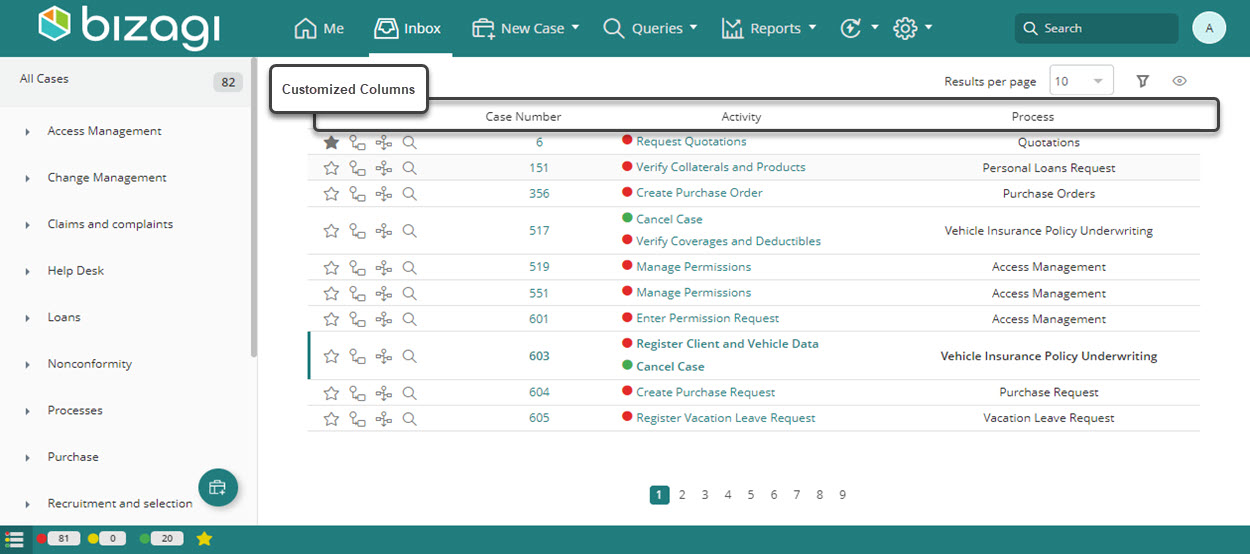
Suppose you only wish to display the case number, activity and process columns.
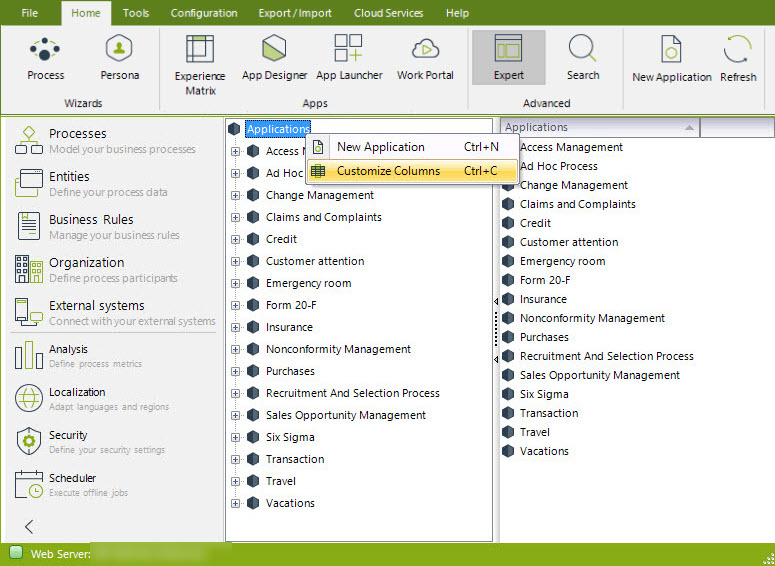
To do so, go to the Applications option, from the Processes module, and right click it. Then select the Customize Columns option.
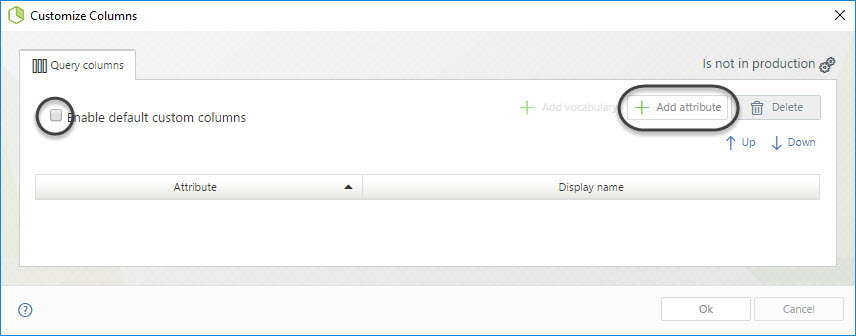
In the new window uncheck the Use default configuration and then click Add attribute.
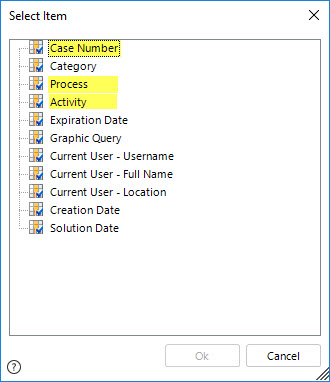
Add the desired attributes and click OK.
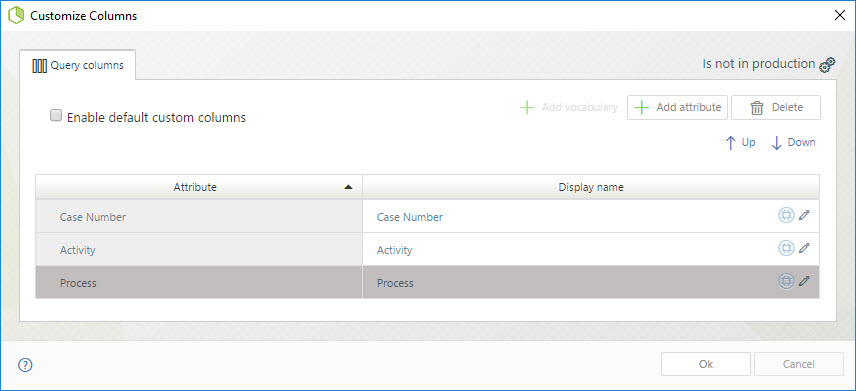
Now go to the work portal to see the changes.
Before customizing columns the cases were shown as the image below.
After customizing the data displayed, the cases are shown as the image below
2. Per business application
Now suppose you have an application called Customer attention. When you filter the pending activities by a process belonging this application (by selecting the process on the Case Area) you only wish to see the following information: Case number, opening date, priority and subject. The others processes will keep the global applications customization configured in the previous example.
To do so, go to the specific Application (Customer attention), from the Processes module, and right click it. Then select the Customize Columns option.
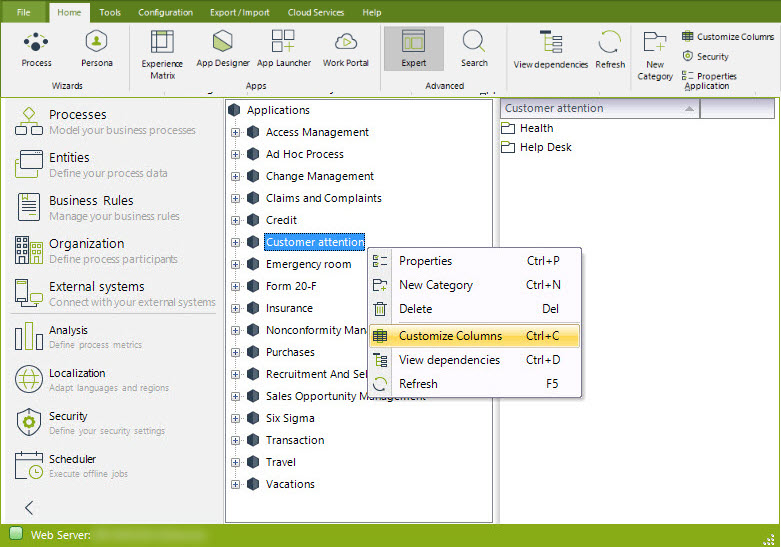
In the new window uncheck the Use default configuration and then click Add attribute.

Add the desired attributes from the data model and click OK.
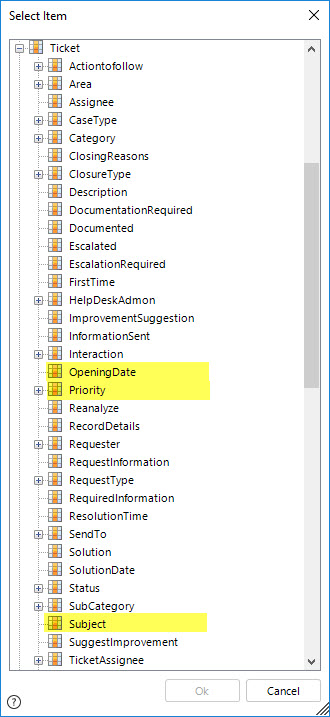
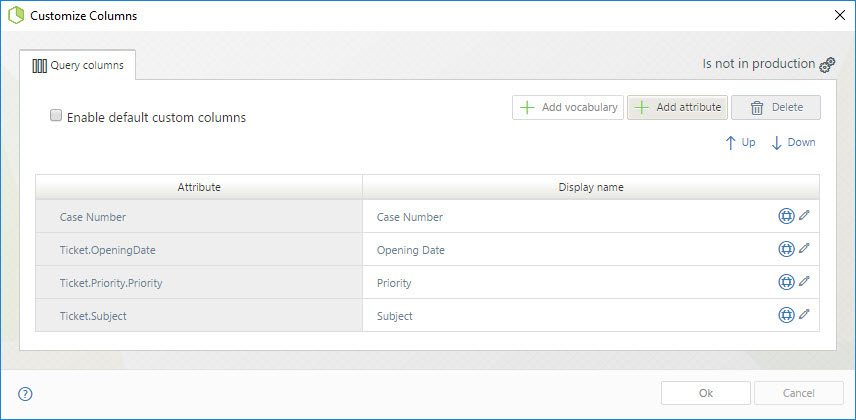
Go to the Work Portal to see the changes.
Before customizing columns the cases were shown as the image below.
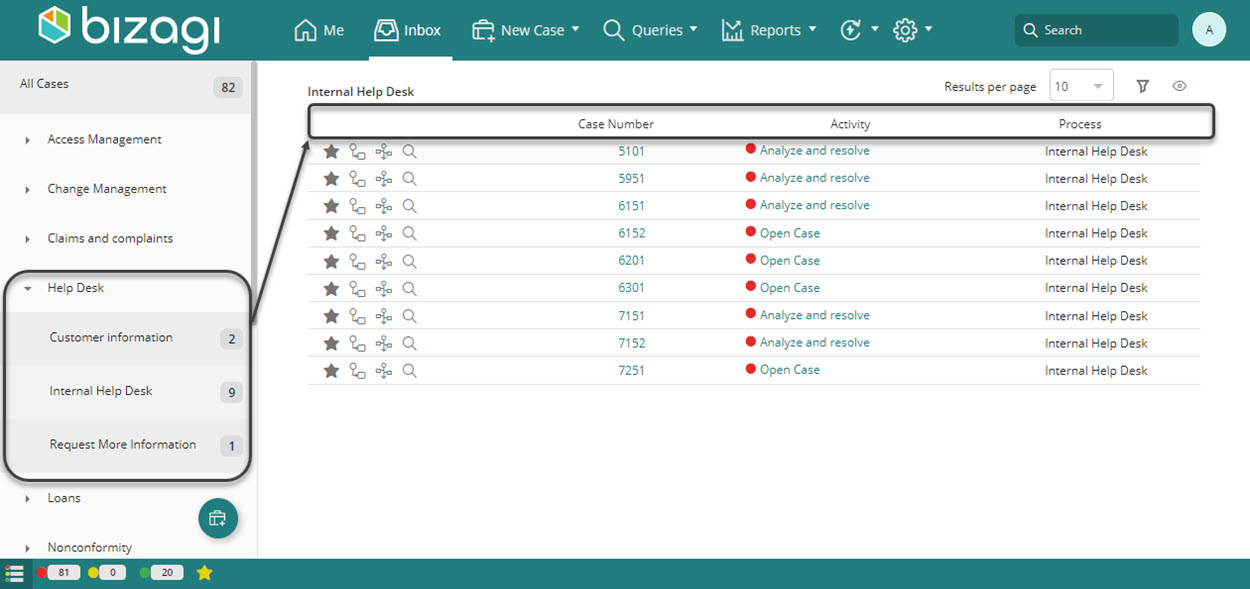
After customizing the data displayed the cases are shown as below.

3. Per process
The procedure to do this is really similar to the previous procedure and example presented for customizing columns per business application.
The main difference relies on right-clicking (selecting) a specific process instead of an application.
Last Updated 2/1/2023 9:33:52 AM