Overview
A connector is a module that groups a list of of actions that extend the functionality of your processes. To know more about connectors, go to Bizagi connectors. You can create connectors based on RESTfull APIs; to do so, you need to read and understand the API of the external system. Creating a connector manually sometimes may be difficult depending on the API of the external system. However, Bizagi's Connector Editor offers an option to generate connectors automatically from specifications described in OpenAPI or RAML.
|
Only REST connectors can be generated automatically from specifications described in OpenAPI or RAML. |
RAML
RESTful API Modeling Language (RAML) is a language that enables you to to manage the lifecycle of an API from designing to using. RAML lets you translate an API technical description, into a language readable for both humans and machines without using code. It is designed to provide a format that both the API provider and the API consumers can use as a mutual contract. To generate a connector through the Bizagi Connector Editor, your API must be defined in versions 0.8 or 1.0 of RAML.
Considerations
The following table illustrates the main considerations and differences between the two RAML supported versions.
RAML v.0.8 |
RAML v.1.0 |
|
|---|---|---|
Supported data types |
String, Integer, Boolean, Number, Array, Object |
|
Supported http methods |
GET, PUT, POST, DELETE |
|
Supported file formats |
.raml, .zip |
.raml, .zip |
Request supported MIME types |
application/json, application/x-www-form-urlencoded*, text/plain |
|
Response supported MIME types |
application/json |
|
Security methods |
Security methods are not mapped during the generation of the connector. It will only take into account which methods require authentication, but specific methods (basic, oauth, etc.) will not be configured. |
|
|
* In RAML v.0.8, to map the input structure when using application/x-www-form-urlencoded, the formParameters property must be used. |
Using the RAML connector generator
Imagine you want to integrate with Salesforce to manage and integrate your sales processes in the cloud. To do so, you can create the connector manually, where you have to define each action in Bizagi's Connector Editor. However, if the specification of the external system is described in RAML, you can easily create your connector.

To generate your connector, complete the following steps:
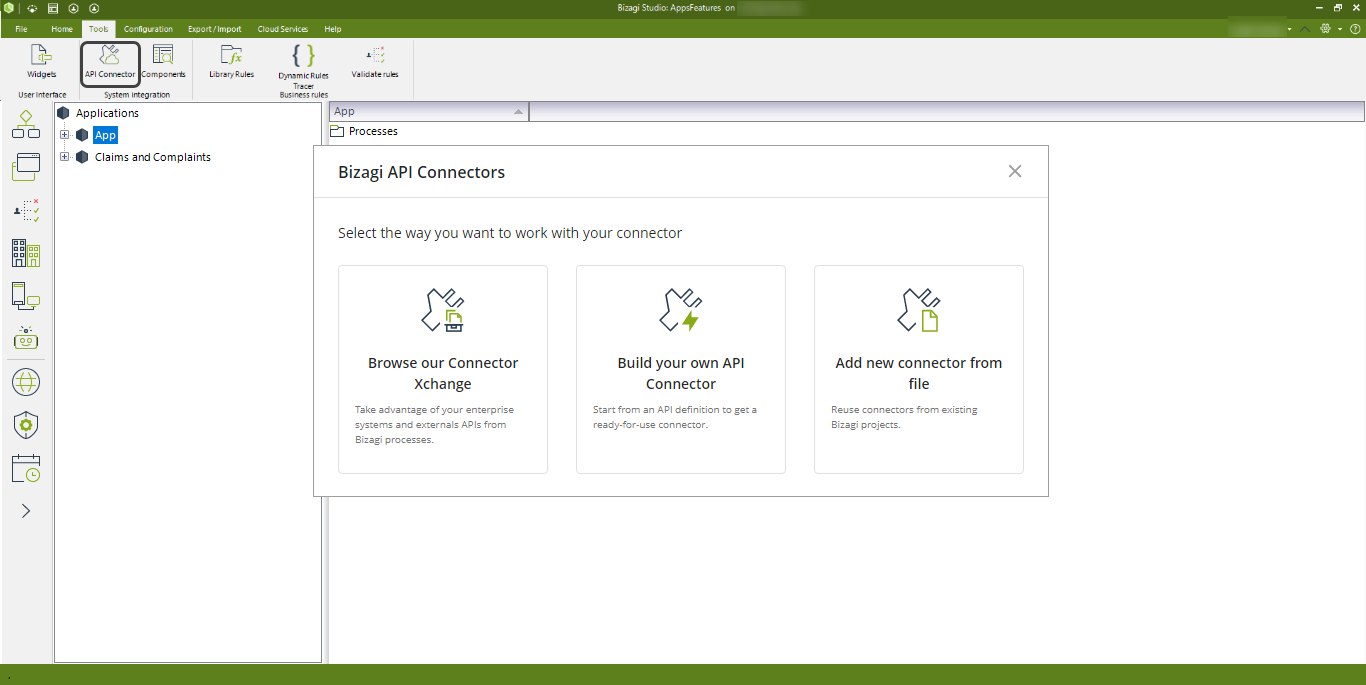
Go to Bizagi Studio's Integration Hub and select Build your own API Connector.
Click Choose File in the RAML option and choose the file that you want to import.
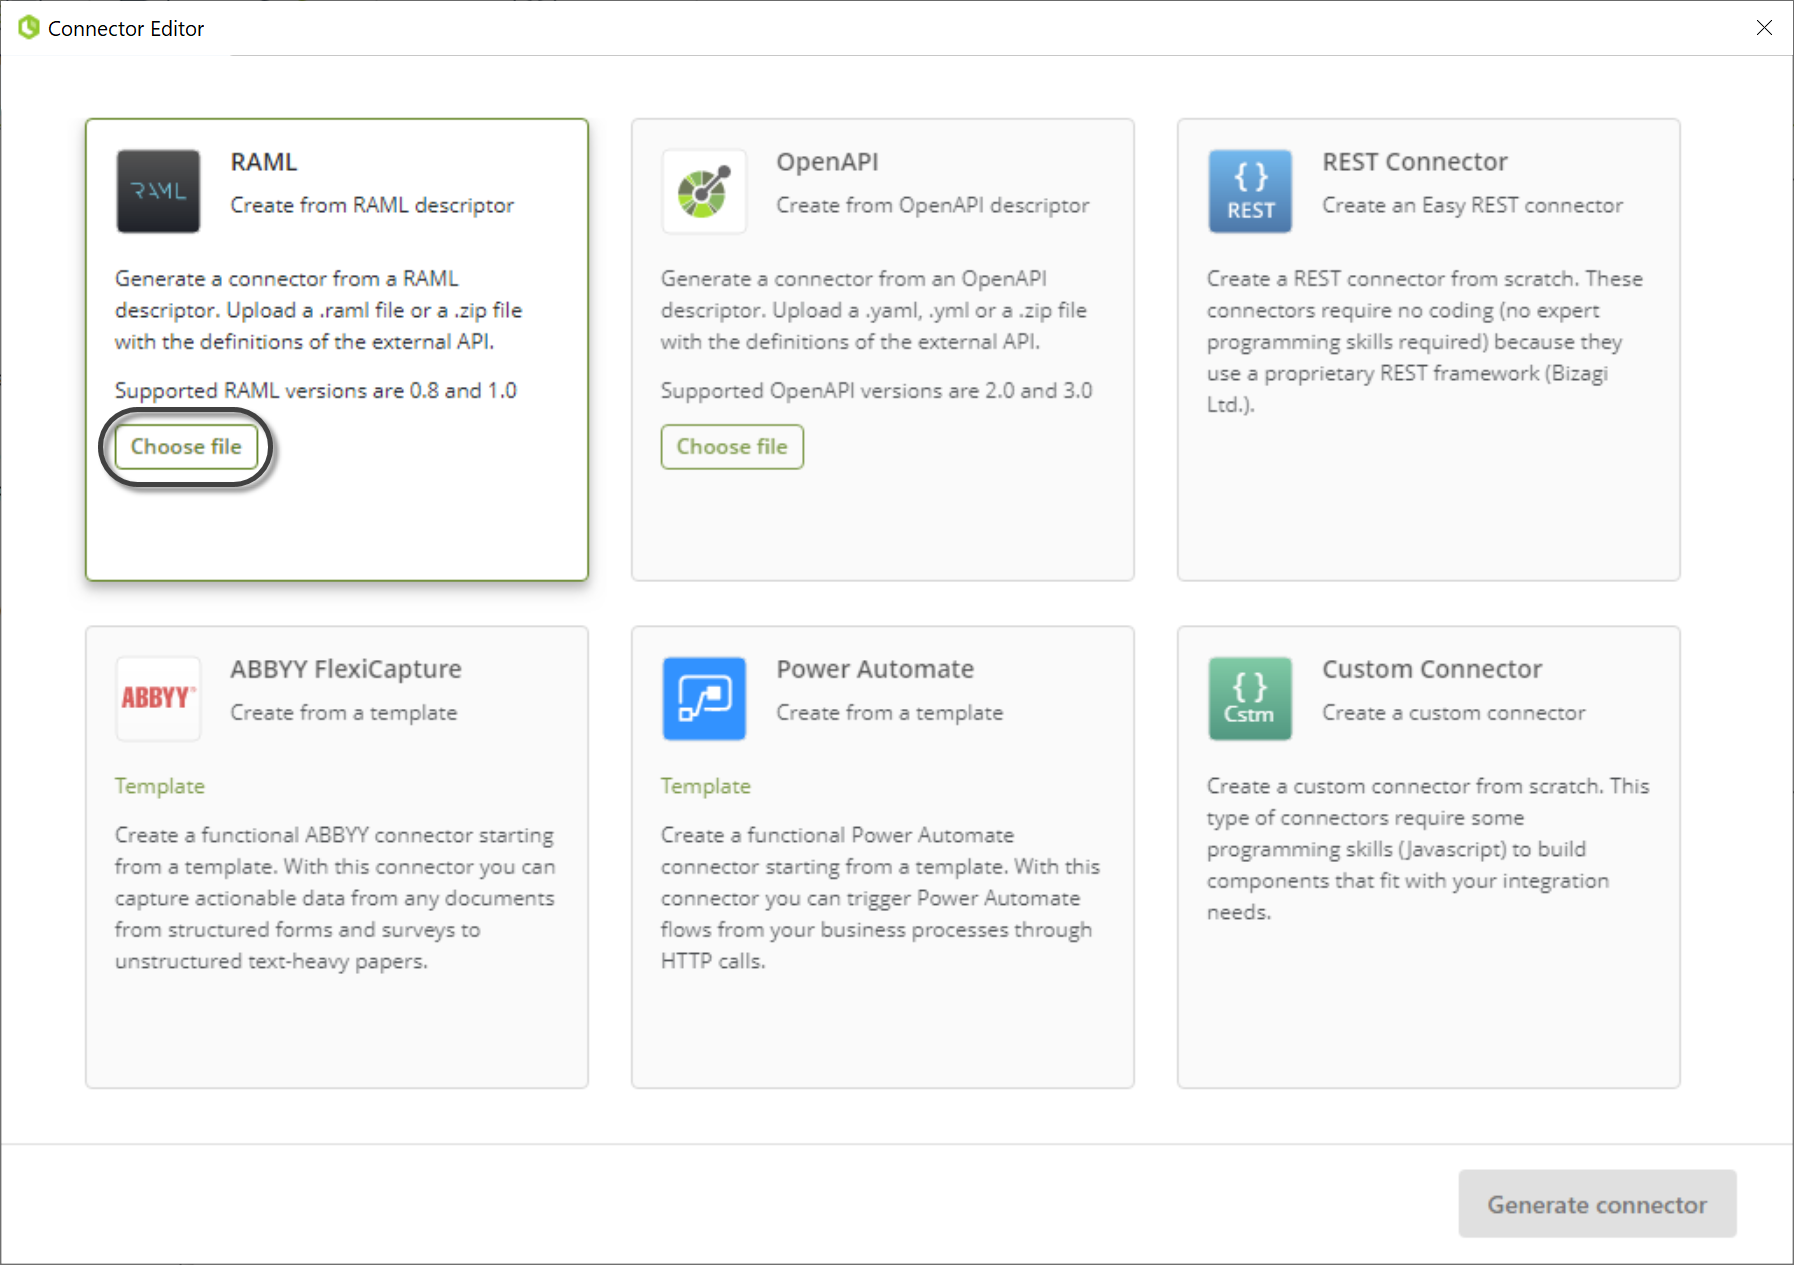
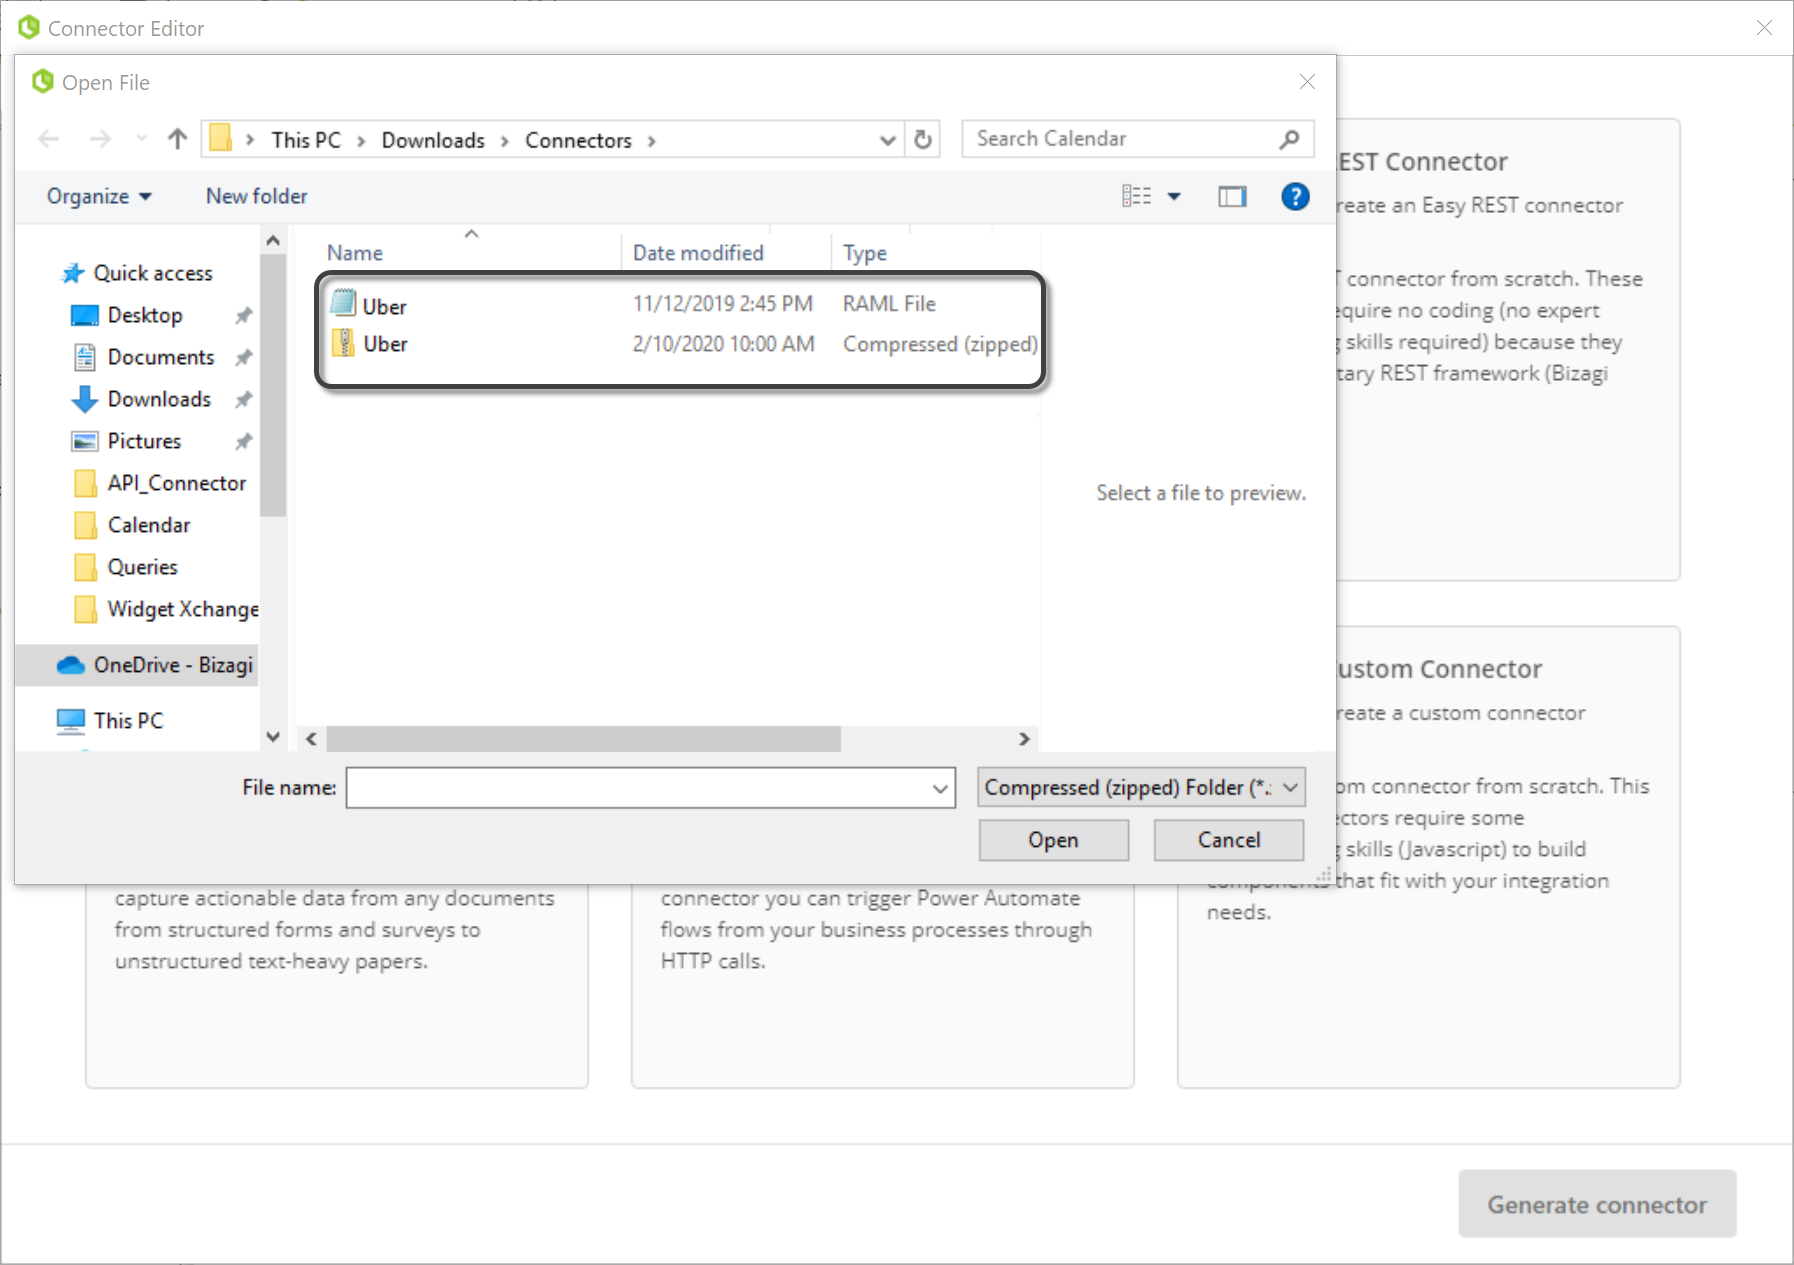
Take into account that with this option you will be able to upload .raml file or a whole project compressed in a .zip folder.
Select the file you want to upload and click open.
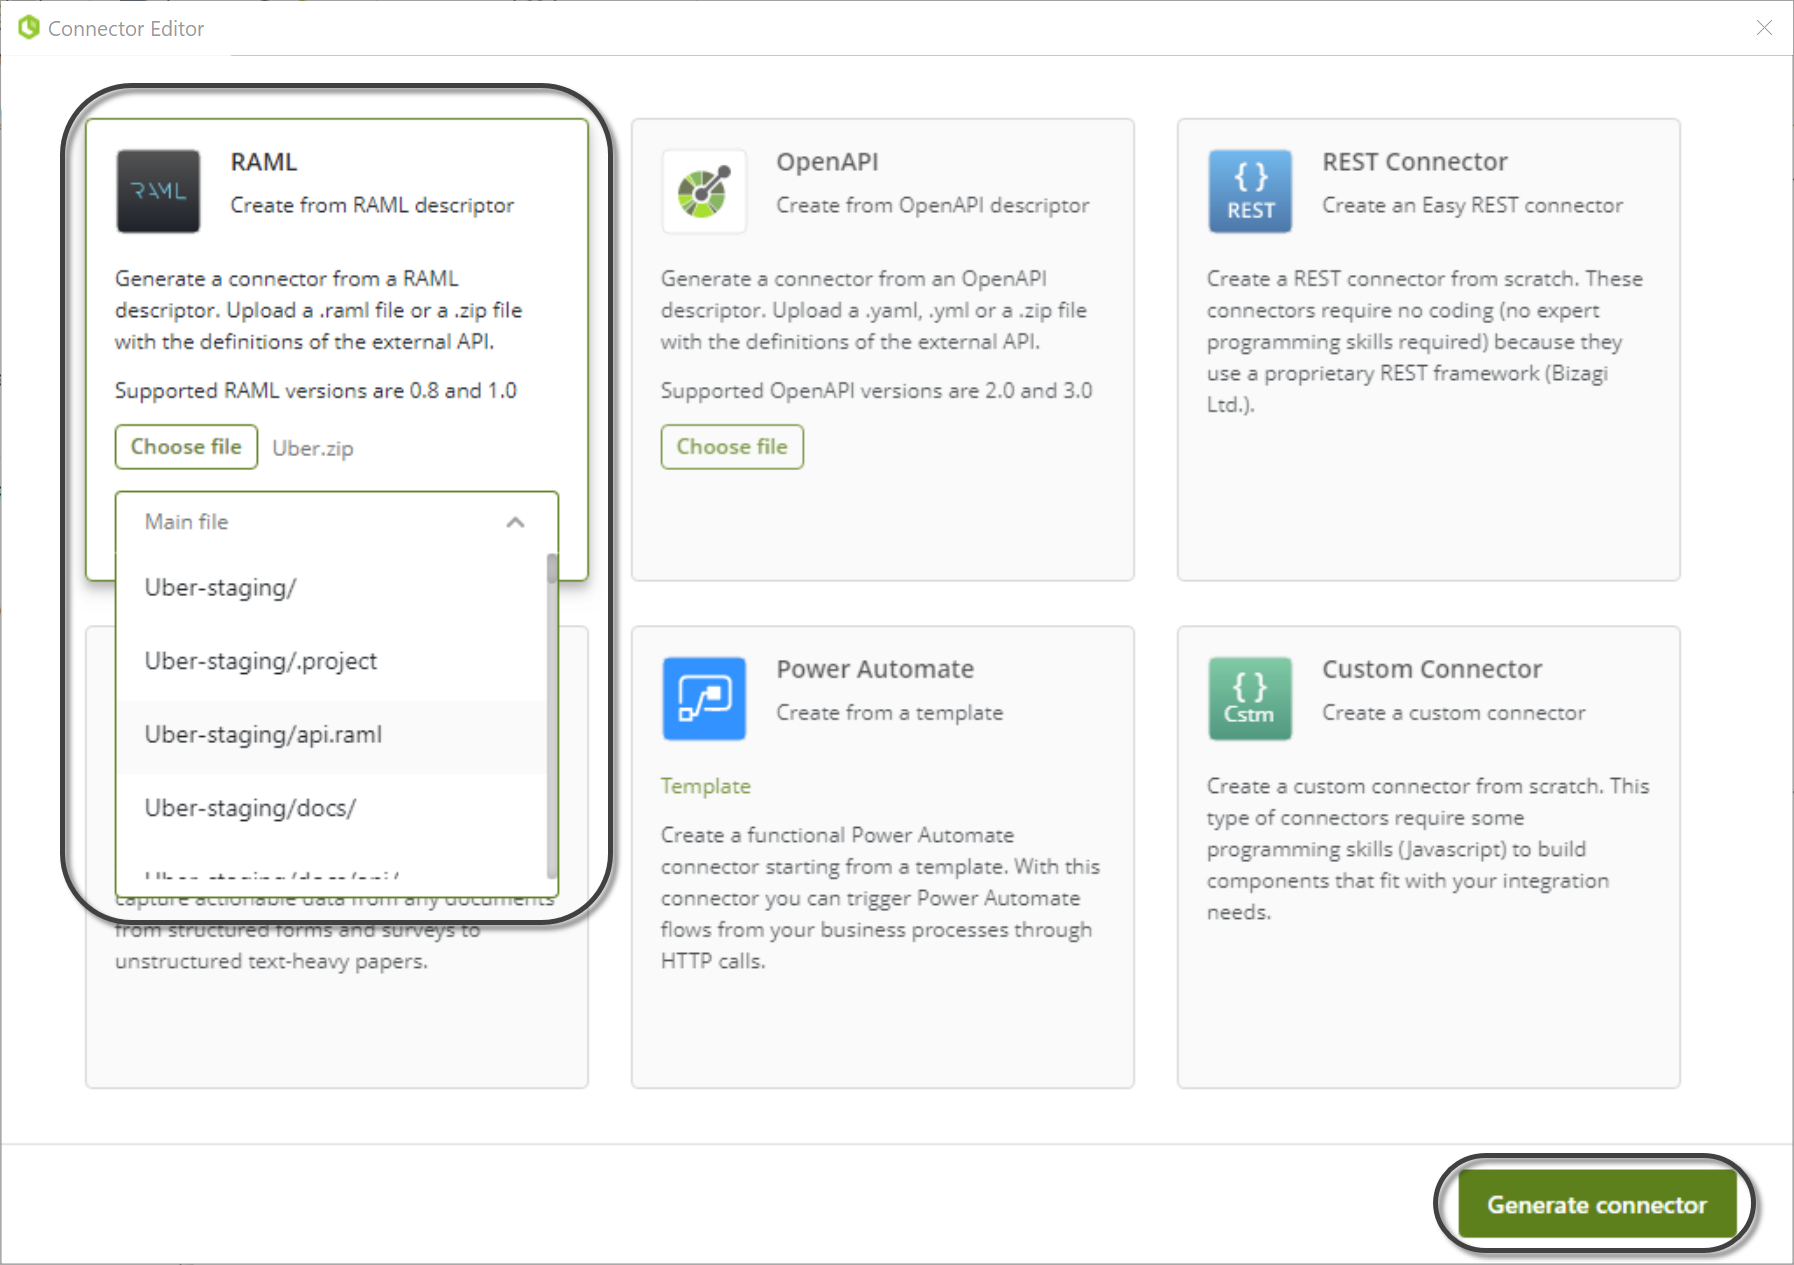
If your project is in a .zip file, select from the drop-down list the project's main file. Click Generate connector to continue.
Once you have uploaded your file or your project, all the actions of the connector will be generated. You can review the details of each action as well as the general configuration of the connector. Notice that you will be able to configure a Base URI for your connector. The Base URI is a customized parameter that can be set in Bizagi Studio, where you can customize the URL for each environment. For example, you can define the Base URI for each environment as follows:
•Development environment: https://dev-api.com/services/data
•Test environment: https://test-api.com/services/data
•Production environment: https://prod-api.com/services/data
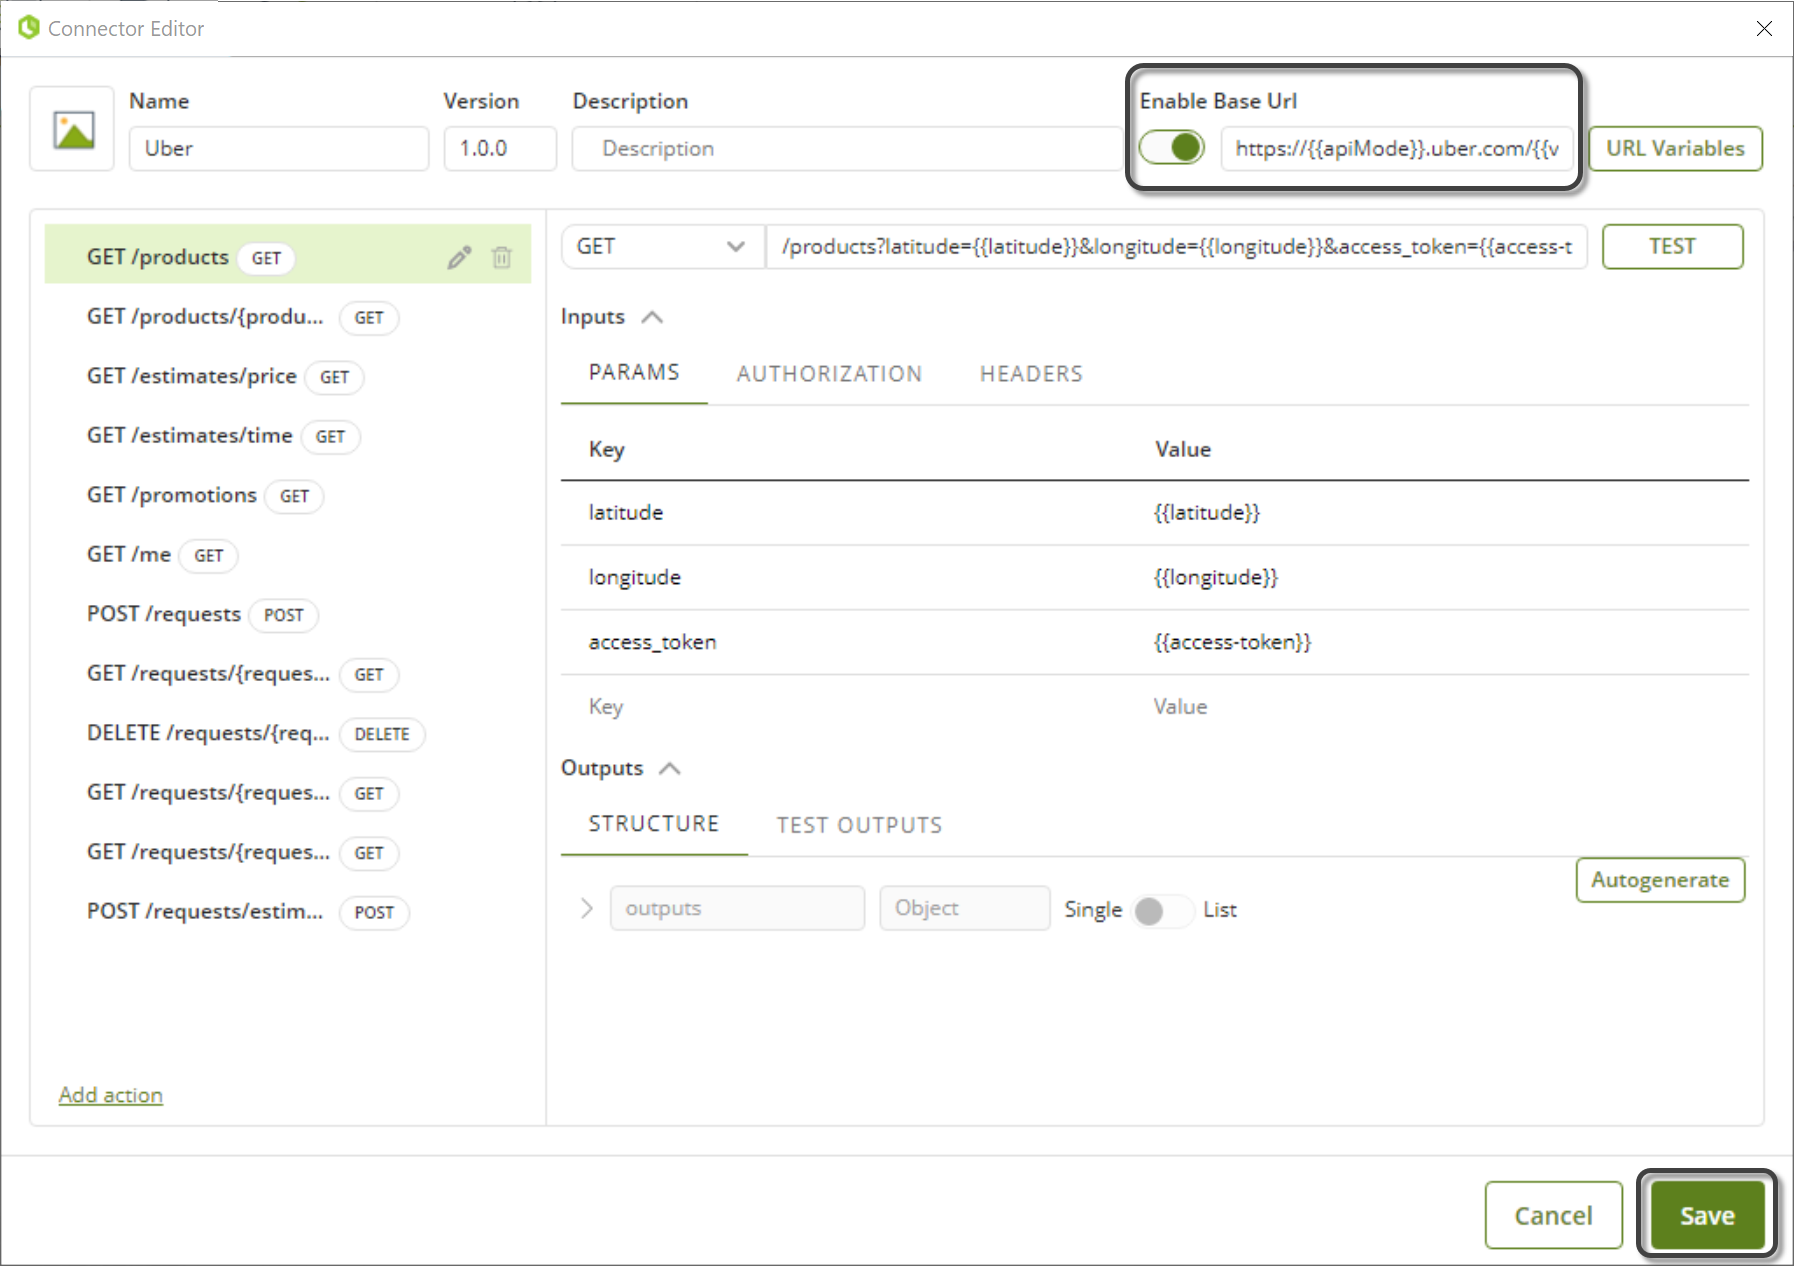
Once your connector is ready, click Save.
Finally, you are able to install and configure your connector. For more information about the connector installation, click here.
OpenAPI
The OpenAPI Specification (OAS) is an API description format for RESTful APIs which allows both humans and computers to understand the capabilities of the service without access to source code. The specification can be written in easy learning and reading formats such as YAML or JSON. To generate a connector through the Bizagi Connector Editor, your API must be defined in version 2.0 of OpenAPI (Swagger) or in version 3.0.
Considerations
The following table illustrates the main considerations and differences between the two OpenAPI supported versions.
OpenAPI v.2.0 |
OpenAPI v.3.0 |
|
|---|---|---|
Supported data types |
String, Integer, Boolean, Number, Array, Object |
|
Supported http methods |
GET, PUT, POST, DELETE |
|
Supported file formats |
.json, .yaml, .yml, .zip |
.json, .yaml, .yml, .zip |
Request supported MIME types |
application/json, application/x-www-form-urlencoded, text/plain |
|
Response supported MIME types |
application/json |
|
Path's Operation supported parameters |
Path, Query, Body, Form |
Path, Query |
Security methods |
Security methods are not mapped during the generation of the connector. It will only take into account which methods require authentication, but specific methods (basic, oauth, etc.) will not be configured. |
|
Base URI |
For the Base URI definition, the properties host, basePath and schemes are taken into account. From the schemes list, Bizagi takes the first URL with an https protocol. If there are no URLs with an https protocol, Bizagi takes the first URL. |
For the Base URI definition, Bizagi will look in the servers property the first URL with an https protocol. If there are no URLs with an https protocol, Bizagi takes the first URL. |
Using the OpenAPI connector generator
Imagine you want to integrate with Uber to manage a process of people transportation. To do so, you can create the connector manually, where you have to define each action in Bizagi's Connector Editor. However, if the specification of the external system is described in OpenAPI, you can easily create your connector.

To generate your connector, complete the following steps:
Go to Bizagi Studio's Integration Hub and select Build your own API Connector.

Click Choose File in the OpenAPI option and choose the file that you want to import.
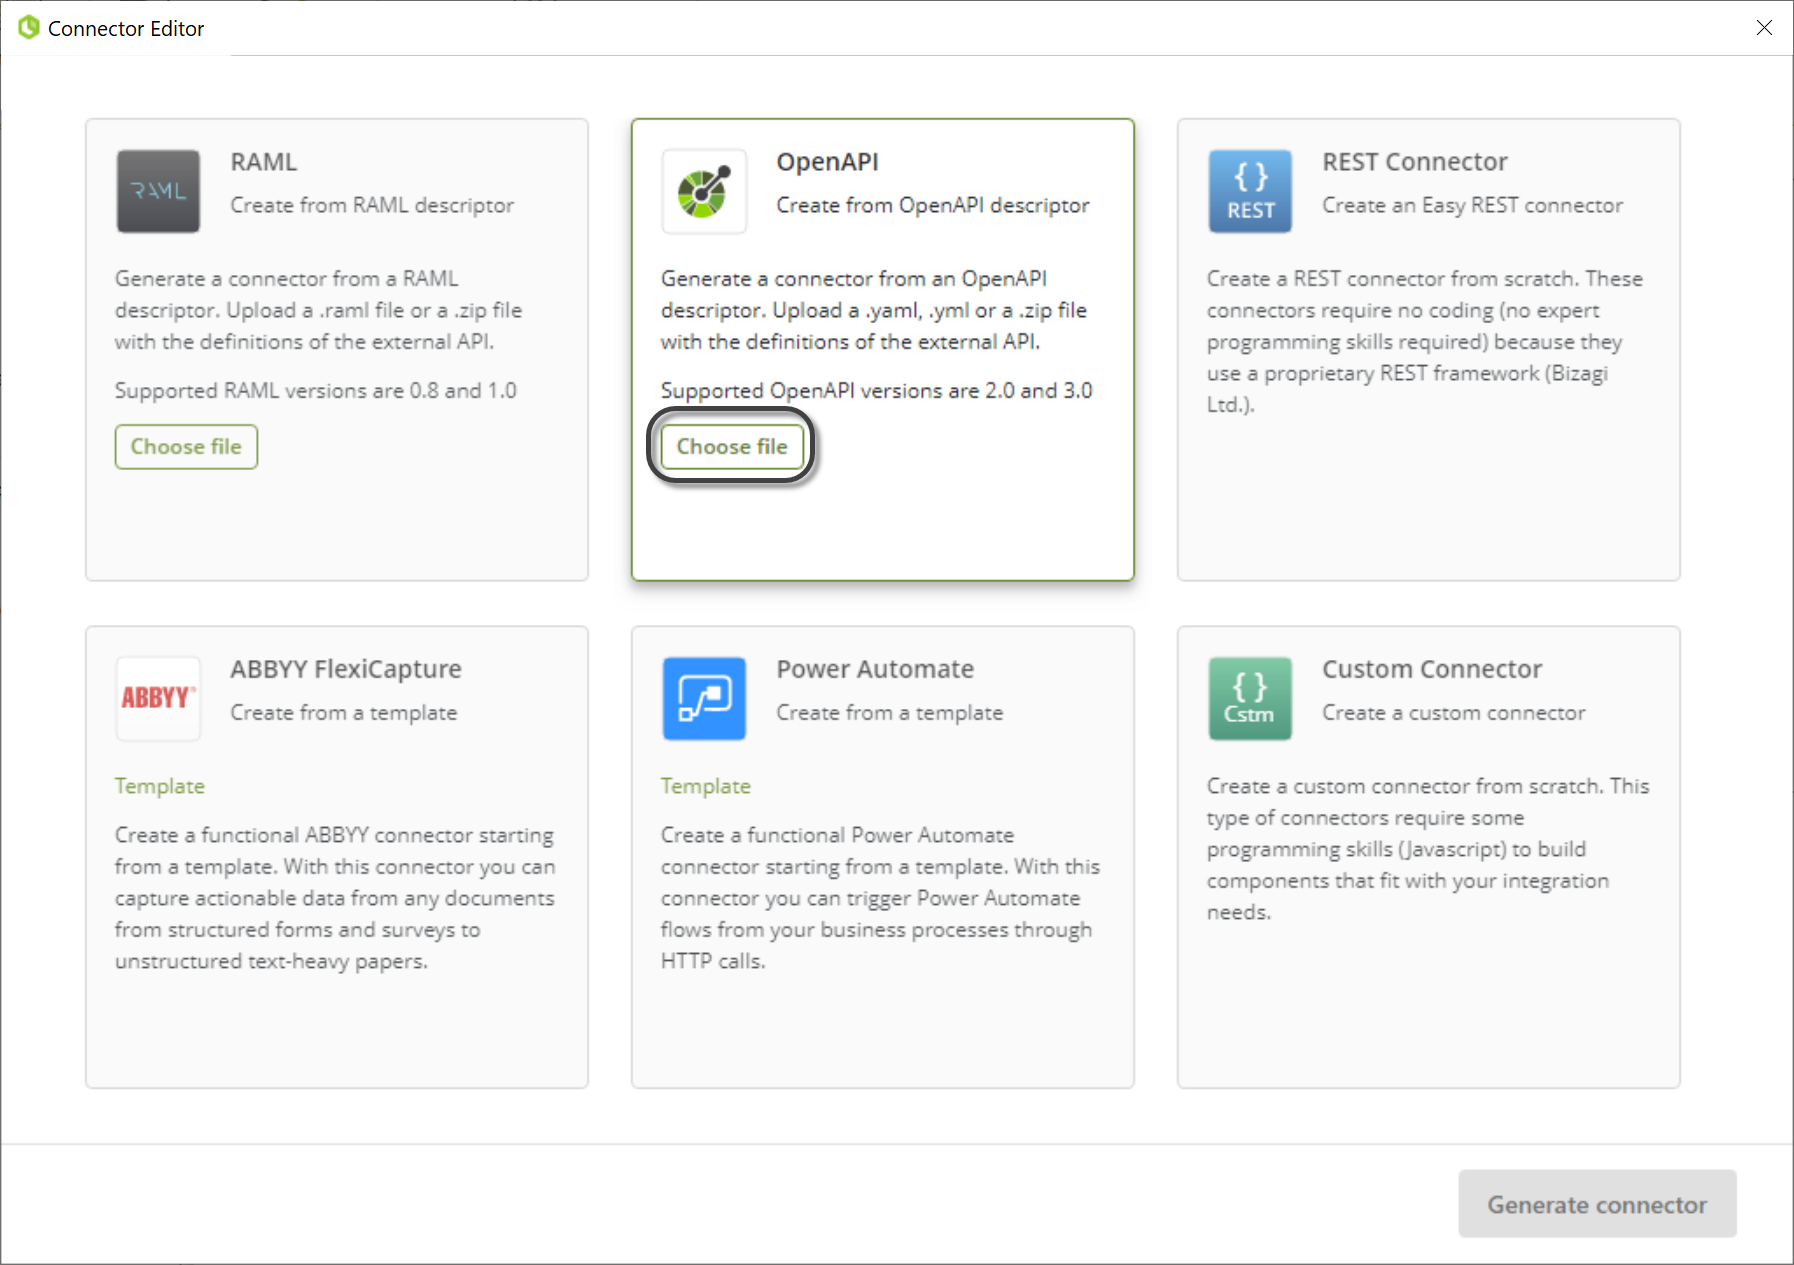
Take into account that with this option you will be able to upload .yaml, .yml or .json file or a whole project compressed in a .zip folder.
Select the file you want to upload and click open.
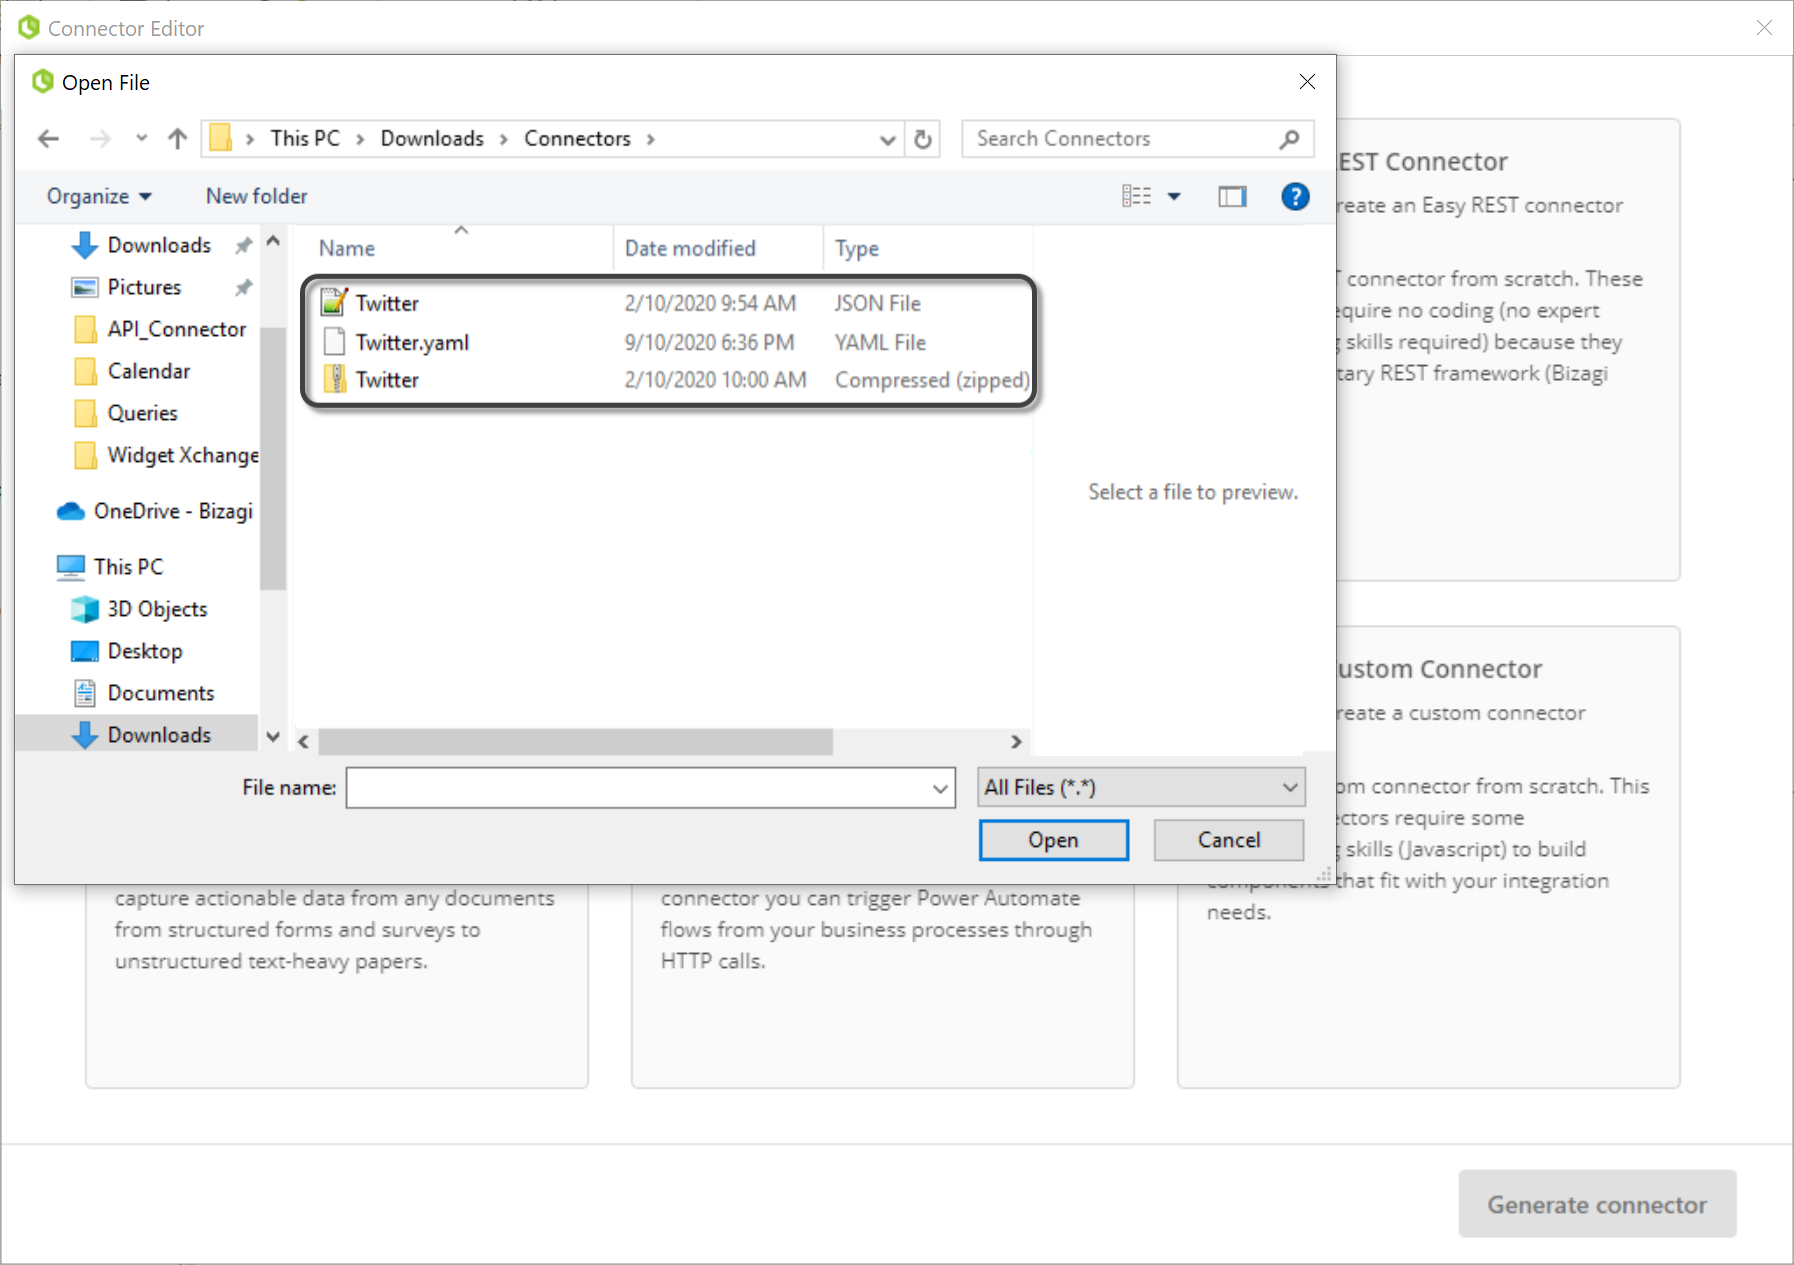
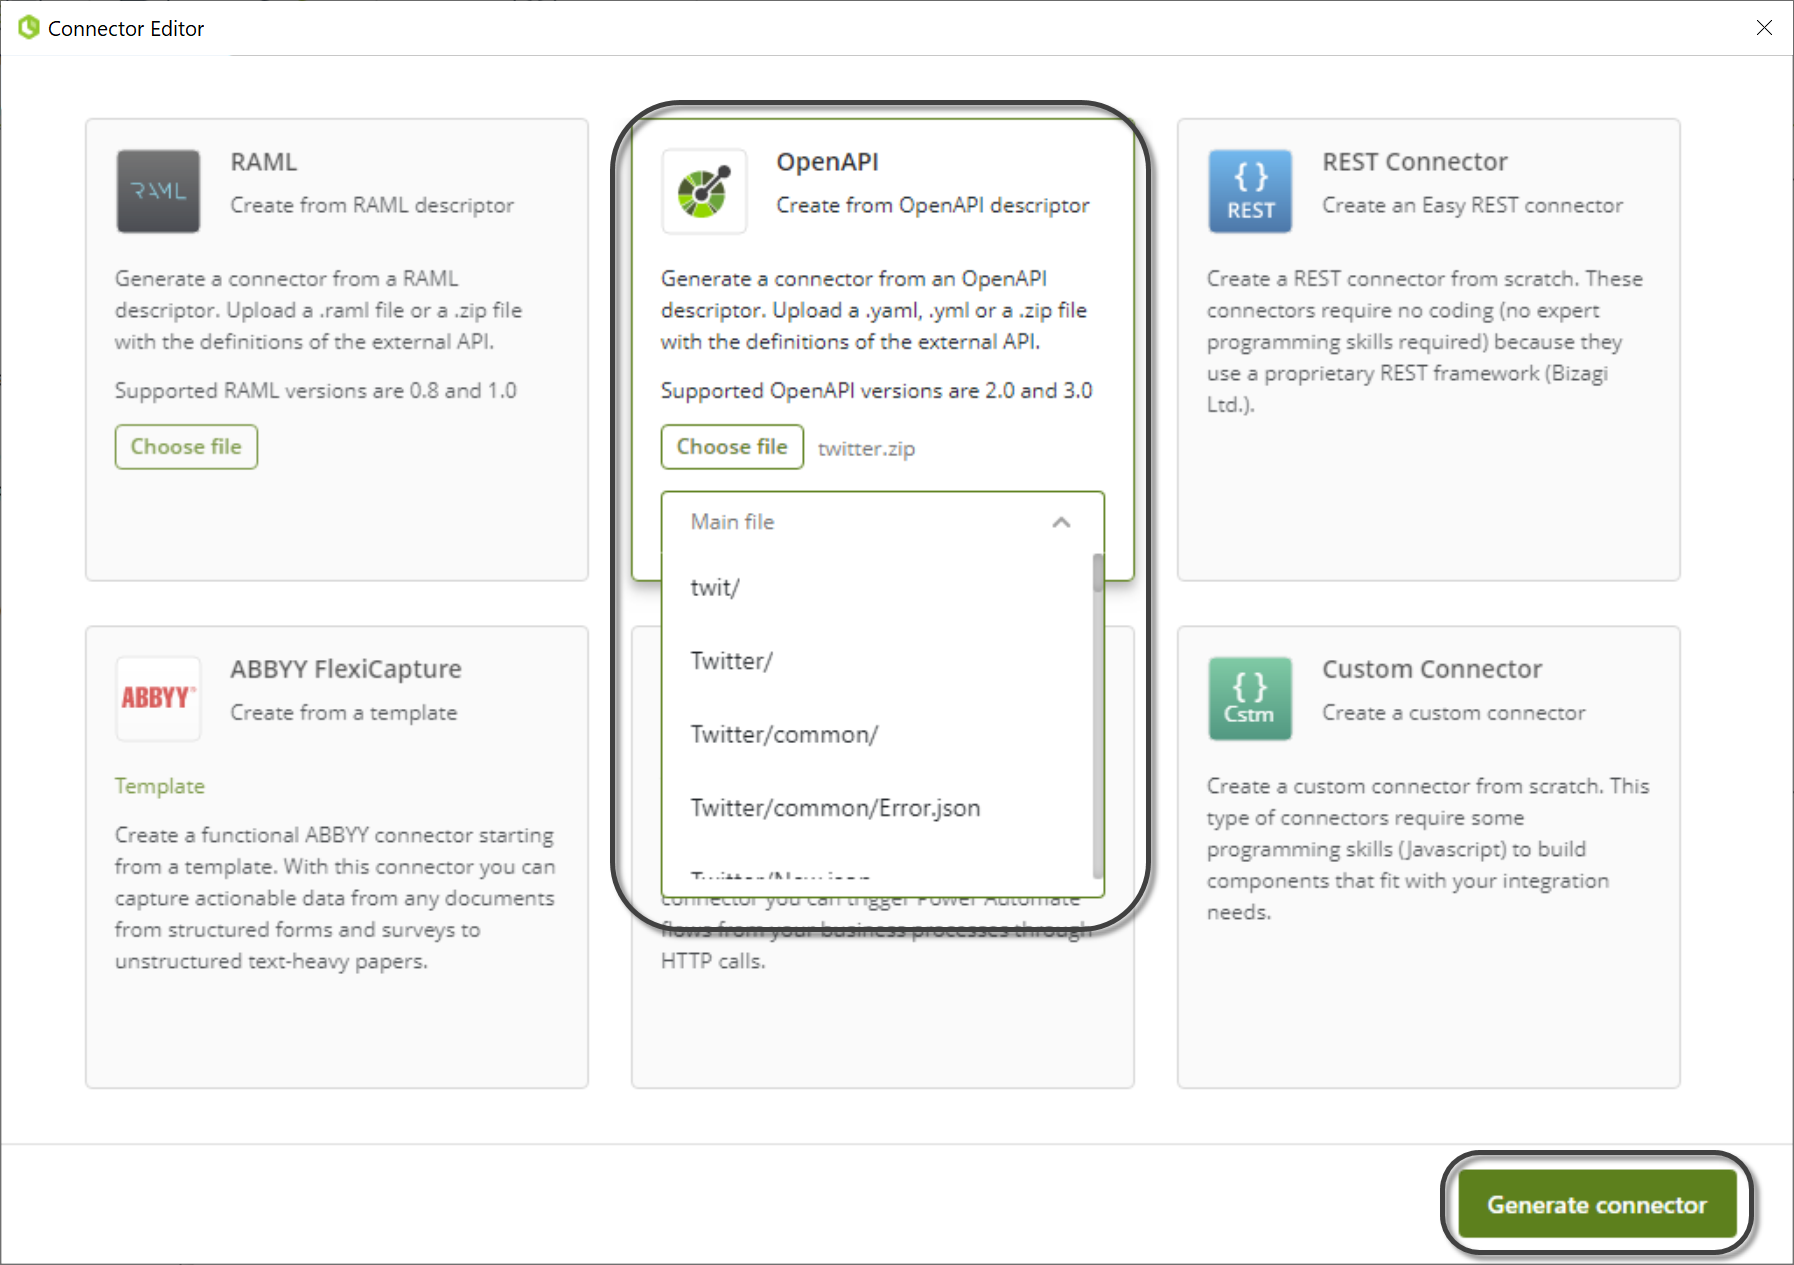
If your project is in a .zip file, a pop-up window appears where you must type project's the main file name. Click Generate connector to continue.
Once you have uploaded your file or your project, all the actions of the connector will be generated. You can review the details of each action as well as the general configuration of the connector. Notice that you will be able to configure a Base URI for your connector. The Base URI is a customize parameter that can be set in Bizagi Studio, where you can customize the URL for each environment. For example, you can define the Base URI for each environment as follows:
•Development environment: https://dev-api.uber.com/v1
•Test environment: https://test-api.uber.com/v1
•Production environment: https://prod-api.uber.com/v1
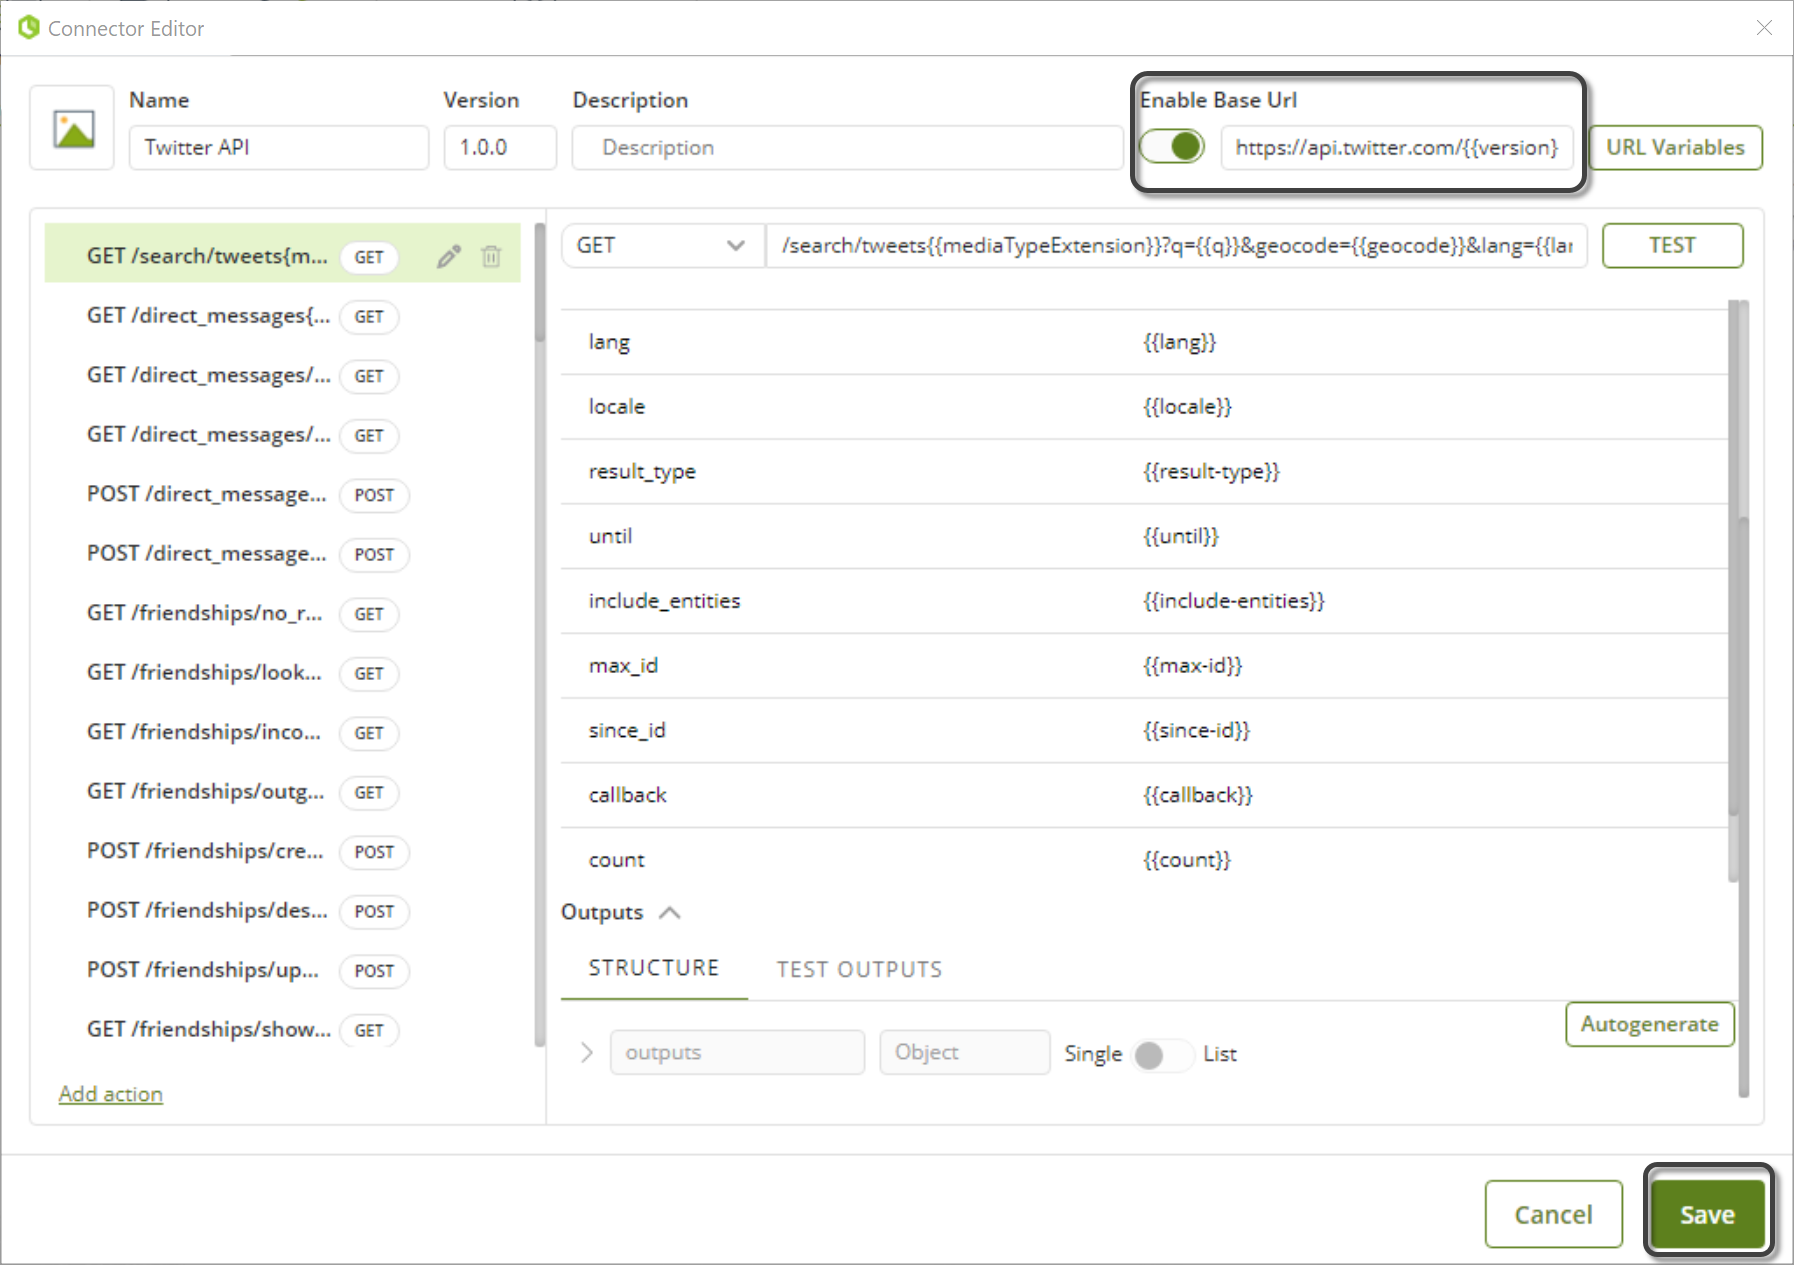
Once your connector is ready, click Save.
Finally, you are able to install and configure your connector. For more information about the connector installation, click here.
Last Updated 1/3/2024 10:48:19 AM