Overview
To use the Power Automate connector you need to create the flow to be triggered from Bizagi. To do that, Microsoft Power Automate provides an easy interface to let you diagram the flows by performing simple steps.
For the sake of this example, the flow to be created here allows you to create a meeting using the Standard Office 365 Outlook connector. This flow will be triggered from Bizagi during the execution of the Contract Tracking process which is part of the Contract Management process available from our Process Xchange.
Considerations
•You need to have an account on make.powerautomate.com.
•You can trigger flows which start when a HTTP request is received.
•You need to be familiarized with the HTTP Methods for RESTful Services. For more information, refer to REST API tutorial.
Creating a flow
The following example provides a brief explanation of how to create a flow, for more information, refer to Microsoft Power Automate official documentation.
For this custom flow, after a HTTP request is received from Bizagi, a new event is created in Office 365 Outlook. Follow the next steps to create the flow.
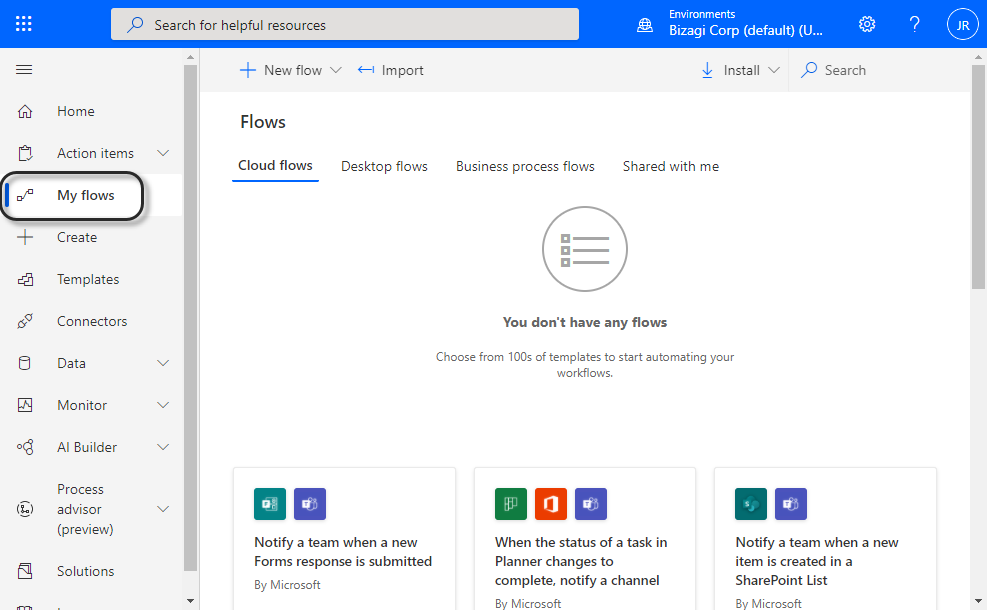
1. In Power Automate, select My flows option located in the left ribbon.
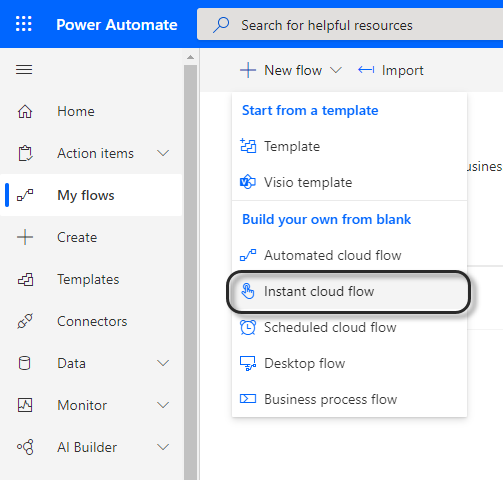
2. Expand New flow option and select Instant cloud flow.
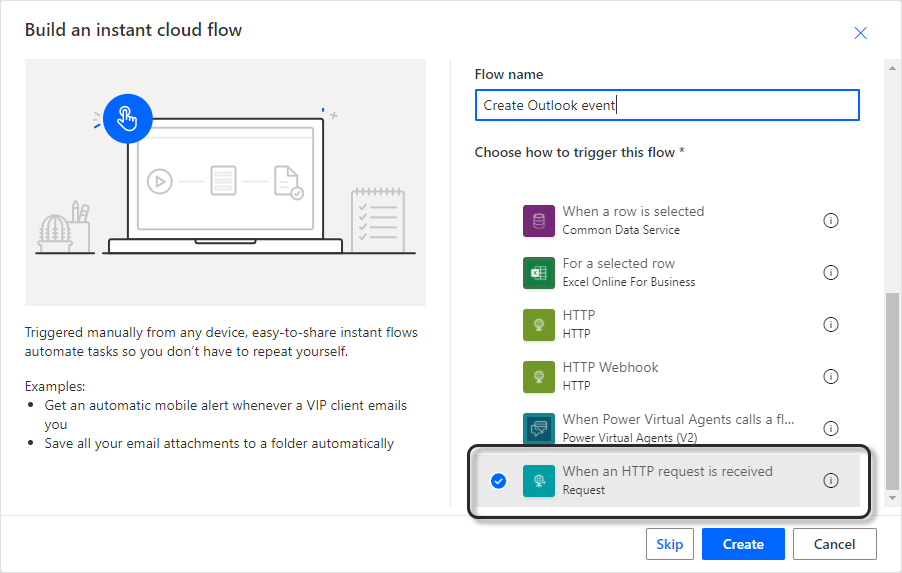
3. Provide a name to your flow and select how to trigger this flow.
Select When a HTTP request is received and click Create.
4. The flow has been created. click the first step to configure the expected HTTP request
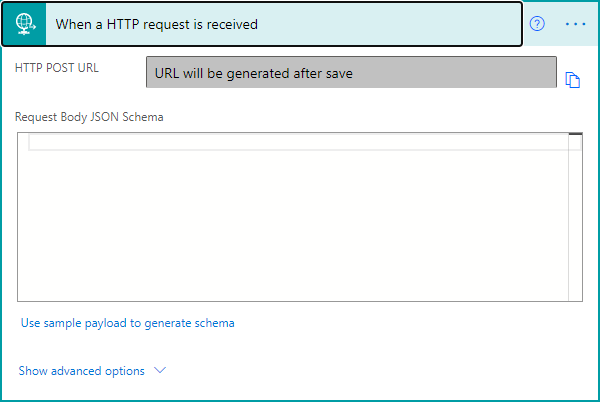
5. Create the input parameters for the step. For this example, the following parameters have to be created:
•Subject of the meeting.
•Start Time.
•End time.
Click Use sample payload to generate schema to create the JSON schema.
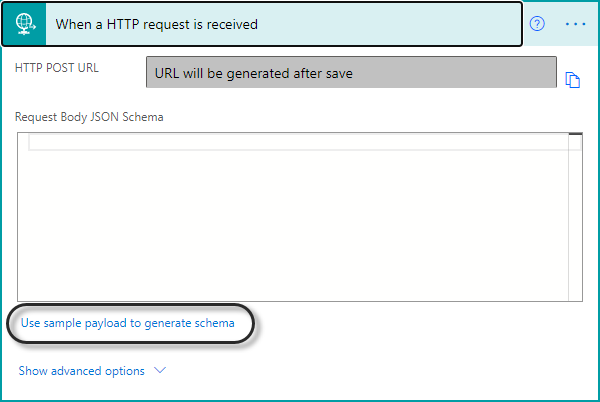
6. Copy and paste the following sample. You can adjust your parameters according to your business needs.
{
"subject":"string",
"StartTime":"string",
"EndTime":"string"
}
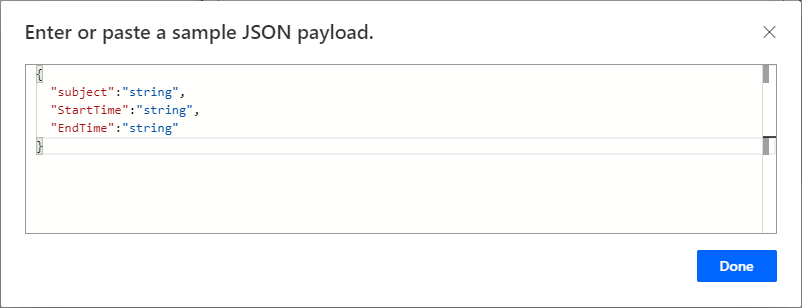
Click Done.
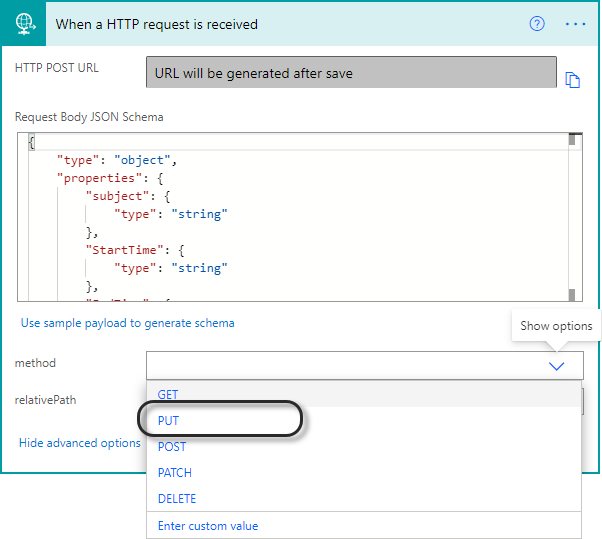
7. Click Show advanced options to configure the HTTP method used.
You can use any of the following methods which are compatible with the Bizagi connector:
•GET
•PUT
•POST
•PATCH
•DELETE
For our example, we use the method PUT. select it in the method field.
8. Now you can create the next step of your flow. Click + New step to add it.
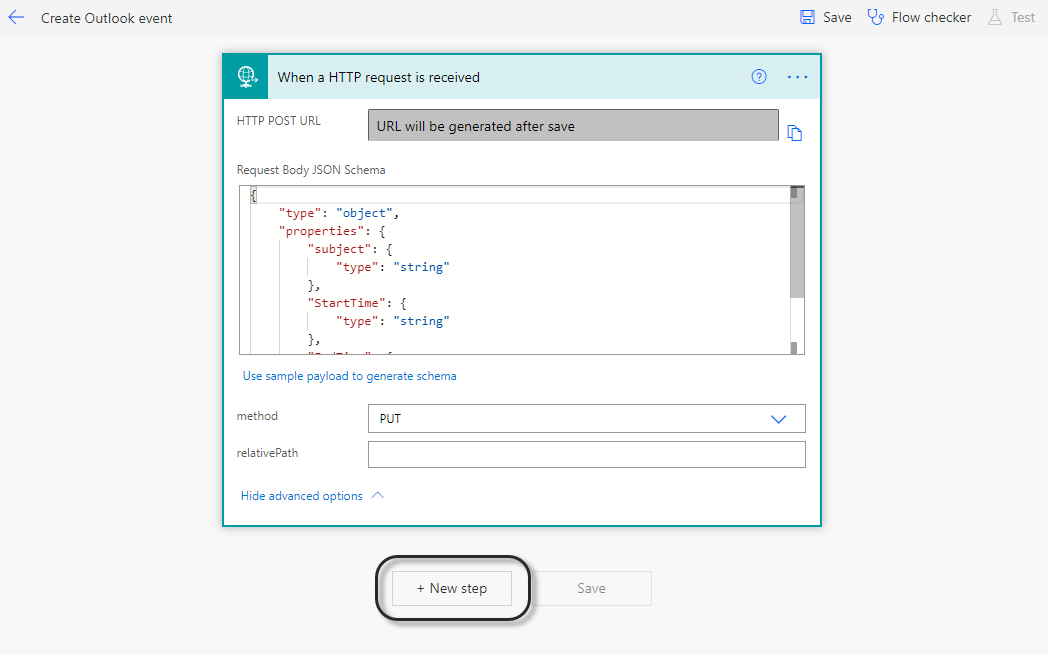
9. In our example, we want to create an Outlook event using the input parameters.
In the new step, go to Standard tab and select Office 365 Outlook.
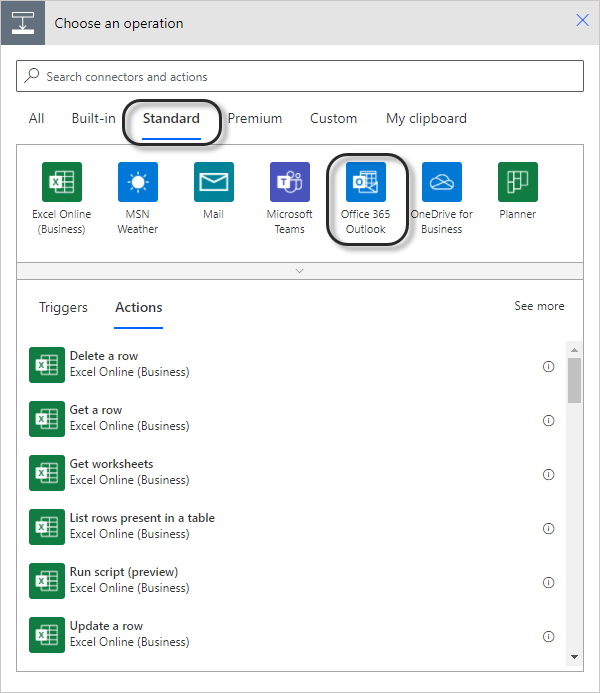
10. In the Actions tab, select Create event.

11. Provide the credentials for the Office 365 Outlook service. If you don't have to enter the credentials of the account in this step of the flow, verify that the connection of this step uses the right email address by clicking the three dots menu at the top right corner of the step.
12. Configure the step using the input parameters of the previous step of the flow.
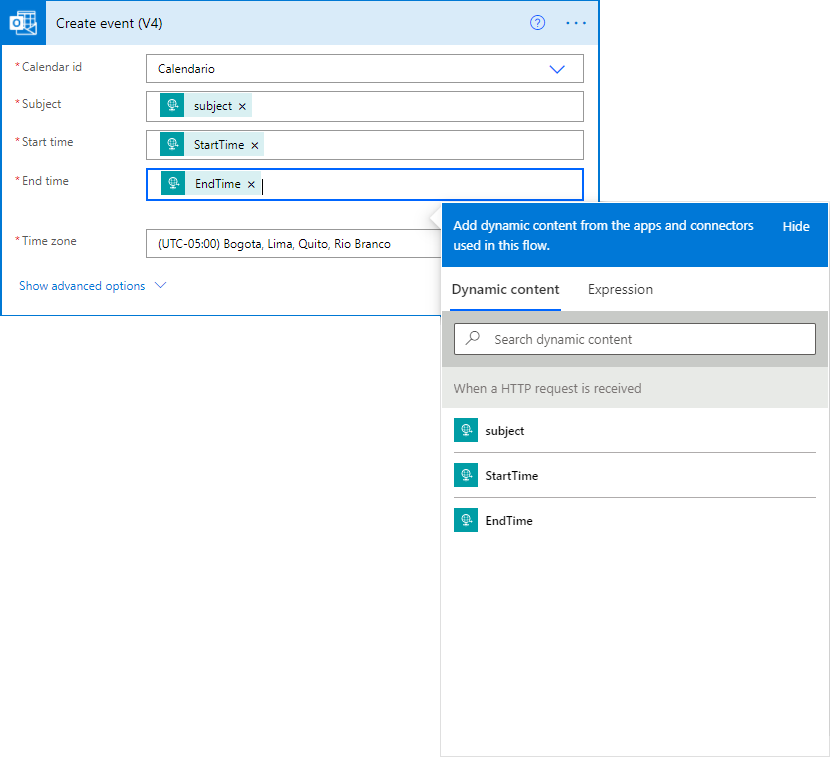
13. To complete the request, the last step is to create the response. Event though you need this step to complete the HTTP request, the Power Automate connector does not receive an answer as result of the flow invocation.
Click + New step to add the response and type Response to select the action performed by the flow step.
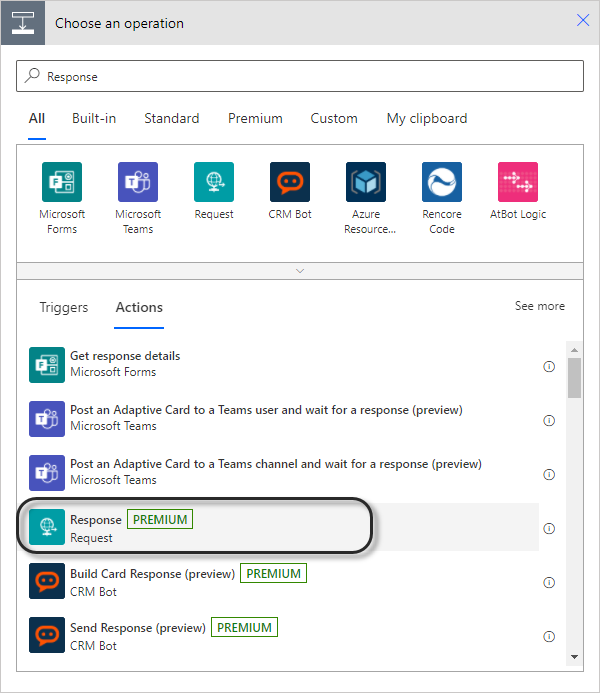
Click Save. This step does not require further configuration.
At this point, your flow is ready to be triggered from Bizagi.
Last Updated 1/30/2024 9:25:14 AM