Overview
This article explains how to configure the connectors authentication methods available within Bizagi (both in Easy REST and Custom connectors).
What you need to do
There are three different ways to configure the authentication of a connector in Bizagi:
1.From the Connector Editor in Bizagi Studio.
2.From the connectors' configuration (i.e., from Bizagi Studio's Expert view).
3.From the connectors' configuration in the Management console of the environment.
Connector Editor
To configure the authentication method from the Connector Editor, you must first select the type of connector you want to create (either Easy REST or Custom) and open the corresponding connector interface.
REST connectors
If you decide to create an Easy REST connector, follow the next steps:
1.In the Easy REST connectors interface, start by filling in the connector's general information and defining its actions.
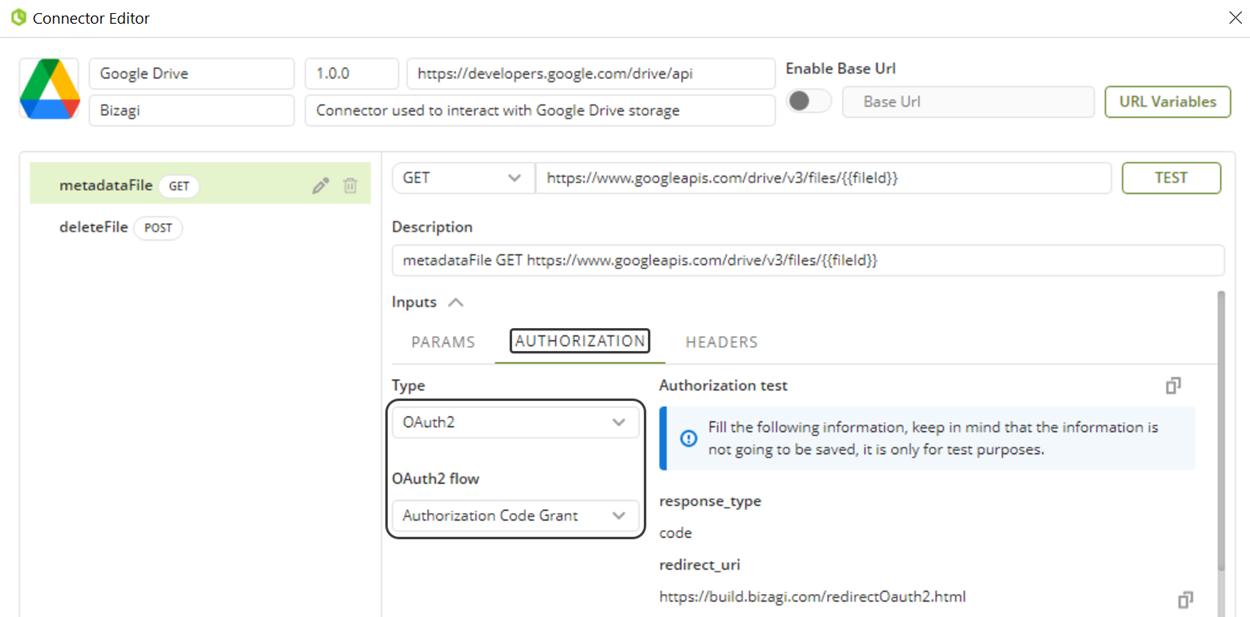
2.When specifying an action's details, the Authorization tab allows you to configure the authentication type associated to this action. In this tab, select the desired authentication method and enter the parameters required, these are listed in the authentication methods article. If you select the OAuth method with Authorization code grant you need to perform the authorization procedure.
|
If you need to replicate the Authorization Code Grant grant type configuration in another of the connector's actions, you can do so with the Copy configuration and Paste configuration buttons. These buttons are located next to the Authorization test label.
|
3.Finally, click the Test button to test the connector's action. If everything is correct, click the Save button to complete the configuration procedure, close the editor and save your changes.
Custom connectors
If you decide to configure a Custom connector, follow the next steps:
1.In the Custom connectors interface, start by filling in the connector's general information and defining its actions.
2.Define the global parameters required to configure the desired authentication method.
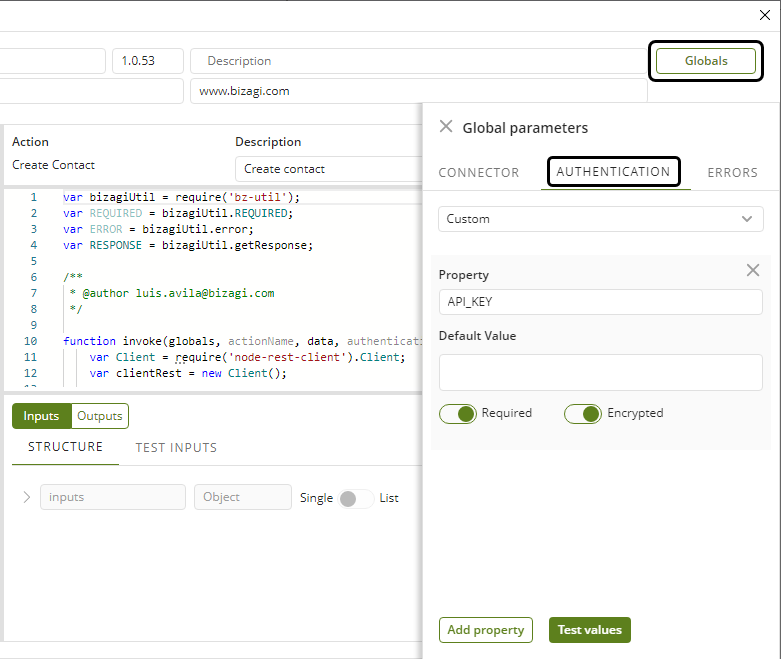
a.If you want to use the OAuth method with Authorization Code Grant, you must declare inside the invoke function a variable that will contain the access token when performing the authorization procedure. To do so, declare this variable as follows:
var token = globals.authdata.tokenOauth2;
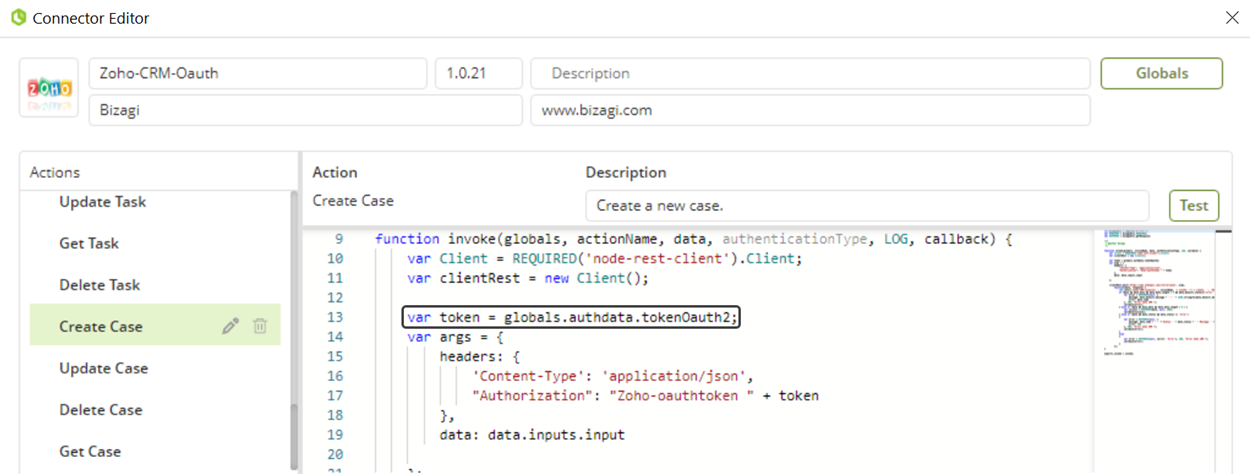
This token is used to access the external system's API using any of the Node.js libraries for HTTP requests (e.g., node-rest-client, request, etc.).
b.Once you have declared the variable, click the Globals button and then the Authentication tab. In the drop-down list that appears, select the OAuth2 Authorization Code Grant option. This displays the Authorization Code Grant grant type editable parameters, which you must fill in with the data provided by the external system (provider) to then perform the authorization procedure.

3.Close the Global parameters panel, and with the parameters created configure your desired authentication method. Then, click the Test button to test the connector's action.
Authorization procedure for OAuth with code grant
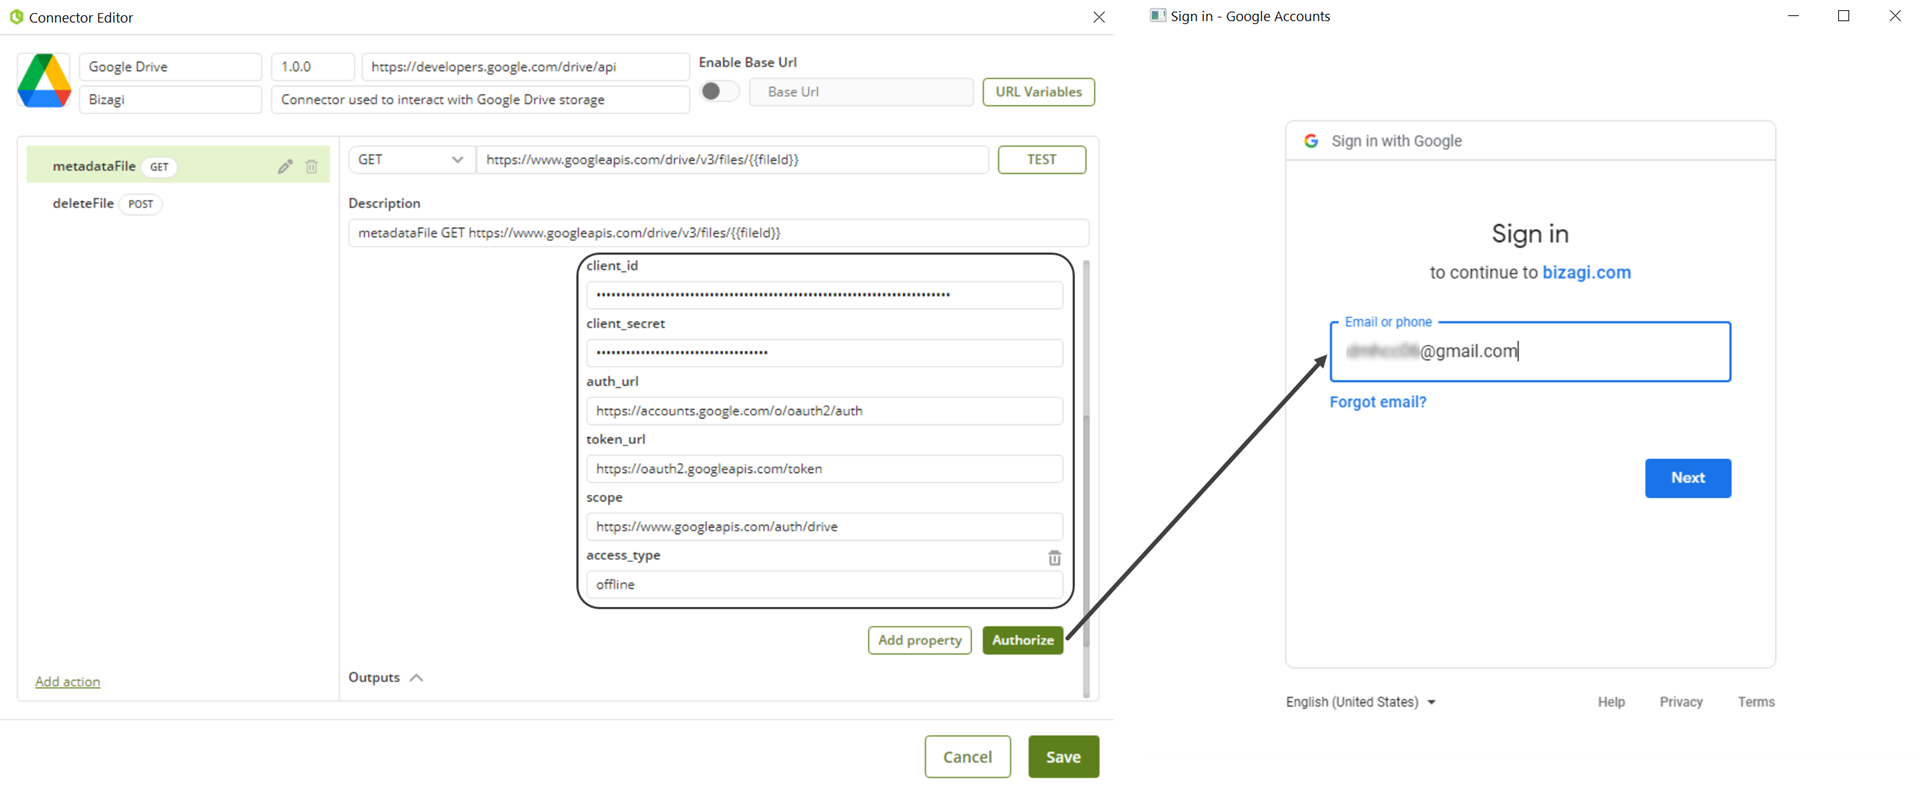
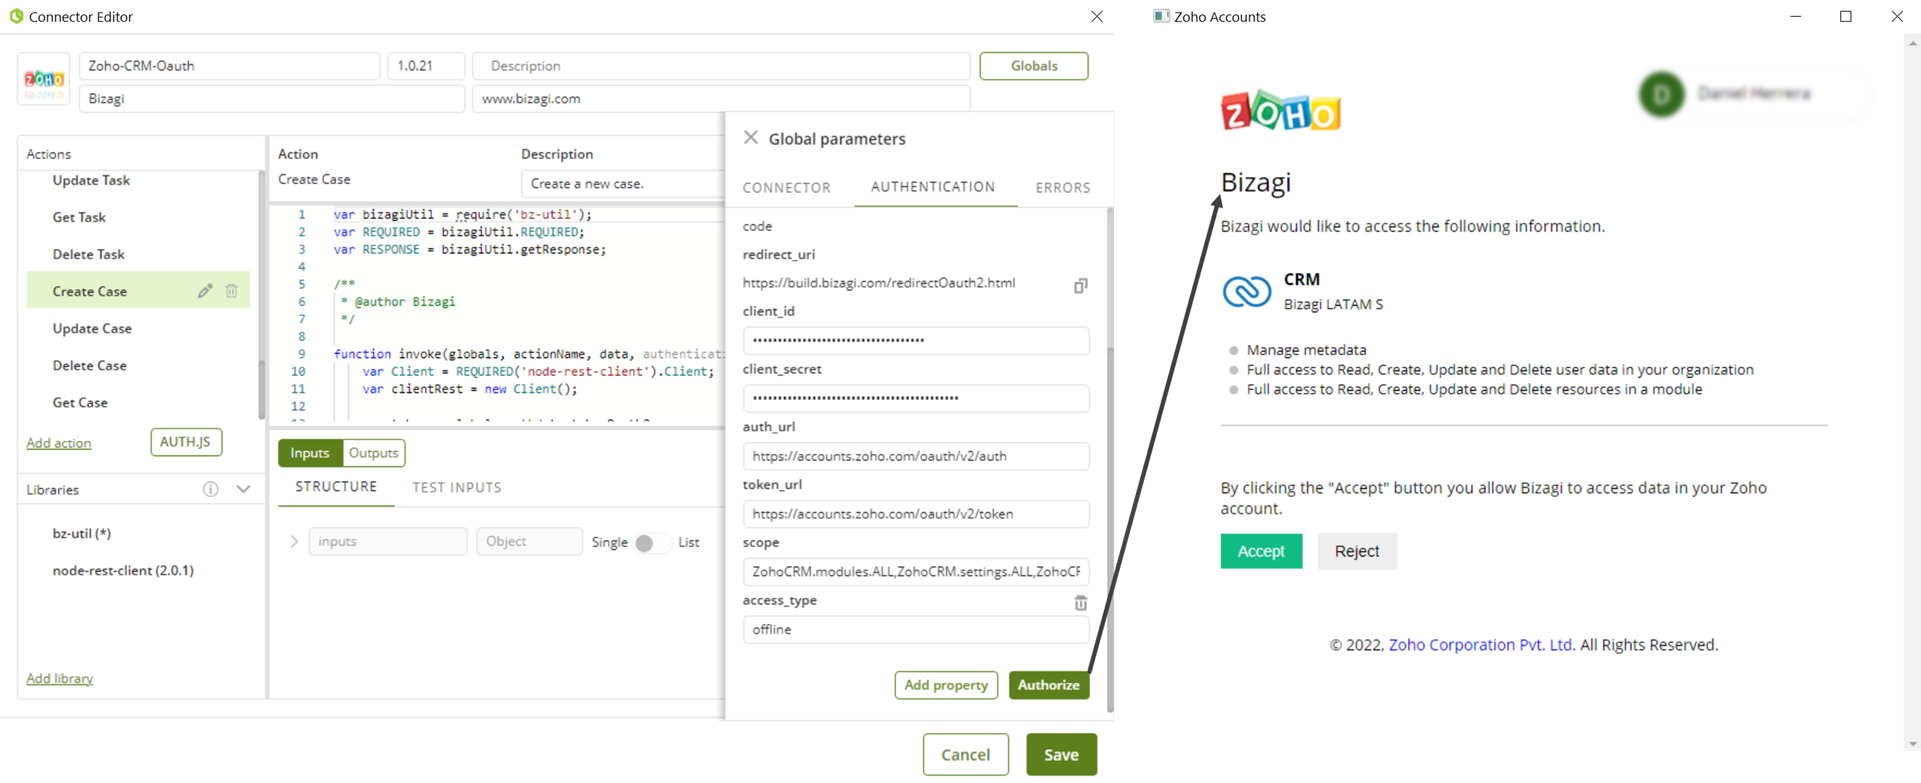
If you chose the OAuth method with Authorization code grant for your connector (for both a REST or a Custom connector) you need to do an additional step to start using your connector, the authorization procedure. To do so fill in the required parameters with the data provided by the external system (provider) and then click Authorize button. If the parameters are correct, a window opens for you to enter the provider's user credentials. Once you have filled them out, a confirmation with the accesses that are being granted appears.
REST
Custom
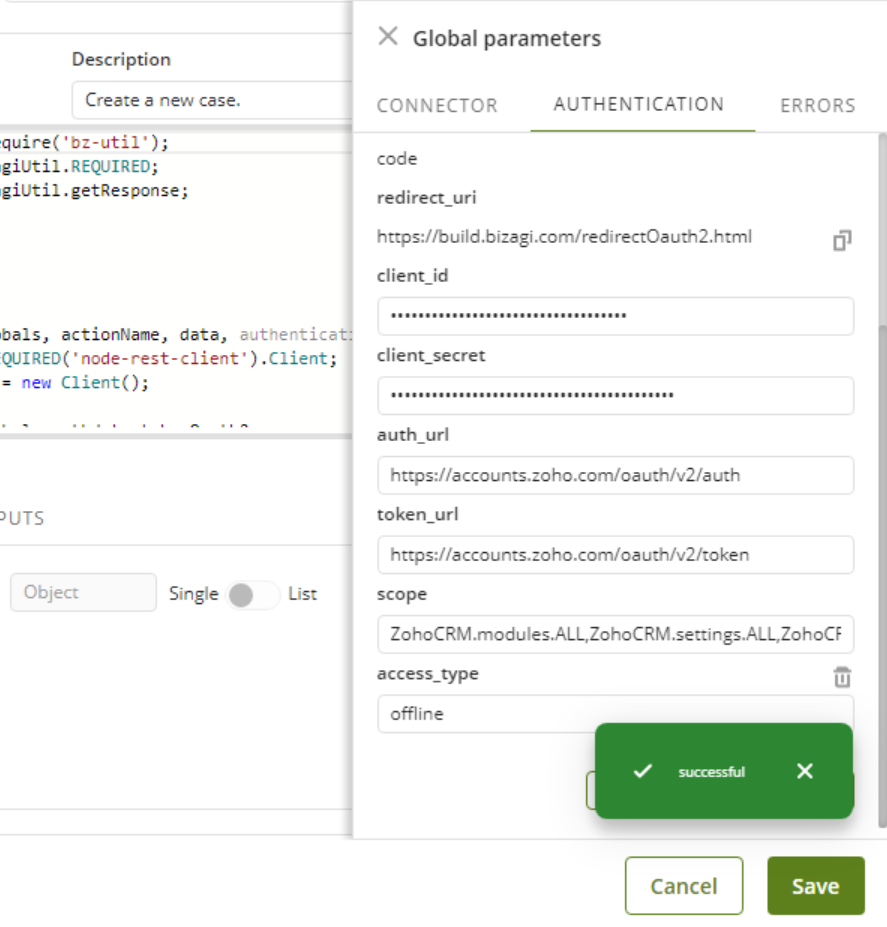
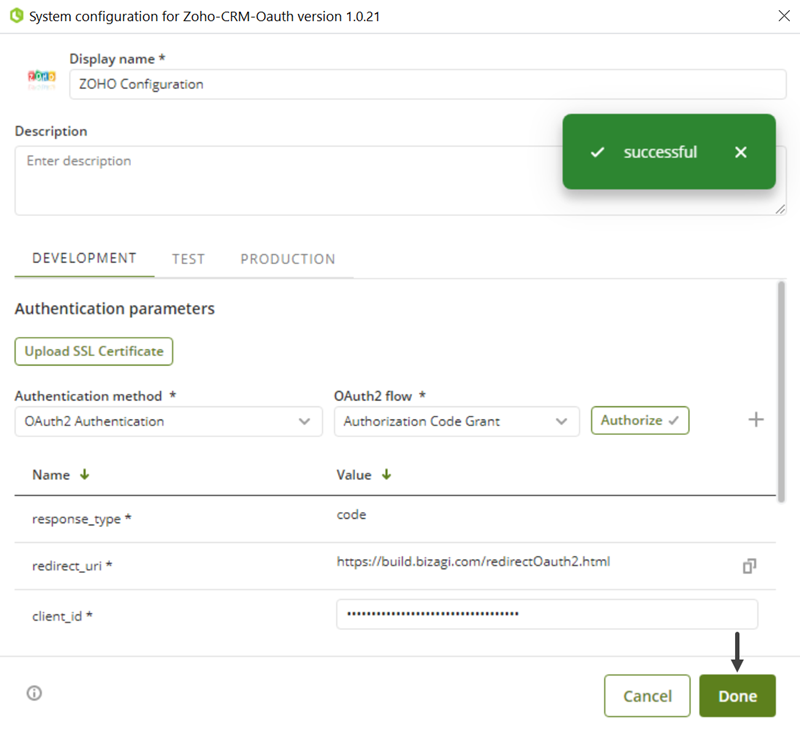
If the configuration is correct, the provider's window will close and a successful message appears on the Connector Editor.
If everything is correct, click the Save button to complete the authorization procedure, close the editor and save your changes.
Connectors configuration (Bizagi Studio's Expert view)
To configure the authentication method selected in the connector editor from the connectors' settings, follow these steps:
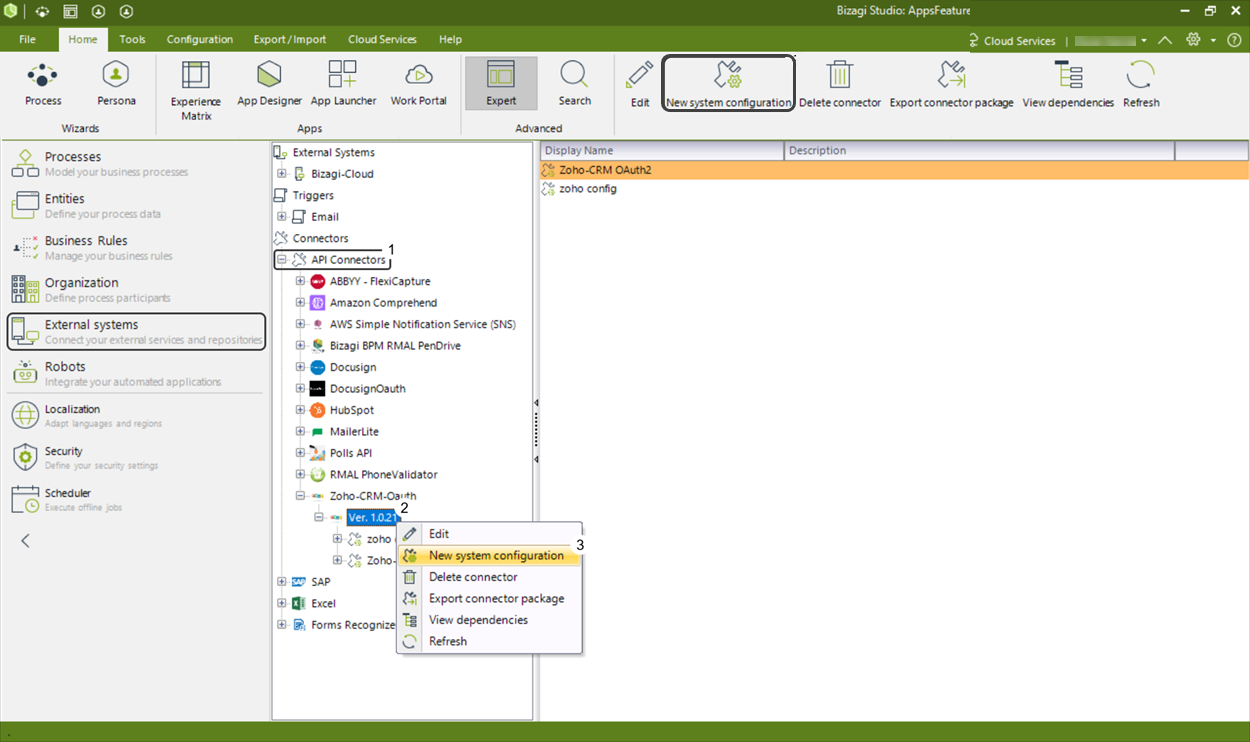
1.Go to Bizagi Studio's Expert view and select the External systems option. In the tree view that appears, look for the API Connectors node and expand it.
2.In the list that appears, search the connector you want to configure and expand its node to observe the connector's versions.
3.Right click the connector's version you want to configure and then click the New system configuration option (alternatively, you can click the connector version and then click the New system configuration button on the top ribbon), you can also edit an existing configuration.
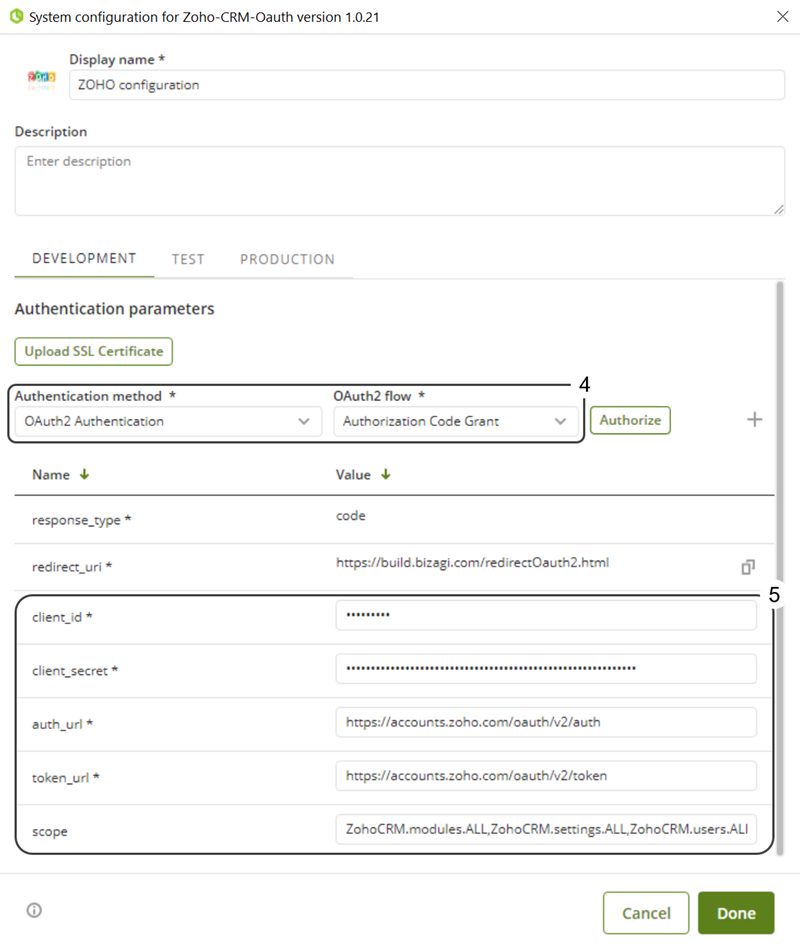
4.In the System Configuration window that appears, fill in the connector's basic information. Then, in the environment's Authentication parameters, select the previously configured authentication method.
|
Bizagi Studio validates that the configuration's Display name is available. If you enter a previously assigned name, Bizagi displays an error message.
|
5.Fill in the authorization method editable parameters with the data provided by the external system (provider). If you selected the OAuth method with Authorization code grant you need to perform the authorization procedure.
|
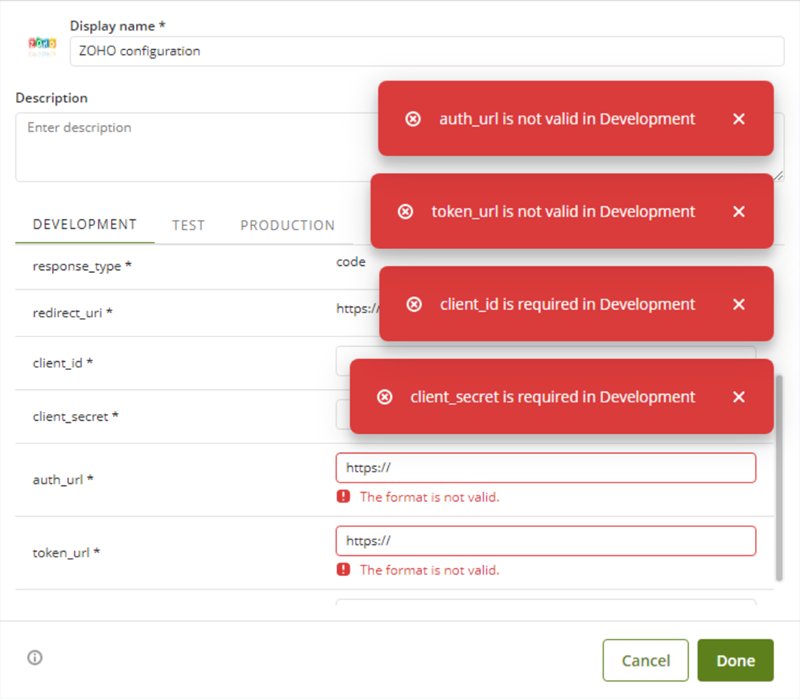
Recall that most of the editable parameters are required. If you do not fill in a required parameter, Bizagi displays an error message indicating that the parameter is required for the environment in which you are configuring the connector.
Similarly, if you enter an erroneous value for a required parameter, an error message is also displayed stating that the parameter's value is not valid.
|
|
When you enter incorrect data for the client_id and client_secret fields and click the Authorize button, Bizagi displays an error message with the provider's response.
Moreover, remember that the client_secret field is encrypted. If you delete a character in this parameter and click the Authorize button, an error occurs when the system attempts to decrypt the password's value and Bizagi displays an error message. To correct it, you must re-enter the data correctly. |
7.Click the Done button to complete the configuration procedure and save your changes.
Management console
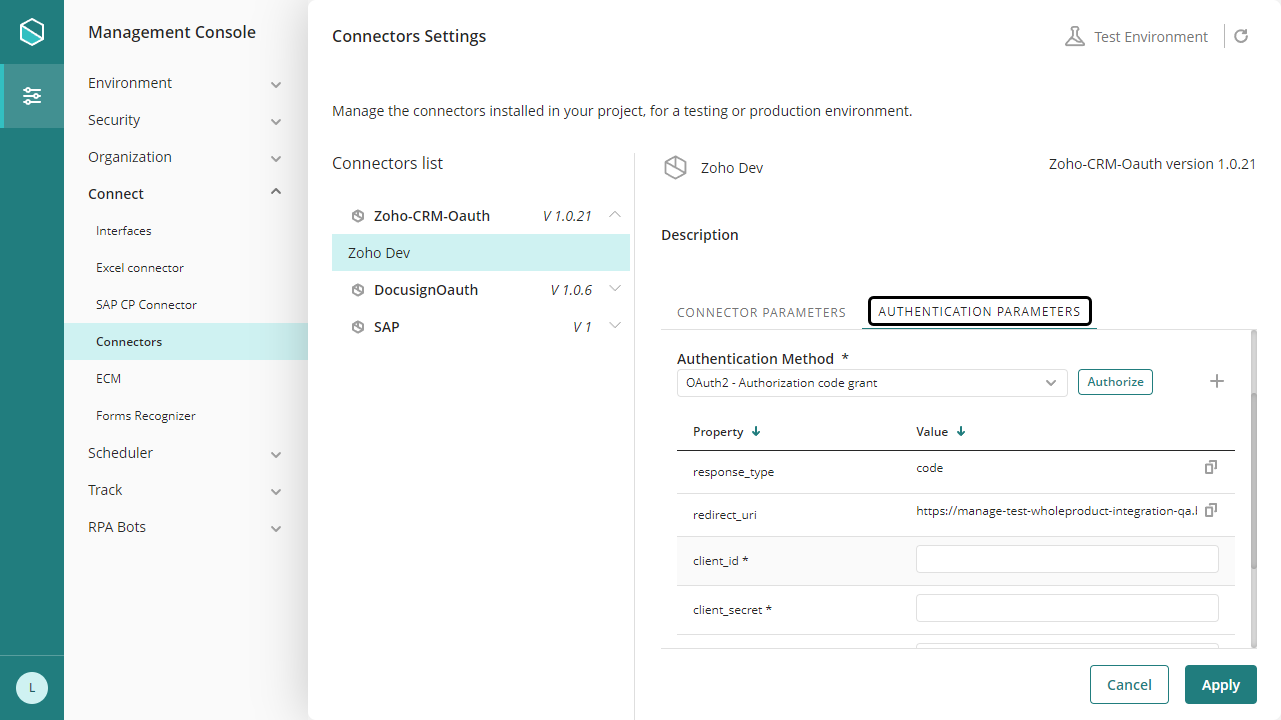
As in the expert view of Bizagi Studio, you can configure the authentication method of a connector from the Management console of an environment. To do so, go to the Connectors section within the Connect menu where the connectors configured are located, select the connector to configure and within the authentication parameters tab fill in the required parameters with the data provided by the external system (provider). If you selected the OAuth method with Authorization code grant you need to perform the authorization procedure. Go to the Management console connectors settings article for more information.
Last Updated 1/9/2024 12:30:13 PM


