Overview
This section illustrates a step-by-step example that creates an Easy REST connector.
The example will send an SMS to a given phone number, via Plivo services from a Bizagi process.
For more information about this feature, refer to Easy REST connectors.
Before you start
Recall that in order to connect to cloud services such as those provided by Plivo, you need an authorized account which can cost using SMS messaging service (or phone calls as text-to-speech) , or use a trial account when applicable.
The above includes ensuring the account uses authorized settings, such as verifying the phone numbers you use for these purposes.
In summary and in order to connect specifically with Plivo, we need an account whose credentials will be used later.
Such credentials are given by Plivo in this case (as managed at https://www.plivo.com/docs/numbers/api/request/authentication/).
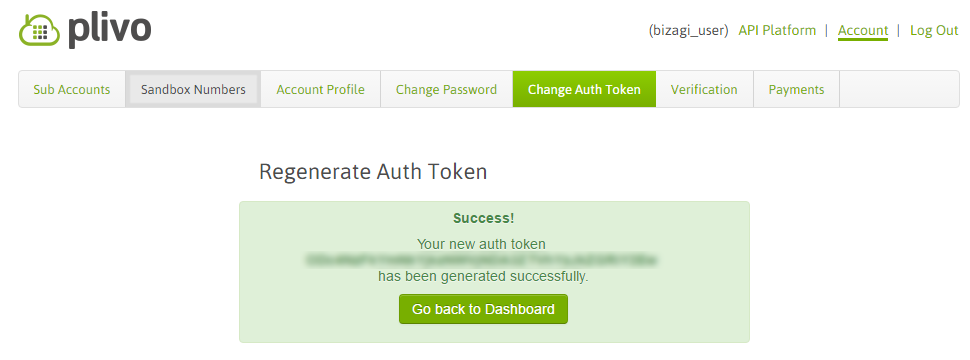
In this example we will use: Auth Token and Auth ID.

Steps
The high-level steps we will illustrate in this example are:
1. Creating the connector: Steps needed to produce the connector by using the Connector Editor).
2. Testing the connector: Steps done with Bizagi Studio to have a process where we can use that connector.
|
Step #2 considers a sample process aimed to illustrate all the potential of the use of this specific connector. Although for this step you will need to have basic understanding of Bizagi Studio and its options, note that it is not required to use the same process as depicted in this example to test the connector. |
1. Creating the connector
To create a Plivo connector, notice that its API highlights how you could do this through basic authentication (without needing a specific library).
1.1 Browsing Plivo API
Refer to the initial description on the API and its authentication type (at https://console.plivo.com/accounts/login/?next=/dashboard/), along with other tips and important specification such as the supported content type:
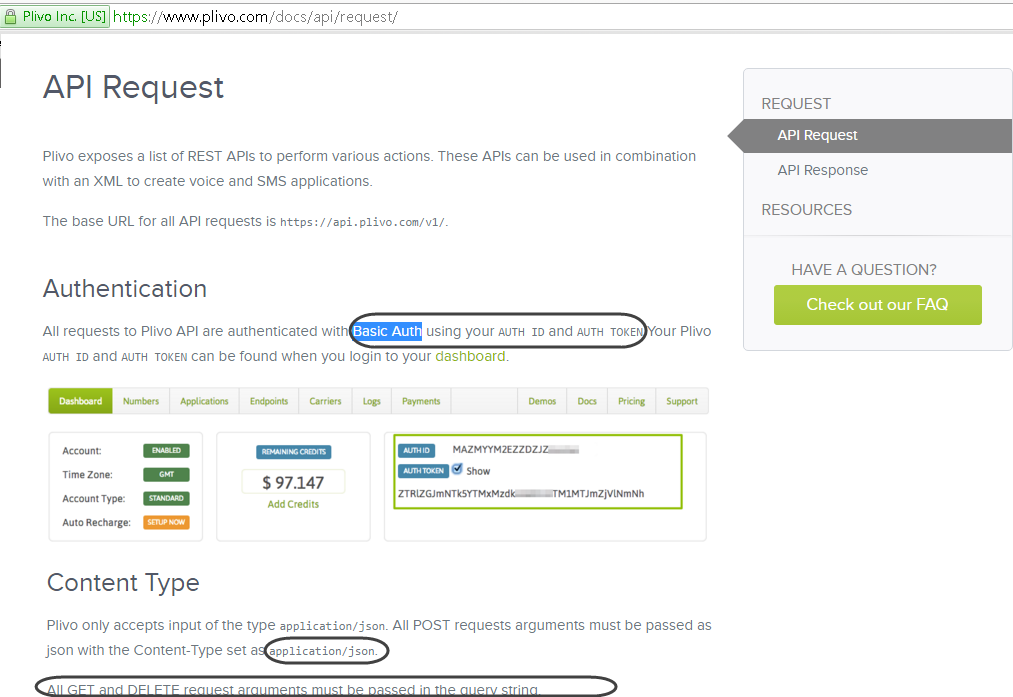
Refer to how you should connect to plivo at https://www.plivo.com/docs/getting-started/send-a-single-sms/.
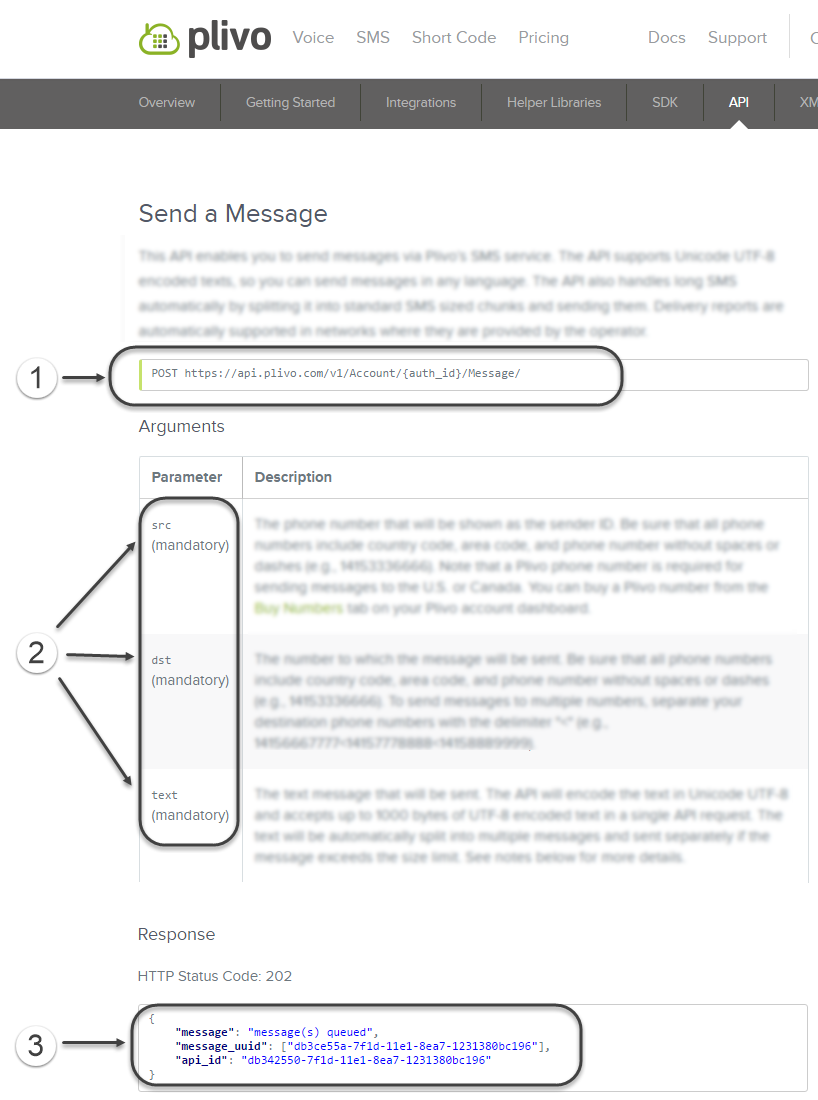
In there, acknowledge important information such as:
Endpoint URL and action type
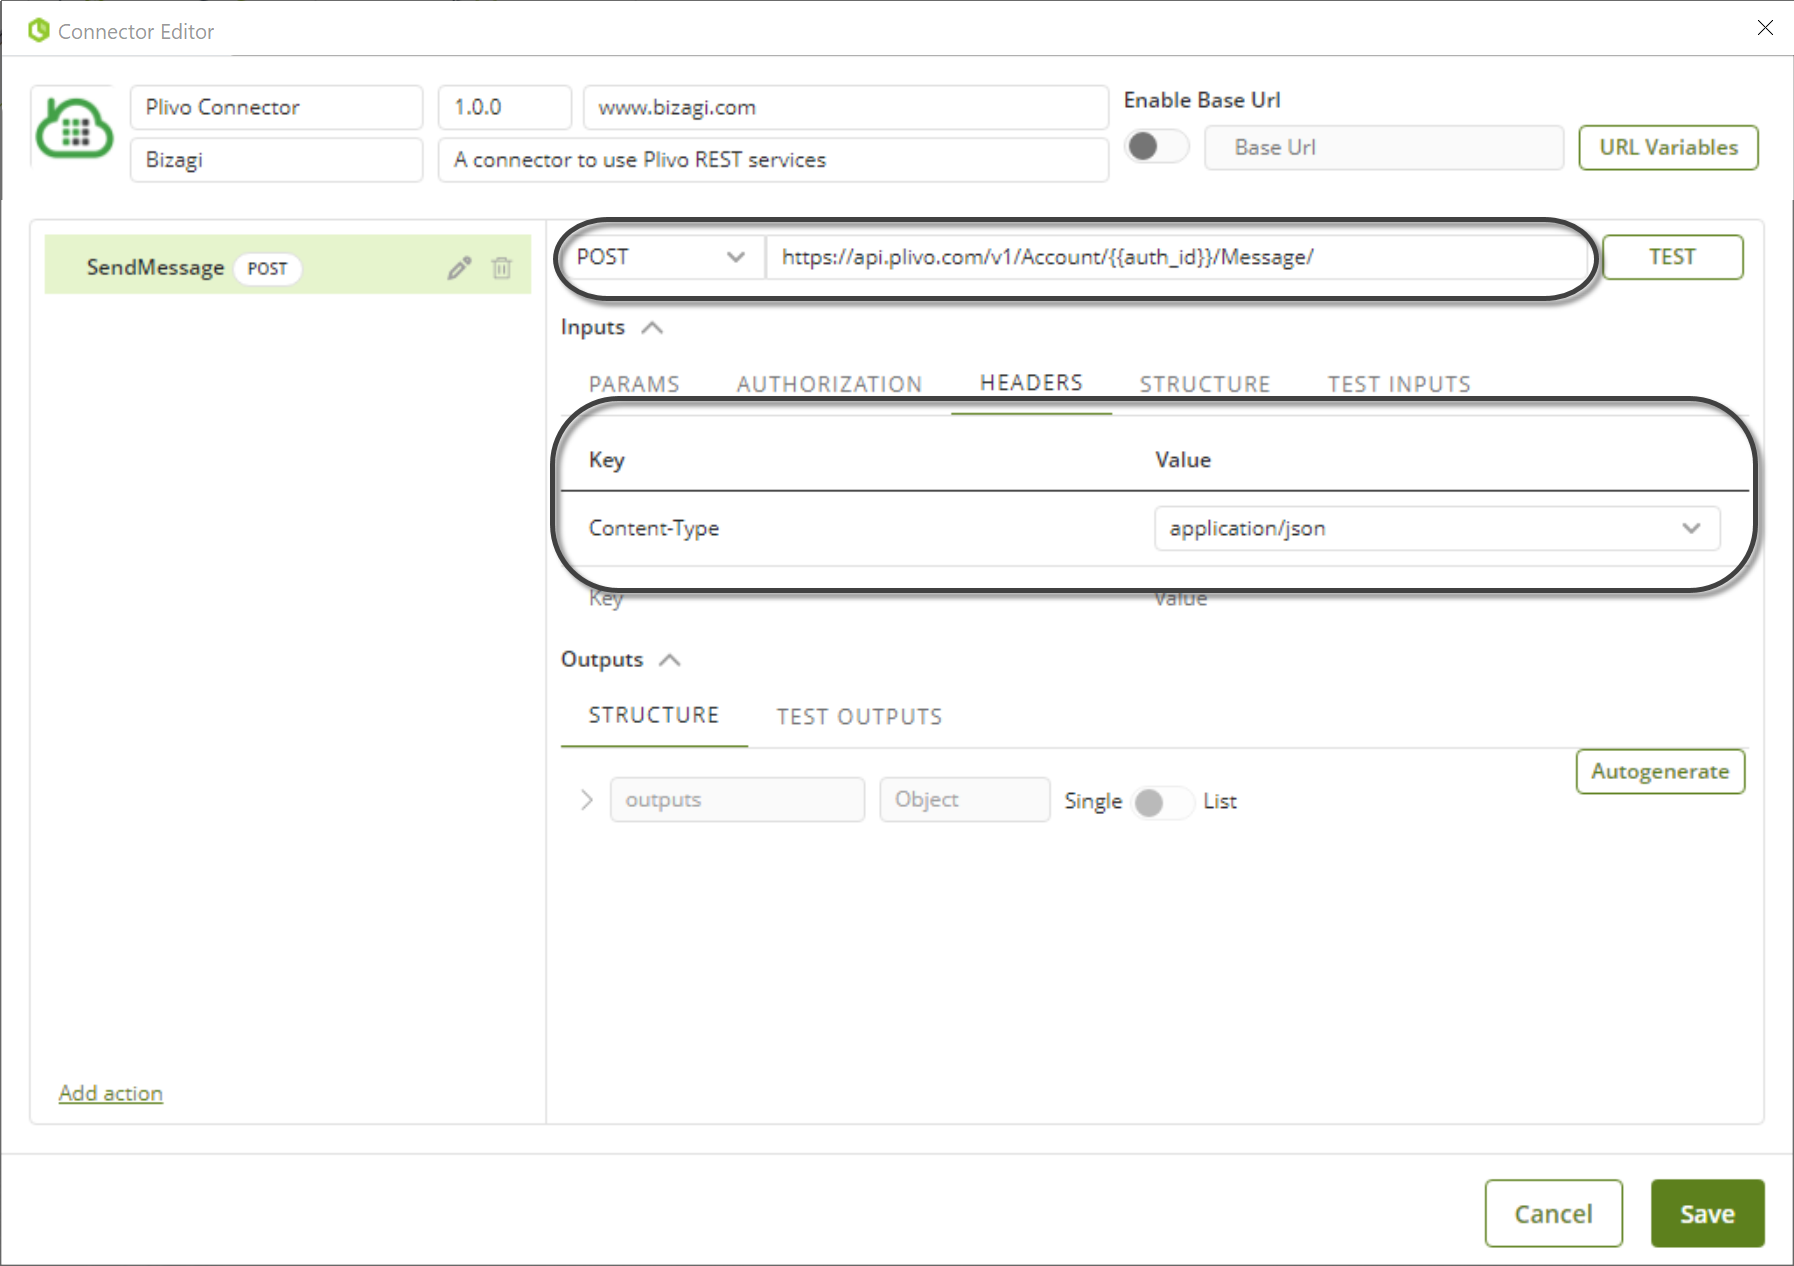
•URL: https://api.plivo.com/v1/Account/{auth_id}/Message/
•Action Type: POST
Arguments (Inputs)
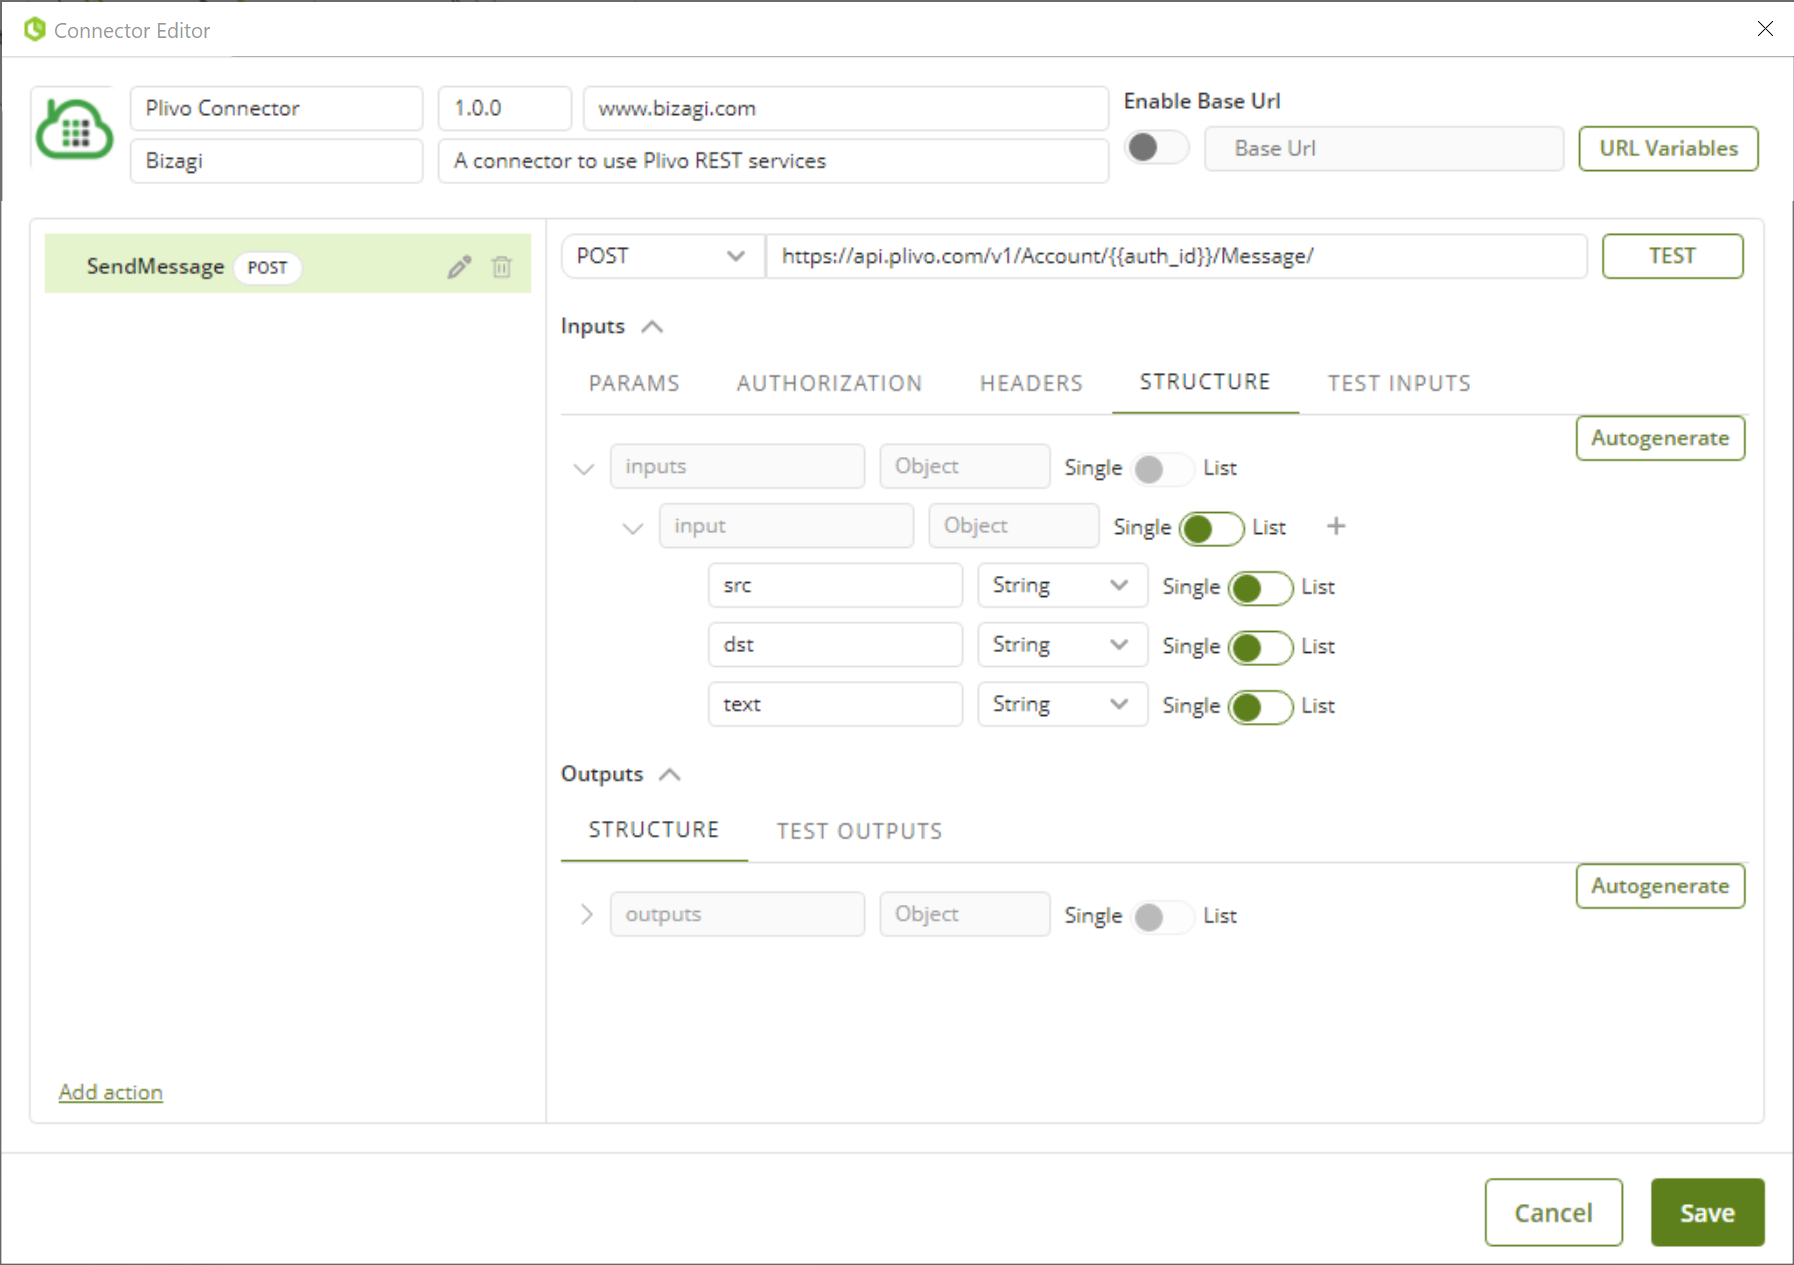
•src: Source phone number.
•dst: Recipient phone number.
•text: Text to be sent.
Response (Outputs)
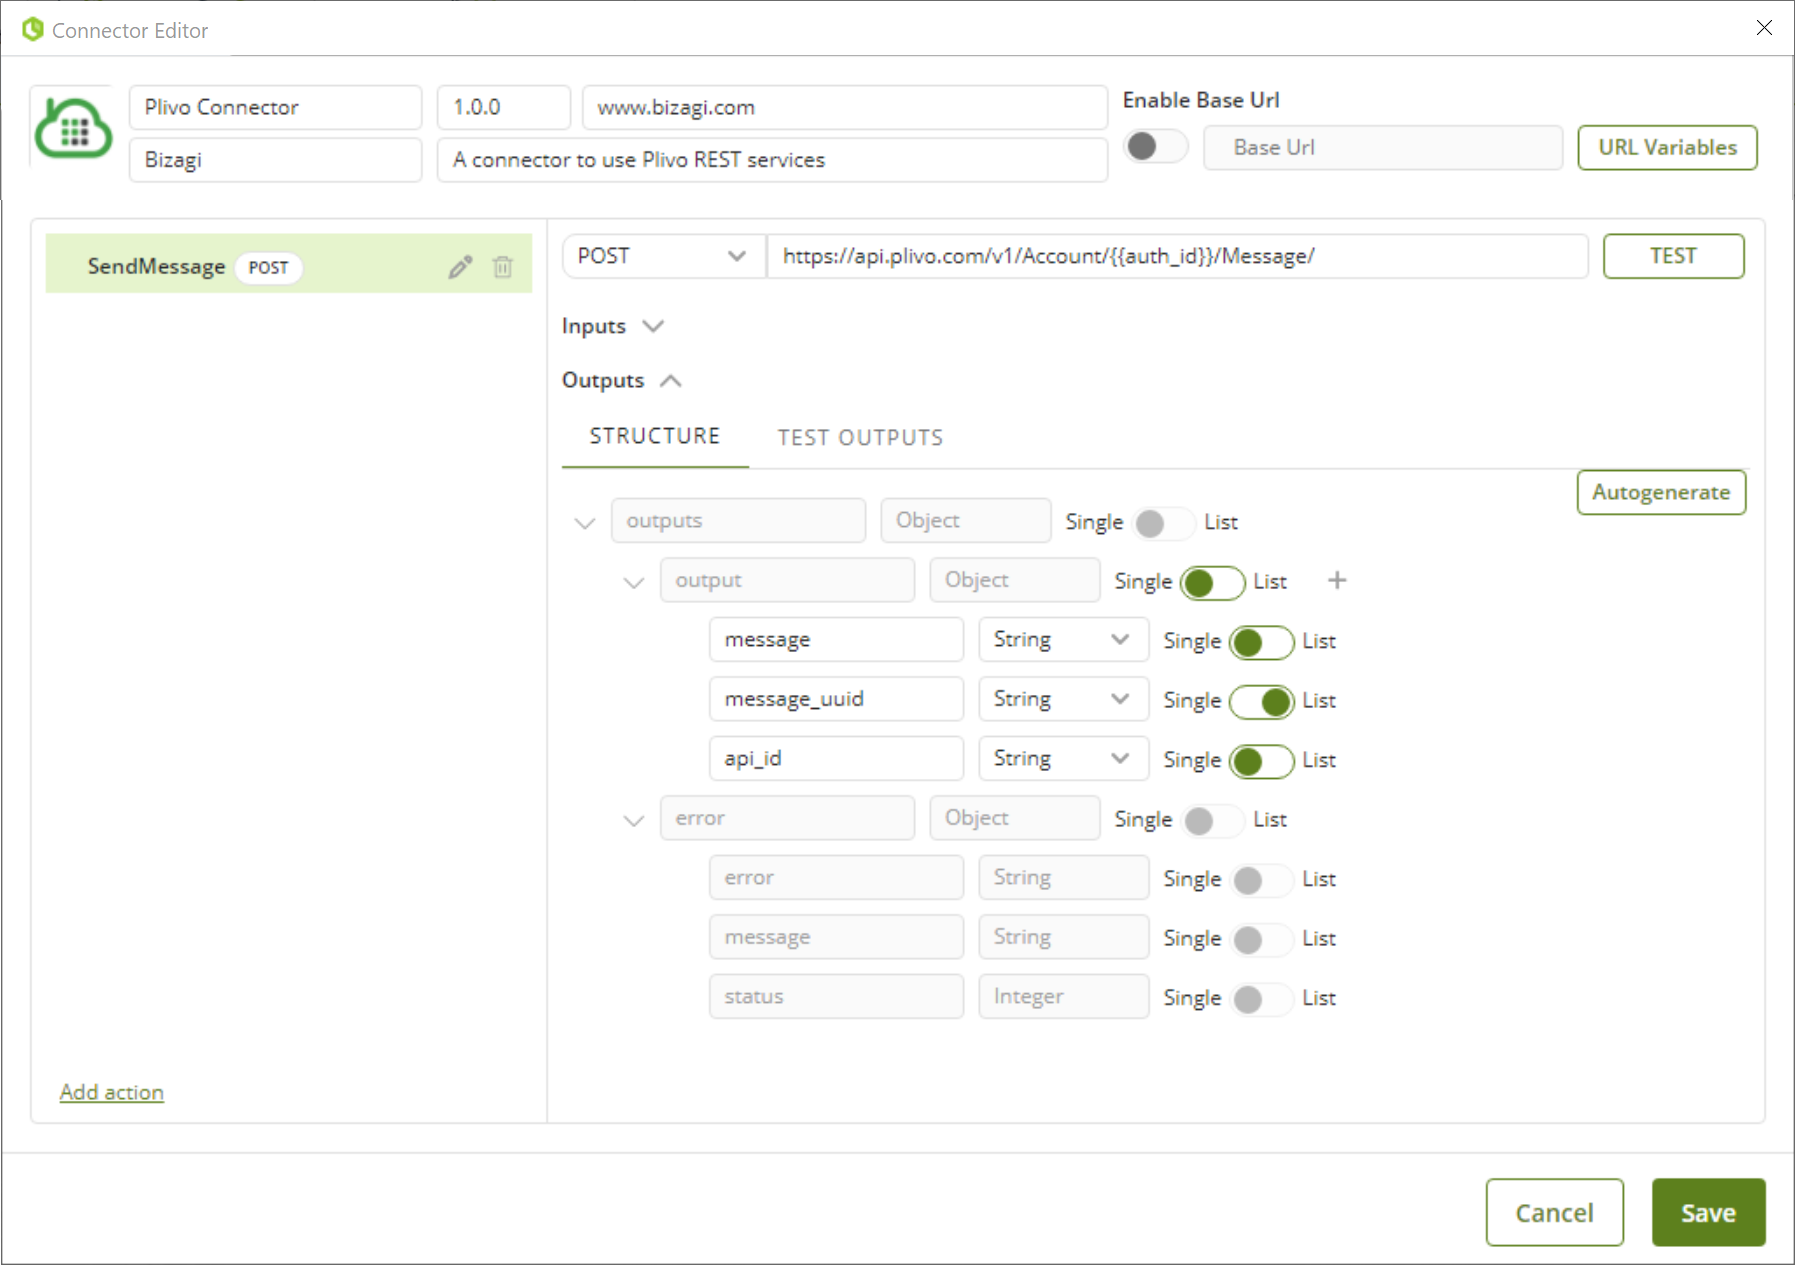
•message: Plivo's answer
•Others such as message_uuid and api_id are not as relevant for our example.
1.2. Creating a new Easy REST connector
Access the Integration Hub and create a new connector with these steps.
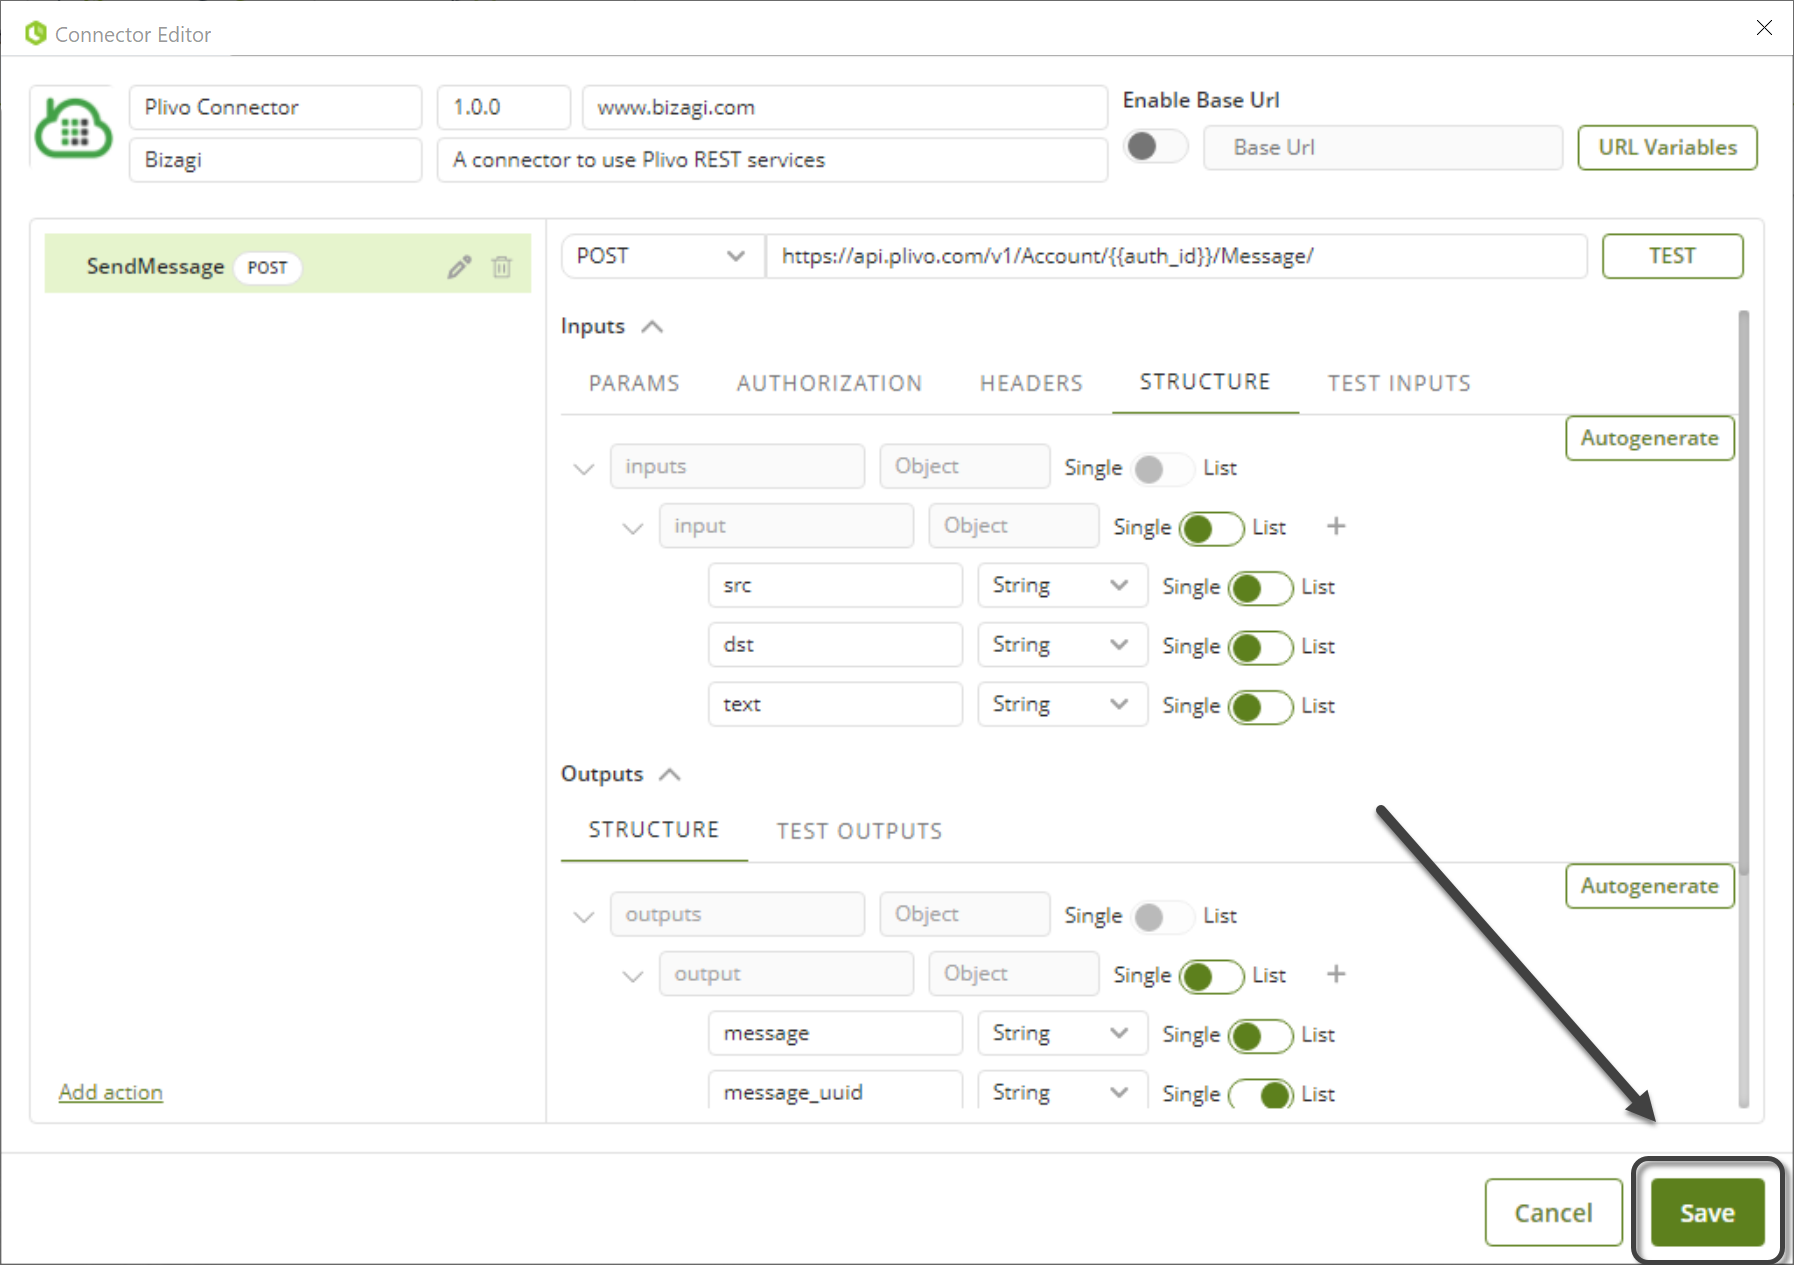
a.Register the basic information of the connector.
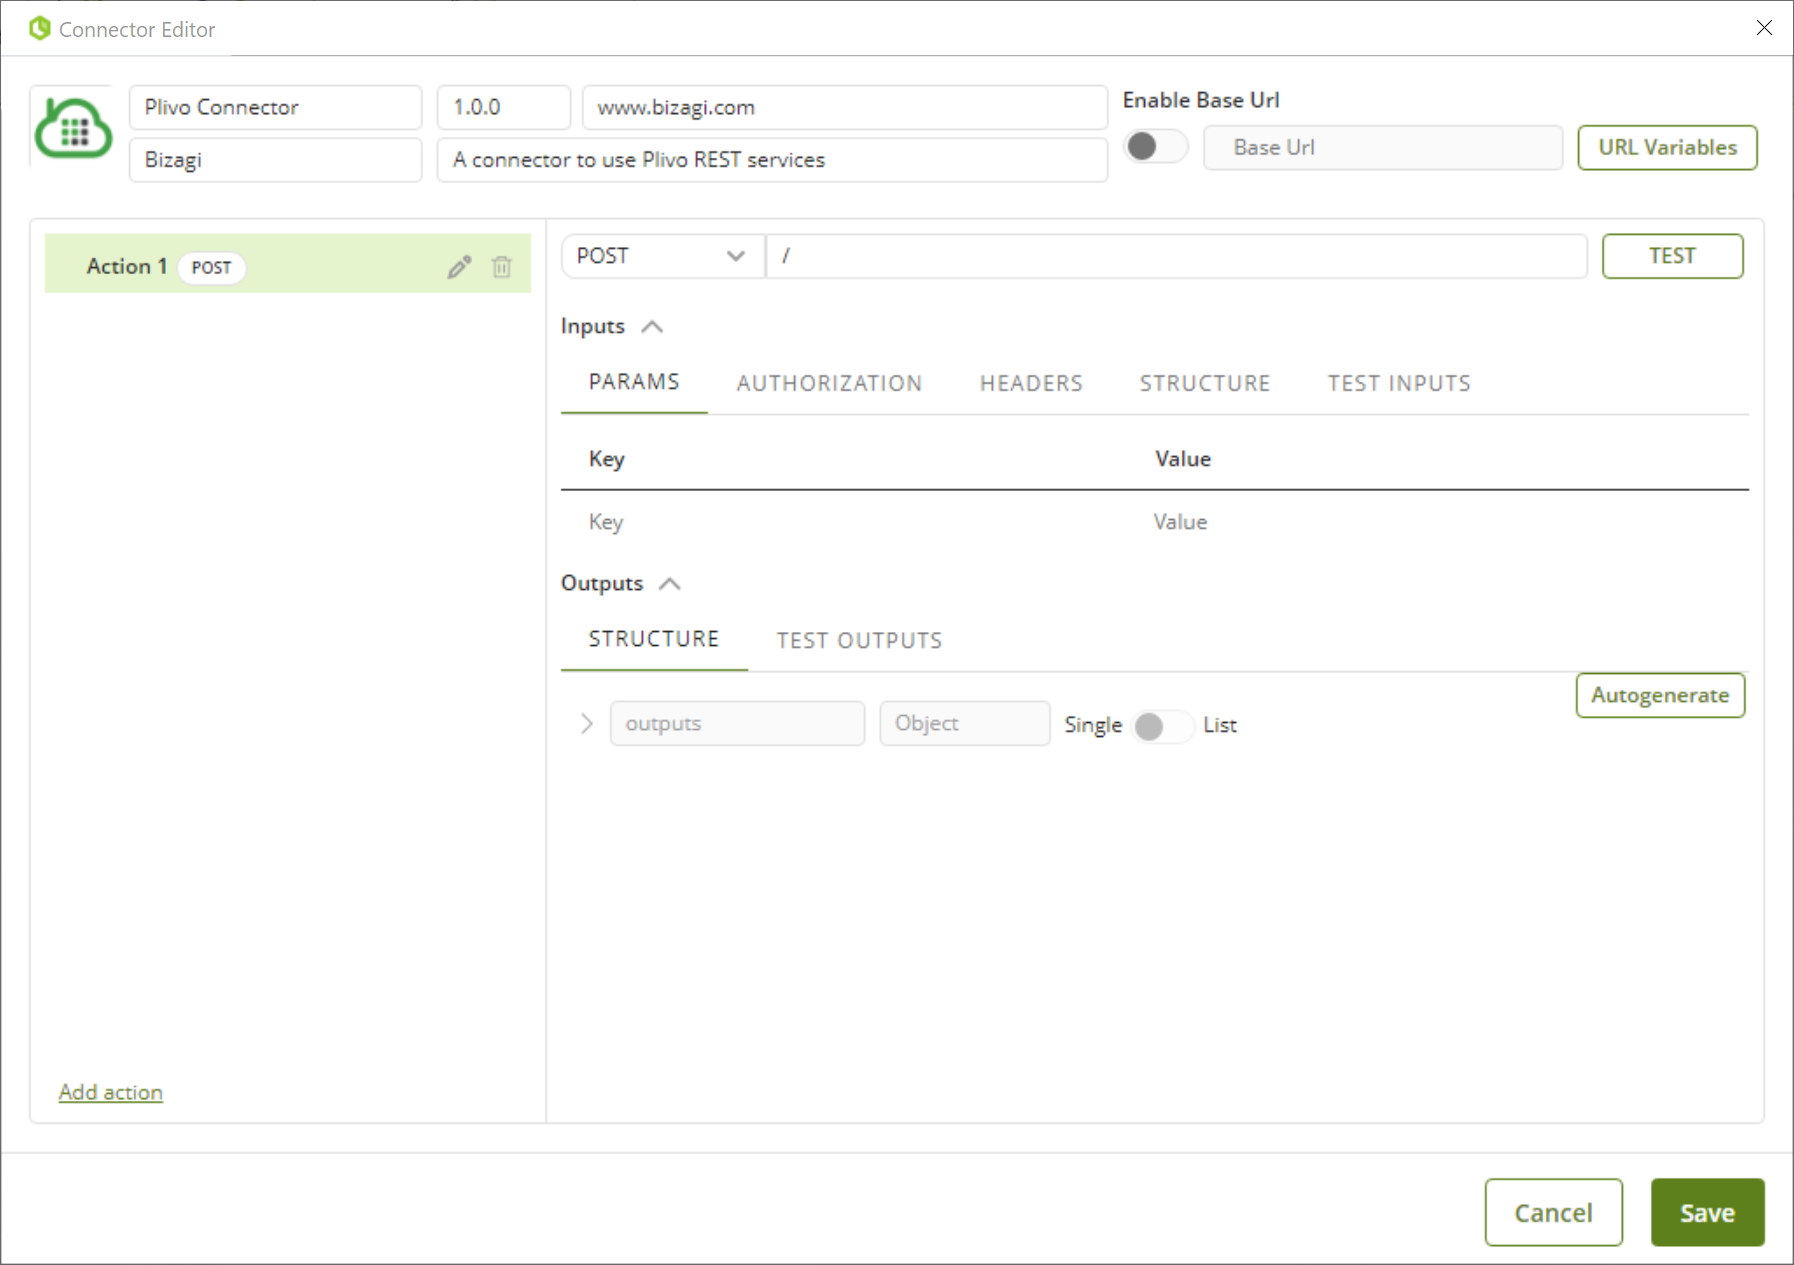
b.Create a POST action and select Basic as the Authentication method used for the action.
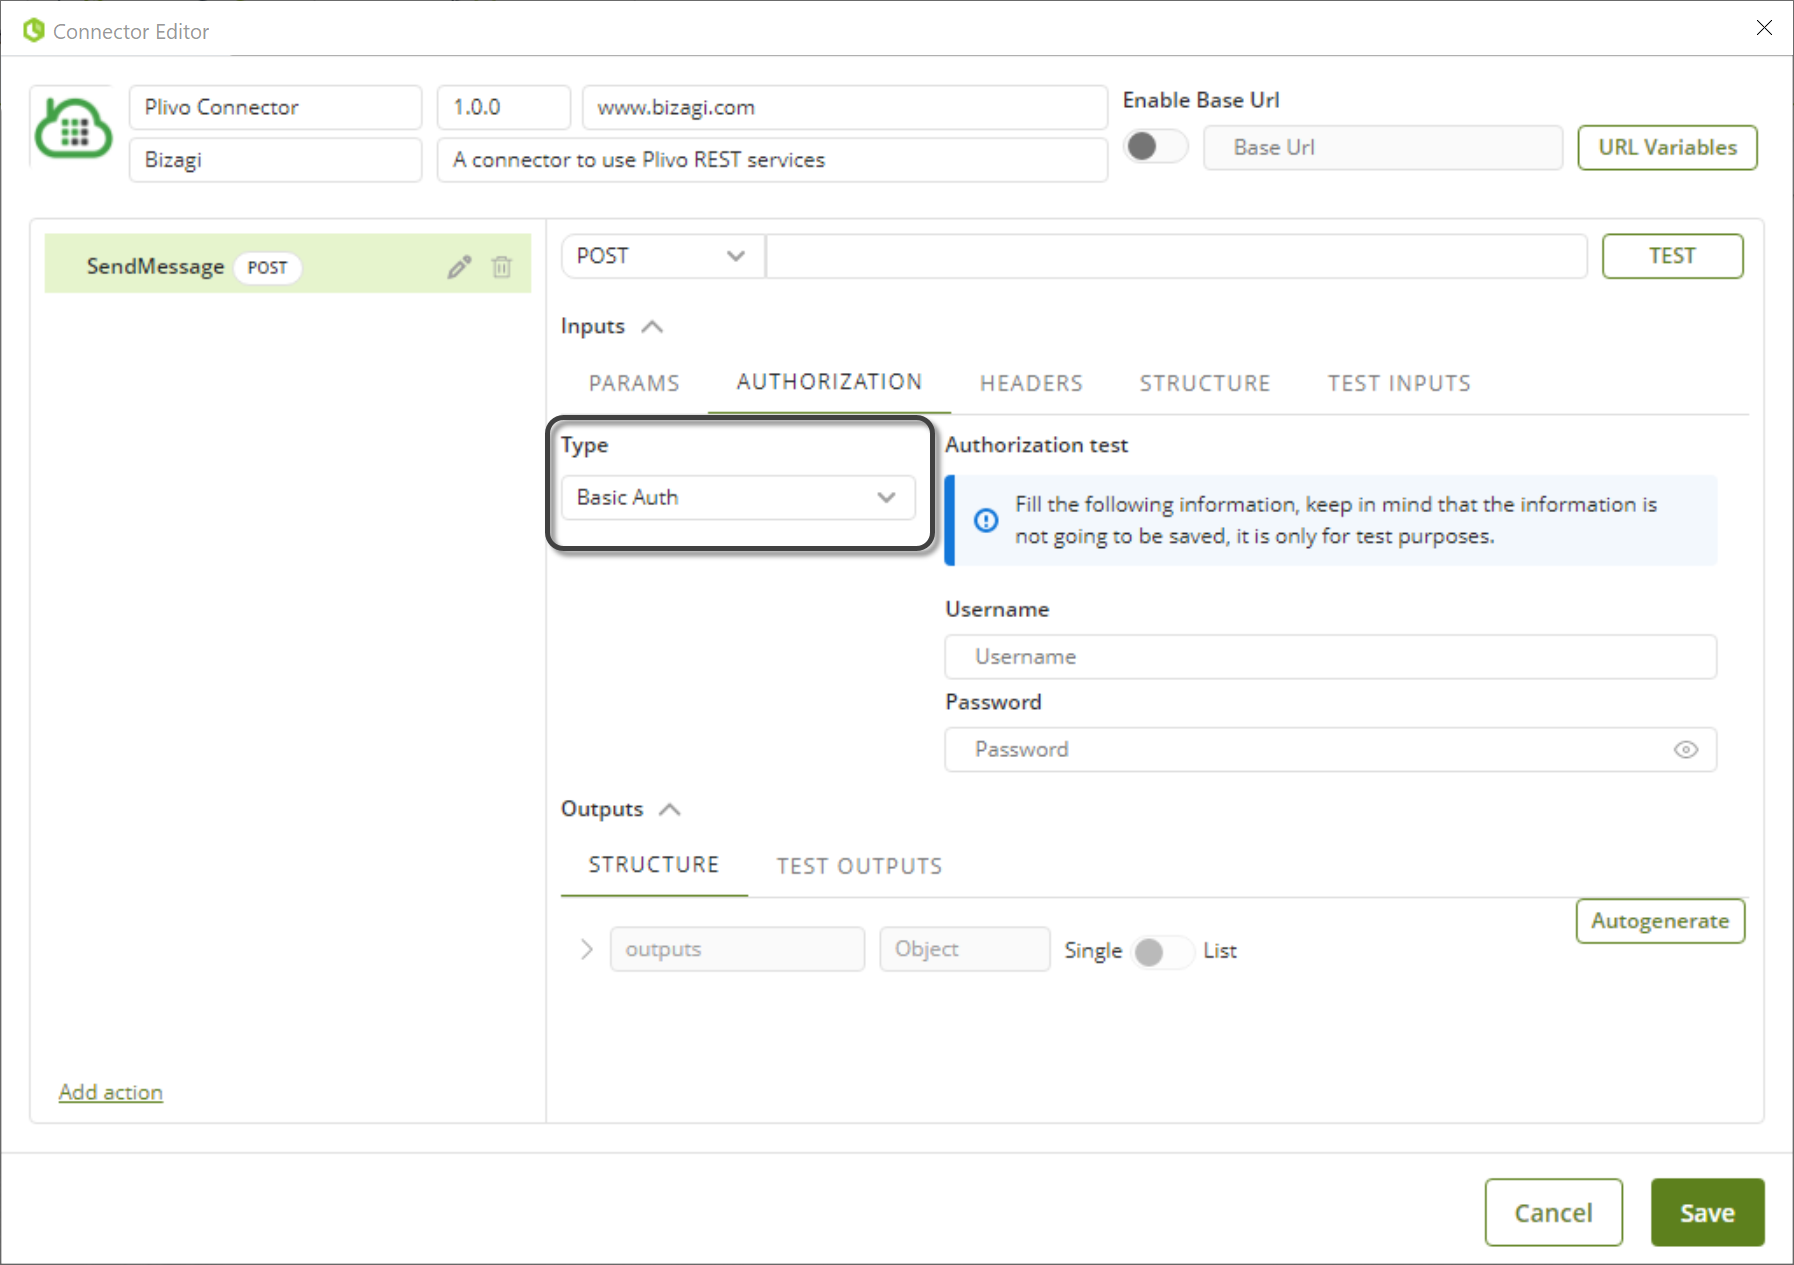
c.Go to the Headers tab and specify the content type which is application/json. Then, include as well parameters within the URL while using double brackets to wrap the name of a variable representing a parameter. This can be done directly in the URL, or in the Params tab. In this case it would be unique ID given by Plivo: {{auth_id}}.
d.Define the inputs structure (recall that you do not need to include all fields; only those you detect are mandatory and make sense for your connector to present as configurable).
e.Define the outputs structure (again, you do not need to include all fields but only those you consider helpful).
f.Save your connector.
2. Testing the connector
Once you have created your connector, installing, configuring and using it, is done with Bizagi Studio.
For this purpose and to illustrate the potential of this connector, we present a process in which new clients are registered (e.g in a web portal of a bank).
And this process sends an SMS confirmation to their registered phone number.
We use the following process:

Technical details behind this process consider that once the client is registered, the system automatically generates and sends a security token via SMS which expires after one day (assuming that then the customer will sign in into the web portal with such token information, i.e a random first-time password).
2.1 Implementing the process
Based on the BPMN model of the process as shown above, further implementation details will consider the following definitions:
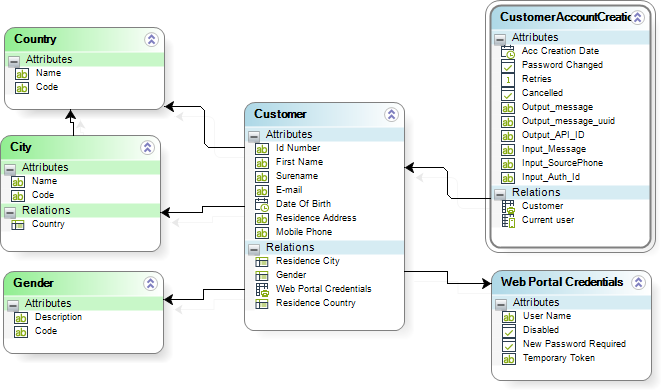
a.Use this data model:
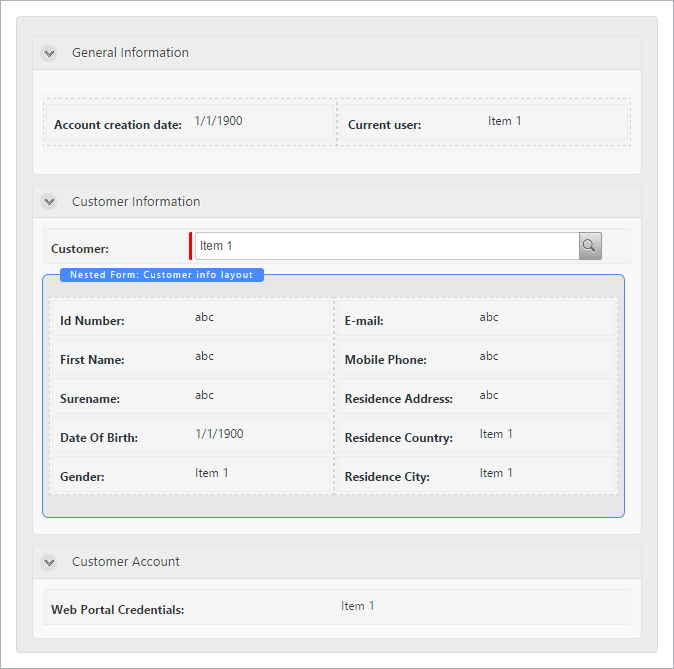
b.Define the form for the Client registration task.
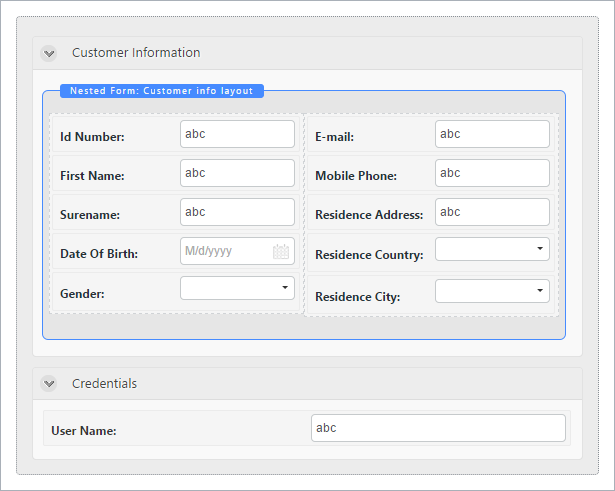
c.Define the form that allows for new information of the customer (make sure you activate the Allow new records option):
d.You may create some constant definitions, having the advantage of being manageable in the work portal. These values could be used directly as values in expressions.
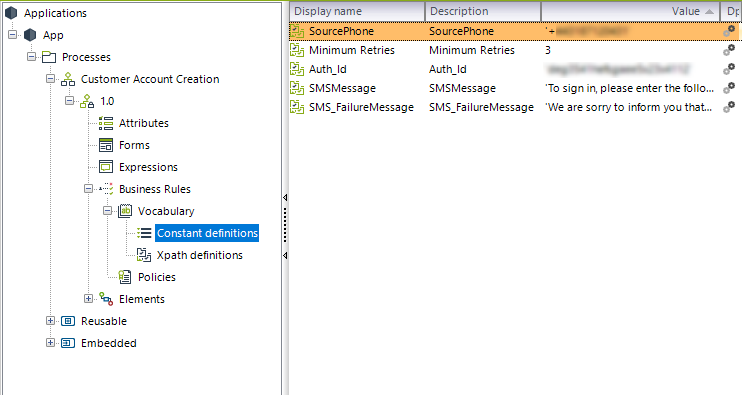
CONSTANT |
DESCRIPTION |
|---|---|
SourcePhone |
Is the phone number displayed as the sender of the SMS and which could be changed over time. |
Minimum Retries |
The number of retries allowed when sending a token, before sending an error message regarding an expired token that demands a new request. |
Auth_Id |
The Auth Id given by Plivio. Though not usually standard for web services to request it in methods, it is the way Plivo has to authenticate an user, and that is why it would be a good idea to set it as a manageable definition. |
SMSMessage |
The message to be sent along with the token. |
SMS_FailureMessage |
The message displayed when the maximum attempts are exceeded and let the tokens expire. |
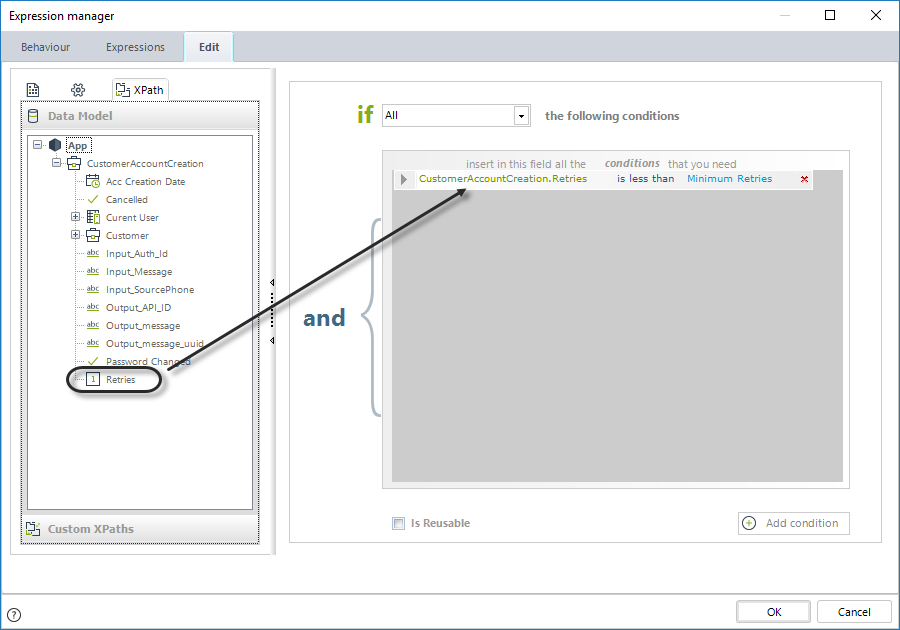
e.Configure the Retries exceeded gateway with the number of retries you consider convenient.
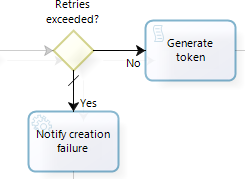
When the number of retries has not exceeded the minimum, an SMS with a new token is sent.
Otherwise, an SMS with an error about having exceeded retries, is sent.
f.Define a rule to Generate a Token, assign the message to be sent whether the number of retries had been exceeded or not. For the Client registration task, assign the initial values for the case (current date and user), the Auth_Id provided by Plivo, and the Source phone set to impersonate the sender's number.
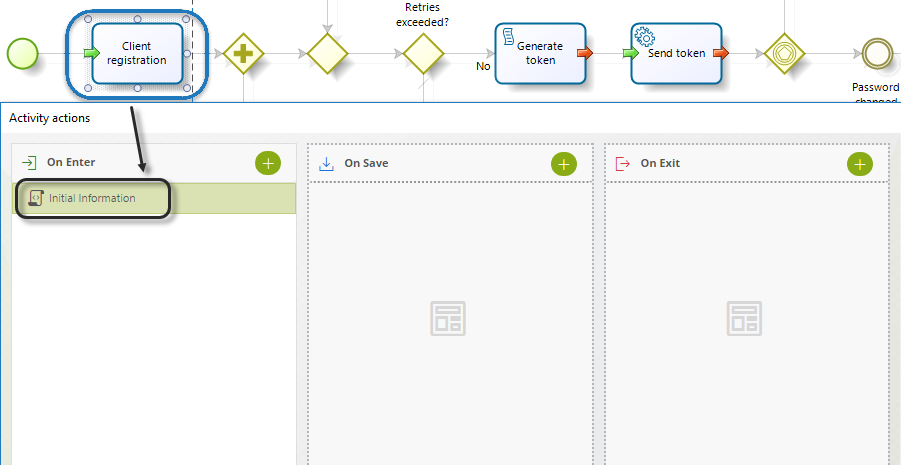
//Case information
<CustomerAccountCreation.Currentuser> = Me.Case.WorkingCredential.UserId;
<CustomerAccountCreation.AccCreationDate> = DateTime.Today;
//Connector information
<CustomerAccountCreation.Input_SourcePhone> = CHelper.resolveVocabulary(Me,"SourcePhone");
<CustomerAccountCreation.Input_Auth_Id> = CHelper.resolveVocabulary(Me,"Auth_Id");
g.Define a rule for the Generate token task: Through a random string of alpha-numeric characters stored in a column called Temporary Token, which belongs to an auxiliary entity (e.g, Web Portal Credentials entity). This expression must be used at the On Exit of this task. When generating the token, remember to increase the retry value.
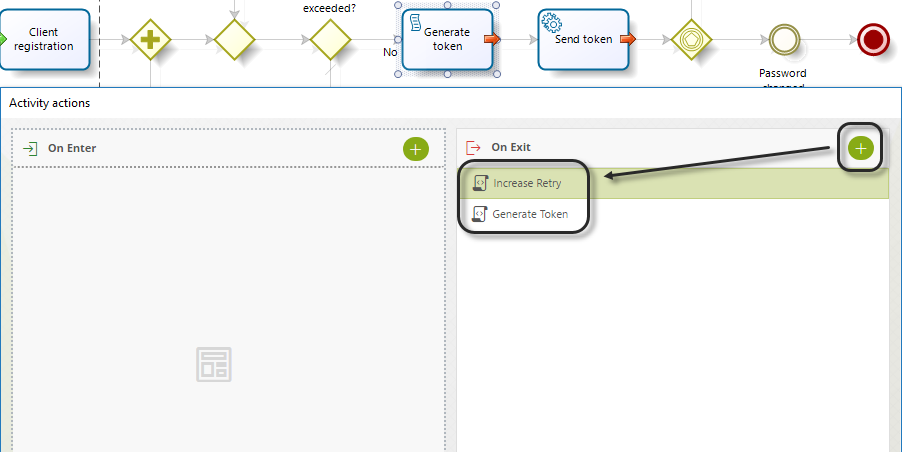
h.Declare a variable to be used to generate the Token.

Token = "";
for(var i = 0; i<10; i++){
var newCharacter = CHelper.Math.Rand(0,9);
Token = Token+""+newCharacter;
}
<CustomerAccountCreation.Customer.WebPortalCredentials.TemporaryToken> = Token;
Increase retry value:
<CustomerAccountCreation.Retries> = <CustomerAccountCreation.Retries> + 1;
i.Send token task: Assign the message to be sent.
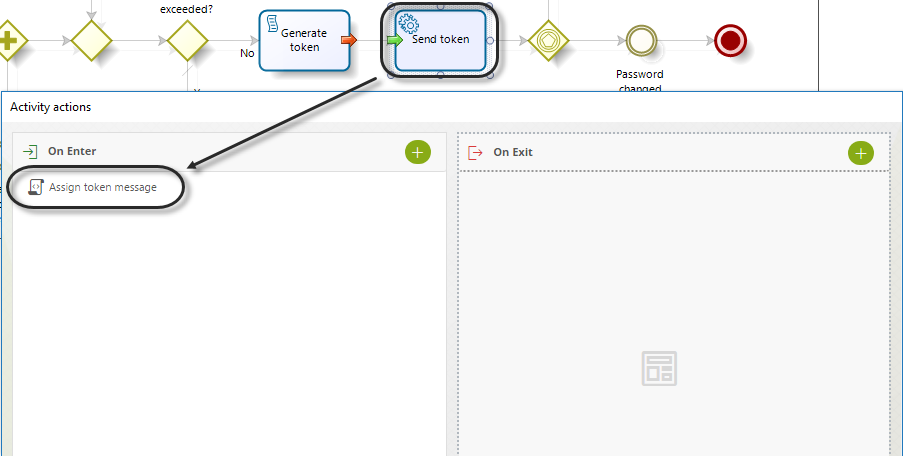
<CustomerAccountCreation.Input_Message> = CHelper.resolveVocabulary(Me,"SMSMessage");
j.Notify creation failure task: Assign the error message to be sent.
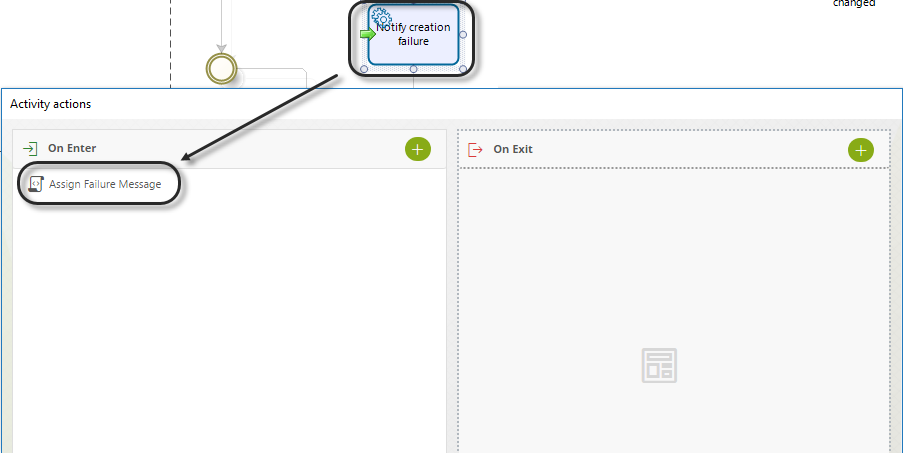
<CustomerAccountCreation.Input_Message> = CHelper.resolveVocabulary(Me,"SMS_FailureMessage");
2.2 Configuring the connector
Now that the process is ready to use the connector, plug the connector to the process through these steps.
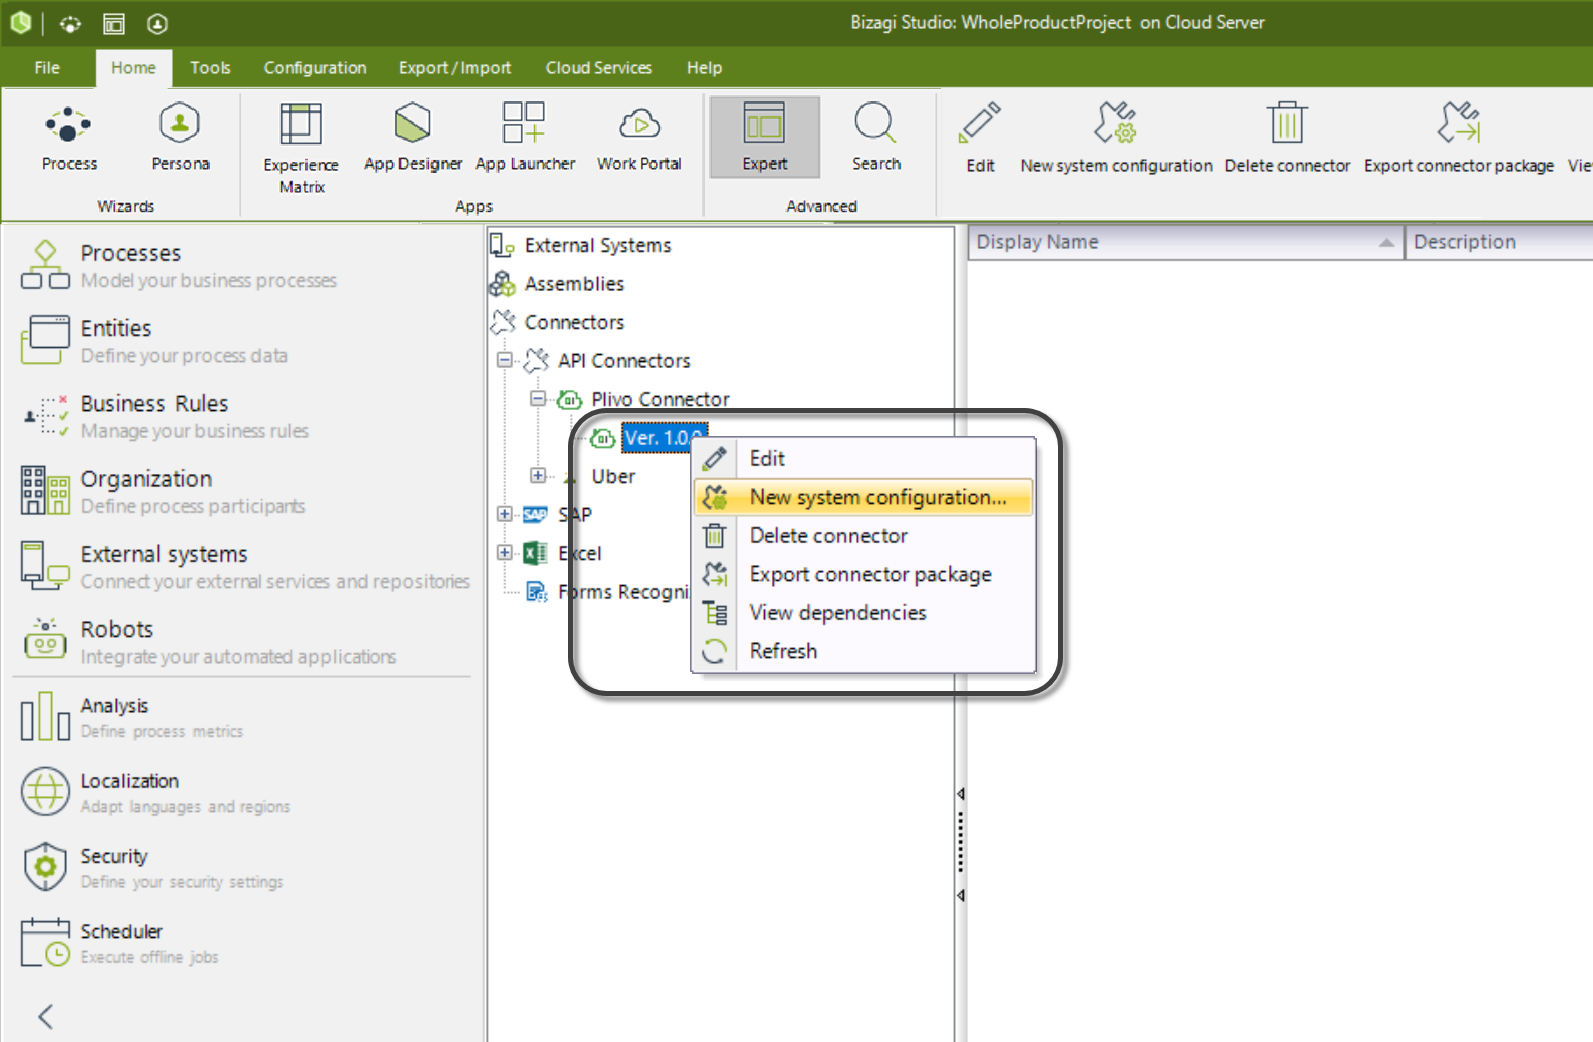
a.Go to the Expert view and into External Systems. Select API Connectors and open your Connector.
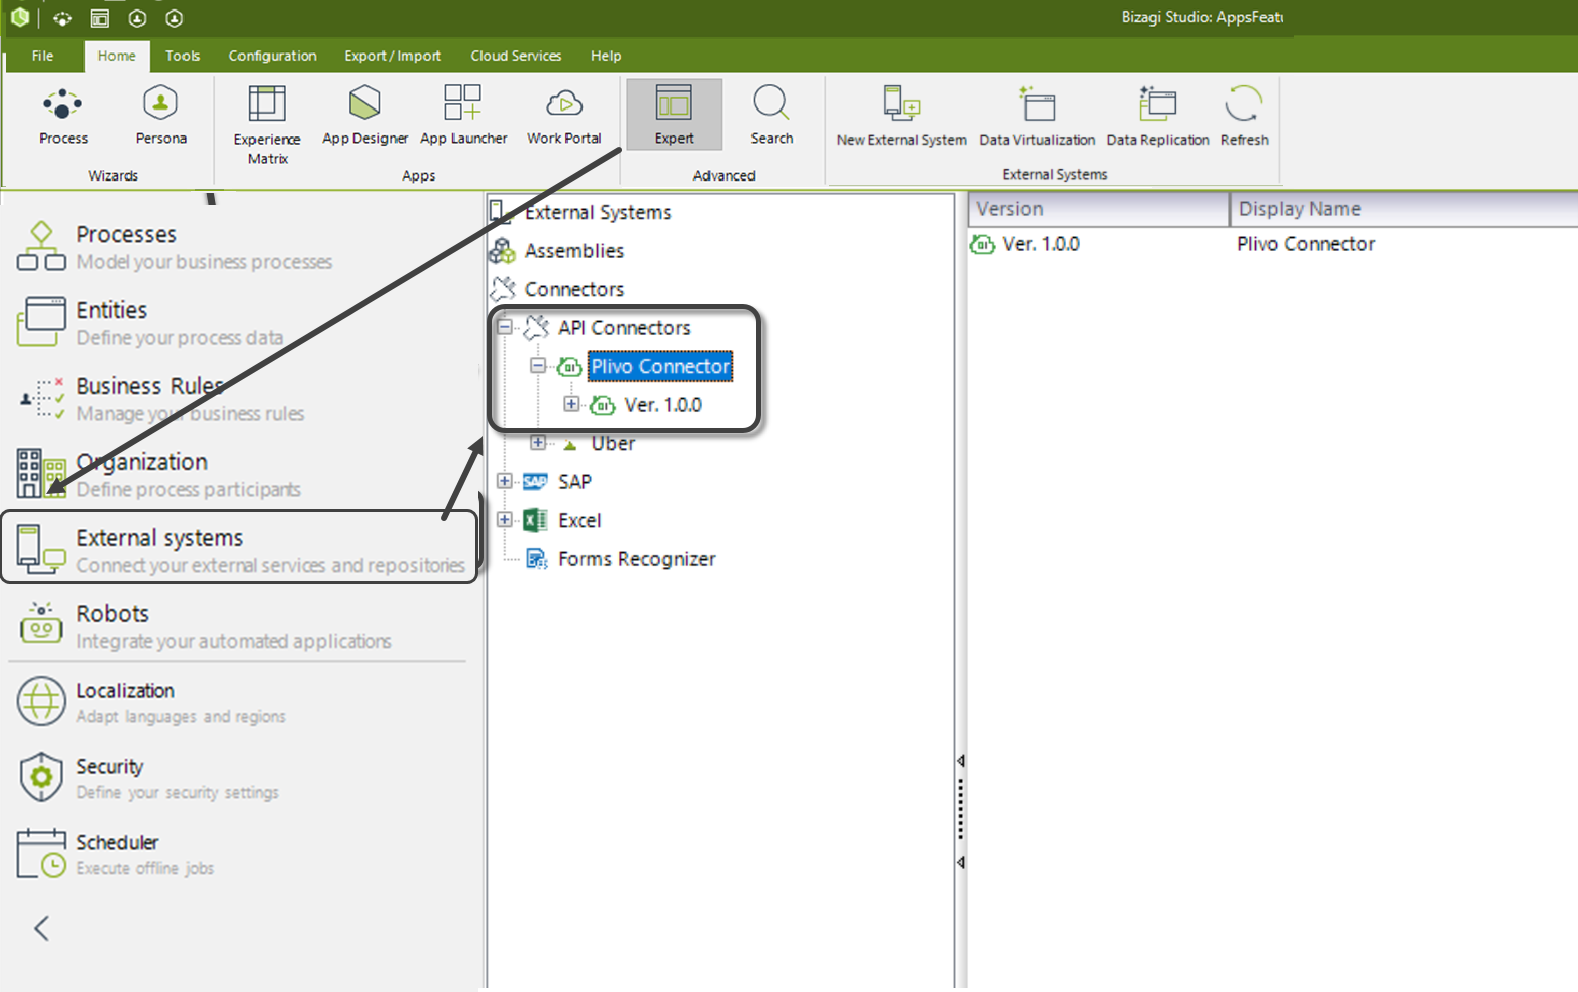
b.Right click your connector's version to add a New System Configuration.
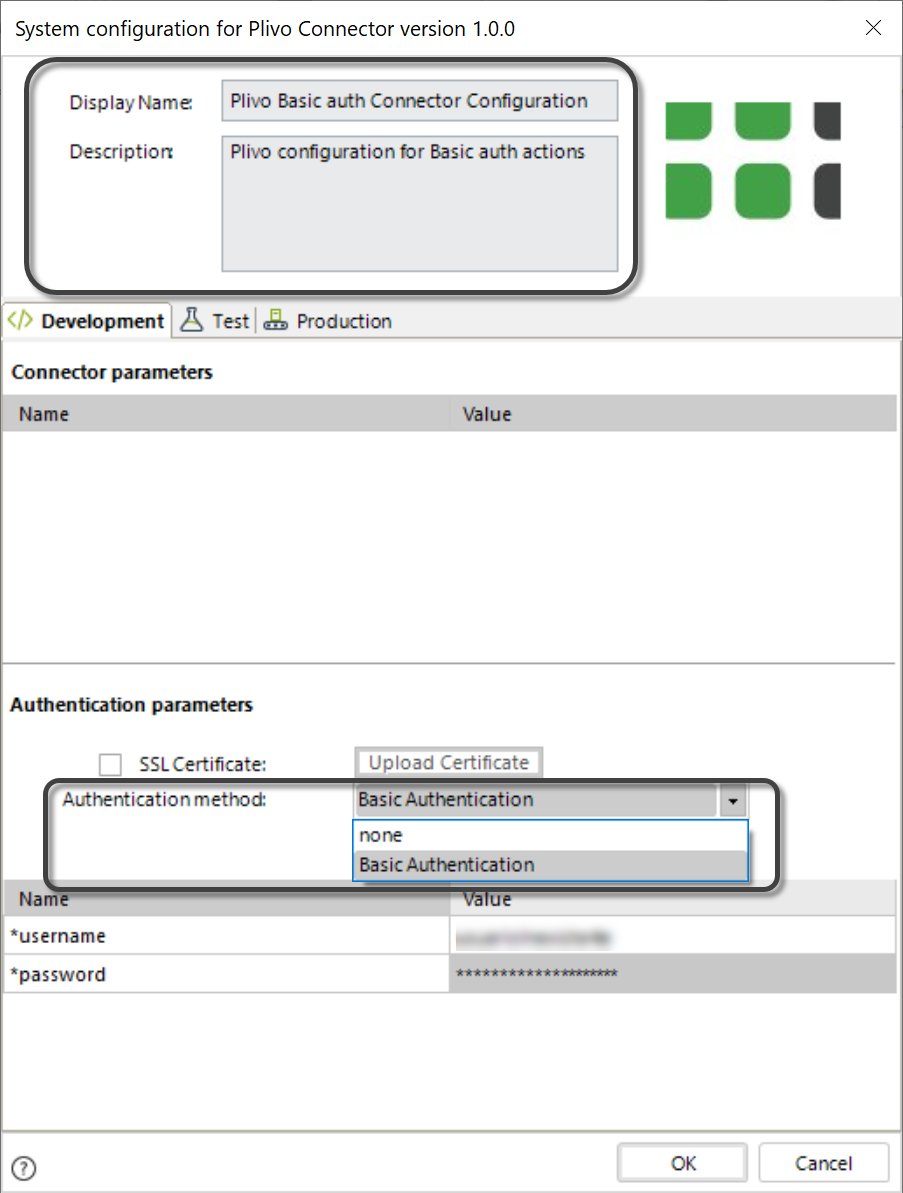
c.Give the new configuration a name and description. Make sure you also select the Authentication method drop down list and click "Basic Authentication" to configure it. Enter the Auth ID given by Plivo as a username and the Auth Token given by Plivo as password. These credentials will now be used every time an action of the connector.
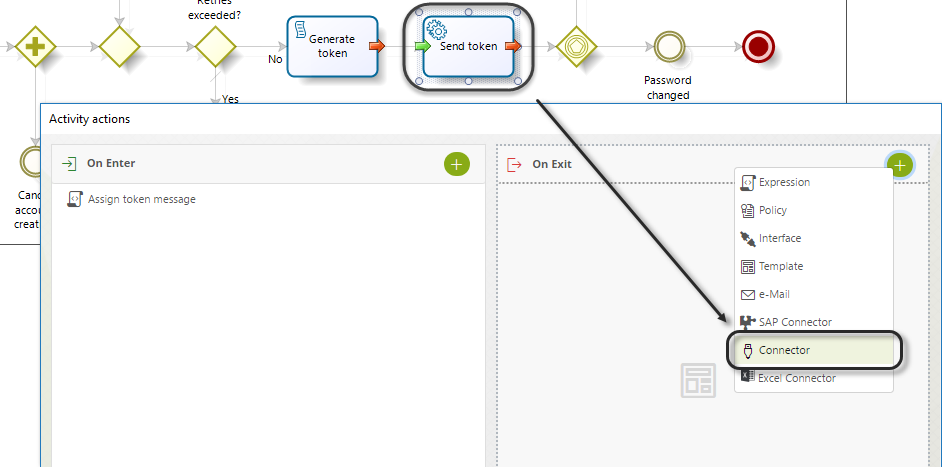
d.Go back to the wizard view and select the forth step (Activity Actions). Add a connector action execution at the on Exit of the task (by selecting the task and choosing the Connector option in drop down list).
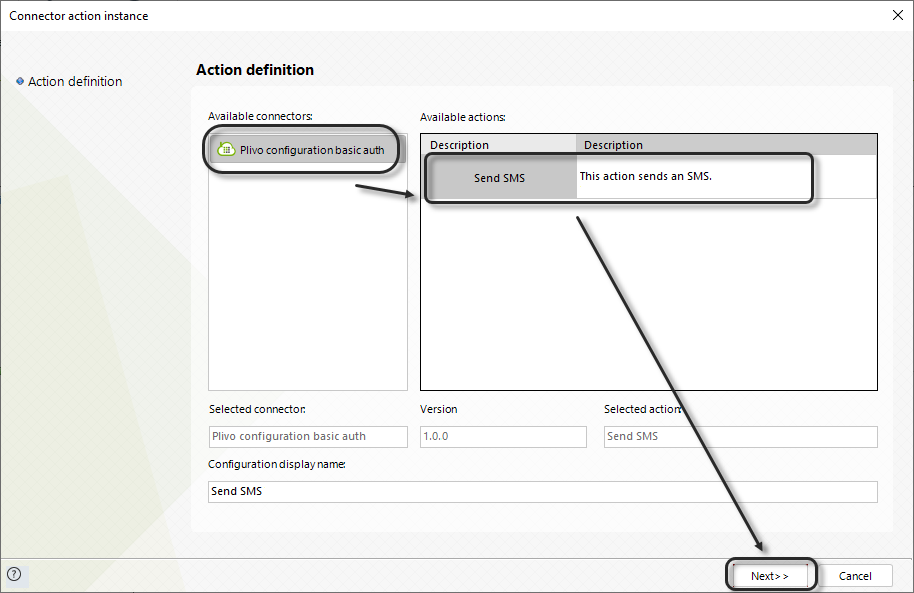
e.Select the connector and then the action to be executed.
f.Map the inputs.
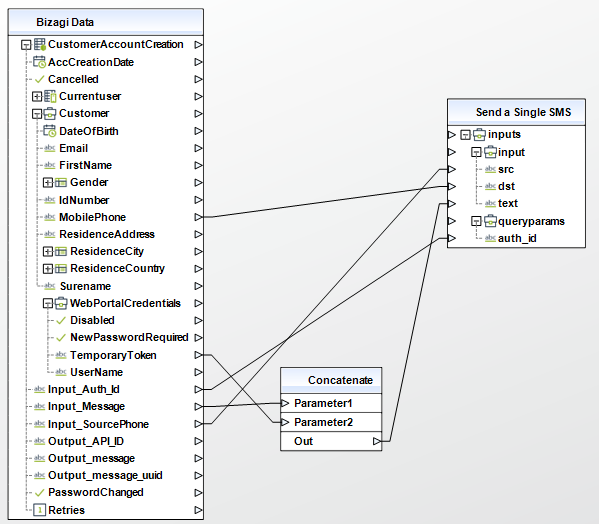
g.Map the outputs and click Finish.
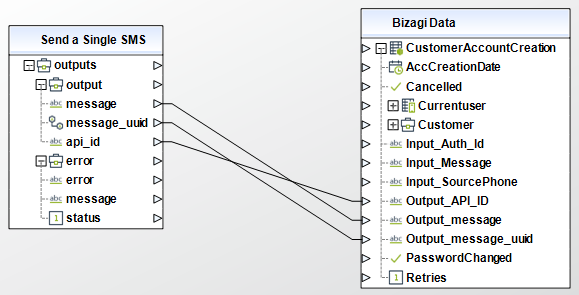
At this point, configuration is set and the only remaining step is to verify its proper execution.
Execution
Launch Bizagi Work portal to execute and test the connector for this process.
Create a new case, and add a customer with a phone number you can verify (and which is authorized in your Plivo account).
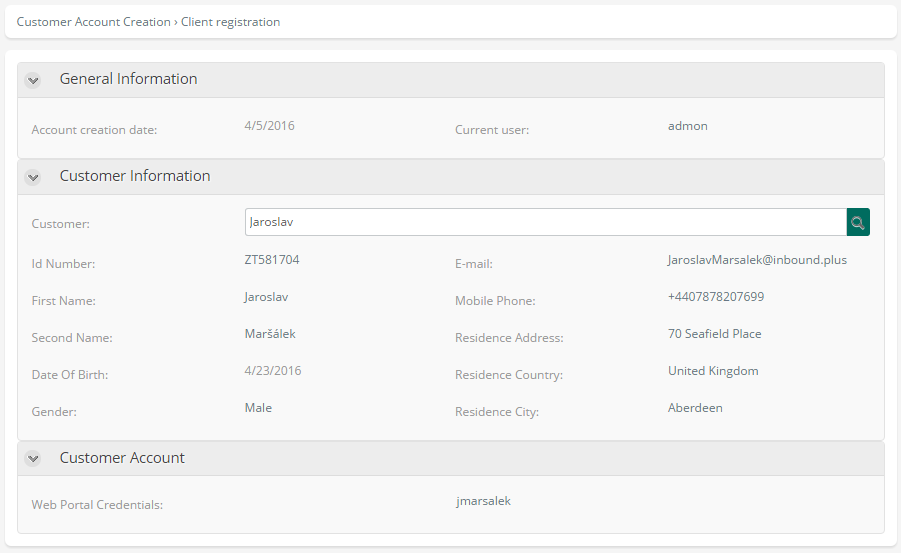
Click Next when done.
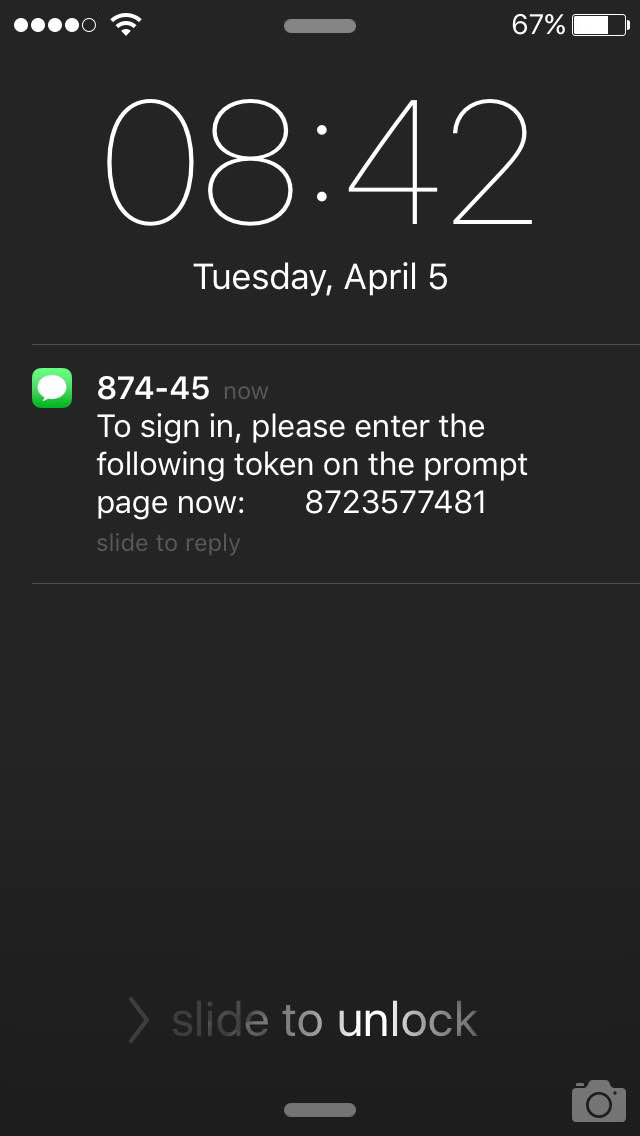
At this point you will notice that an SMS will be sent to the customer's registered phone number.
Last Updated 1/3/2024 3:00:49 PM