Overview
Bizagi supports integration with Identity and Access Management systems (i.e, Identity Managers or Identity Providers) through secure industry protocols and standards.
The SAML 2.0 protocol, which Bizagi supports, requires issued and installed certificates.
An exchange of messages between Bizagi (as a Service Provider) and your SAML-compliant Identity Provider needs to be duly signed.
For some Identity Providers (depending on how they support extended options), using another certificate can be employed to also encrypt the messages exchanged.
Self-signed certificates
Regarding the certificates that are used to sign or encrypt messages, you may use self-signed certificates without raising any security concerns.
Self-signed certificates are not issued by a public Certificate Authority. You can generate them yourself using SDK tools such as Java's keytool or OpenSSL.
This article describes how to issue and install a self-signed certificate.
The following illustration represents (at a high level) working with certificates. The Certificate Authority may not necessarily be an external one but can be one setup locally by use of a self-signed certificate.

The illustration shows generating a certificate using a private and a public key pair.
You sign the certificate with the root certificate of a Certificate Authority (providing the public key through a certificate signing request .csr). Then you issue and export the signed certificate in a P12 format. Use a certificate its password when setting up a trusted communication such as SAML 2.0.
Prerequisites
The main prerequisite is to install the SDK you will employ to generate self-signed certificates.
This article provides steps applicable to using OpenSSL as the SDK for this purpose.
Download the appropriate installer of OpenSSL from https://slproweb.com/products/Win32OpenSSL.html, where you can choose 64-bit or 32-bit installers according to your system architecture.
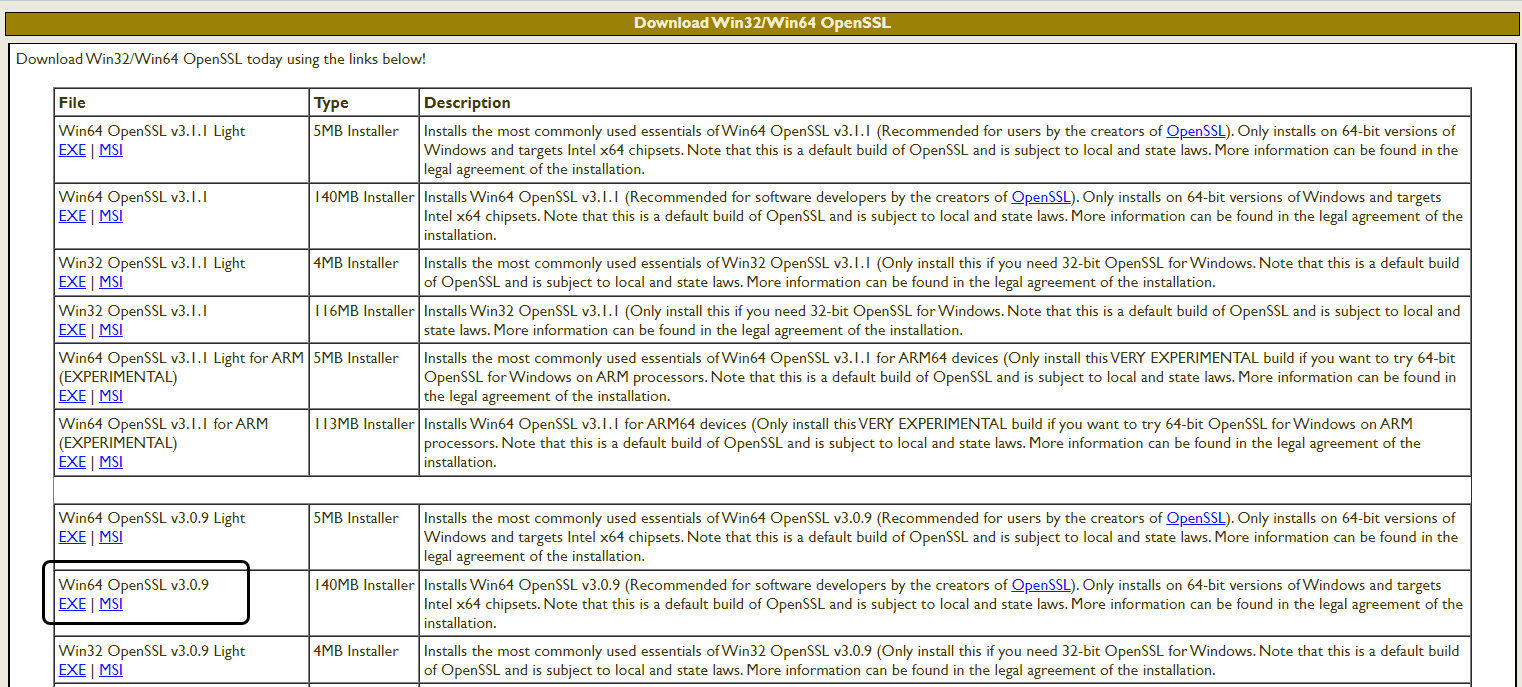
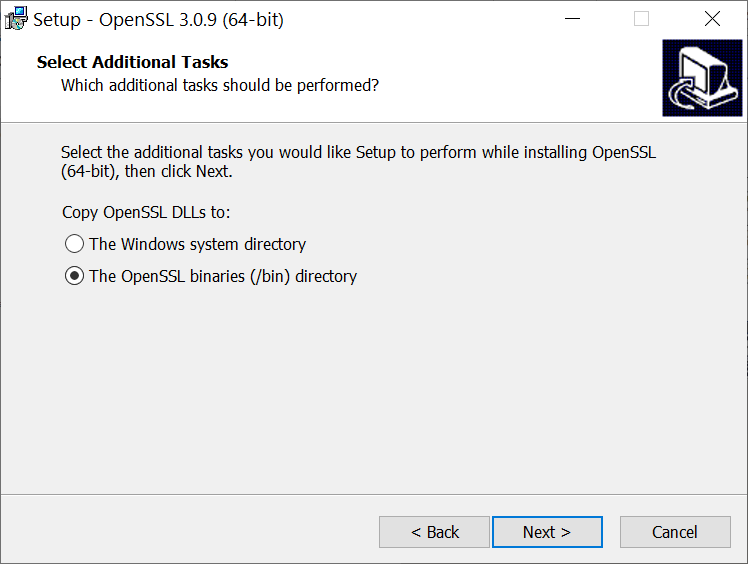
For Windows OS, a wizard can help you install the SDK. Follow the default steps to copy OpenSSL DLLs to The OpenSSL binaries (bin) directory:
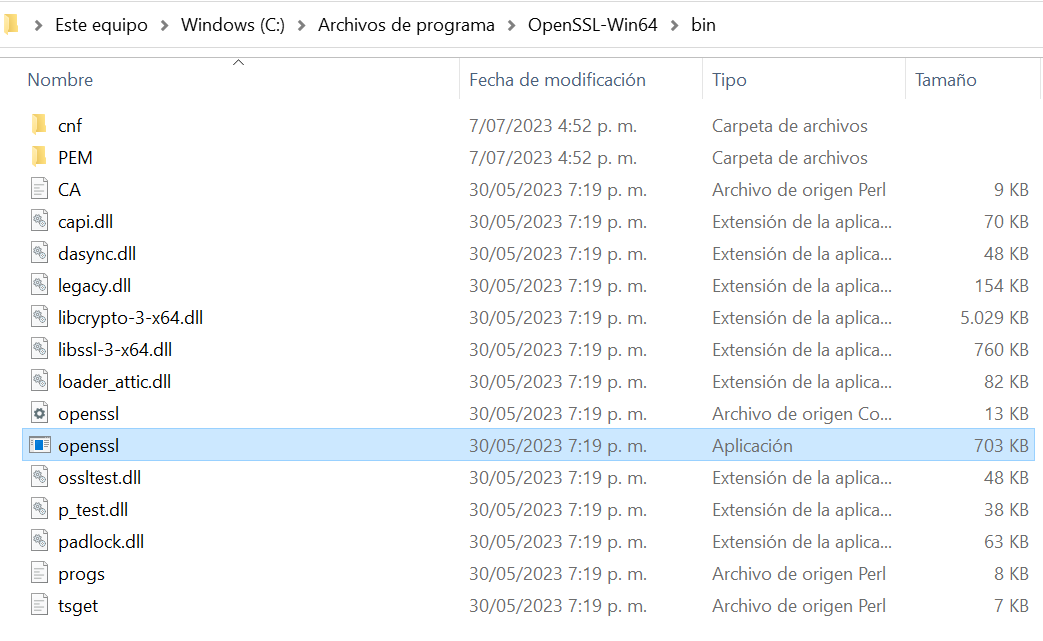
After a successful installation in Windows, you should be able to see the openssl.exe executable file, along with its openssl.cfg configuration file, in the bin folder of the location you selected during installation:
We recommend that you add OpenSSL to your system environment variables so that you can run its executable without needing to worry about paths.
To do this, edit the Path variable:
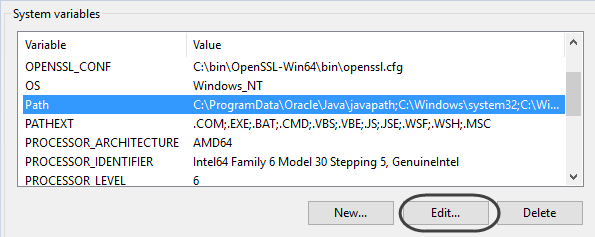
Add the OpenSSL's bin folder into the registered locations:
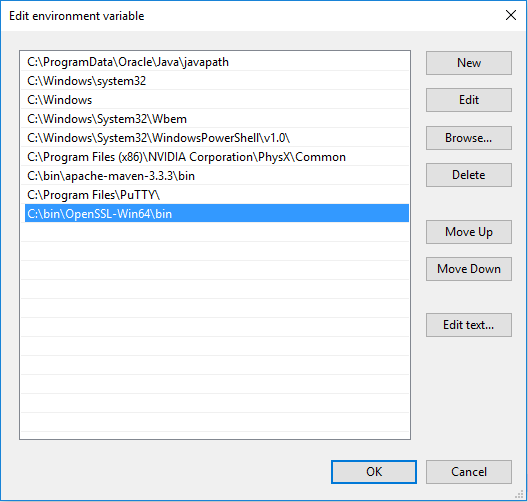
Click OK to save your changes before closing any windows (opened command prompts, environment variable windows, etc).
The steps in this article use OpenSSL from a command prompt.
To learn about other options and for complete information about OpenSSL, refer to its official documentation at https://www.openssl.org/docs/man1.0.2/apps/openssl-req.html.
Before you start
The goal of these steps is to issue two different certificates: one for message signing, and another for encryption.
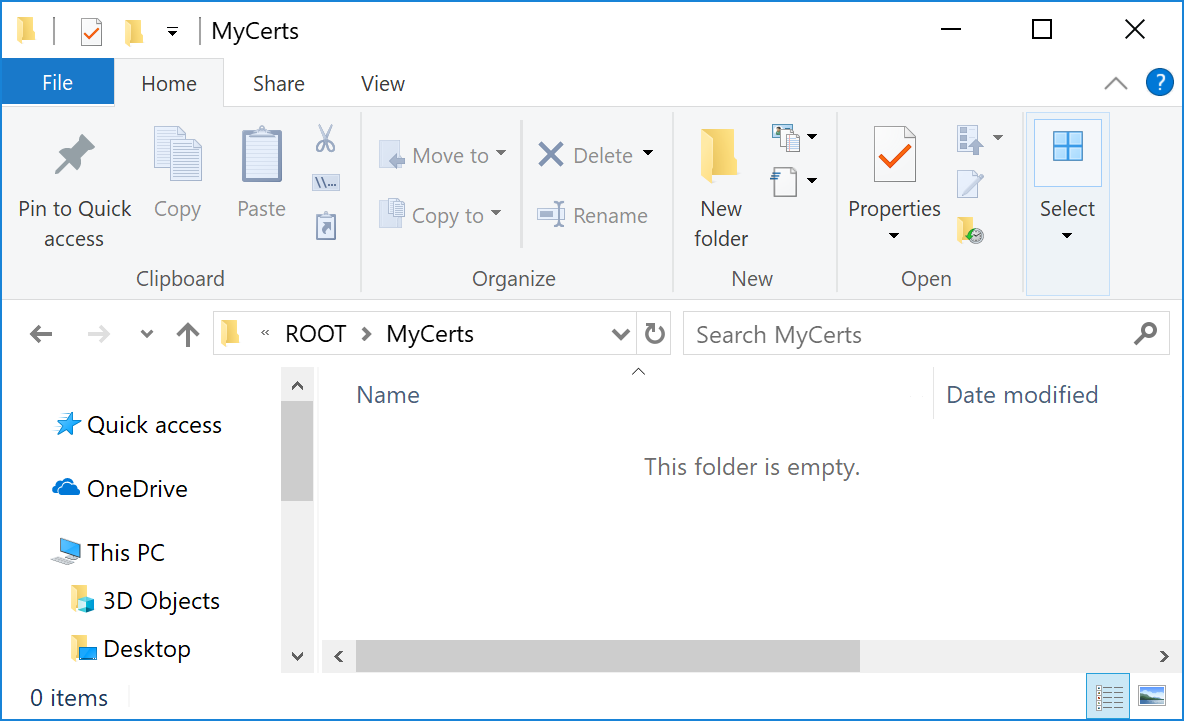
We recommend that you create a folder to store the certificates to be issued within the following steps, so you can locate them easily.
This path to the folder will be referred to as <CERT_DIR>.
The sample image below shows a created folder set to C:\Root\MyCerts:
What you need to do
When issuing a self-signed certificate, follow these steps:
1.Create a Certificate Signing Request (CSR)
2.Sign the request
3.Export the private and public key under a P12 format
Procedure
1. Create a Certificate Signing Request (CSR)
You need to issue a Certificate Signing Request before issuing a final certificate, while creating both a private key and a public key file.
The instructed commands may display in more than one line for presentation purposes.
For commands that are lengthy, remove any line breaks between parameters when entering them in the .command prompt.
1.1. Open a command prompt and browse into the <CERT_DIR> folder you created.
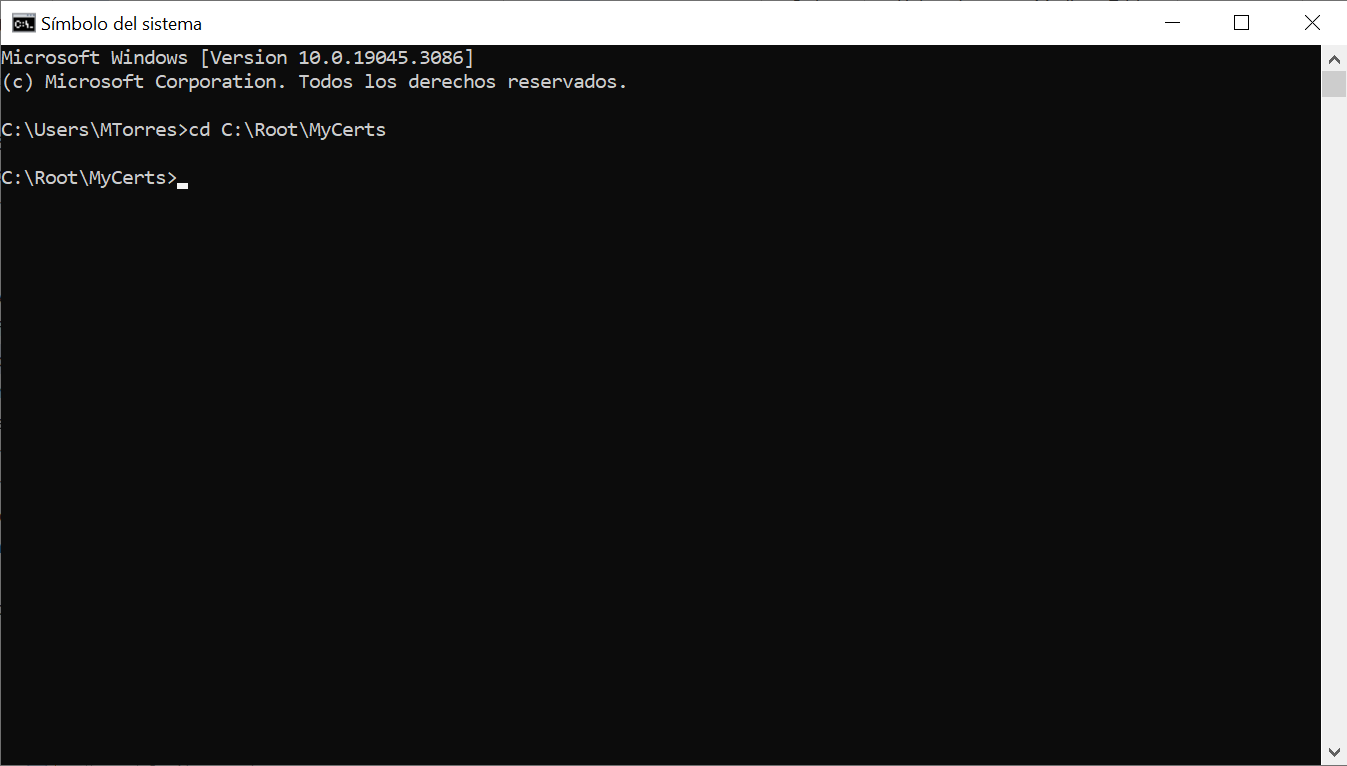
1.2. Run the following command to create a Certificate Signing Request for the certificate to be used to sign assertions:
openssl req -newkey rsa:2048 -subj "[certificate_details]" -nodes -sha256 -keyout [key_name].key -out [csr_name].csr
Replacement:
•[certificate_details]: The identifier and displayed details of the certificate.
Use the following format: /C=[CO]/ST=[ST]/L=[city]/O=[org]/OU=[unit]/CN=[display_name]/
Replace [CO] with your 2-digit country code, [ST] with your 2-digit state code, [city] with your locality or city, [org] with your organization's name, [unit] for the organizational unit, and [display_name] with your identifier of the certificate.
For clarity and convenience, we suggest that the [display_name] includes the word Sign.
•[key_name]: The name of the file holding the private key which will be generated.
For clarity and convenience, we suggest that the name includes the word Sign.
•[csr_name]: The name for the file holding the certificate signing request with the public key which will be generated.
For clarity and convenience, we suggest that the name includes the word Sign.

Once the command runs successfully, the two output files (.key and .csr) should appear in your <CERT_DIR> folder:
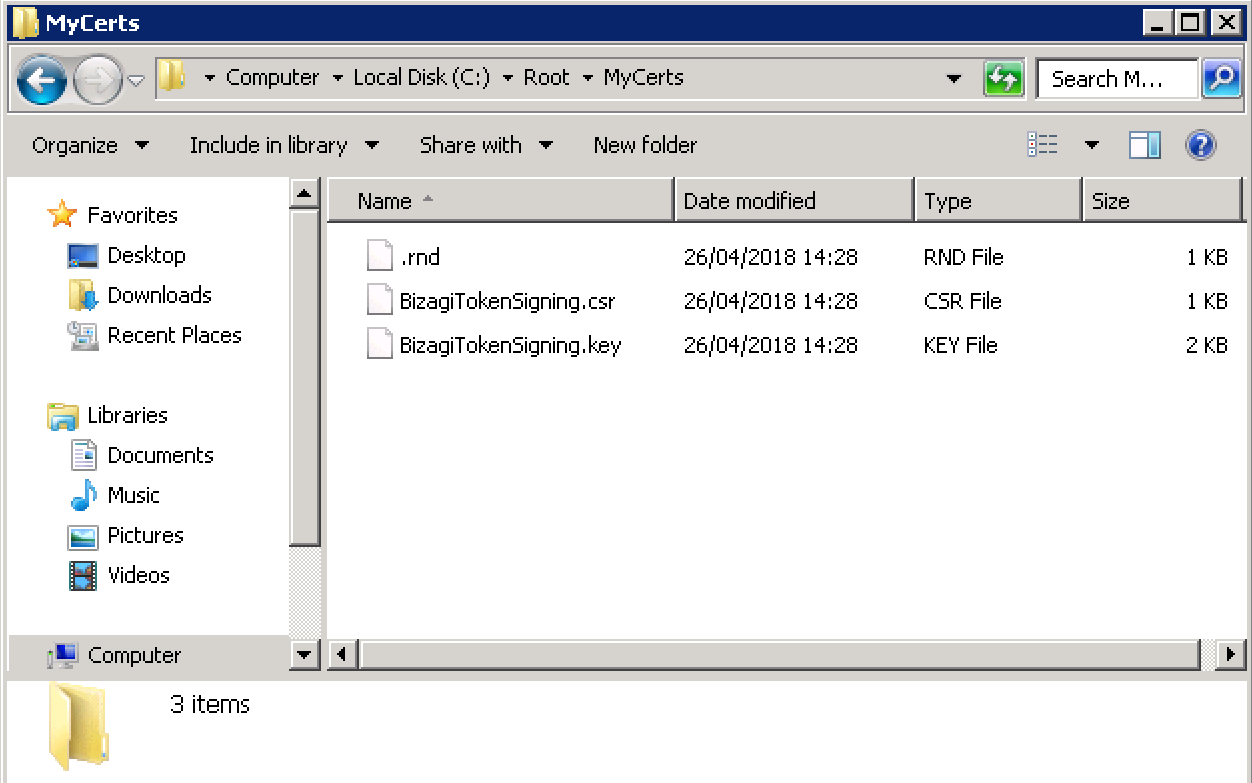
1.3. Repeat the previous step if you are encrypting the assertions.
Encrypting assertions is optional, but we recommend it if your Identity Provider supports it.
If you choose to do this, run the same previous command:
openssl req -newkey rsa:2048 -subj "[certificate_details]" -nodes -sha256 -keyout [key_name].key -out [csr_name].csr

This time, specify a different [key_name] and [csr_name] so you don’t overwrite the first file you created.
For clarity and convenience, we suggest the name includes the word Encrypt.
Similarly, and within the information in[certificate_details], the [display_name] should be different for each of the generated certificates.
Once the command runs successfully, the two output files (.key and .csr) should appear in your <CERT_DIR> folder:

2. Sign the request
To sign the request, you need a Certificate Authority (CA), it is best to use one that you already have for your organization.
If you use an existing Certificate Authority for your organization, copy its .cer and .key files into your <CERT_DIR> folder, and skip to step 2.2.
2.1. If you don't have an existing Certificate Authority, you can issue a local one with the following command:
openssl req -new -newkey rsa:2048 -days [validity] -extensions v3_ca -subj "[certificate_details]"
-nodes -x509 -sha256 -set_serial 0 -keyout [root_key].key -out [root_cer].cer
Customization:
•[validity]: The number of days to certify the certificate for. For instance setting 3650 makes the certificate valid for almost 10 years. Using a high value such as 3650 is best for reducing administrative overhead related to the process of generating new certificates when the old ones expire. However, this decision is up to you according to your corporate policies. Whatever you decide, you need to make sure that those certificates are maintained since your authentication depends on it.
•[certificate_details]: The identifier and displayed details of the certificate.
The information should follow the following format: /C=[CO]/ST=[ST]/L=[city]/O=[org]/OU=[unit]/CN=[display_name]/
Replace [CO] with your 2-digit country code, [ST] with your 2-digit state code, [city] with your locality or city, [org] with your organization's name, [unit] for the organizational unit, and [display_name] for the identifier of the certificate.
For clarity and convenience, we suggest that the [display_name] includes the word Root somewhere.
•[root_key]: The name for the file which will be generated holding the private key.
For clarity purposes and for your own convenience, we suggest that the name includes the word Root somewhere.
•[root_cer]: The name for the certificate file which will be generated with the public key.
For clarity purposes and for your own convenience, we suggest that the name includes the word Root somewhere.

Once the command runs successfully, the two output files (.key and .cer) should appear in your <CERT_DIR> folder:
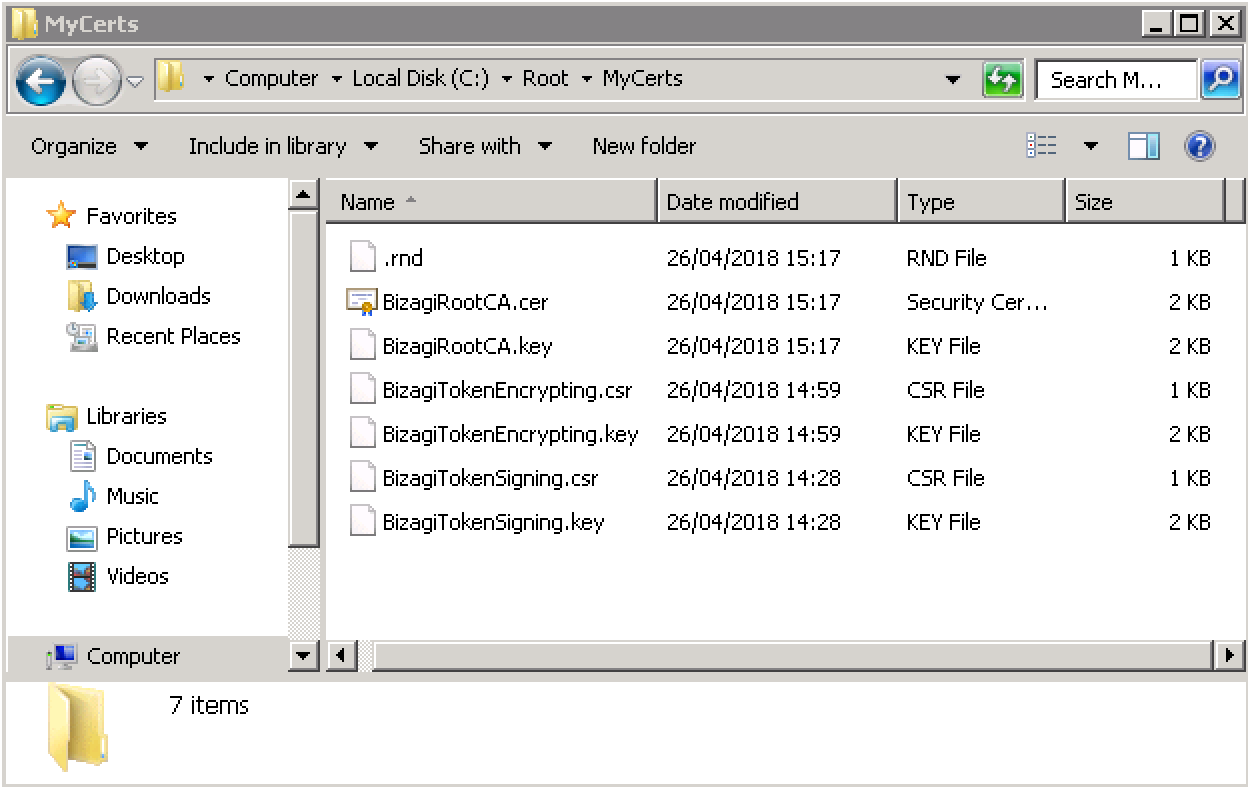
2.2. Run the following command to sign the Certificate Signing Request for assertions:
openssl x509 -req -sha256 -CAcreateserial -in [csr_name].csr -days [validity]
-CA [root_cer].cer -CAkey [root_key].key -out [cer_name].cer
Customization:
•[validity]: The number of days that the certificate is valid. Setting this to 3650 makes it valid for almost 10 years. Using a high value reduces administrative overhead related to the process of generating new certificates when the old one expire. However, this decision is up to you according to your corporate policies. You will need to make sure that the certificates are maintained since your authentication depends on them.
•[root_key]: The name of the file holding the private key of the Certificate Authority.
It should match the name you defined in the previous step if you generated a Certificate Authority; or the name of the file you copied into the <CERT_DIR> folder if you are using an existing one.
•[root_cer]: The name for the certificate file holding the public key of the Certificate Authority.
It should match the name you defined in the previous step if you generated a Certificate Authority; or the name of the file you copied into the <CERT_DIR> folder if you are using an existing one.
•[csr_name]: The name of the Certificate Signing Request file, as defined and generated in step 1.2.
Bear in mind that this is required for the certificate involved in signing assertions.
•[cer_name]: The name for the final certificate file which will be generated with the public key.
For clarity and convenience, we suggest that the name includes the word Sign.

The subject display the details and identifier of the first certificate generated.
Once the command runs successfully, a .cer output file should appear in your <CERT_DIR> folder:
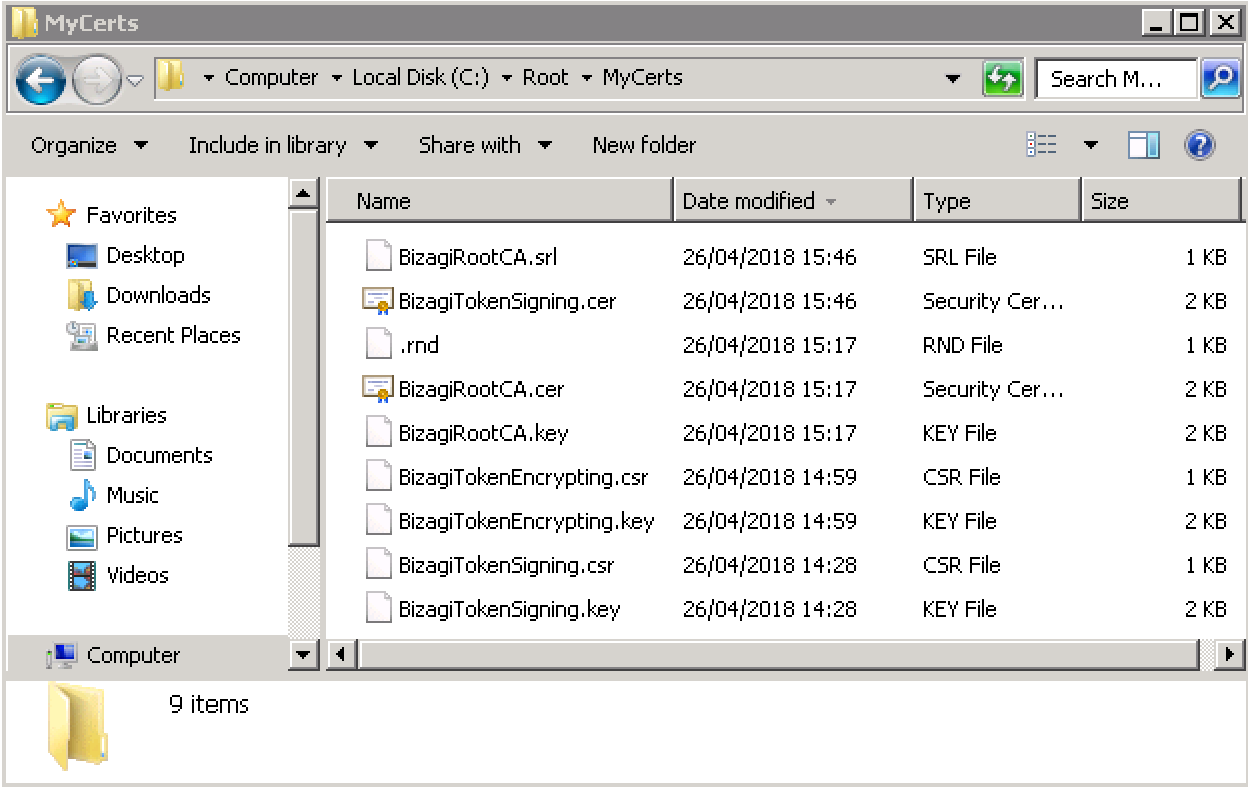
2.3. Repeat the previous step if you will be encrypting the assertions and carried out the instructions provided in step 1.3.
If you choose to do this, then run the same previous command:
openssl x509 -req -sha256 -CAcreateserial -in [csr_name].csr -days [validity]
-CA [root_cer].cer -CAkey [root_key].key -out [cer_name].cer
Customization:
•[validity]: The number of days during which certificate is valid. For instance setting the number to 3650 makes the certificate valid for almost 10 years. Using a high value such as 3650 is best to reduce administrative overhead related to the process of generating new certificates periodically. However, this decision is up to you according to your corporate policies. You will need to make sure that the certificates are maintained since your authentication depends on them.
•[root_key]: The name of the file holding the private key of the Certificate Authority.
It should match the name you defined in the previous step if you generated a Certificate Authority, or the name of the you file copied into the <CERT_DIR> folder if you are using an existing file.
•[root_cer]: The name for the certificate file holding the public key of the Certificate Authority.
It should match the name you defined in the previous step if you generated a Certificate Authority, or the name of the you file copied into the <CERT_DIR> folder if you are using an existing file.
•[csr_name]: The name of the Certificate Signing Request file, as defined and generated in step 1.3.
•[cer_name]: The name for the final certificate file which will be generated with the public key.
For clarity and convenience, we suggest that the name includes the word Encrypt.
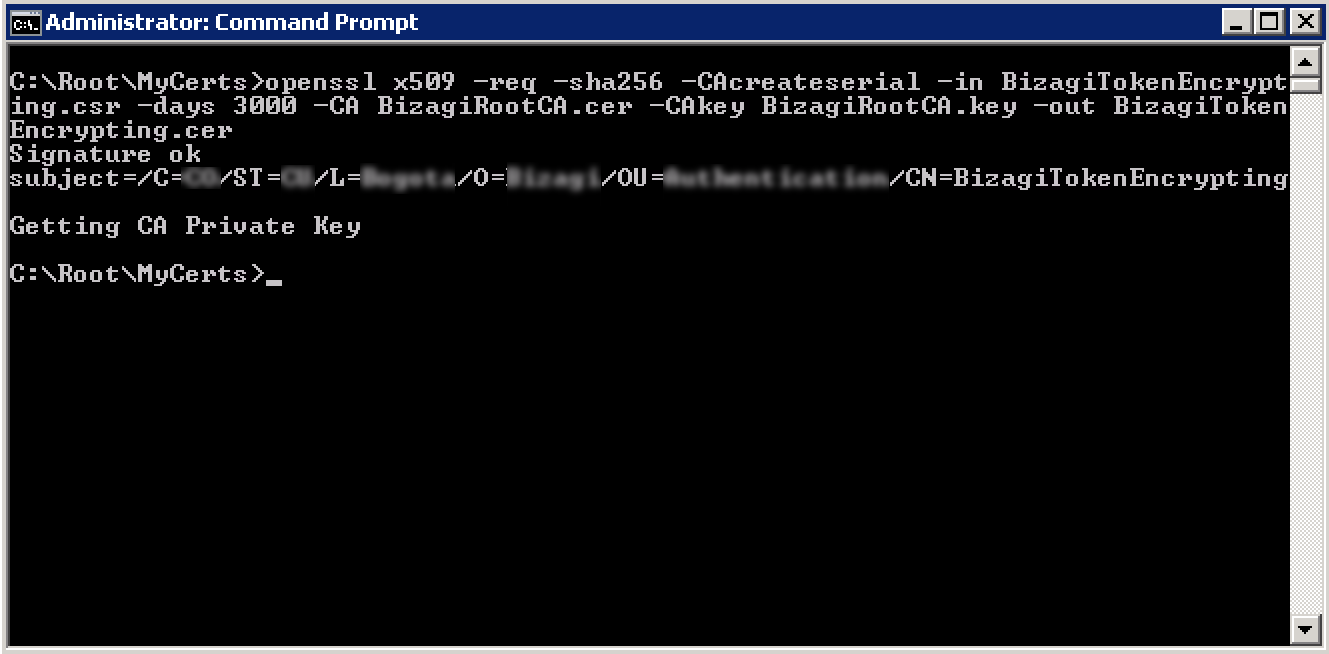
The subject will display the details and identifier of the first certificate you generated, which should be different from the one you generated in step 2.2.
Once the command runs successfully, a .cer output file should appear in your <CERT_DIR> folder:
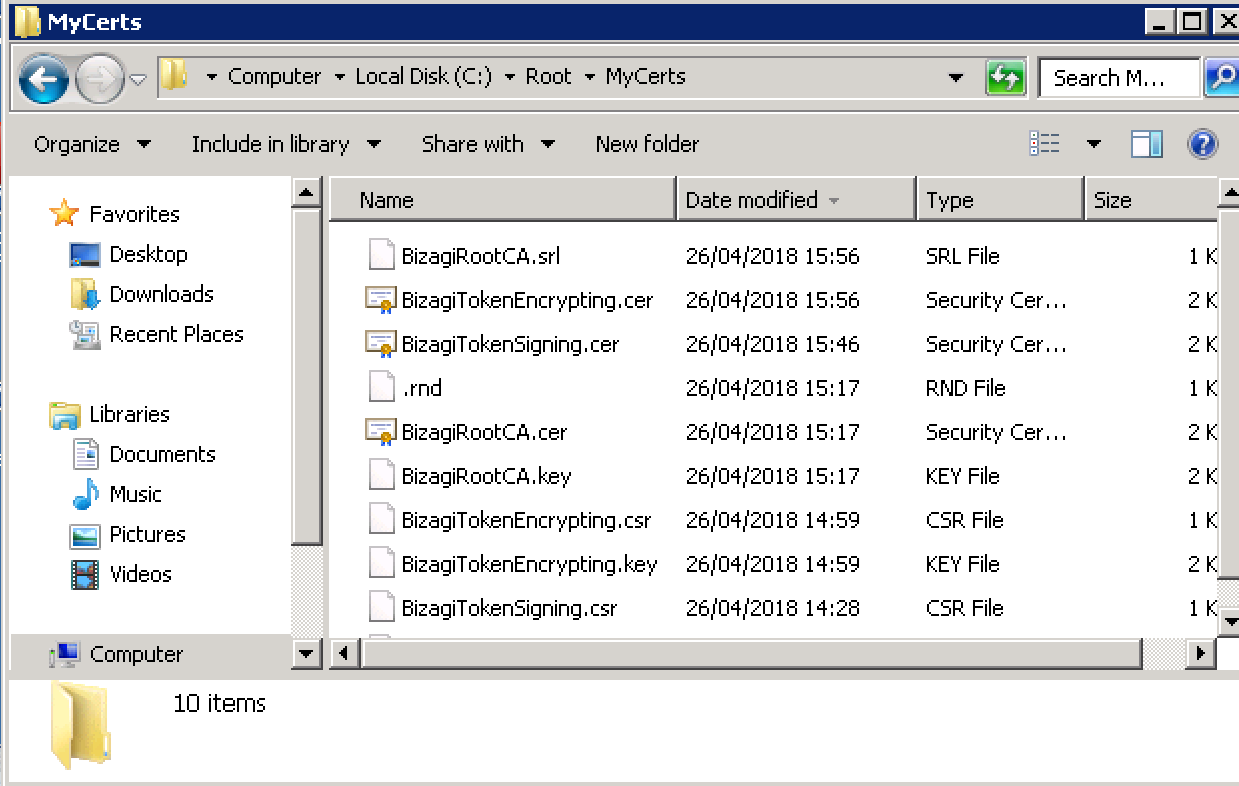
3. Export the private and public key under a P12 format
Finally, you need a P12 file holding both the private and the public key.
3.1. Run the following command first for the certificate employed for assertion signing:
openssl pkcs12 -export -macalg SHA1 -keypbe PBE-SHA1-3DES -certpbe PBE-SHA1-3DES -in [cert_name].cer -inkey [key_name].key -out [p12_name].p12 -CSP "Microsoft Enhanced RSA and AES Cryptographic Provider"
Customization:
•[cert_name]: The name for the public key file, as defined and generated in step 2.3.
•[key_name]: The name for the private key file, as defined and generated in step 1.3.
•[p12_name]: The name for the P12 file which will be generated.
For clarity and convenience, we suggest that the name includes the word Sign.

At this point, you see a prompt to define and confirm a password for the P12 file.
Make sure you copy the password and that keep it in a safe place, as you need it for configuration steps later on in Bizagi.
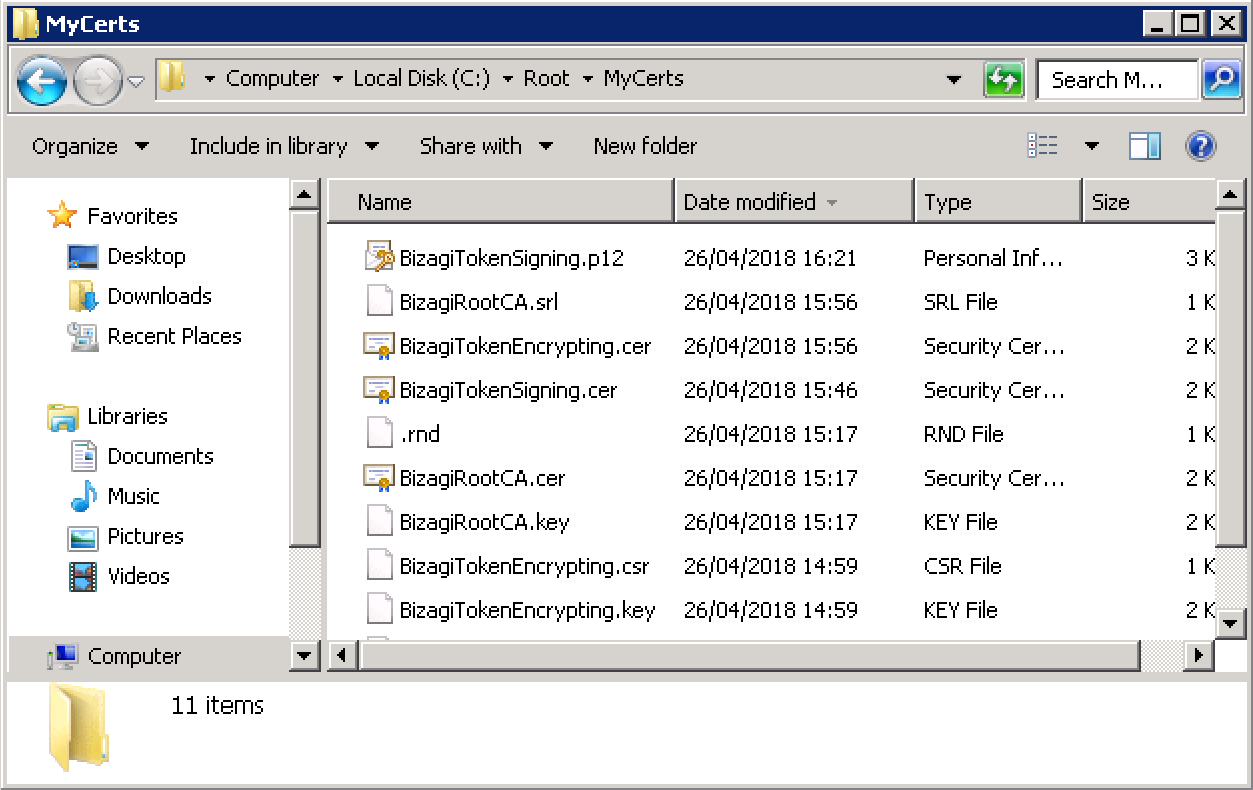
Once the command runs successfully, a .p12 output file should appear at your <CERT_DIR> folder:
3.2. Repeat the previous step if you are encrypting the assertions and carried out the instructions in step 1.3.
If you to do this, run the previous command:
openssl pkcs12 -export -macalg SHA1 -keypbe PBE-SHA1-3DES -certpbe PBE-SHA1-3DES -in [cert_name].cer -inkey [key_name].key -out [p12_name].p12 -CSP "Microsoft Enhanced RSA and AES Cryptographic Provider"
Customization:
•[cert_name]: The name for the public key file, as defined and generated in step 2.3.
•[key_name]: The name for the private key file, as defined and generated in step 1.3.
•[p12_name]: The name for the P12 file which will be generated.
For clarity and convenience, we suggest that the name includes the word Encrypt.

At this point, you will see a prompt to define and confirm a password for the P12 file.
Make sure you copy the password and that keep it in a safe place, as you need it for configuration steps later on in Bizagi.
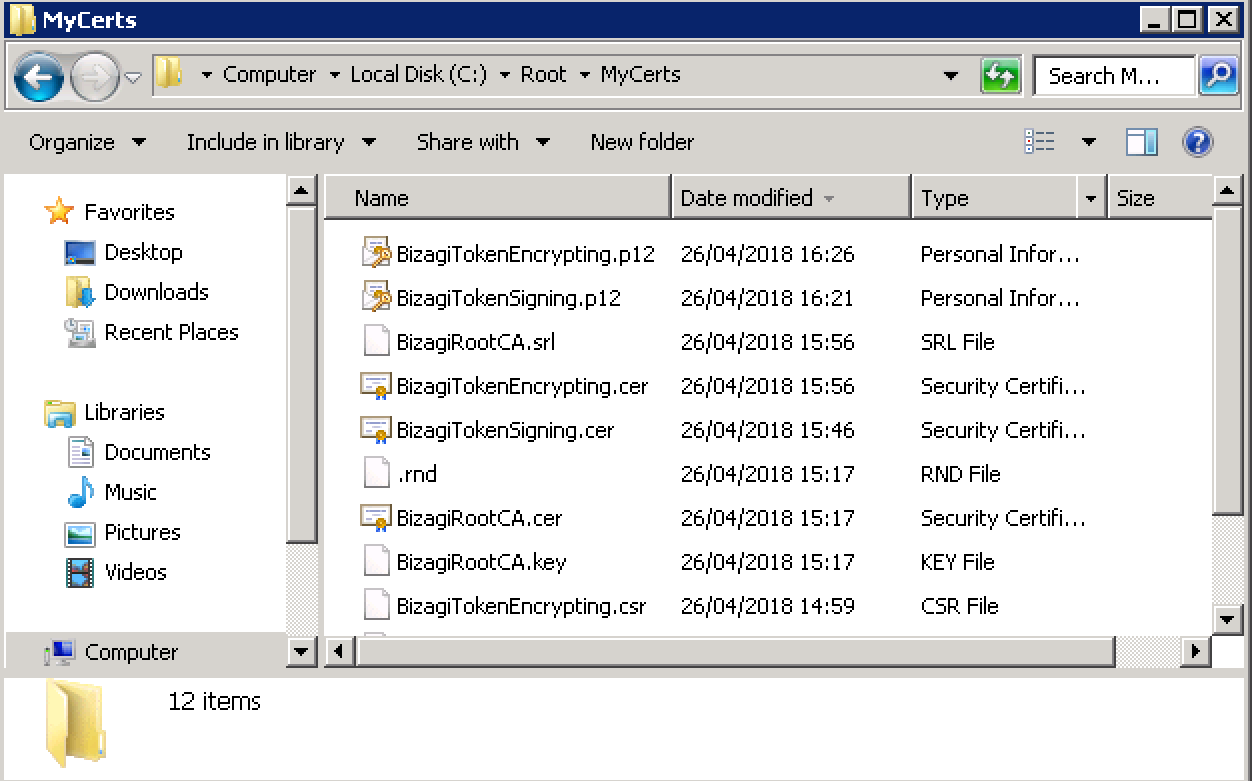
Once the command runs successfully, a .p12 output file should appear at your <CERT_DIR> folder:
Checkpoint
At this point you may choose to verify that the .p12 file is well-formed and has everything you need.
You may have one .p12 file, or two of them depending on your decision regarding encrypting assertions.
1. For this, run the following command to verify the .p12 file you will be using for assertion signing:
openssl pkcs12 -info -nodes -in [p12_name].p12
Customization:
•[p12_name]: The name for the P12 file, you defined and generated in step 3.1.
At this point, you will see a prompt to enter the password for the P12 file you defined in step 3.1.

Apart from checking that there no errors in the command, you can verify:
•That the password you defined is correct.
•That a public and private key are displayed.
•That the subject displays accurately the details you defined when generating the certificate.
•That the issuer displays accurately the details of the Certificate Authority used to sign the certificate.
•Other details, such as the employed algorithm.
2. If you are encrypting the assertions and carried out the instructions provided in step 1.3, you can repeat the previous step for the other .p12 file.
To do this, run the following command to verify the .p12 file you will be using for assertion encrypting:
openssl pkcs12 -info -nodes -in [p12_name].p12
Customization:
•[p12_name]: The name for the P12 file, as defined and generated in step 3.2.
At this point, you will see a prompt to enter the password for the P12 file that you defined in step 3.2.

Last Updated 7/7/2023 5:01:58 PM