Overview
This section explains how to create a Storage account inside a Resource group.
What you need to do
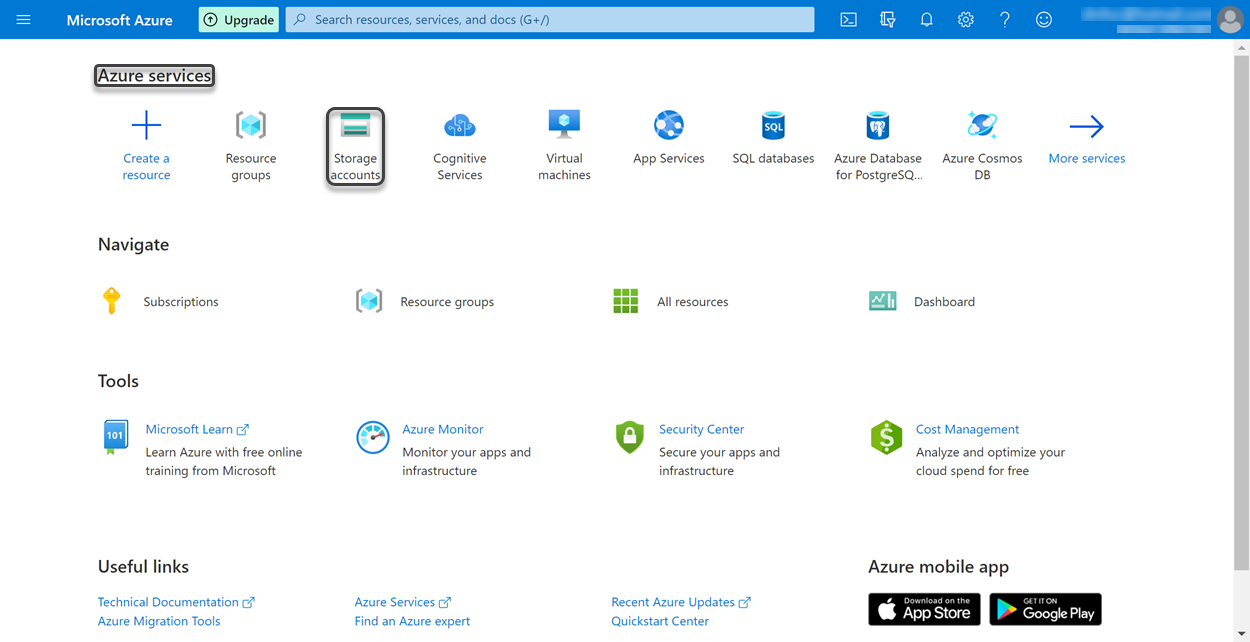
Once you have created a resource group, you can start filling this 'container' with Azure resources. Go to portal's home page (if you are in the Resource groups' page, the easiest way to do it is by clicking the Home hyperlink located on top of the Resource groups label) and then look for the Storage accounts icon under the Azure services ribbon.
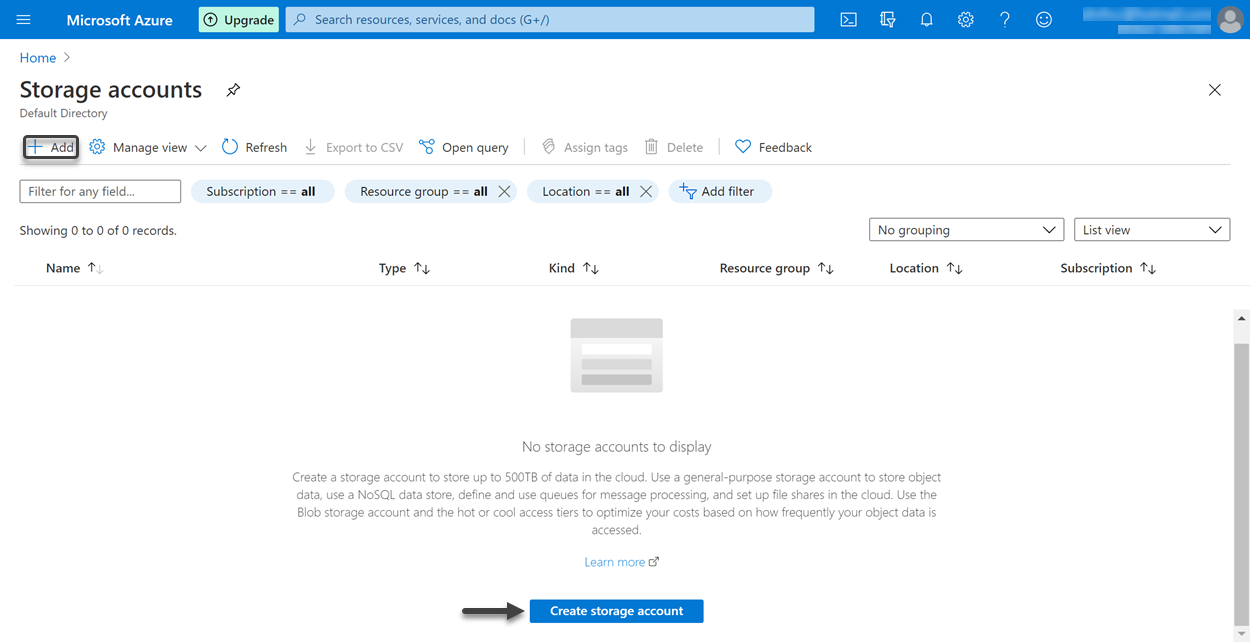
You are directed to the Storage accounts' page. To create a new storage account (an account that allows you to store up to 500 TB of data in the cloud), click the Add button located in the options ribbon. If you do not have any storage account, you can also click the Create storage account button located at the bottom.
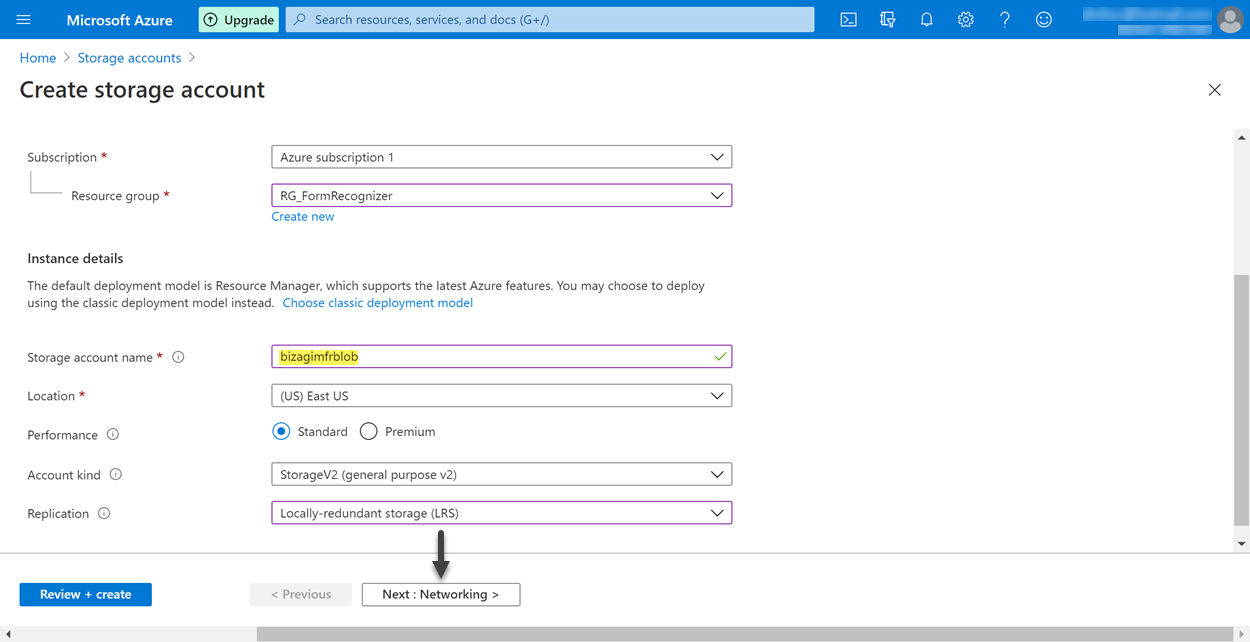
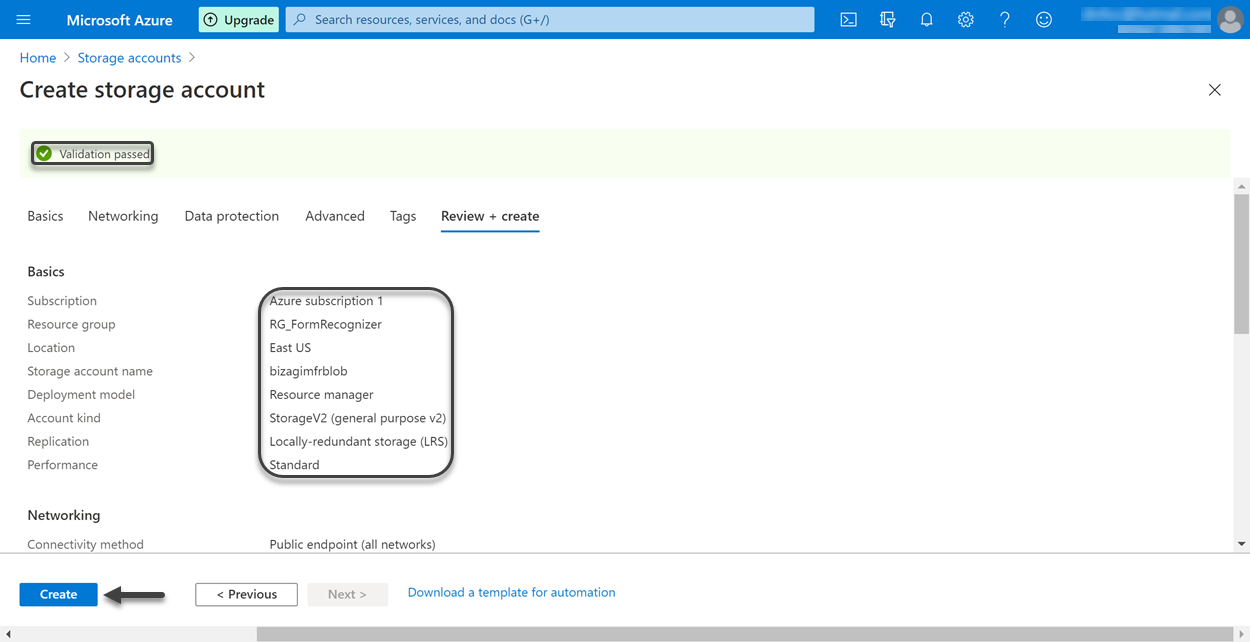
The Create storage account wizard opens. This wizard has six steps: Basics, Networking, Data protection, Advanced, Tags and Review+create. In a similar way as the creation of your resource group, the Basics step allows you to define the Project details, and the Instance details. This time, in the Project details you select the subscription in which the storage account is going to be created, as well as the resource group that is going to contain it. In this example, the selected subscription is Azure subscription 1 and the resource group is RG_FormRecognizer (the resource group already created).
Moreover, in the Instance details you define the characteristics of your storage account, meaning its name, region, performance, type and redundancy. In this example, the following characteristics are defined:
•Storage account name: bizagimfrblob
•Location: (US) East US
•Performance: Standard
•Account kind: StorageV2 (general purpose v2)
•Replication: Locally-redundant storage (LRS)
For more information about Azure Storage accounts, refer to Storage account overview. Once you have finished filling the information above, click the Next:Networking> button.
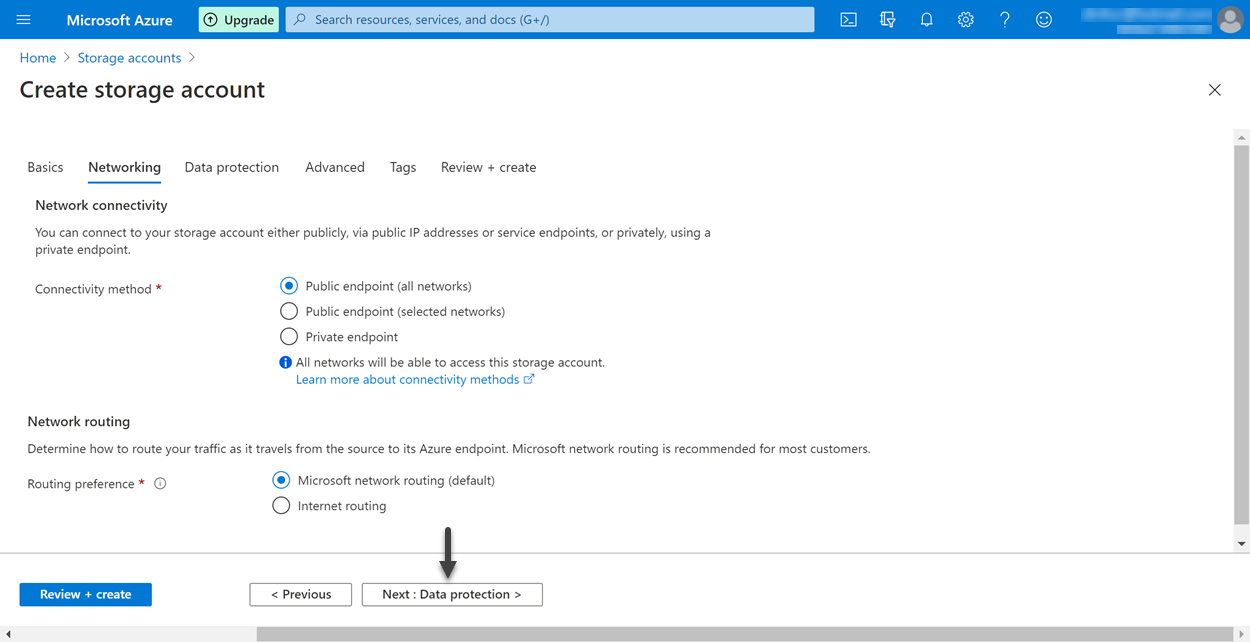
In the second step of the wizard, Networking, you can decide whether connect to your storage account publicly (via public IP addresses or service endpoints) or privately (private endpoint), and the network routing. For this example, you can leave the default values, that is:
•Connectivity method: Public endpoint (all networks)
•Routing preference: Microsoft networking routing (default)
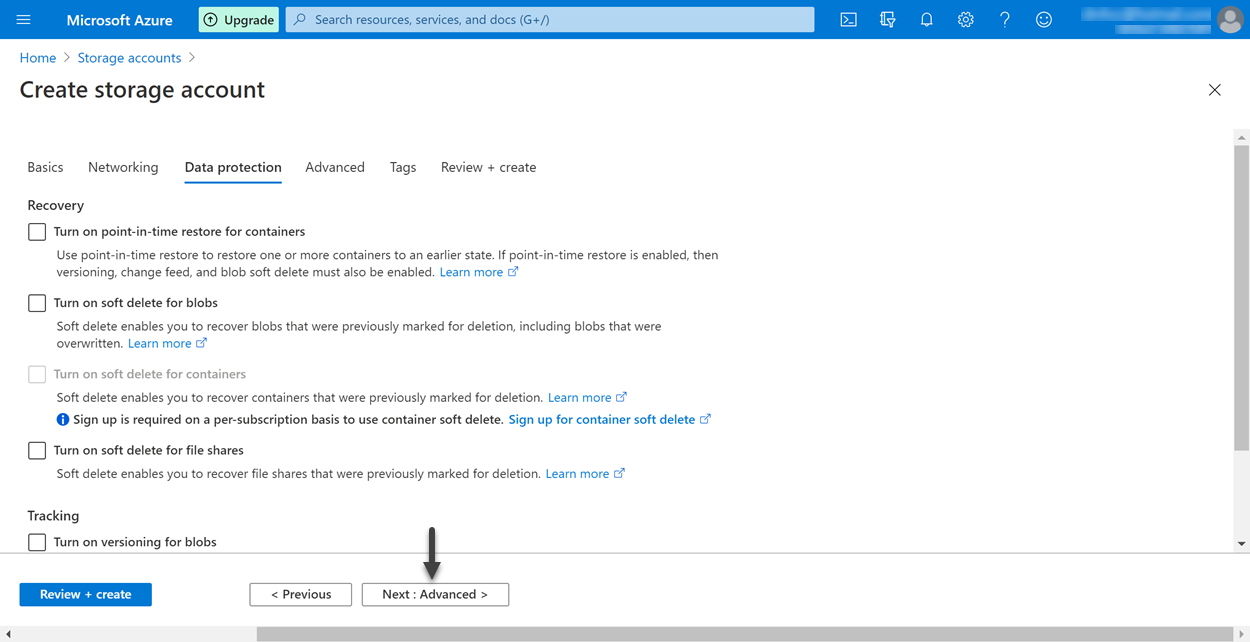
The Data protection step allows you to configure recovery and tracking parameters for the container, and for blobs and files within it. In this example, none of the available data protection options were selected. Click the Next:Advanced> button to continue to next step of the wizard.
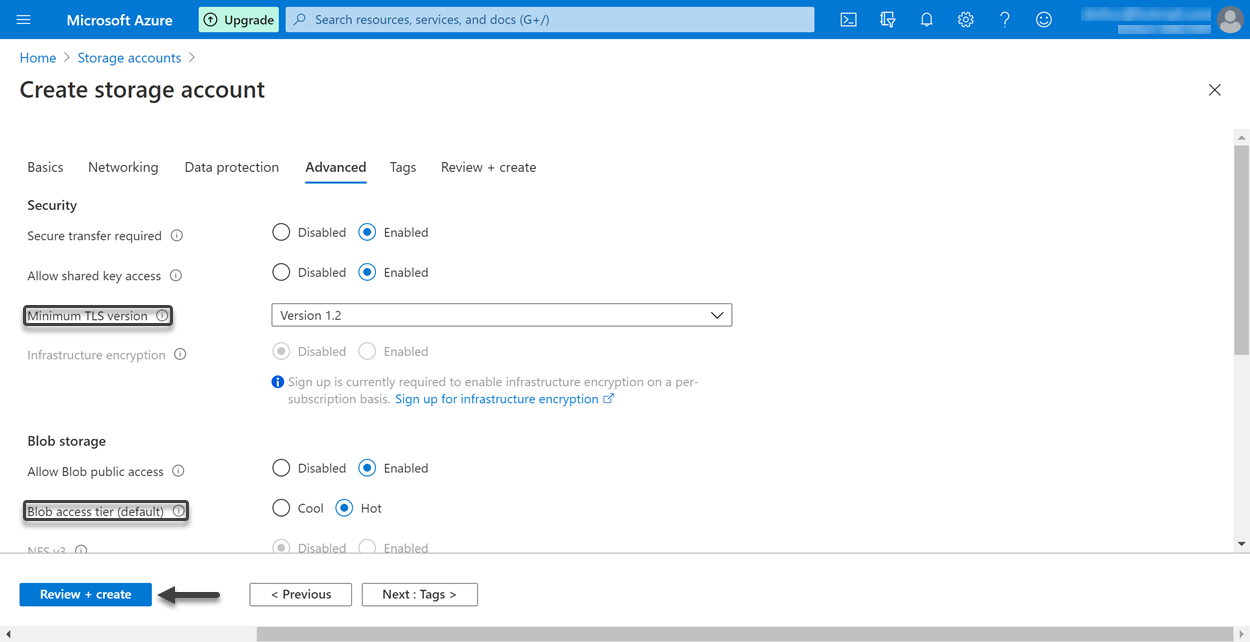
In the Advanced step you define the security of your storage account, as well as data accessibility parameters such as enabling public access to blobs, an access frequency tier for them, and the possibility of sharing large files. In this step, we recommend to change two parameters according to your requirements:
•The first parameter is Minimum TLS version under the Security options. This is an authentication protocol called Transport Layer Security, and you must validate the protocol's version supported by the application you are going to use to connect to the storage account. In this example, the version is 1.2.
•The second parameter is Blob access tier (default) under the Blob Storage options. Depending on how frequently the data of your blobs is going to be accessed, Azure recommends to choose between two access tiers: Hot for frequently accessed data, and Cool for infrequently accessed data. In this example, the Hot tier is selected.
As you may have noticed, in all the wizard steps there is a blue button located at the bottom left corner with the label Review+create. The button allows you to fast-forward to the last step of the wizard (the Review+create step) whenever you want. Assuming you do not want to configure Tags, click this button.
Once Azure has validated that the storage account can indeed be created, remember that you must review the information you entered. If everything is okay, click Create.
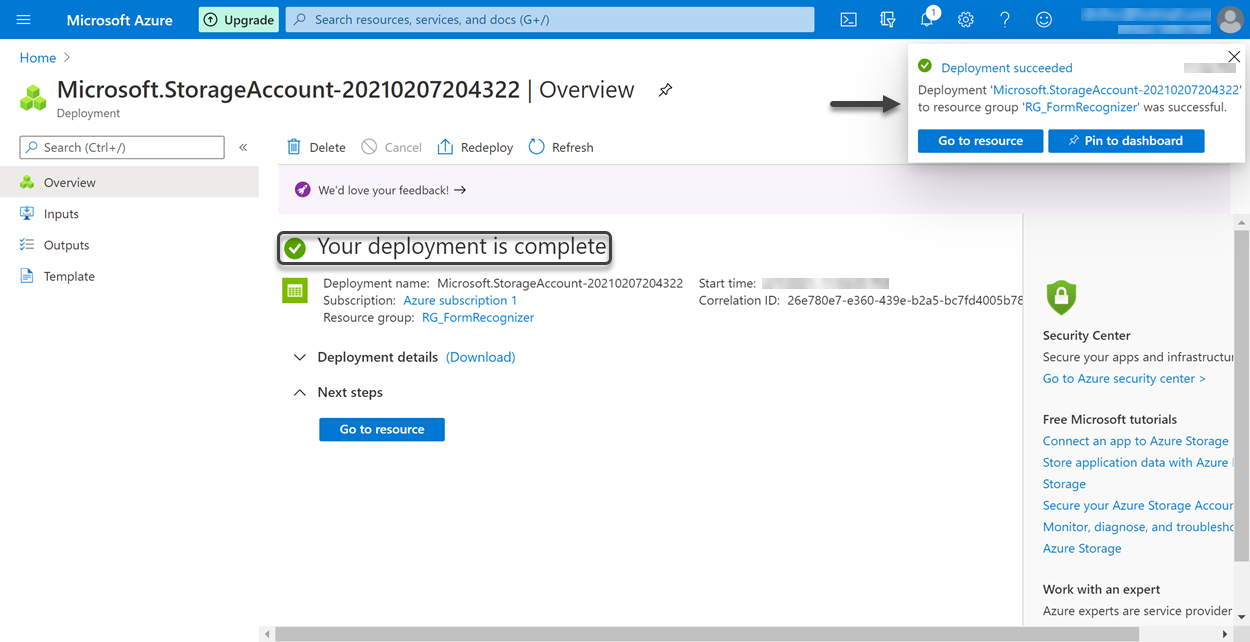
Azure starts the deployment of your storage account resource. After a few seconds, a message is displayed stating that the storage account deployment is complete. Furthermore, a notification pops-up at the top right corner confirming that the deployment succeeded.
Last Updated 1/29/2024 4:17:40 PM