Overview
This section explains how to create a Resource group in an Azure subscription.
What you need to do
Once you have signed in to your Azure subscription, click the Resource groups icon under the Azure services ribbon.
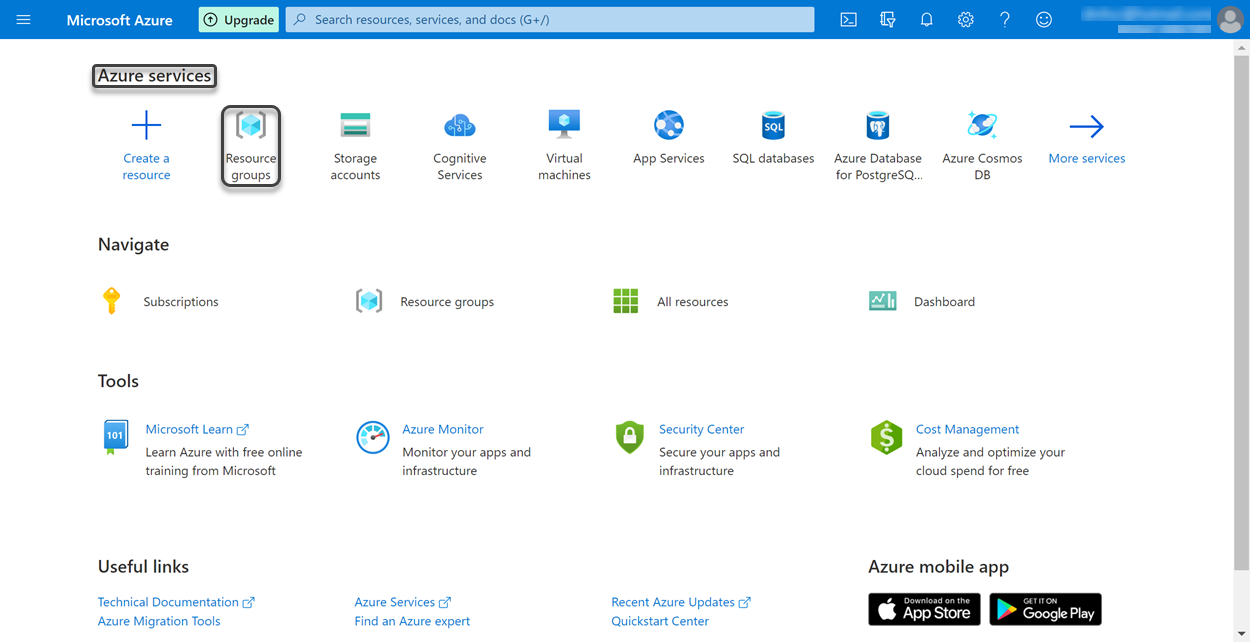
If the icon does not appear, click the More services icon and look for it under the Featured ribbon.
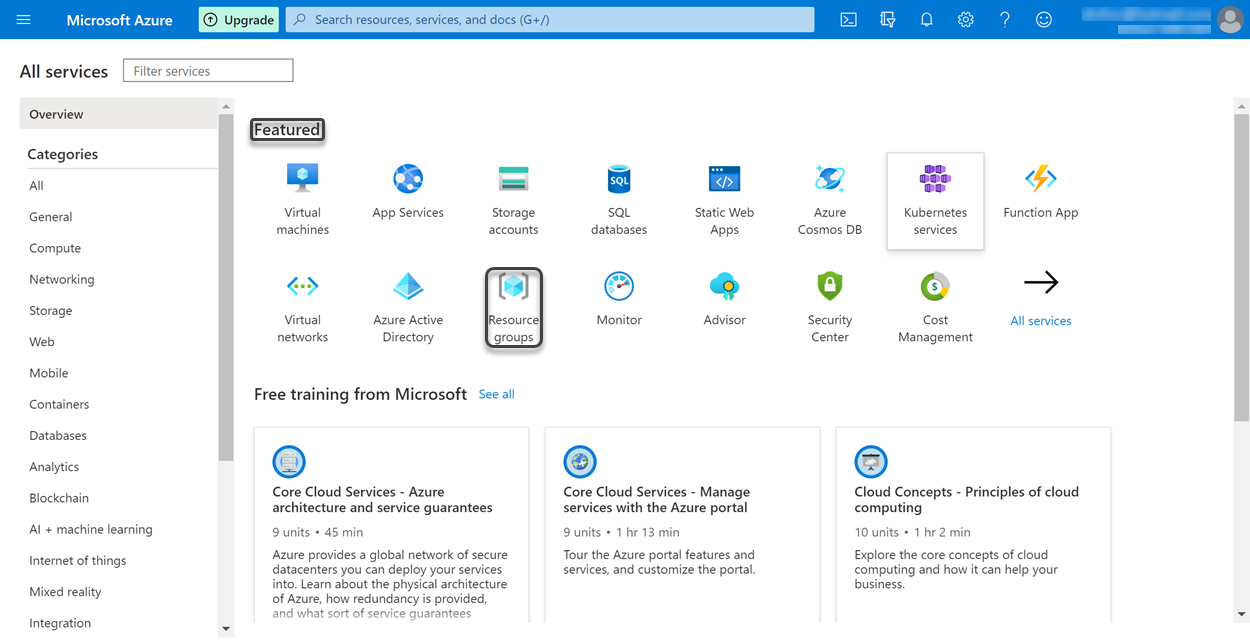
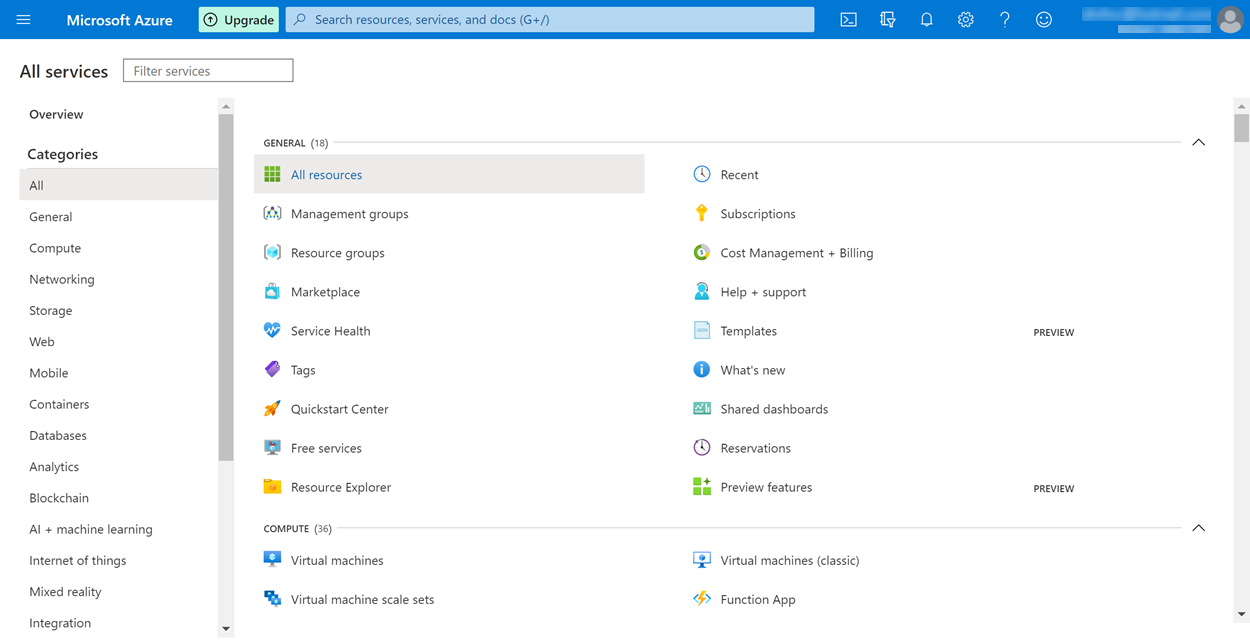
If you cannot find it yet, click the All services icon. This allows you to observe every service offered by Azure properly categorized.
|
Remember these steps as they apply for every Azure service you want to search. To easily find a service, you can type its name in the Filter services search bar next to the All services label located at the top left corner. |
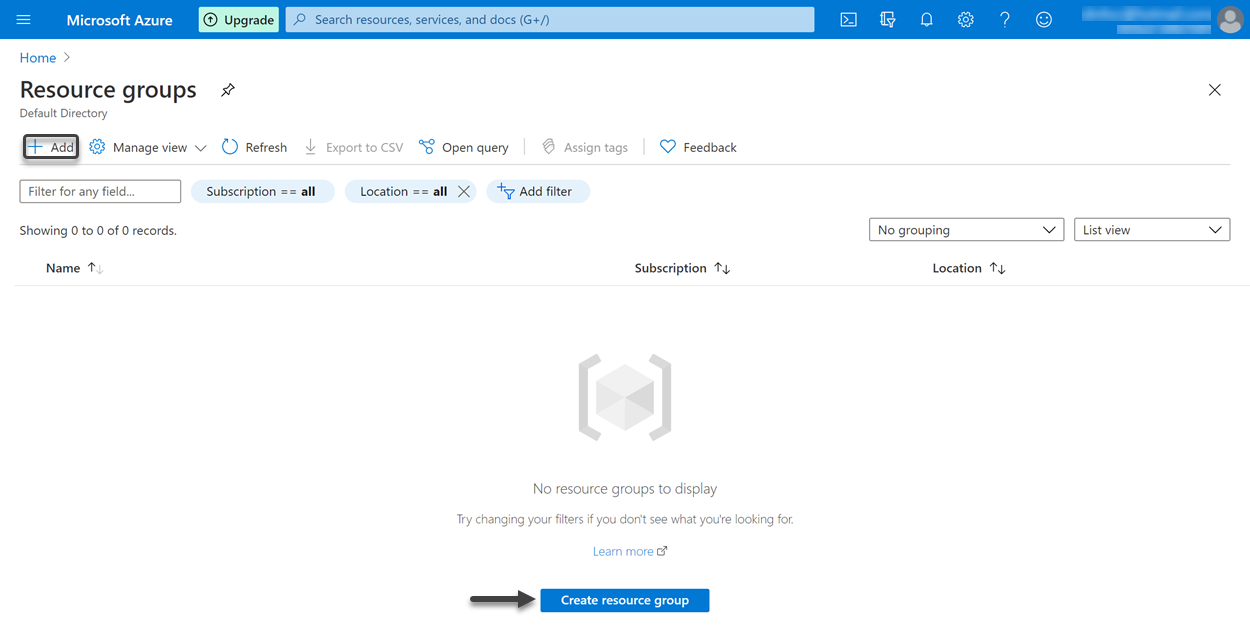
Once you click the Resource groups icon, you are directed to the Resource groups' page. To create a new Resource groups (the container of your Azure resources), click the Add button located in the options ribbon. If you do not have any resource groups, you can also click the Create resource group button located at the bottom.
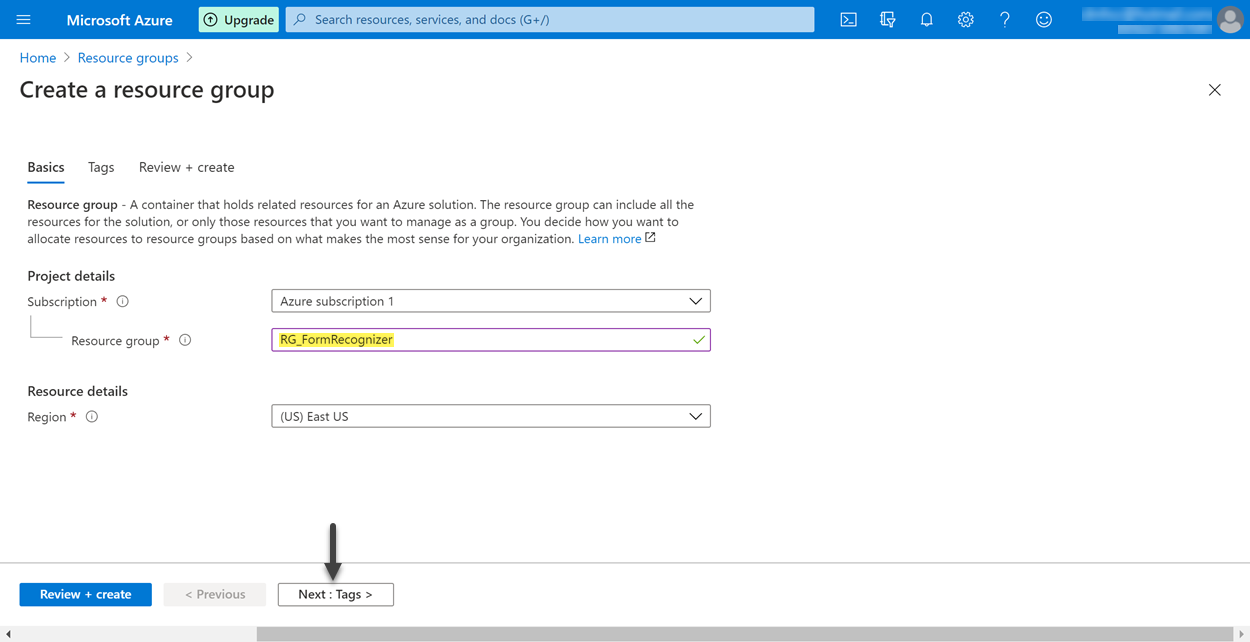
The Create a resource group wizard opens. This wizard has three steps: Basics, Tags and Review+create. The Basics step allows you to define the Project details, and the Resource details. In the Project details you can select the subscription in which the resource group is going to be created, and you must give a name to this resource group. In this example, the selected subscription is Azure subscription 1 and the resource group's name is RG_FormRecognizer.
Similarly, in Resource details you can select the region where the resource group is going to be deployed. In this example, the selected region is (US) East US. For more information about Azure regions, refer to Azure geographies. Once you have finished filling the above information, click the Next:Tags> button.
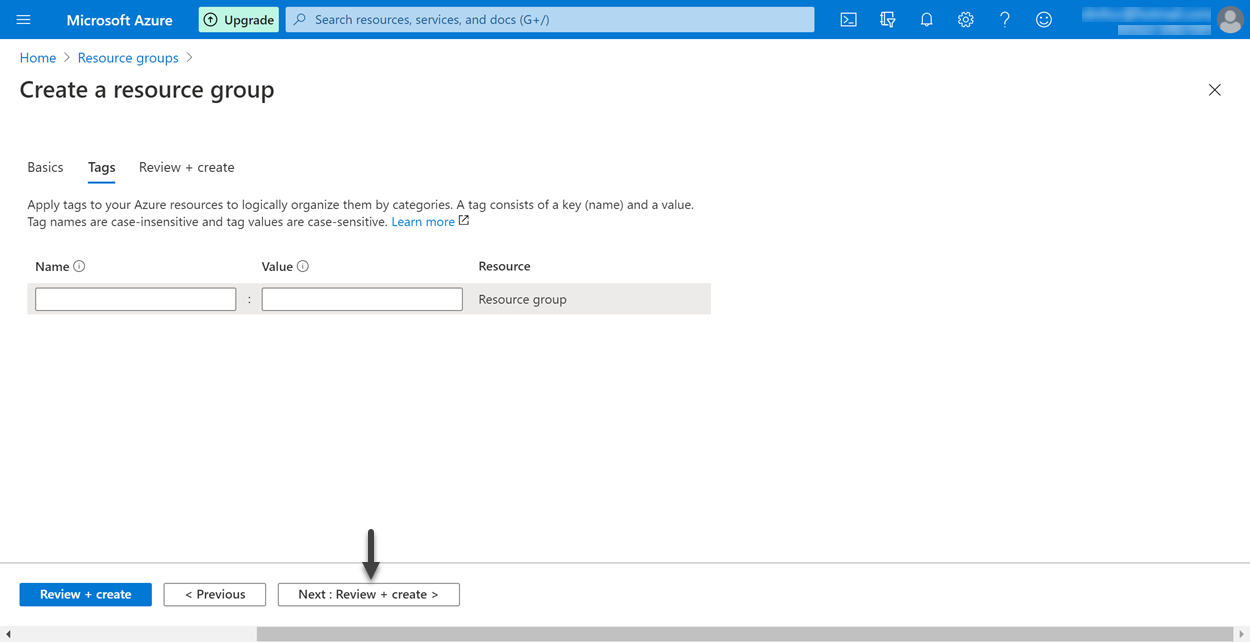
In the Tags step you can apply tags to your resource group to organize it later by category in your management hierarchy. Tags have two components: a name and a value. Both of them are basically labels that allows you to identify easily a resource. For example, you can choose Environment as name, and Test as value to identify a resource group that contains the Test Environment's resources.
As this step is not mandatory, you can skip it by clicking the Review+create> button. For more information on the tags functionality, refer to Use tags to organize your Azure resources and management hierarchy.
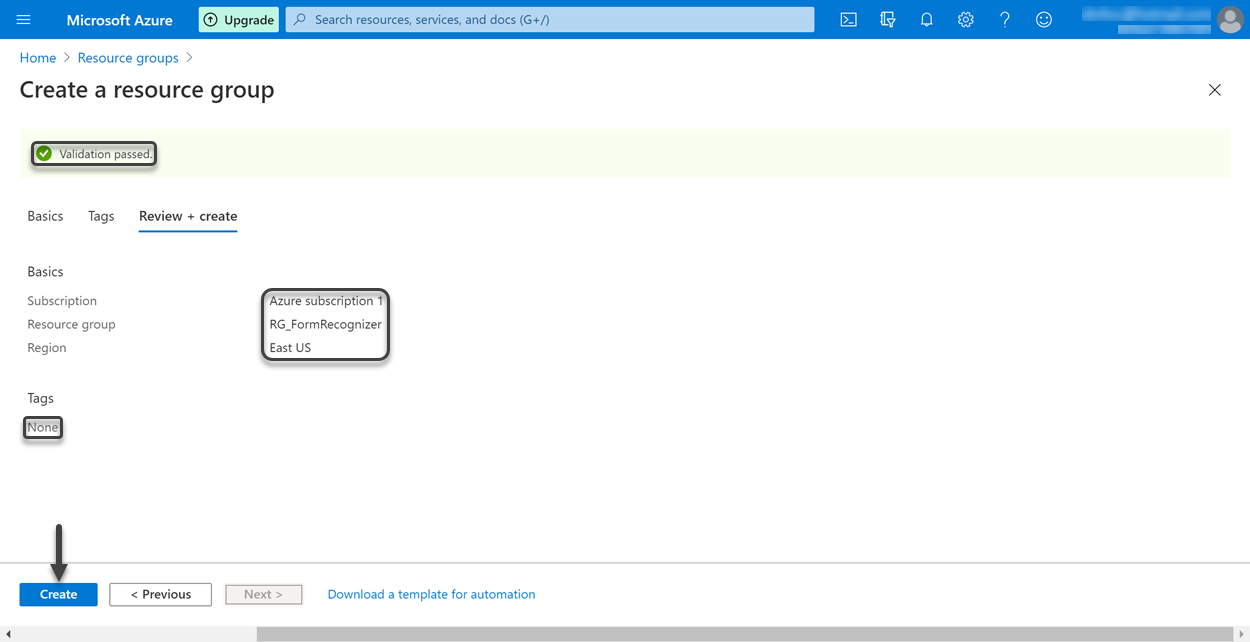
Finally, in the Review+create step, Azure validates that the resource group can be created, and displays the information you entered in the Basics and Tags steps for your review. If everything is okay, click Create.
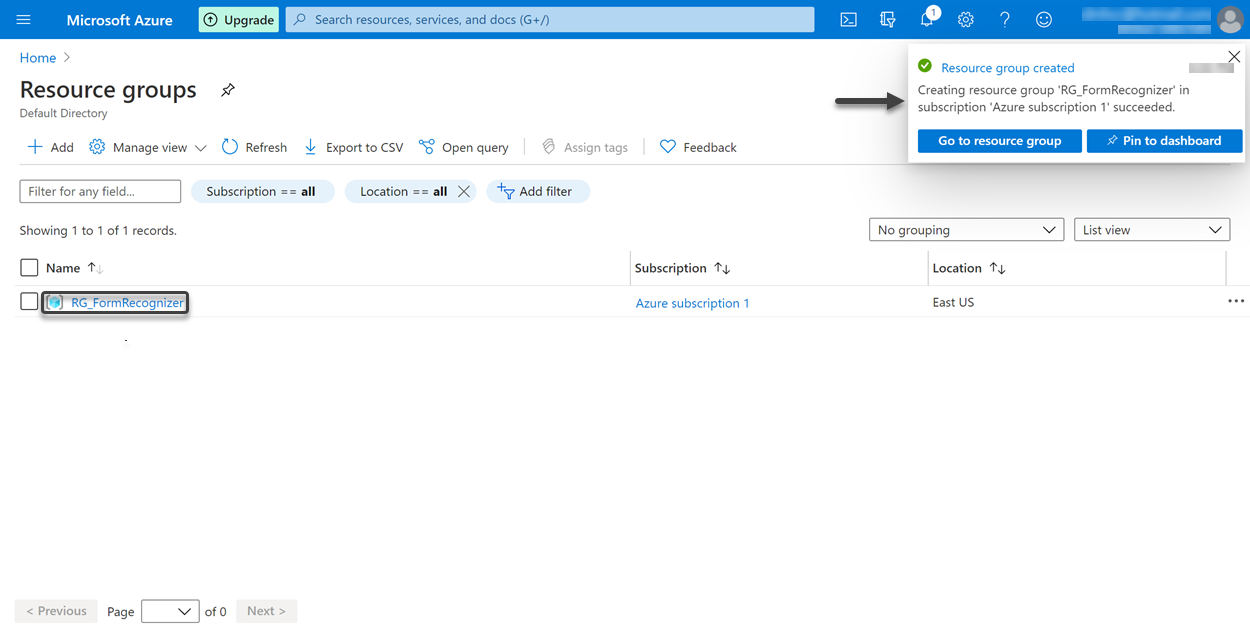
After Azure has successfully created the resource group, a notification stating so is shown at the top right corner. Likewise, the recently created resource group appears in the records list for future consultation or modification.
Last Updated 1/29/2024 4:12:37 PM