The integration with Automation Anywhere can't send outputs directly to Bizagi. This means that the bot must interact with Bizagi through the use of Metabots. Metabots are independent, reusable logic blocks used for common user interface operations, functions or tasks. As Such the Bizagi Metabot contains the most common operations an Automation Anywhere Bot must perform in Bizagi. Additionally, some support task are added to ease the use of the main tasks. In this article you will find some use guidelines that must be taken into account while using the Bizagi Metabot.
Guidelines to use Metabots in Bizagi
You can get the Bizagi Metabot at https://resources.bizagi.com/docs/bots/BizagiMetabot.mbot.
The Bizagi Metabot uses the Bizagi OData layer, therefore all the guidlines to use this layer must be considered in this scenario.
For more information on the OData layer go to: OData services
The main guidelines that you must recall when working with Automation Anywhere are:
1.OData must have permissions to access the desired data.
2.OData access is given to an user therefore the authenticated user must be an user that can access the process or task you want to work on.
3.The only elements of your Data model that you can change are the once present in the form of the task or event.
4.To send information to a new case you must add the expected attributes in a Start form. For more information on start forms go to Start Form
Operations
The metabot has six main actions that let you interact with Bizagi and five support operations generates outputs that enhance the capabilities of the main operations.

Main operations
These are the main operations of the metabots that let you interact with Bizagi from Automation Anywhere. For each operation and its guidelines are described in its own article.
1.Authenticate: Authenticates a user and returns a token. This token is need to use the other operations.
2.StartProcess: Starts a process in the Bizagi Work Portal. You can add data to the process using a start parameter JSON.
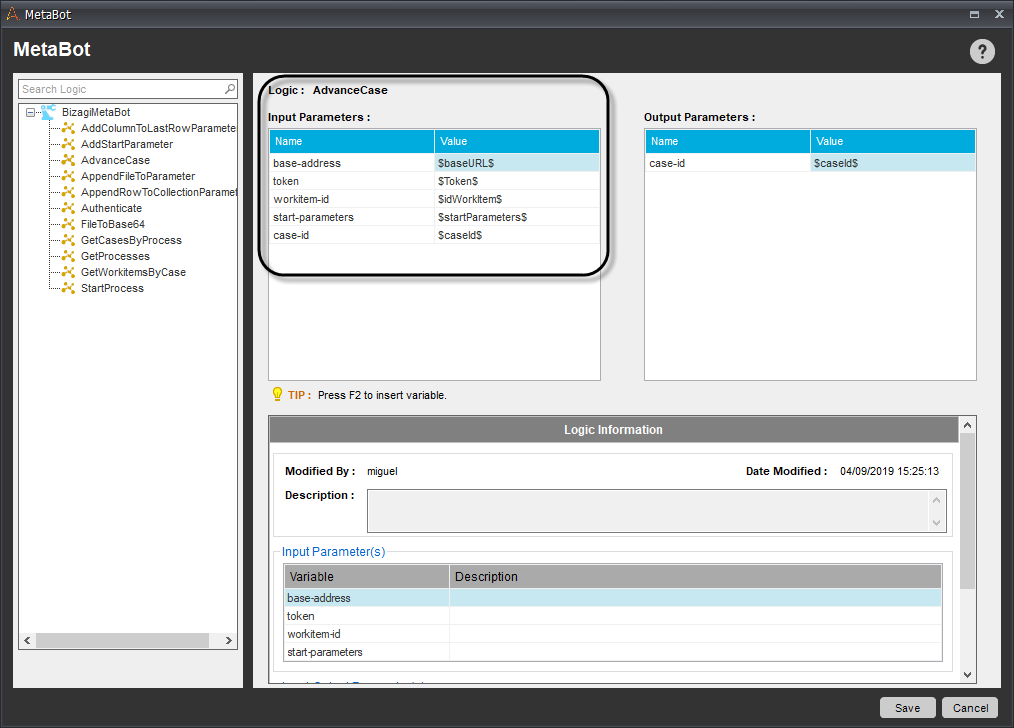
3.AdvanceCase: Advances a workitem of a process in the Bizagi Work Portal. You can add data to the process using a start parameter JSON.
4.GetProcess: Lists all the available process for the authenticated user.
5.GetCasesByProcess: Lists all the available cases of a process for the authenticated user.
6.GetWorkitemsByCase: List all the available workitems for the authenticated user of a case.
Support operations
1.AddStartParameter: Adds a parameter to the start parameter JSON. If no start parameter JSON exists it will generate the JSON.
2.AppendRowToCollectionParameter: Adds a row to a collection in the start parameter JSON.
3.AddColumnToLastRowParameter: Sets the value of a column in the last row of a collection in the start parameter JSON,
4.AppendFileToParameter: Appends a file, in base64, to the start parameters.
5.FileToBase64: Converts a file to base64.
Obtaining an output from Automation Anywhere
When you trigger a bot from Bizagi you may want to receive an output from Automation Anywhere. Since Automation anywhere does not support this the following steps must be used to retrieve an output from your bot:
1.Add an event between your bot task (or task that executes the bot) and the next task.
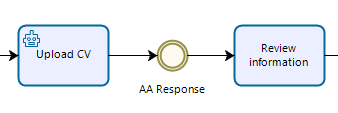
2.In this form event add the attributes of your Data Model where the outputs of the bot will be saved. If this form is empty you can't write any information into Bizagi.
3.In the parameters that you send to the queue remember to include your case ID (both in Bizagi and in Automation Anywhere).
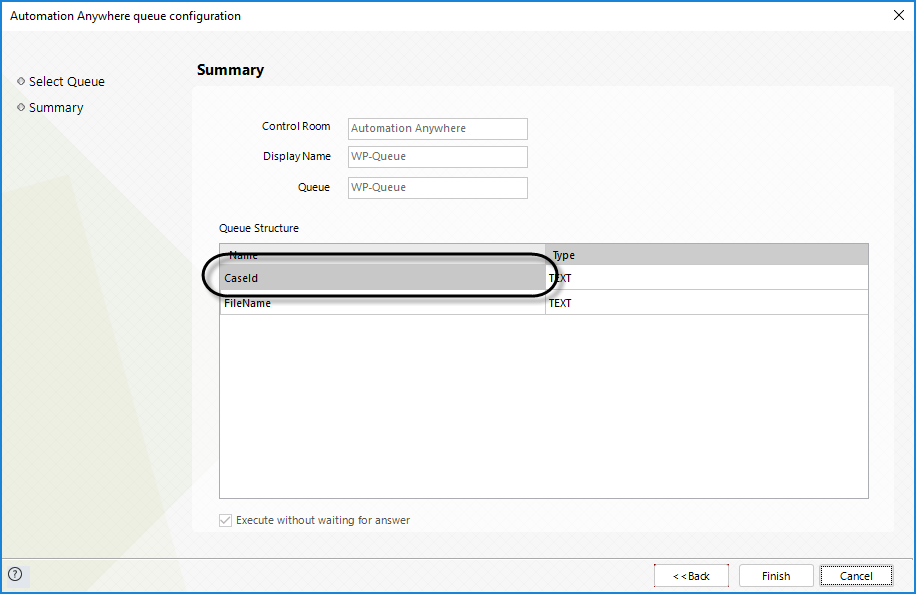
You can save the case ID in an attribute of your Data Model by using the function Me.Case.Id.
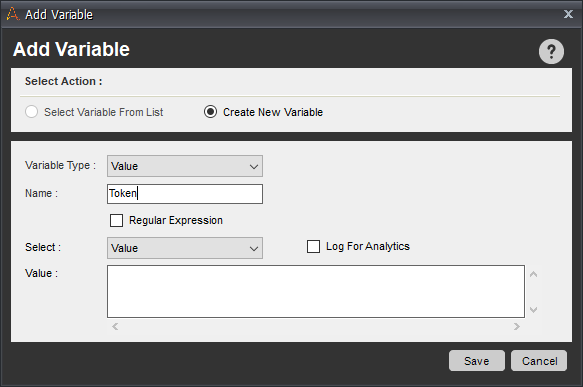
4.In the Automation Anywhere Client edit your bot task and add a variable named Token.
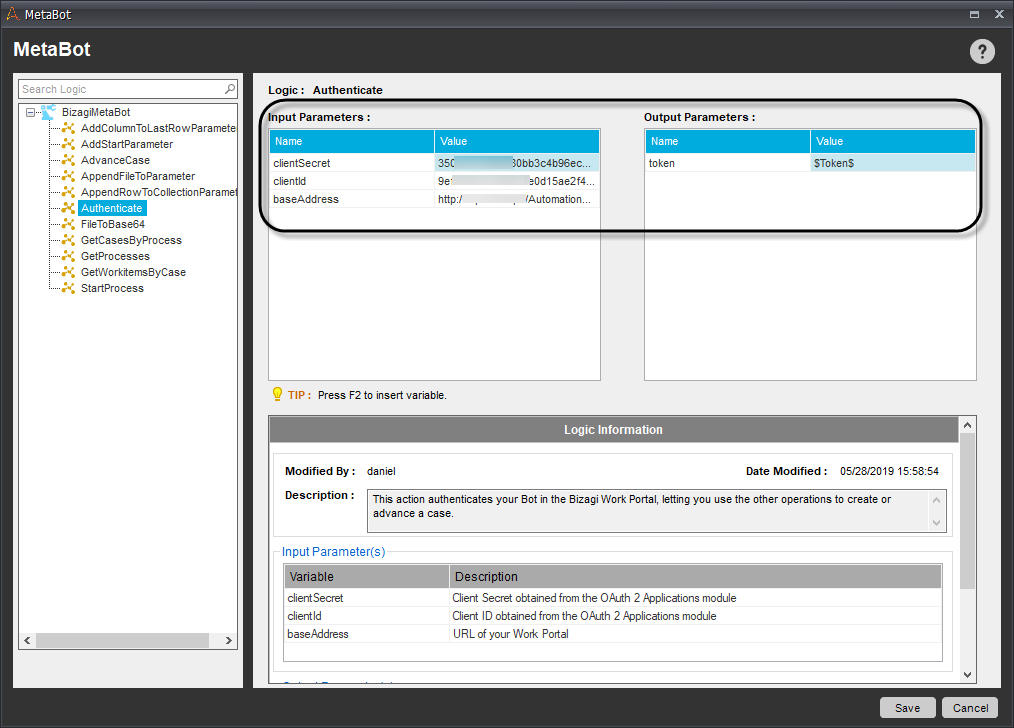
5.At the end of your Task add a Metabot operation of type Authenticate. Insert your Work Portal URL, your Client ID and your Client Secret. Save your token in the variable create in the previous step.
6.Get your Case ID form the queue.
7.Get the Workitem ID of your intermediate event (AA Response in the image), either by using other metabotoperations (GetWorkitemsByCase) or by querying it through the OData layer.
8.Build your start parameter JSON using the support methods or using String Operations.
9.Finally add an AdvanceCase operation provide your base URL, your previously obtained token, Case ID, Workitem ID and Start parameter. Then save the output in your id case variable
10.Upload your new Task to the Control room to use your bot with the added Metabot operations.
If you configured everything correctly, the data written by the bot should appear in the next task.
Last Updated 7/25/2022 2:20:46 PM