Overview
The AI Jobs feature in the Management Console allows you to schedule, manage, and monitor AI tasks. You can define the start date and time for task execution, enable or disable scheduling as needed, and select from flexible frequency options including weekly, monthly, or annual cycles. Additionally, it allows access to detailed execution history logs to review results from previous runs. With these capabilities, you can streamline oversight and optimize their AI workflows with ease.
The configurations present in the AI Jobs sub-menu in the Scheduler section of the Management Console, correspond to the configurations set in the Data Sync tab within Bizagi Data Knowledge configuration in Studio and define settings like update frequency (weekly, monthly, or annually) as well as start schedule details (start date and time). Note that all times are displayed in Coordinated Universal Time (UTC).
Note: if no update frequency is selected, the AI Jobs configured in Studio automatically appear in its associated Development environment in the Management Console after the Bizagi Data Knowledge is configured.
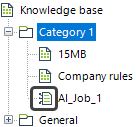
In Studio, you can distinguish between the types of Knowledge Base Catalogs by their icons in the Knowledge Base tree. Catalogs of Bizagi Files Knowledge type are represented by a standard file icon, while those with Bizagi Data Knowledge type are identified by a file icon with incoming arrows.
|
•When you create a Knowledge Base Catalog of Bizagi Data Knowledge type in Studio, the associated AI Job is automatically displayed in the corresponding Development environment within the Management Console (MC). •However, to work with Test or Production environments in the Management Console, you need to perform a deployment process. This involves exporting AI Jobs configured in Studio from the AI in Process tab in the export window and importing them into the Management Console (refer to the Generate a package from Studio and AI in Process (MC) documentation for guidance on this procedure). |

Navigating AI Jobs in the Management Console
To navigate AI Jobs in the Management Console (MC), follow through the steps below:
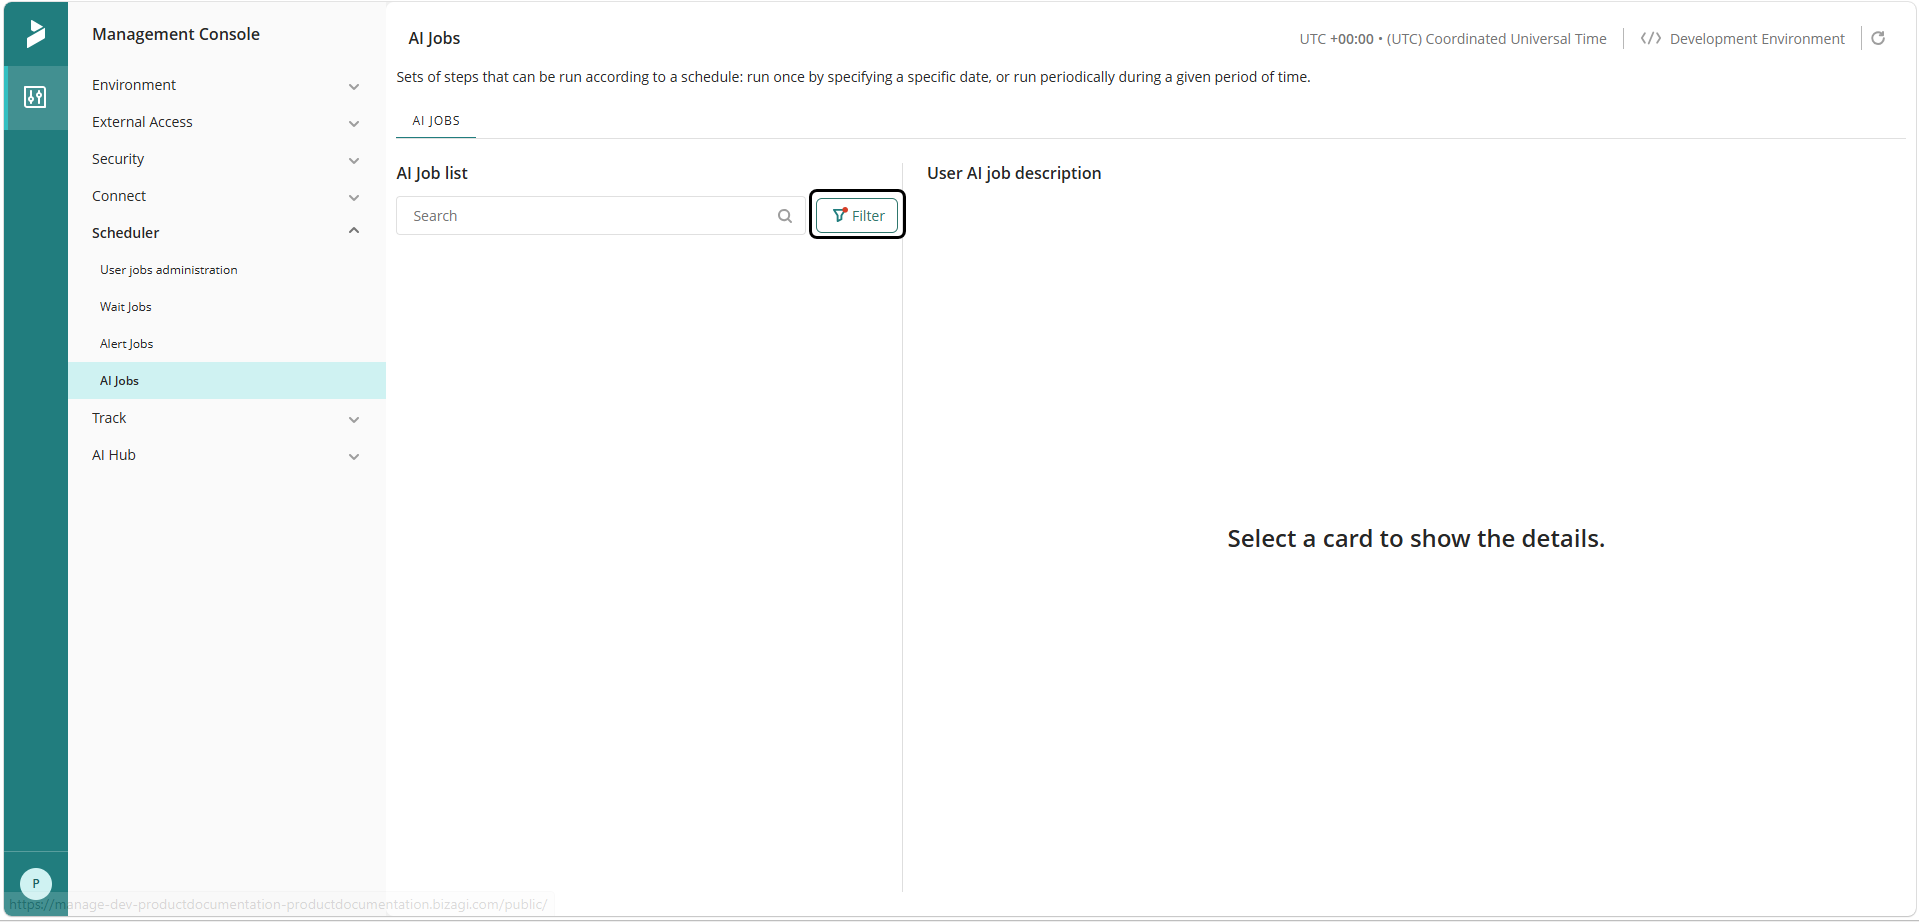
1.Open the Scheduler tree from the left panel and go to the AI Jobs tab, which contains the AI Jobs configured in Studio.
2.Upon selecting an AI Job, you will be able to see its details in the User AI job description section. The Settings tab contains the same AI Job configuration options as in Studio—such a enabling or disabling it—and define settings like update frequency (weekly, monthly, or annually) as well as start schedule details (start date and time).
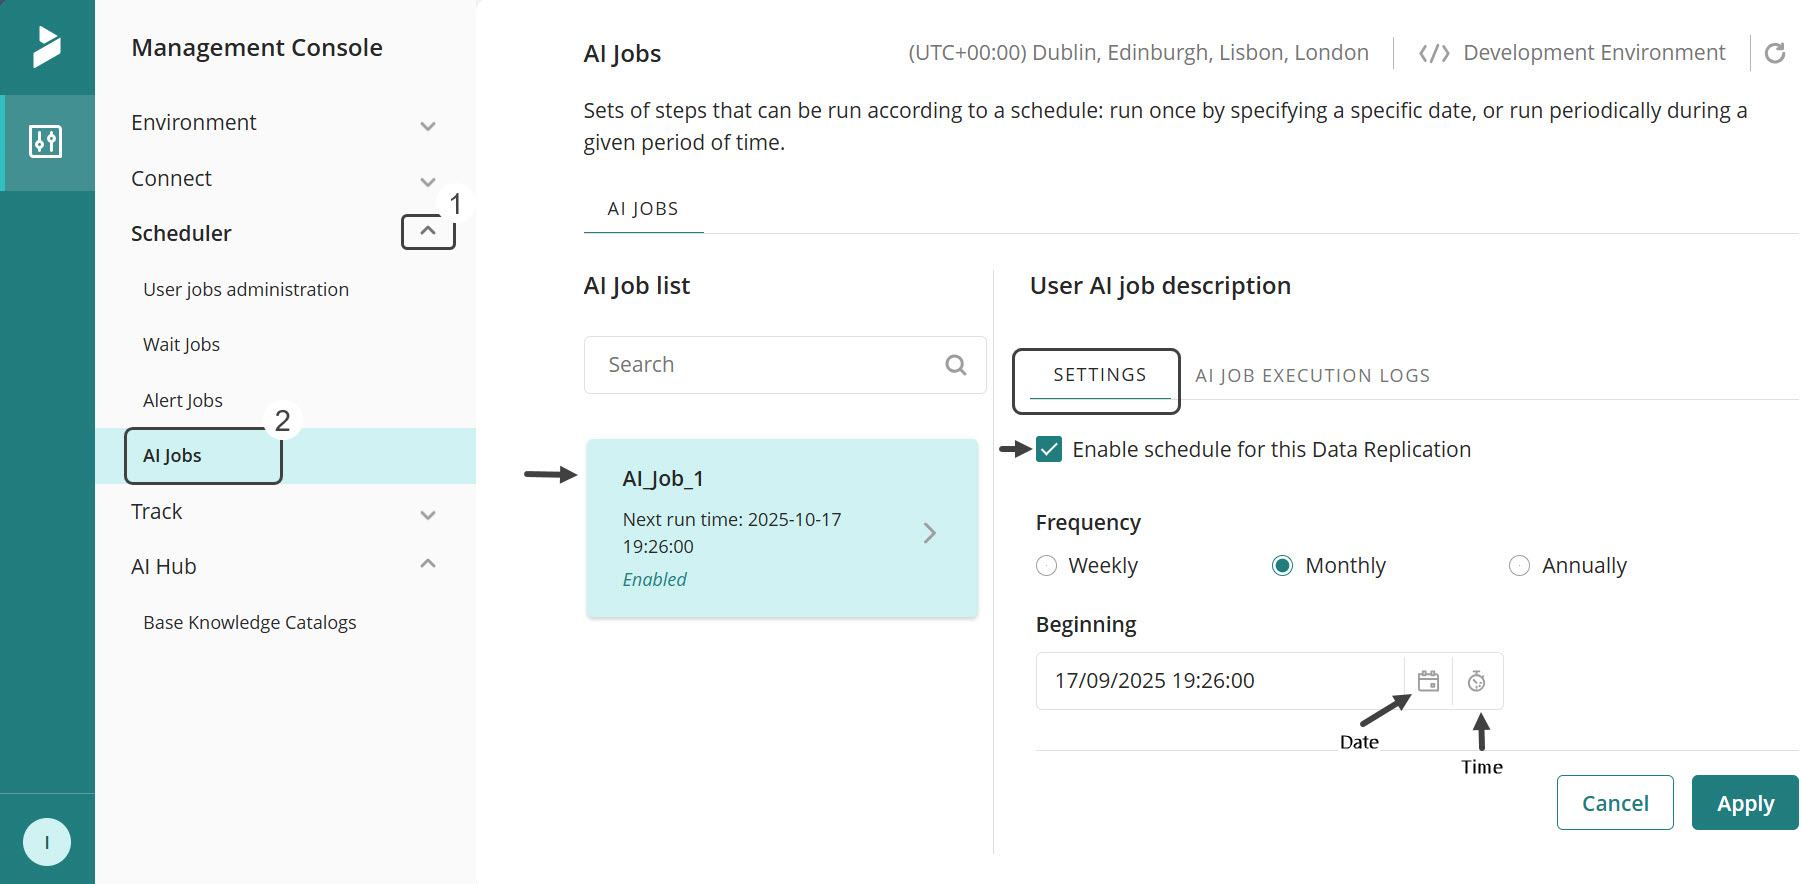
3. After making changes, click Apply to save and implement your updates.
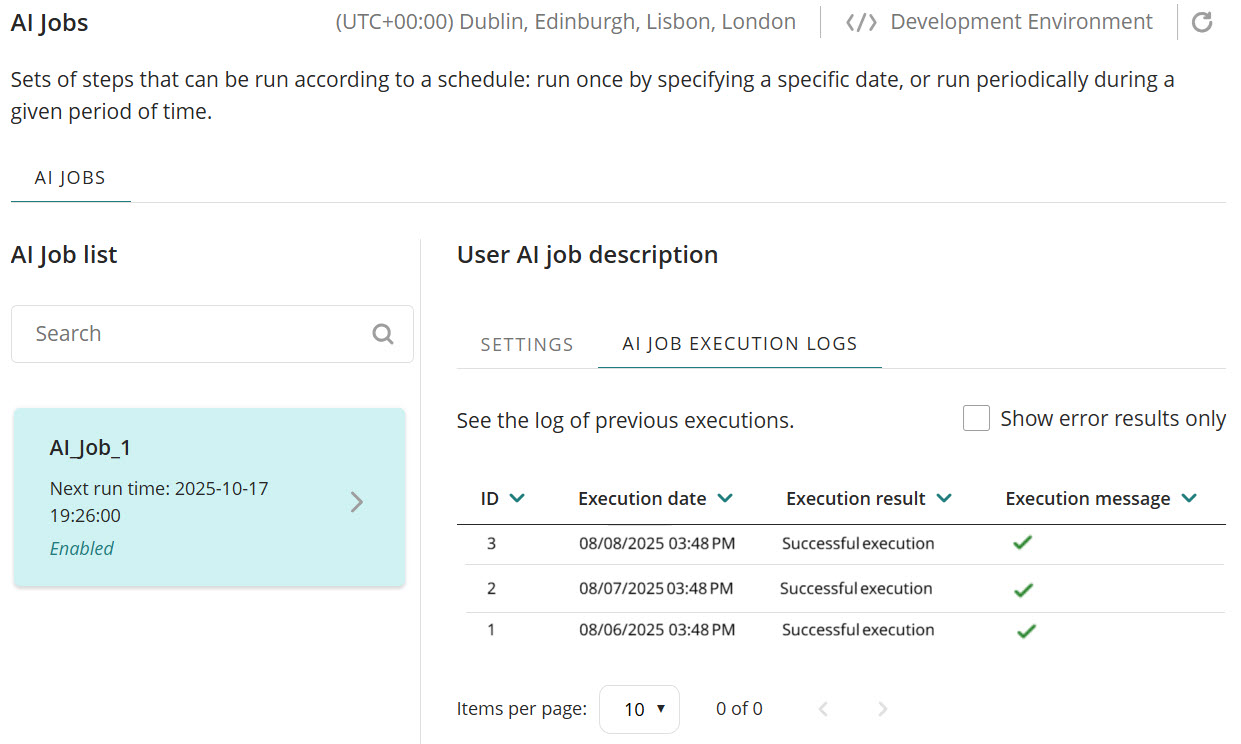
The AI Job execution logs tab allows you to view the execution history of an AI Job, including the date it was performed and the corresponding status of each execution.
|
Execution history is displayed in descending order by default, meaning the most recent execution appears first. This ordering allows you to identify recent events, errors, or failures more quickly without scrolling through older records. |
Advanced AI Job Filtering
You can refine results by execution status and by whether an AI Job is enabled or disabled. The AI Job list includes expanded filtering options that help you find specific AI Jobs even when working with a large number of records.
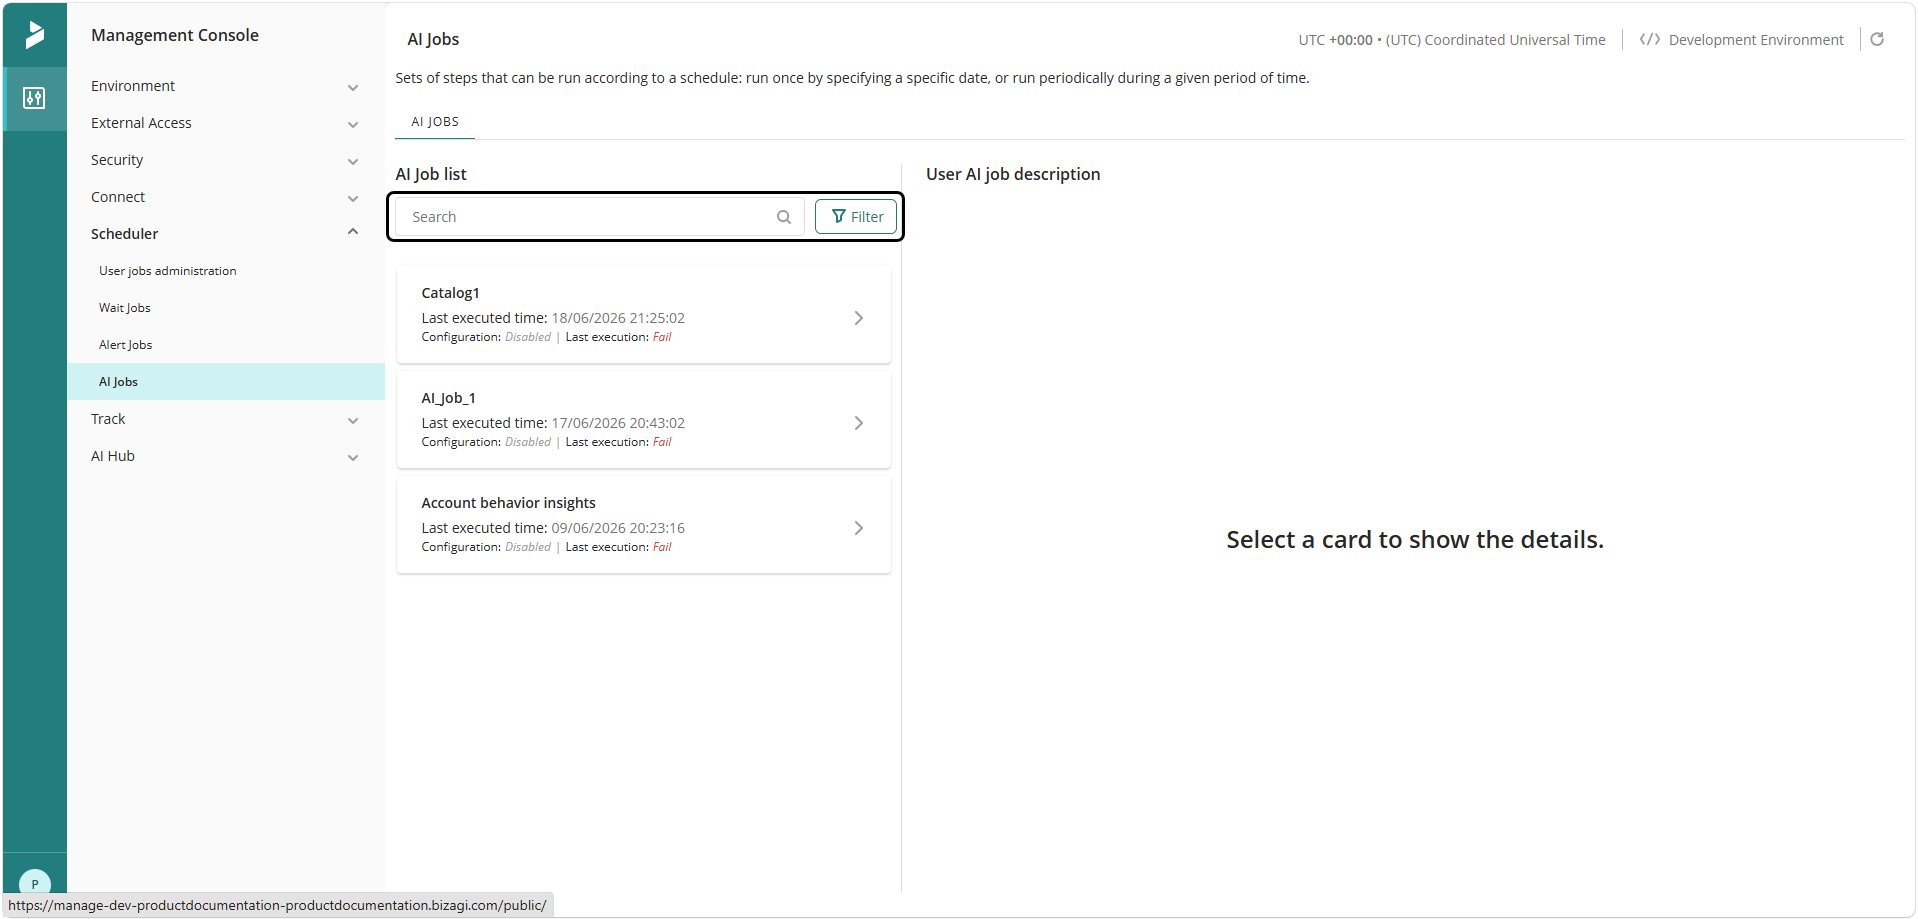
You can filter AI Jobs using the following criteria:
•Filter Jobs by Configuration status: All, Enabled, Disabled.
•Filter Jobs by Execution status: All, Not Executed, Success, Fail.
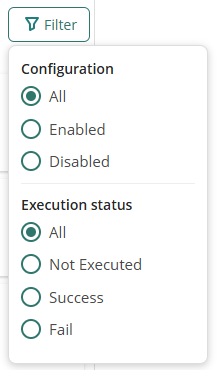
You can apply multiple filters at the same time for more precise results (e.g. Enabled and Success). You can also use filters and text search together to further narrow down the list.
A visual indicator appears when filters are active, so you can easily tell when the AI Job list is being refined by filter criteria.
Last Updated 7/19/2026 12:33:47 PM