Adding records to a Table requires the following settings in the Table Properties.
•Select (![]() ) the Editable property in the Basic tab.
) the Editable property in the Basic tab.
•Select (![]() ) the Required property in the Basic tab to set records addition in the work portal as mandatory
) the Required property in the Basic tab to set records addition in the work portal as mandatory
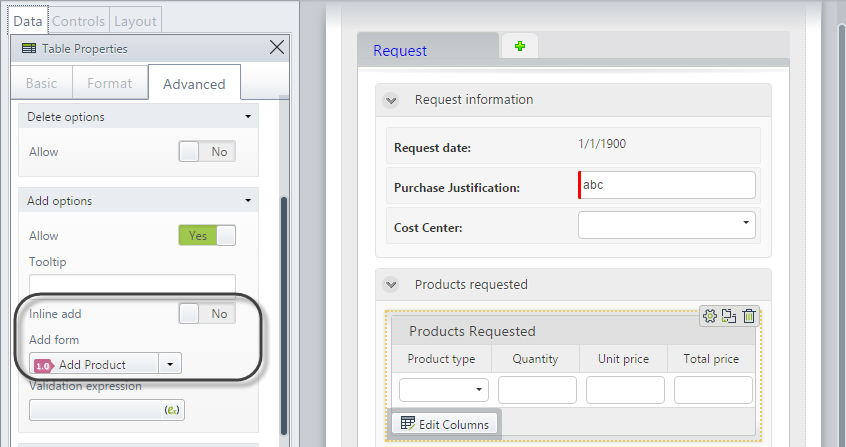
•Enable the Allow property in the Add options group of in the Advanced tab.
•Set the Inline add property according to whether the addition will be done inline (Yes) or using an independent form (No). If disabled, an Add form must be selected.
•The two methods of adding records namely Inline add and Add Form are mutually exclusive. If you choose to add inline you cannot also add records using an independent form, and vice versa. The properties available in the Add options group will differ according to the add method selected.


Inline addition allows the end user to add a record directly into the table, without the need for a separate window.
This option does not support validations.
When the Inline add property is enabled, the Add icon (+) will be visible on the Table (in Production).

In the Work Portal, click the Add icon. A new record will display with all blank columns.

Enter the data into the columns. To commit this new record, click Save.
To discard changes click Cancel.
Note If you do not click Save and leave the page all data entered will be lost.

|
•Default values are not supported. •Actions over table fields are not executed. •Visibility and Editability rules are not supported and will not be executed. •Submit on change property is not supported. •Fields in table will always be editable. •Search control is not supported •Action Launcher control is not supported |
If the Inline add property is not enabled (No) it indicates the addition will be done in an independent pop-up window. This method is very helpful when the entered information is complex, extensive, or requires validation.

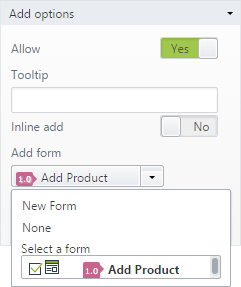
Expand the Add form property's drop-down list and select one of the three options.
•New Form: this will open a new Forms Designer window where you can enter all the controls required for the new record.
The context of the form is the Collection entity. When it is saved, it will be stored as a reusable form. This way, it can be related to a Table control in another form. Always give this new form a Display name by clicking on the Properties option in the Ribbon.
•None: Displayed when no form has been chosen. However a form is needed to add records with a form.
•Select a Form: choose from a list of reusable forms previously defined.

Once you have an Add form defined, save and close it. Then save the parent form.
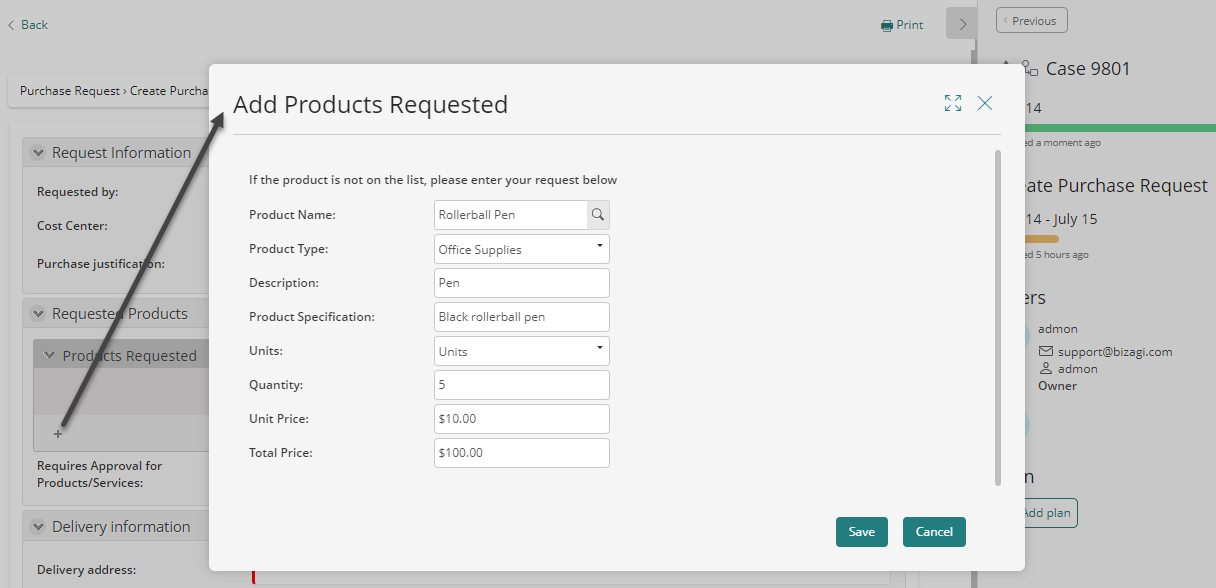
In the Work Portal the Table will display an Add icon (+).

Click the Add icon. A new window will display for you to enter the data.

Enter the information and click Save to commit the record.

|
•Action Launcher control is not supported |
Last Updated 1/23/2023 12:04:44 PM