Overview
The MS Exchange connector for Bizagi is available for download at Bizagi Connectors Xchange.
Through this connector, you will be able to rely on an Office 365 account to connect to its Exchange online server directly from Bizagi processes
While connecting to the Exchange server, you will be able to send mails, add contacts or create and look up events.
For more information about this connector's capabilities, visit Bizagi Connectors Xchange.
Before you start
In order to test and use this connector, you will need:
1.Bizagi Studio previously installed.
2.This connector previously installed, via the Connectors Xchange as described at https://help.bizagi.com/platform/en/index.html?Connectors_Xchange.htm, or through a manual installation as described at https://help.bizagi.com/platform/en/index.html?connectors_setup.htm
3.An account at portal.office.om, a registered app and authorization from your Office 365 subscription admin.
Registering an app
In order to register an app with authorized access to your portal.office.com subscription, follow these steps:
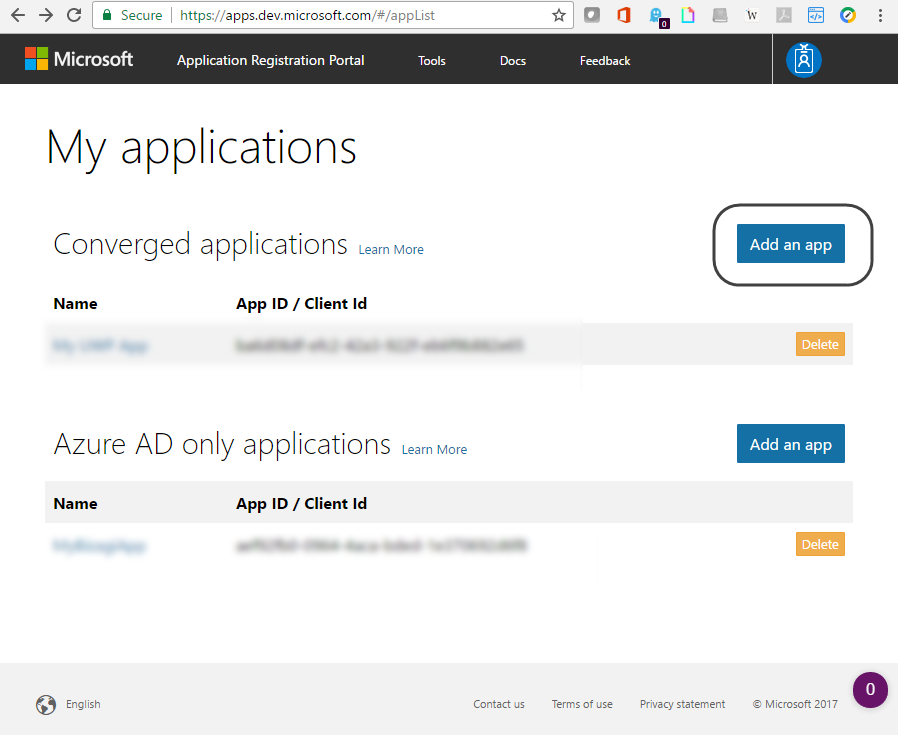
1. Access https://apps.dev.microsoft.com/ and log in with your Office 365 account, to add a new app:
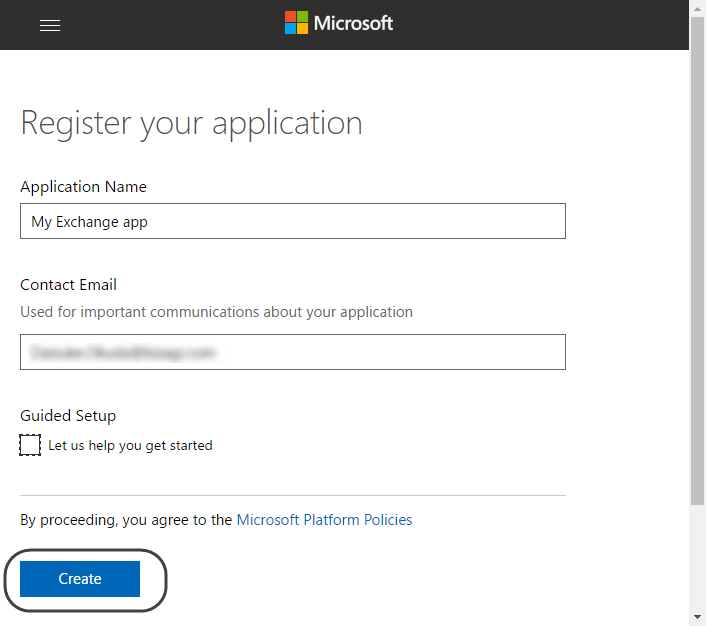
2. Input details for your app, such as a unique name and click Create.
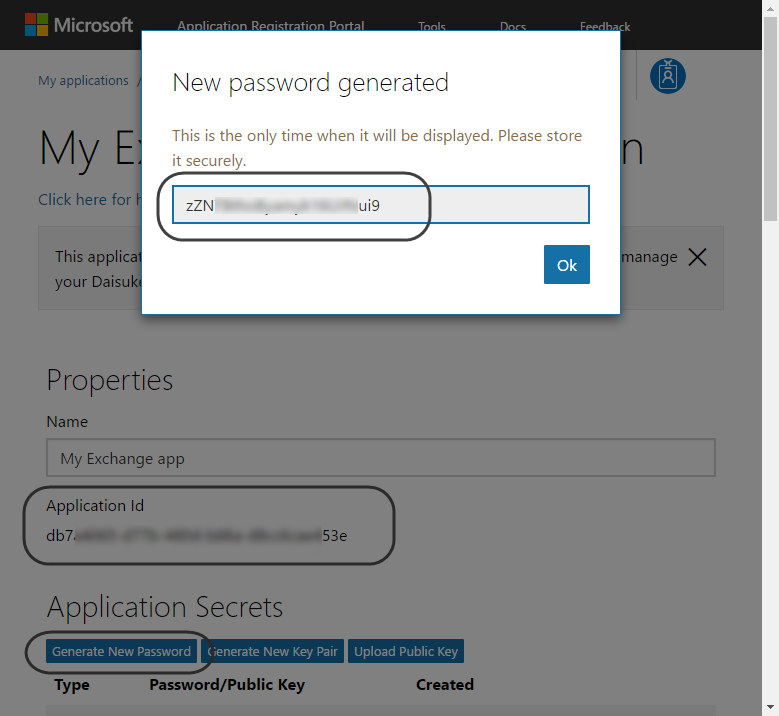
3. Click on Generate New Password and copy the password you are presented with.
Make sure you copy it down to a temporary file or somewhere you can retrieve it later on when configuring the connector in Bizagi (this password will represent the Client Secret parameter).
Copy as well the Application Id which will represent the Client ID later on for the same configuration in Bizagi.
4. Make sure you specify that it is applicable to a Web platform, by clicking on Add platform and then selecting Web.
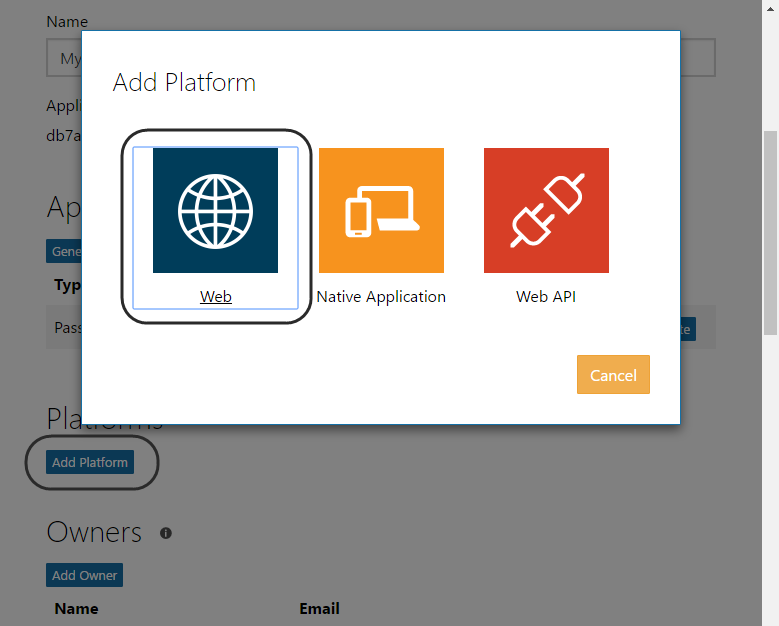
5. Input URL parameters to enable a Web platform treatment.
Use the following:
•Redirect URLs: http://localhost/myapp/permissions
•Logout URL: https://localhost/sample
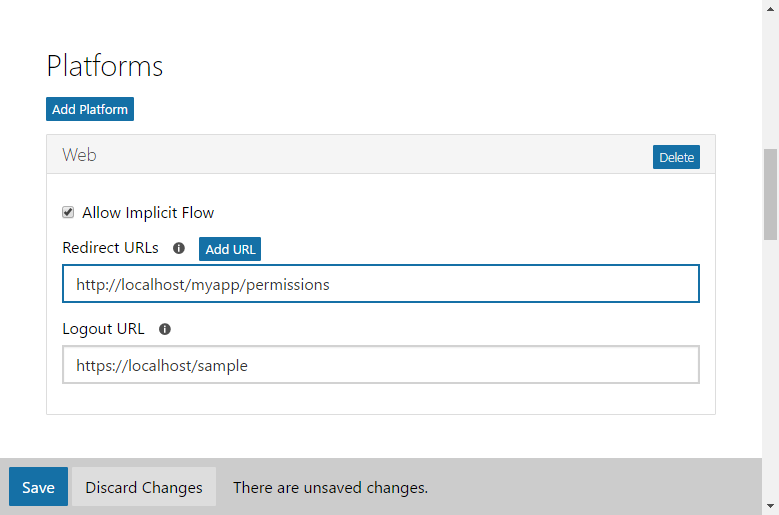
Note that you should use these values given that these do not interfere with your own different URLs. Such configuration is not relevant for runtime, it is only done once by your Office 365 accounts administrator (in order to grant access for the application).
6. Click on Add for the Application permissions to grant access rights to this application as described below.
Consider ticking the checkbox for these permissions:
•Calendars.Read
•Calendars.ReadWrite
•Contacts.Read
•Contacts.ReadWrite
•Mail.Send
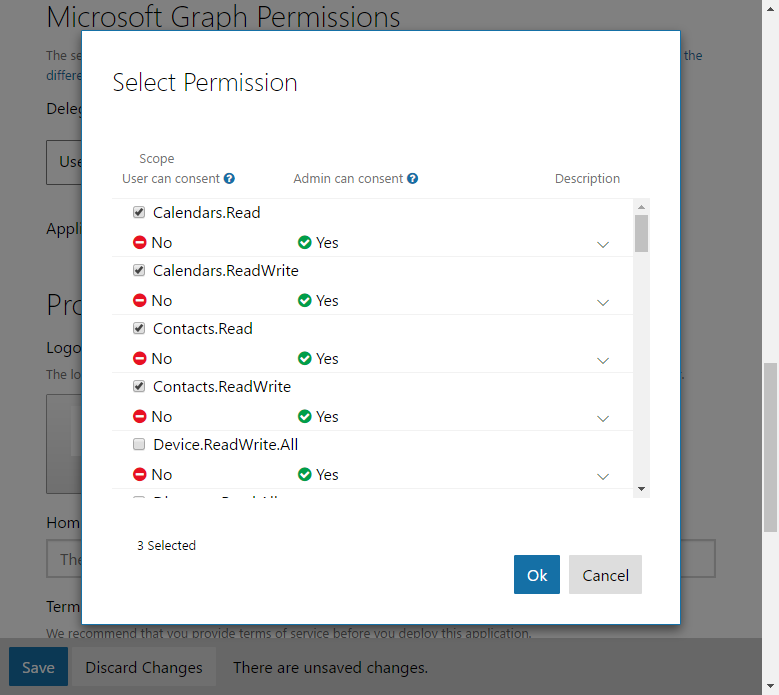
Click OK when done.
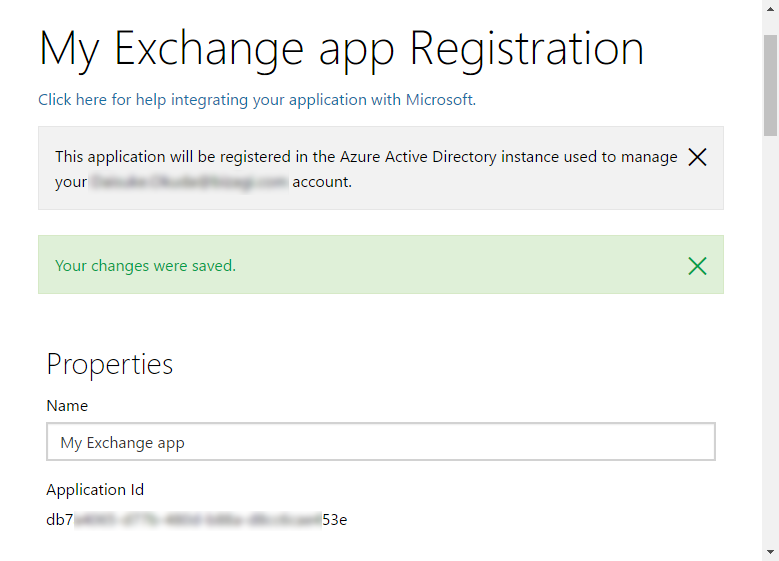
At this point your application will be registered and you will be shown a confirmation message.
7. Access the Office 365 portal by using the following URL:
https://login.microsoftonline.com/[TENANT]/adminconsent?client_id=[APPLICACION_ID]&state=12345&redirect_uri=http://localhost/myapp/permissions
For this URL, consider:
•[TENANT]: Should be replaced by the domain of your Office 365 subscription. This usually means everything that goes after the @ character of the e-mail address used to sign in.
•[APPLICACION_ID]: Should be replaced by your application's ID as shown in step #3 where it was stated that it is equivalent to the Client ID.
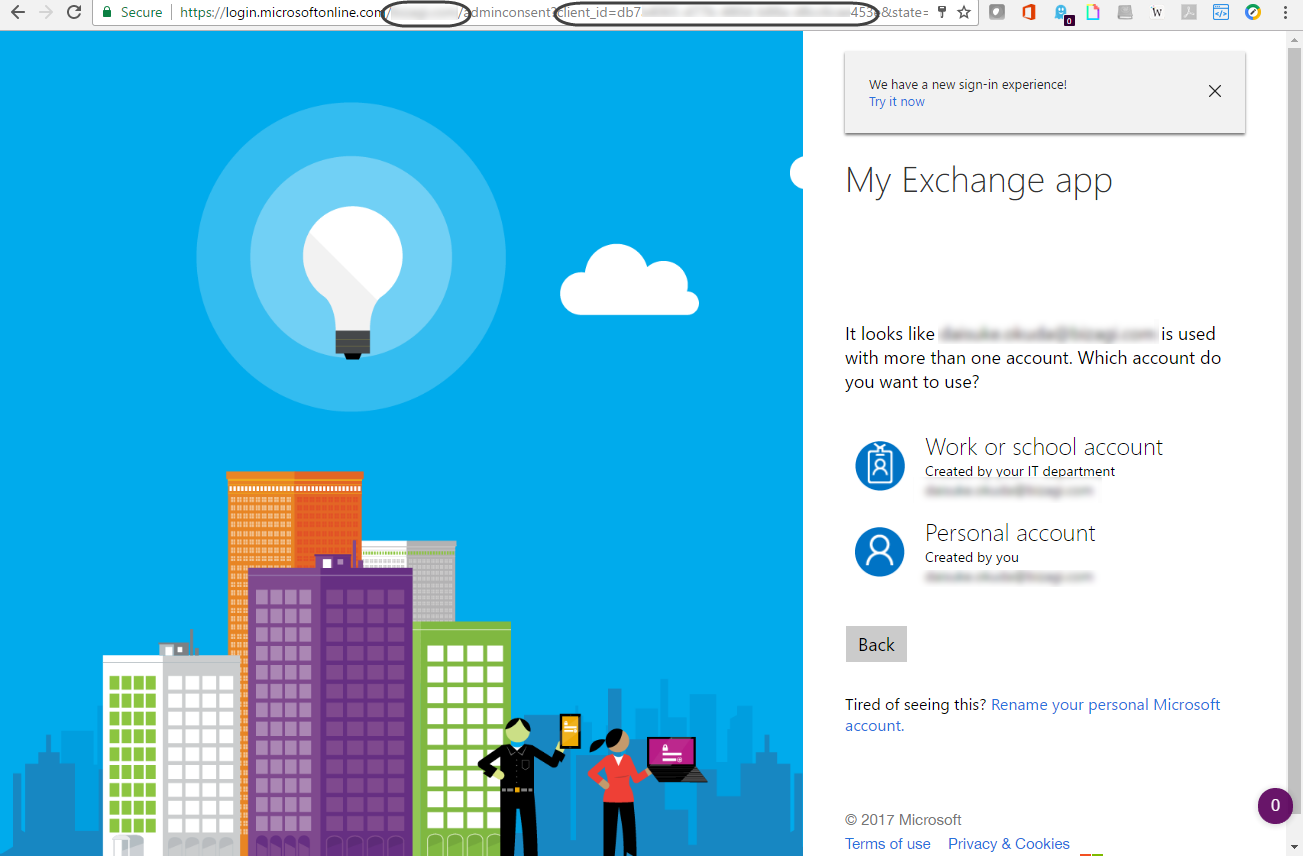
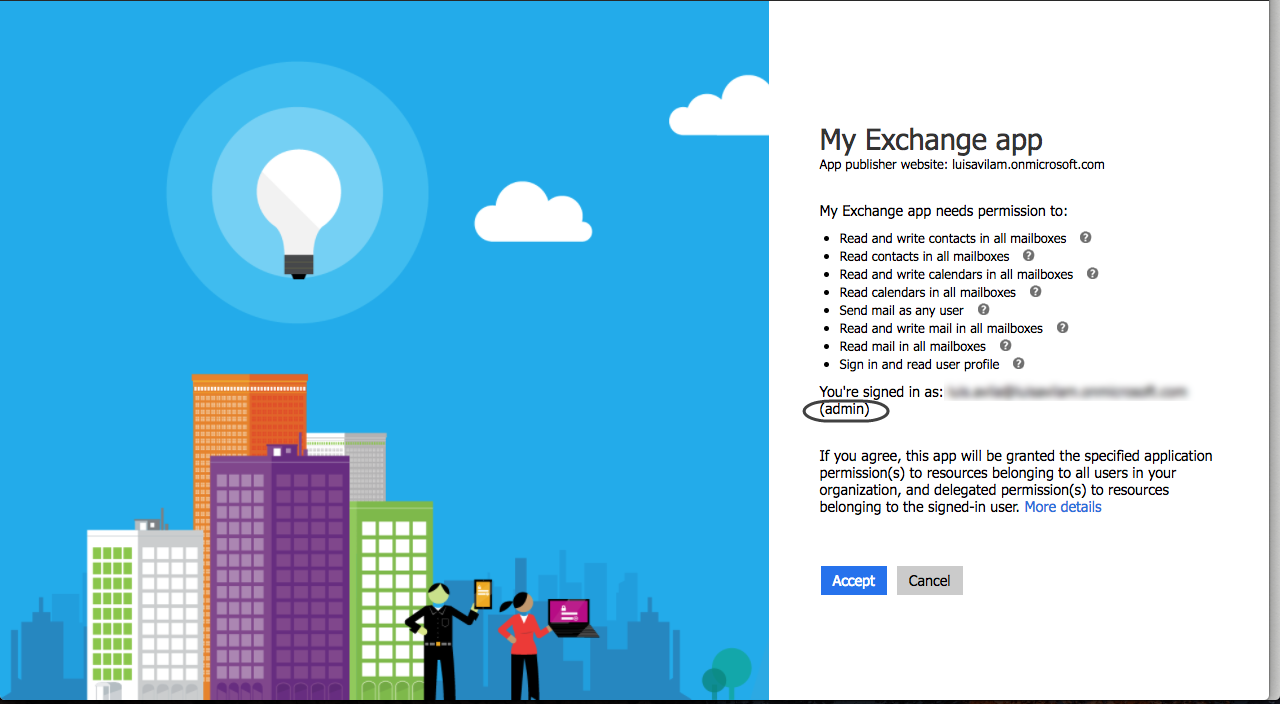
8. Make sure you log in with an administrator account.
Such account needs to be able to admin the Office 365 subscription for this specific tenant (if your account does not comply to this profile, you may request an admin to log in and authorize your app).
Note that this step takes only seconds, by clicking Accept:
|
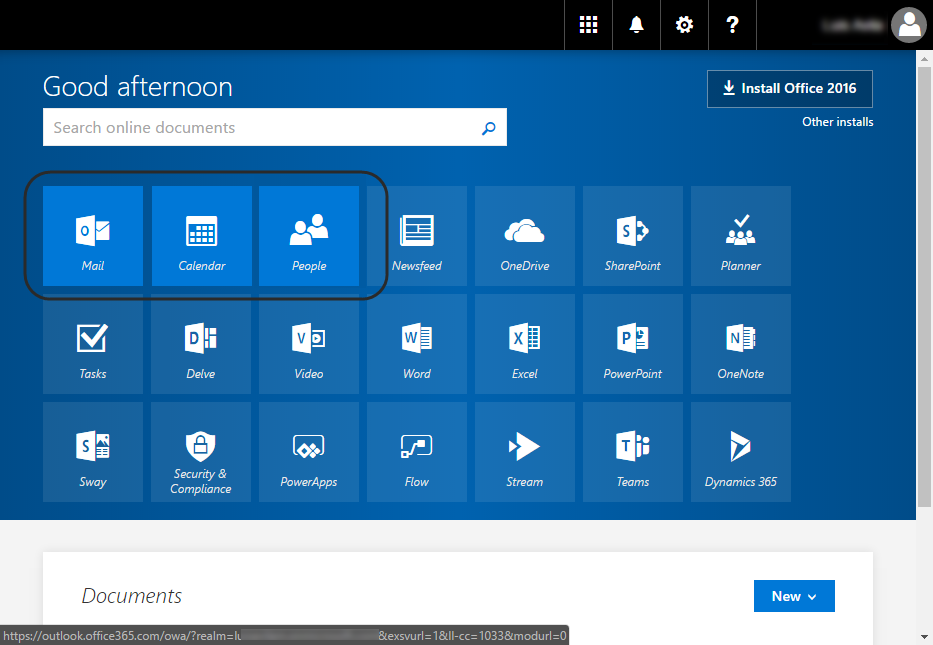
Note that you will use a service account in Bizagi to use this connector. Therefore, such account will need to have enabled the Mail, Calendar and People modules of Office 365 so that you can use their methods.
|
Configuring the connector
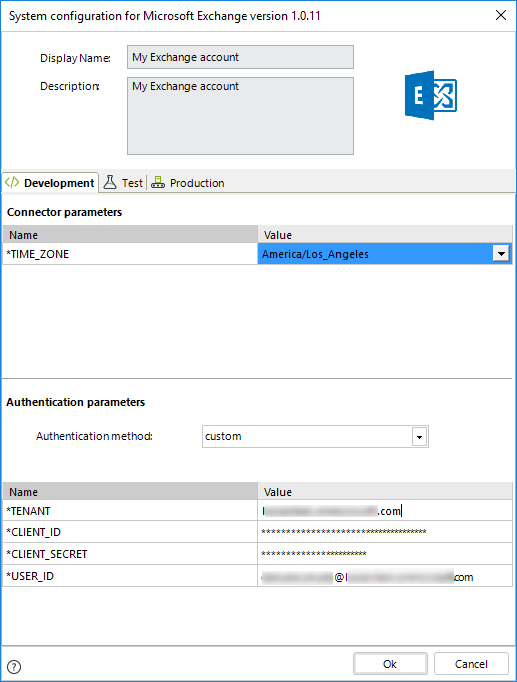
In order to configure the connector (i.e its authentication parameters), follow the steps presented at the Configuration chapter in https://help.bizagi.com/platform/en/index.html?connectors_setup.htm
For this configuration, consider the following authentication parameters:
•TIME_ZONE: Select the time zone to which you want to associate dates you send out from Bizagi (e.g, when filtering to search for events or when specifying the date while creating a new event).
•Authentication method: Custom.
•Tenant: The domain of your Office 365 subscription, which usually means everything that goes after the @ character of the e-mail addresses when signing in.
•Client_ID: The Application ID as configured previously.
•Client_Secret: The generated password as configured previously.
•User_ID: The service account to which contacts, events and mail is bound to.
Using the connector
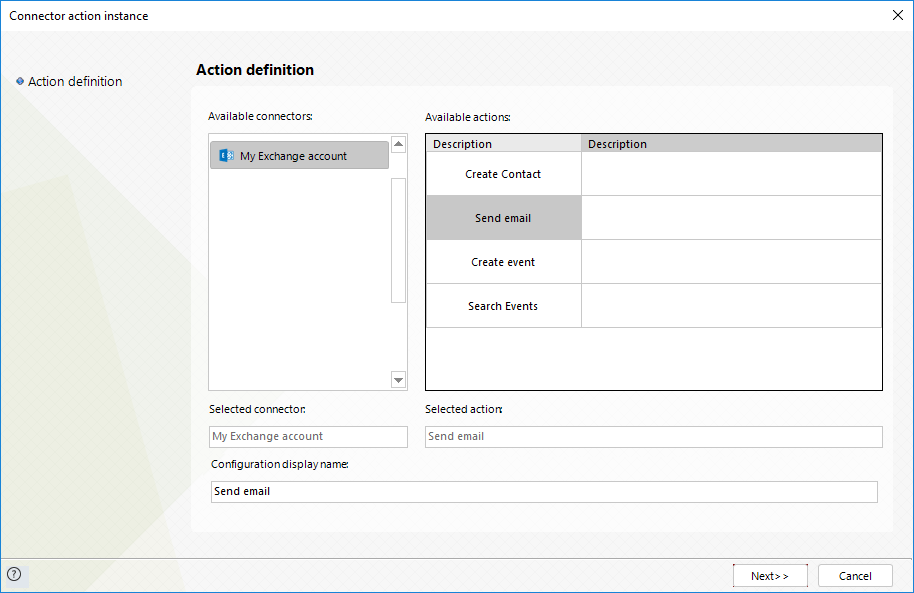
This connector features 4 available methods of Office 365 services.
To learn overall how/where to configure the use of a connector, refer to https://help.bizagi.com/platform/en/index.html?Connectors_Studio.htm.
When using the connector, make sure you consider the following details for each of the available methods.
Send e-mail
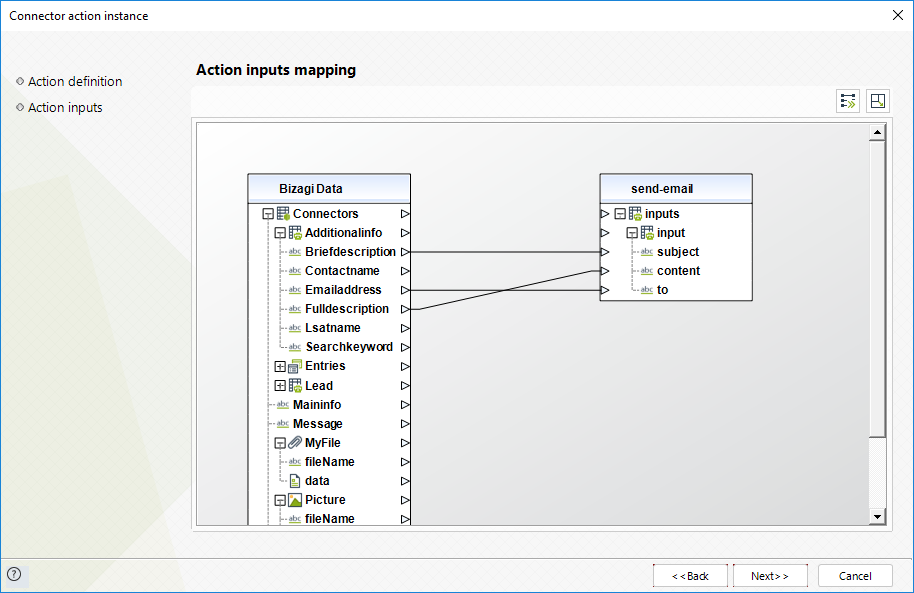
Enter basic e-mail text (subject, body, recipient) to send an e-mail on behalf of the pre-configured service account.
To configure its inputs, consider:
•Subject: The e-mail's subject.
•Content: The e-mail's body.
•To: The recipient's e-mail address.
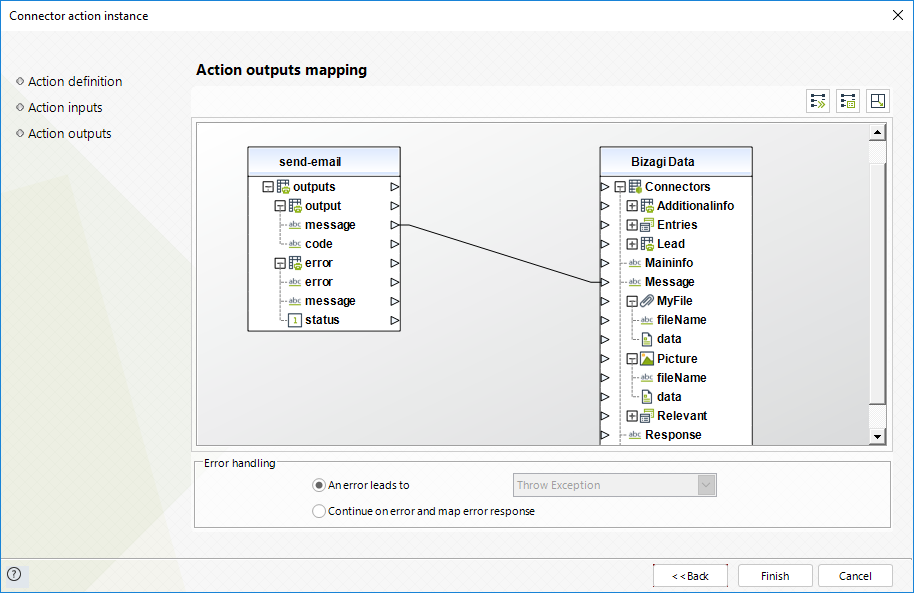
To configure its outputs when getting started and testing, you may map the response Message from output:
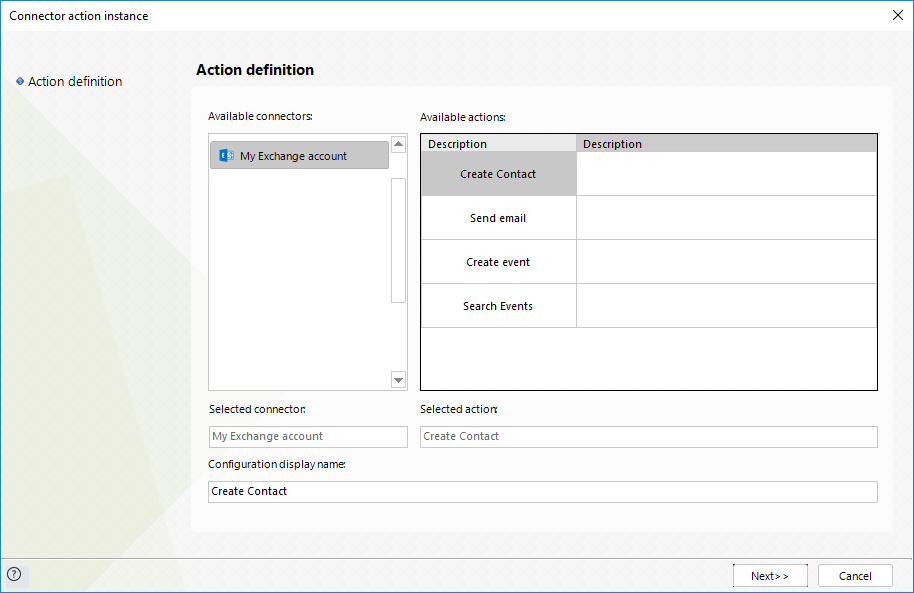
Create contact
Enter basic information (name, e-mail) to create a new contact.
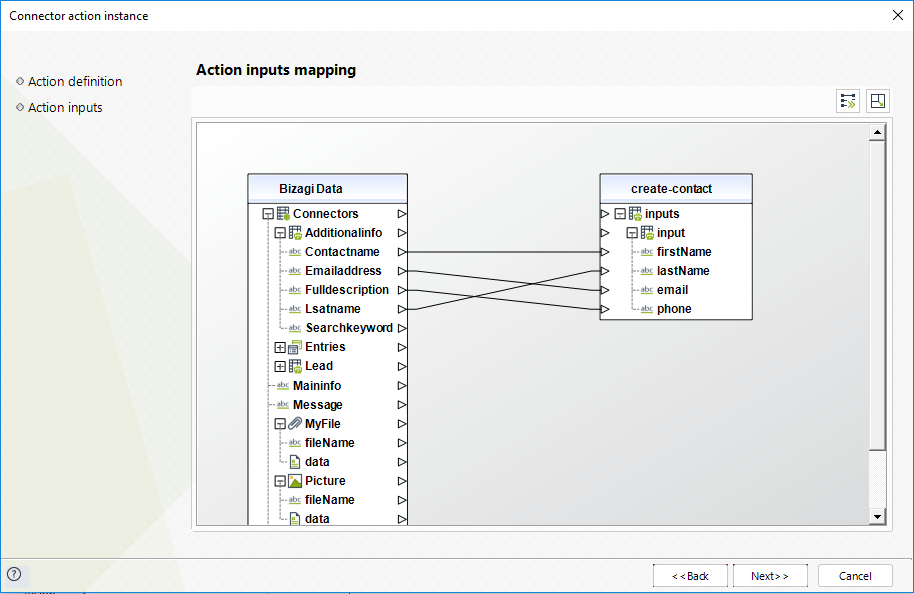
To configure its inputs, consider:
•First name: The contact's first name (mandatory).
•Last name: The contact's last name (mandatory).
•E-mail: The e-mail address (mandatory)
•Phone: The contact's phone number.
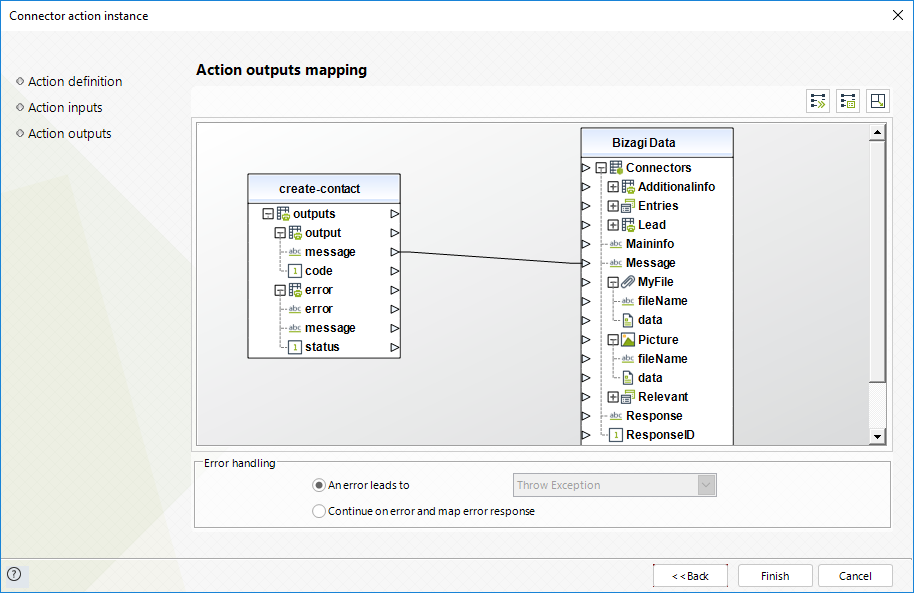
To configure its outputs when getting started and testing, you may map the response Message from output (e.g, such message may return "Created" or similar confirmation messages):
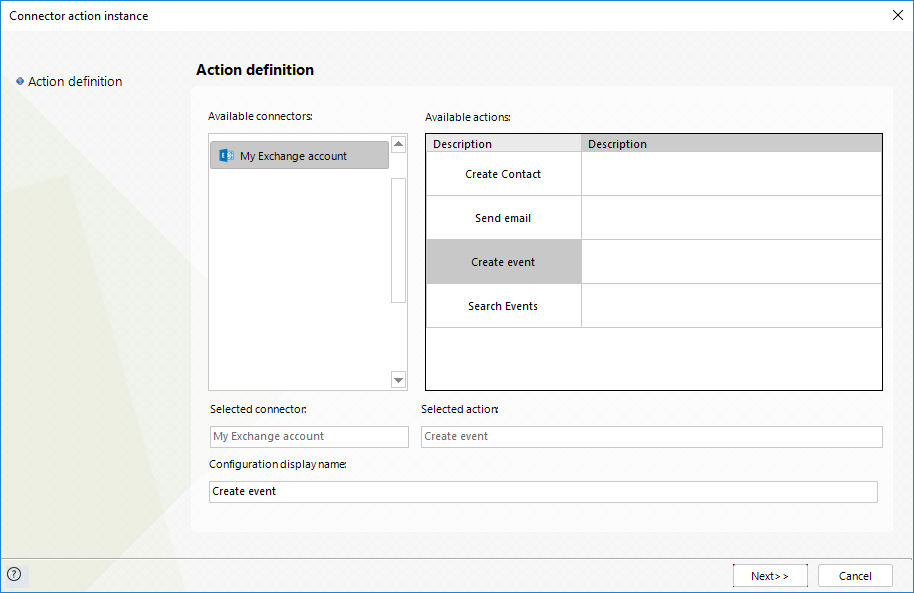
Create event
Register a new event in the calendar.
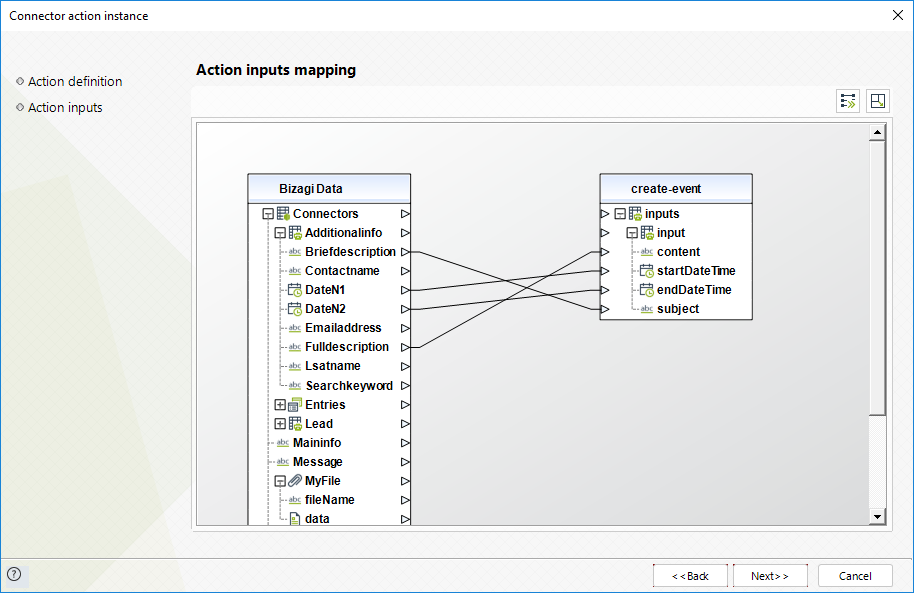
To configure its inputs, consider:
•Subject: The e-subject of the event.
•Content: The whole description for the event.
•Start date: The event's starting date.
•End date: The event's finalizing date.
Note that this date will use the time zone setting as defined for the connector.
Dates in Bizagi always send out a time as well (if none explicitly selected, then it defaults to 12:00).
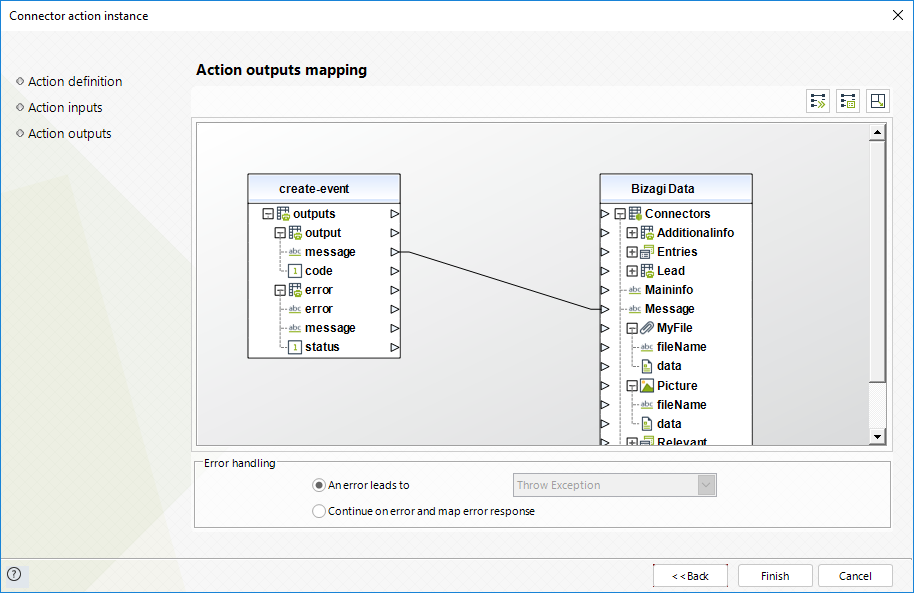
To configure its outputs when getting started and testing, you may map the response Message from output:
Search events
Obtain a list of events that match a given time frame.
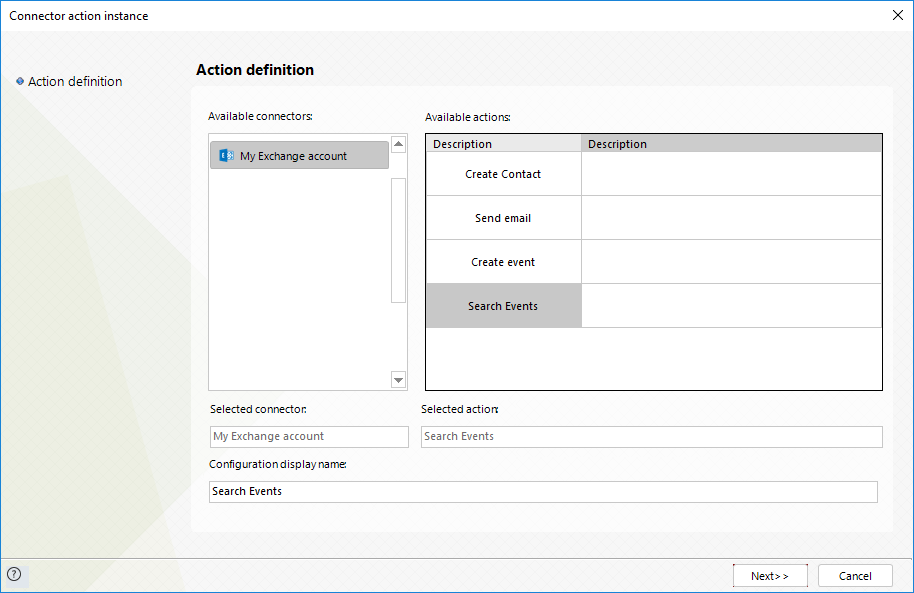
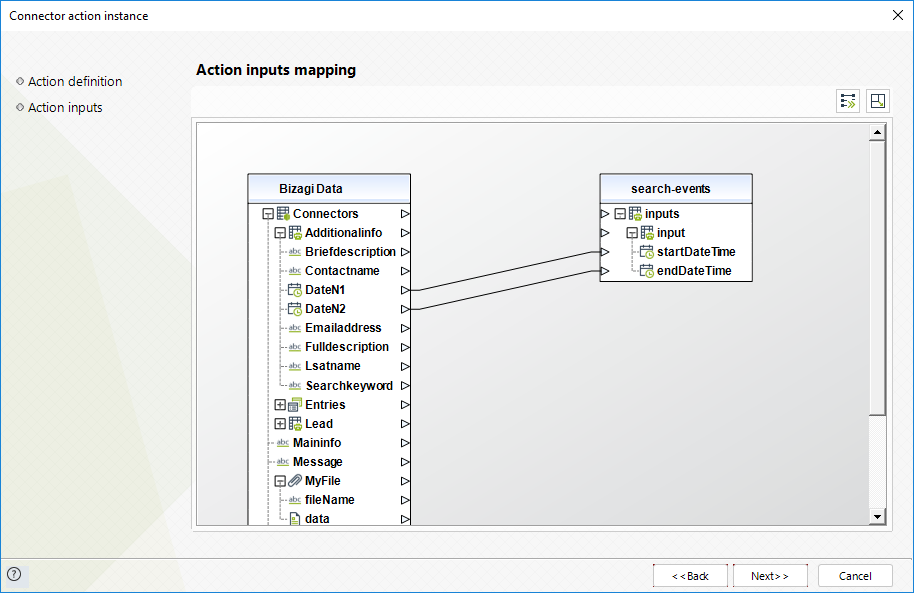
To configure its inputs, consider:
•Start date: The event's starting date.
•End date: The event's finalizing date.
Note that this date will use the time zone setting as defined for the connector.
Dates in Bizagi always send out a time as well (if none explicitly selected, then it defaults to 12:00).
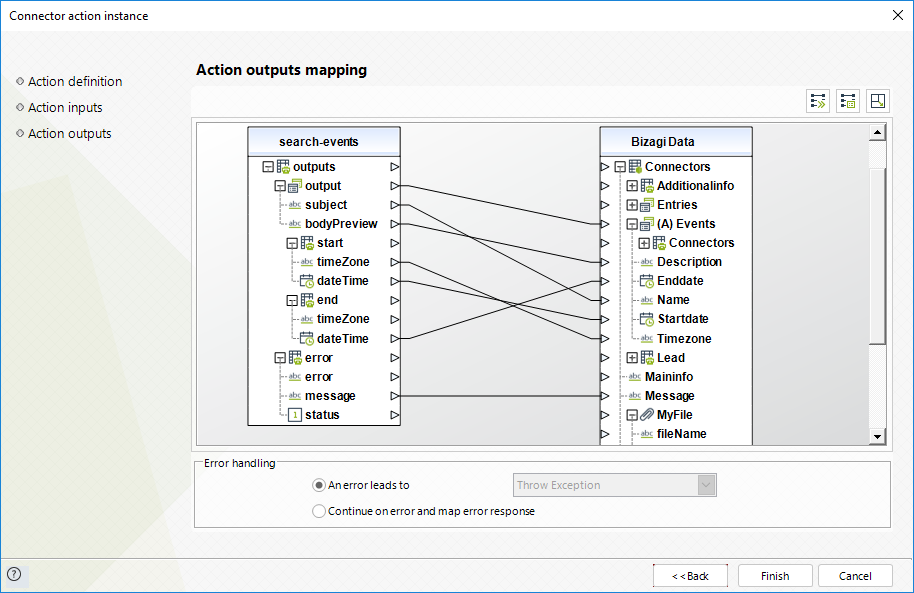
To configure its outputs when getting started and testing, consider mapping the multiple events into a collection in Bizagi.
For such collection consider mapping subject (of the Event), body preview (description of the Event), start's datetime and end's datetime:
For further documentation on the official API employed by this connector, refer to https://developer.microsoft.com/en-us/graph/docs/concepts/use_the_api.
Last Updated 10/27/2022 10:40:47 AM

