Overview
You can manage WS‑Security certificates autonomously from the Management Console. You can activate, update, and download a certificate corresponding to each environment (Development, Test, and Production). This certificate is generated automatically and remains valid for 10 years. It can also be migrated during upgrades without requiring any action.
|
•This capability is available starting in Summer 2026. Customers running versions earlier than Summer 2026 must request WS-Security certificate generation by submitting a Support ticket. For information about enabling SOAP services with WS-Security in earlier versions, see Enabling Bizagi API. •Only one certificate is stored and managed per environment (Development, Production and Test) to ensure consistent WS-Security configuration. |

Managing WS-Security Certificates
Certificate generation
Starting in Summer 2026, a passwordless WS-Security certificate is generated automatically when no previous certificate exists.
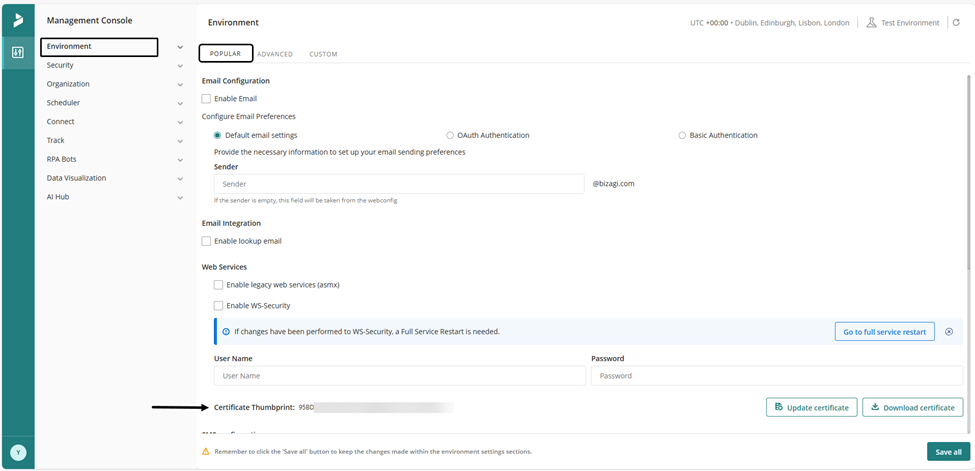
The Web Services options are located under Environment > Popular in the Management Console. At the bottom of the Web Services section, the Certificate Thumbprint indicates that the certificate exists but is disabled.
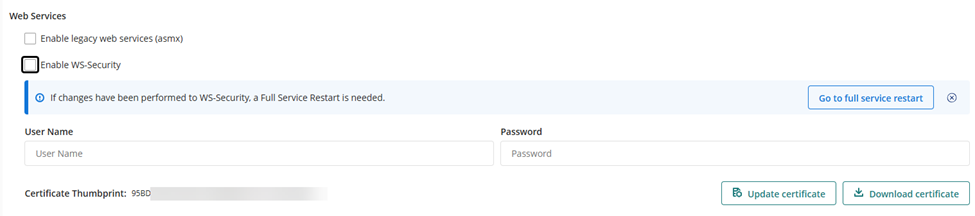
To enable the certificate, select the Enable WS‑Security box.
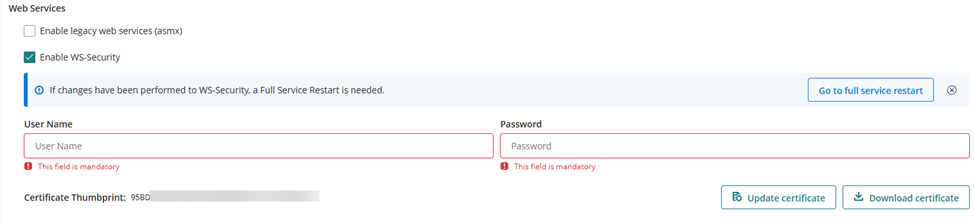
Upon enabling this option, the User Name and Password fields become required.
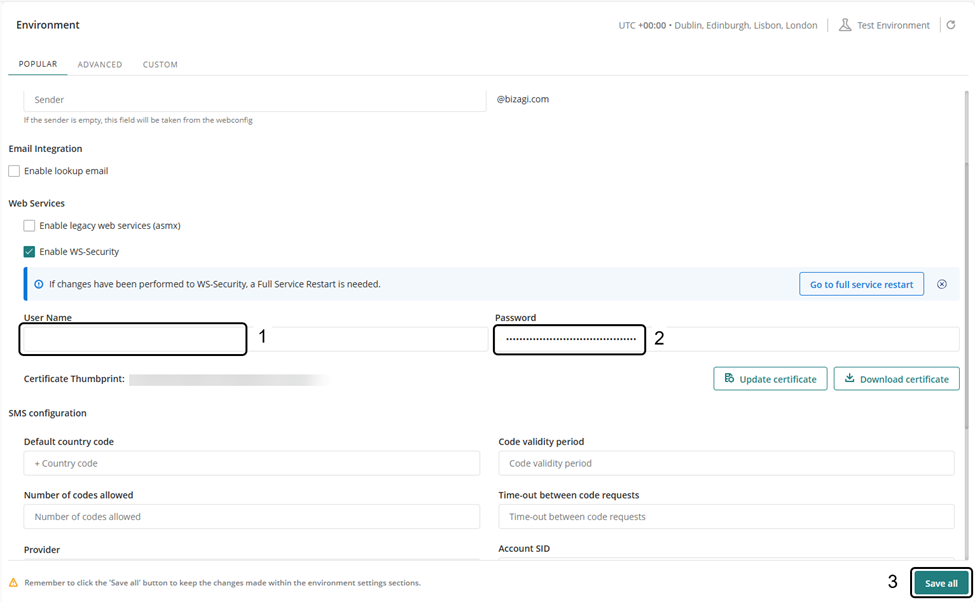
Specify the User Name and Password and click Save all to finish your configuration.
|
Auditing records each operation, including generation, activation, update, and download. |
Certificate update
To update your WS-Security certificate:
1.Click Update certificate.
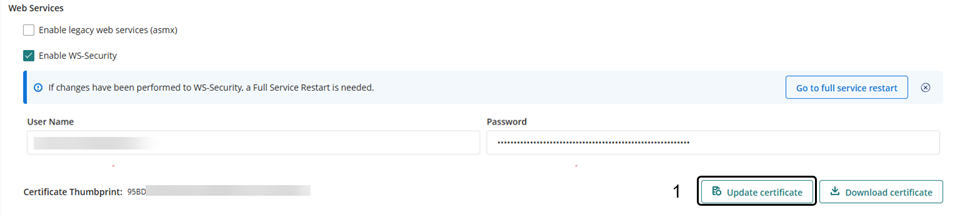
2.In the confirmation dialog, click Update.
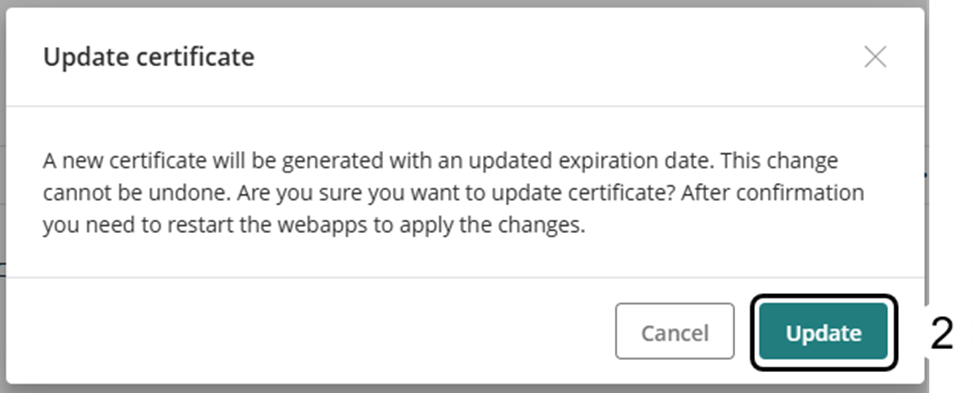
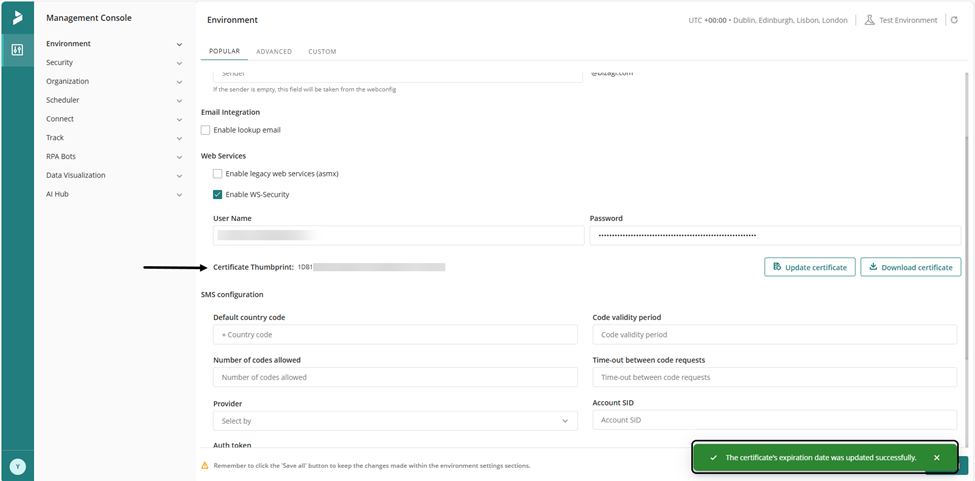
A confirmation message appears in the bottom-right corner of the window. Verify that the Certificate Thumbprint has been updated.
Certificate download
To download your certificate:
1.Click Download certificate.
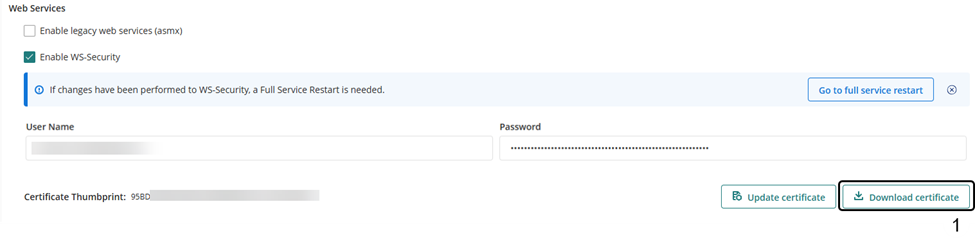
2.In the pop-up window, set a password for your files by completing the text box. If left blank, no password is required to view the content of the file.
3.Click Download Certificate to confirm the action.
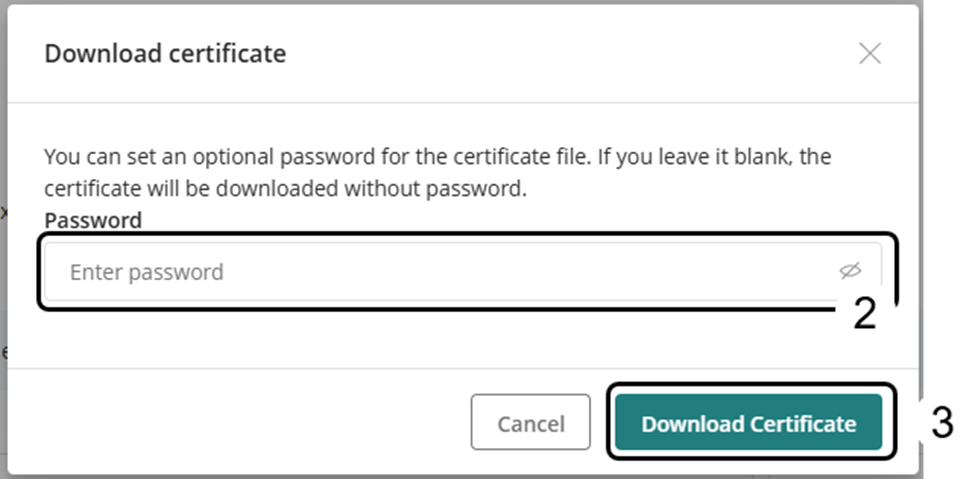
4.The downloaded file appears in the browser's download area. Double-click it to open its location.

5.The certificates are downloaded as a compressed file. Right‑click the .zip file.
6.Click Extract All.
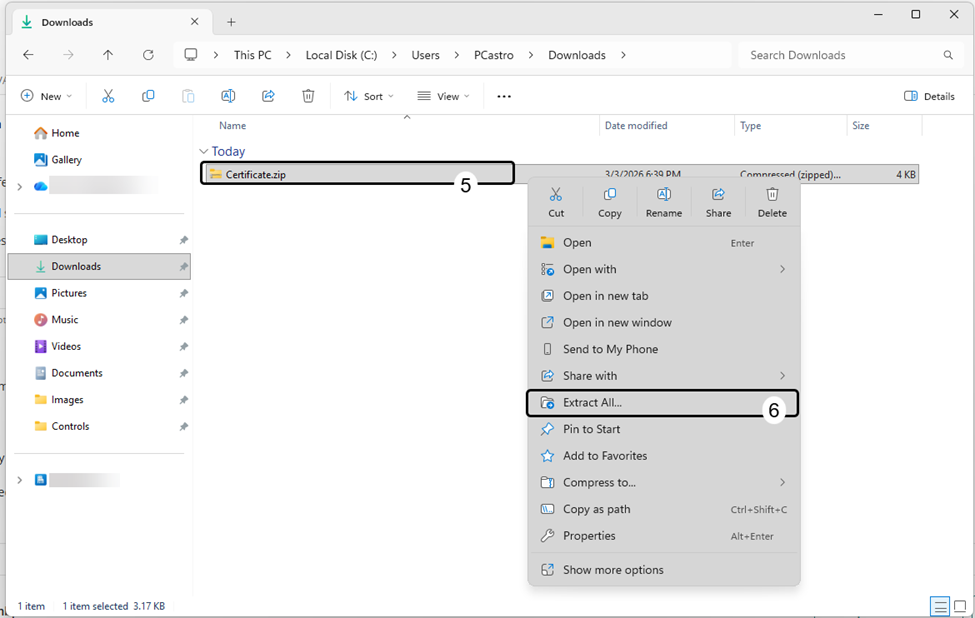
7.Enter the destination folder and file name, or click Browse to choose them in the File Explorer.
8.Click Extract.
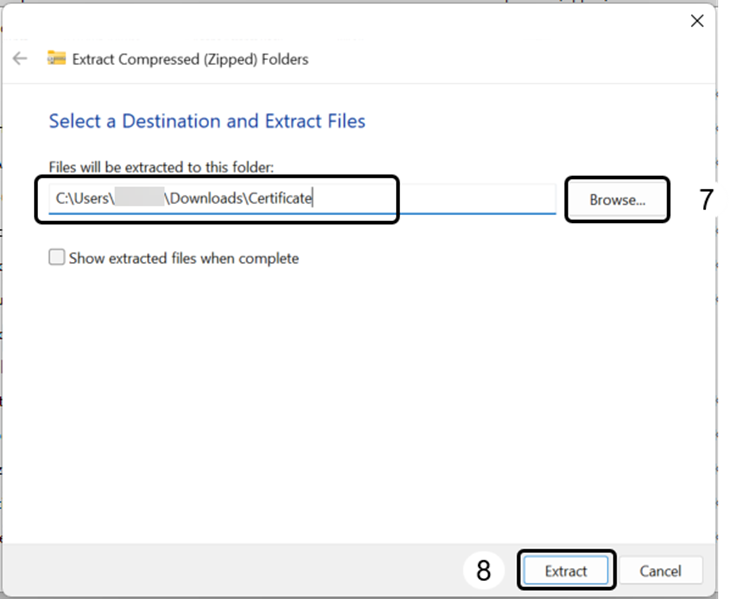
The folder contains two files:
•.cer: Contains the public certificate only.
•.pfx: Contains the certificate and its private key.
|
If a new certificate is generated and downloaded to replace an existing certificate, any external integrations that depend on the previous certificate must be updated accordingly. |
Certificate Status Monitoring
Certificate status indicators are displayed in the Management Console dashboard:
•GREEN: More than 90 days before expiration.
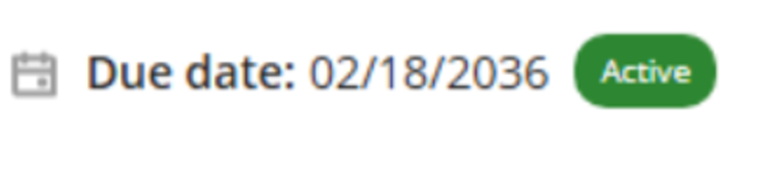
•YELLOW: Less than 90 days before expiration.

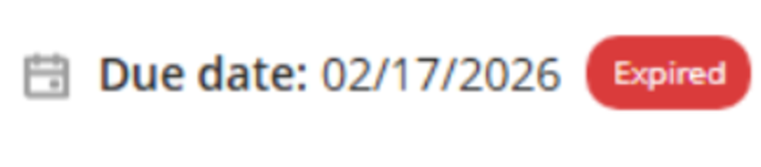
•RED: Certificate has expired.
Last Updated 8/18/2026 3:57:39 PM