Overview
While documenting your processes, you may use rich format for the entered text in both descriptions and extended documentation.
This is, the possibility of having your texts use different font colors, color shading, and styles such as: bold, italic, underlined, as well as other formatting possibilities such as: indentation and bullets, use of tables, links and images, amongst others.
This applies for the information contained in descriptions and extended attributes such as Textareas and Textboxes.
Rich format in descriptions
To define rich text formatting for your elements descriptions, use the Expand icon located at the right hand.
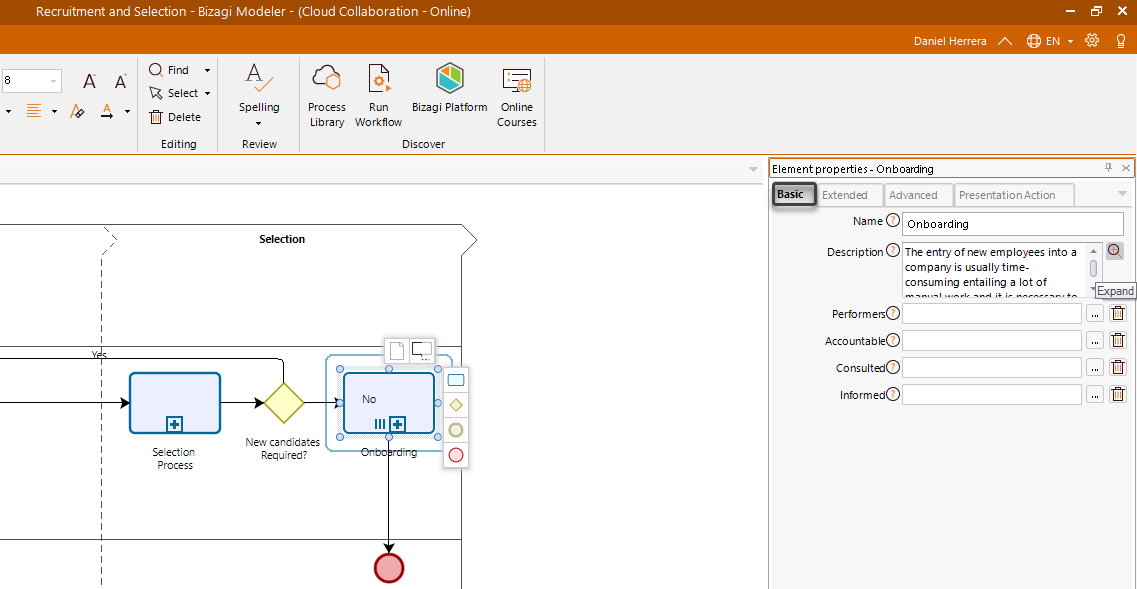
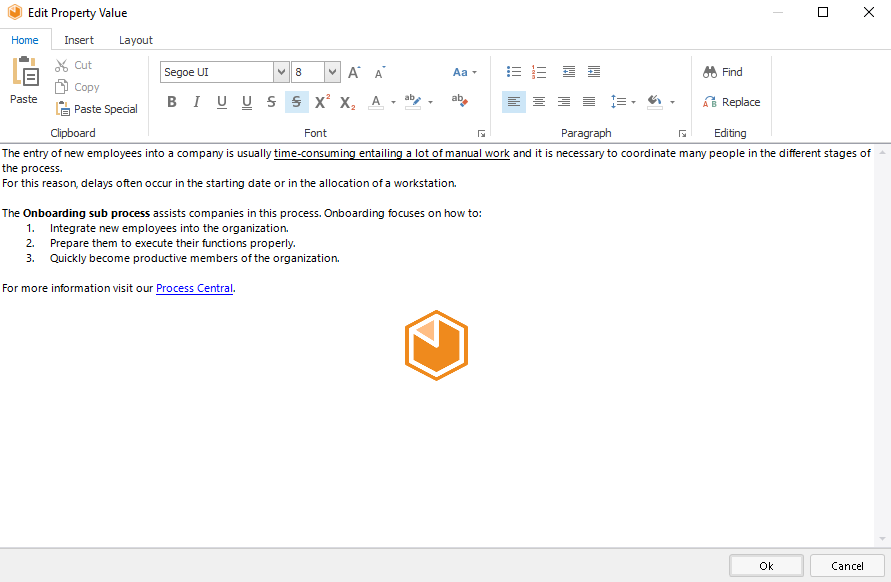
This option will open an edition-mode window, in which you may make full use of the rich formatting options:
Rich format in extended documentation
To define rich text formatting for your detail in extended attributes (Textareas, Textboxes), use the Expand icon.
This icon appears right above the information, when hovering over the extended attribute name.
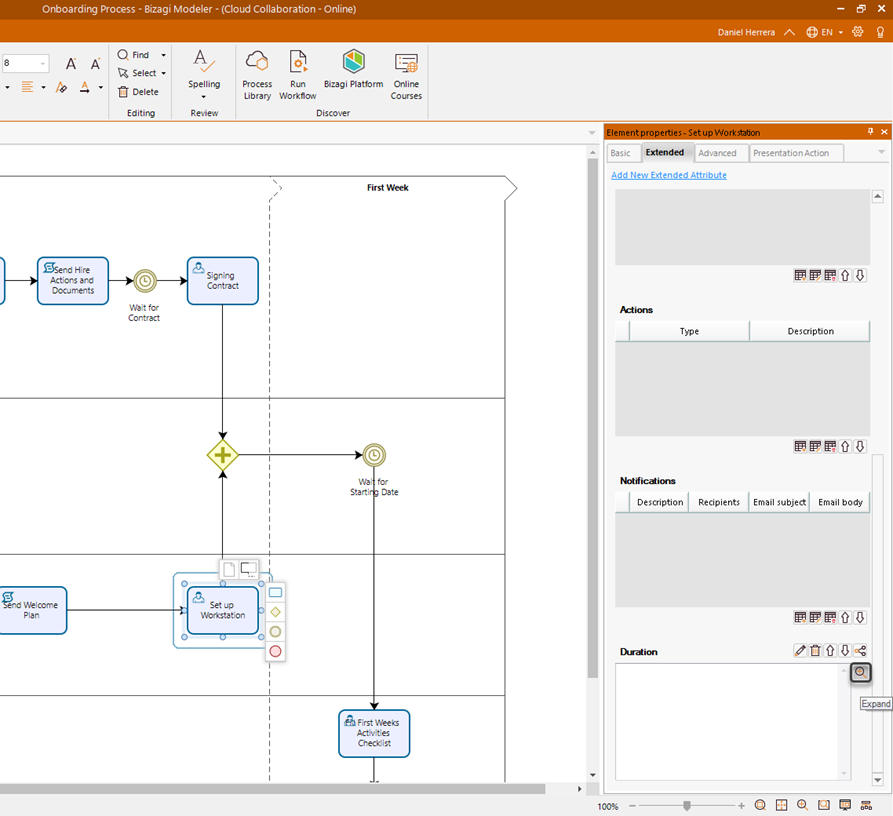
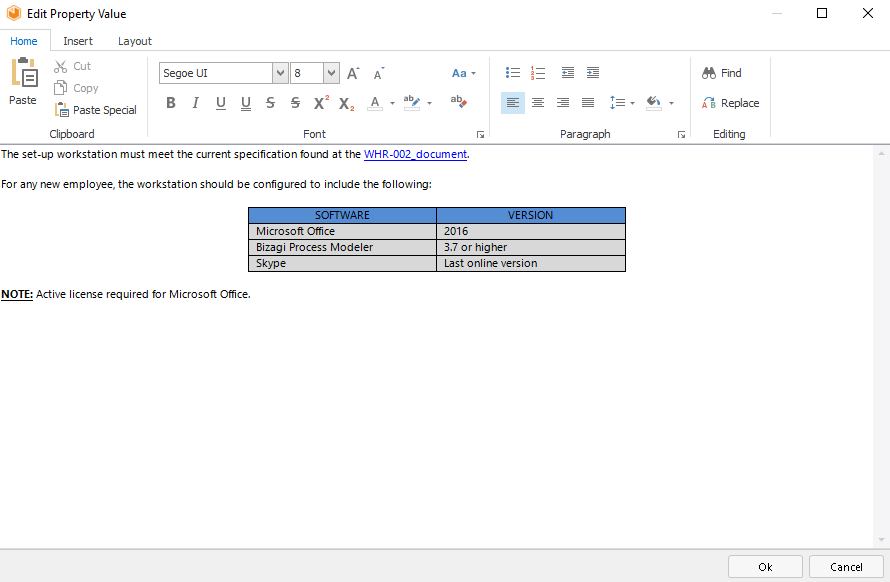
When clicking on this option, Bizagi will show an edition-mode window, in which you may make full use of the rich formatting options:
Rich formatting
You may include rich text format to your documentation using the following options:
TAB / GROUP |
DESCRIPTION |
|---|---|
Home / Clipboard |
Handle content by using standard clipboard possibilities: Copy, Cut, Paste and Paste special |
Home / Font |
Modify: fonts, font size, emphasis (bold, italic,underlined, strikethrough, etc) and other formatting options such as upper or lower case, and shading color. |
Home / Paragraph |
Define: alignment, indentation, bullets and numbering, spacing and color fill options. |
Home / Editing |
Use: Find and replace options to quickly locate your texts. |
Insert / Illustrations |
Include pictures. |
Insert / Links |
Include hyperlinks to Web pages, or to other places in the content. |
Insert / Symbol |
Include symbols from the standard set of characters. |
Layout / Table |
Allows: creating a table with the desired number of rows and columns, giving quick format, borders and shading to the table, and its rows and columns. |
Layout / Rows and columns |
Handle table modifications by inserting or deleting rows and columns. |
Layout / Merge |
Quickly use powerful options to merge or split cells, or split a table into two of them. |
Layout / Cell size |
Define the cell size and property for specific cells. |
Layout / Alignment |
Define alignment and margins involved in cells. |
|
Some options may not be available if the writing input method has been configured Right-to-Left. |
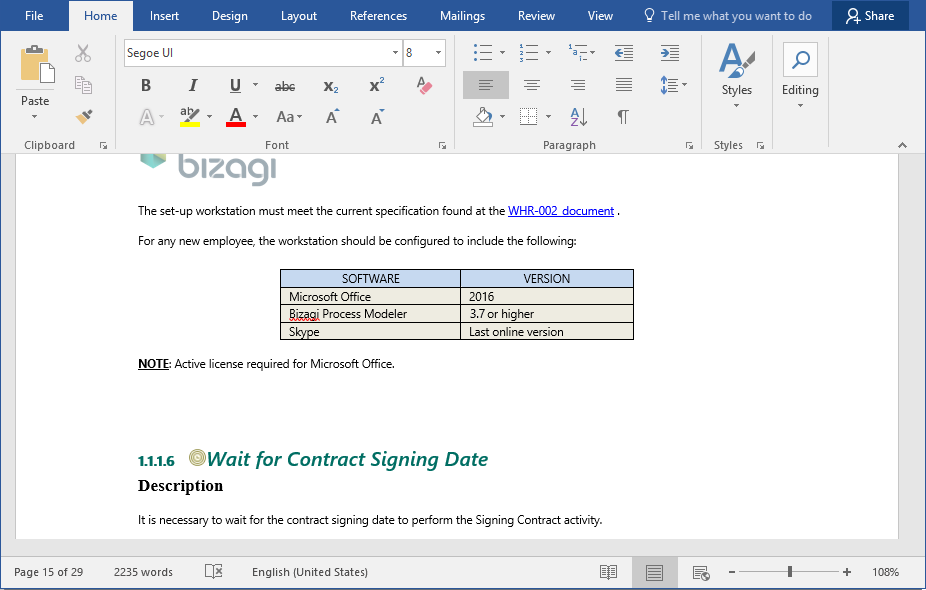
Information with rich text format is published in the generated PDF or Word document:
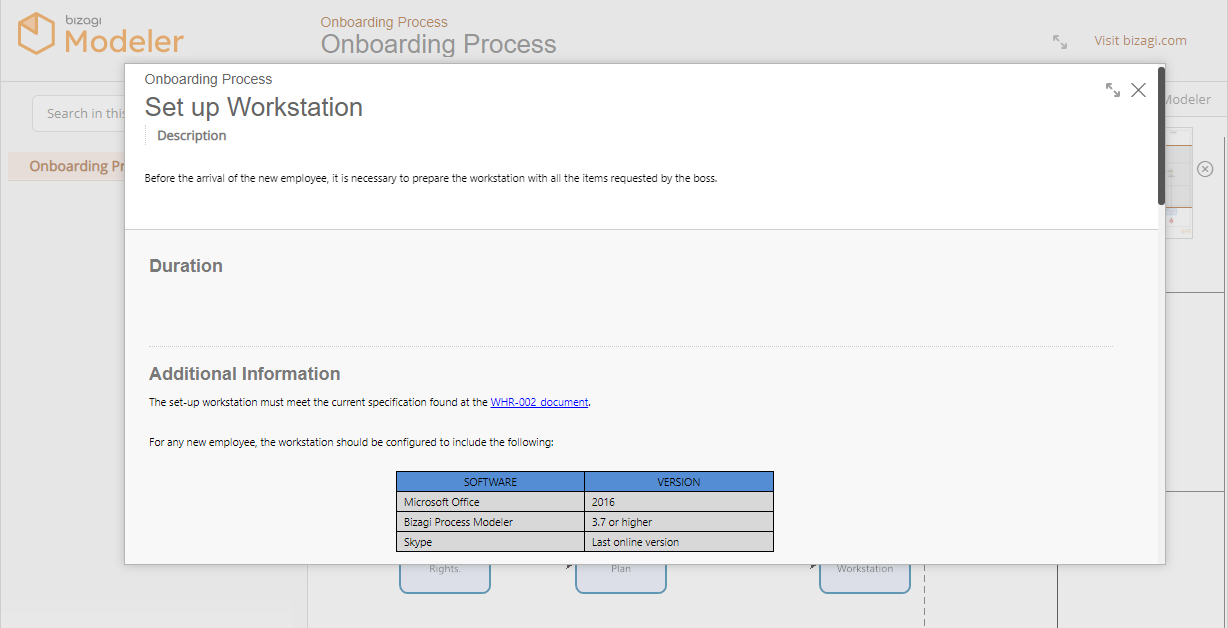
Information with rich text format published in Web:
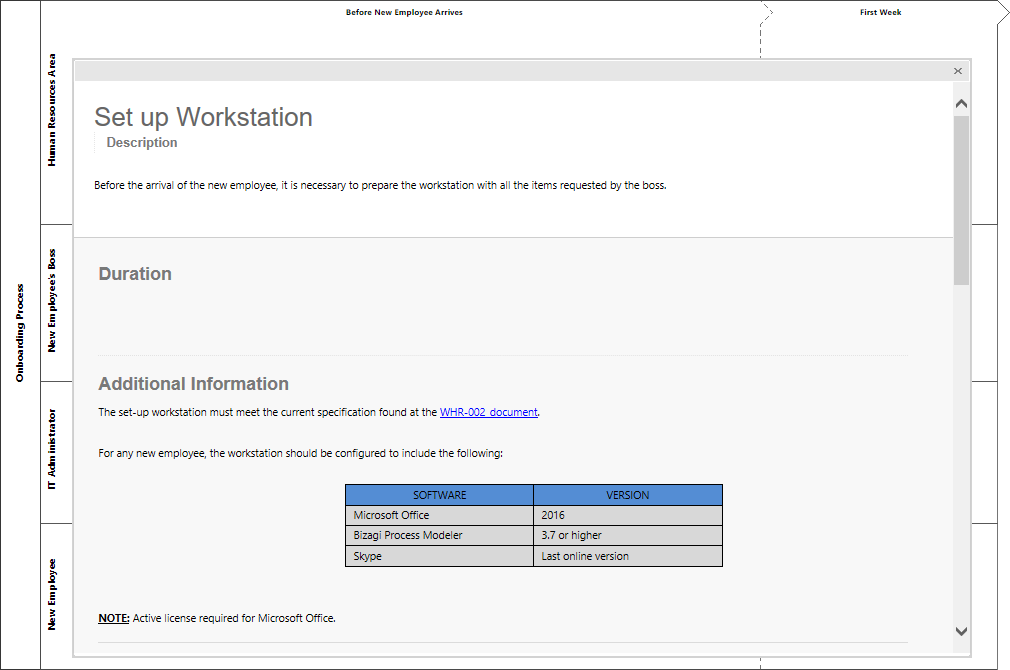
Information with rich text format shown in Presentation mode:
For more information about the generated Web, PDF or Word, and Web documentation, refer to Generating Documentation.
Important
Some Rich text controls may appear differently in the Desktop application and the Web Portal.
This is the case for Cell coloring in tables, where options to color paragraphs and cells are available.
Note that the table has two colors when reviewed on the Desktop application, one for each column:
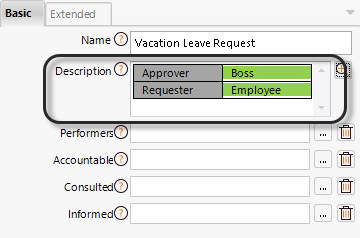
But when reviewed on the Web Portal, or after generating Documentation in Word, PDF or other formats, the table looks as follows:
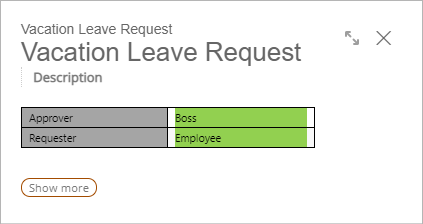
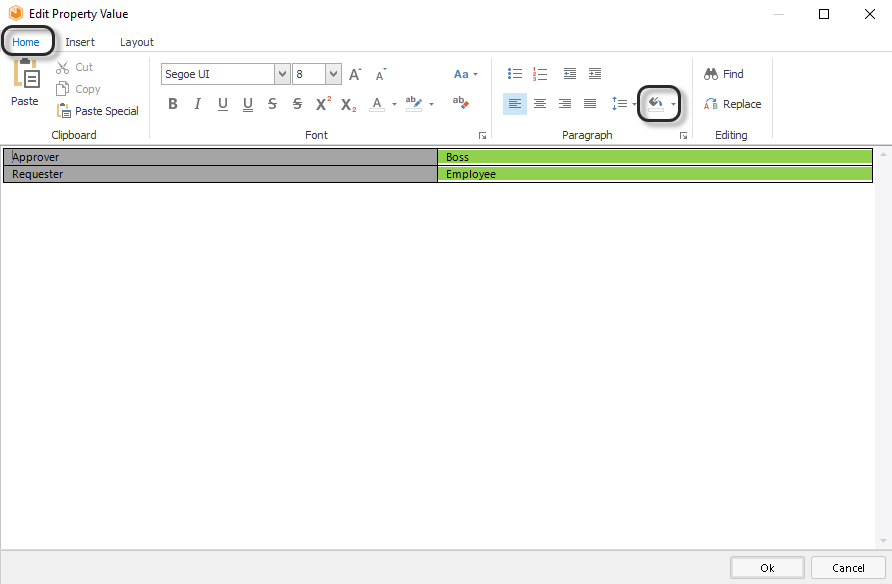
Notice how on the second column, the green color appears in the background of the text instead of as the color of the whole cell. This happens since there are two different options to set colors when a table is added as a Rich text element: Paragraph color and Cell color.
The paragraph color option is found under the Home tab of the ribbon, inside the paragraph options:
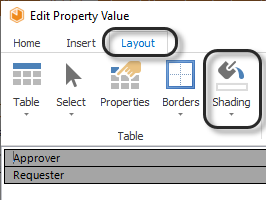
The cell color option is found under the Layout tab on the ribbon, inside the table options:
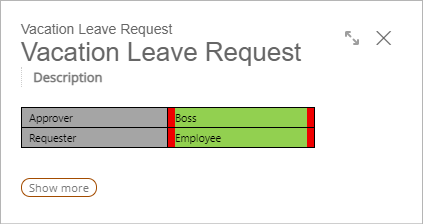
Both colorings can be used simultaneously. In that case on the Desktop application only one of them will be shown, but on the Web portal or documentation both will be displayed.
Last Updated 7/8/2022 10:20:01 AM