When there is a locked account, the user can send a request to an administrator to unlock it after trying to log in to the Work Portal.
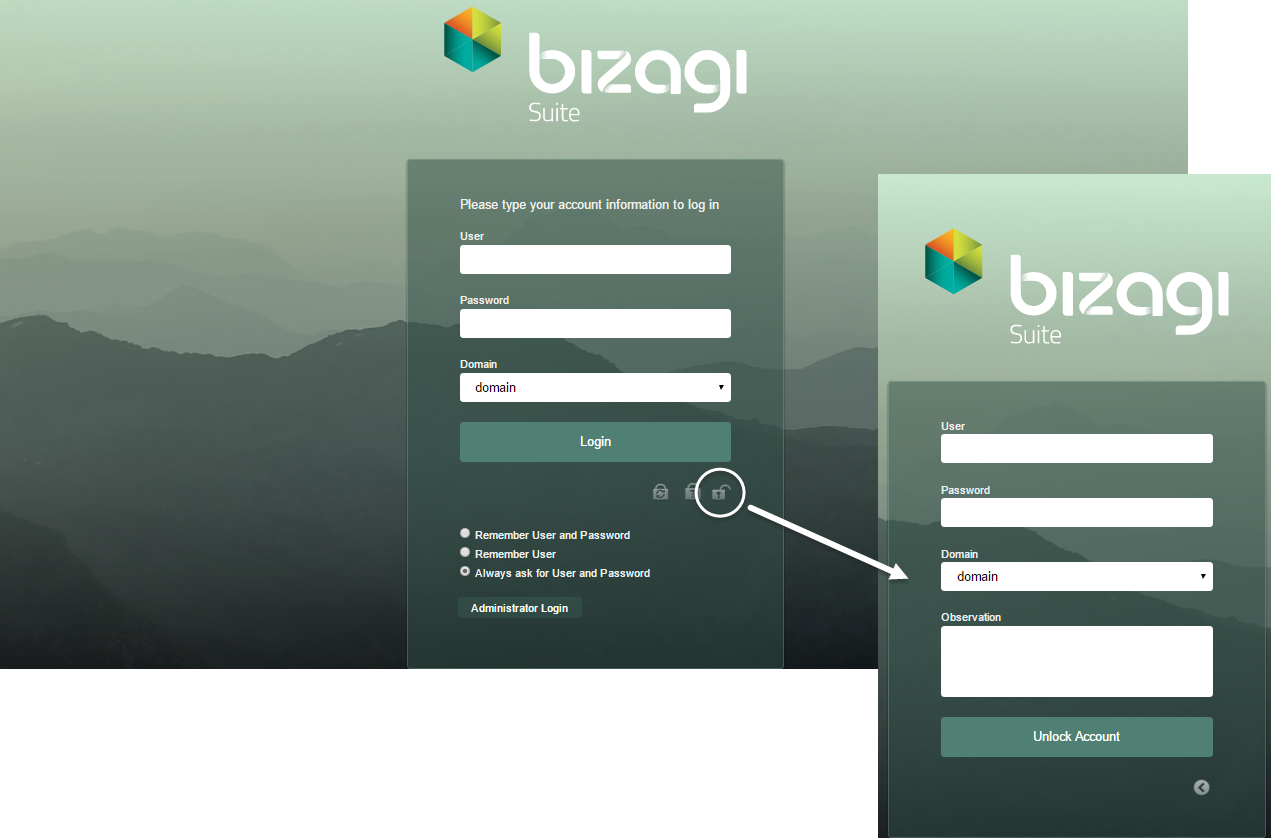
The administrator (usually the admon user) will receive an unlock request notification.
If you are the administrator you can view the log of all requests pending. To do so, click the Admin option in the Main Menu of the Work Portal, open the User Management category and select the Locked accounts option.
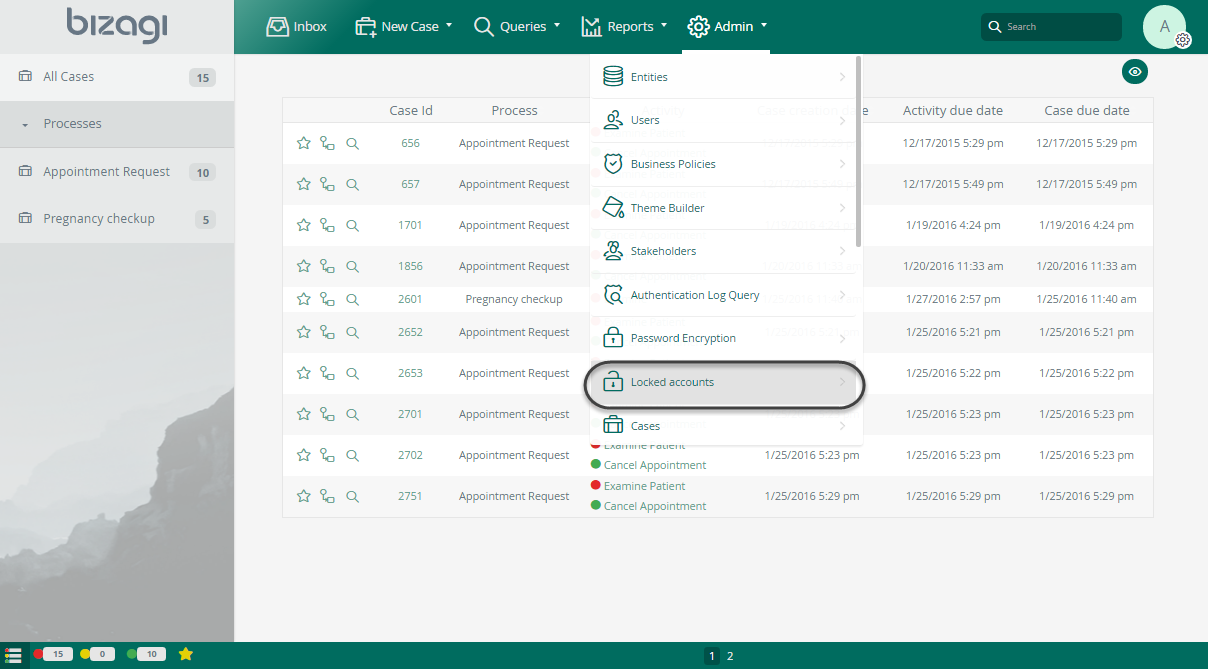
At the side of each request there is a stoplight that indicates if the predetermined service time has expired or not.

When a request is selected, a new window shows the Locked accounts window. On this screen the administrator can change the user authentication options and the account status, whether blocked or deactivated, as well as check if the Password is expired.
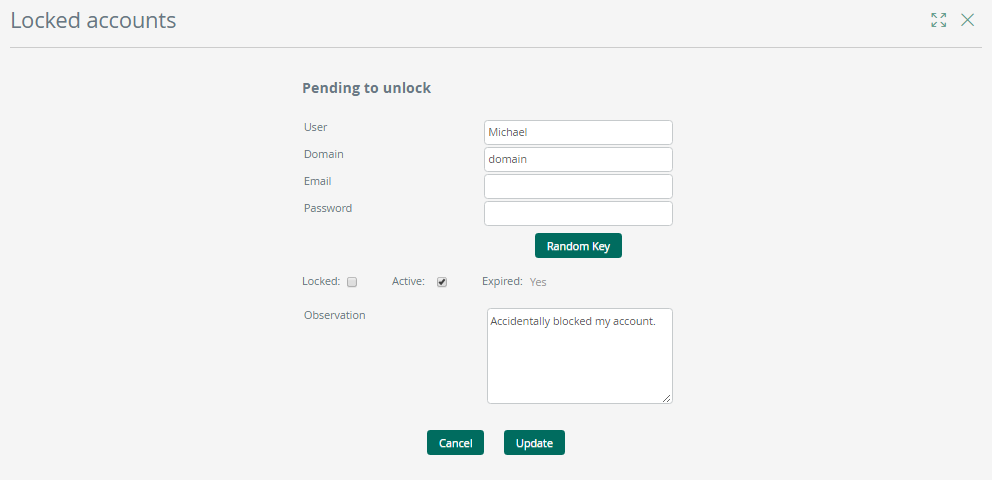
You can generate Passwords for the user account by clicking Random Key (in order to generate a random password).
Configuring accounts locking
Accounts are locked in the following two scenarios:
•The maximum number of failed user login attempts has been reached.
•The inactive time limit of the account has been reached.
You can configure the accounts locking from Bizagi Studio in the Authentication options.
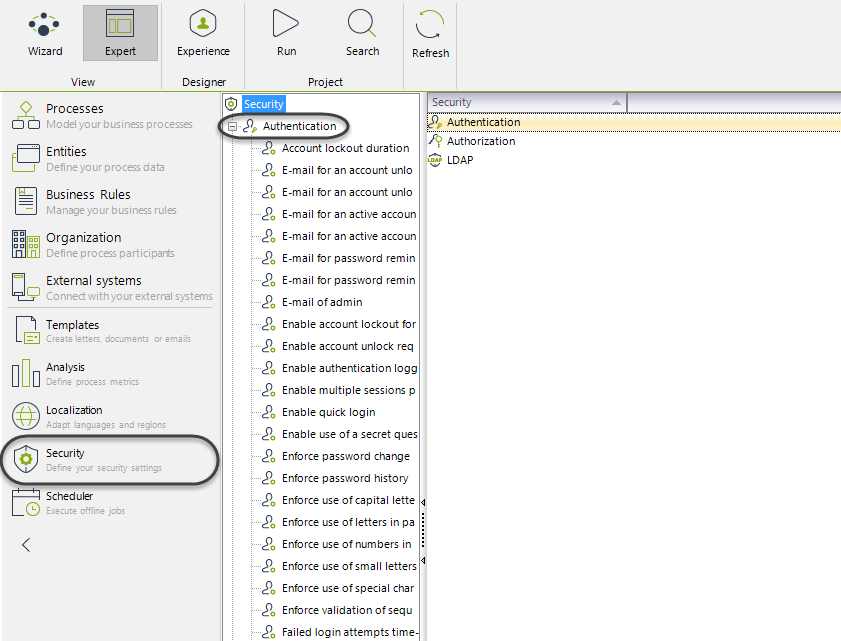
Just follow the next steps:
1. Enable Lock Account.
This option allows locking users accounts when the maximum login attempts are reached.
It is disabled by default. To enable it, go to the Enable account lockout for failed login attempts option and check the On/Off box.
Click Update to save the changes.
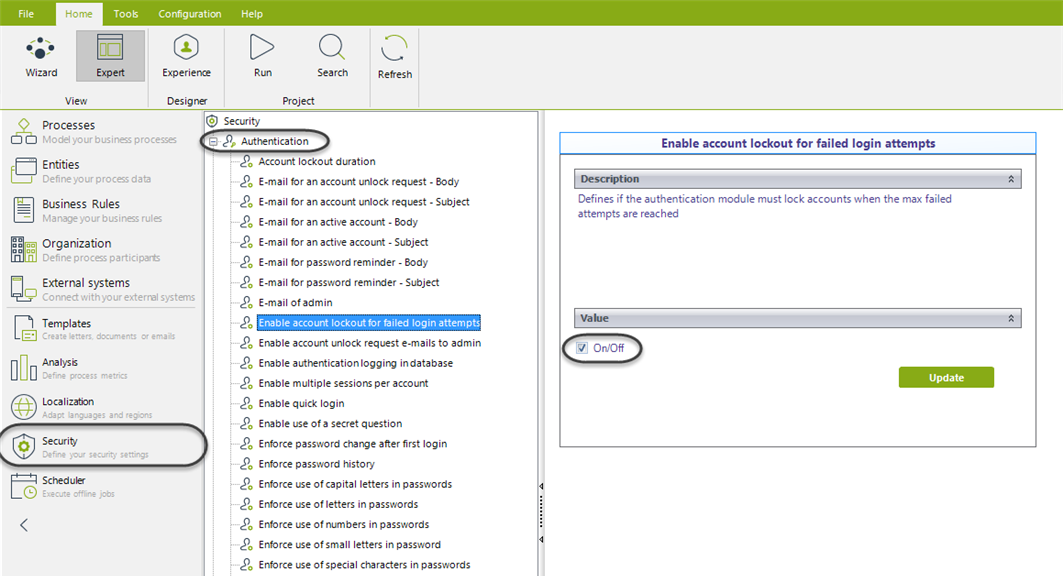
2. Define the maximum login attempts allowed.
Go to the Failed login attempts time-out option and type the number of attempts allowed before the account gets locked.
Click Update to save the changes.
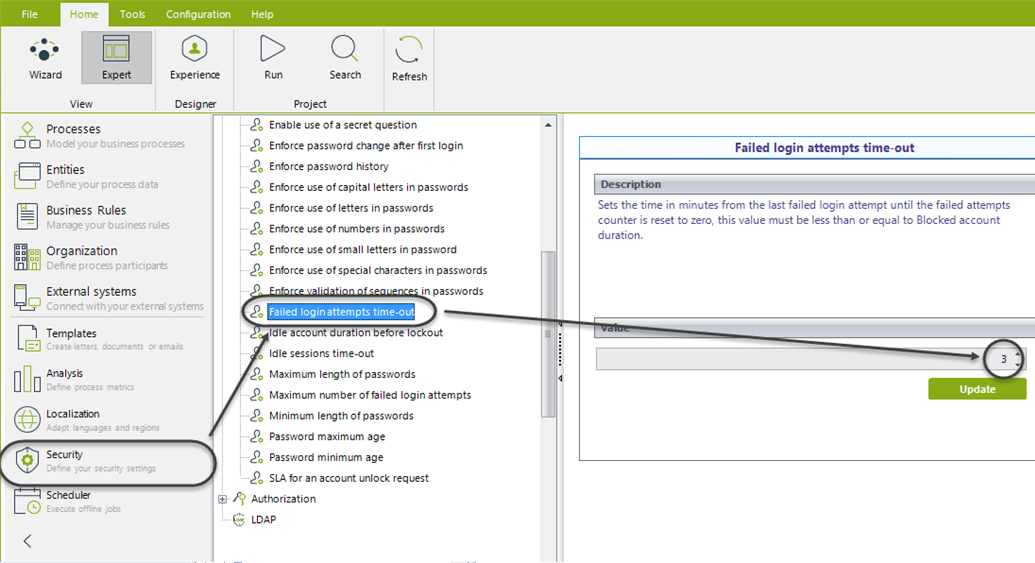
3. Define the time limit to reset a Password.
Go to the Idle account duration before lockout option and type the number of days an account can be inactive before it gets locked.
Click Update to save the changes.
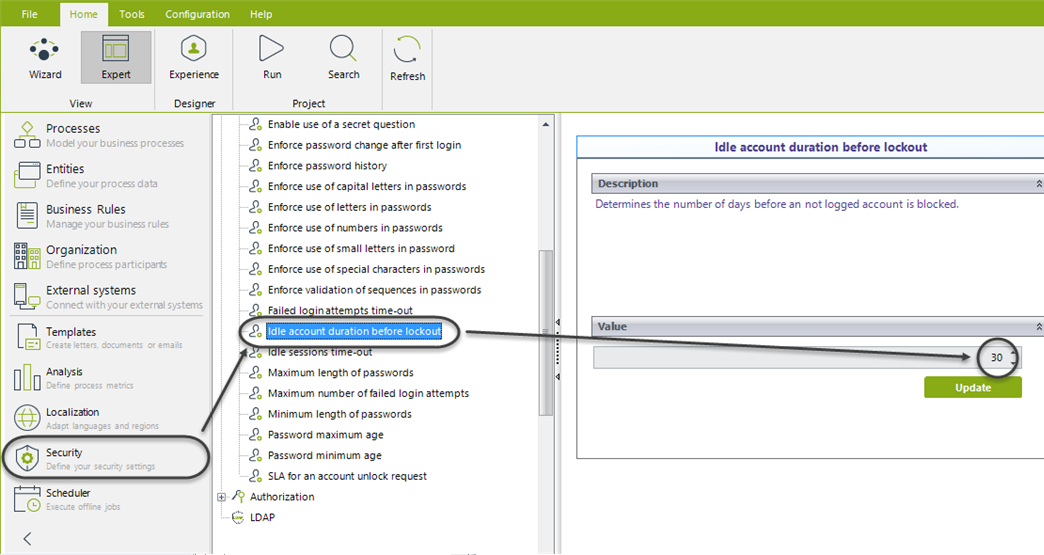
4. Define the service time.
You can define a maximum service time in which the administrator must reply to the unlock request.
Go to the SLA for an account unlock request option and type the maximum number of hours in which the administrator should respond to requests.
Click Update to save the changes.
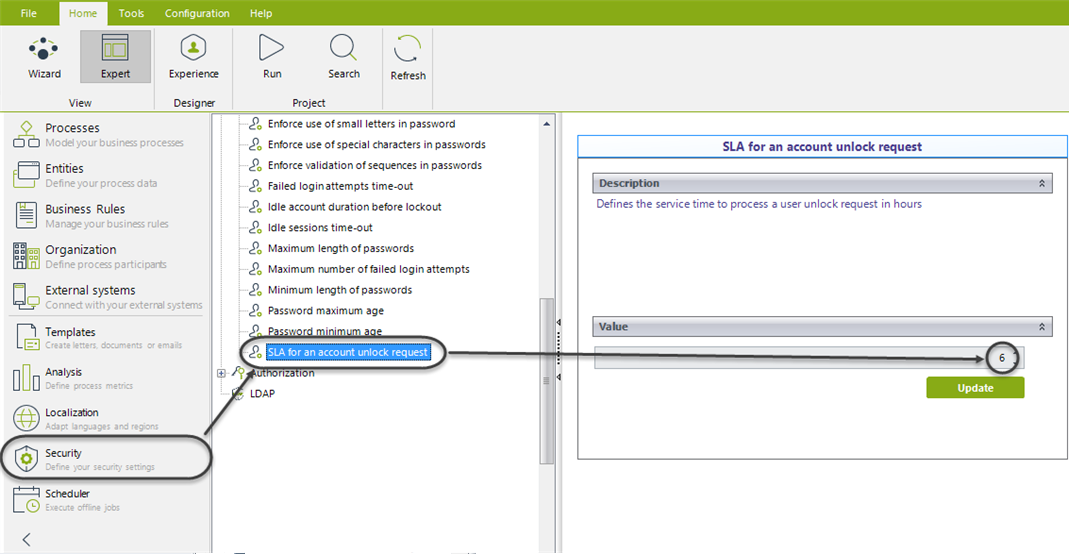
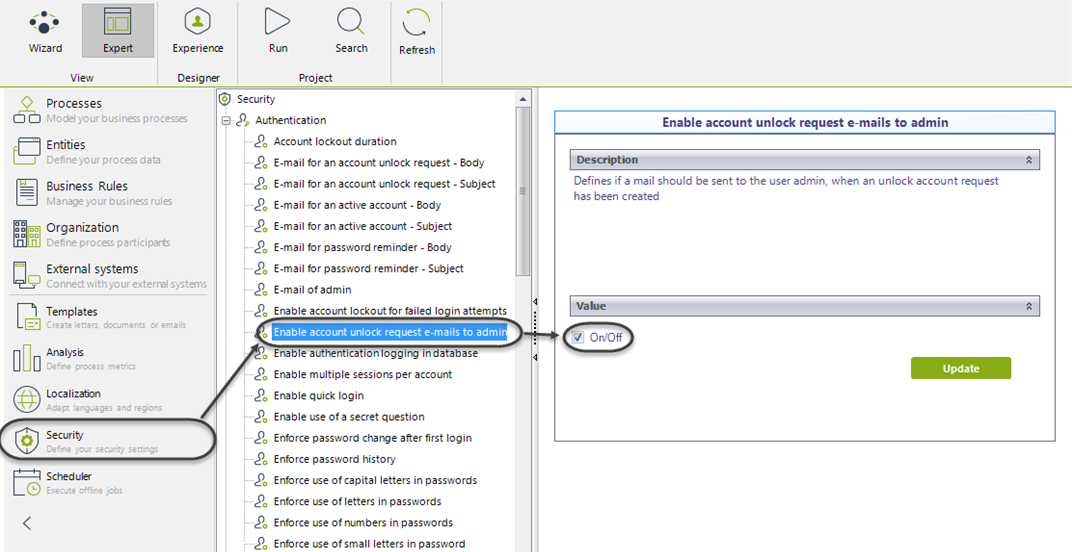
5. Enable notifications to the administrator.
The administrator can be notified via e-mail when a user request the unlocking of an account.
By default this option is disabled. Go to the Enable account unlock request e-mails to admin option and check the On/Off box to enable it.
Click Update to save the changes.
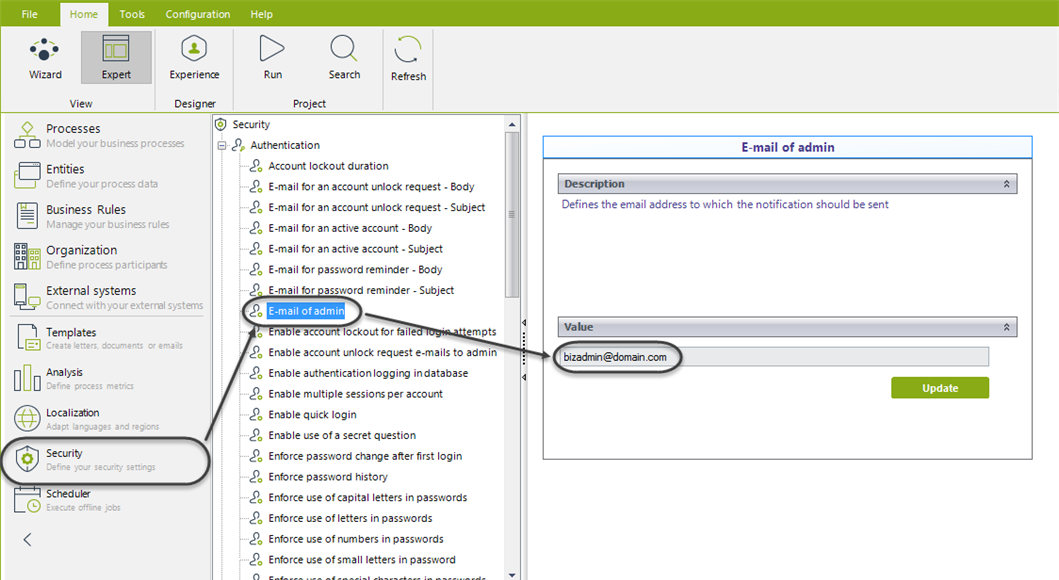
6. Change the e-mail account of the administrator.
The notifications about Locked accounts will be sent to an e-mail account.
By default this account is admin@domain.com. Go to the E-mail of admin option and change the e-mail address.
Click Update to save the changes.
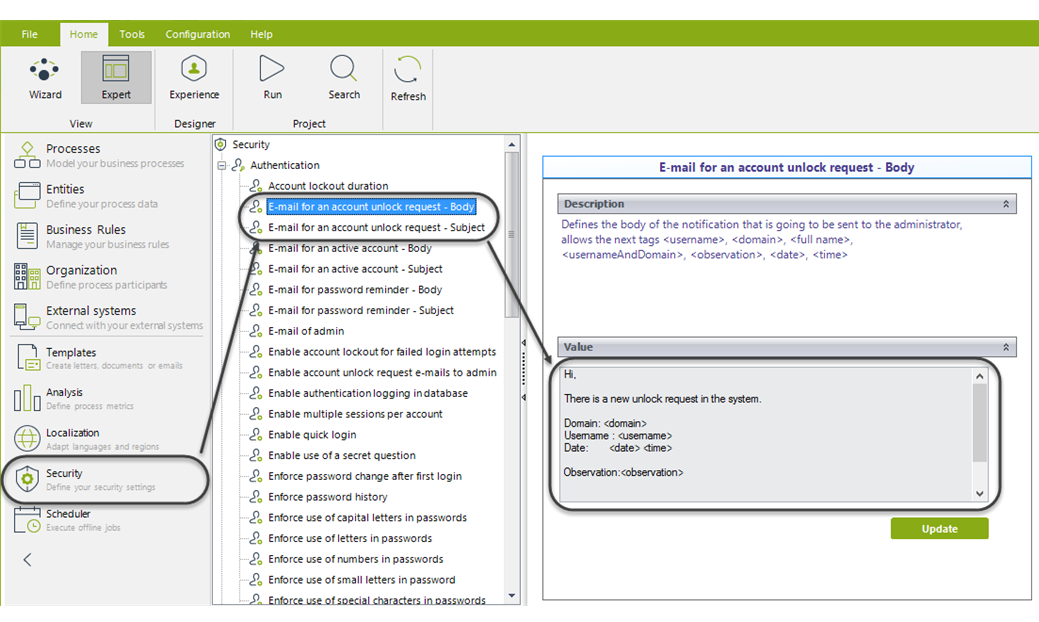
7. Configure subject and body for notifications.
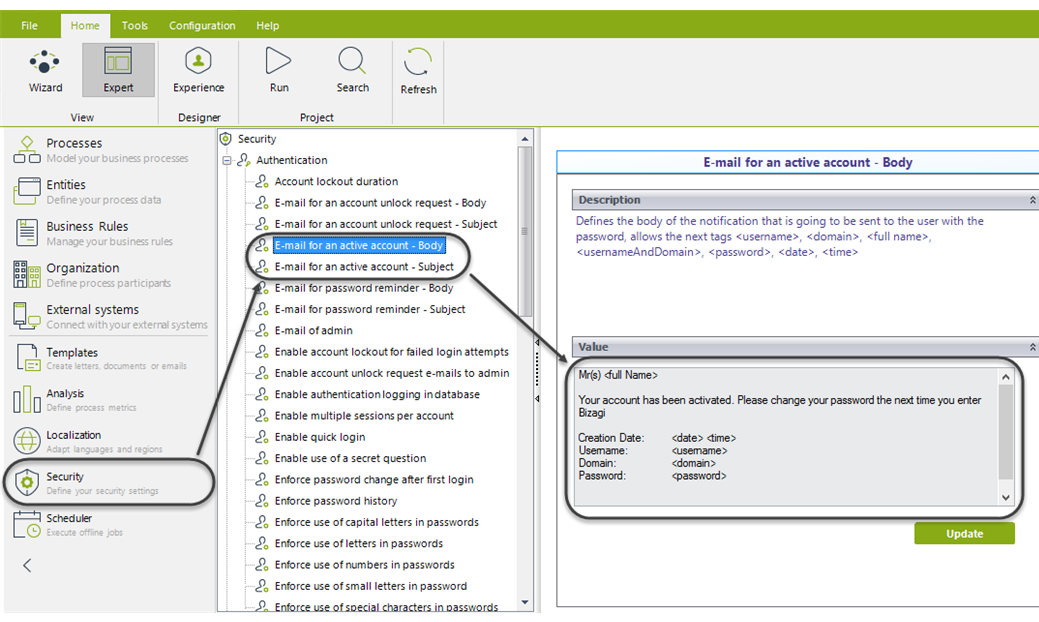
You can customize the body and subject of the notifications that are sent to:
•The administrator, when a user sends an unblocking account request. This is done from the Email for an account unlock request - Body and E-mail for an account unlock request - Subject.
•The user, when the account is unlocked.
Last Updated 12/2/2025 5:24:56 PM