Overview
To integrate a bot with a Bizagi process, you must first complete all setup in UiPath. This includes developing the bot, publishing it to UiPath Orchestrator, and configuring the required components: Environment, Machine, Robot, and Process. For more details about this setup, refer to the UiPath Orchestrator documentation.
|
Keep in mind the following: •Orchestrator Studio and StudioX robots cannot be used to start jobs or create triggers in Orchestrator. •For production environments using unattended scheduling in Orchestrator, use Unattended robots. •If you cannot change the robot type to Unattended, review the Unattended robots available in your license and, if possible, assign one. •A UiPath free account includes two Attended robots and one Unattended robot. To use more robots, you must upgrade your plan. |


Once you have taken care of the UiPath setup for the robot, head to Bizagi Studio and go to the Expert view.

Click Robots, click RPA Bots and select UiPath.
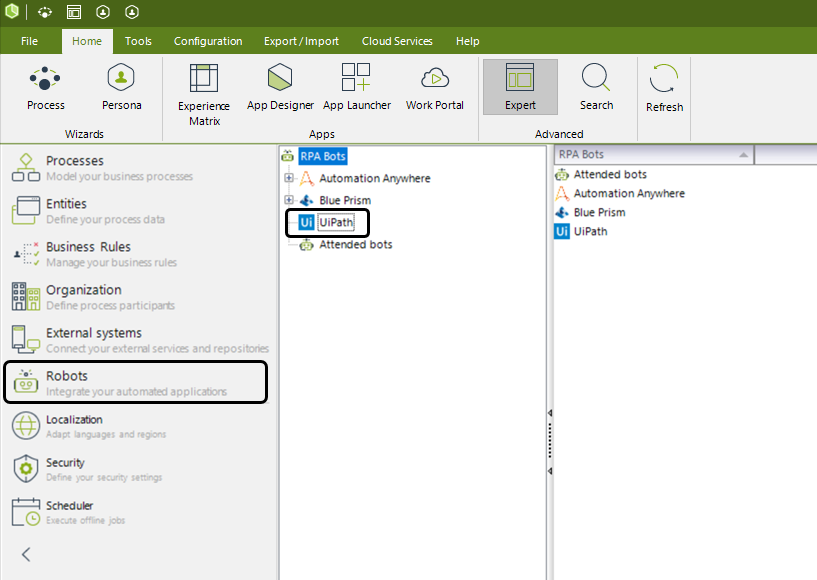
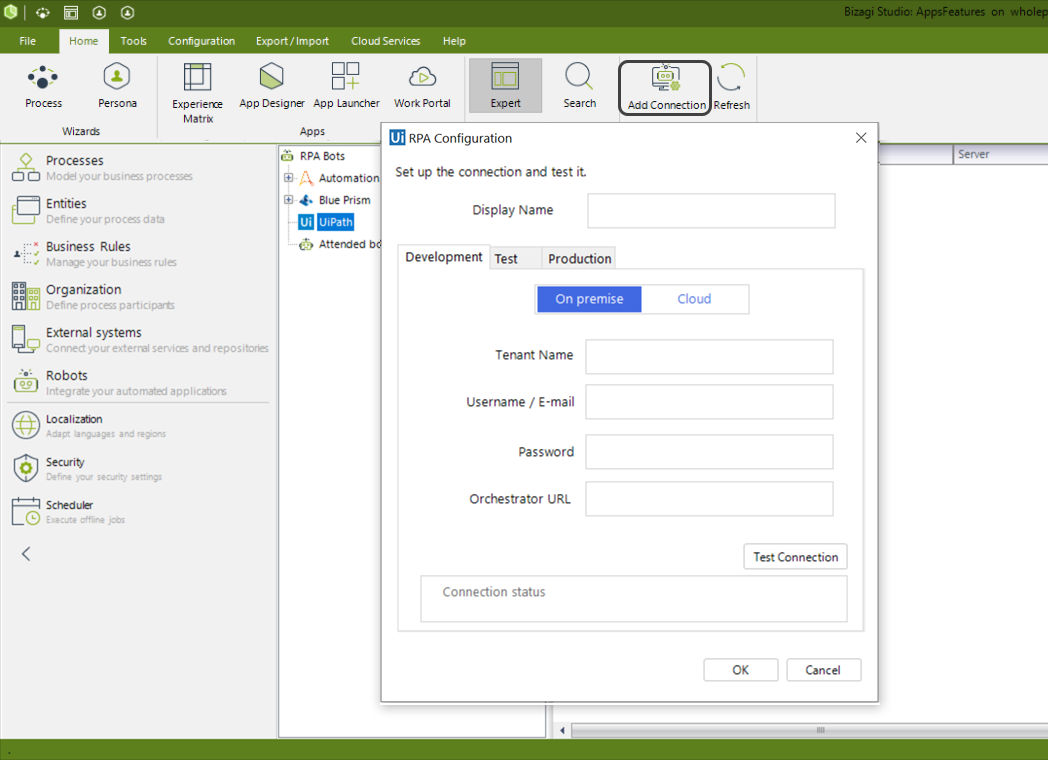
In the Tools bar, click Add Connection. At this point, the UiPath configuration wizard appears.
Configure connection
In the UiPath configuration wizard, you can set up the connection to your bots.
|
You can configure either an On-Premise connection, where you manage the infrastructure required for your resources, or a Cloud connection, where UiPath manages that infrastructure for you.
|
Client credentials authentication (OAuth)
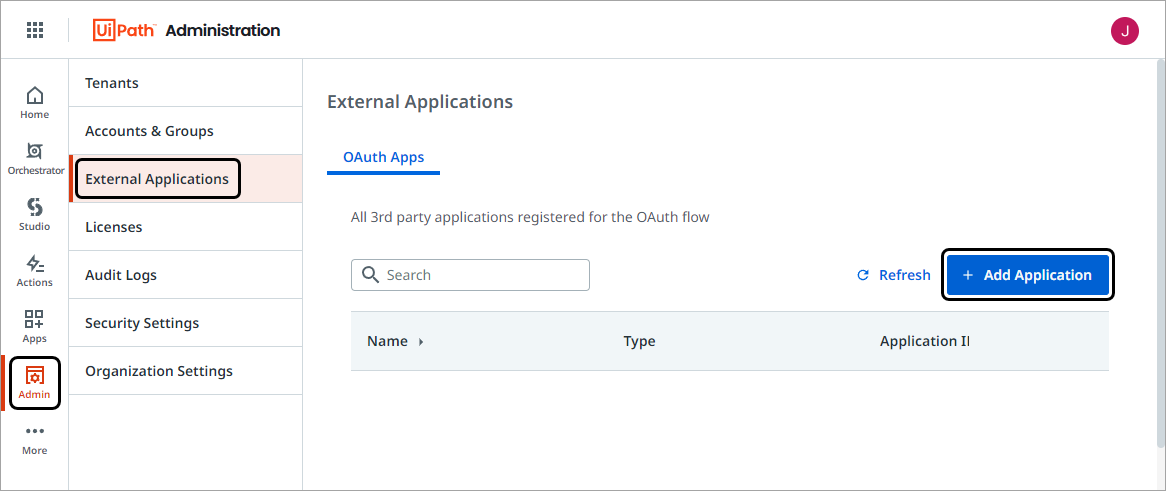
Before configuring the connection within Bizagi, it is necessary to register Bizagi as an application in the UiPath cloud console settings. To do this, within your cloud console go to the admin section, select the External Applications option and click the Add Application button.
1.Enter a name for the application.
2.Select the application type. It is recommended to choose Confidential application for security purposes.
3.In the Resources section, add Orchestrator API Access and select the required scopes. Ensure that the following minimum scopes are granted for both user and application:
•OR.Execution
•OR.Folders.Read
•OR.Jobs
•OR.Queues
•OR.Robots.Read
4.Configure the authentication response URL. Bizagi does not require a specific value, so you can enter any valid URL, for example: http://localhost
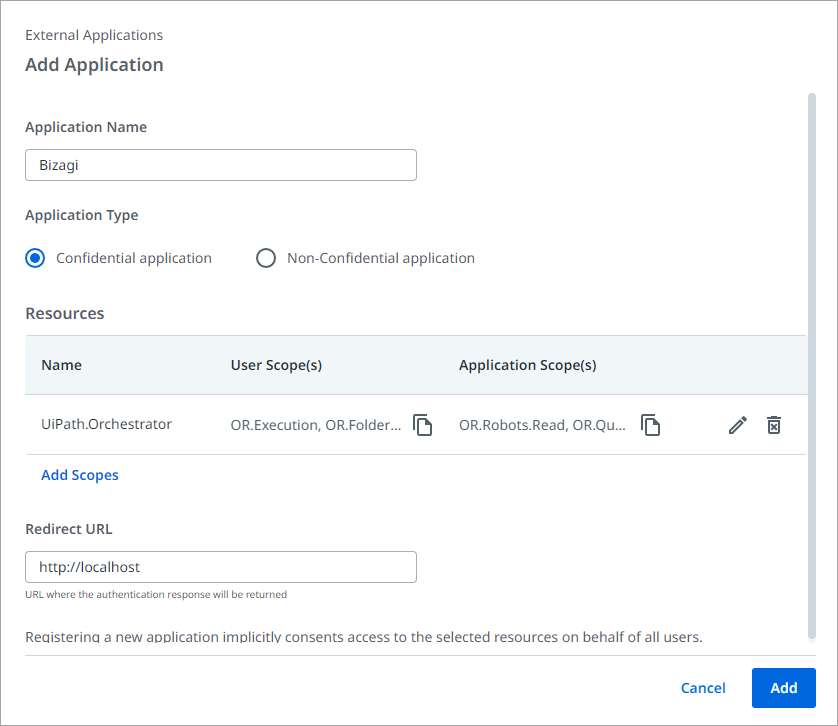
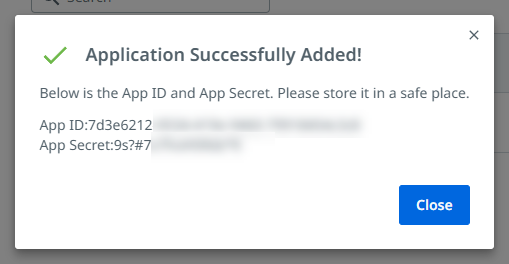
When you finish entering all the required parameters, click Add. This generates the App ID and App Secret, which are required to configure the cloud connection in Bizagi.
On-Premises Connection
|
Using self-signed certificates in UiPath's orchestrator might lead to connection errors between the two applications. We strongly recommend using certificates issued by a Certificate Authority (CA) regardless of the environment. |
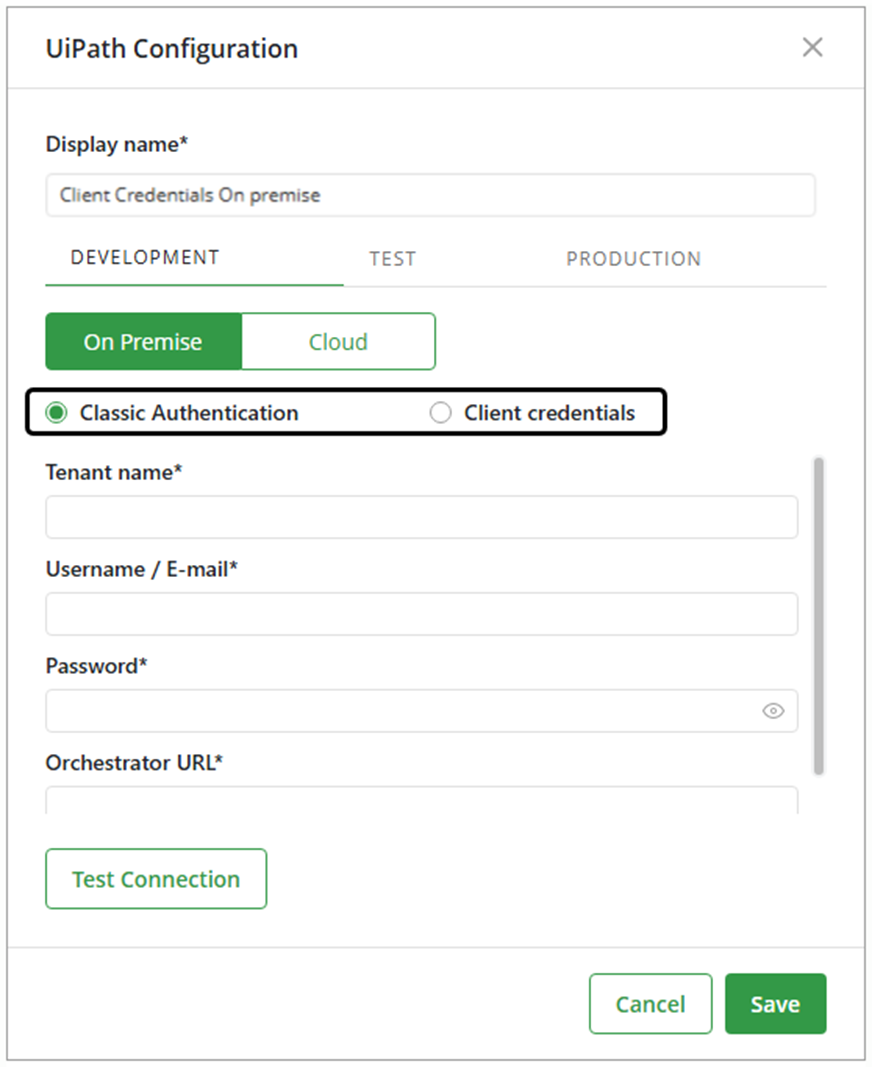
When you select On Premise connection you can select between Classic Authentication and Client Credentials.
Classic Authentication requires the following information:
•Tenant Name: name of the orchestrator instance you provided at the time of its creation.
•Username / Email: associated Username or Email of an admin user of the orchestrator.
•Password: corresponding password to the previous field.
•Orchestrator URL: URL of the UiPath orchestrator.
Client credentials connections require the following information:
•Grant type: client_credentials
•Organization ID: your UiPath organization identifier
•Tenant name: name of the orchestrator instance you provided at the time of its creation.
•Client id: App ID
•Client secret: App Secret
•Auth url: must use the following format: https://<server_url>/identity_/connect/token
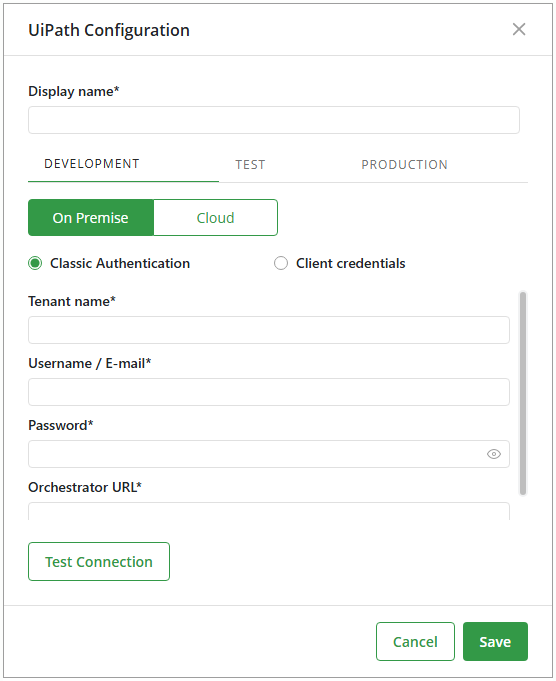
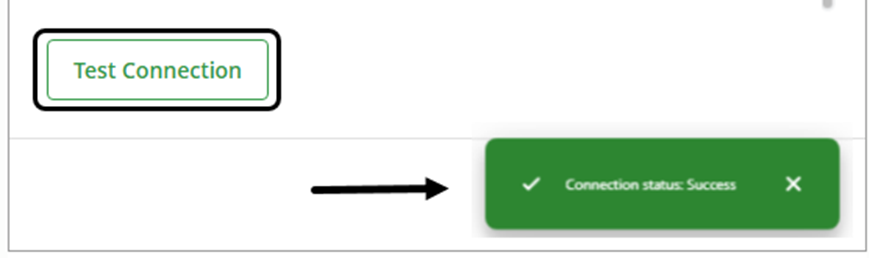
After entering the required configuration information, test the connection. If the validation is successful, save your changes. Otherwise, review the information and try again.
Cloud Connection
Once registered the new application and obtained the client credentials within UiPath it is time to configure the cloud connection in Bizagi. To do so, in the UiPath configuration wizard select Connection type: Cloud.
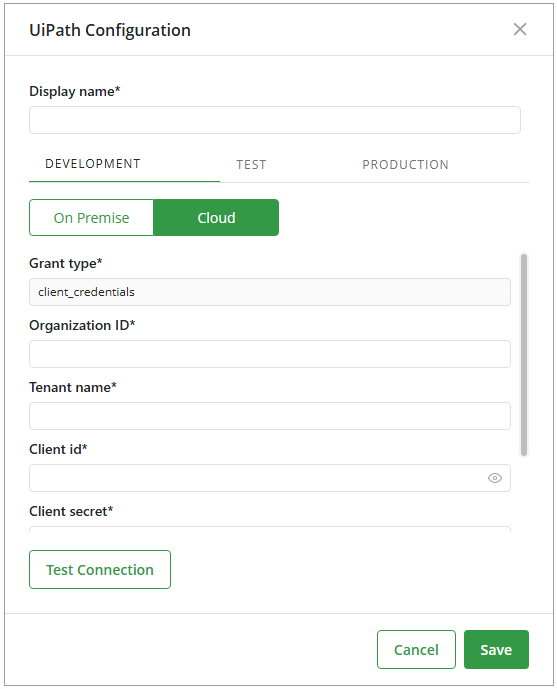
The authentication type is Client Credentials authentication as in an On‑premise connection.
|
You can configure a different connection for each of your Environments by creating a new configuration in their respective tab. You can change these connections for your Test or Production environment in Studio. |
Last Updated 7/16/2026 5:47:13 PM