Adding a UiPath Process to your configured connection
After having the connection successfully configured, you need to add to that connection the UiPath process that you want Bizagi to trigger at some point. You can do this by clicking the connection and then clicking the Add UiPath process button.

Upon clicking such option, the UiPath Process Configuration wizard appears. Here you can see all the available processes from your Orchestrator. Depending on the way your bot is configured different options may appear and this may also vary depending on your UiPath Studio Version. If your bot was programmed on UiPath Studio v2018.1 or lower, the only way it can receive parameters is via a Queue. If your bot was programmed on an equal or higher version of UiPath Studio, it can receive parameters directly. Alternatively, you can have a bot configured to not receive parameters, in any version. For more information on the use of queues and when you need to use them go to Using queues in UiPath.
UiPath Folders
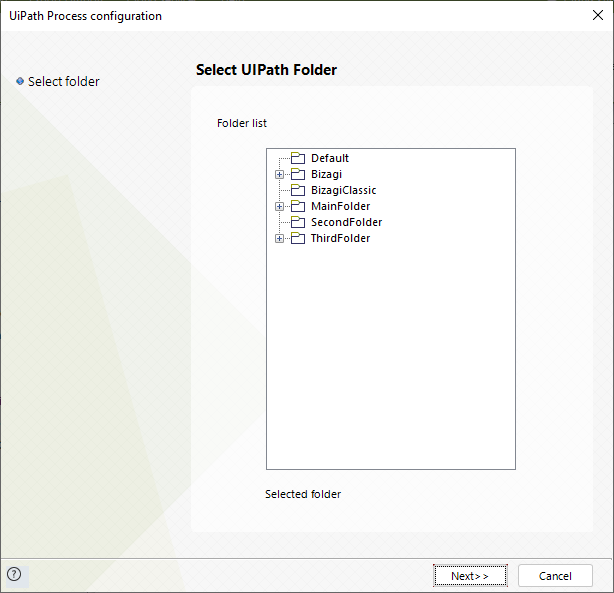
For unattended bots, in the first step of the configuration Wizard select the tenant folder where the desired bot is located.
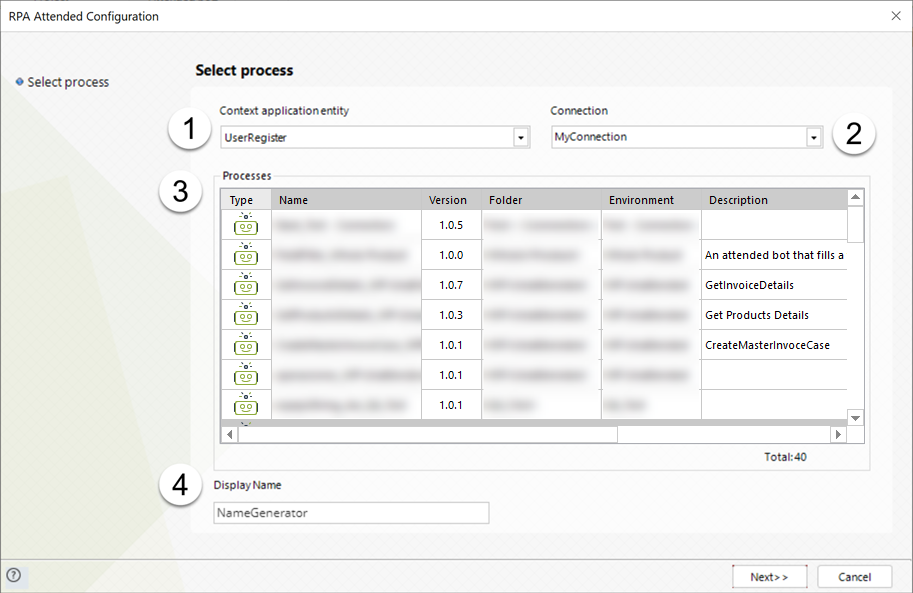
For attended bots, the folders are shown within the table of properties of the processes available in the orchestrator.
Configuring a Process with no input parameters
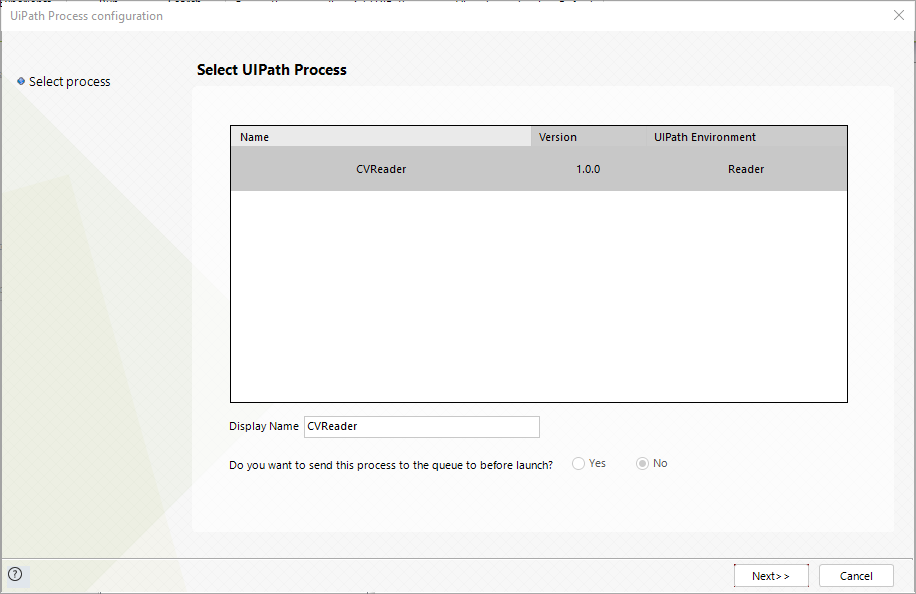
In the first step of the Wizard provide a Display Name, and select the No option in the prompted question, to indicate that your Bot has no input parameters configured, nor it will look for them in a queue.
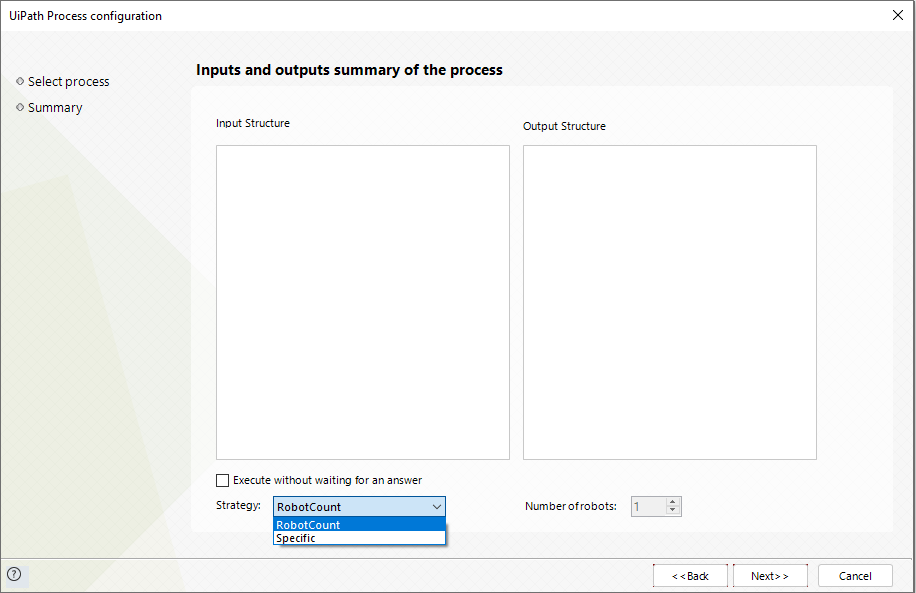
Click Next to go to the second step of the Wizard. Select the strategy with which the robots will execute the jobs in the process, and then click Next.
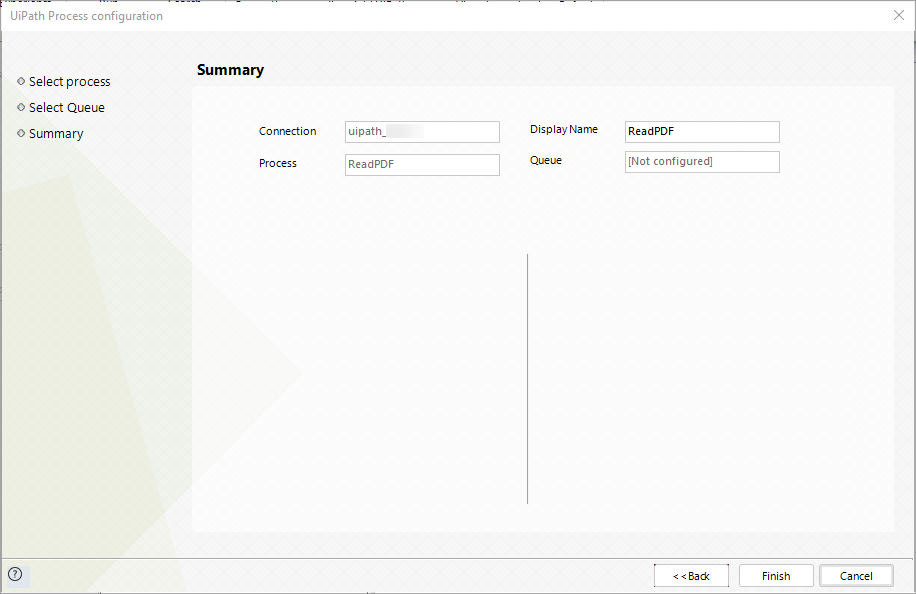
Review the presented information, and if everything is correct, click Finish to end your bot's process configuration.
Configuring a process that receives input parameters
If you have a process that directly receives parameters for its execution (not from a queue) the No option is selected for you by default and you are not able to change it.

Click Next to go to the second step of the Wizard, in which you configure the input parameters and the strategy with which the robots will execute the jobs in the process. Any input and output parameters configured on your Bot will appear in this step. Each parameter has its name and a mock value with its corresponding configured Data type.
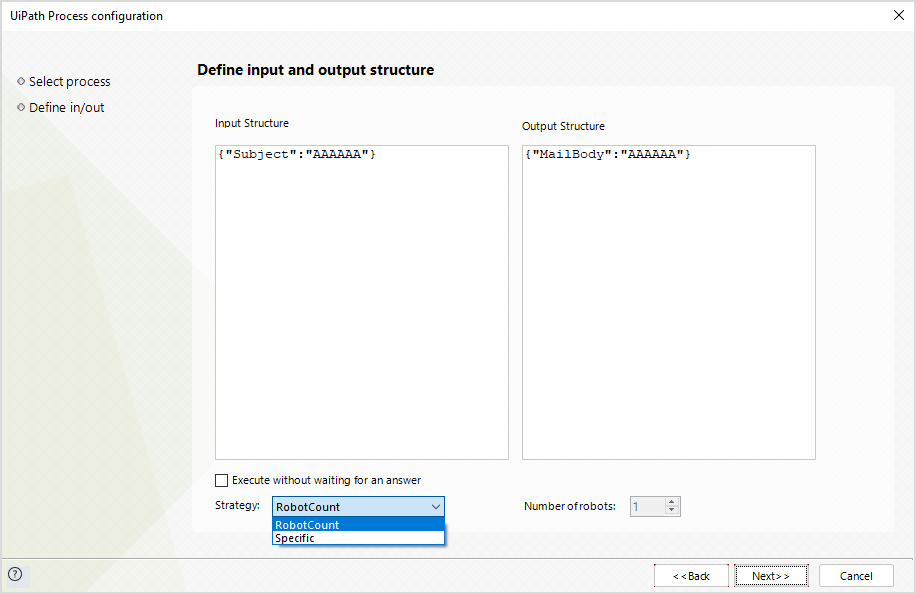
Review, and make any necessary changes to this information, and then click Next, to be directed into the third and last step of the Wizard, which is the summary.
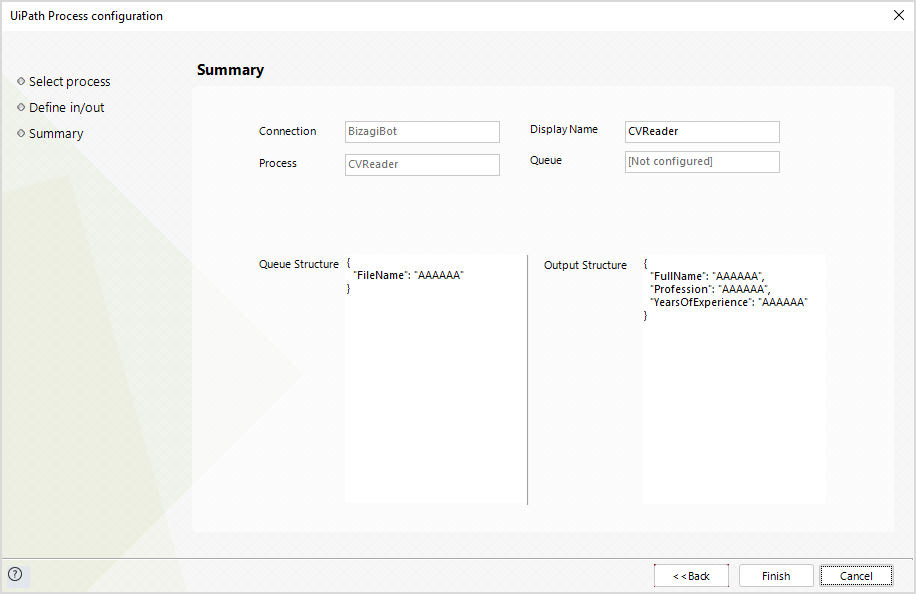
Review the information and return to the previous steps in case you want to make any changes. Once you are done, click Finish.
Configuring a process that receives parameters or writes outputs to a queue
If your bot is configured in such a way that it reads and writes from a queue, select the corresponding option on the first step of the Wizard.
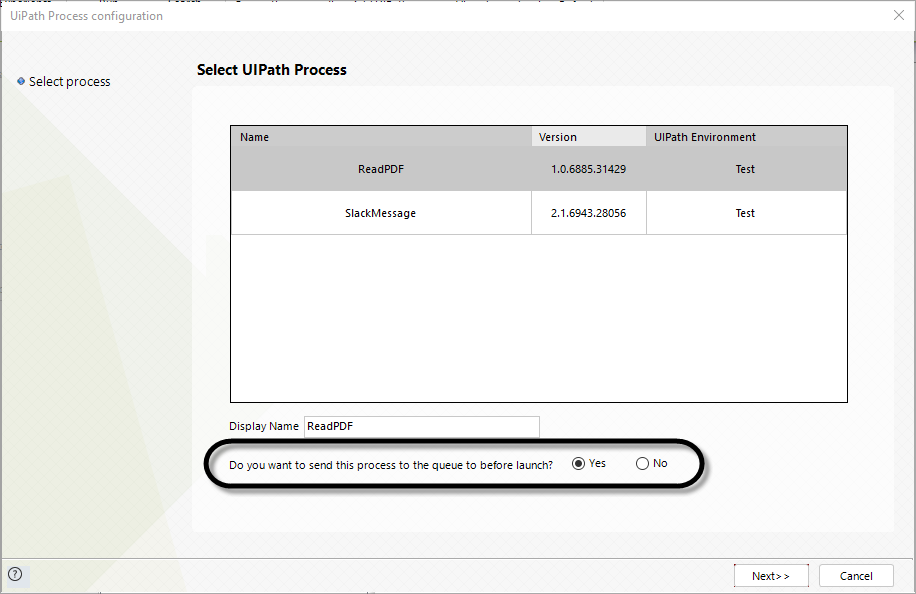
Click Next to go to the next step of the Wizard, where you can configure your input and output parameters from a queue, as well as the strategy with which the robots will execute the jobs in the process.
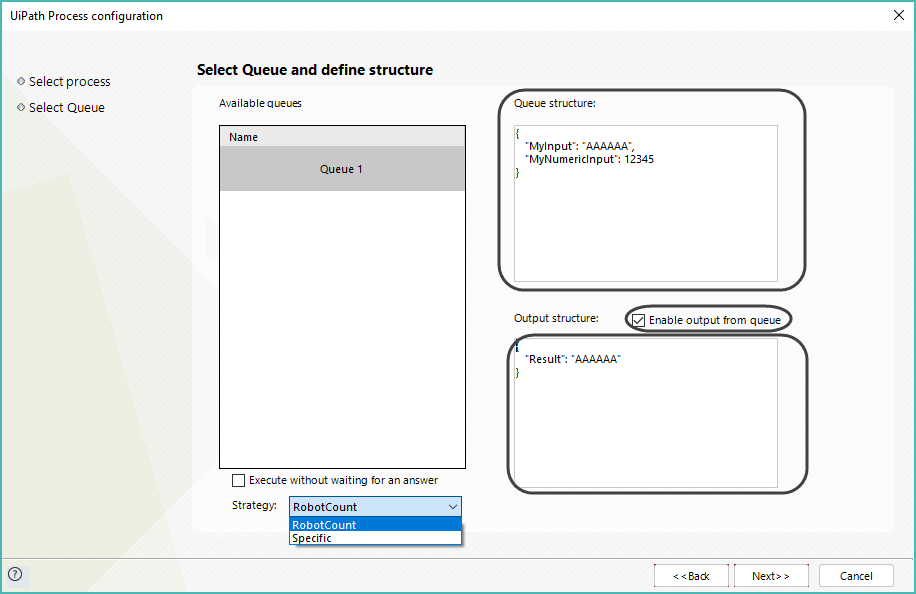
From your Orchestrator's Queues, select the one that you are going to use for this process. Then, configure the input and output parameters in the designated text fields for this. Provide the structure of the information you are going to read and write in JSON syntax (refer to Parameter Configuration for further details). In case you are not going to write results, leave the Enable output from queue option unticked.
Once you are done configuring your parameters' structure, click Next to go to the third and last step of the Wizard. In that screen you are presented with a summary of what you have configured. Review the information and return to previous steps if you need to make any changes. Once you are done, click Finish.
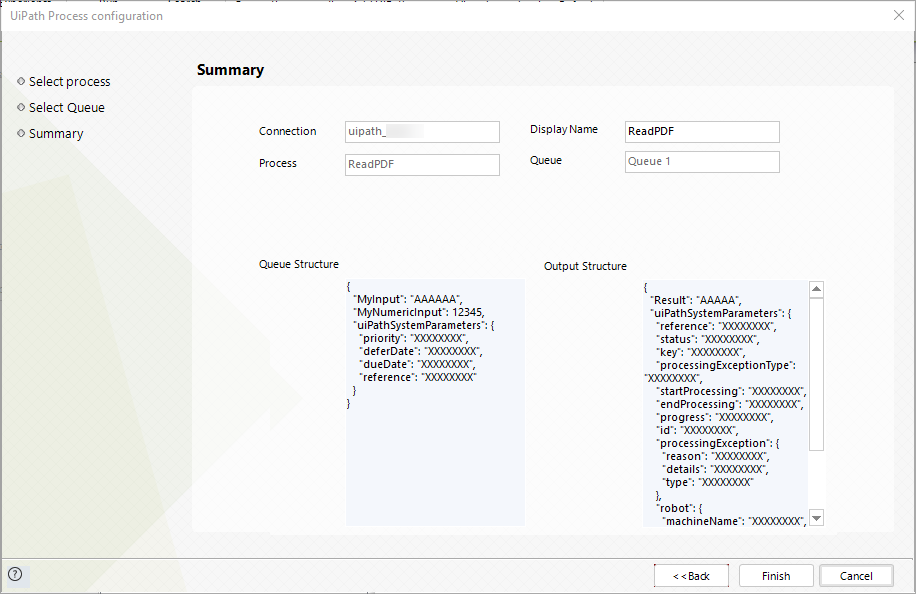
After your configured parameters, you will see a new set of parameters. These are the UiPath System parameters. You don't have to map them, but you can use them to configure your queue items or obtain information about the executed RPA process.
At this point, independently from which alternative of parameters you have used, you now count with a configured connection to your UiPath Orchestrator and a configured process to be used from Bizagi. Take into account that you can add as many processes as you need to a connection.
Last Updated 3/1/2023 2:23:38 PM