Overview
Once you have initially depicted the different contexts for your Personas, as described at Contexts, you will now be able to sort out the things that apply to a Persona while specifically found under a given context.
Defining searches that a Persona can perform directly in data, are among these things you classify per context.
We will continue using the Hospital as an example to explain Data searches.
These searches are known as Data searches and will display filtering information by a given criteria, and afterward potentially launching actions for the matching records.
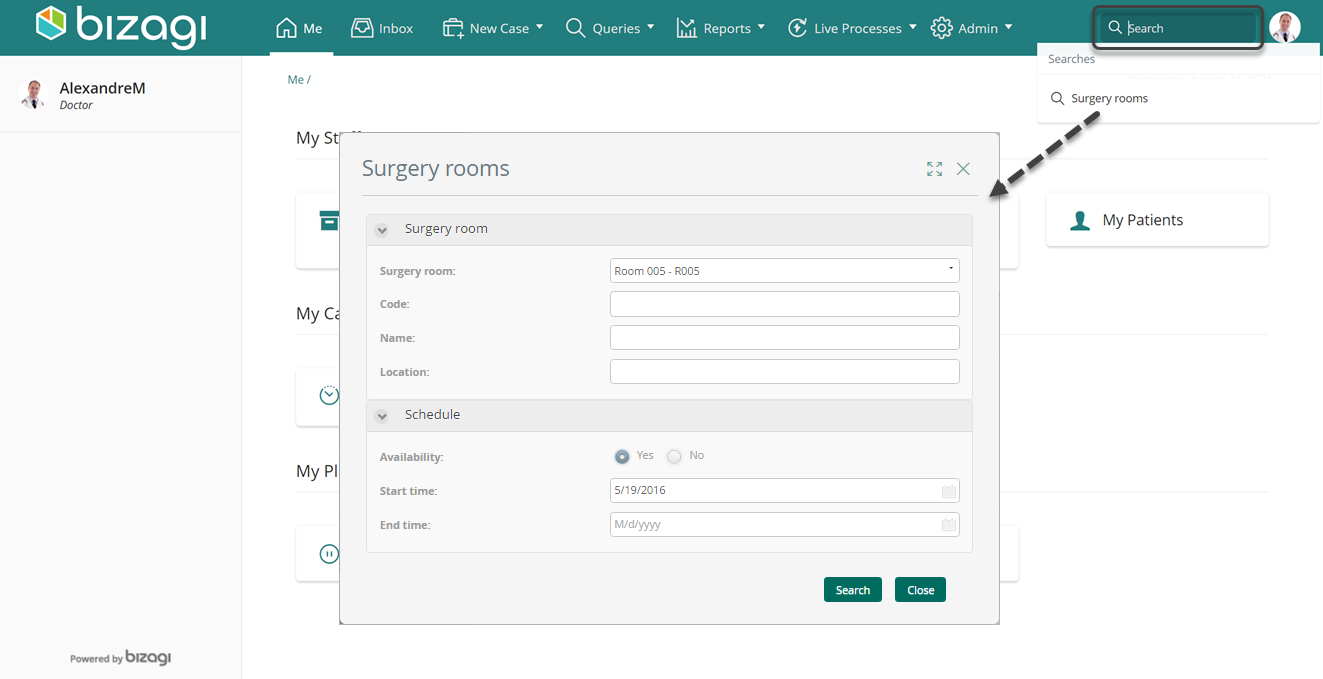
|
Searches also appear under the Queries node of an entity in the Entities option of the Expert view, even though searches are bound to a Persona and entity queries are not. |
Searches per context
Recall that data searches are also defined per context, and this means that different searching options (target entities, their filters or displayed information) can be presented to Personas depending on the context they are in.
Defining searches is done by defining a form with relevant fields that can be filtered or marked in runtime for the Persona to include such information in results.
Defining searches
To define applicable data searches for each context, hover on that context and use the ![]() icon to include a new one, while in the My searches tab.
icon to include a new one, while in the My searches tab.
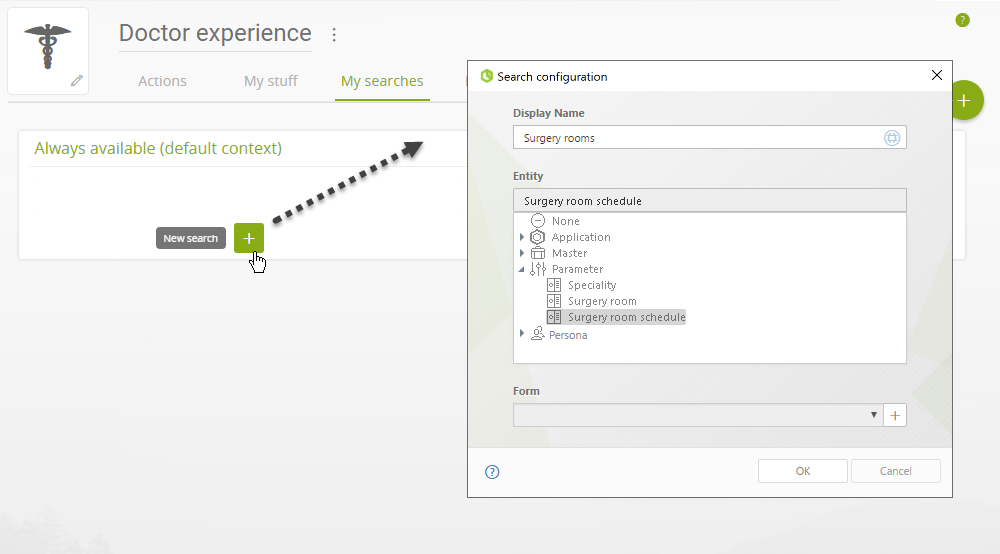
Give the data search a Display name and select the Entity on which this search will run.
Click on Add new form to define the search form in the Forms designer (alternatively, select one from the drop-down list whose context entity is the same entity selected):
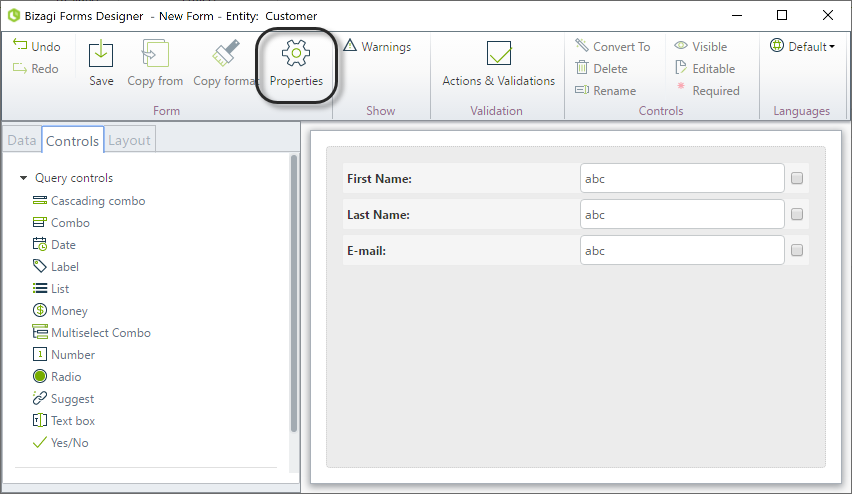
Notice you may use the controls presented at Query controls, and make sure you give this form a Display name in its properties.
When done, save the form and click OK.
|
The Multiselect Combo control is not available in the Work Portal for Experience data searches. |
Collection attributes in data searches
Whenever you have collections and second level collections (i.e., collections inside another collection) in your project's data model, you can use their attributes as criteria for data searches. To do this, add the desired attributes to the search form by dragging and dropping them from the Data tab of the Forms designer. In the following example, two collection attributes (Course Name and Summer School Course from the Courses collection) and one second level collection attribute (Last Name from the Professors second level collection) are added to a search form.
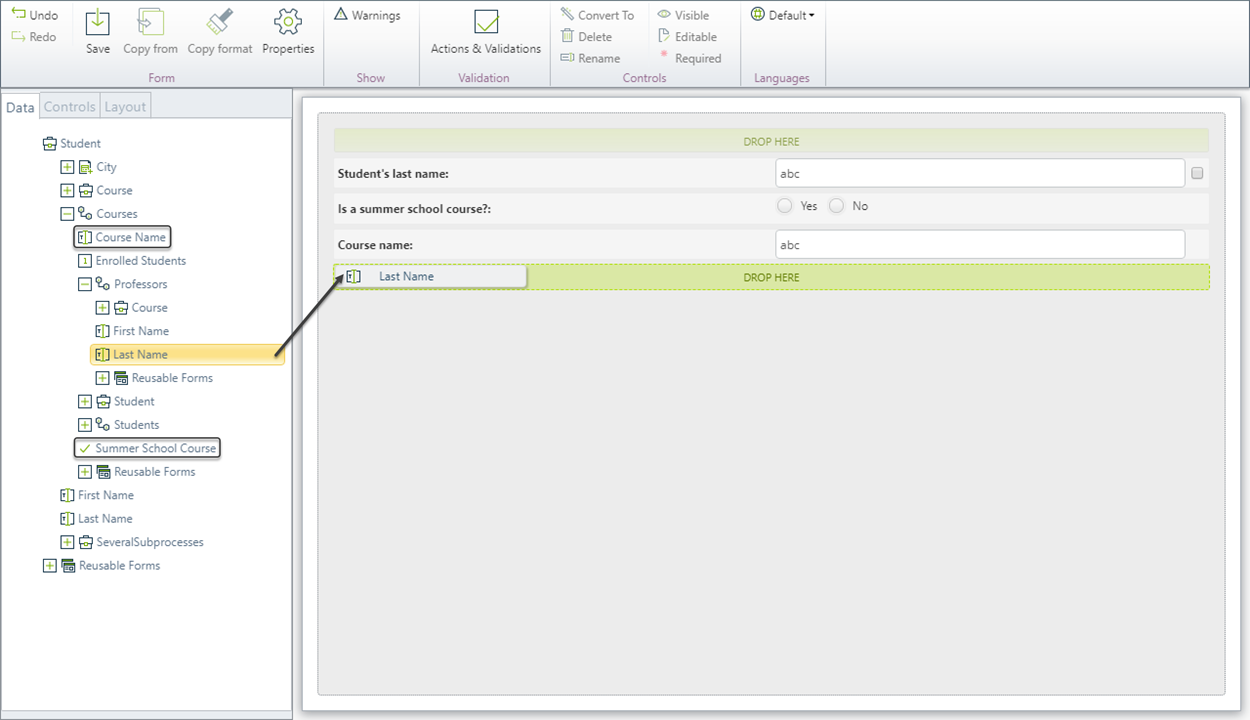
Make sure to give the search form a Display name in its properties, save it to keep the modifications made, and then click OK.
Once you have done this, go to the Work Portal and perform the data search using one of the added attributes as the only search criteria. In the following example, the second level collection attribute is used for this purpose.
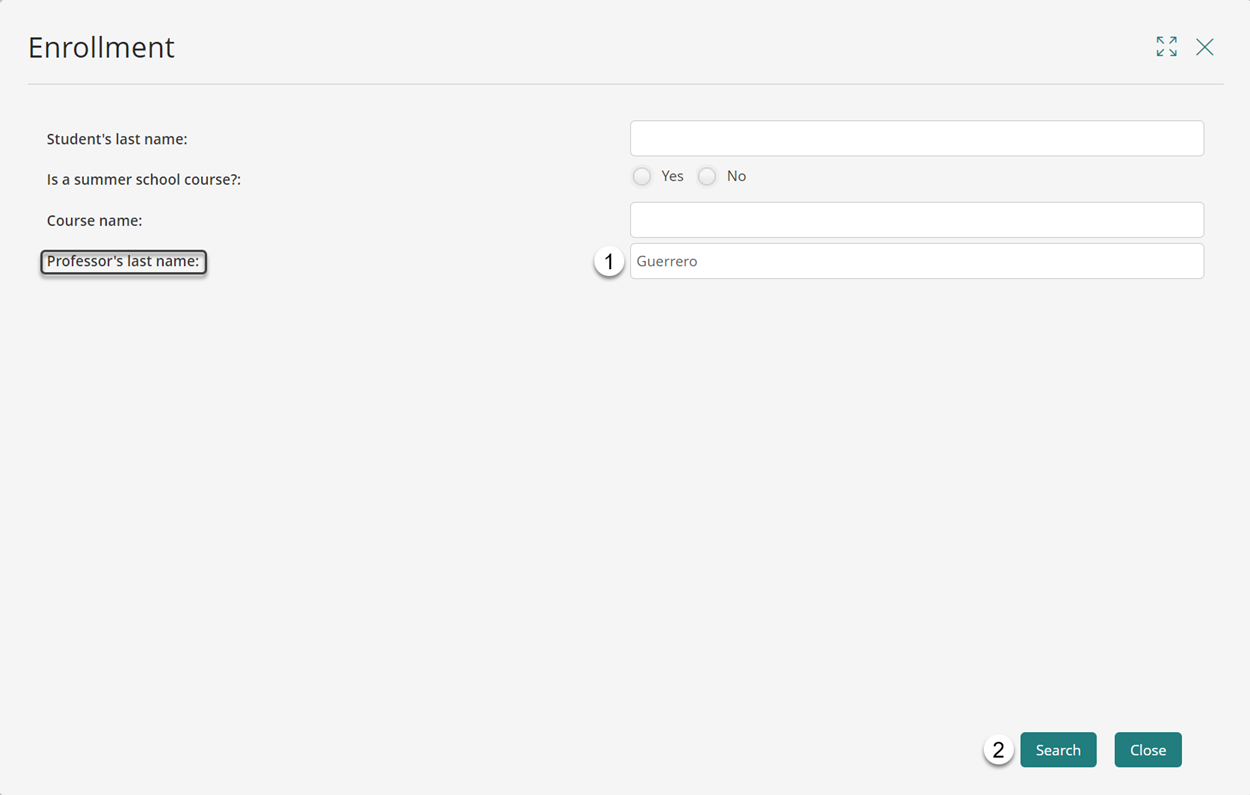
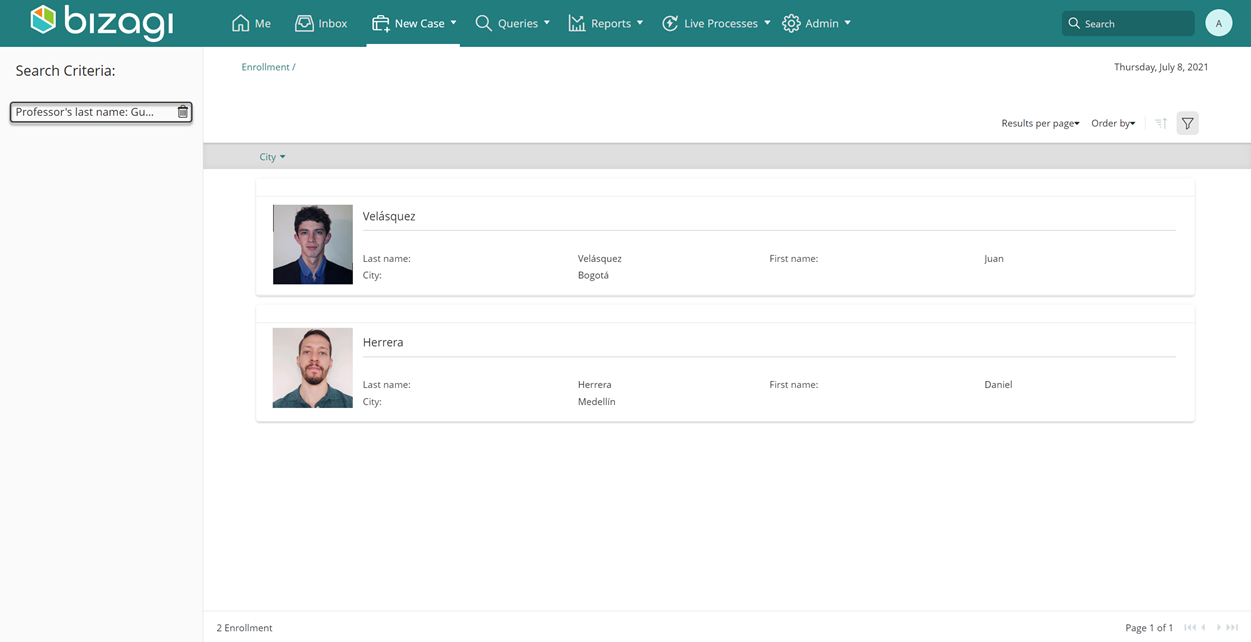
The data search shows as a result the registers associated (i.e., the students enrolled) with the second level collection attribute defined (i.e., the professor's last name).
You can also perform the data search using collection attributes and the results are going to be displayed accordingly.
Managing data searches
At any time you may move data searches from one context to another by dragging and dropping that definition:

You may also delete unused searches by clicking on the 3-dotted option and selecting Delete search:

Additional configuration
Consider the following aspects which you can configure when choosing not to use the default configuration for data search results.
Summary information of records
By default, Bizagi uses a basic template to display information of searched for records.
Such template uses random attributes of the entity that was searched.
You may choose to define your own data templates to display information, be it for list of records (referred to as List type templates), or when viewing one specific record (referred to as Content type template).
For more information on how to do this, refer to Data templates.
Using Data Searches
In this section of the article we will review the capabilities that are given to your end users in the Work Portal when Data Searches have been defined for their contexts. Let's take a Library as an example.
Smith is a Librarian and for such Persona a couple of searches have been defined. When he clicks on the search bar on the top right part of the Work Portal, all available Searches will be listed.
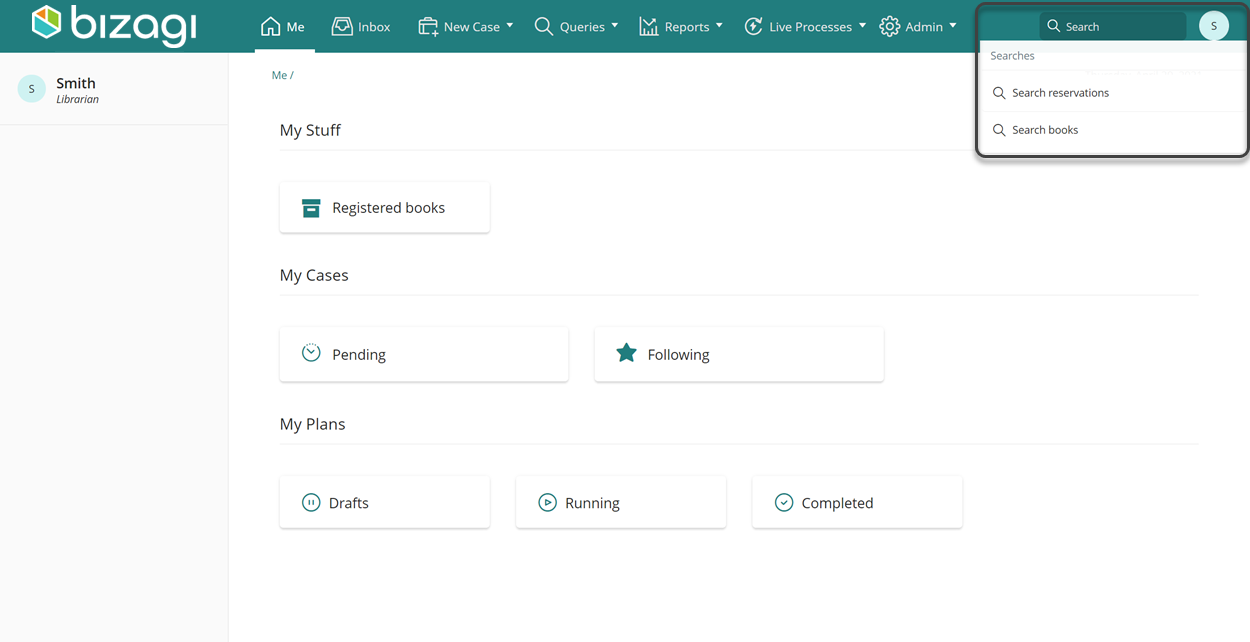
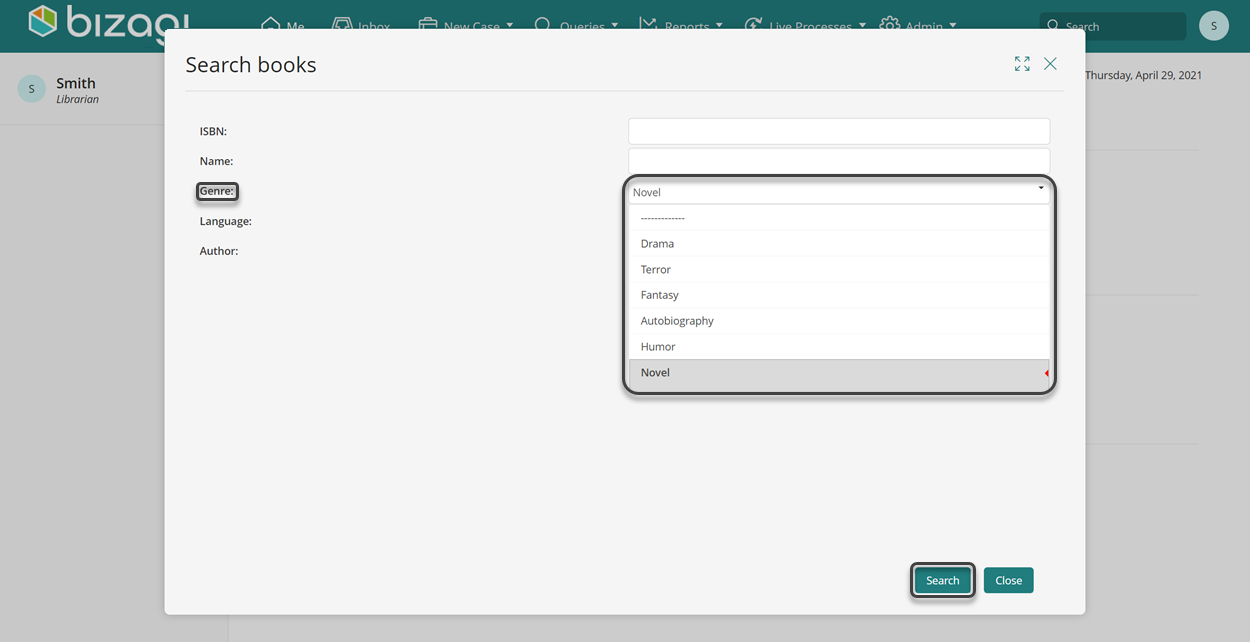
As it can be seen on the previous image, there are two Data Searches defined for Librarians like Smith: Search reservations and Search Books. These searches allow him to check the book reservations that have been made, with their corresponding details, and check all the registered books in the library. Let's dig deeper into the Search books Data Search. As soon as one of your users click a Search, the form that was previously configured in Studio will pop up, in this case it will prompt Smith for details about Books.
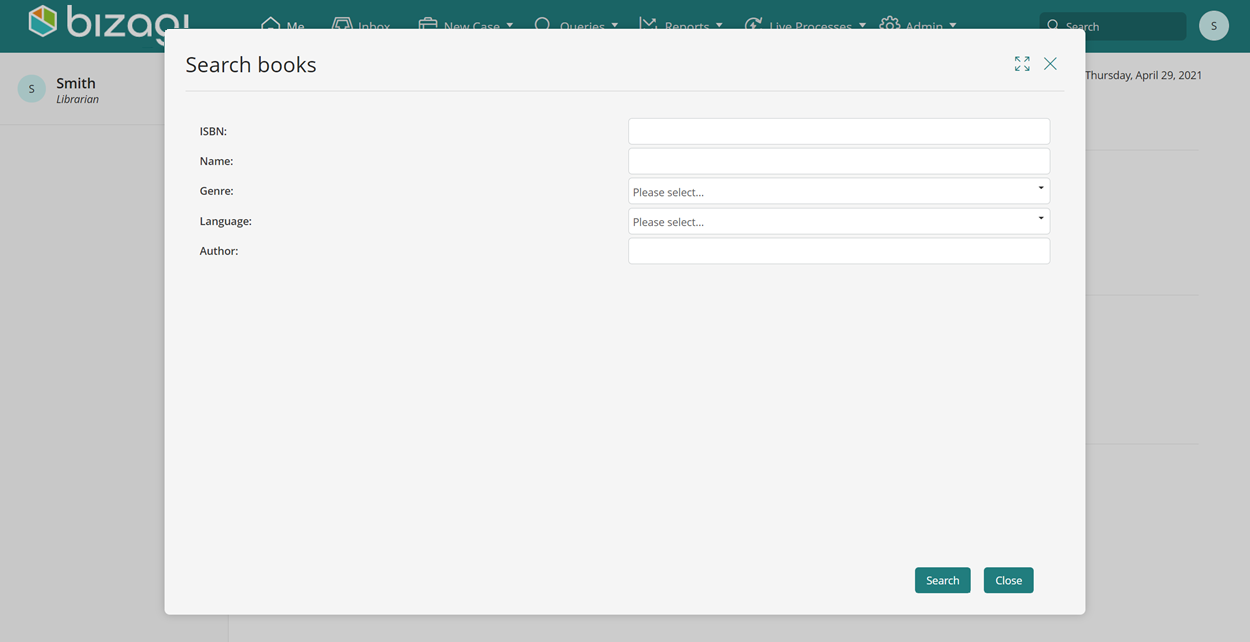
All information provided by Smith in this form is used to perform a Search query which will then be reflected in the retrieved records. Smith needs to review some details about the book Origin. For this purpose, he uses one of the filtering controls to narrow down the records. In the following images you can see how Smith searches for that specific book through the given results.
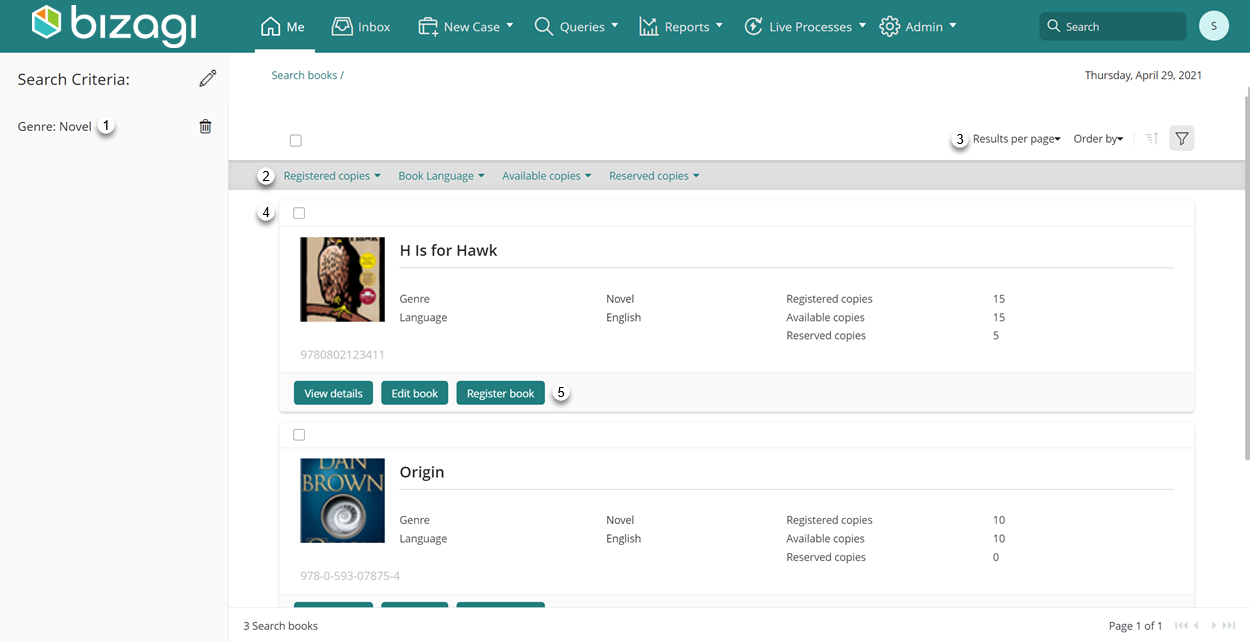
Some areas of the window shown in the previous image have been marked with a number, the intention is to highlight the important features that Searches comprehend. Please find the corresponding explanation of those features in the list below.
1. Search criteria
On the left panel of the screen, the search criteria are listed, each accompanied by a delete icon for individual removal. To remove a specific criterion, click the delete icon, and the page will refresh to display the updated list of results. To modify the entire search, click the pencil icon next to the Search Criteria title. A pop-up window will appear, allowing you to update the search fields.
2. Available filters
Just under the Work Portal's ribbon all the available filters are shown. These filters are automatically added by Bizagi based on the type of each attribute of the Entity subject to the Search. Attribute types like Integers, Booleans, Dates, Related entities and some others are considered. These filters are useful when initially you had a vague idea of the specific record's details you wanted to consult, in such case you can initially get a list of records and start digging deeper on it by relying on those filters. For example, as Smith wanted to specifically review the book "Origin" he can use the Language filter to rule out all books in Spanish.
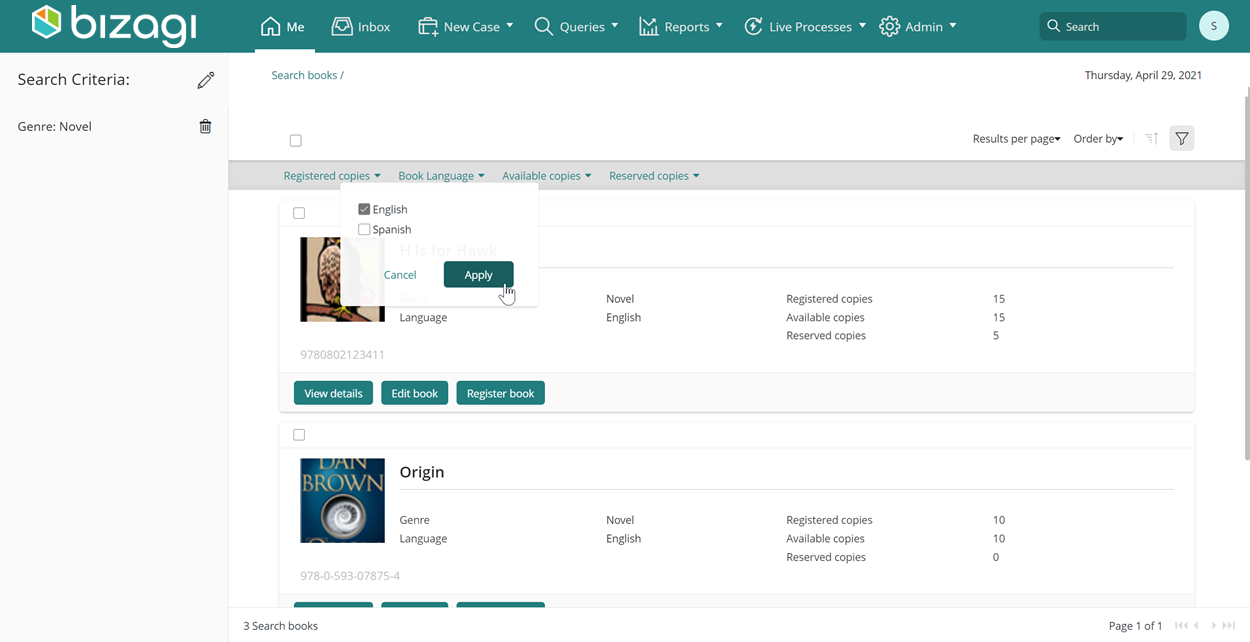
The result list updates and shows a clear icon and the used value next to the filter that was used and shows a red dot with a number over the filter icon, this allows to clear the filter that was just added, and informs you about how many additional filters have been chained.
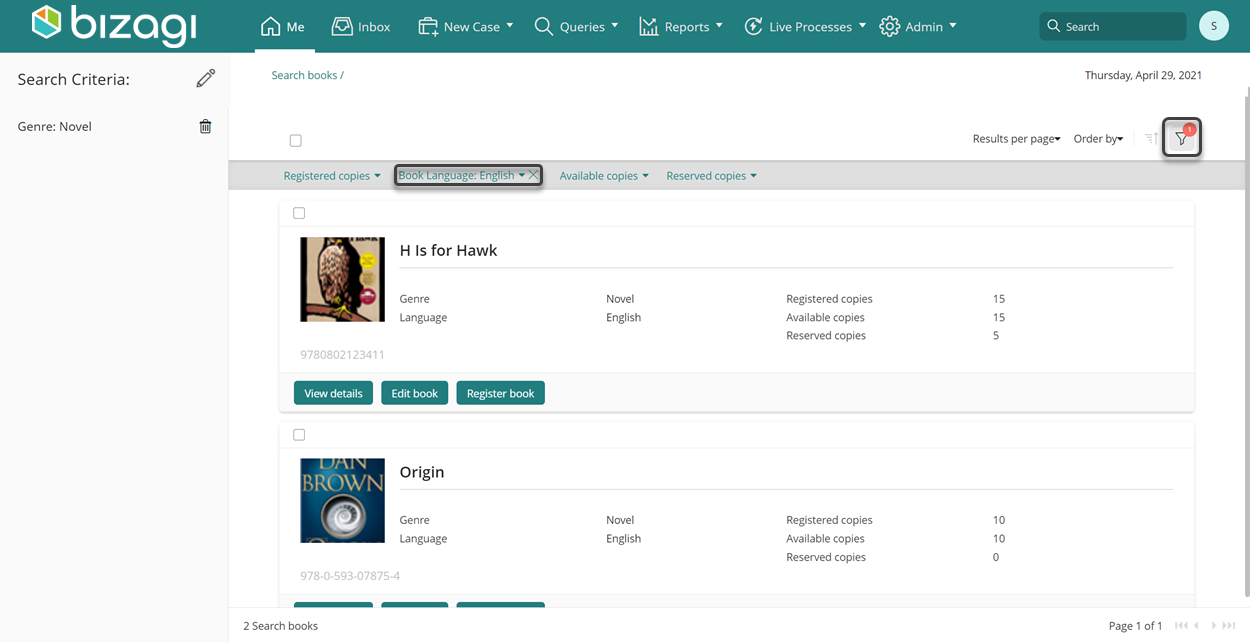
When you add an additional filter, the clear icon and the value is also shown on the other control, and the chaining indicator increases.
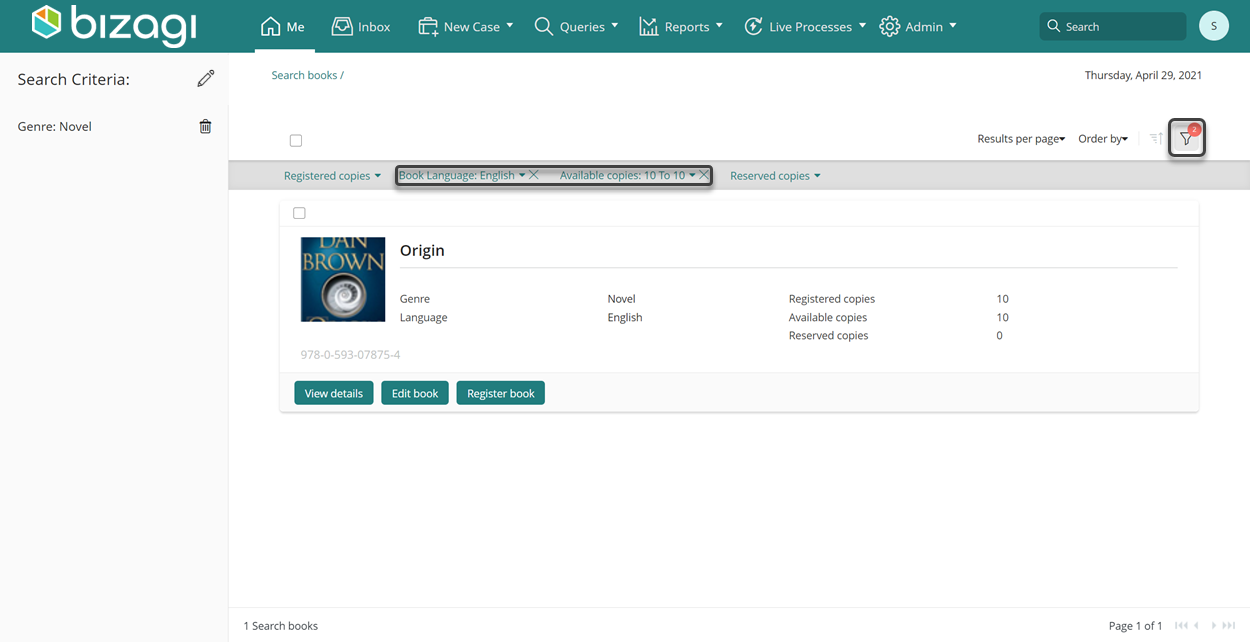
Please note that filters are applied as an AND operation. This means that the list of results shown contains all the records that match all filtering criteria. In the previous example the results shown are those books which its Genre is a Novel, its Language is English and it has exactly 10 available copies.
3. Customization of results
The options shown just above the filters allow you to customize the way results are shown. There are 4 options that you can leverage on:
•Results per page: allows you to choose the number of results shown per page. This is especially useful when the result set is vast and you want to tackle it by a specific amount of records at a time.
•Sorting criteria: the second option allows you to choose by which attribute of the entity the results are to be sorted.
•Sorting direction: the third option is a switch to toggle between ascending and descending order.
•Show / Hide filtering options: the fourth option is a toggle between showing and hiding the filtering options. Please note that hiding the filtering options do not alter the filtering criteria that were already configured, it just visibly hides the filtering bar.
4. Search results
In the main panel all the records that meet the filtering criteria are shown. Please recall that if no template is defined to show the results of a Data Search, a set of default attributes will be included. Please note that the set of results are paginated to simplify the navigation of results. The pagination options are available at the bottom of the screen and they allow to move to next or previous pages, move to the first or last page, and displays the current page number and the total number of results.
5. Actions
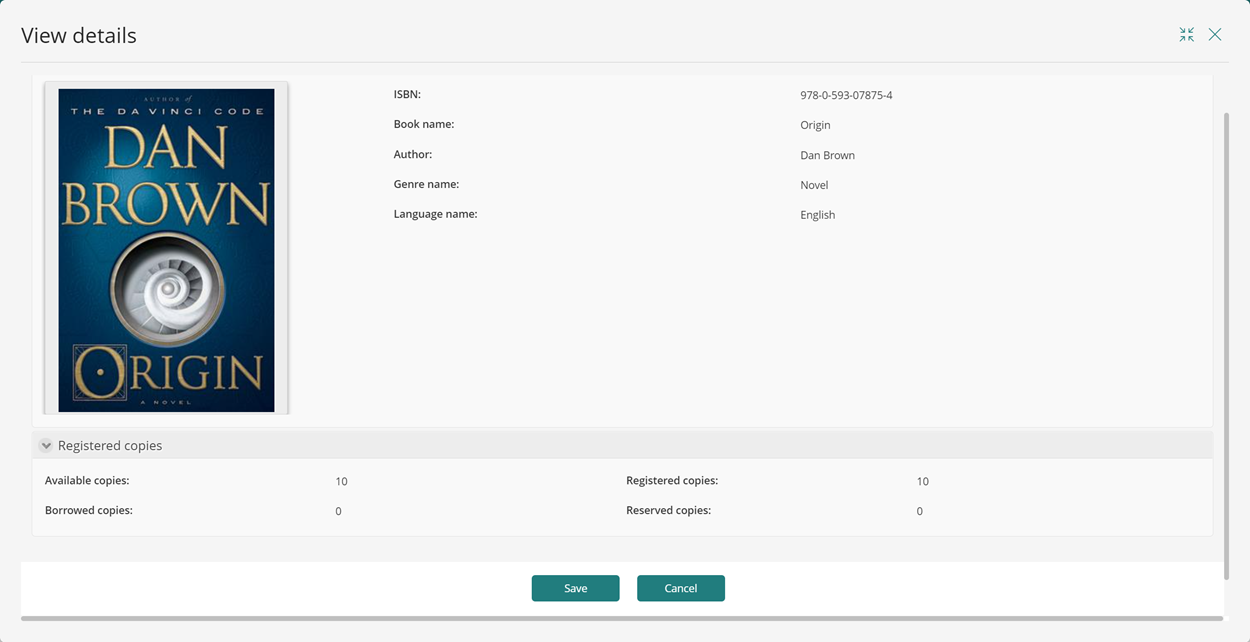
If there are Actions defined for a Persona to perform over the specific Entity that is being searched, they are displayed as teal buttons under each result's card and can be directly triggered from the search results. For example, lets trigger the View details action for the "Origin" book.
Last Updated 9/8/2025 11:21:04 AM