Overview
As part of Bizagi Modeler you can publish your completed documentation and share it with your organization in the SharePoint format. You can either publish to SharePoint Online or On-premises.
Customize the output information for inclusion in your document by selecting the diagrams and the elements to be included.
Bizagi provides an intuitive wizard to help you through the steps to generate your documentation.
Considerations
•SharePoint On-premises: Before publishing, make sure you have SharePoint installed.
•Make sure that the person publishing to SharePoint has Full Control access.
•SharePoint Online: Before publishing make sure to set the SharePoint online configuration.
SharePoint Online configuration
Make sure to set the Sharepoint Online configuration before publishing. To do this, follow the steps described in the Configure WebPart article.
How to Publish to SharePoint
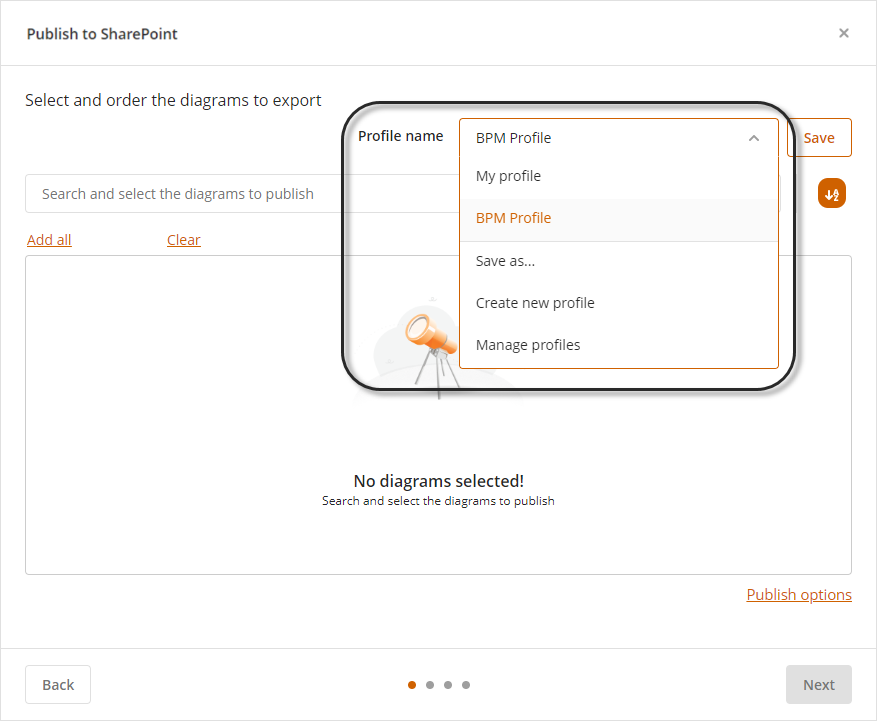
1. Go to Modeler's Publish tab and select SharePoint within the Process documentation group.

2. If your model is stored in the cloud, use the Profile name drop-down menu to select the profile used to publish the models.
Note: The Profile name drop-down menu is disabled for models that are locally stored.
|
By default, the profile My profile is selected to publish your models, if you want a new model, click the create new profile option. This profile is private for the current user. Each user has a private profile |
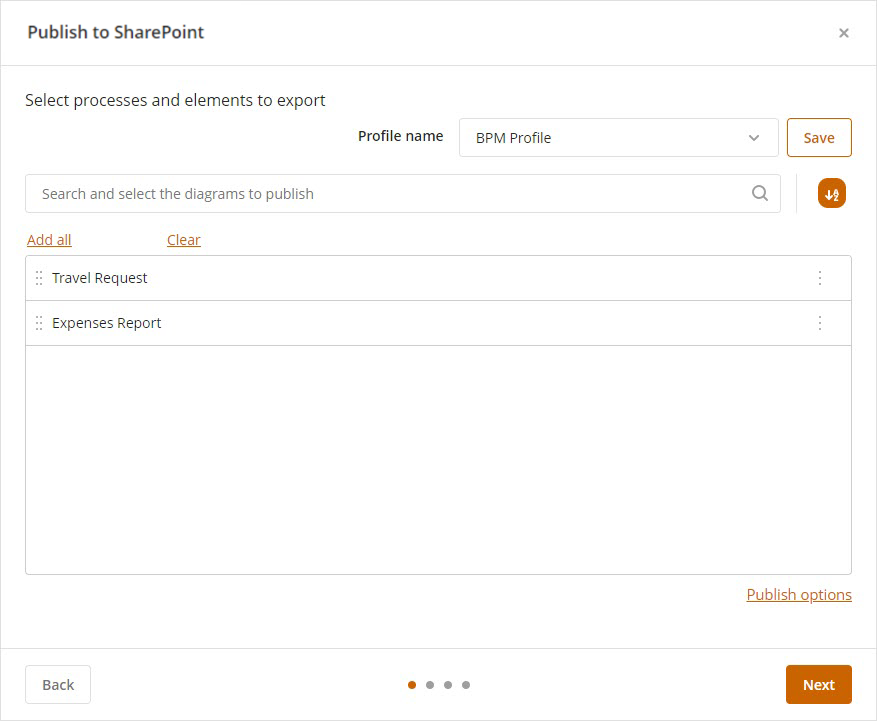
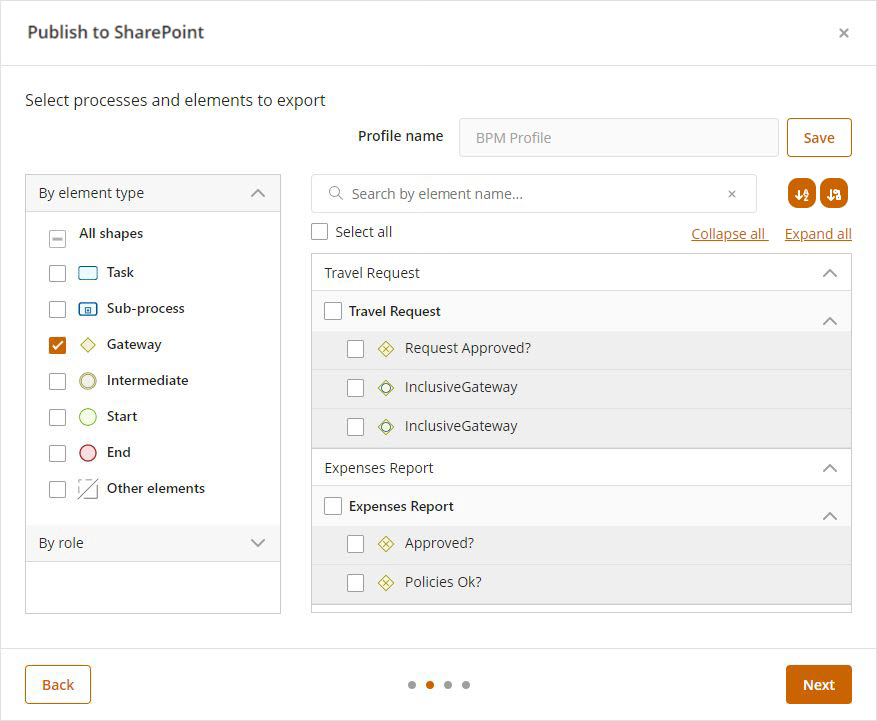
3. Each diagram and its elements appear in the collapsible panel on the right. For each diagram, select the elements you want to include in the documentation to publish.
You can also use the Select All checkbox to mark all elements across all diagrams for publication. If you check this box, all individual diagram configurations will be overridden, and every diagram and its elements will be marked for publishing.
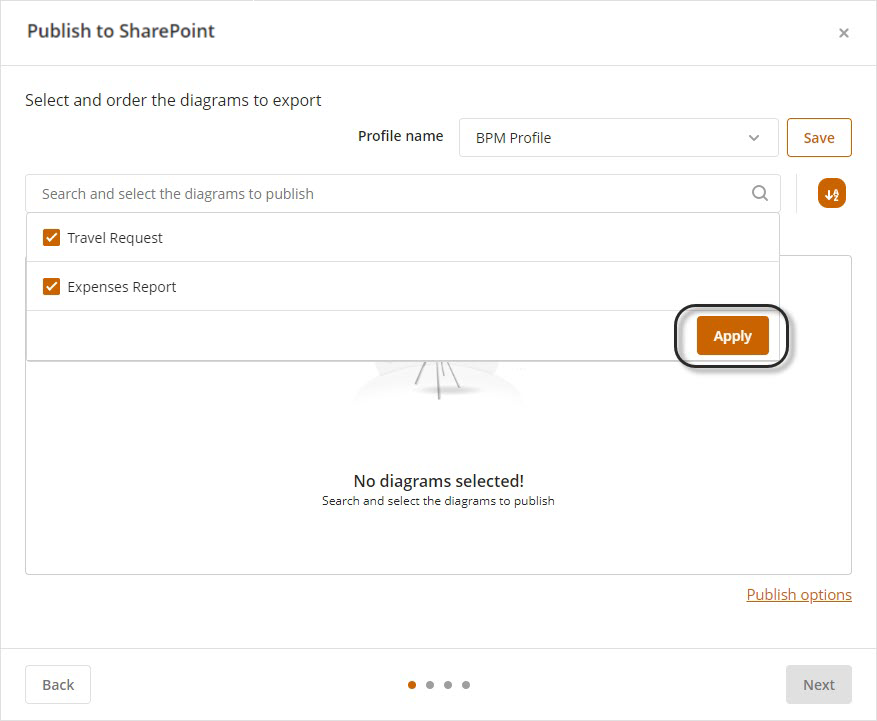
4. Arrange the order in which your diagrams will be published using the drag-and-drop feature to the left-most side. Alternatively, you can sort them alphabetically by clicking the Sort ![]() button.
button.
Once you are done organizing the diagrams, click Next to continue.
In this step, you can override the default publishing settings by clicking the Publish options link. The available options are:
•Exclude artifacts: When enabled, the application does not include artifacts on the publishing.
•Black and white: When enabled, the publish exports the diagrams in black and white colors.
•Exclude unused resources: When enabled, the application does not include resources which have not been included on any task's basic element properties' RACI Responsibility Roles. It means, the publishing includes only the resources which were used at least in one task.
5. Each diagram and its elements appear in the collapsible panel on the right. For each diagram, select the elements you want to include in the documentation. To publish all elements across all diagrams, use the Select All checkbox, selecting this option will mark every diagram and its elements for publishing, and any individual diagram configuration will be overwritten.
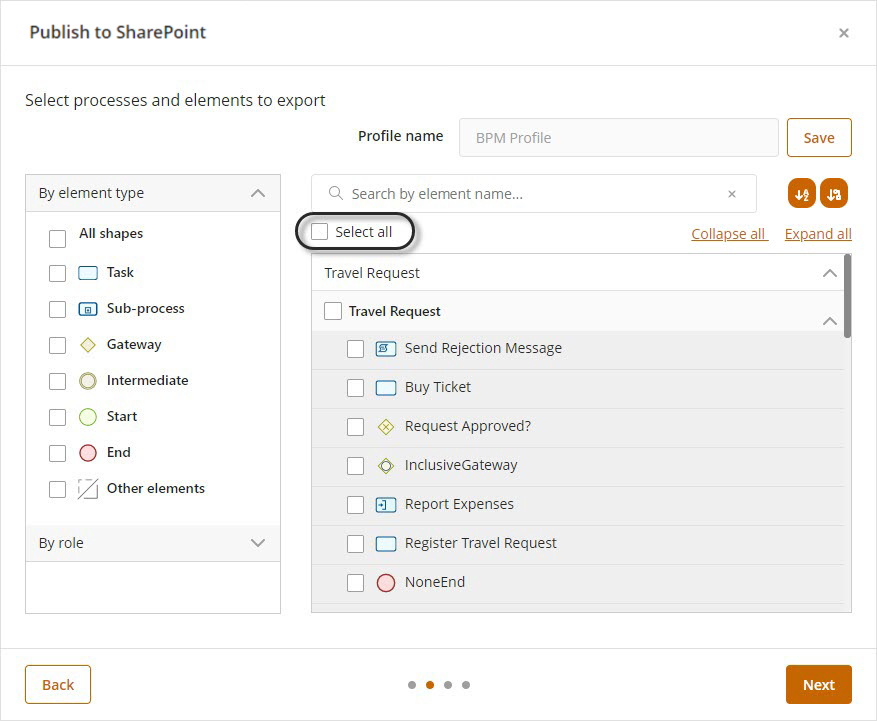
Use the left panel to filter diagram elements by type or role. When you select one or more element types, only matching elements will be shown in the right panel.
Note: Filtering does not remove previously selected elements. Even if filtered elements are hidden, they remain selected and will still be included in the documentation.
To filter by roles, expand the by role element and select the roles you want to use in the filter. Then, click Apply.
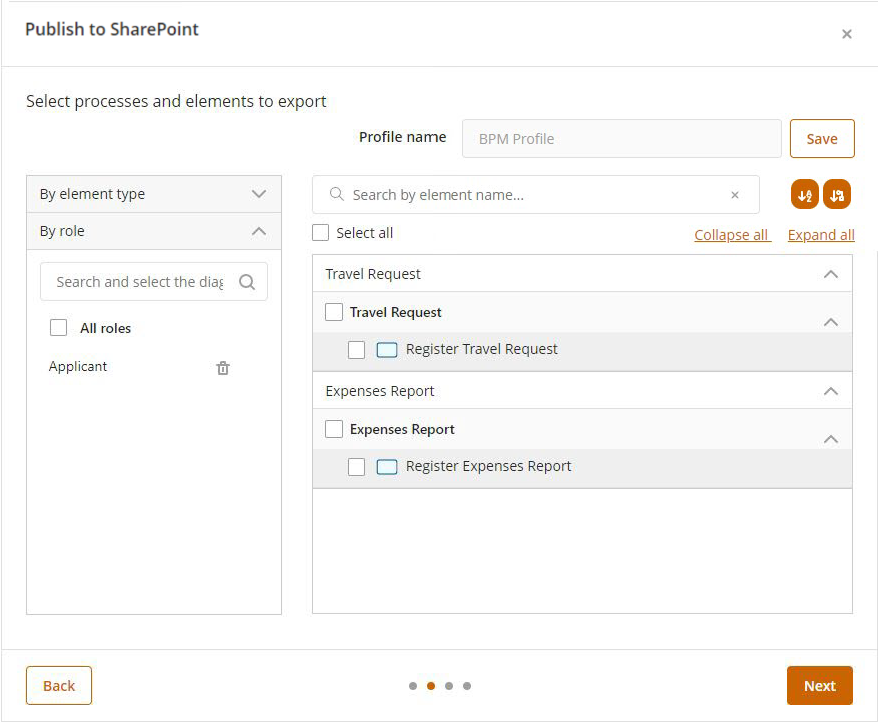
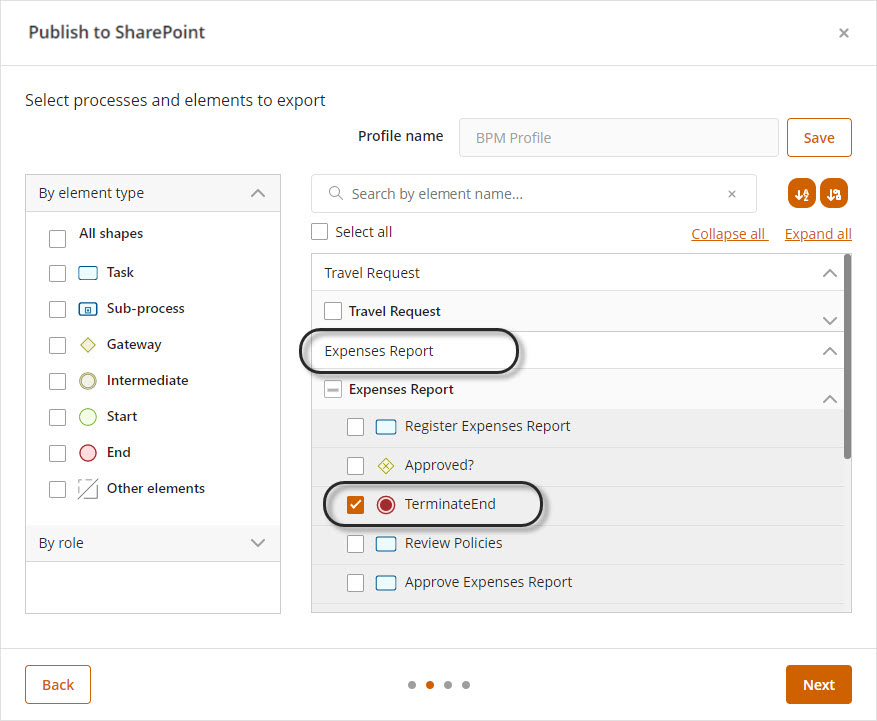
You can individually select elements from each diagram marking their checkbox.
You can use the Sort ![]() button to automatically organize the elements.
button to automatically organize the elements.
By default, elements are ordered based on their position in the diagram. If they appear after a gateway, they are sorted by their creation date (i.e., when they were added to the diagram).
Alternatively, you can click the Sort ![]() button again to sort the elements alphabetically.
button again to sort the elements alphabetically.
Once you have selected the elements you want to publish, click Next to continue.
6. The selected elements appear in this step. For each diagram, select the order in which you wish the elements to be exported. Each diagram selected appears as a collapsible panel.
By default, elements are organized according to the sequence of the process flow. You can use the drag and drop features to the left of each element to set the desired order.
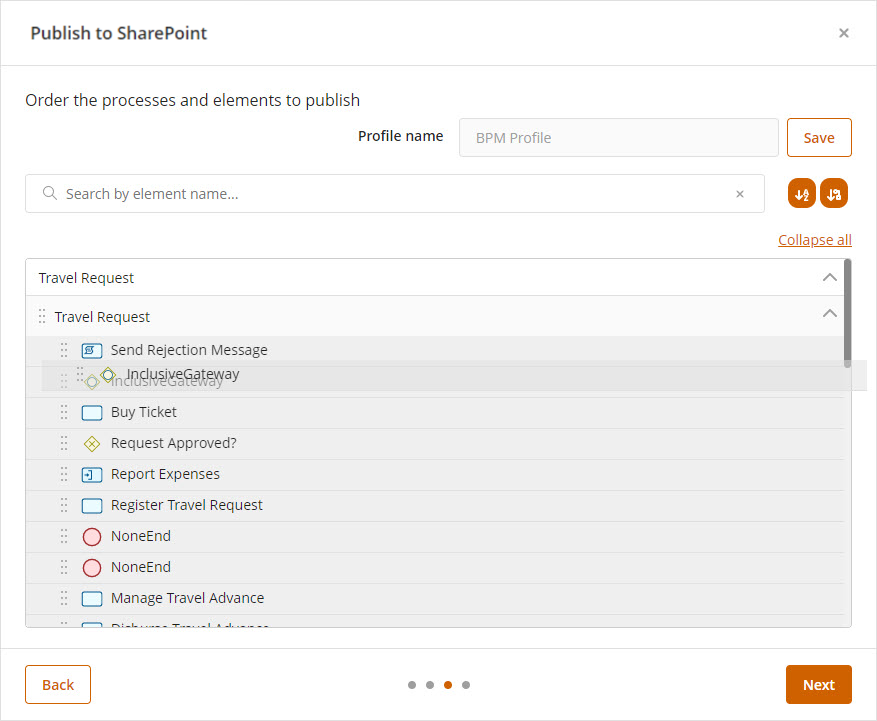
Click the Sort ![]() button to order the elements automatically or click the Sort (alphabetically)
button to order the elements automatically or click the Sort (alphabetically) ![]() button to order the elements alphabetically.
button to order the elements alphabetically.
When you are satisfied with the order of the elements for each diagram, click the Next button.
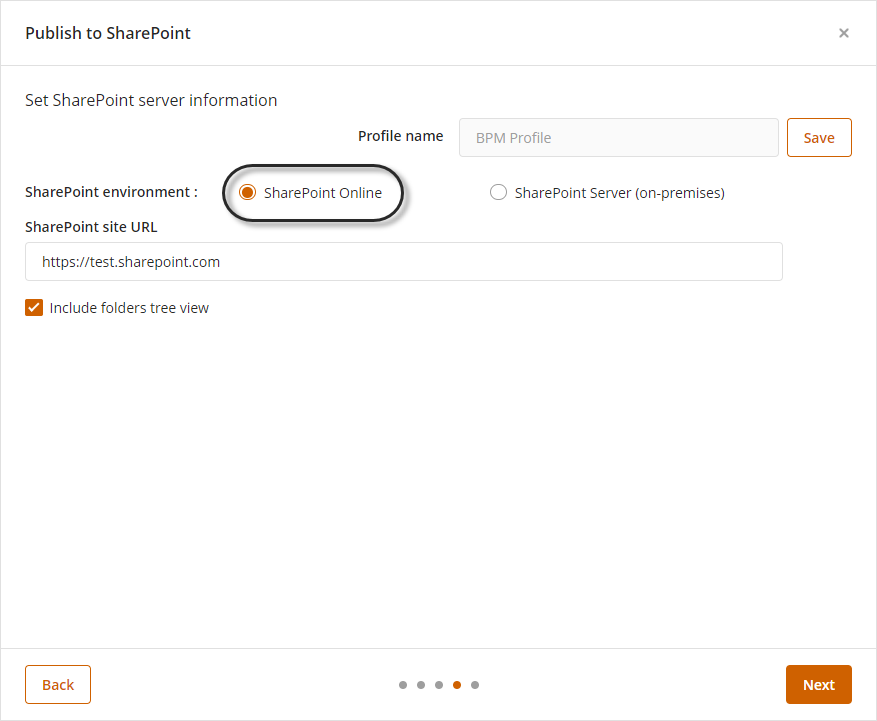
7. Select the SharePoint environment you wish to publish in: SharePoint Online (step 7.1) or Sharepoint Server (on-premises) (step 7.2).
7.1 If you select SharePoint Online, provide the SharePoint site URL, and click Next.
For more details on setting up the site, refer to the Configure WebPart article.
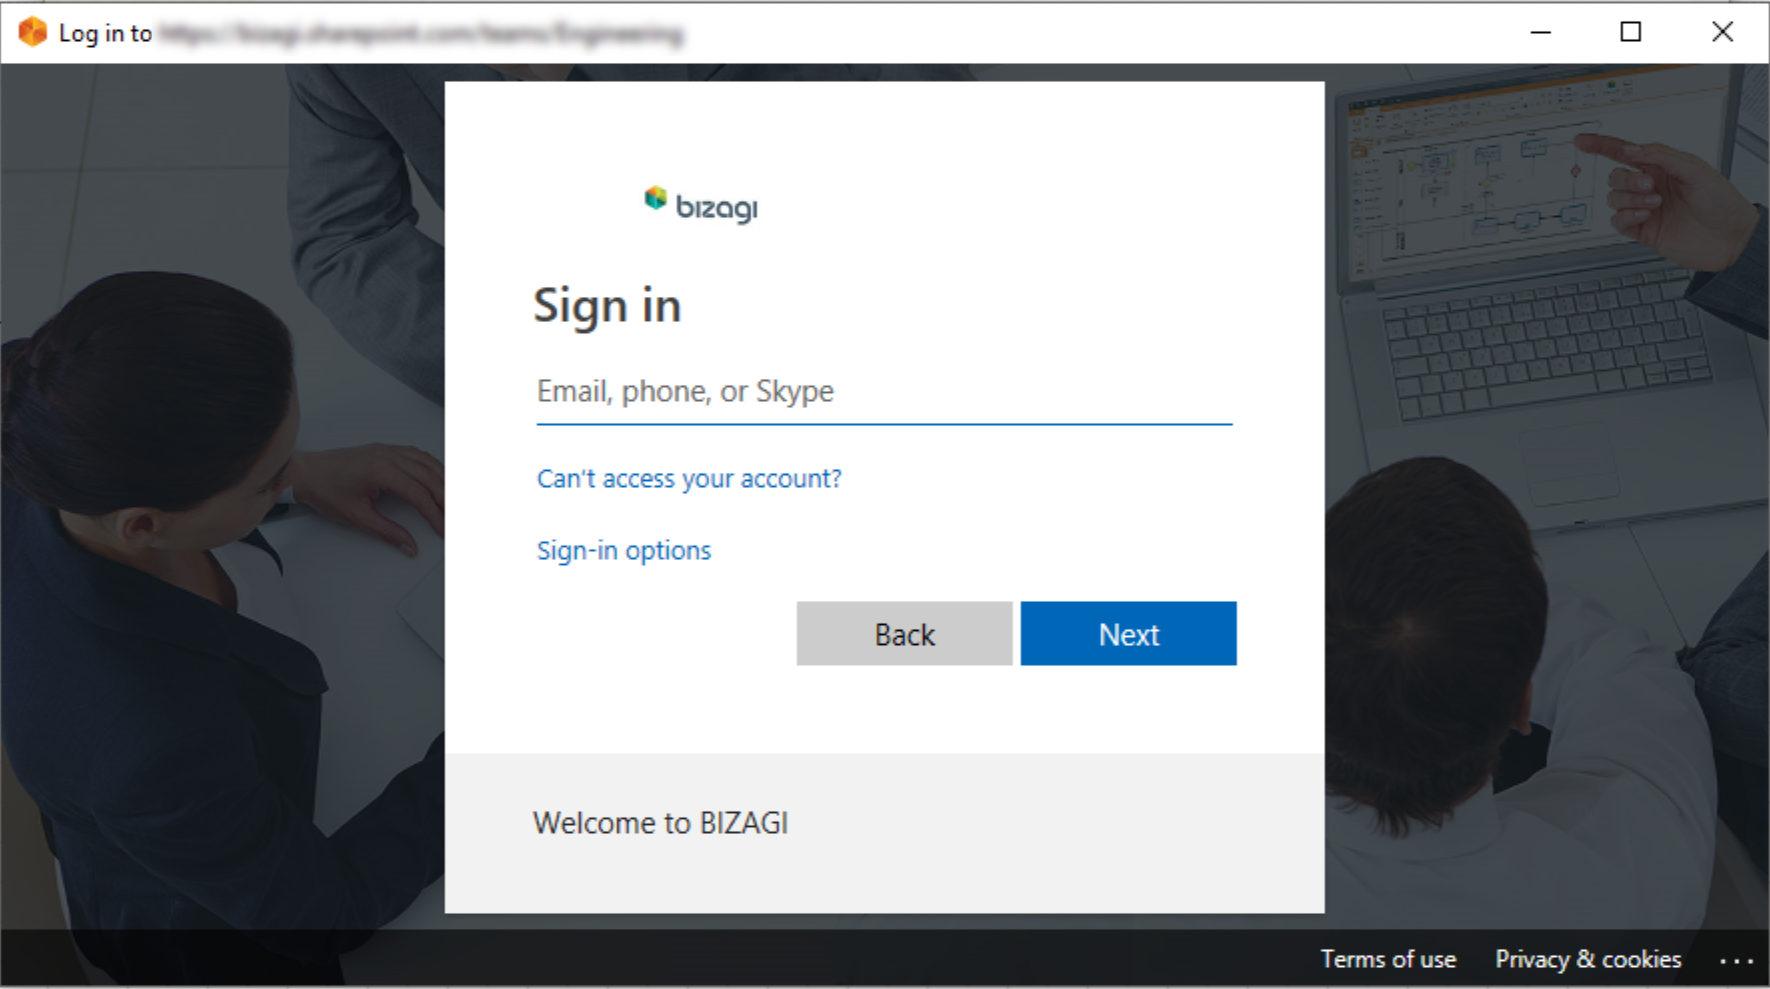
If you are not logged in, the application takes you to the SharePoint log in portal.
Provide your credentials and click Next.
7.2 If you select SharePoint Server (on-premises):
The SharePoint site must already be created. You need to provide the location and user credentials to access it. Then, click the Next button.

|
Note: Regardless of the SharePoint environment you use, select Include folders tree view option to include the folder structure of the selected models. |
8. Specify the appropriate folder in which to publish your process. This folder must have Read and Write permissions. Then, click the Finish button.

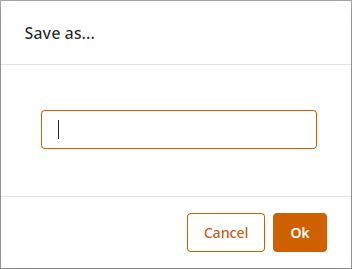
Hover the mouse over any of the folders displayed and select the add folder icon: ![]() to create a new folder inside the selected folder. Provide the folder name in the following dialog:
to create a new folder inside the selected folder. Provide the folder name in the following dialog:
|
If you use the Profile features and you have not saved the changes in the profile, the wizard prompts you to save the changes before publishing. Saving is not mandatory.
|

Once the process has been published on SharePoint, you will be able to view your diagram documentation.
SharePoint Output
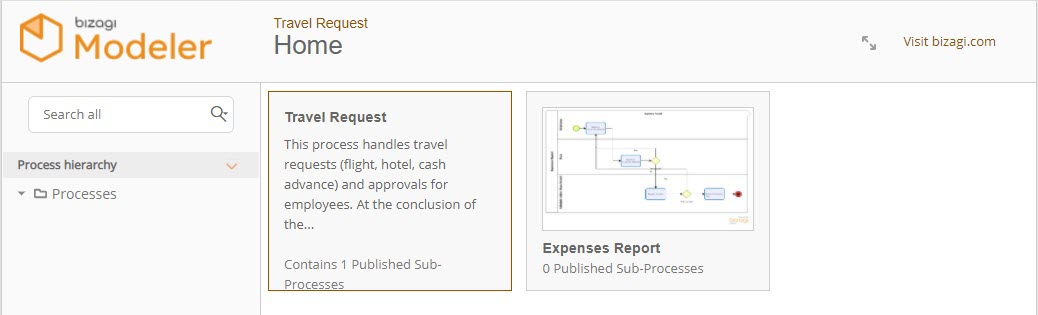
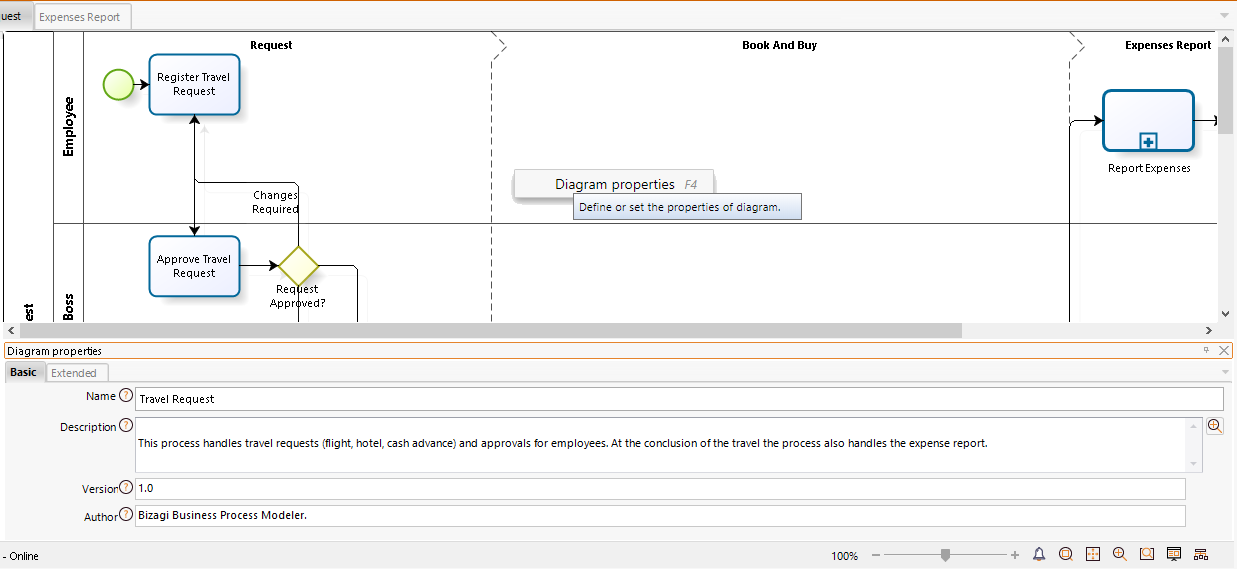
The legend displayed when the mouse is hovered over each process is defined in the Diagram properties section.
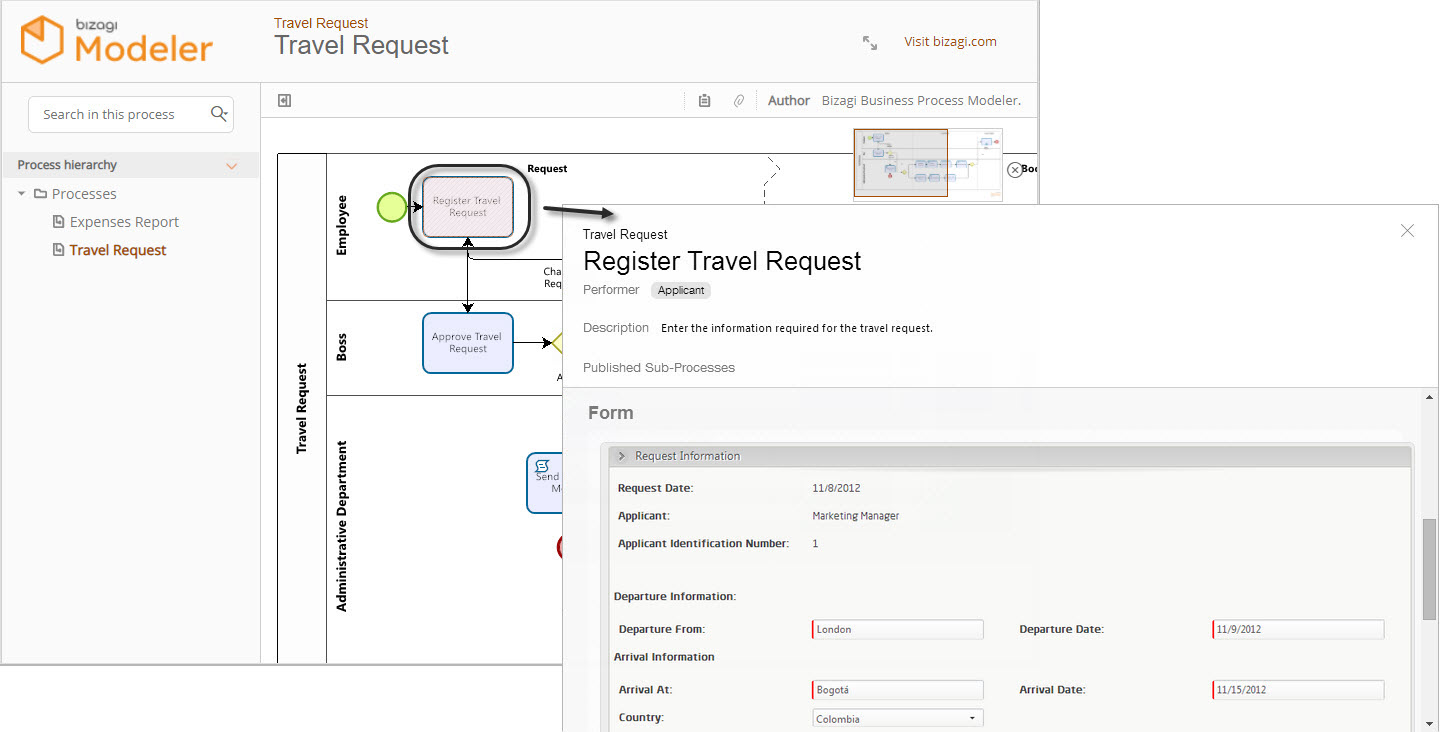
All other documentation included will be displayed when clicking over each element.
Click your process to see the detailed information.
You will be able to see the documentation of any diagram element by clicking it.
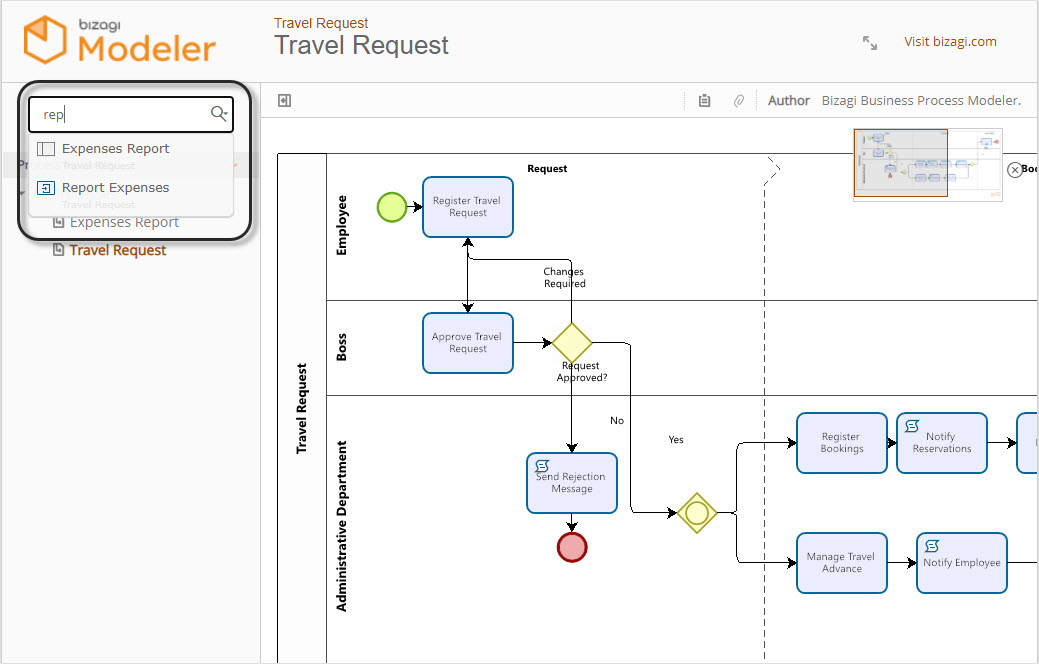
To perform quick searches on the Process Elements, use the search field.
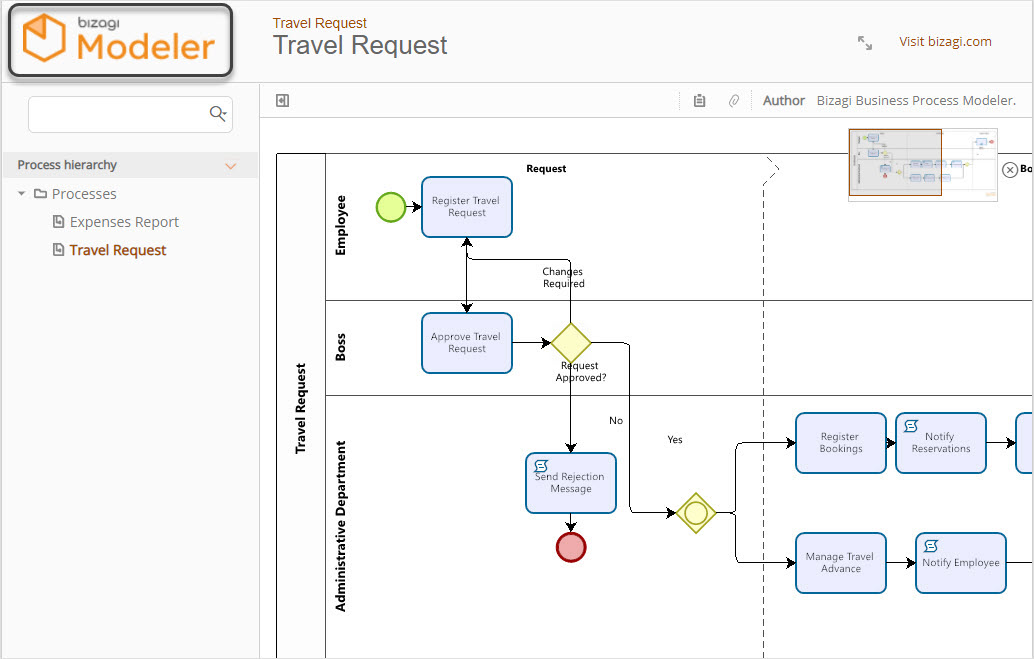
To go back to the general view, click the Bizagi Modeler Logo.
Last Updated 11/19/2025 12:12:14 AM