Overview
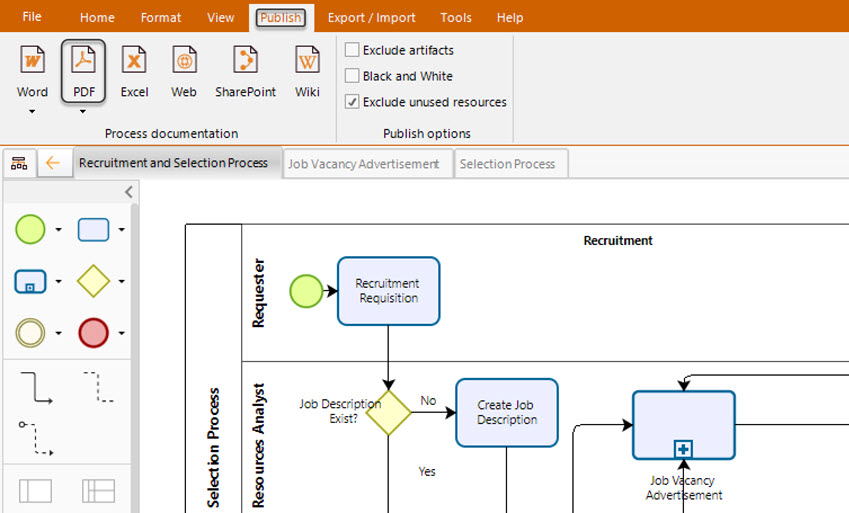
You can publish your completed documentation and share it with your organization in PDF format.
Customize the output information for inclusion in your document by selecting the diagrams and the elements to be included.
Bizagi provides an intuitive wizard to help you through the steps to generate your documentation.
1. In the Publish tab, in the Process documentation group, click PDF.

2. If your model is stored in the cloud use the Profile name combo to select the profile used to publish the models. For models stored locally, this combo is disabled.

|
By default, the profile My profile is selected to publish your models, if you want a new model, click create new profile option. This profile is private for the current user. Each user has a private profile |
3. Select the diagrams that you wish to publish. Click the Search and select diagrams to publish field. Type the diagram name to filter the available diagrams, while you type, the wizard show you the diagrams which fits with the input name.
You can select one or more diagrams by checking the check box next to the name, if you use the filtering options, the selected diagrams remain.
When all the diagrams you wish to publish are selected, click the Apply button.

4. Choose the order in which you wish to publish your diagrams by using drag and drop features. Alternatively, you can sort them alphabetically by using the ![]() button.
button.
Once finished, click the Next button.

In this step, you can override the publishing options for the current publish by click the Publish options link. The options are:
•Exclude artifacts: When enabled, the application does not include artifacts on the publishing.
•Black and white: When enabled, the publish exports the diagrams in black and white colors.
•Exclude unused resources: When enabled, the application does not include resources which have not been included on any task's basic element properties' RACI Responsibility Roles. It means, the publishing includes only the resources which were used at least in one task.
5. Each diagram and their elements appear in the collapsible panel on the right. Select per each diagram the elements that you wish to publish in the documentation.
You can select all elements across all diagrams using the select all checkbox. By checking this checkbox ALL your diagrams and their elements will be marked as elements to publish. Any individual diagram configuration will be lost.

Using the left panel, you can filter the elements of the diagrams either by element type or role.
When you select one or more element types, the elements that match this type are displayed in the right panel. When you filter the elements, all the selected elements in the right panel remains even they are not displayed.

To filter by roles, expand the by role element and select the roles you want to use in the filter, Then click Apply.

You can individually select elements from each diagram marking their checkbox.

You can also click the ![]() button to order the elements automatically. The position of the elements is defined by the order in which they appear. When they are presented after a gateway, they are sorted by their creation (when they were added to the diagram).
button to order the elements automatically. The position of the elements is defined by the order in which they appear. When they are presented after a gateway, they are sorted by their creation (when they were added to the diagram).
You can also click the ![]() button to order the elements alphabetically.
button to order the elements alphabetically.
Click Next, when you have included the elements in your publish.
6. The selected elements appears in this step. For each diagram select the order in which you wish the elements to be exported. Each diagram selected appears a s a collapsible panel.
By default elements are organized according to the sequence of the process flow. You can use the drag and drop features to set the order as you desire.

Click the ![]() button to order the elements automatically or click the
button to order the elements automatically or click the ![]() button to order the elements alphabetically.
button to order the elements alphabetically.
When you are satisfied with the order of the elements for each diagram, click the Next button.
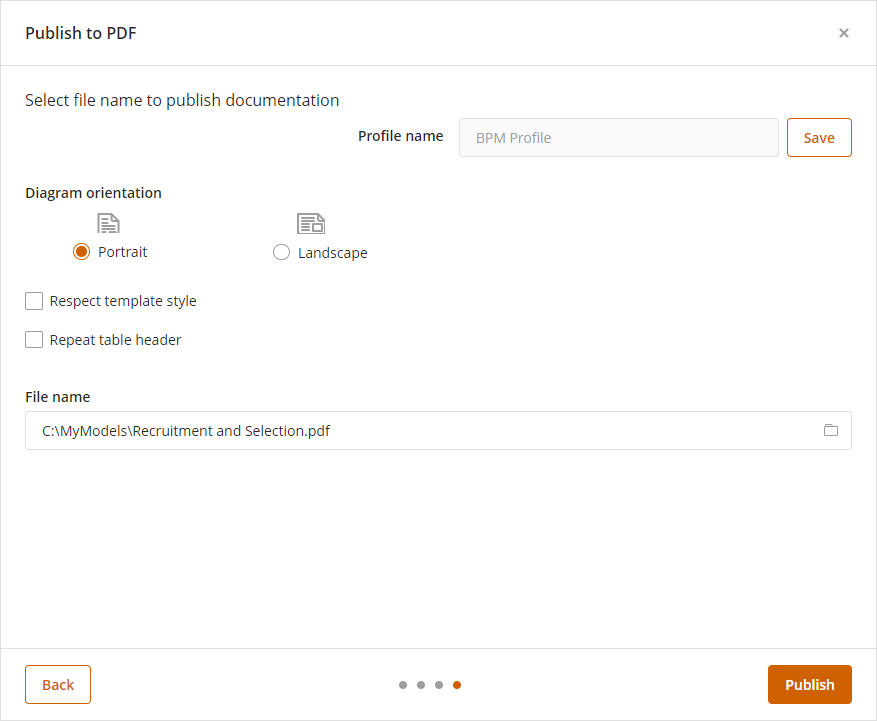
7. By default, the Diagram's model will be published in a Landscape orientation (only this page). You can change this setting in this step as well.
You can also use the following publishing options:
•Respect template style: mark this option to override the styles used when you configure the diagram or shape properties using advanced text, so the publish uses only the specified template.
•Repeat template header: this options replicates the table header in each page when the table uses several pages.
Specify the appropriate folder in which you want to publish your process. This folder should have Read and Write permissions.
Click the Publish button to generate your documentation.

|
If you use the Profile features and you have not saved the changes in the profile, The wizard prompts you to save the changes before publish. Saving is not mandatory.
|
8. The PDF document will be opened as soon as the documentation is generated.
|
You may customize your PDF output's styles (i.e, font color and sizes, include watermarks, etc). To do so, edit the ModelerTemplate.dot file located at the ./Templates/ folder of your Modeler installation. For more information about editing styles in this template, refer to Document template. |
Last Updated 5/14/2025 11:44:54 AM
