Overview
In the Management Console, you can view your configured bot processes, manage the connections to your UiPath Orchestrator, and access the Orchestrator dashboard. The available sections are:
1.RPA configuration: In this section you can see and modify your Orchestrator connection
2.UiPath processes: In this section you can see the name of all your configured UiPath processes that use this connection.
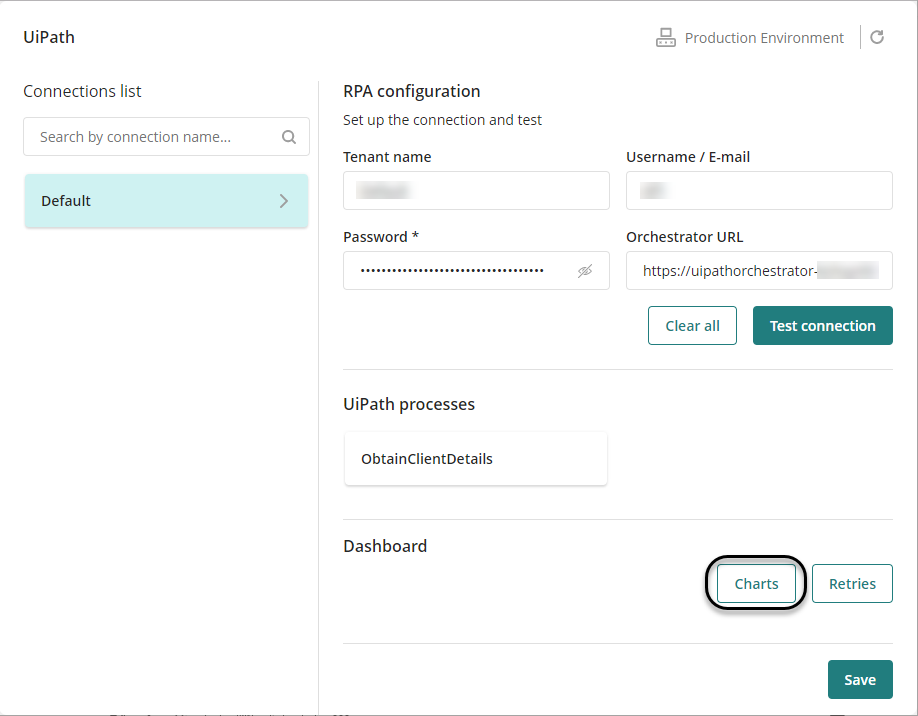
3.Dashboard: You can access the two sections of the RPA Dashboard: Charts and Retries.
Configure connection
In the RPA configuration section, you can set up the connection to your bots.
|
You can configure either an On-Premise connection, where you manage the infrastructure required for your resources, or a Cloud connection, where UiPath manages that infrastructure for you.
|

Client credentials authentication (OAuth)
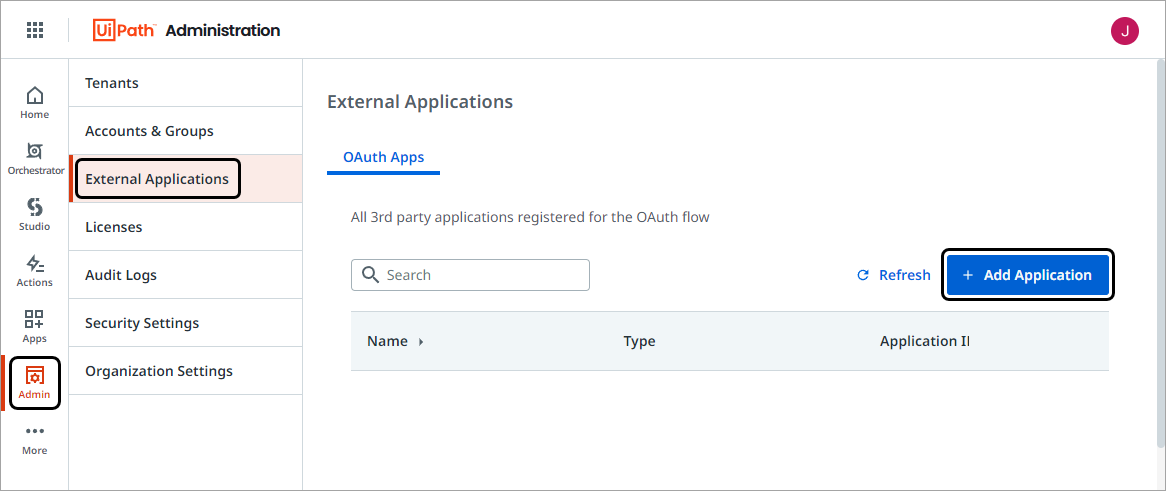
Before configuring the connection within Bizagi, it is necessary to register Bizagi as an application in the UiPath cloud console settings. To do this, within your cloud console go to the admin section, select the External Applications option and click the Add Application button.
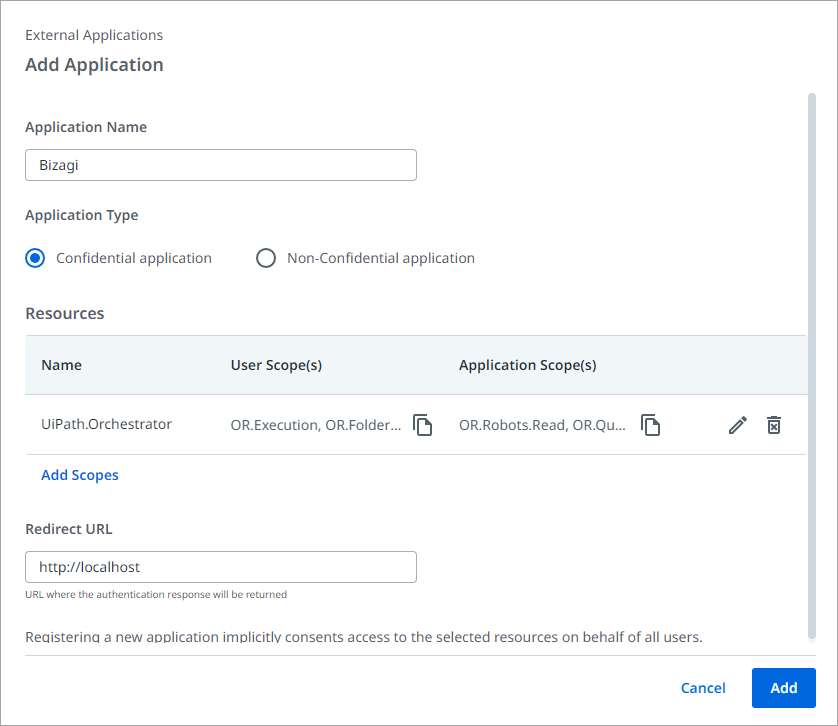
1.Enter a name for the application.
2.Select the application type. It is recommended to choose Confidential application for security purposes.
3.In the Resources section, add Orchestrator API Access and select the required scopes. Ensure that the following minimum scopes are granted for both user and application:
•OR.Execution
•OR.Folders.Read
•OR.Jobs
•OR.Queues
•OR.Robots.Read
4.Configure the authentication response URL. Bizagi does not require a specific value, so you can enter any valid URL, for example: http://localhost
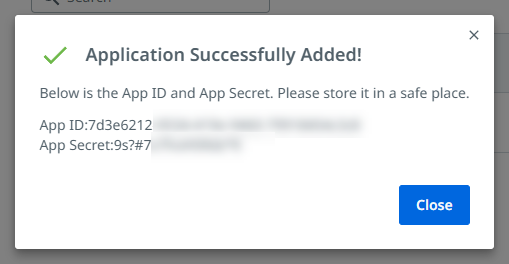
When you finish entering all the required parameters, click Add. This generates the App ID and App Secret, which are required to configure the cloud connection in Bizagi.
On-Premise Connection
In the Management Console, click RPA Bots and select UiPath, then click your connection from the available options.
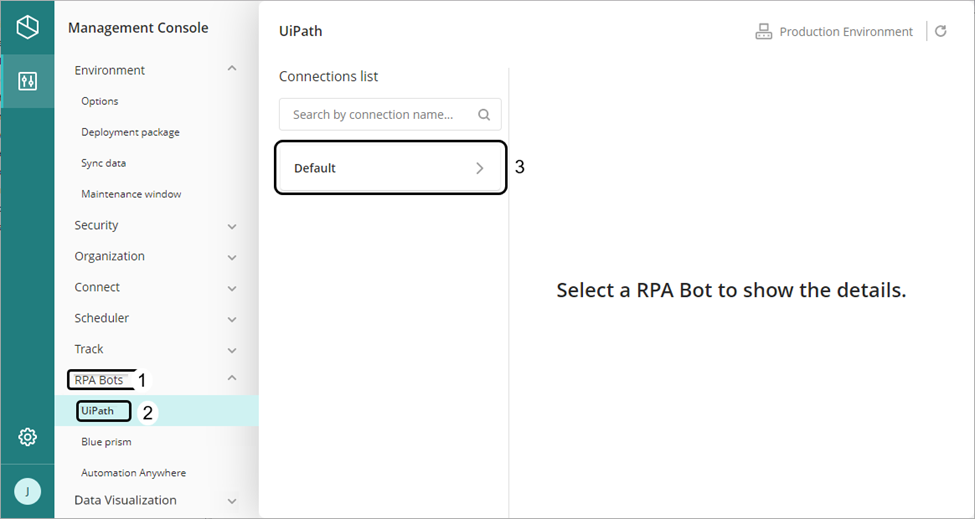
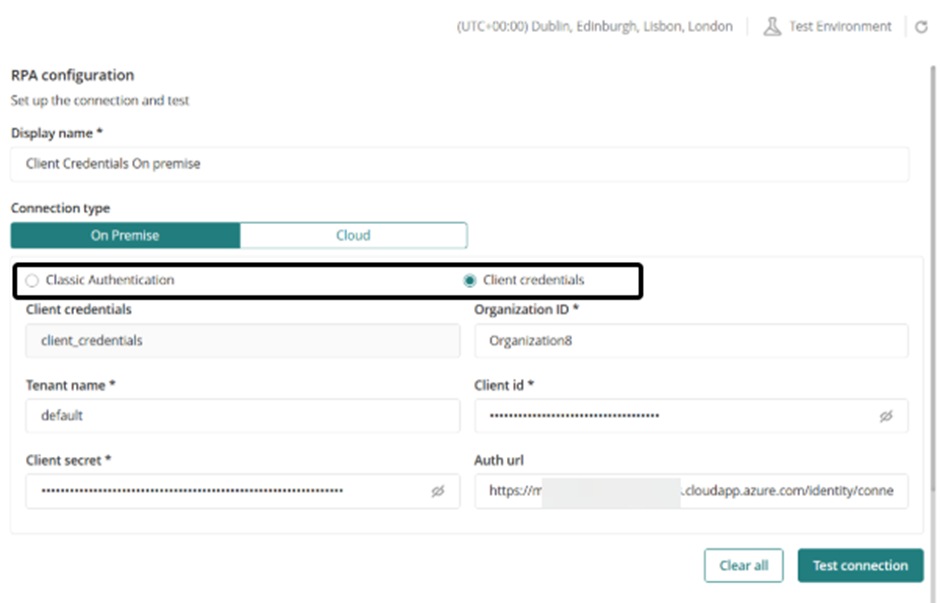
When you select On Premise connection you can select between Classic Authentication and Client Credentials.
|
The availability Client Credentials authentication in the Management Console depends on the application configuration. If this option is not enabled, the authentication options are as shown below: •On Premise connection:
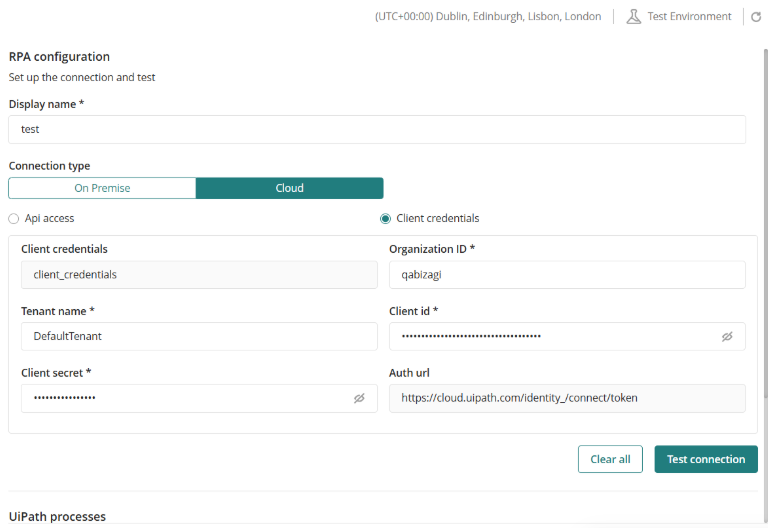
•Cloud connection:
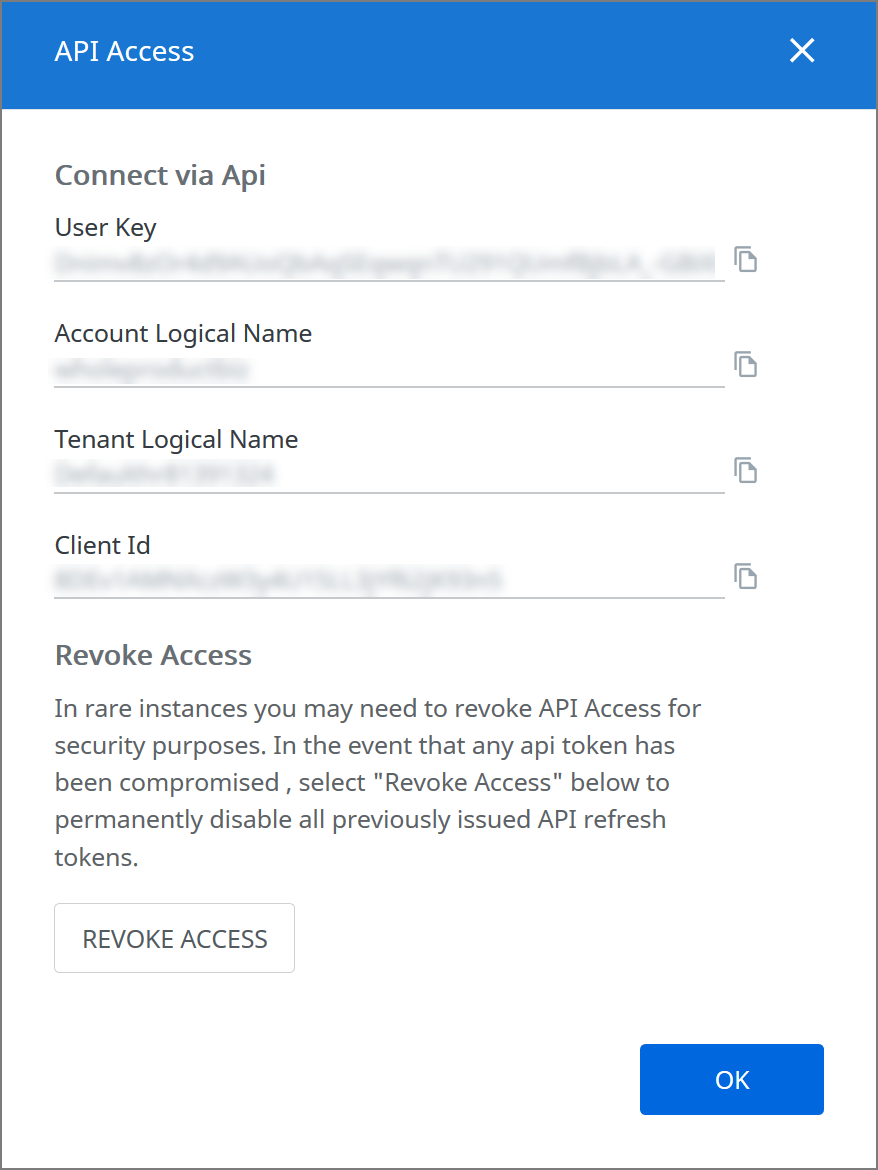
For Api access you must provide the following information: •User key: allows you to generate unique login keys to be used with APIs or with 3rd party applications in order to log in and perform actions on your behalf. •Account Logical Name: logical name found within the portal's URL. For example, if your URL is https://cloud.uipath.com/yourSite, the account logical name is yourSite. •Tenant Logical Name: logical name of the selected service. Take into account that it may differ from the tenant's name. For example, if the tenant's name default, the tenant's logical name may be defaulthr8139. •Client ID: ID specific to the Orchestrator itself. It is the same for all users and tenants on a specific platform. You may get the values for these parameters in the UiPath Automation Cloud portal. To do so, go to the Admin option and under your tenant's name, click API Access.
|
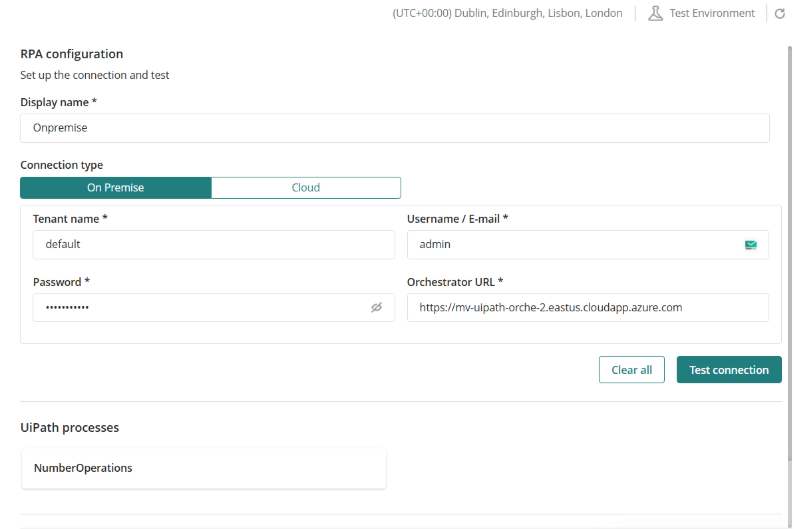
Classic Authentication requires the following information:
•Tenant Name: name of the orchestrator instance you provided at the time of its creation.
•Username / Email: associated Username or Email of an admin user of the orchestrator.
•Password: corresponding password to the previous field.
•Orchestrator URL: URL of the UiPath orchestrator.
Client credentials connections require the following information:
•Grant type: client_credentials
•Organization ID: your UiPath organization identifier
•Tenant name: name of the orchestrator instance you provided at the time of its creation.
•Client id: App ID
•Client secret: App Secret
•Auth url: must use the following format: https://<server_url>/identity_/connect/token
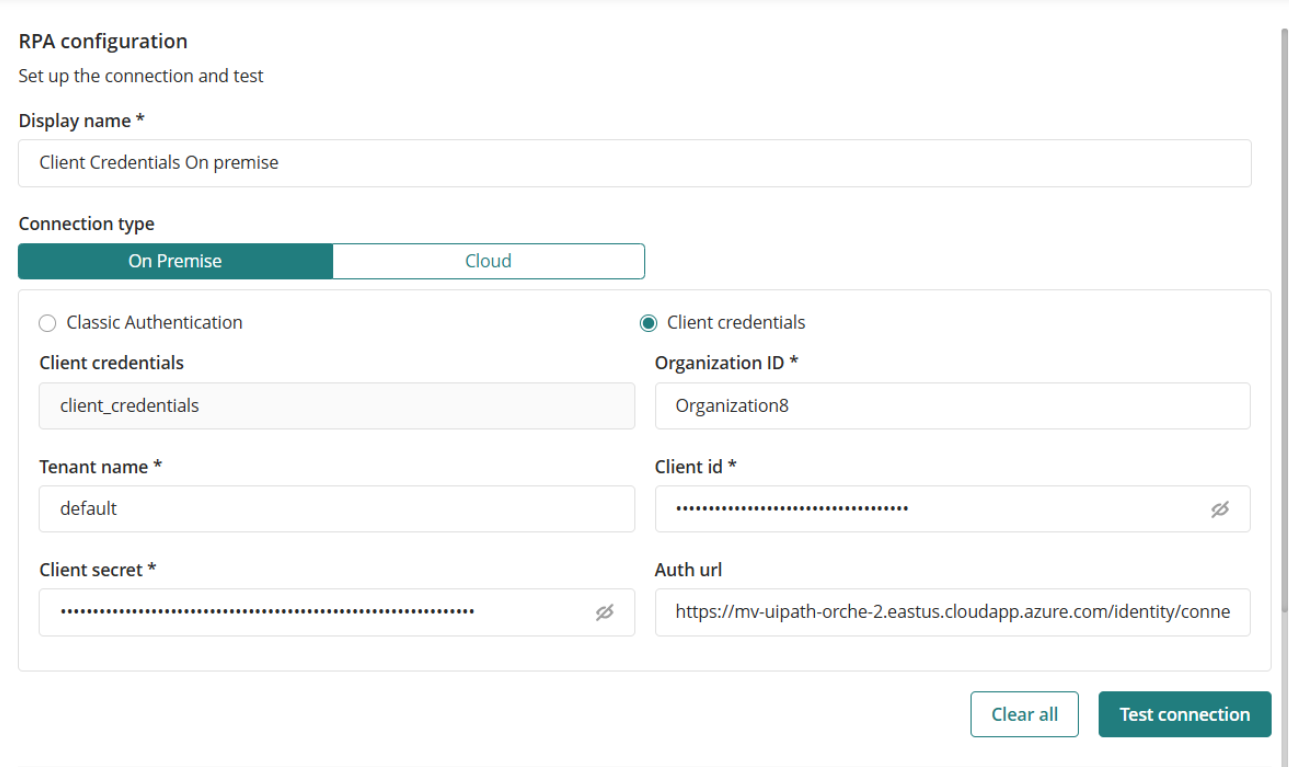
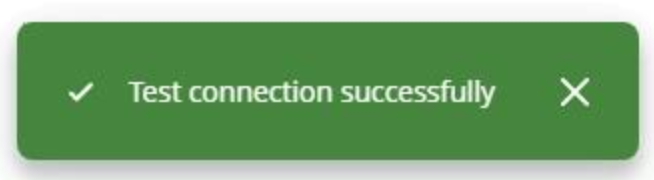
After entering the required configuration information, test the connection. If the validation is successful, save your changes. Otherwise, review the information and try again.
Cloud Connection
Once registered the new application and obtained the client credentials within UiPath you can configure the cloud connection in Bizagi. To do so, in the RPA configuration in the Management Console select Connection type: Cloud.
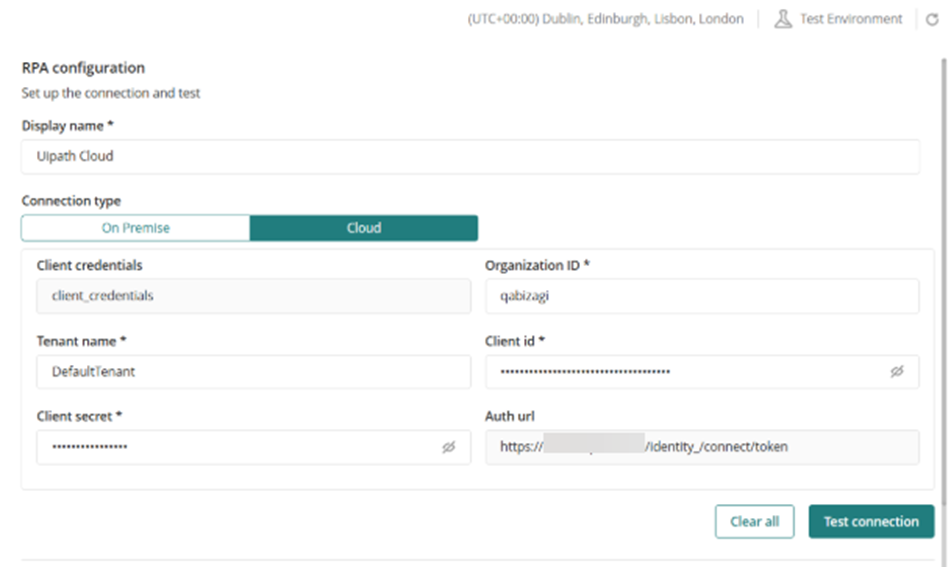
The authentication type is Client Credentials for this connection, and it requires the same parameters as in said On‑Premise connection type.
|
You can configure a different connection for each of your Environments by creating a new configuration in their respective tab. You can change these connections for your Test or Production environment in the Management Console. |
Charts
In this section you can view a report of your Orchestrator's Jobs and Queue Items in chart form.
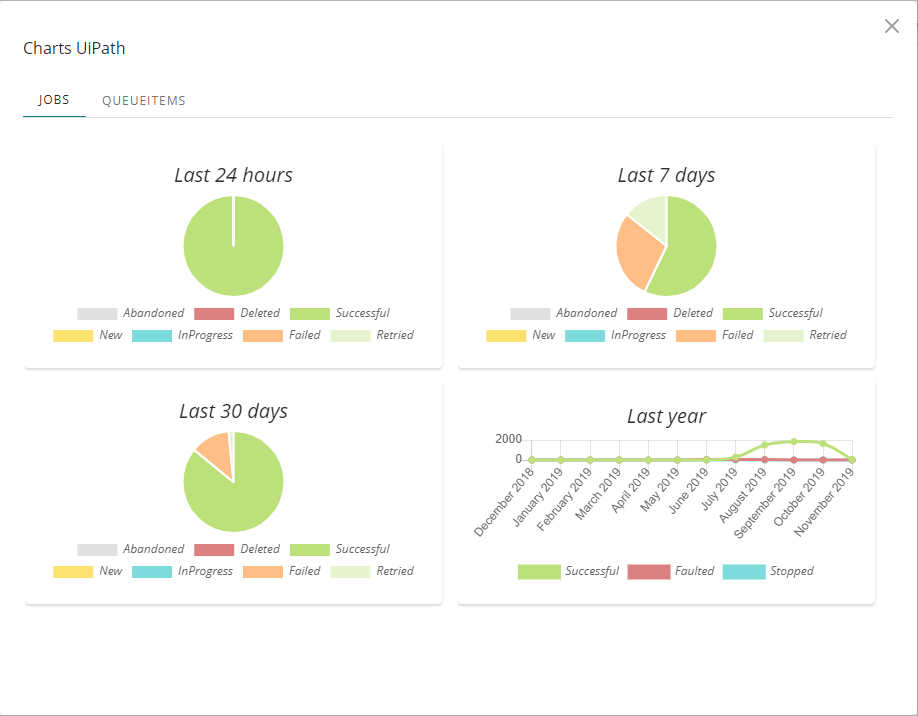
To access this section go to the Chart button under the RPA Dashboard section. You must wait a few seconds until the report loads.
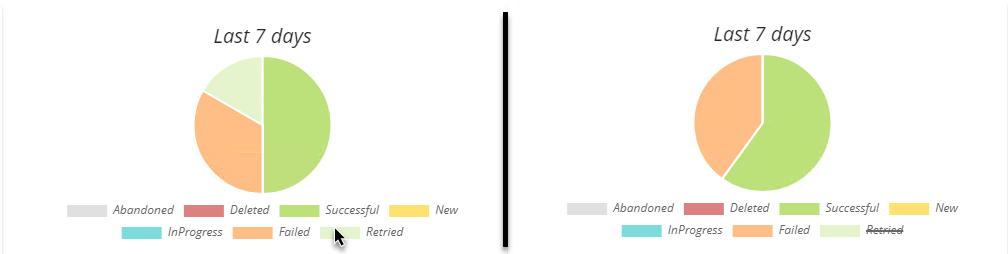
You can see three pie charts showing the status of all jobs executed in the last 24 hours, 7 days, and 30 days. Additionally, a 2-D line graph shows the number of executions by status each month of the last year.
You can remove a status from your graph by clicking the label showing the status name. The Dashboard will cross-out the excluded status label.
You can view a similar report for your Queueitems by clicking on the Queueitmes button.

If there is no data to display a blank chart is shown.
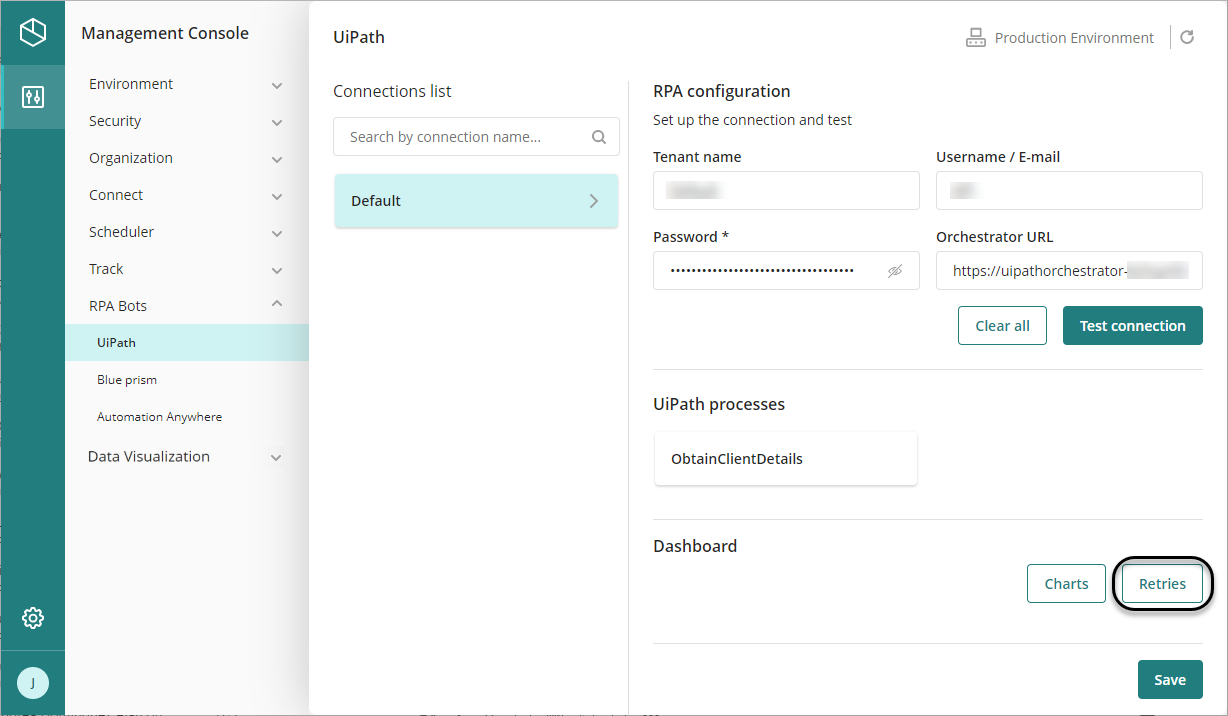
Retry Jobs
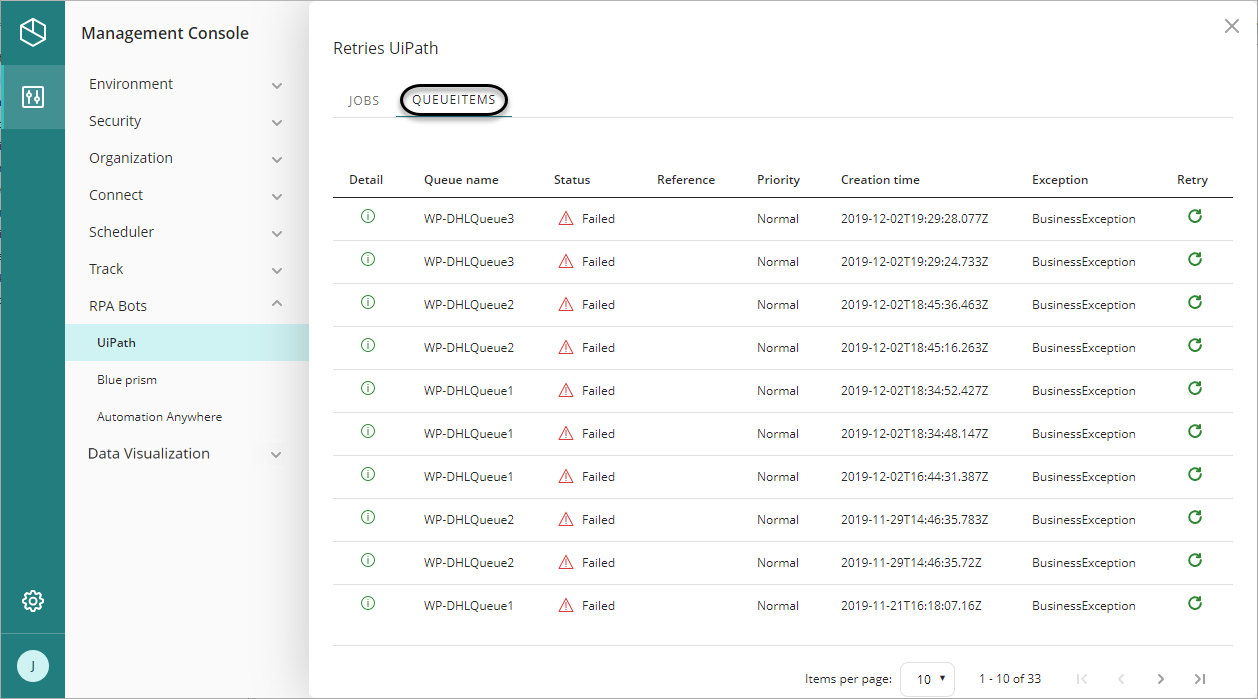
In this section you can view the failed Orchestrator Jobs and Queueitems and retry them directly in the Management Console.

To access this section go to the Chart button under the RPA Dashboard section. You must wait a few seconds until the report loads.
You can retry your failed jobs by clicking the  icon. You can retry your failed jobs by clicking the icon. The Management Console creates a new instance of the job. Since this is a different instance, the failed job will still be visible in the list.
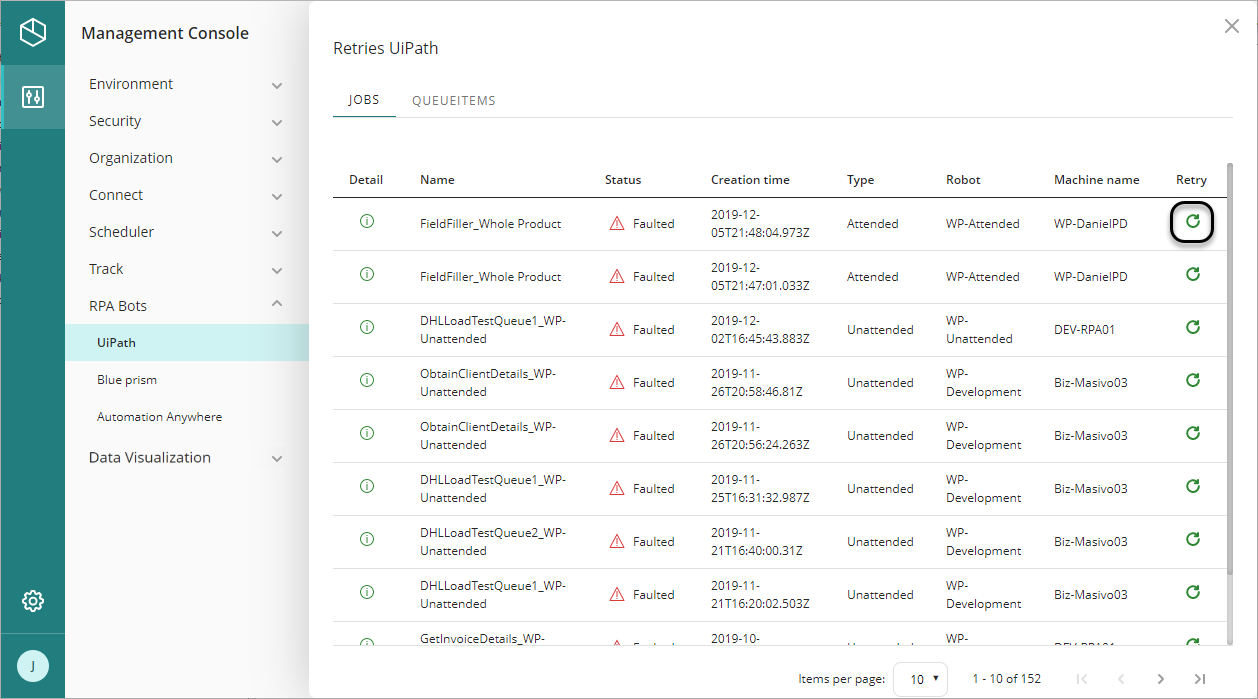
A new panel appears showing additional information about the job.
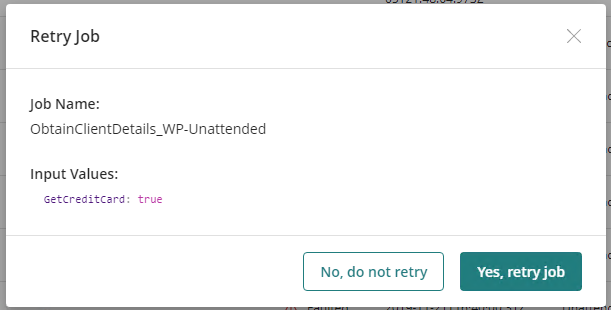
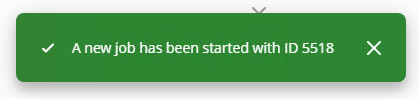
Click Yes, retry job and wait until the following message appears.
You can view a similar window for your Queue items by clicking on the Queueitmes button.
Last Updated 7/16/2026 5:50:01 PM