Overview
What is MCP?
The Model Context Protocol (MCP) is an open standard that provides a common interface for AI models to interact with external tools and data sources. By using MCP, models can dynamically discover, invoke, and stream results from third-party systems in real time, rather than relying solely on static training data.
In Bizagi AI Agents, MCP (Model Context Protocol) lets the agents connect in real time to external systems and data. An MCP server works like a bridge: it shows the agent what functions are available, and the agent can use them instantly to get live results. This way, Bizagi AI Agents don’t rely only on what they were trained on—they can pull up-to-date information directly from other tools, making their answers more accurate and useful.
Model Context Protocol (MCP) Integration in Bizagi AI Agents
Bizagi allows you to incorporate the Model Context Protocol (MCP) into its AI Agent capabilities. By connecting Bizagi AI Agents to MCP-compatible servers via Server-Sent Events (SSE), agents can securely interact with external tools and live data in real time. MCP servers act as bridges, exposing functionalities that agents can instantly discover, invoke, and stream results from. This integration enhances accuracy, reduces hallucinations, and ensures responses are always grounded in up-to-date information.
Scenarios
The Model Context Protocol (MCP) integration in Bizagi AI Agents includes several scenarios. These outline the steps and functionalities, starting from MCP server creation through integration with AI Agents and related capabilities:
•Create or edit an MCP server directly.
•Associate MCP erver(s) with an agent.
•Test the functionality of an Action of a MCP server.
Creating or Editing an MCP Server
1.Log in to Bizagi Studio and go to the Expert view by clicking the Expert button on the ribbon.
2.In the left-side menu, open the AI Hub module.
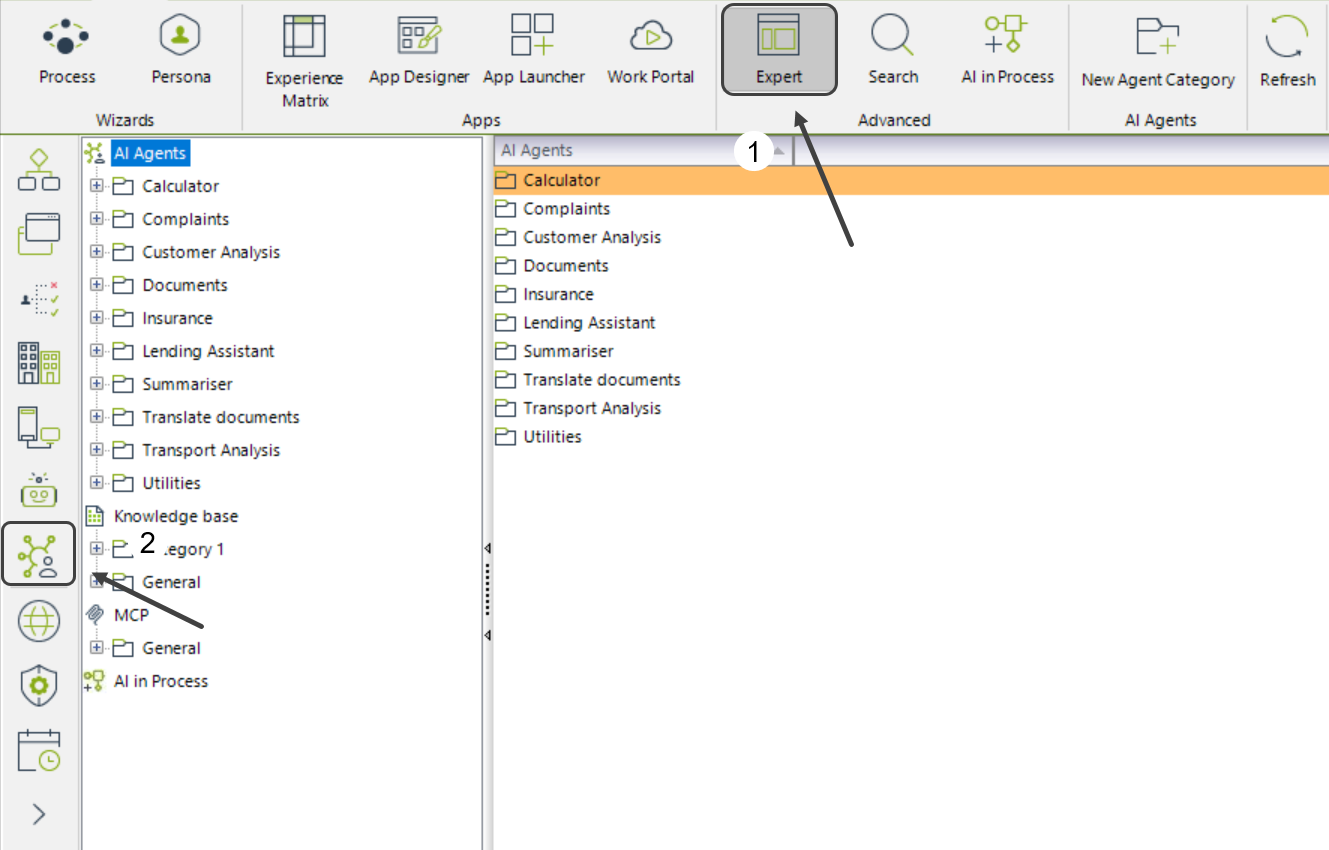
3.Navigate to the MCP section.
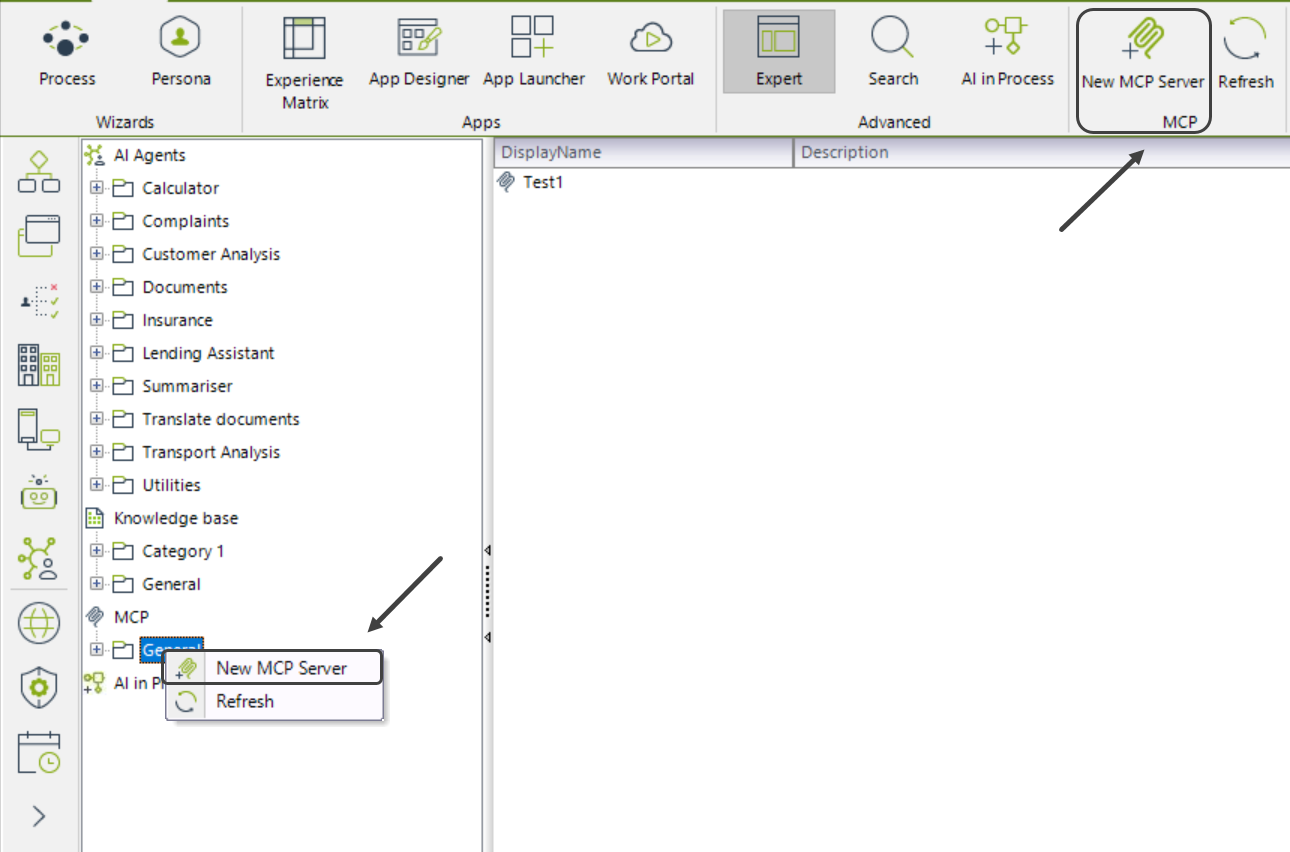
4.Select the General button and right-click it.
5.Click New MCP Server or use the New MCP Server button in the top ribbon.
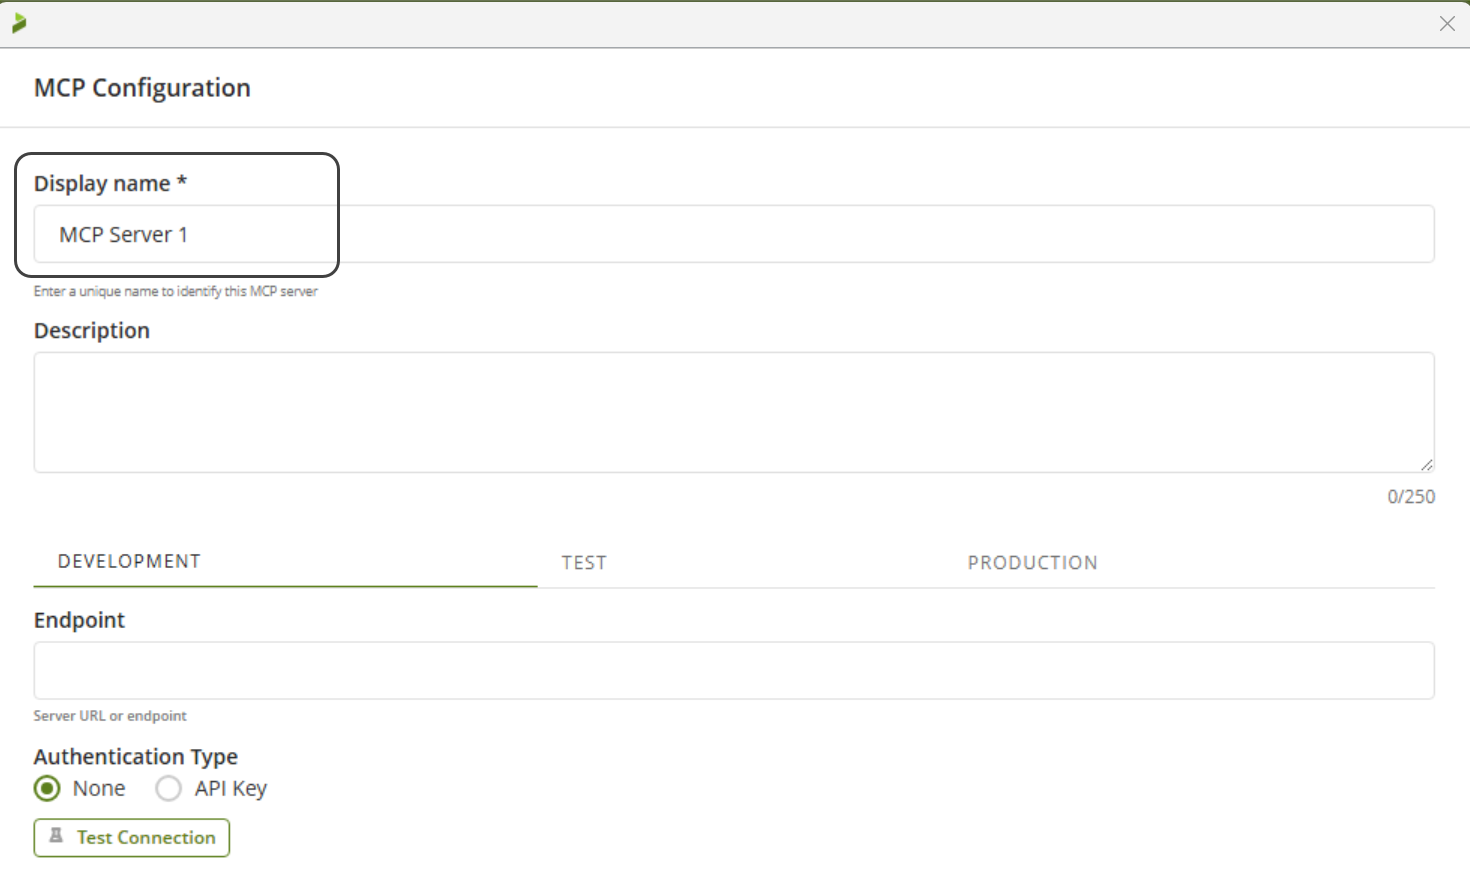
6.Complete the following fields:
oDisplay name: Enter a descriptive name for the MCP you are creating. This name will help you easily identify it within the MCP section.
oDescription: Provide a detailed explanation of what this MCP represents and how it will be used. This information helps the AI understand the MCP’s purpose and the type of insights it can extract.
oEndpoint: Enter the URL endpoint of the external service that your MCP will connect to. This should be the full address where requests will be sent to retrieve or send data.
oAPI Key: Provide the API Key required to authenticate your connection with the external service. Make sure the key has the necessary permissions for the operations defined in this MCP.
oAuth Type: Select how the API Key should be sent in the request header. You can choose between:
▪Basic: The key is included as part of the Basic Authentication scheme.
▪Bearer: The key is included in the Authorization header using the Bearer token format.
▪Custom: The key is sent using a custom header name defined by your service’s requirements.
|
Note that development environment credentials are copied automatically to test and production environments if no other data is entered. |

7.Click Test Connection to validate connectivity.
Associate MCP server(s) and AI Actions with an agent.
1.Log in to Bizagi Studio and go to the Expert view by clicking the Expert button on the ribbon.
2.In the left-side menu, open the AI Hub module.
3.Navigate to the AI Agents section.
4.Select the folder of the AI Agent you want to associate with the MCP Server.
5.Right click the AI Agent you want o edit and click Edit Agent.
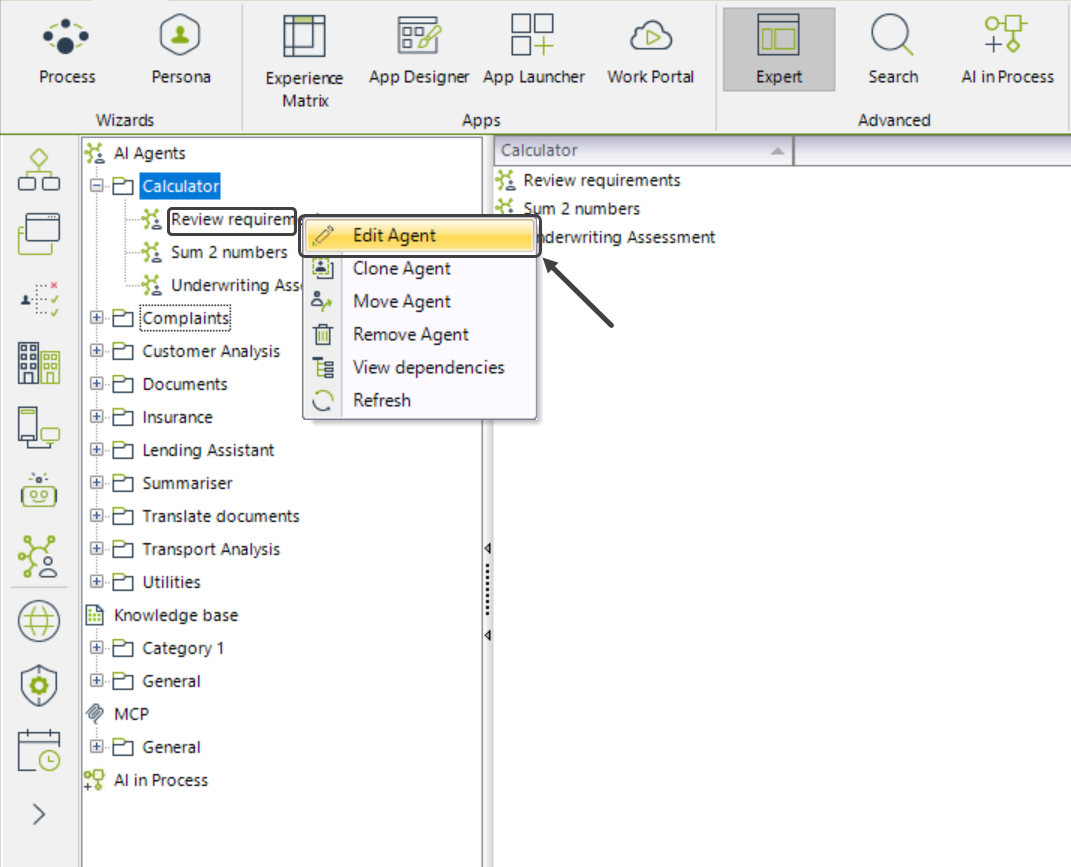
6.Click the AI Actions button to the left of the screen.
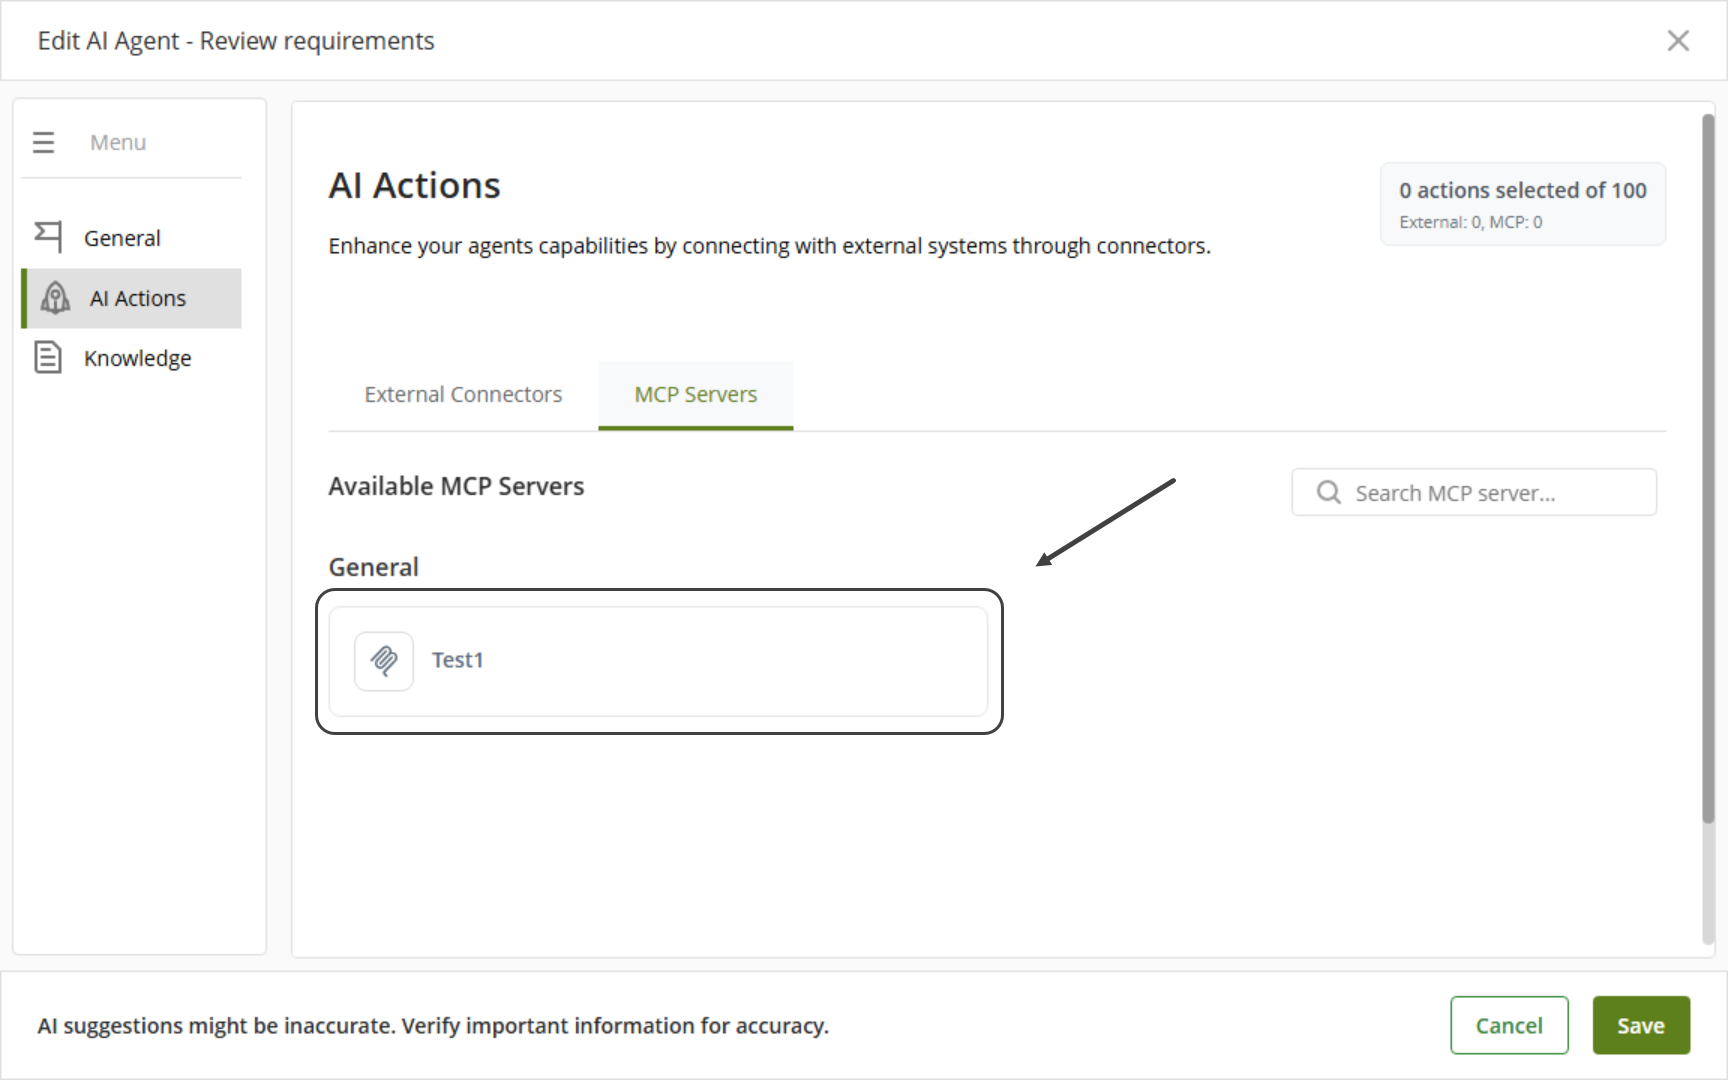
7.Click the MCP Servers tab.
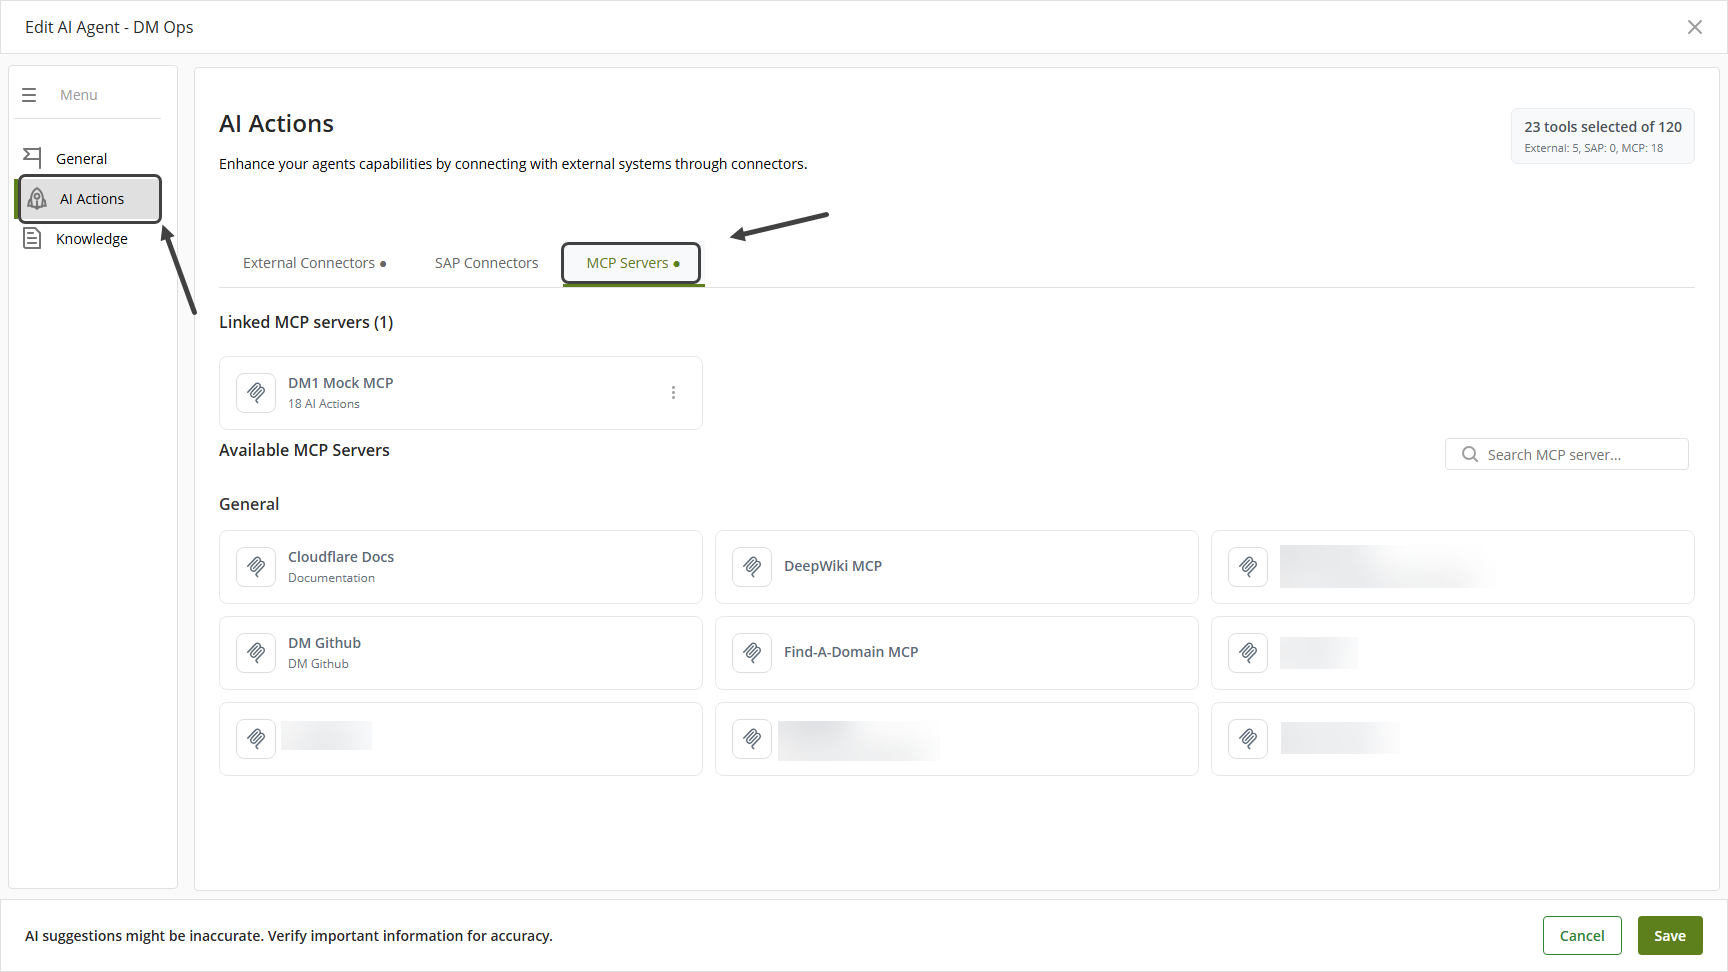
8.Select the MCP Server you wish to connect to.
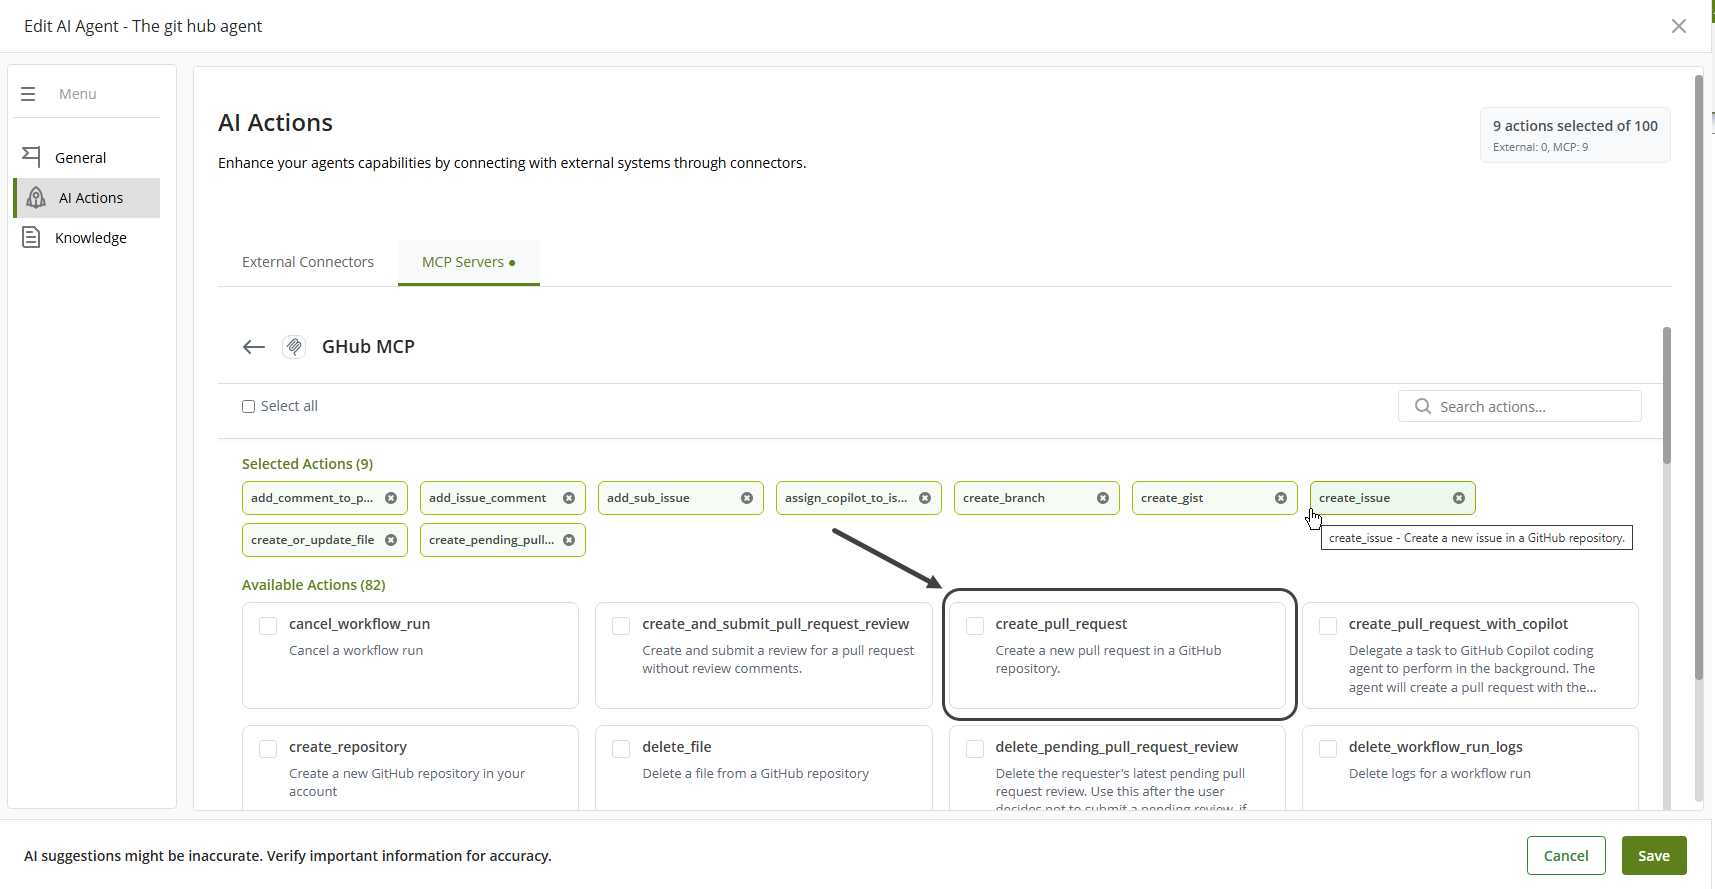
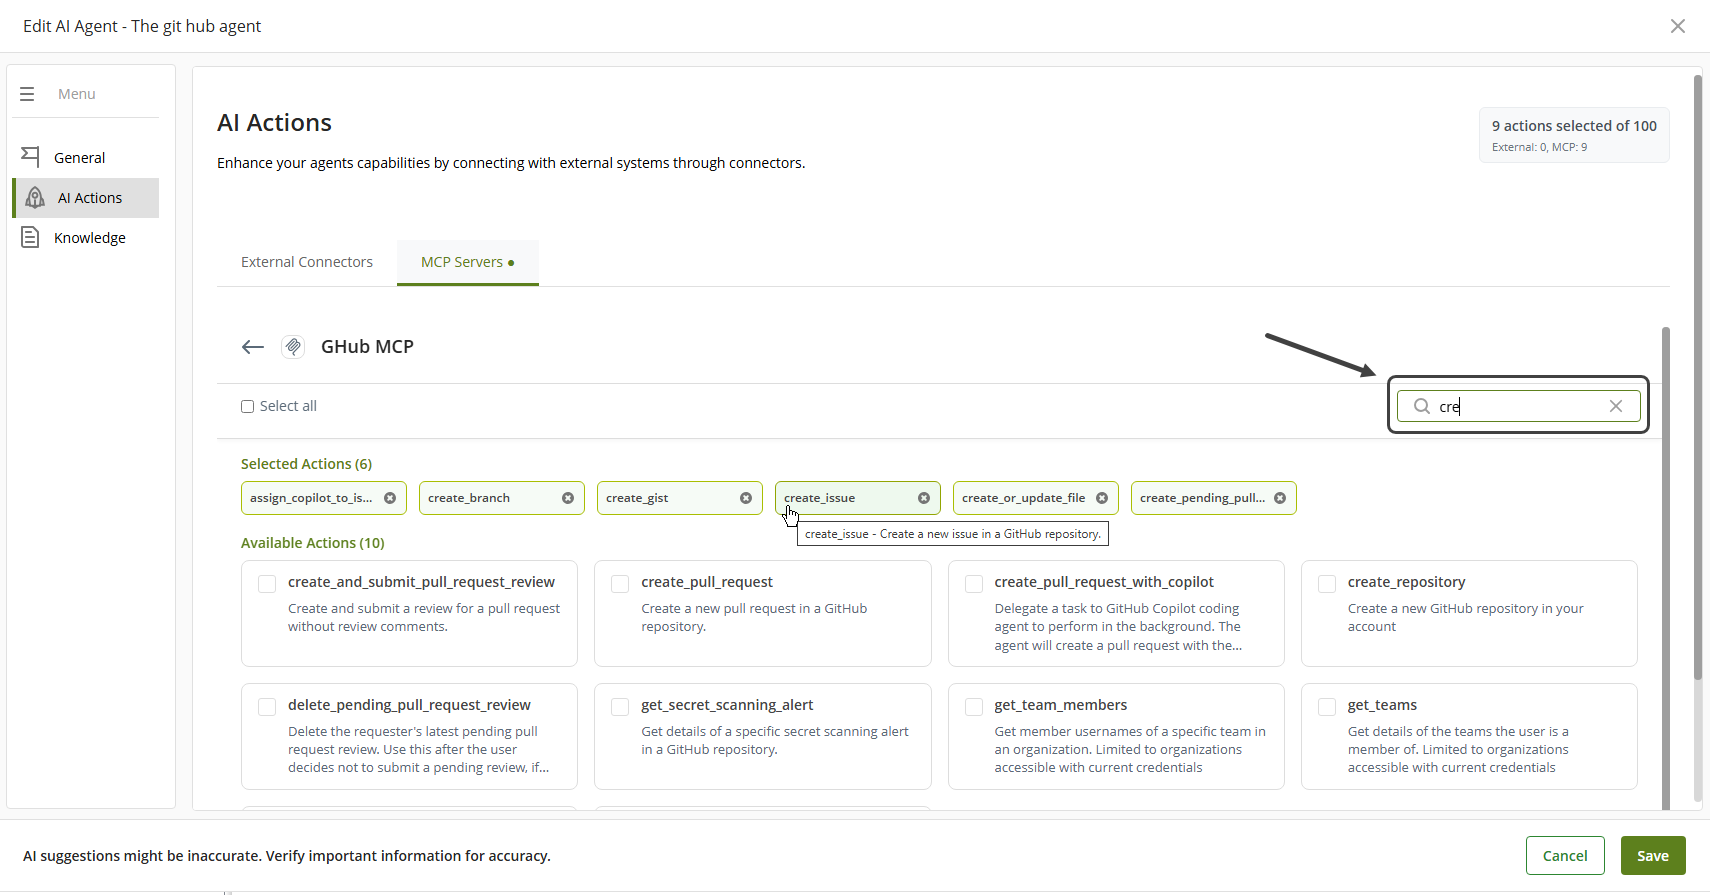
9.Click the Actions that you want to use.
10.Click the Save button
|
Considerations •The global action limit is 100 actions. •Note that operational MCP server endpoint(s) are required for actions to be listed. |
Remember that you can use the search bar to filter Actions, the results are going to be displayed alphabetically.
Test the functionality of an Action of a MCP server
Once you have configured a SAP Connector to an AI Agent, you can test the Action(s) selected by using the Test Prompt window. Follow these instructions to test the Action(s).
1.Log in to Bizagi Studio and go to the Expert view by clicking the Expert button on the ribbon.
2.In the left-side menu, open the AI Hub module.
3.Navigate to the AI Agents section.
4.Select the folder of the AI Agent that contains the Action(s) you want to test.
5.Right click the AI Agent you want o edit and click Edit Agent.
6.Click the Test Prompt button.
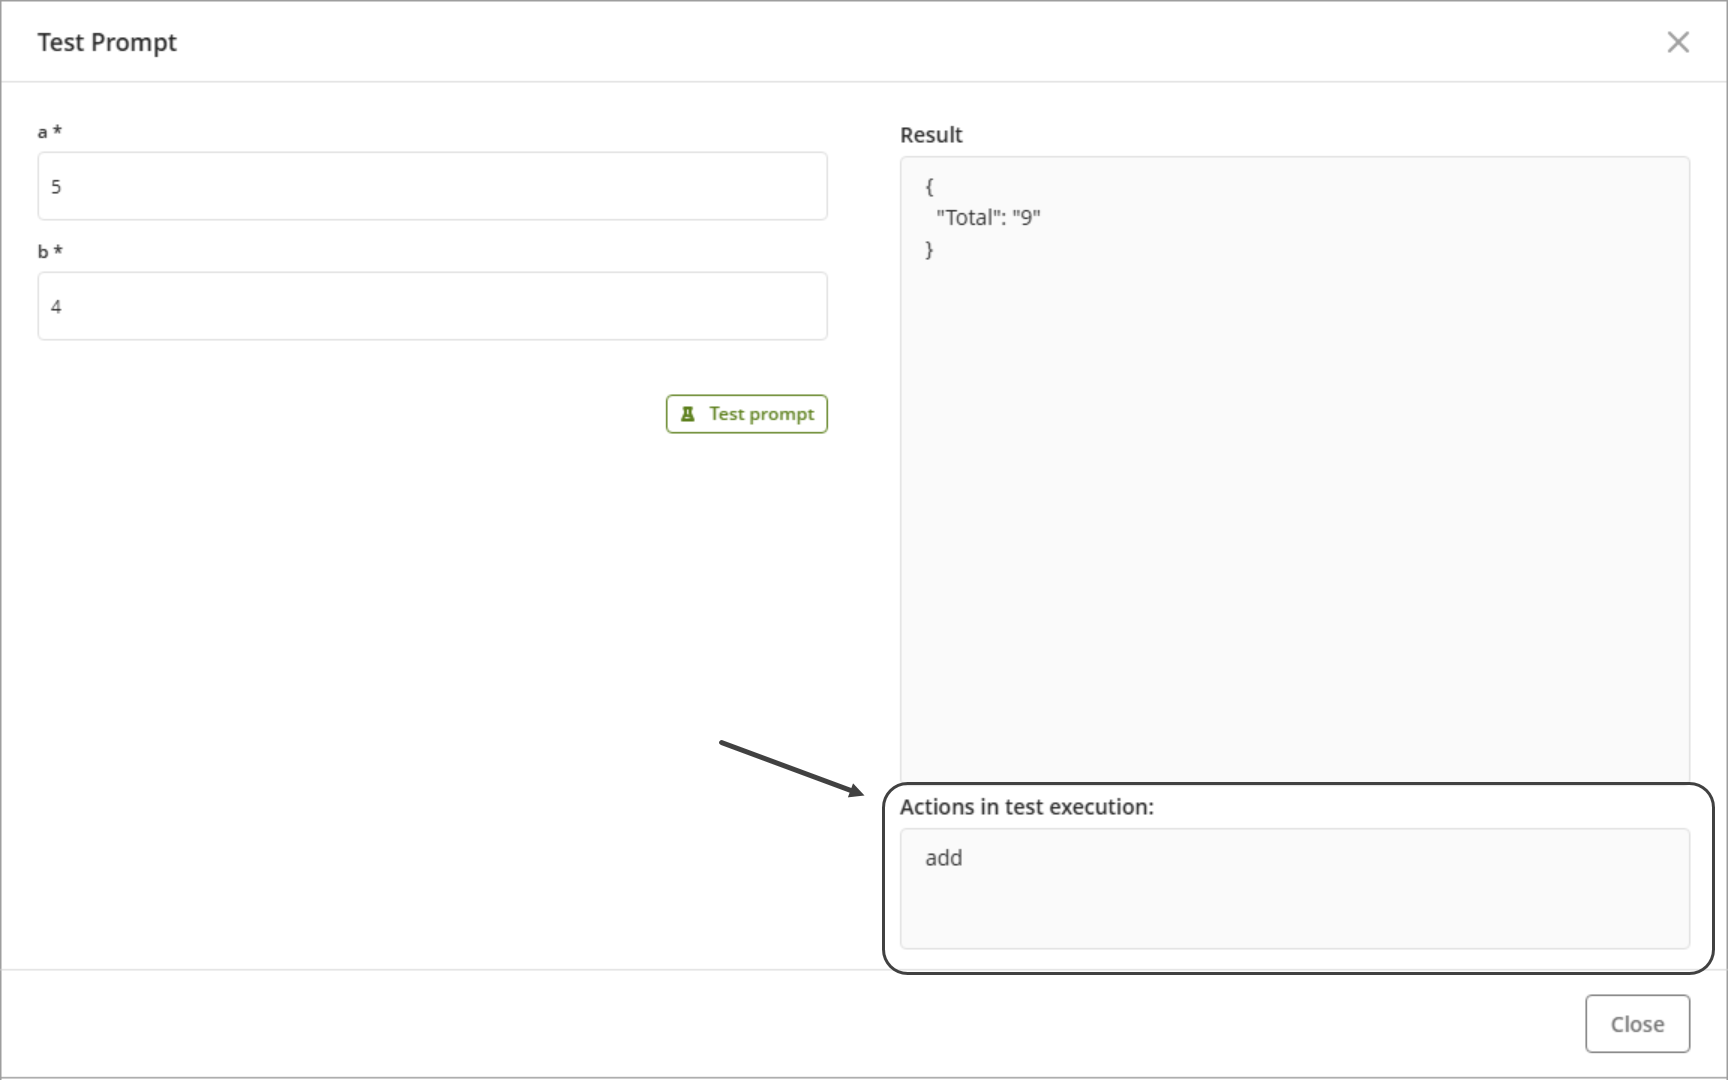
7.The Test Prompt window will open. Enter the values you want to use to test the AI Agent.
8.On the lower right side, you can view the Actions involved in the test execution.
|
Note that if no actions were executed, the message “No actions were executed during this test.” is displayed. |
Tracing
Consult the Tools Tracing documentation during debugging or whenever you need deeper insight into execution details.
Last Updated 11/20/2025 3:40:02 PM