Overview
When having a long list of predefined values you wish to use from Bizagi processes, manually inputting them though the Work portal may not be a best approach.
By relying on Bizagi SOAP web services API instead, you may populate data in a single invocation (in batch) and do this fairly easily especially if those values are already held in an Excel spreadsheet.
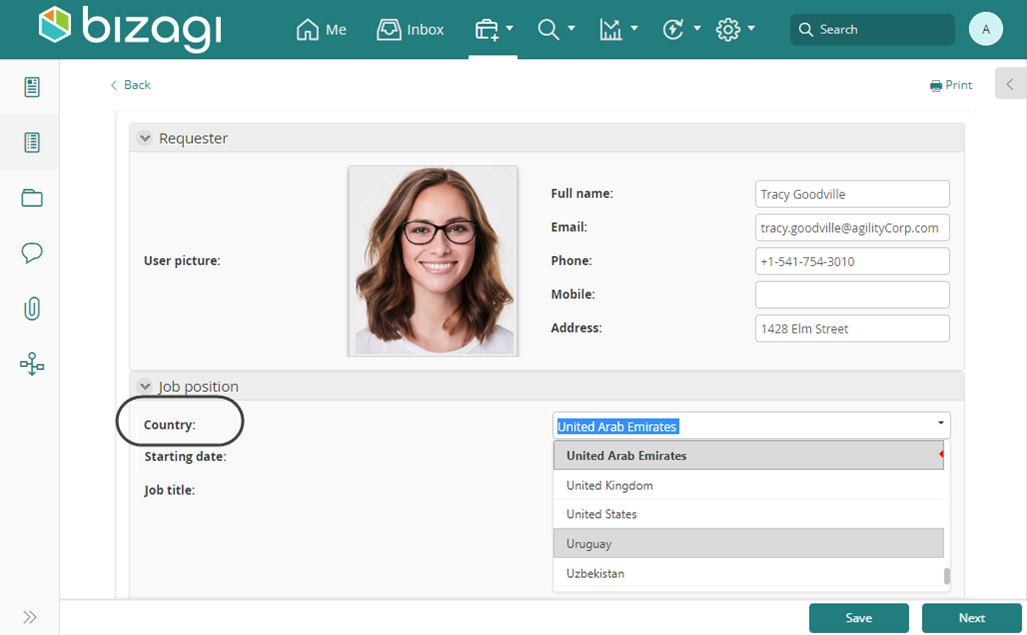
Once you populate data in Bizagi, you will be able to choose from these values directly from your processes:
Before you start
The following how-to illustrates a practical approach to populate initial data in batch into Bizagi, though specifically designed and supported to fill in data into entities of Bizagi which are defined as "parameter entities".
If you are not familiar with parameter entities, refer to Entity types.
When working with parameter entities, consider that it is also a best practice to explicitly define: unique codes for each record, while designing an attribute (i.e. "Code") to hold such value, and consequently rely on Bizagi's business keys definitions so that you can enforce that such code-based attribute is meant to have a unique constraint.
|
If you wish to open up an Excel file from within a process (i.e, to fetch certain information in it), you may use Bizagi Connectors. Within the ready-to-use connectors of the Connector Xchange, there is one for Excel. For more information about this possibility, refer to Bizagi Connectors. |
Through business keys definitions, you accomplish two things:
1. Have Bizagi automatically prevent the creation of duplicate records.
2. Design a mechanism to reference existing records by their unique code, as a best practice for integration with other systems (for instance when sending out information from an external application into Bizagi and wanting to update an existing record).
For more information about this possibility, refer to Business keys.
This how-to's example will not focus on business keys definitions, though their use is recommended.
Whether or not you define business keys for your entities, it will not affect how to perform steps described in this how-to.
What you need to do
The following outline of steps provide a big picture of the steps needed:
1. Prepare data in your Excel
As when working with extracted data for any application, this step basically means making sure you have no blank values where otherwise expected, or performing any other tweaks you may want to apply to your data in Excel (e.g., such as filtering out duplicates, etc).
2. Export data from Excel into an XML
By relying on features in Excel, you may define which columns you want to include from the whole information in Excel, and end up producing an XML file with the relevant data (and which is compliant to Bizagi SOAP web services).
3. Invoke Bizagi SOAP web services
This final step is about getting to use a SOAP web services client to invoke Bizagi API and populate data.
Example
To illustrate these above step, we will consider populating a Country parameter entity in Bizagi.
This means, filling out such entity with one record for each country in the world.
The Bizagi process designed and involved for such use case is not revelant, and we will rely on the Excel spreadsheet as available at:
http://www.statvision.com/webinars/countries%20of%20the%20world.xls
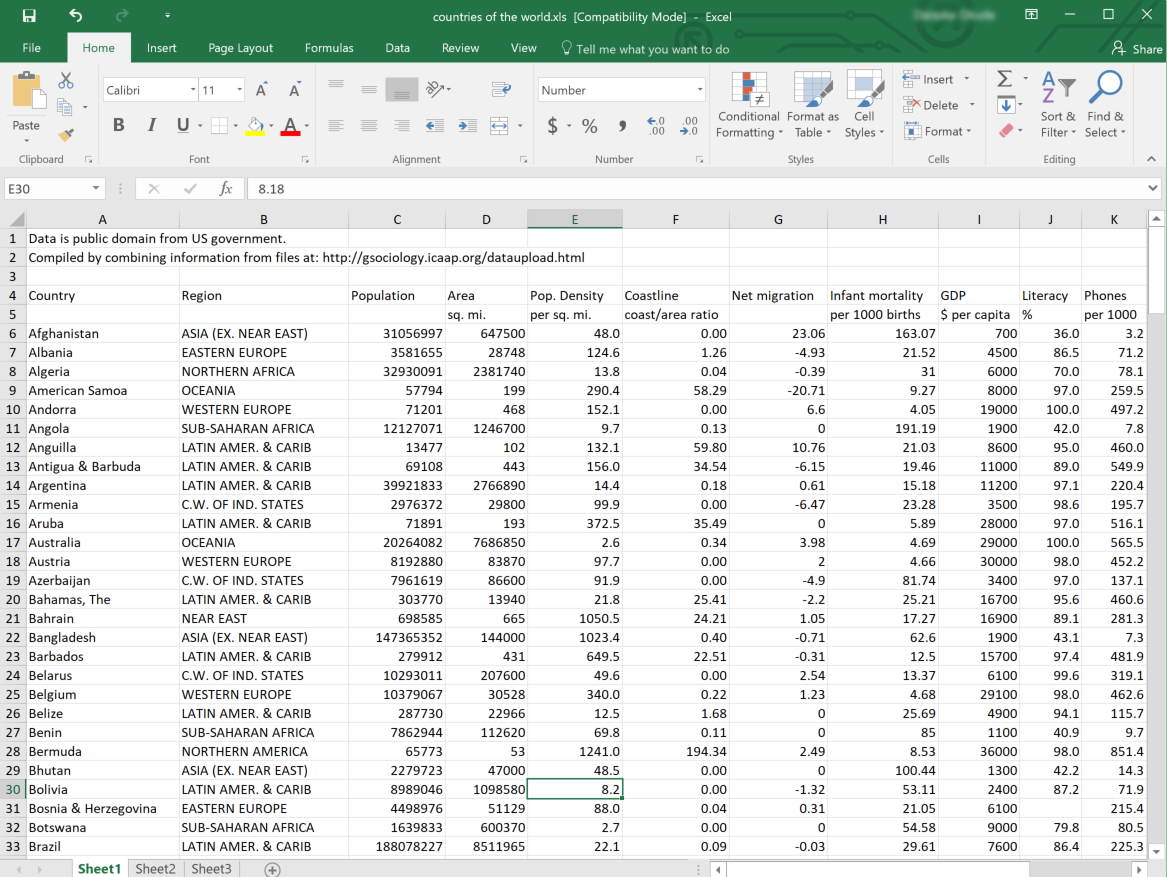
This entails automatically, that as a prerequisite and starting point, it is expected for you to already have a parameter entity in Bizagi where you will store such information.
Make sure your parameter entity's definition is compliant to the information you wish to store (i.e, having the attributes in that entity whose data type match that type of incoming information, while considering adequate lengths for string attributes).
For this example, we will only store in Bizagi the Name of the country and the Region they belong to.
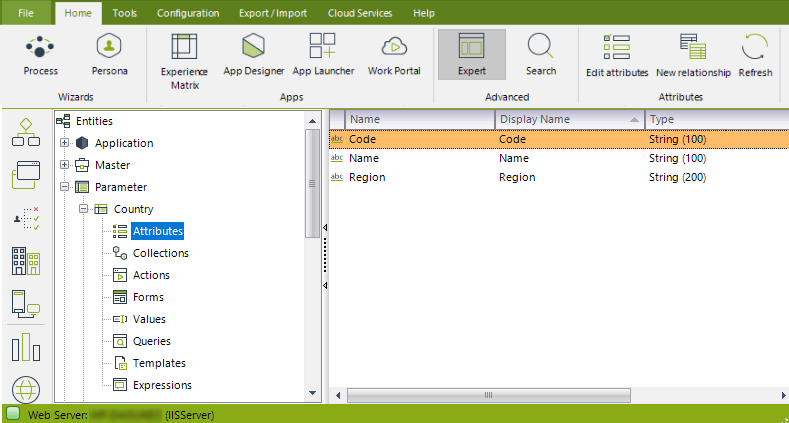
Note that because it is a best practice to rely on a Code attribute, we created that additional one.
Steps
Carry out the following steps.
1. Prepare data in your Excel
The first thing is to make sure that your data is "ready".
Among the things you may typically carry out to make sure this, is to: eliminate blank rows, blank spaces if undesired, or filter out duplicate records.
Furthermore and because we will be using a Code attribute in Bizagi, you may want to choose to add such information (such as the 2-digit ISO country code).
For a practical approach in this example, we will simply reuse and duplicate the country Name as the Code.
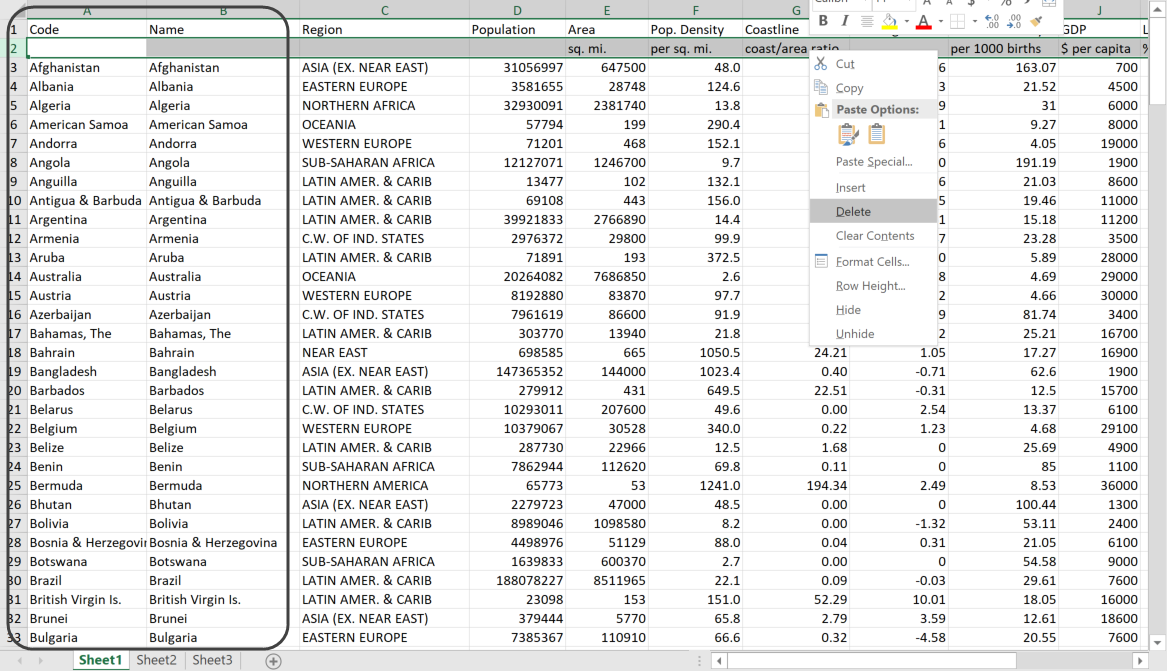
In this example, preparing data in Excel meant exactly:
•Adding the Code column.
•Changing the Country header to Name, just for clarity purposes.
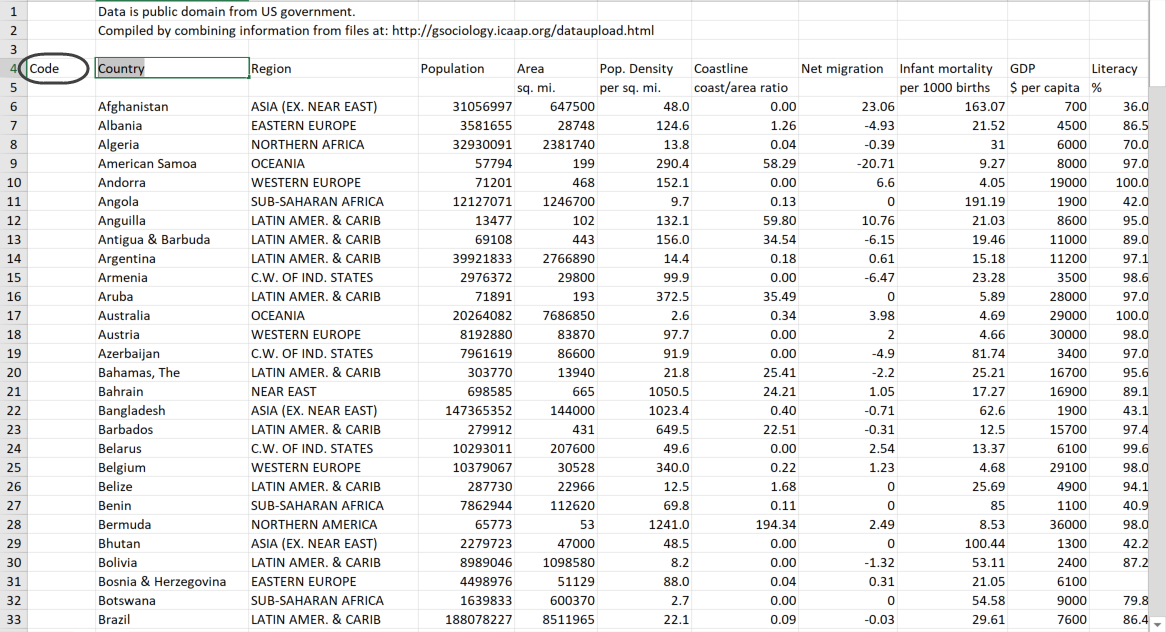
•Copying values from Name into Code (duplicating them).
•Deleting the upper rows simply to have a "cleaner" Excel.
•Similarly, deleting the row having empty information for the first 4 columns (this row mainly informs about measure units for other data, which won't be used anyway).
2. Export data from Excel into an XML
Next we will make sure we can define which information we want to export.
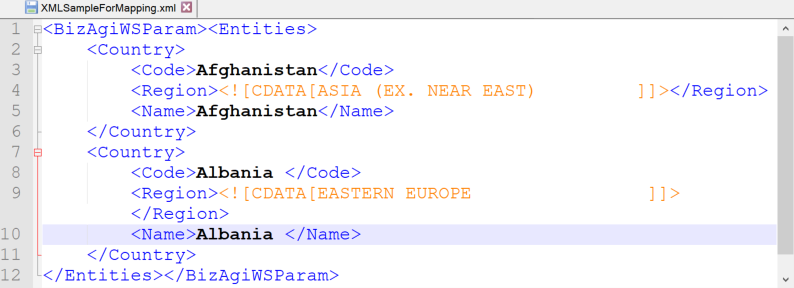
In order to do this, create a temporary XML file to be used as a sample, so that Excel can interpret from it how you would want your data exported.
For this example, we will create this temporary XML file having:
<BizAgiWSParam><Entities>
<Country>
<Code>Afghanistan</Code>
<Region><![CDATA[ASIA (EX. NEAR EAST) ]]></Region>
<Name>Afghanistan</Name>
</Country>
<Country>
<Code>Albania </Code>
<Region><![CDATA[EASTERN EUROPE ]]></Region>
<Name>Albania </Name>
</Country>
</Entities></BizAgiWSParam>
What is really important for your above XML sample is to:
•Include a root node, but specifically that such root node is <BizAgiWSParam>.
•Strictly use the structure shown above, where there is an <Entities> element containing the multiple occurrences of your records (both the <BizAgiWSParam> and the <Entities> element, are needed to make the XML compliant with Bizagi, given that we will invoke a the saveEntitiesAsString web method using such structure and as described at Save Entities).
•Make sure you include at least 2 records so that Excel can infer that you expect more than one occurrence of them (behind the curtains, Excel generates an XSD based on this XML).
•Multiple occurrences are contained in an element named exactly the same as the parameter entity you wish to fill out in Bizagi (recall that for our example, we will fill in Country).
•Make sure you include all columns that you wish to include in the XML file you will export.
•Use CDATA as a best practice or at least when detecting that your information may contain characters conflicting with XML's markup syntax (such as <, >, &).
Save it into a local path of your choice:
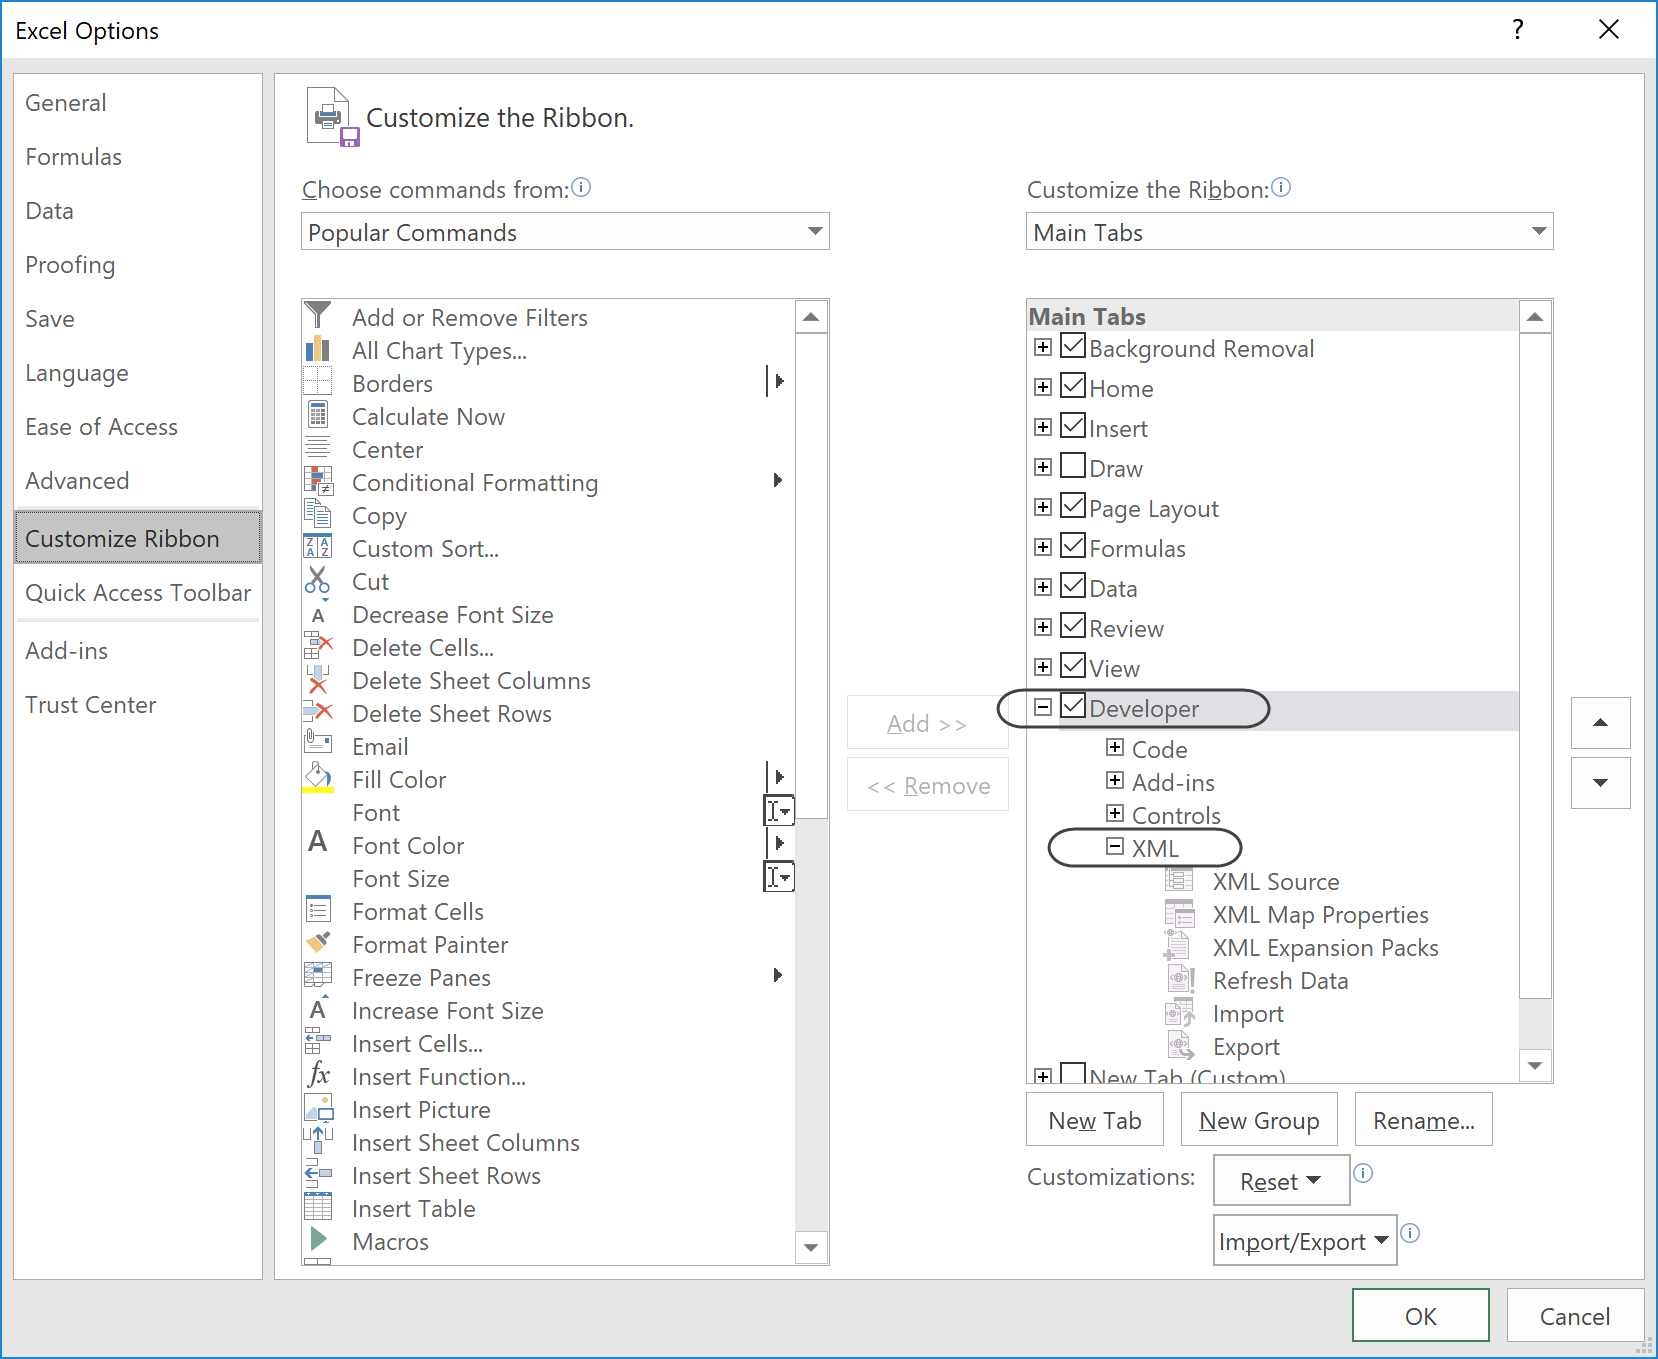
Then go to the Developer tab and click Source option (available in the XML options group):

Notice that by default, you may not get that Developer tab in your Excel installation.
If that is the case, then you need to go into Excel configuration (File -> Options ) and into the Customize Ribbon option.
In there, make sure you explicitly tick the checkbox to show that Developer tab.
At the Sources pane, click XML Maps.. and in Add...
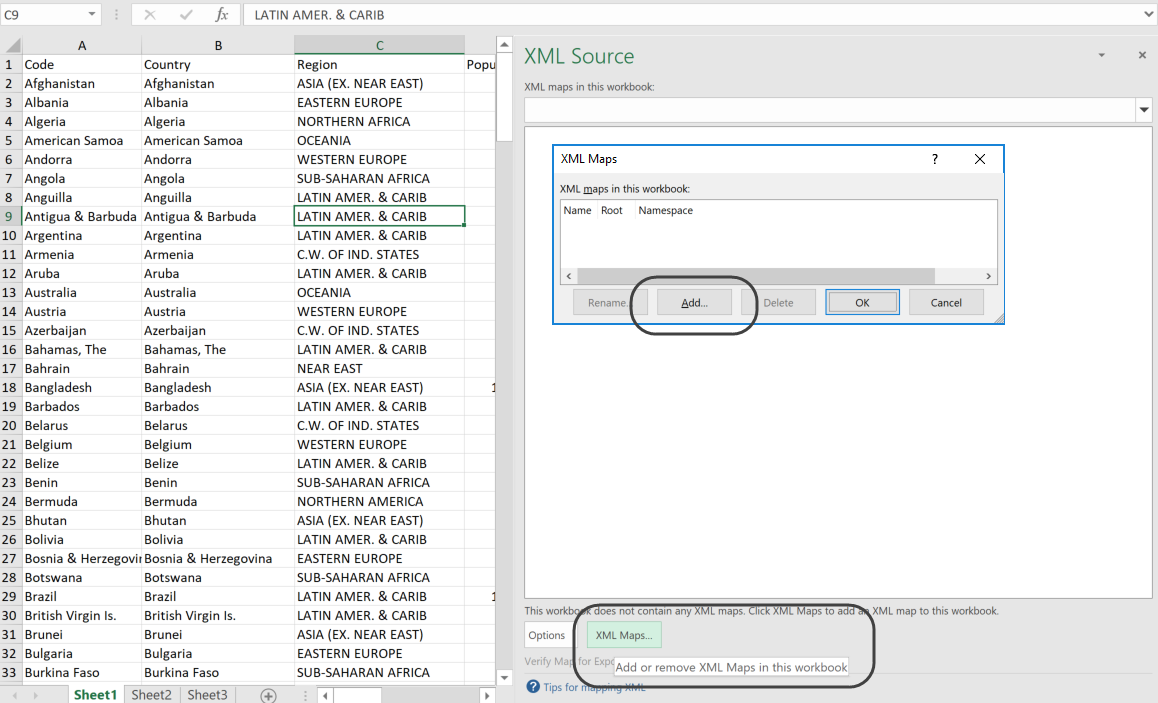
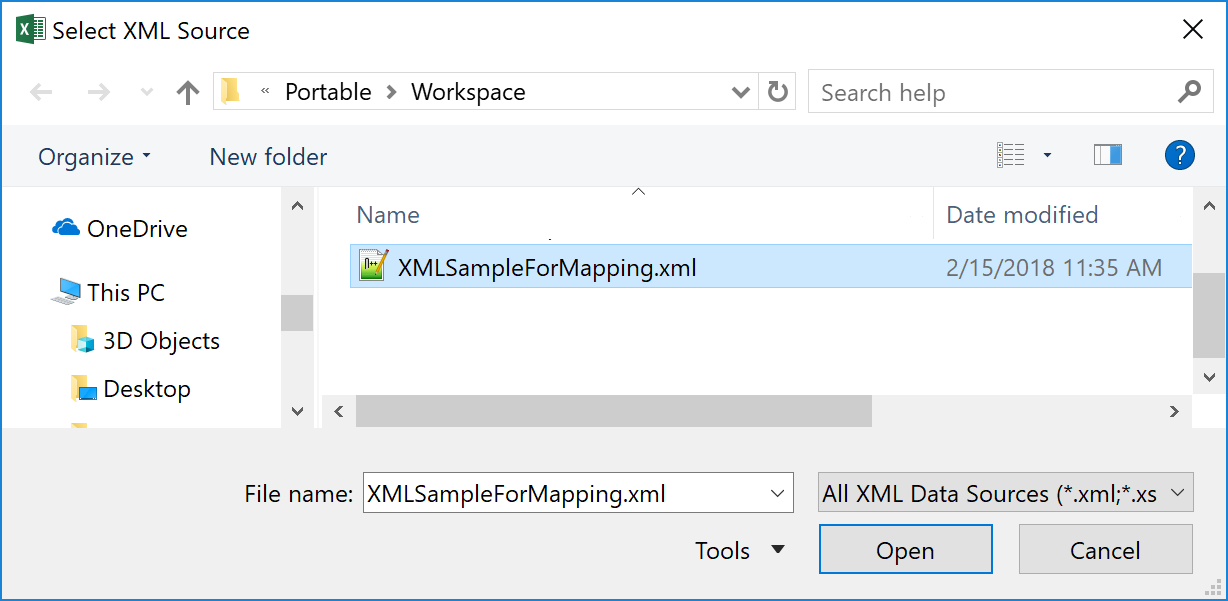
Select the temporary XML file that indicates the desired columns (as created previously).
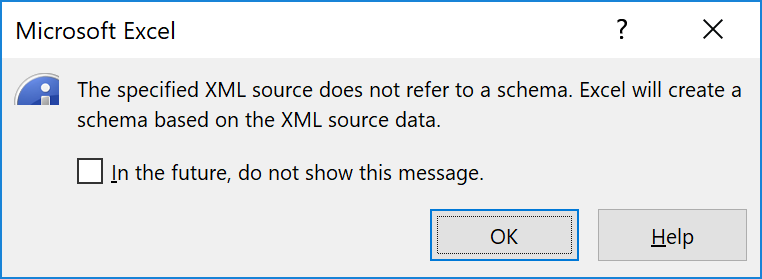
You may notice that Excel indicates that it will generate an XSD based on this sample. Click OK to continue.
Once the definition loads up, you will be able to notice that it displays the name of the root node, which should be BizAgiWSParam.
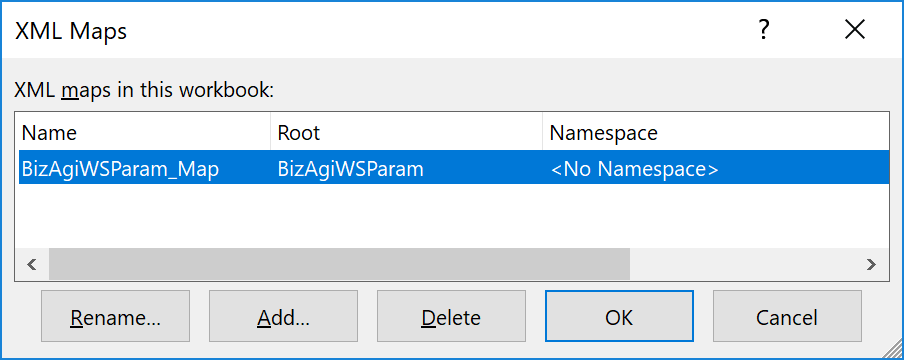
Click OK and review that the columns you explicitly defined in the XML are shown in the structure to the right.
You may start mapping these into the columns of the Excel where your data resides.
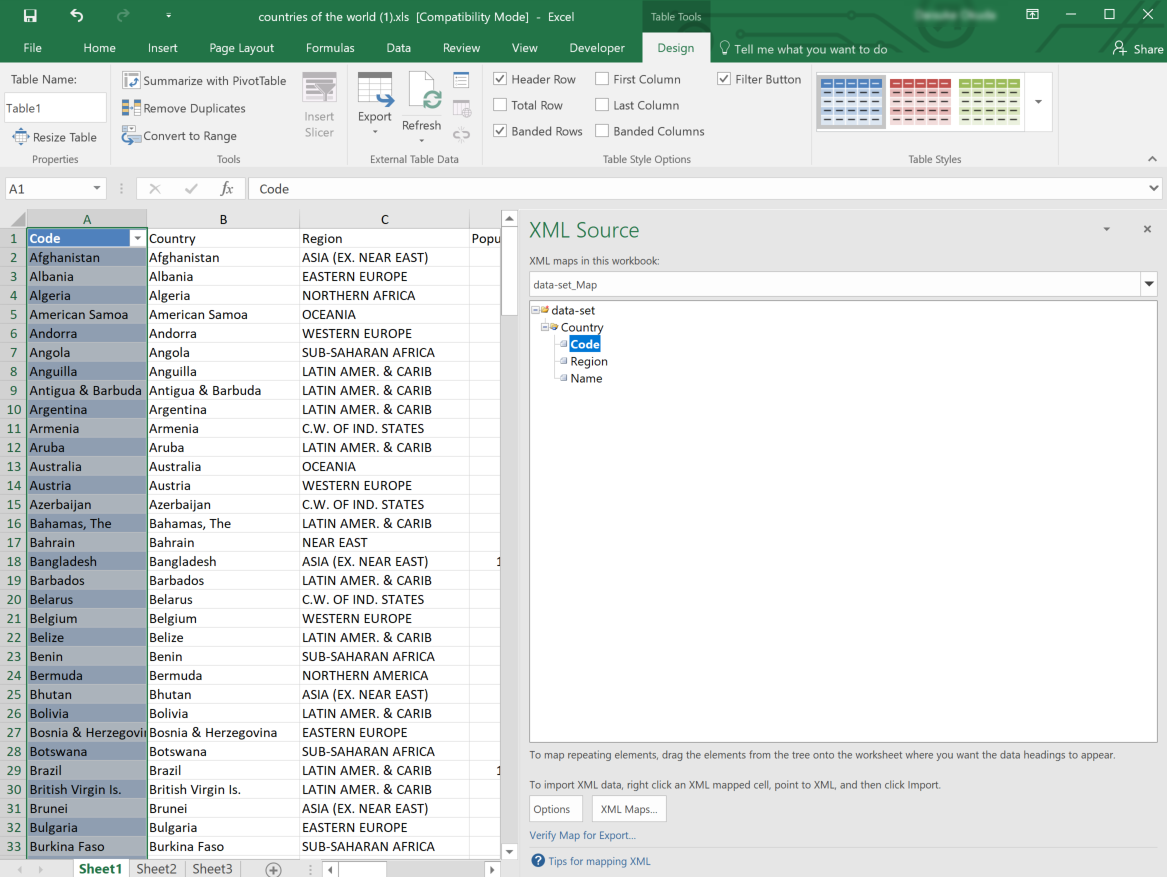
To do this, drag and drop the loaded definitions (e.g, data-set/Country/Code into cell A1).
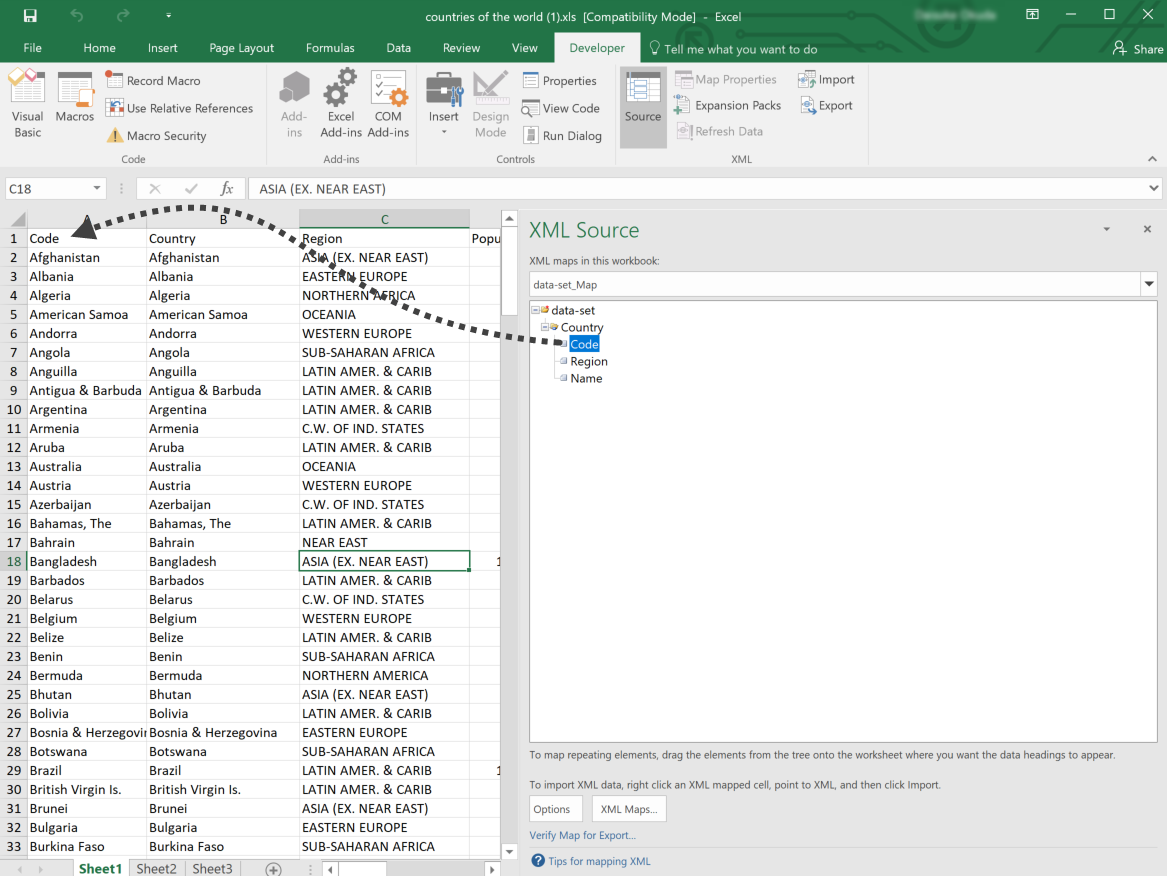
To make sure that the mapping was taken correctly by Excel, you should be able to see that the whole column highlights and becomes selected while enabling a filter at the A1 cell (the Code header):
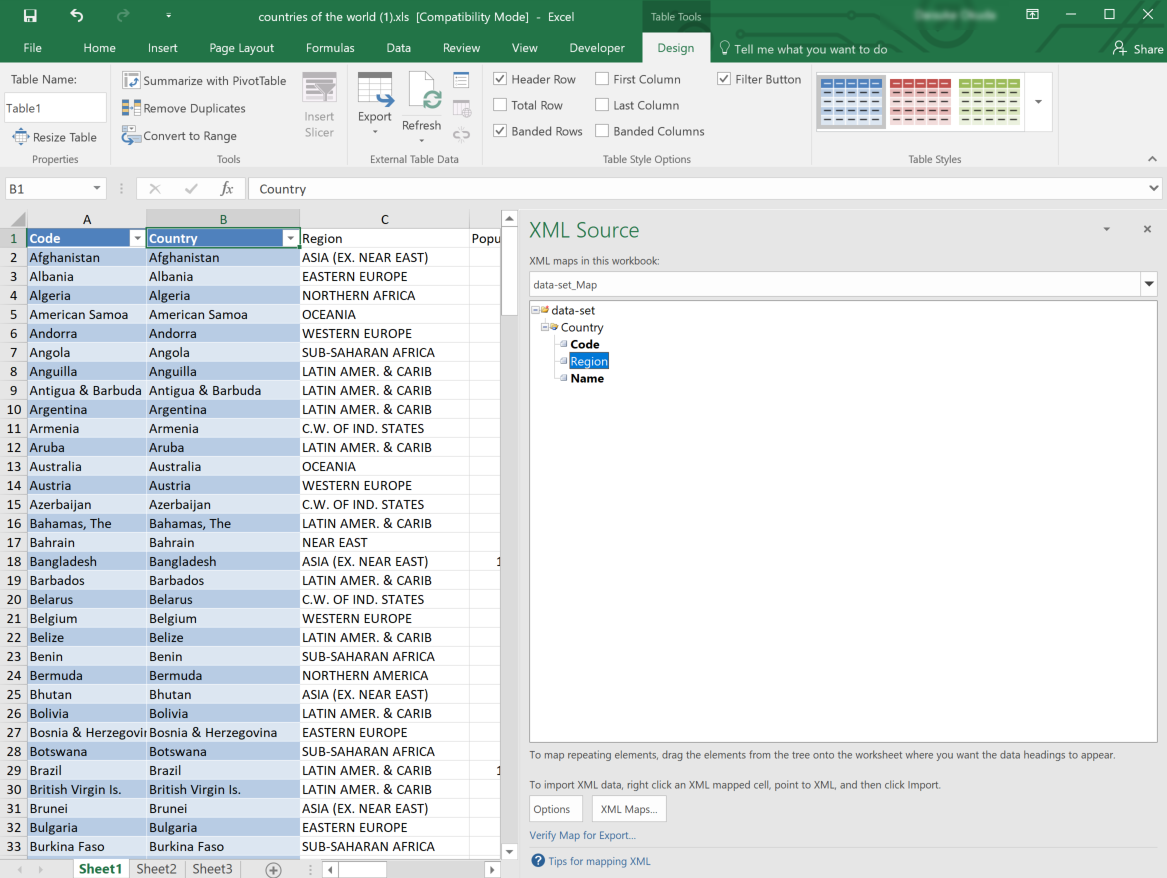
Repeat the steps for all loaded definitions (do this for data-set/Country/Name and data-set/Country/Region):
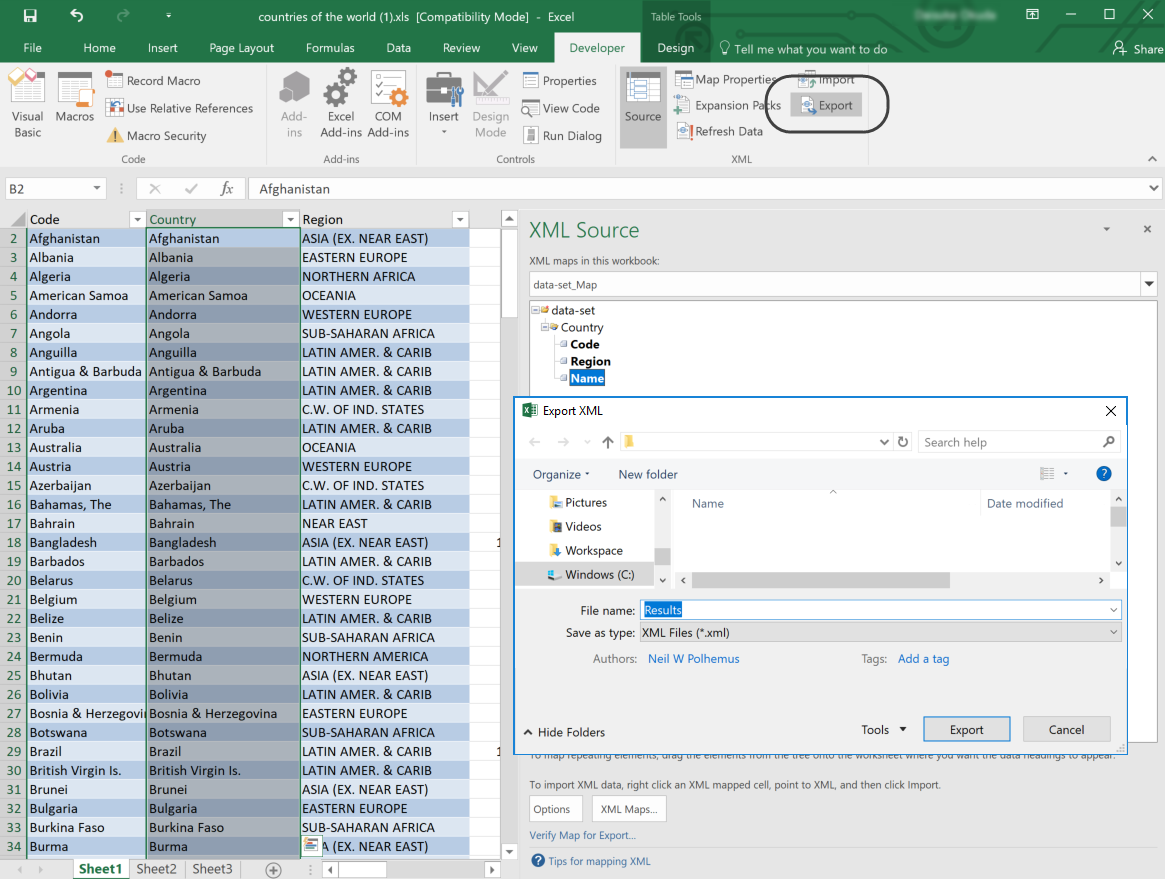
Once done, when all three columns are highlighted, click Export and name your output XML file:
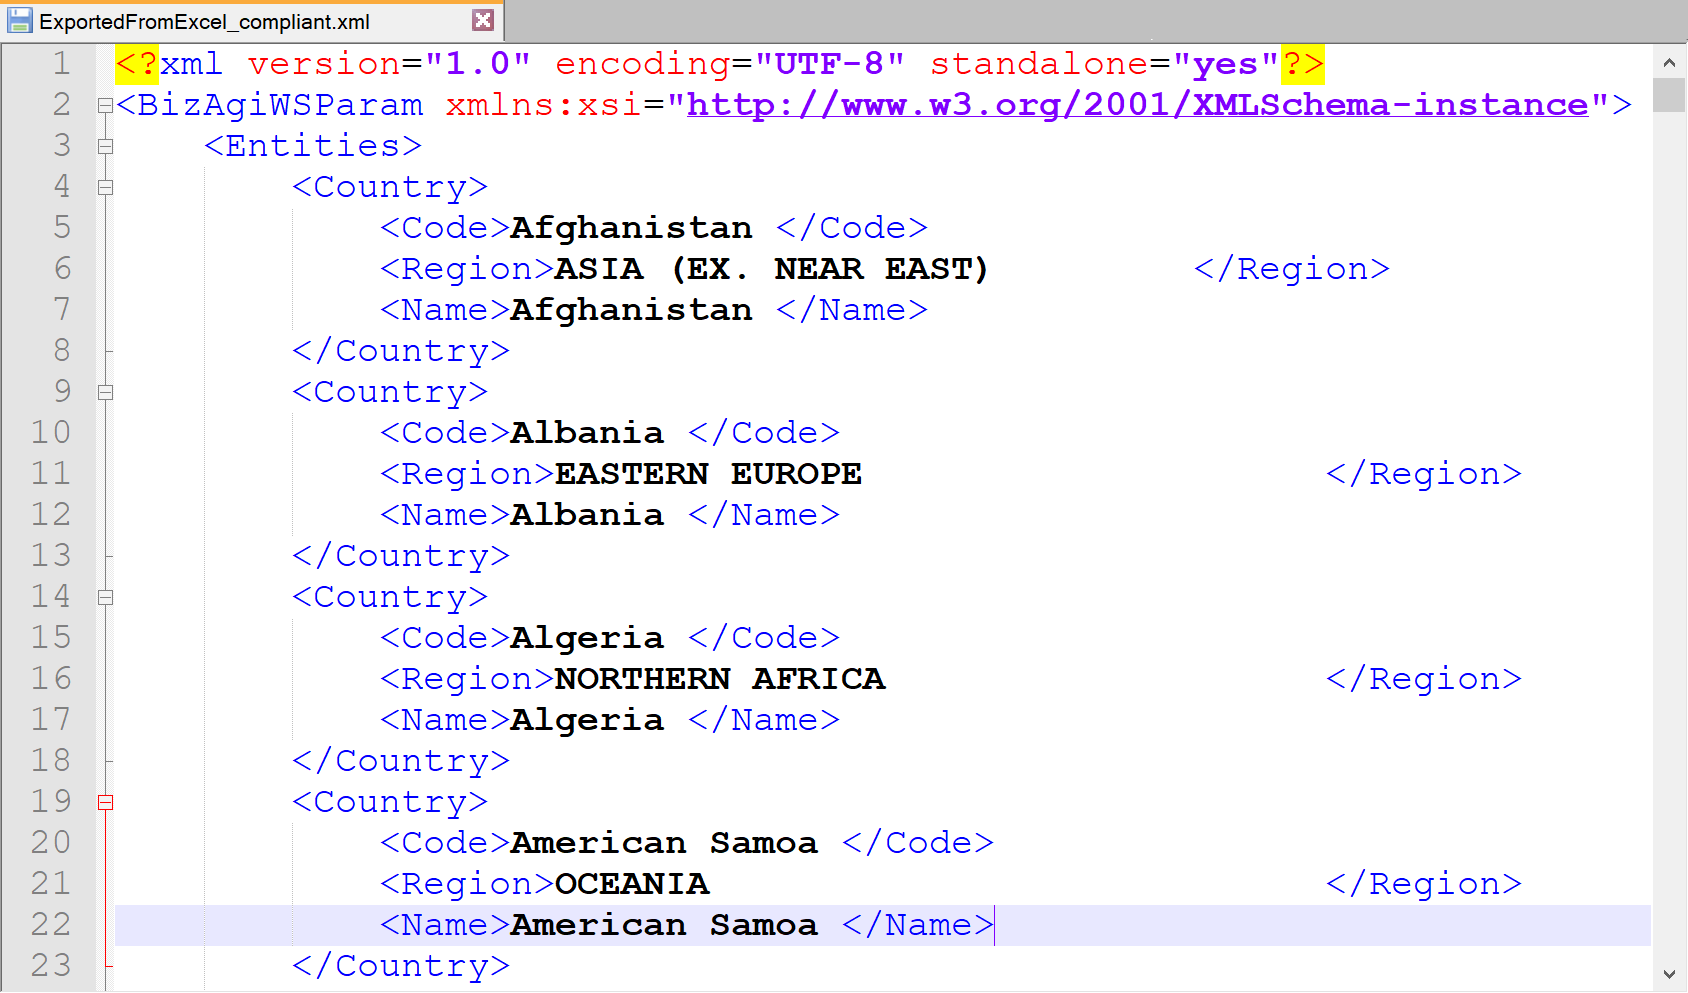
Your exported XML should look somewhat similar to the following image (starting out with <BizAgiWSParam> and followed by <Entities>):
|
For full reference about these Excel features or when troubleshooting, you may refer to Microsoft's documentation at https://support.office.com/en-us/article/map-xml-elements-to-cells-in-an-xml-map-ddb23edf-f5c5-4fbf-b736-b3bf977a0c53. |
3. Invoke Bizagi SOAP web services
This final step is about getting to use a SOAP web services client to invoke Bizagi API and populate data.
To use Bizagi SOAP web services, first make sure these are enabled in your project (at Configuration -> Environment):

It is recommended to enable the WS-Security web services. Though for simplicity of this example and if not will be using these web services in a production environment, you may use the legacy web services instead (you need at least one of the two).
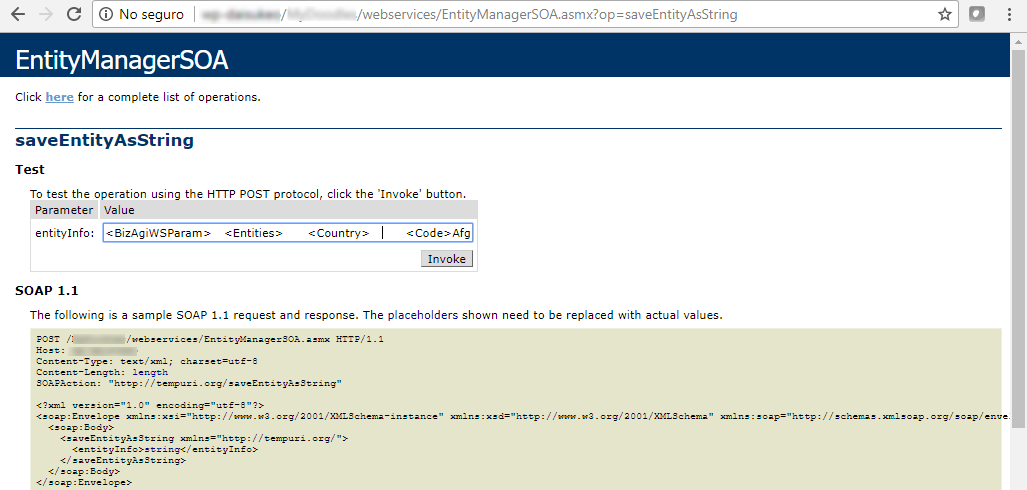
Once the web services are enabled, use a SOAP web client of your choice to send out the content of the XML produced in our previous step to invoke the EntityManagerSOA's saveEntityAsString web method.
If you wish to send out the XML by itself, then you may invoke the EntityManagerSOA's saveEntity web method (which receives an XML instead of a string but with the same information structure).
For this purpose, you may use SOAP UI or a similar tool.
For a quick start you may use the built-in web services test client bundled in the web services pages for saveEntityAsString.
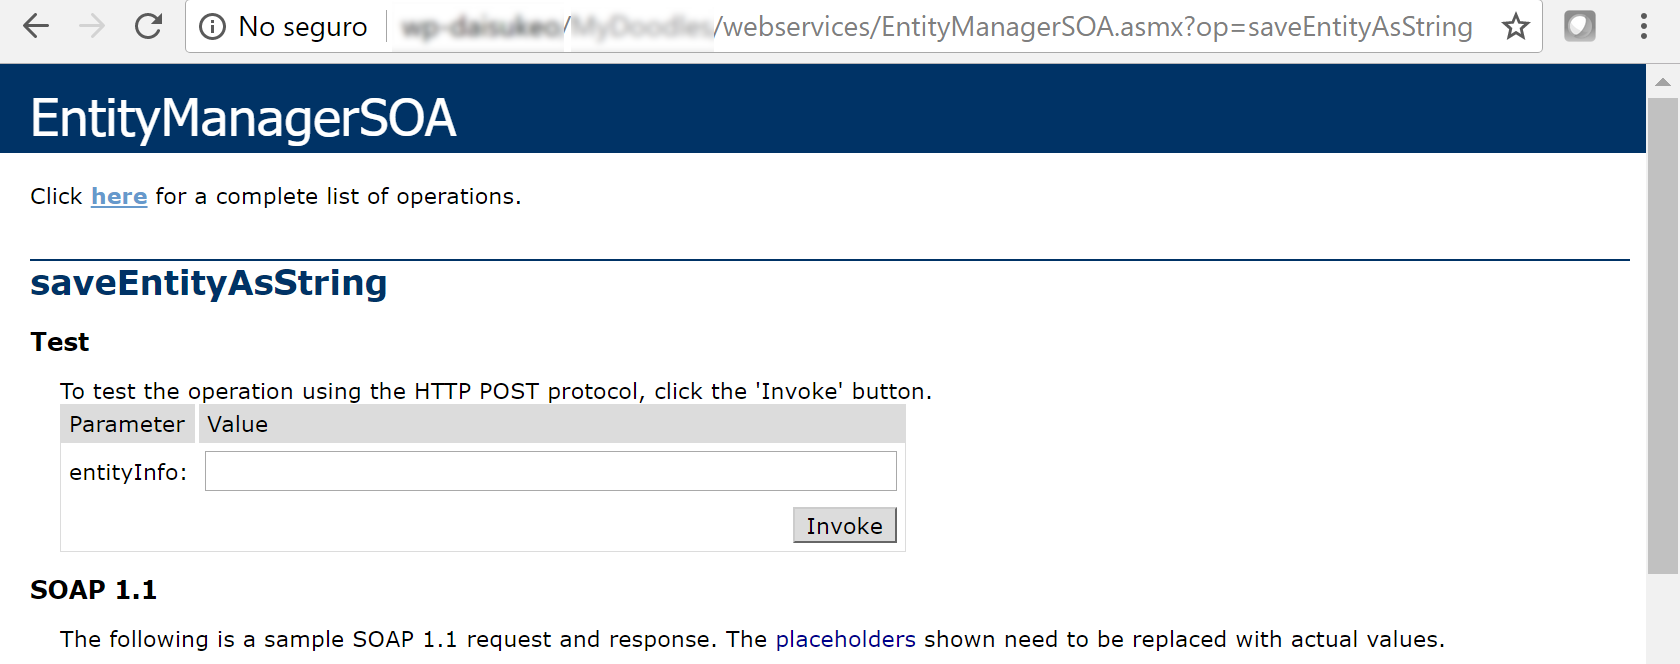
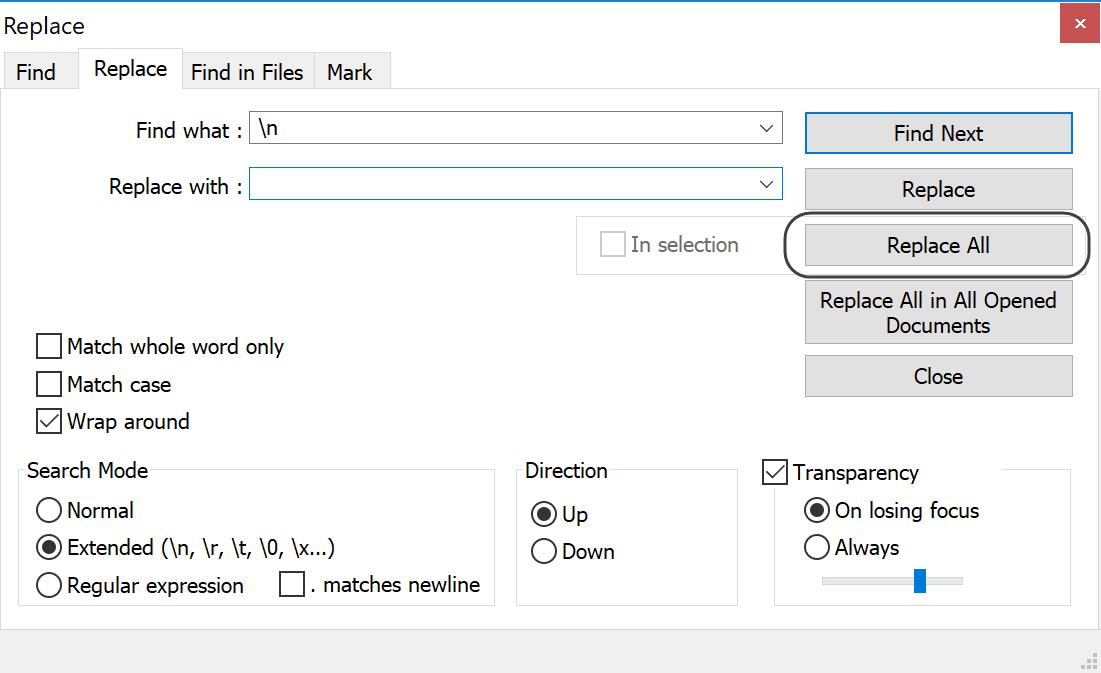
If you will be using this bundled web services client, make sure that you remove all break lines so that the content in the XML is held in a single line of text.
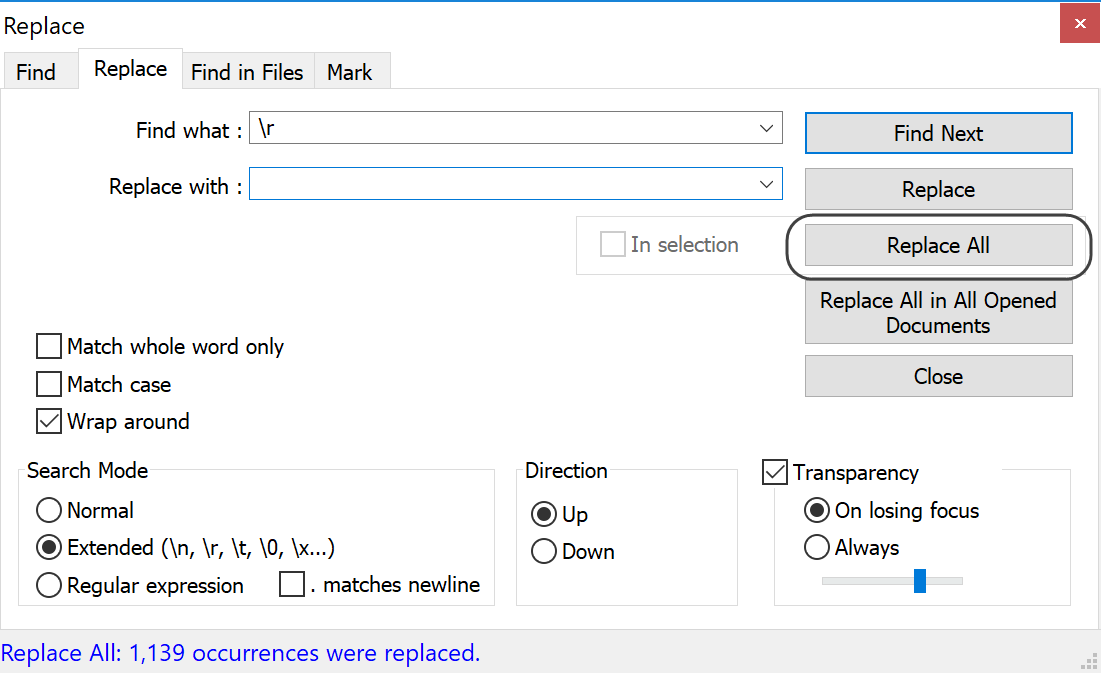
For this you may rely on a text editor such as Notepad++ or others, replacing \r and \n:
Make sure you replace all occurrences with no character whatsoever:
In the end, an XML in a single line of text should look like the image below:
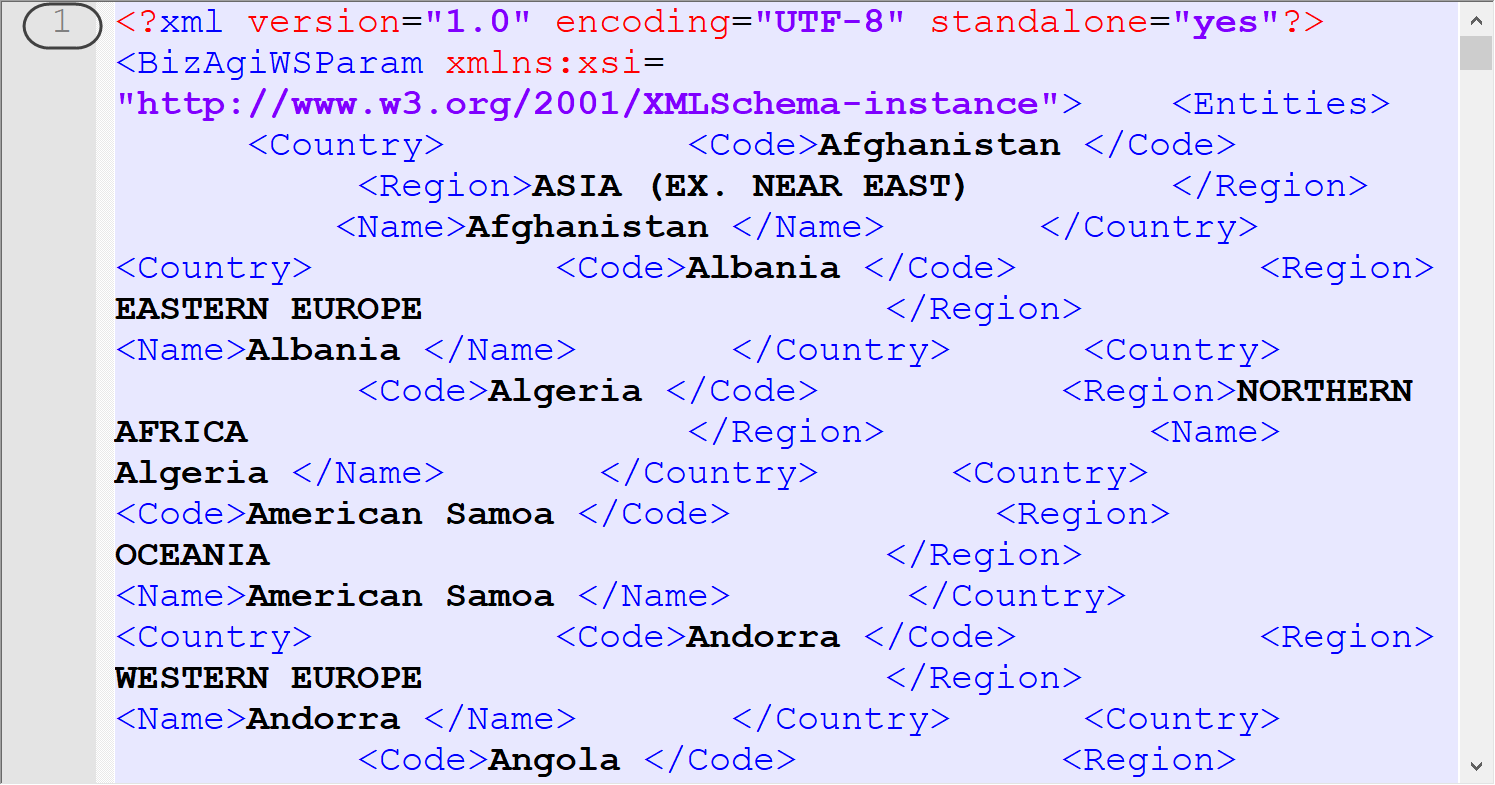
Once having the content in a single line, copy it into the entityInfo textbox and click Invoke:
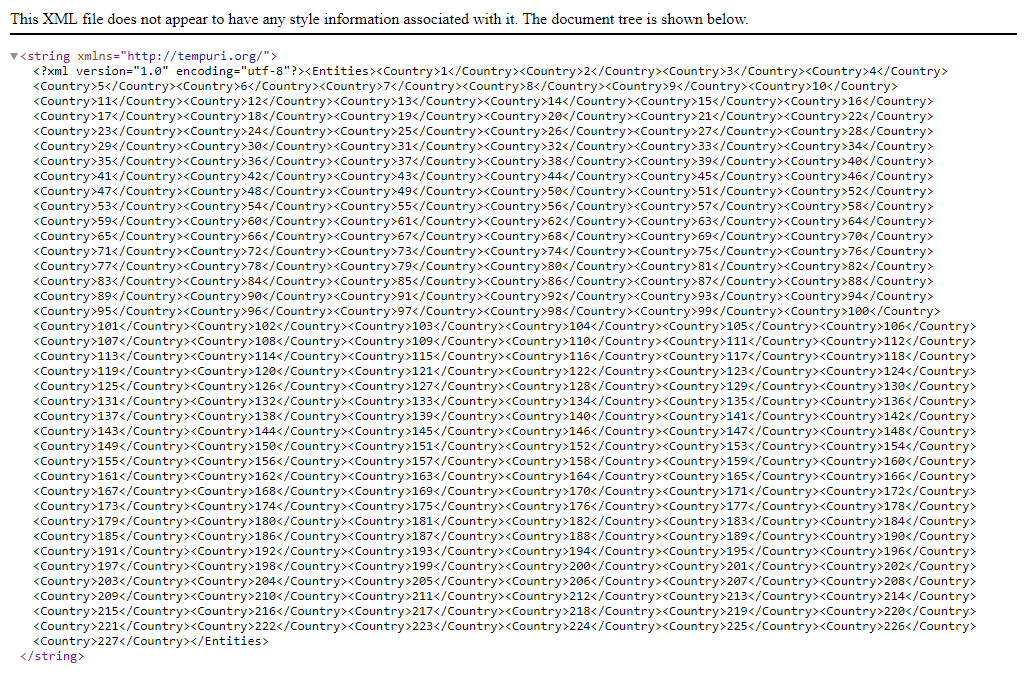
A successful invocation will display multiple occurrences of the <Country> element, but this time each one will contain the unique internal key assigned to each record.
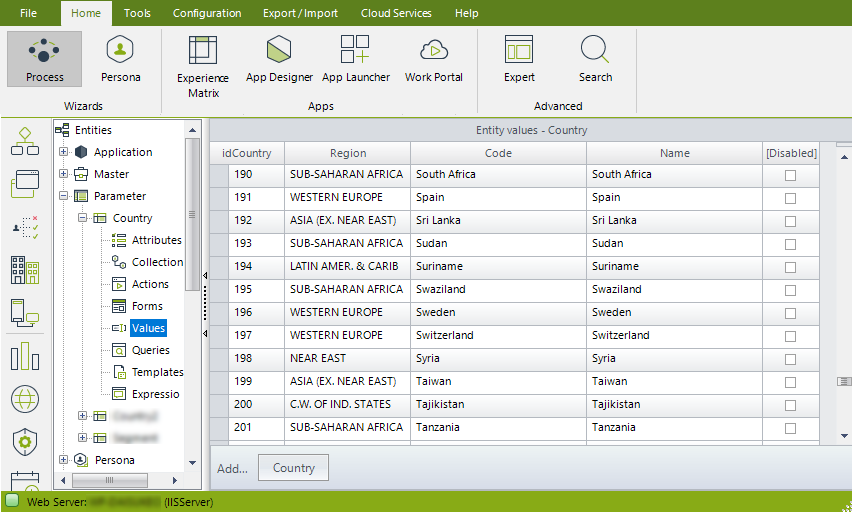
When doing this in a development environment, you may also easily double-check that the populated values are OK, by browsing your specific entity (at the Entities Expert view), and clicking on values:
At this point we are done, and you may start to use such values directly from your Bizagi processes!

Last Updated 1/24/2025 4:54:51 PM