Important notice
Due to a decision by Microsoft to discontinue support for the Form Recognizer API versions 2.0 and 2.1, the Form Recognizer connector in Bizagi is currently unavailable. Microsoft has confirmed that training custom models with these versions is no longer supported and recommends migrating to the Document Intelligence version v3.1 or v3.0 APIs, which offer enhanced model quality and capabilities.
The Bizagi team is actively working on updating the API version to restore functionality to the Form Recognizer connector. We apologize for any inconvenience this may cause and appreciate your understanding during this transition.
For more information on the changes and migration options, you can refer to the Microsoft Migration Guide.
Overview
This section describes the steps needed to execute a Form Recognizer connector and verify its functioning from the Work Portal.
Before you start
•Make sure that you have created:
oA Form Recognizer connector in Bizagi Studio.
oA process that allows you to (1) upload the file from which data is going to be extracted and (2) display the extracted data. You must do this in the first step of Bizagi Studio Wizard view, 1. MODEL PROCESS.
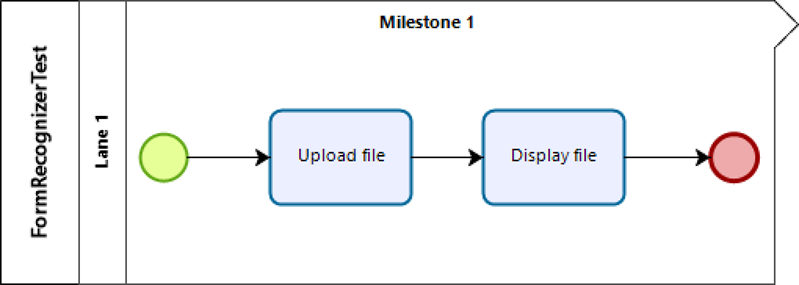
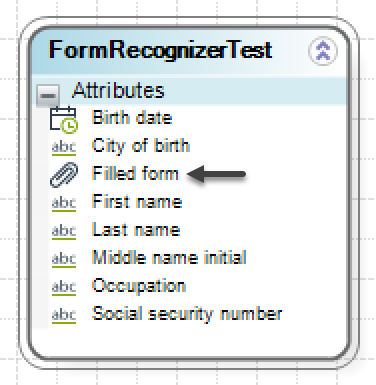
oA data model that allows you to map extracted data with Bizagi attributes. You must do this in the second step of Bizagi Studio Wizard view, 2. MODEL DATA. To be consistent with the data extraction structure generated in Review and define the data extraction structure, the following data model is assembled:
|
Notice that the data model includes a File attribute named Filled form. This attribute is the one that allows you to map the uploaded file as an input for the Form Recognizer connector. |
oThe required forms in each task of the process. You must do this in the third step of Bizagi Studio Wizard view, 3. DEFINE FORMS.
Steps
To execute a Form Recognizer connector in Bizagi Studio, you need to follow these steps:
1. Configure a Form Recognizer Activity action.
2. Execute the Form Recognizer connector.
1. Configure a Form Recognizer Activity action
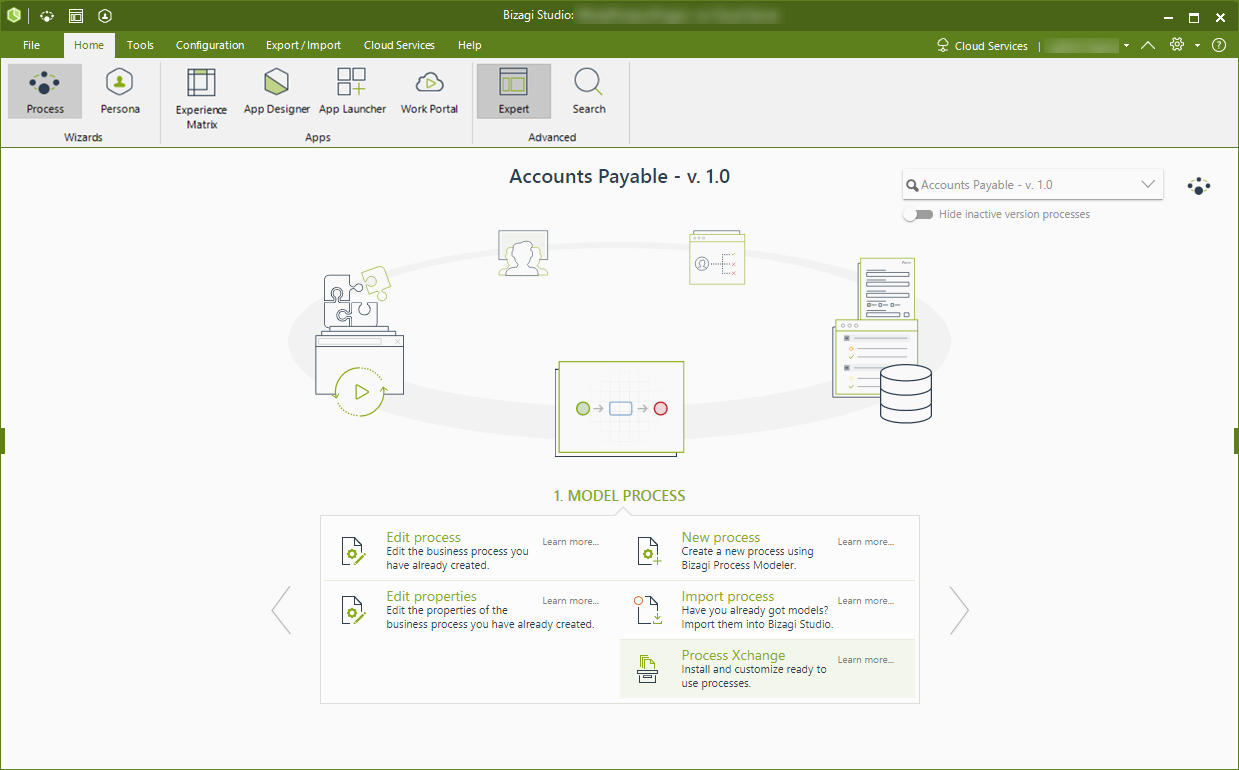
To configure an activity action, you must go to the fourth step of Bizagi Studio Wizard view, 4. BUSINESS RULES, and select the Activity actions option.
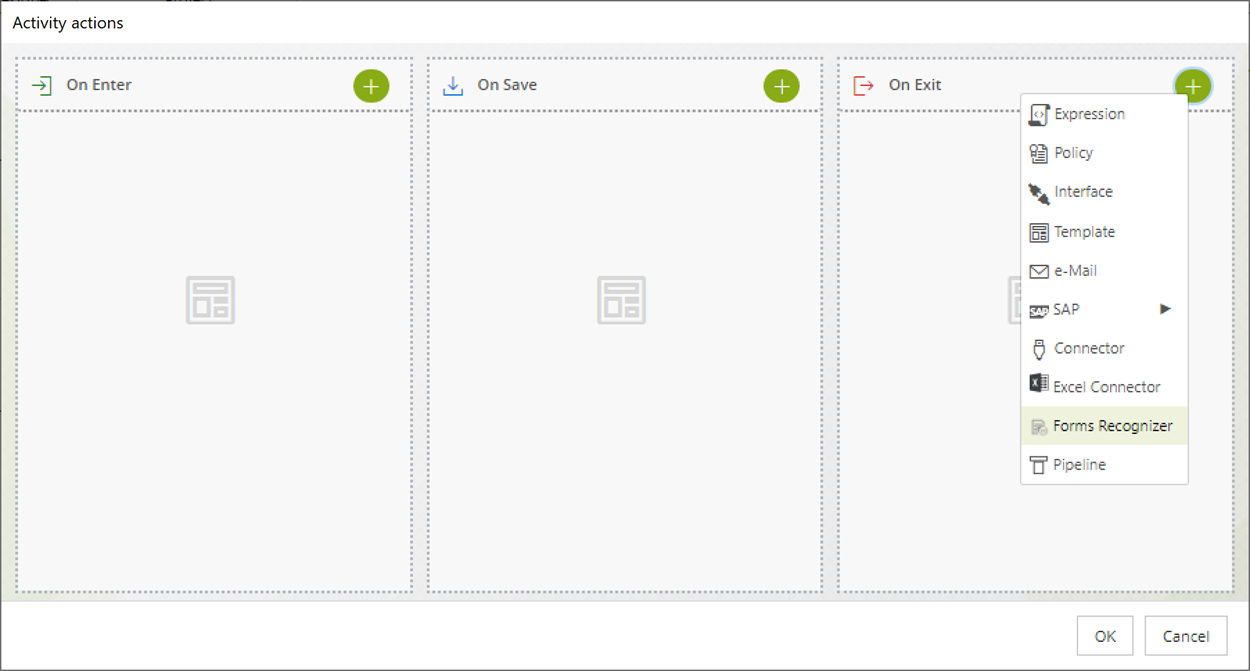
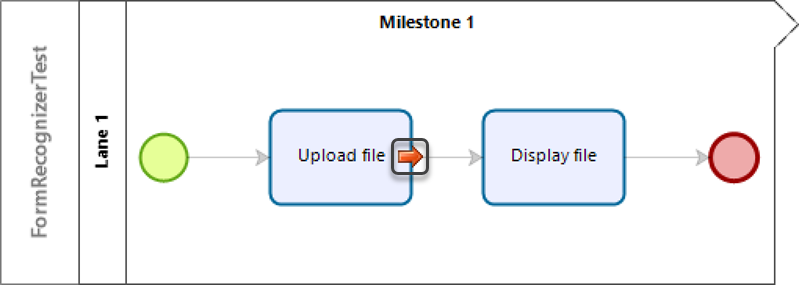
This opens a window that shows your selected process (in this example, FormRecognizerTest). In here, you must define in which task you are going to create the activity action, and if you want to create it On Enter, On Save, or On Exit. As you must first upload the file from which data is going to be extracted, the activity action must be configured after the upload process has finished. That being said, in this example you must create it in the Upload file task and On Exit.
To do this, click the task name and in the Activity actions window that appears, click the plus icon next to the On Exit label. Then, select the Form Recognizer option from the drop down list that opens.
The Form Recognizer action configuration wizard opens. This wizard has three steps: (1) Action definition, (2) Action inputs, and (3) Action outputs.
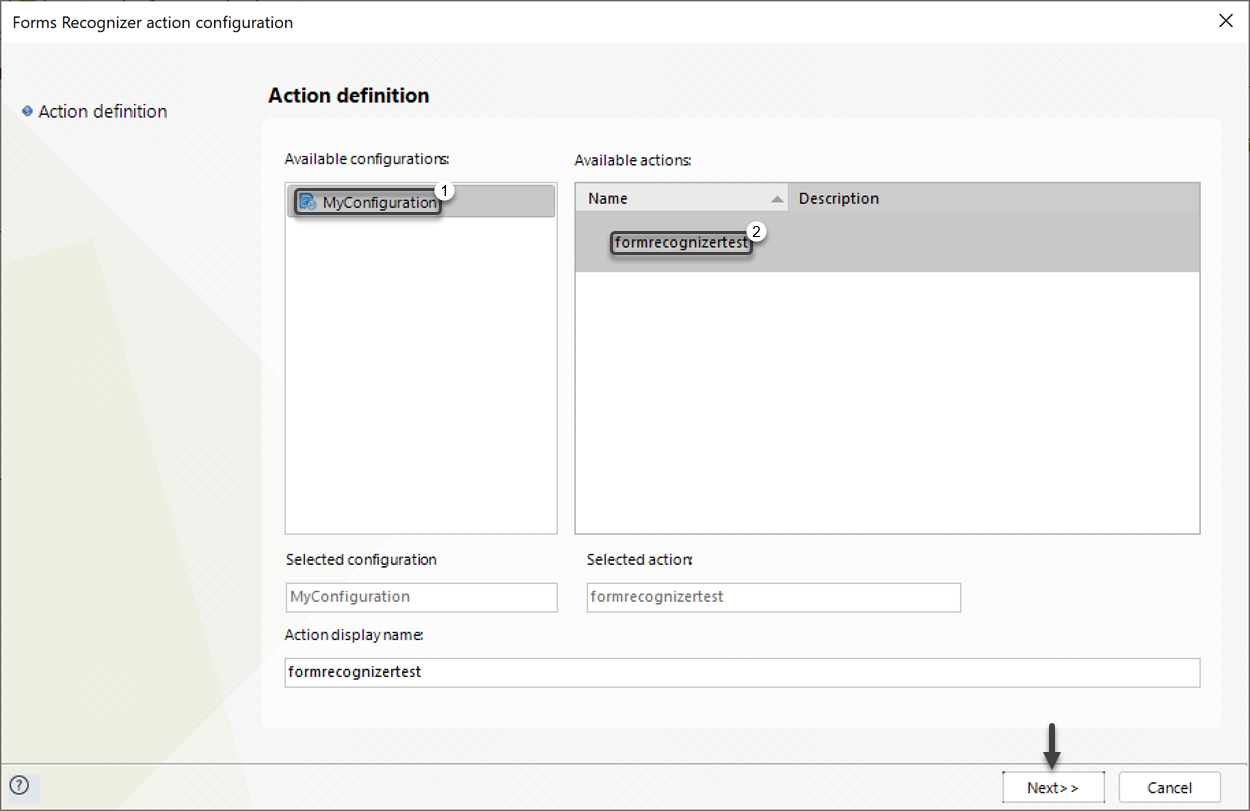
In the first step of the wizard, Action definition, you must select under the Available configurations panel the Form Recognizer connector configuration you made in Configure the connector (i.e. MyConfiguration). Likewise, in the Available actions panel, select the action you added to this configuration in Train a Form Recognizer custom model (i.e. formrecognizertest). Once you have done this, click the Next button to advance to the second step, Action inputs.
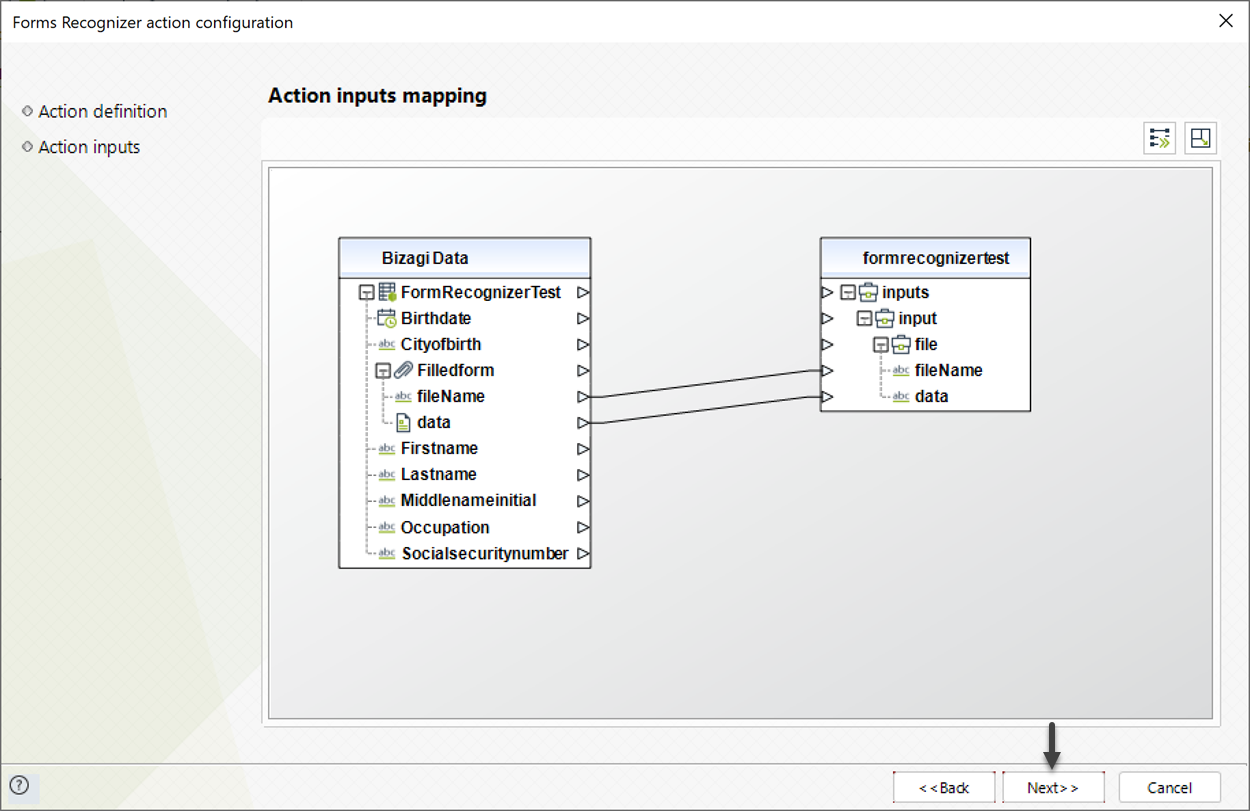
The Action inputs step allows you to map the inputs you require to execute the Form Recognizer activity action. As mentioned throughout this article, the only input you need is the uploaded file from which data is going to be extracted. Hence, map the fileName and data fields of the File attribute that contains the input file (in this example, FilledForm) as follows:
Then, click the Next button to advance to the last step of the wizard.
Finally, in the Action outputs step you must map the Fields of your data extraction structure defined in Review and define the data extraction structure with the Bizagi attributes of your project's data model. When you are mapping these fields, remember to verify that the fields' data type matches the attributes' type (e.g. BirthDate should have a Date type).
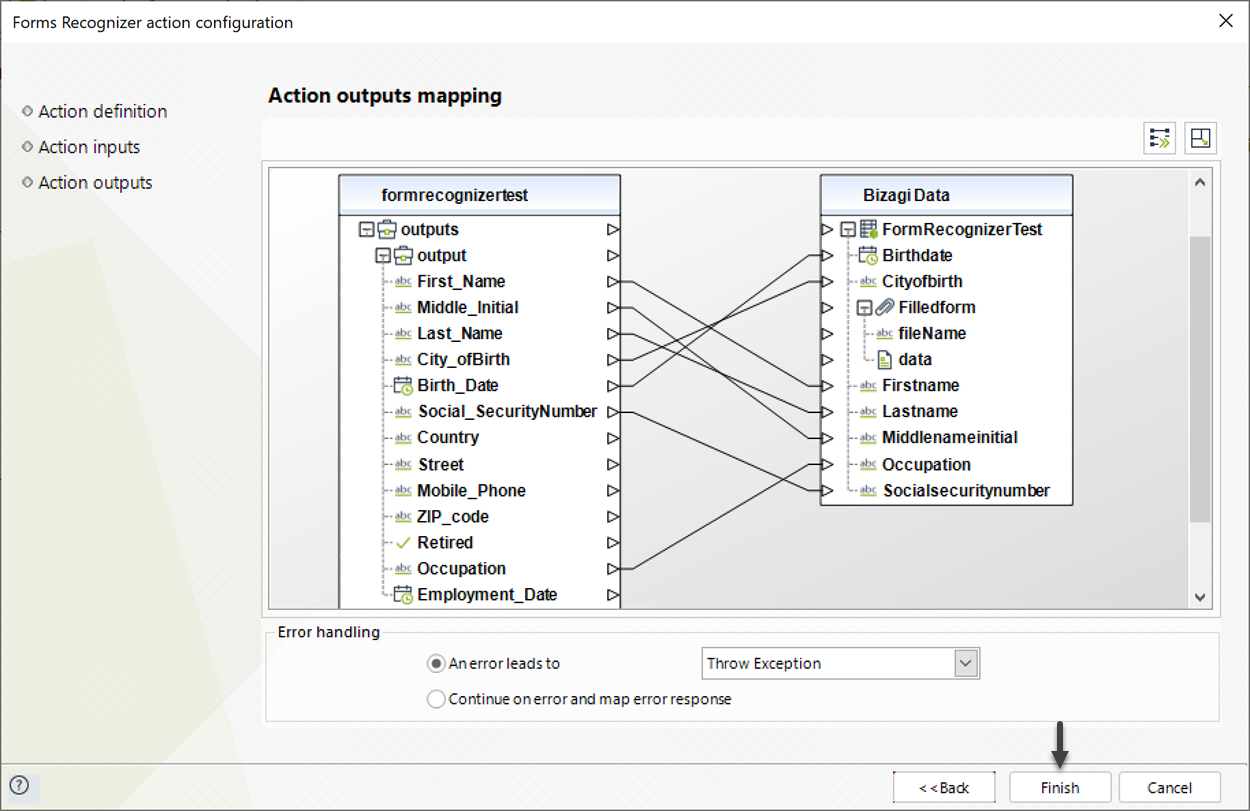
Once you have finished mapping the outputs of your Form Recognizer activity action, click the Finish button to close the wizard and save the configuration. To confirm that the activity action has been successfully created, verify that the task has a red arrow icon at the right side its name. This means that the activity action is indeed configured On Exit, that is, just after the task has been executed.
2. Execute the Form Recognizer connector
Once you have configured your Form Recognizer activity action, it is time for you to execute the connector and test the functioning of your data extraction structure. To do this, you must run your project by clicking the Run button located in the Project options of the Home tab.

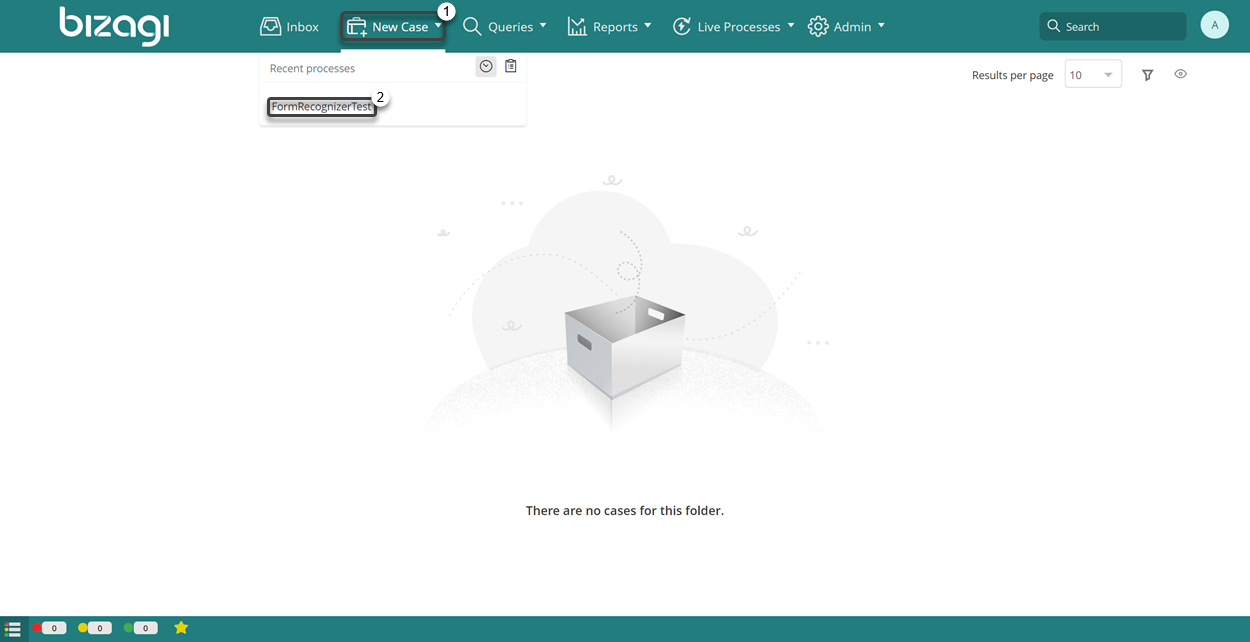
The project's Work Portal opens for you to create a new case inside the process where you have configured the Form Recognizer activity action. To do this, click the New Case button and in the drop down list that appears, select the process' name (in this example, FormRecognizerTest).
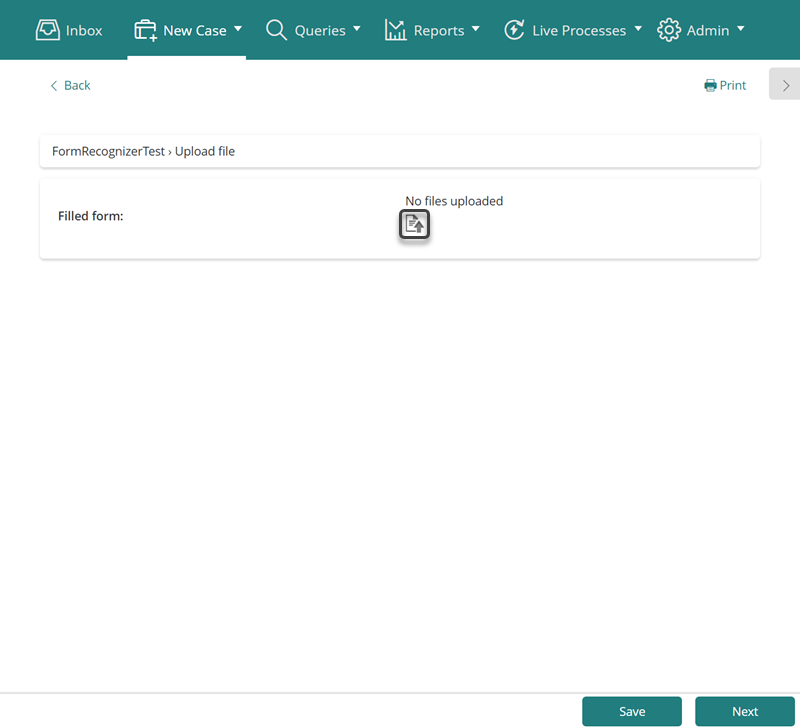
Once you have done this, the form defined in the Upload file task must appear. Click the file icon to upload the file from which data is going to be extracted.
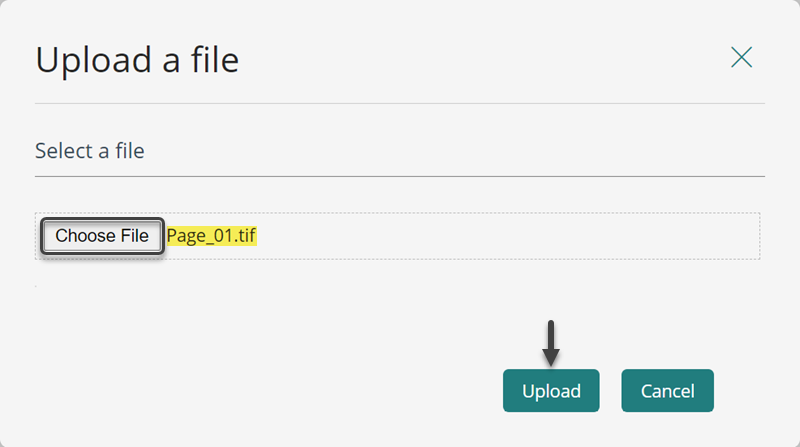
In the Upload a file screen, click the Choose File button and look for the file you want to upload. While you search for the file, recall that the Form Recognizer service supports only the formats listed in Requirements. Once you have chosen the file, check that its name appears on screen, and then click the Upload button.
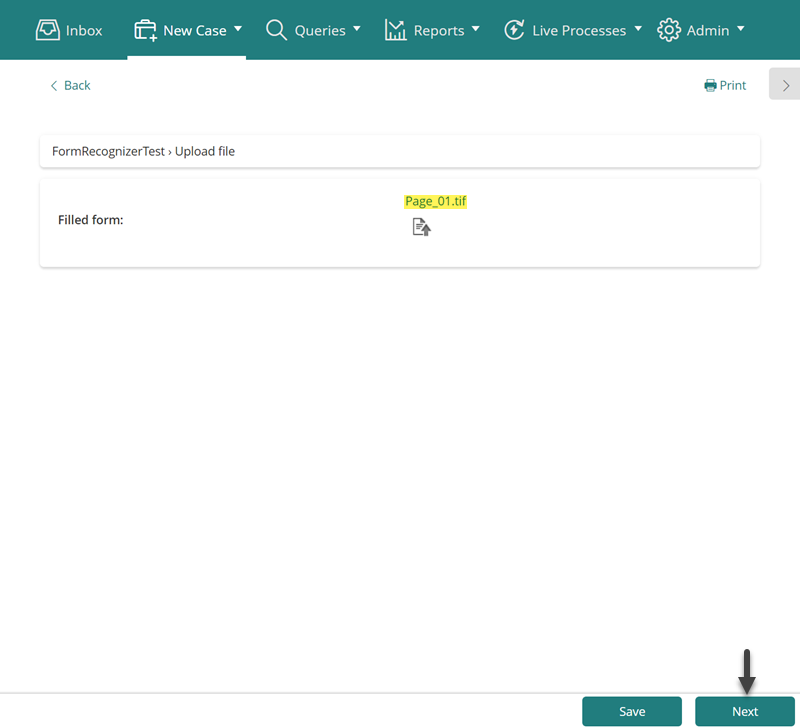
Back in the Upload file task's form, verify that the file has been successfully uploaded, and then click the Next button.
The Form Recognizer connector is executed and after a few seconds, you must see the results of the data extraction procedure in the form you have defined for the Display file task.
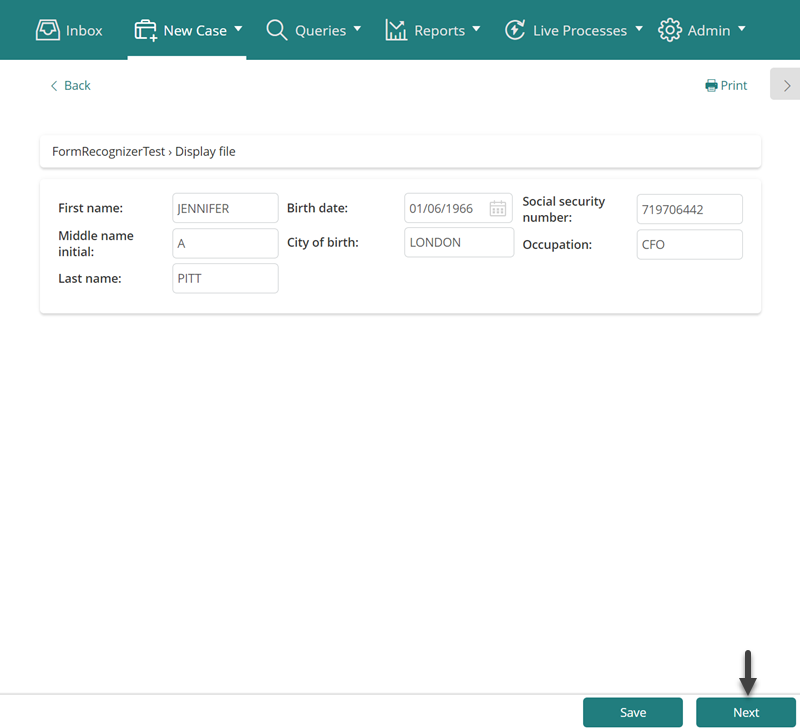
Verify that each attribute has the corresponding extracted value, complete any non-mapped information, and then click Next to end the process.
Last Updated 8/21/2024 9:52:46 AM