Overview
By default Bizagi displays two buttons in the footer of each activity; these buttons are Save and Next.
Form buttons is a feature that allow users to customize these default buttons and/or add new ones.
These buttons can execute business rules, validate data, save the form and advance the activities.
You can define their behavior according to the project's needs. The appearance of these buttons (text, colors) can be customized in order to provide friendly user interfaces in any device.
You can customize the Form buttons only in Activity Forms.

Properties available
The following are the available properties for each Form button:
You can combine between button execution and actions as desired.
For instance, you can execute an expression and then execute Next. Then, with a single click of the button an expression will be executed and then the case will move forward.
If you only require an action, leave the Button execution None.
If you only require a button execution, leave the Actions None.
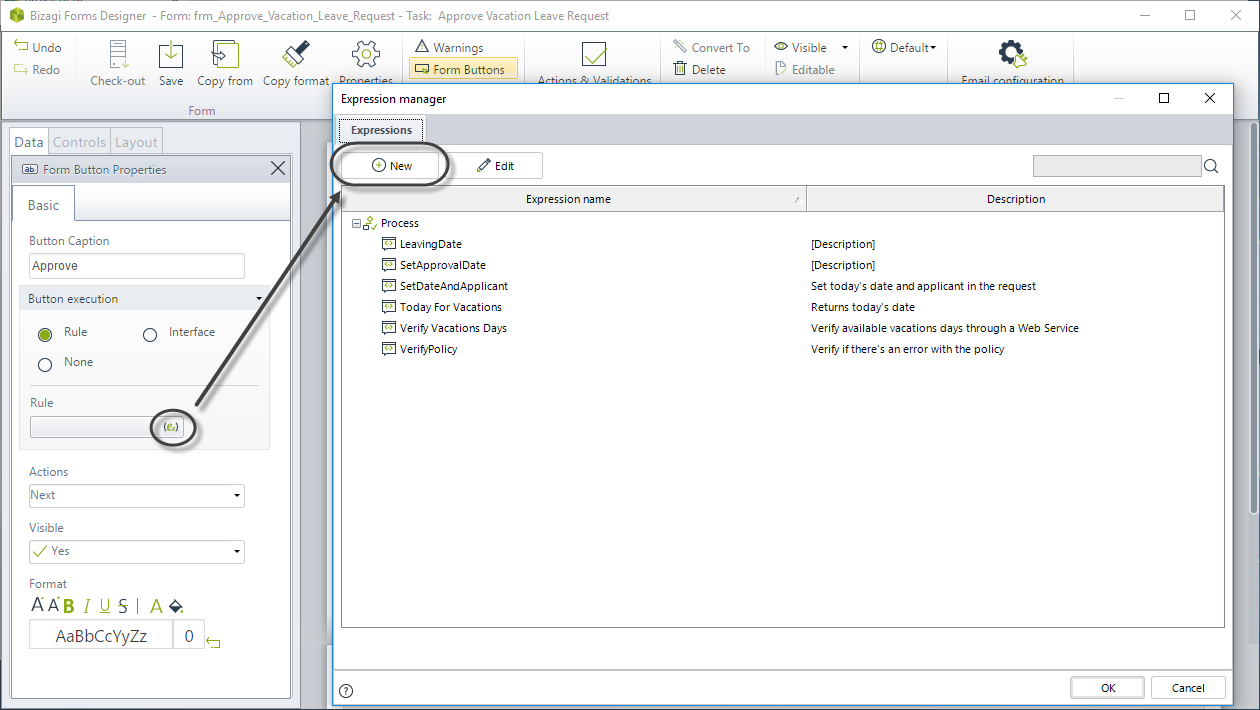
How to create a Form button
1. Go to the form where you need to create the Form button and enable the Form buttons option on the ribbon.

2. A new panel will display at the bottom of the form.
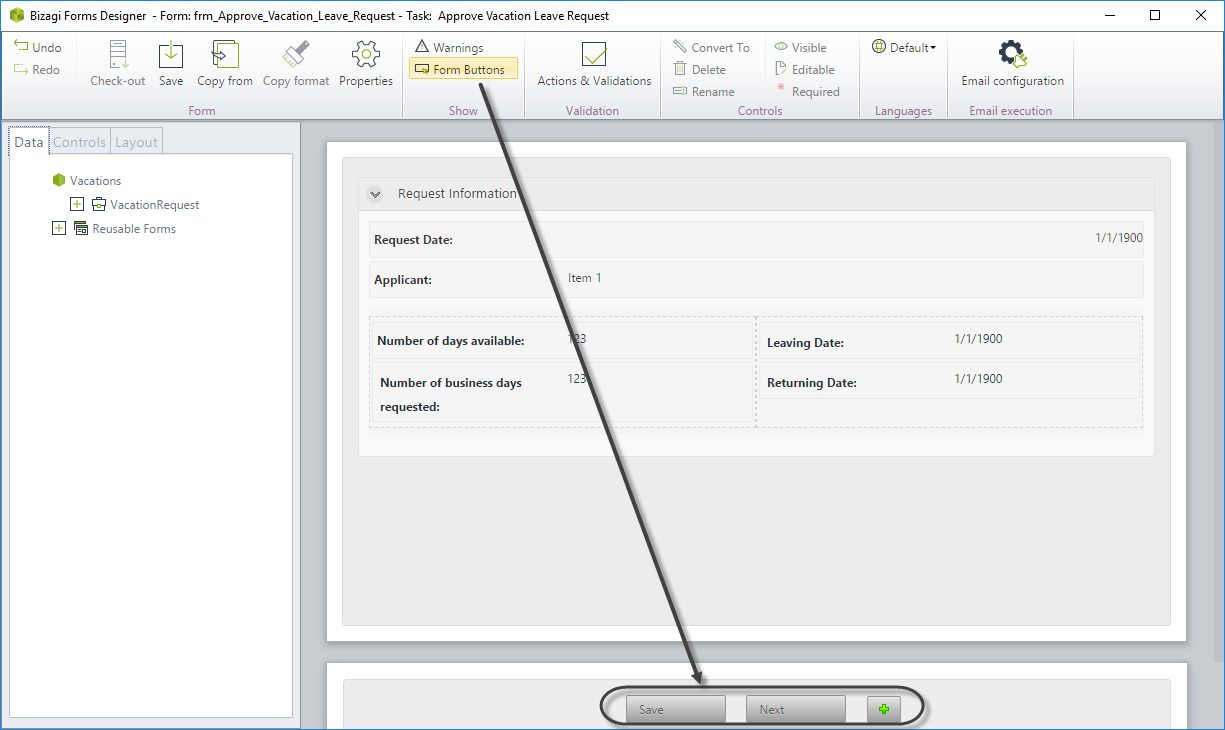
3. Click the Add icon to include a new button.
A new button will appear to the right.

4. Click the new button to display its properties.
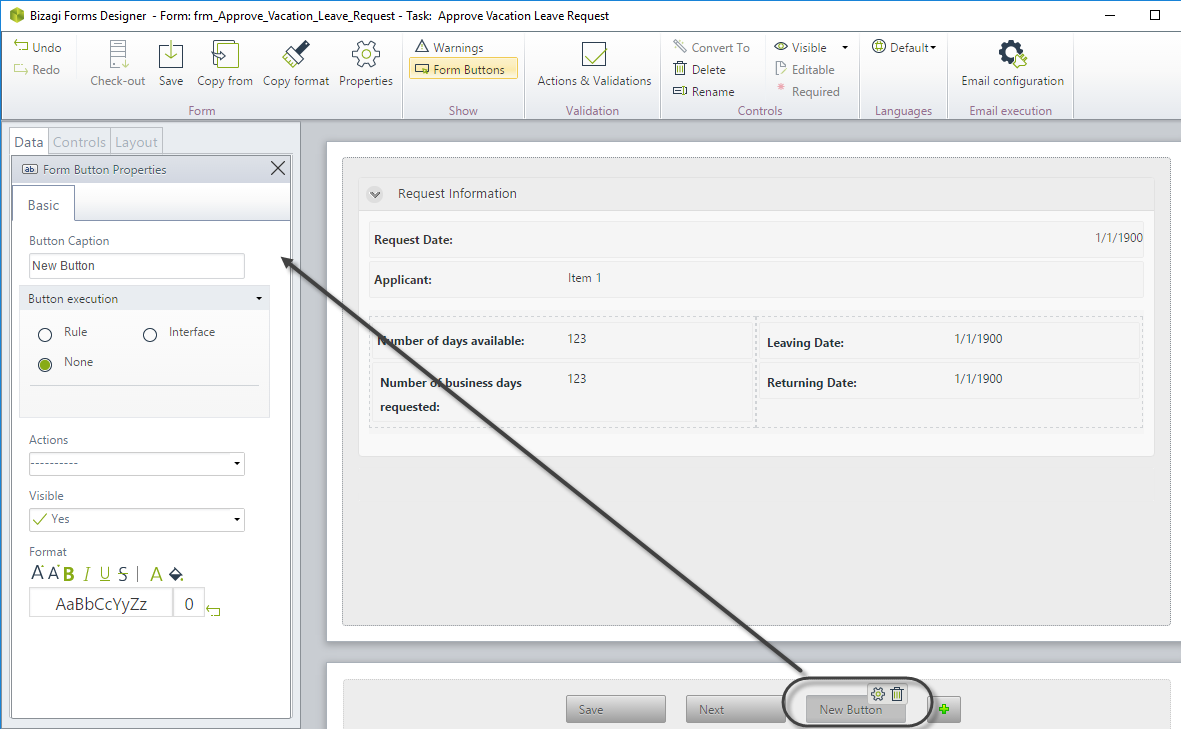
5. Define the required properties according to your needs.
How to edit a Custom button
To edit a custom button:
1. Go to the form where the button to be edited is found. Enable the Form buttons option on the ribbon.

2. A new panel will display at the bottom of the form. Click the button to be edited in order to display its properties.
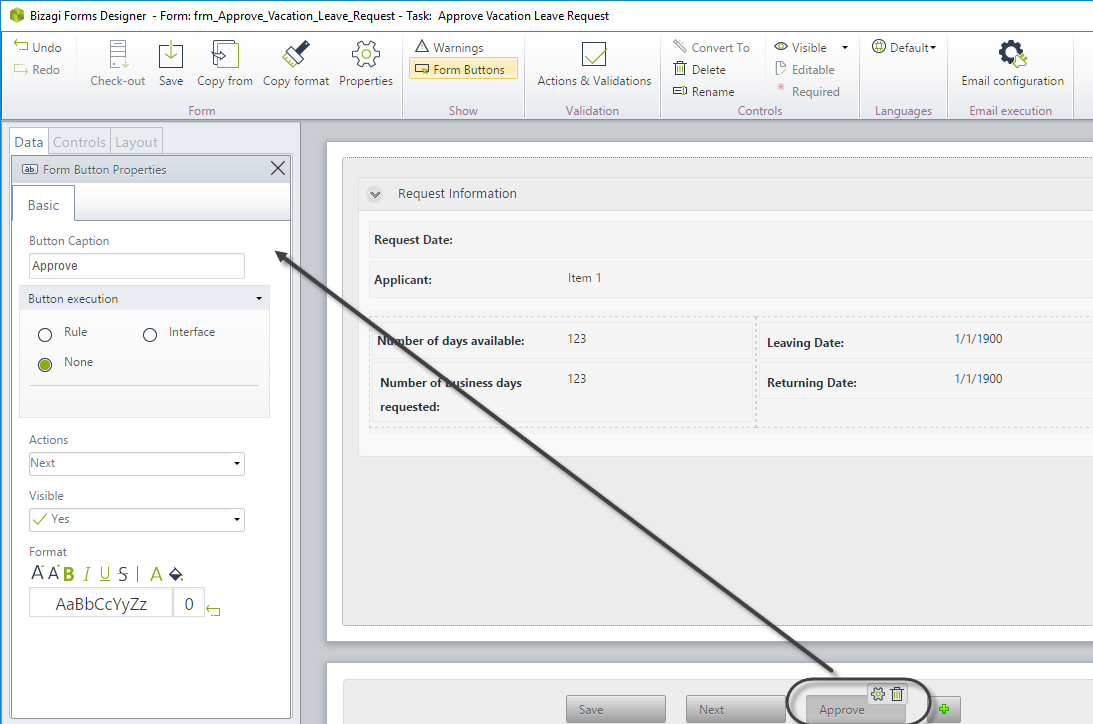
3. Change the button properties as you need.
How to remove a Custom button
1. Go to the form where the button to be deleted is found. Enable the Form buttons option on the ribbon.

2. A new panel is displayed at the bottom of the form. Click the button to be deleted.
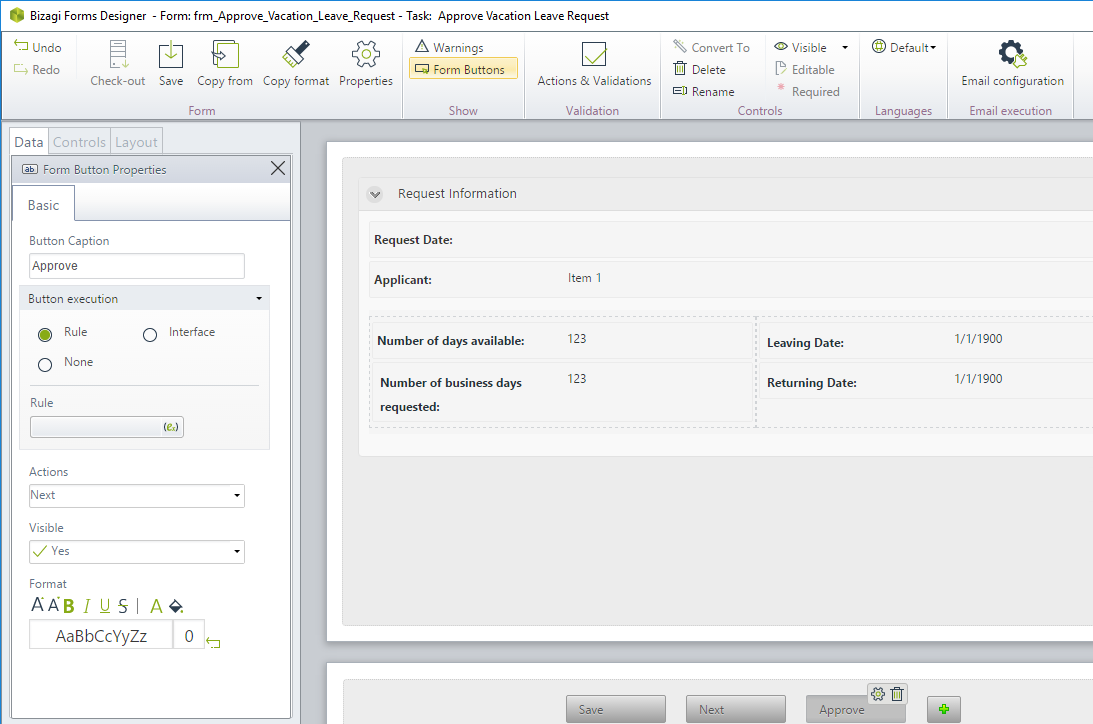
3. Click the Delete icon that will appear on the upper right corner of the button to remove it.

Example
In a Vacation Leave Request process, the boss of the person requesting vacations has to approve the request. The boss should be able to approve or reject the request just by clicking a button.
To meet this requirement Custom Buttons are used. Follow the next steps to create them:
1. Go to the form of the Approve Vacations activity and enable the Form buttons option on the ribbon.
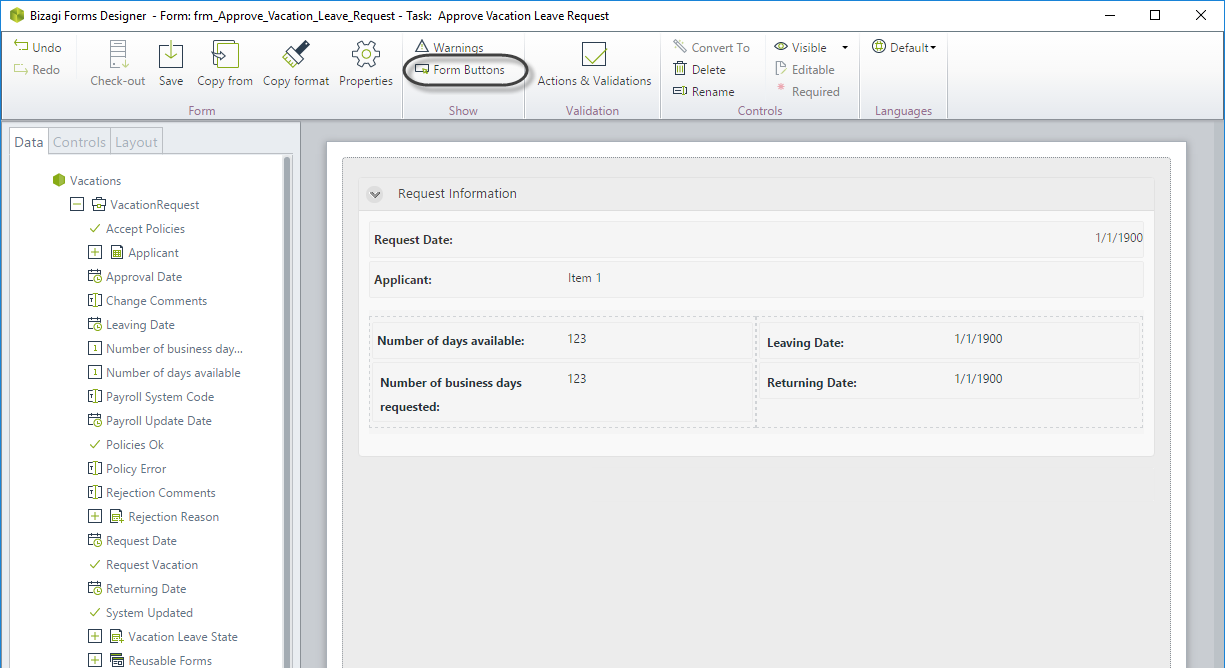
2. In the panel displayed at the bottom of the form click the Add icon to include a new button.
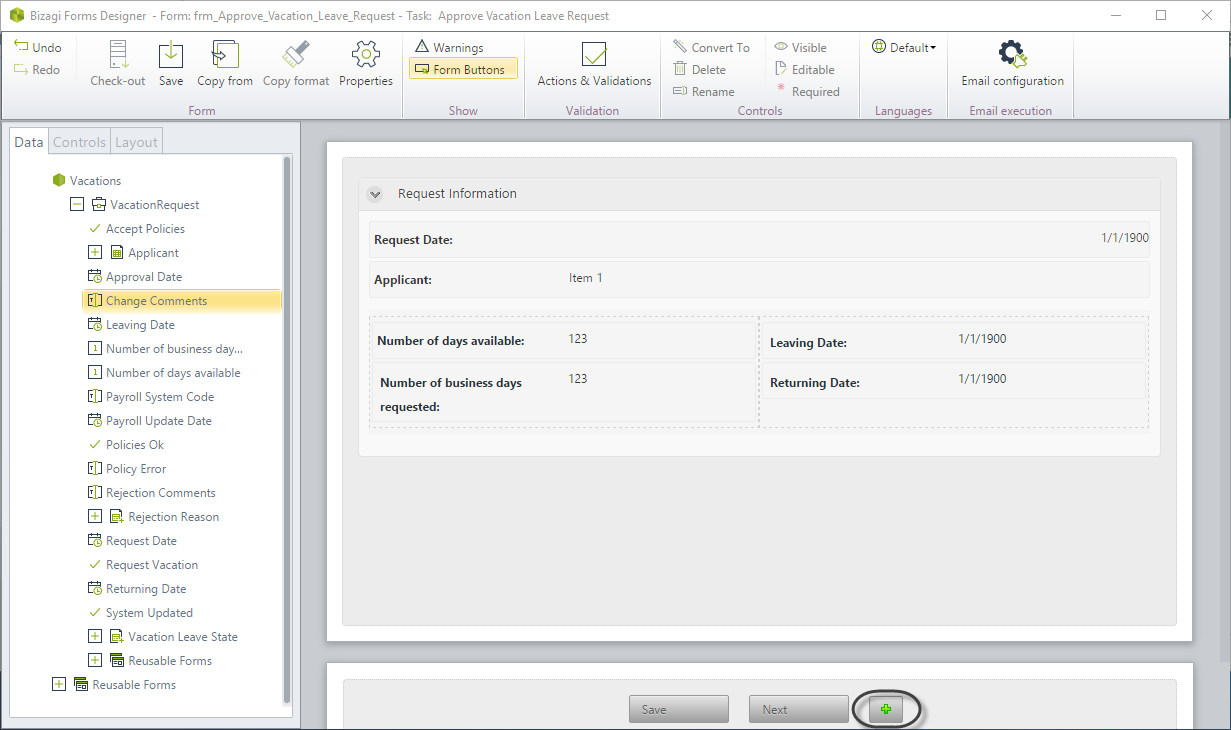
3. Click the new button. In the button properties define the following:
•Button caption: "Approve"- This button will be used to approve the request.
•Button execution : Rule - Once clicked, the button will execute a rule to identify the request as approved.
•Action : Next - Once clicked the button, the case will move to the next activity.
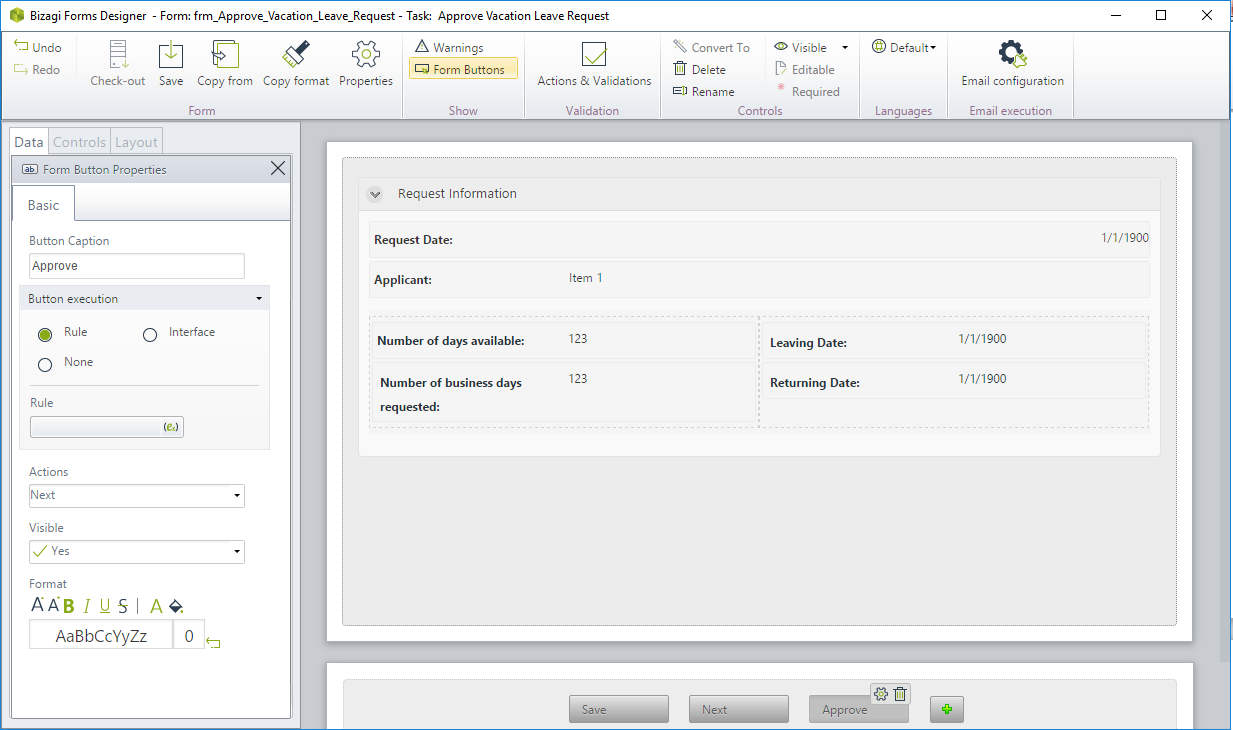
4. Now define the rule associated to the button execution by clicking the expression icon.

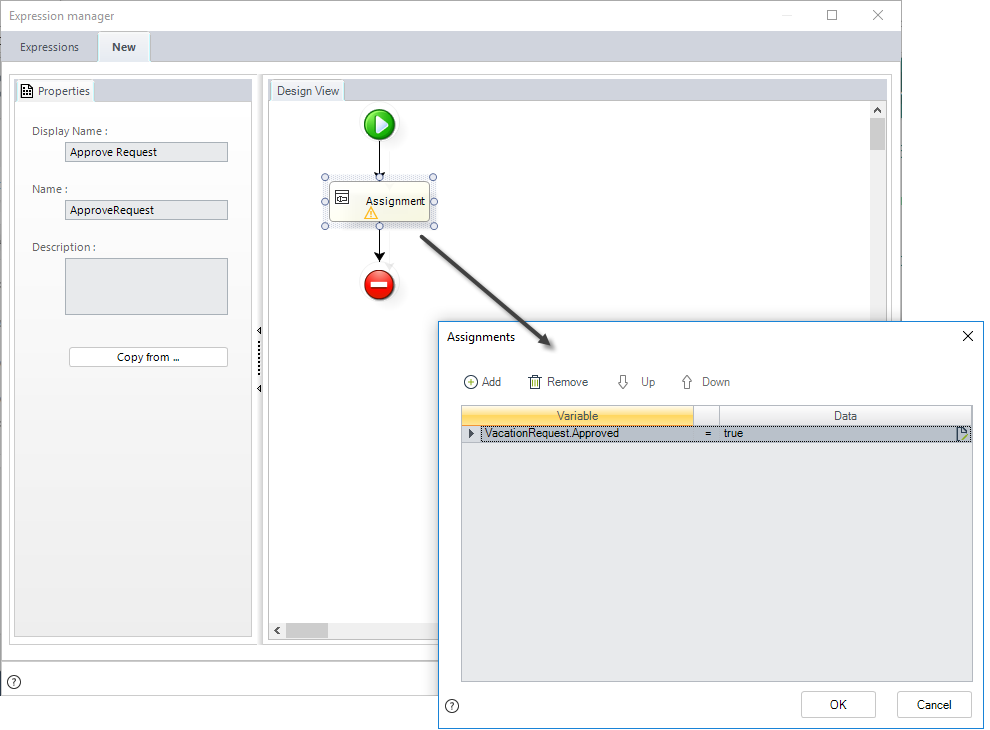
5. To identify if the request is approved or rejected, the process uses a Boolean attribute called Approved. If this attribute is in TRUE, the request is approved, otherwise is rejected.
This button will approve the request. Create an assignment element to set the Approved attribute to TRUE.
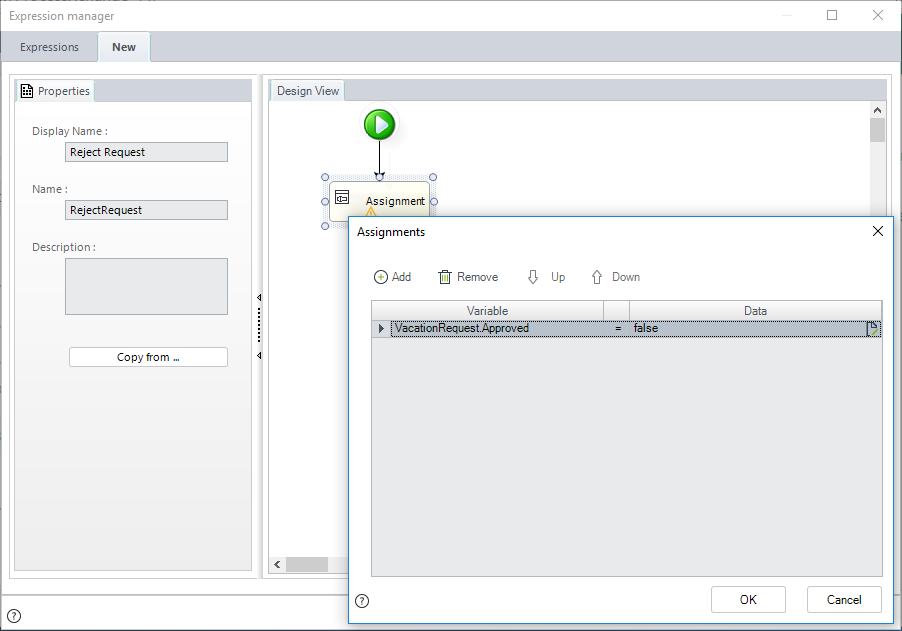
6. Repeat the steps 2-5 to create a new button called Reject. In the expression assign the value FALSE to the attribute.
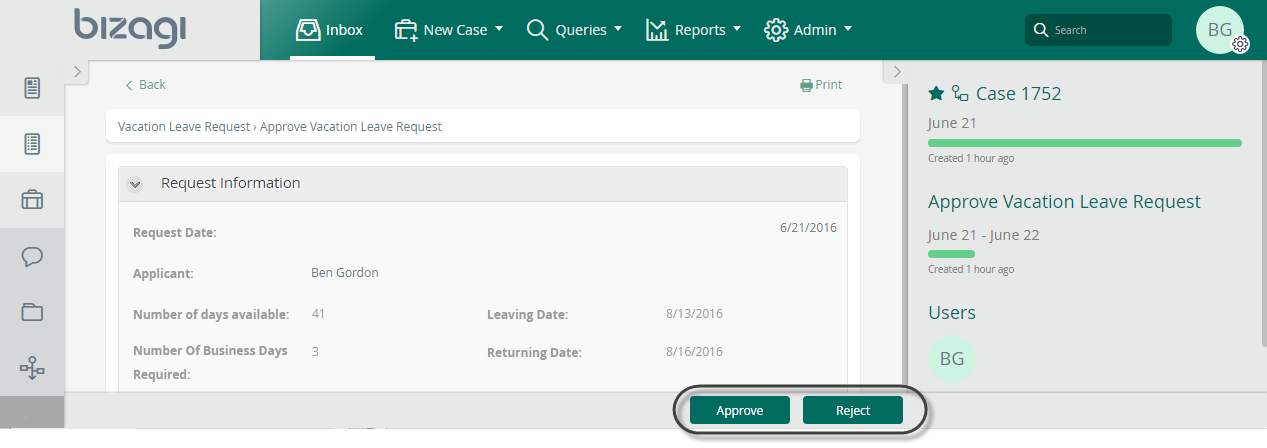
7. Finally remove the Save and Next buttons. Select the button and then click the delete icon.

In the Work Portal, the new buttons will display and the configured actions will be executed clicking them.
How to configure a customized confirmation message
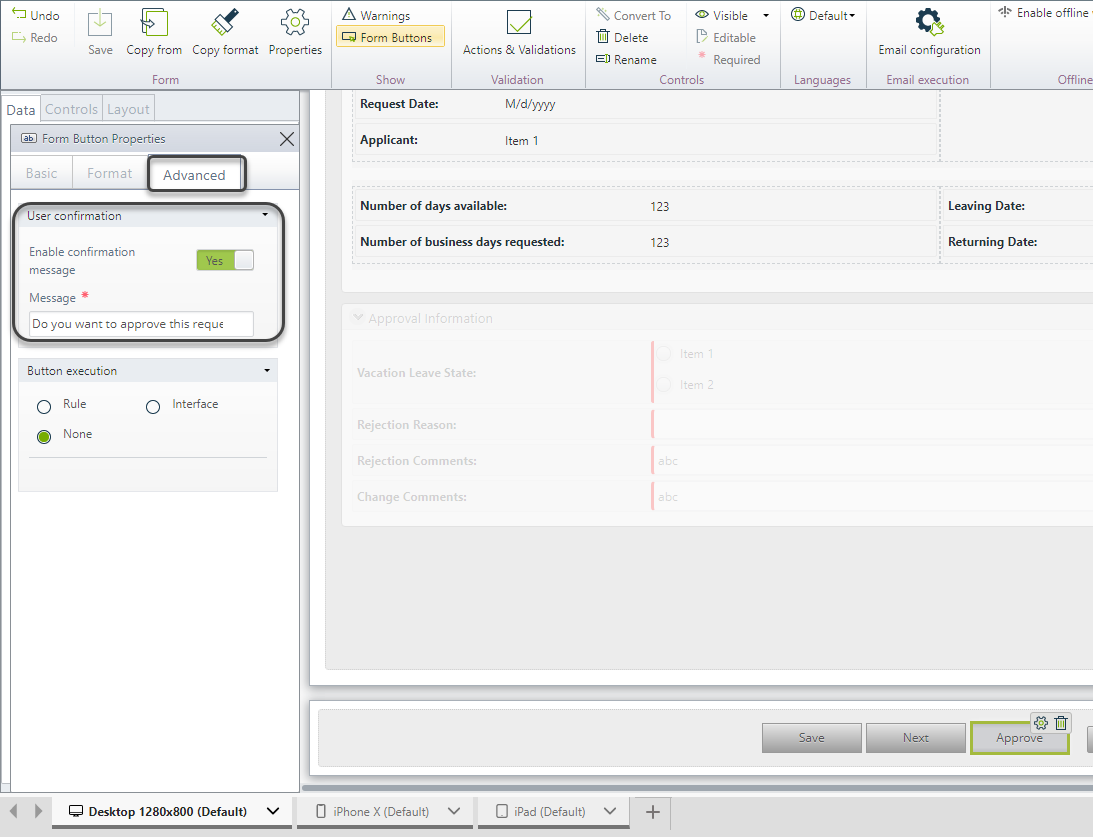
In some cases, a confirmation message is useful before executing an action to review if the information registered is correct. You can configure a confirmation message in the buttons previous to the execution of the action. To configure a customized confirmation complete the following steps:
1. Go to the form where you want to configure the confirmation message.

2. A new panel will display at the bottom of the form.
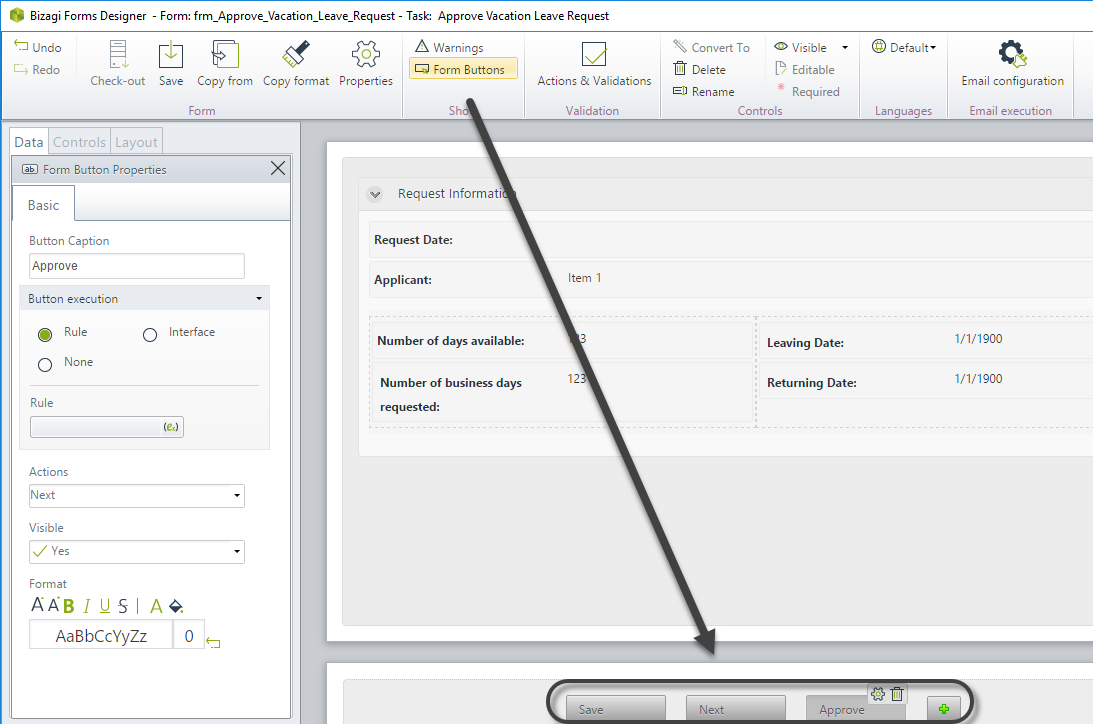
3. Click the button to be edited in order to display its properties and go to the advanced tab.
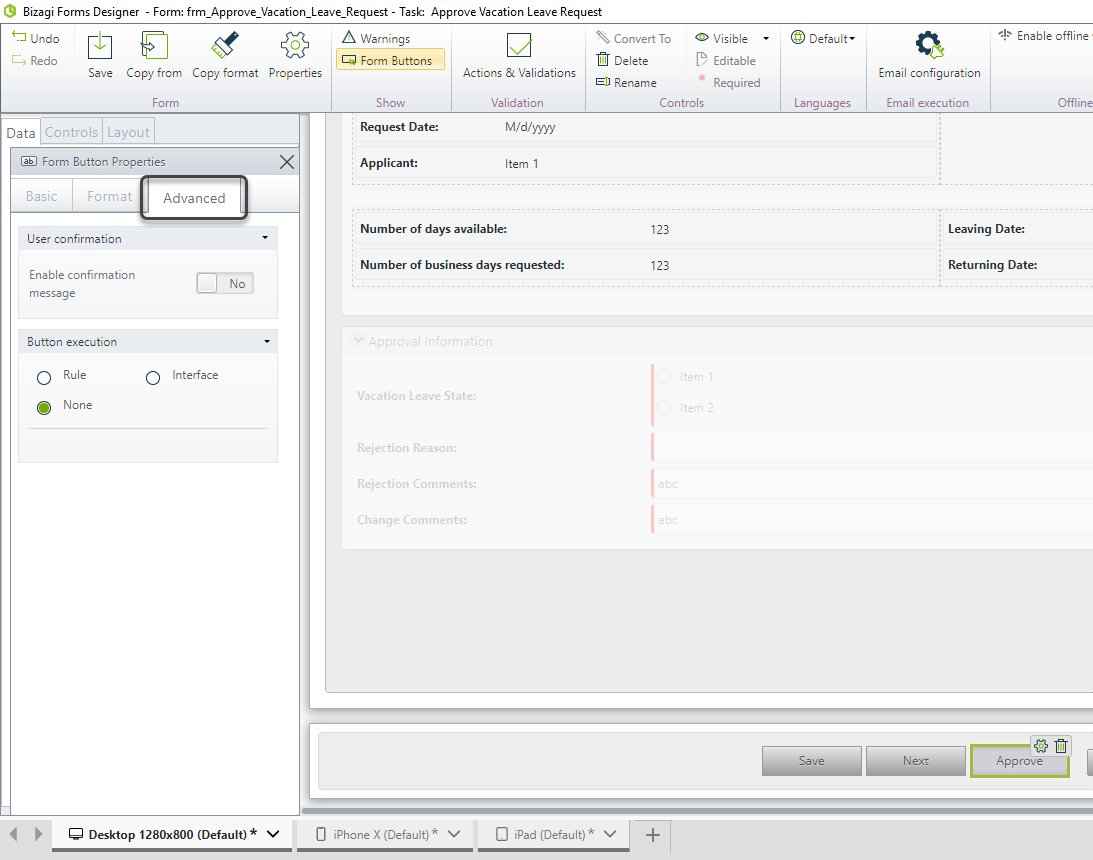
4. Enable the confirmation message and type the message that you want to be displayed.
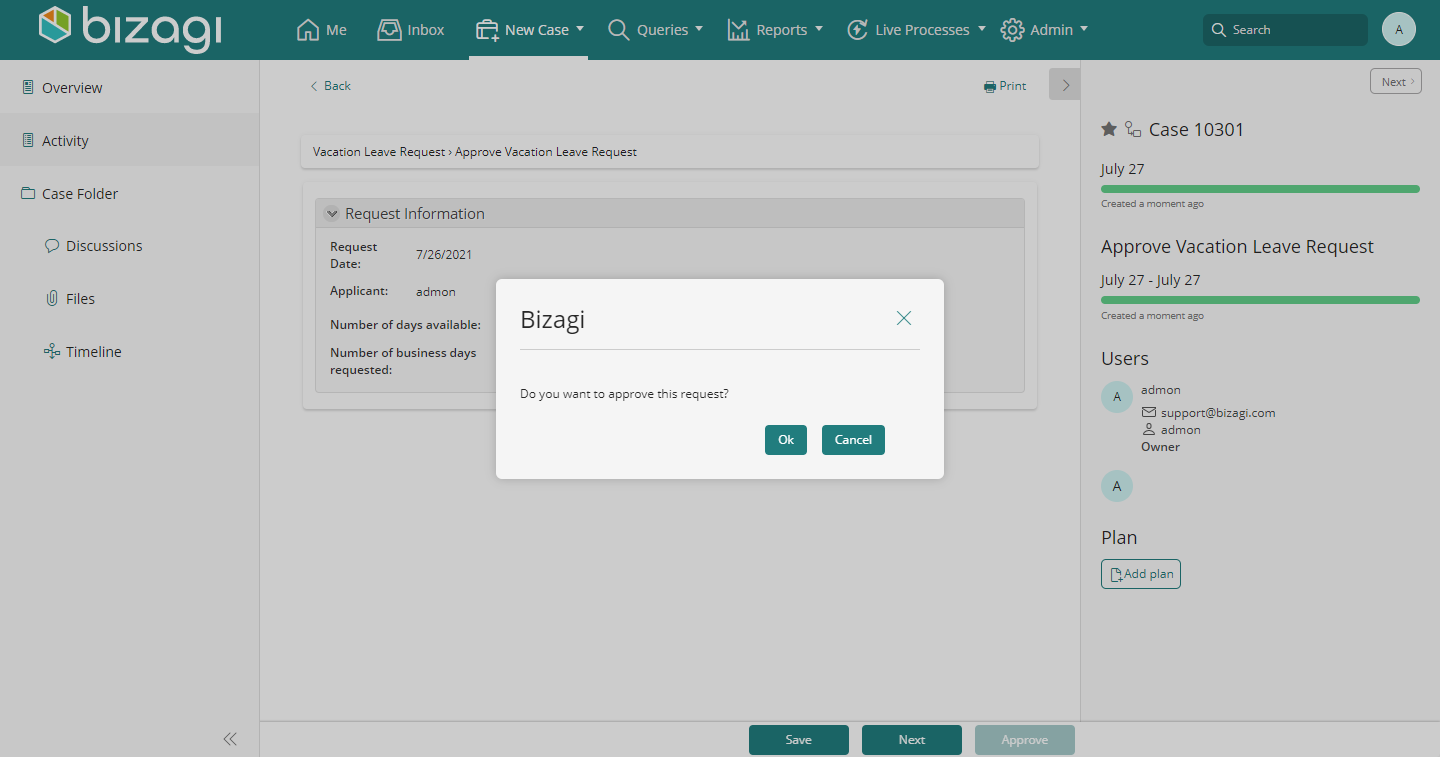
In the Work Portal when the button is clicked, the confirmation message is displayed when the button is clicked.
Last Updated 1/6/2022 11:31:28 AM