Overview
To integrate your Customer Portal and Bizagi's cloud-baed services with your corporate Okta you need to carry out the configuration steps as described in this section. Note that these are done only once, typically by an admin user of your Customer Portal having access to your Okta.
Once you have carried out these steps users sign in to any cloud-based service directly via your Okta, as described at Signing in the Bizagi Cloud Portals and Applications.
Before you start
The Customer Portal and cloud-based services support Okta using the OAuth2 & Open ID protocol.
|
The only identity provider supported by OAuth2 & Open ID is Okta |
Additionally you need:
To have already users into the Customer Portal
When integrating any Identity Manager, you need to register authorized accounts so they can access Bizagi 's cloud-based portals.
Register means providing or updating the account's primary identifiers. The Bizagi's account email must match with the email registered in your Okta. Usually, email is the most common parameter. See Create company users.
Bizagi does not store passwords when integrating an Identity Manager.
|
You cannot have two or more users with the same email, because it is considered as part of the primary identifier. |
Once you have verified in the Customer Portal that there has been at least an initial import of your users into Bizagi, you may proceed.
What you need to do
An outline describing the configuration needed to sign in with Okta considers these steps:
1.Register an Bizagi as an authorized application in Okta
2.Configure Okta in the Customer Portal
Configuration
Follow the steps presented to integrate your Okta after you've created the company users:
1. Register an authorized application.
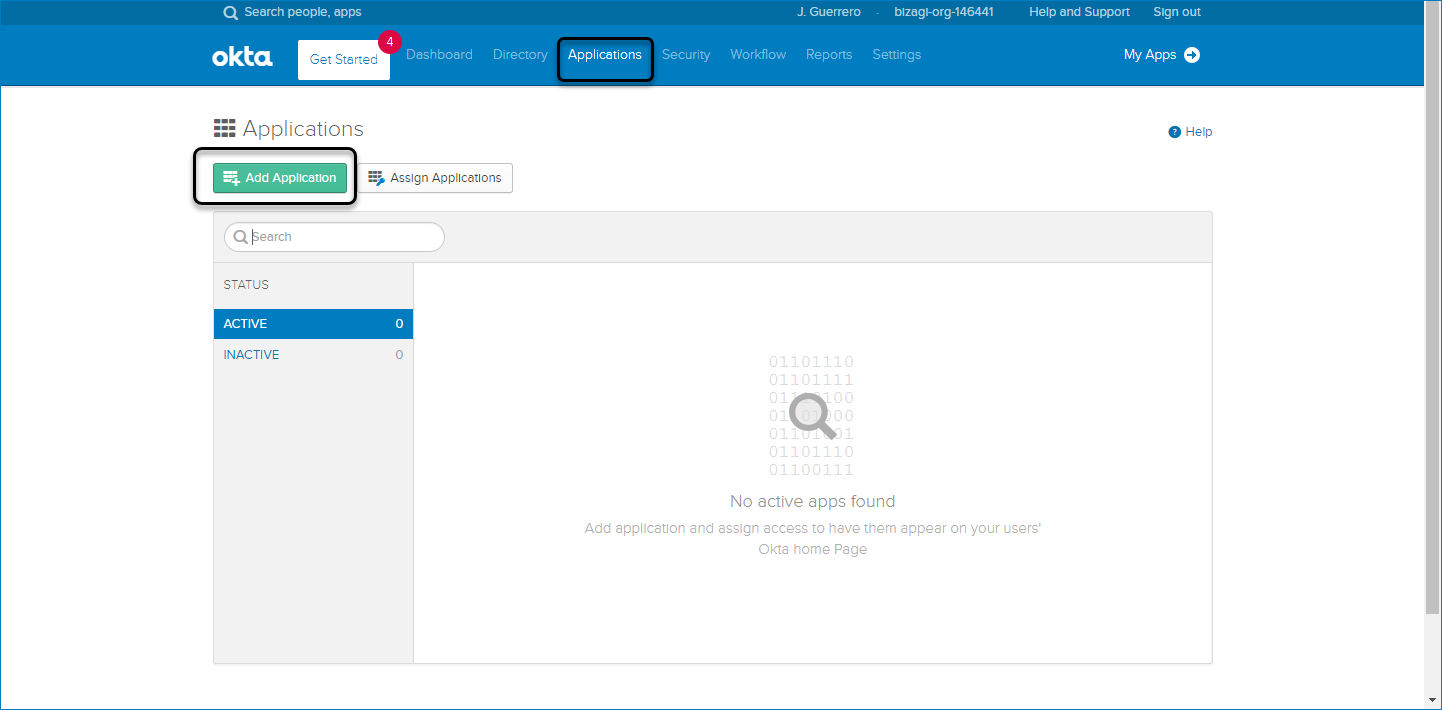
This step is done directly at your Okta portal. Sign in to your Okta portal as administrator. Click the Applications tab, and click the Add Application button.
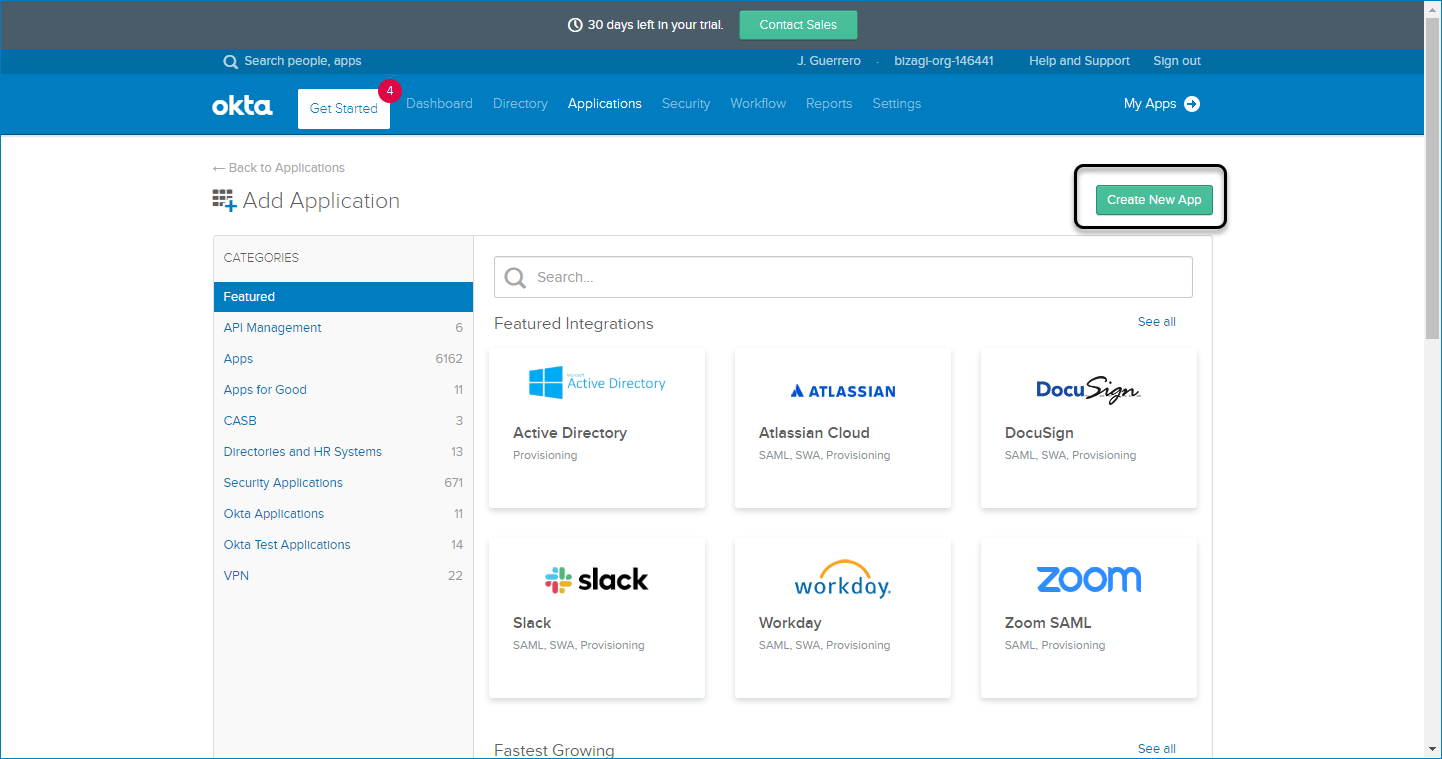
Create a New App.
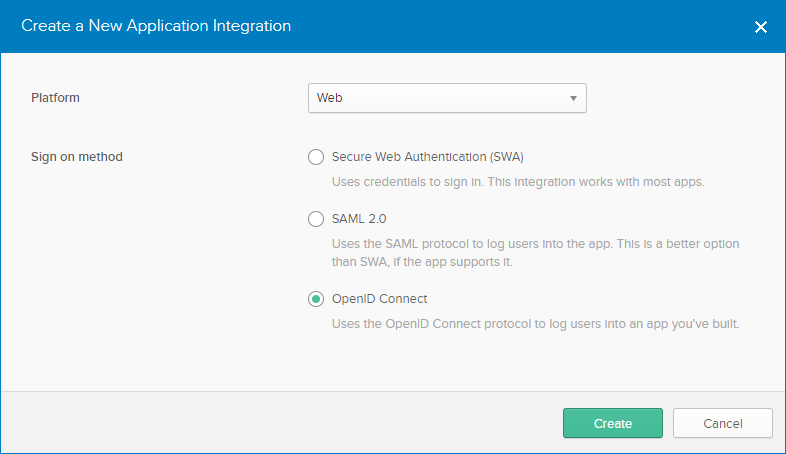
Select OpenID Connect.
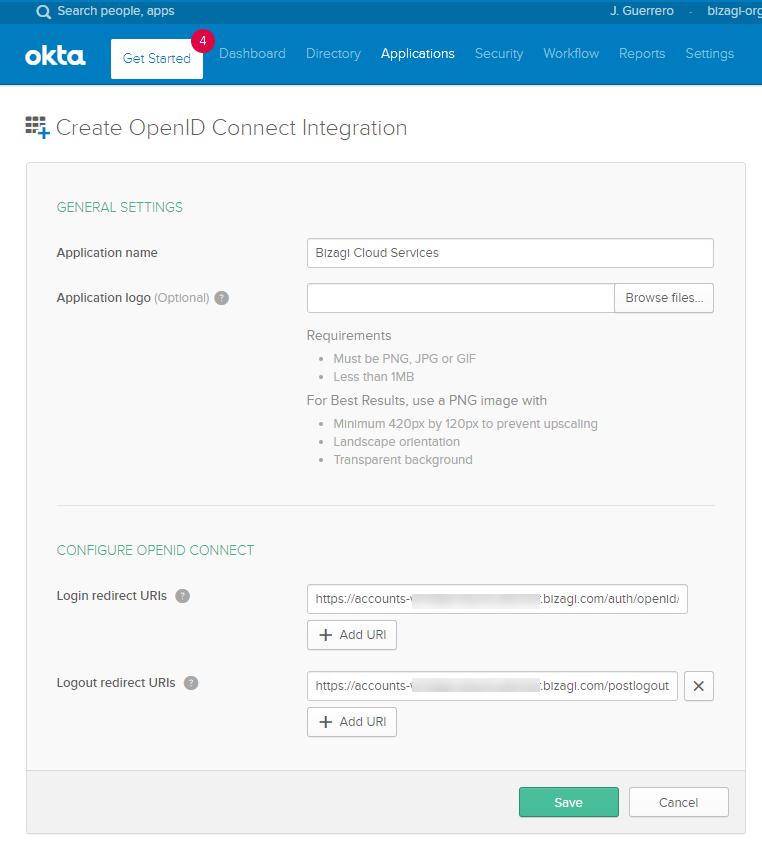
Register the Login and logout redirect.
Login URI: https://accounts-[your_company].bizagi.com/auth/openid/bridge/callback
Logout URI: https://accounts-[your_company].bizagi.com/postlogout.html
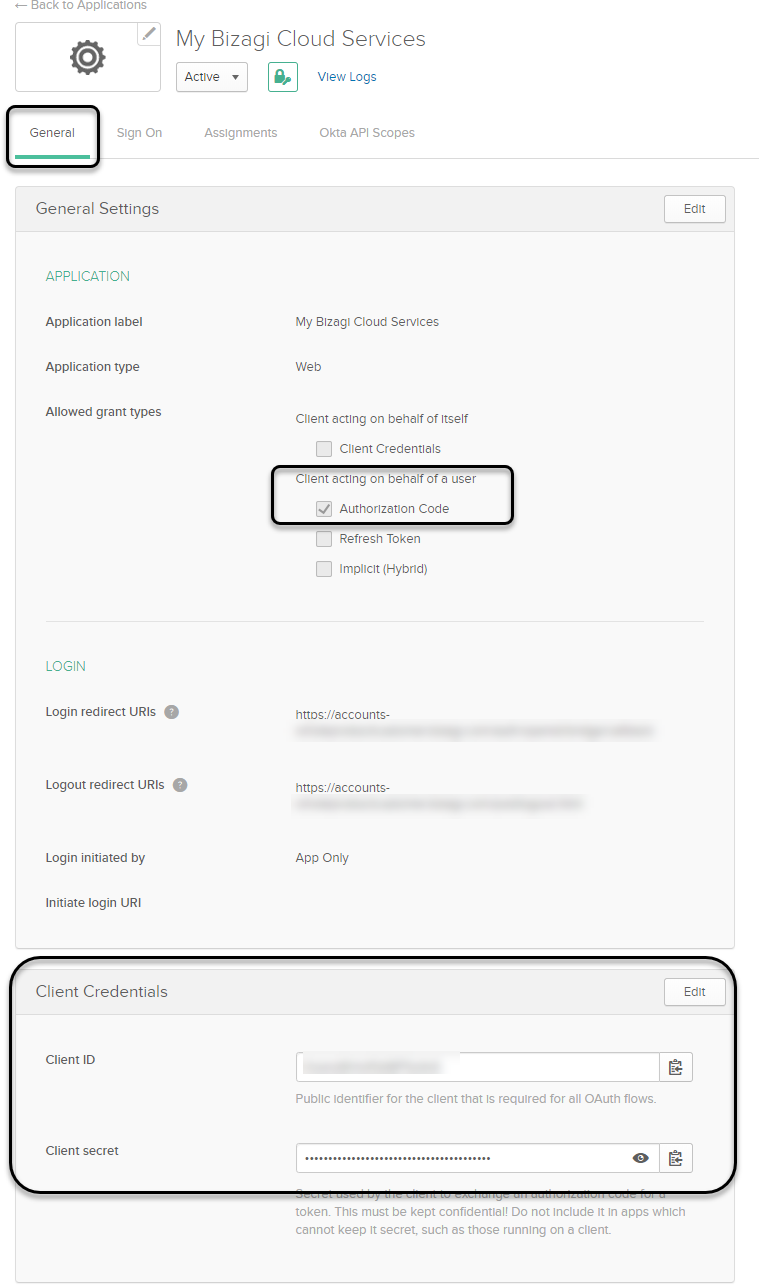
Select the Authorization grant type as Authorization Code. Make sure that you save the Client ID and Client Secret.
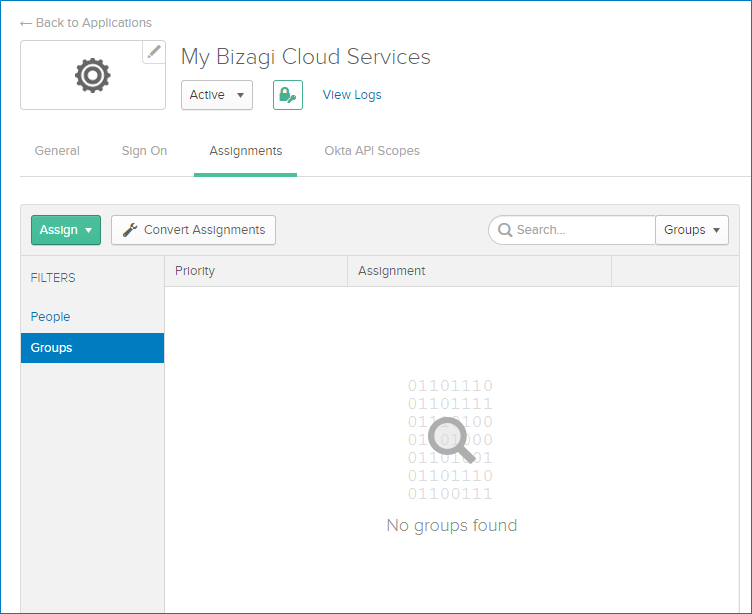
You can associated your Okta application with users or groups. To control who has access to the Customer Portal.
|
Bizagi considers the following priority in the assertions: 1. UPN 2. Email
Both UPN and Email Address must be in email format: [name]@[provider].[domain]. For example john.smith@mycompany.com. |
Make sure that the user is registered as a company user and is added to a subscription.
2. Configure Okta in the Customer Portal
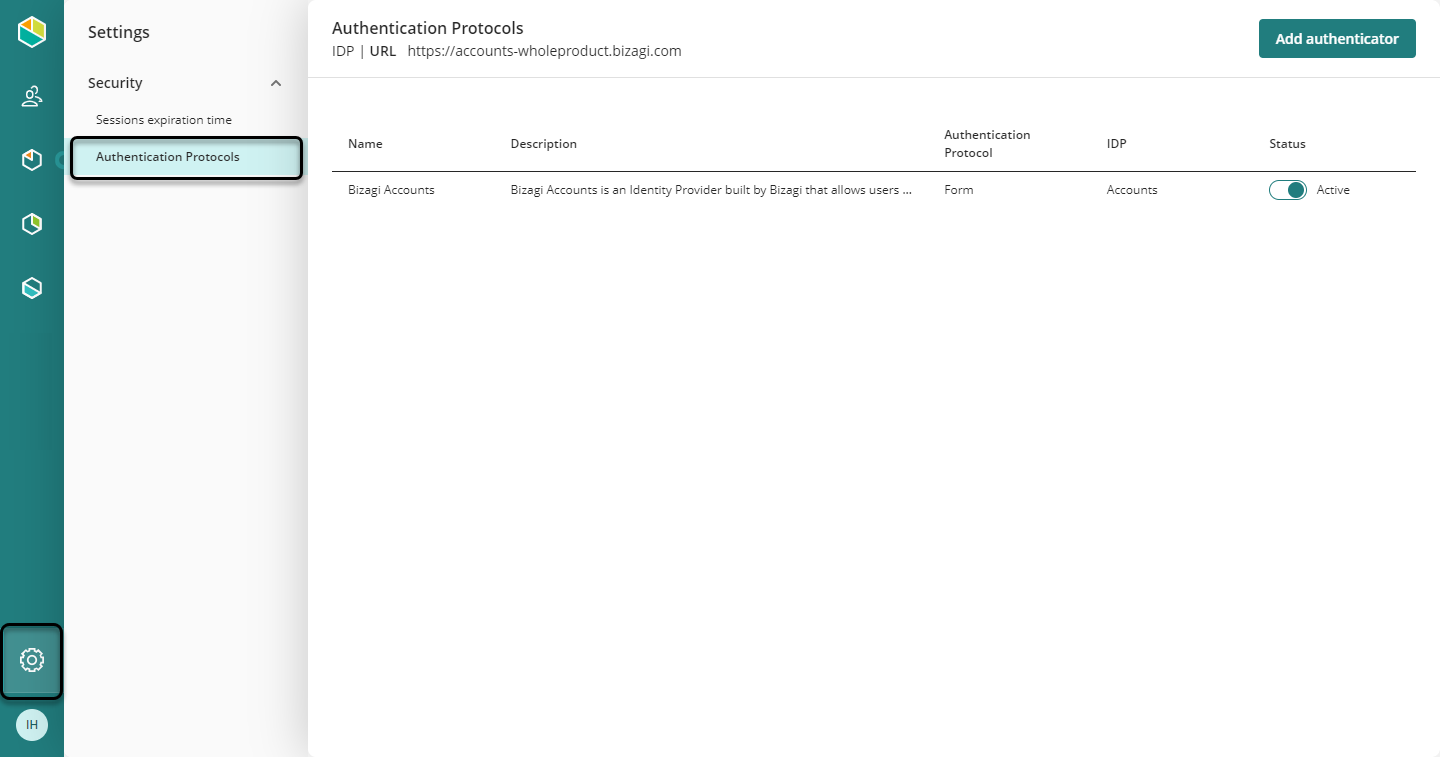
To configure Okta as your Identity Provider, you need to access the Customer Portal as a company administrator, select the Settings Icon, open the Protocols menu, and click Add authenticator.
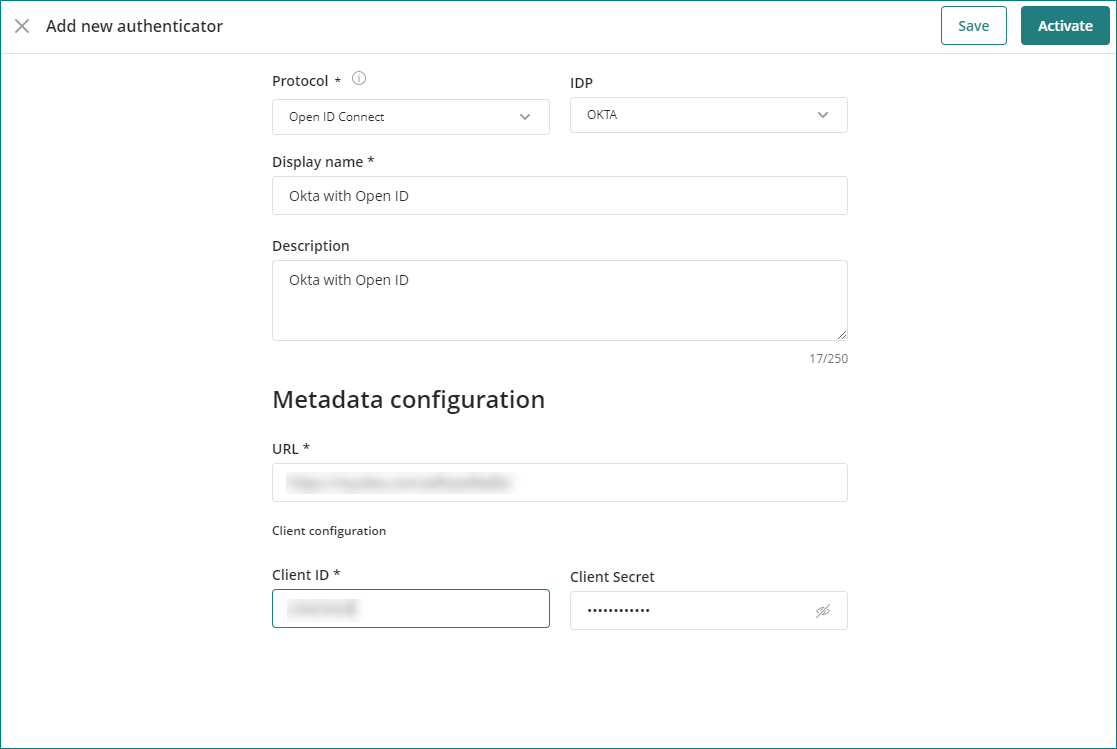
Select the OAuth2 & Open ID connect option in the protocol drop-down list, and configure these settings:
•Display name: name of the authenticator displayed in the Customer Portal.
•Description: Brief description of the authenticator.
•URL: Your Okta application URL.
•Client ID: Client ID obtained in the general settings of the Okta application configuration.
•Client Secret: Client Secret obtained in the general settings of the Okta application configuration.
Define the domains
If you need to activate multiple authenticators, you can define the email domains associated with each authenticator. See Multiple authenticators for cloud-based portals.
Finally, you need to activate the authenticator. Before activating the new authenticator, review carefully your configuration settings. Bizagi displays a warning message when activating the protocol.

To test your configuration we recommend that all users log out and opening a new tab using incognito mode, or use a different browser. If the configuration with a new IdP fails, you can restore the authentication protocol.
Last Updated 7/17/2023 4:43:42 PM