Overview
This section describes how to create and use Custom Jobs with Bizagi.
Sometimes, the execution of a process needs to consult external data that allow to perform various procedures. For example, some processes need to have some information about prices, rates or any value located on an external system. Another example is when the process needs an external event to start an instance.
In order to meet these needs, Bizagi has developed Custom Jobs, which are a sequence of steps that run according to a schedule, for example, often on an specific date, periodically (every minute, hour, day, week or month) or during a given interval between two dates.
Jobs are business rules that can be carried out periodically, and their main characteristic is that they are general expressions of the process, not associated to a specific business case.
|
Custom Jobs are also named User Jobs in the Management Console. |
The elements of a Custom Job are:
•General properties of the job: Name, Description, Enable, etc.
•Schedules: Determines when the job will be carried out and how often.
•Steps: The actions that will be carried out
What You Need to Do
In order to learn how to create Custom jobs, consider the steps below
1.Create the General properties of the Custom Job
2.Schedule the Custom Job
3.Create the steps to be executed by the Custom Job
|
When a Job cannot run or generates a run error, Bizagi disables it automatically. You need to re-enable it manually. |
Example
We are creating a process called Purchase Order. An instance of this process should be created when the available quantity of any product is less than or equal to 100 units, consider the next flow for this process:
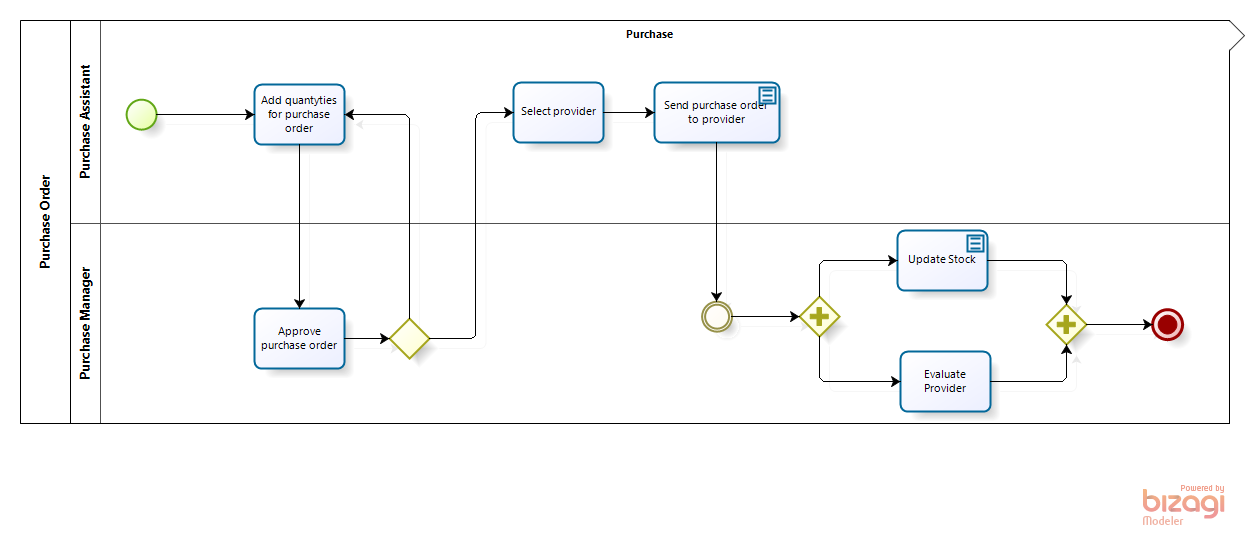
A Custom job is required to periodically check for any product whose quantity is less than or equal to 100. This Job will be created in this section.
1.Create the general properties of the Custom Job
The first step is to create the first elements of the Custom Job, follow the steps below.
In the Bizagi Menu, go to Expert View and open the option Scheduler.
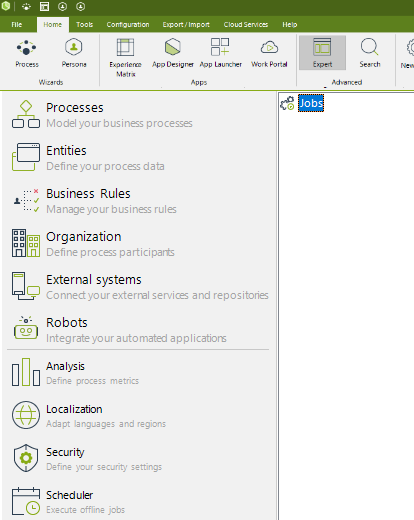
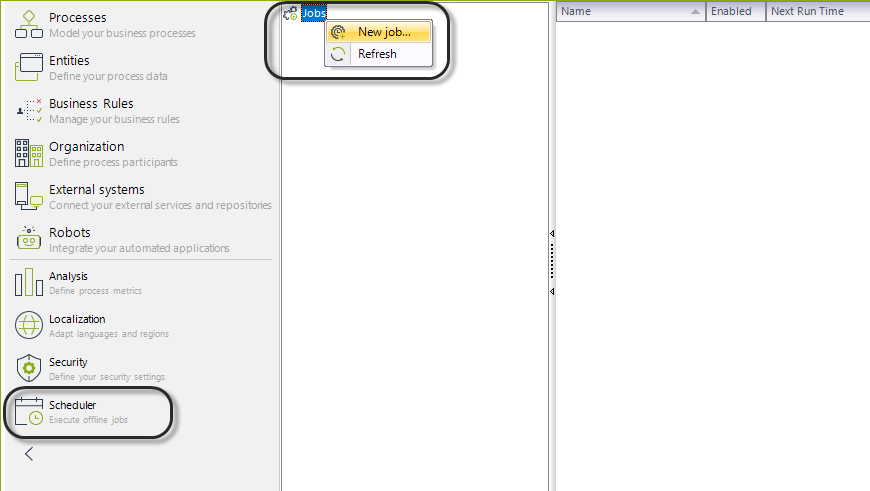
Right click Jobs, and select New Job.
The Job properties window appears, complete the fields for the new Job.

Property |
Description |
|---|---|
Job name |
Indicates the Name of the Job. The name may be max. 15 characters long. This field should not contain spaces, accent marks or symbols. |
Description |
Enter a brief description of what the job does. |
Enabled |
This option allows you to enable or disable the execution of the Job. |
Next run time |
Indicates the date and time when the Job will run. This date is re-scheduled each time the job runs depending on the periodicity indicated for the Job. |
Success rule |
Indicates the business rule that will be executed once the scheduled Custom job has finished successfully each one of the steps. This field is optional. It gives you the possibility to define an additional execution in case you need it. This field is OPTIONAL: It can be left blank. |
Failure rule |
Indicates the business rule that will be executed when the execution of any of the steps fail. This field is optional. It gives you the possibility to define an additional execution in case you need it. This field is OPTIONAL: It can be left blank |
Add or create the success and failure rule. To create a business rule, please refer to Defining Business Rules.
Click OK to save the changes.
2.Schedule the Custom Job
Once the Job has been created and the properties defined, we should create a schedule for the job in order to determinate the frequency of execution. To do this, please follow the steps below:
Expand the node with the name of the Job that you created. Right-click Schedules and select New job schedule option.
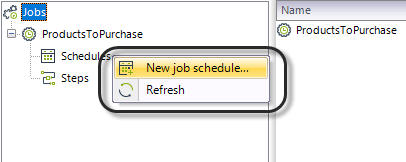
The Schedule properties window appears, add the following information:

Property |
Description |
|---|---|
Name |
Indicates the name of the schedule. The name may be max. 15 characters long. This field should not contain any spaces, accents marks or symbols |
Start date |
Date on which the Job will begin to run. Any change in this field will automatically update the Next Run Time property within the Job properties. |
Recurring |
Date on which the Job will begin to run. |
Occurs every |
In the first field, enter how many times the job will take place according to the frequency indicated, and in the second field, enter the frequency (Example: Every N weeks). |
Click OK to save the changes.
3.Create the steps to be executed by the Custom Job
The last step in the creation of a Custom Job is to establish the sequence of steps to be executed. You can create as many steps as you need and this activity will be repeated several times according to the required steps required. Each step requires a Rule to execute, so the Rule is mandatory.
To perform this action, please follow the steps below:
If it is collapsed, expand the node with the name of the Job that you created. Right click Steps and select New job step option.
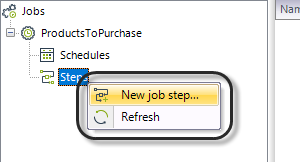
The Job step properties windows is shown, add the following information:

Property |
Description |
|---|---|
Name |
Enter the name of the step. The name may be max. 15 characters long. This field should not contain any spaces, accents marks or symbols. Suggestion: choose a name that characterizes the function or the formula used. |
Description |
Enter the description of the step. This purpose of this is to be able to understand the function of the step when you read the description. |
Order |
Indicates the order in which the step is carried out in relation to the other steps that belong to the Job. |
On step success |
If running on step success, indicate what needs to be done. The options are "Next Step", "Quit Success" or "Quit Failure". |
On step failure |
If running on step failure, indicate what should be done. The options are "Next Step", "Quit Success" or "Quit Failure". |
Rule |
In this field, select the business rule that you would like to be carried out. If you would like to call on a business rule, this can be transformed into a call on a component or a method. To create a Business Rule, please refer to Defining Business Rules. |
Click OK to save the changes.
For the present example, we have created the rule "Create case", this rule consists of an expression, as is shown in the following image
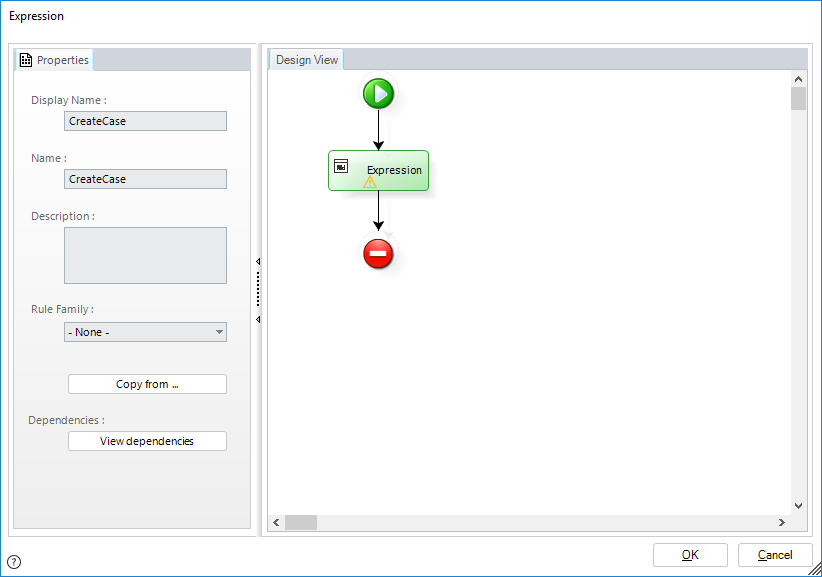
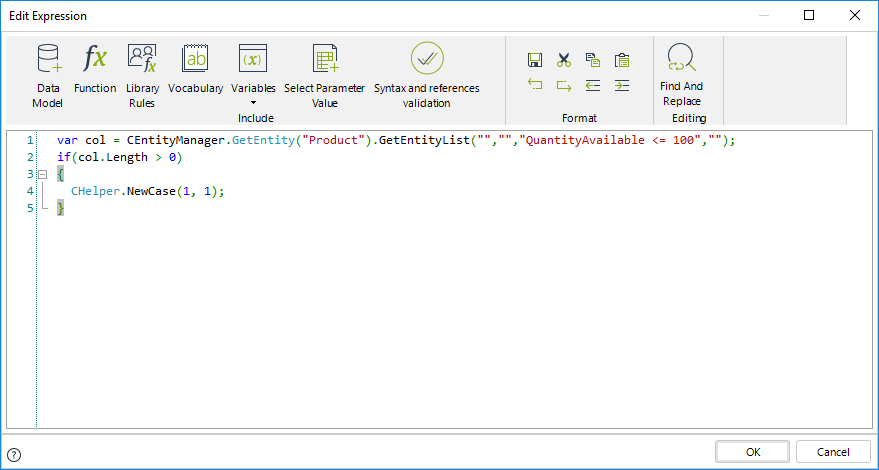
The expression has the following code to determinate if any of the products have less than 100 units available in stock
var col = CEntityManager.GetEntity("Product").GetEntityList("","","QuantityAvailable <= 100","");
if(col.Length > 0)
{
CHelper.NewCase(1, 1);
}
The previous code will look like this
|
Custom Jobs have no process context because they are not associated to any case. Thus, XPath expressions that navigate from a Process entity are not supported in these expressions.
Other expressions with context referencing the Me object not supported, for example Me.Case or Me.Task.
For more information about how to build CEntityManager expressions, refer to this article. |
Click OK to save the changes.
When the Job is executed (in our case at 3:00 am every day) the Job will run the previous expression, only when there is at least one product with less than 100 units available in stock, a new instance of the process will be created in the inbox of the user, which should look like this.

Reviewing Custom Jobs Execution
To review the execution of Custom Jobs you can access the Management Console and look for the User Jobs administration. From this tab, you can edit the steps and schedules of User Jobs (also known as Custom Jobs) directly in the Management Console (MC) in Test and Production environments.
Custom Jobs in Production
When a project has been deployed, some elements such as Custom Jobs will remain editable in the Development environment. However, to avoid possible problems with subsequent deployments, Bizagi restricts changes to some of these elements. For this reason, when a Custom Job is already in Production it is not possible to delete it. Everything else remains editable (job steps and scheduling).
Last Updated 11/19/2025 1:28:37 PM