Overview
Bizagi can be integrated with SAP Business Technology Platform (BTP) using an out-of-the-box connector. This article explains how can you configure the SAP BT Platform connector in a Bizagi Studio project.
Before you start
To configure the connector, you must have configured the services and connections in SAP BTP. For more information, refer to How to configure SAP BTP for SAP on-premises systems. From this configuration, you must obtain the Application Route within the Cloud Foundry.
Bizagi has a Proxy configuration option available to connect with external services such as the SAP BT Platform connector.
Configuration in Bizagi Studio
To set the SAP BT Platform connector, follow the next steps:
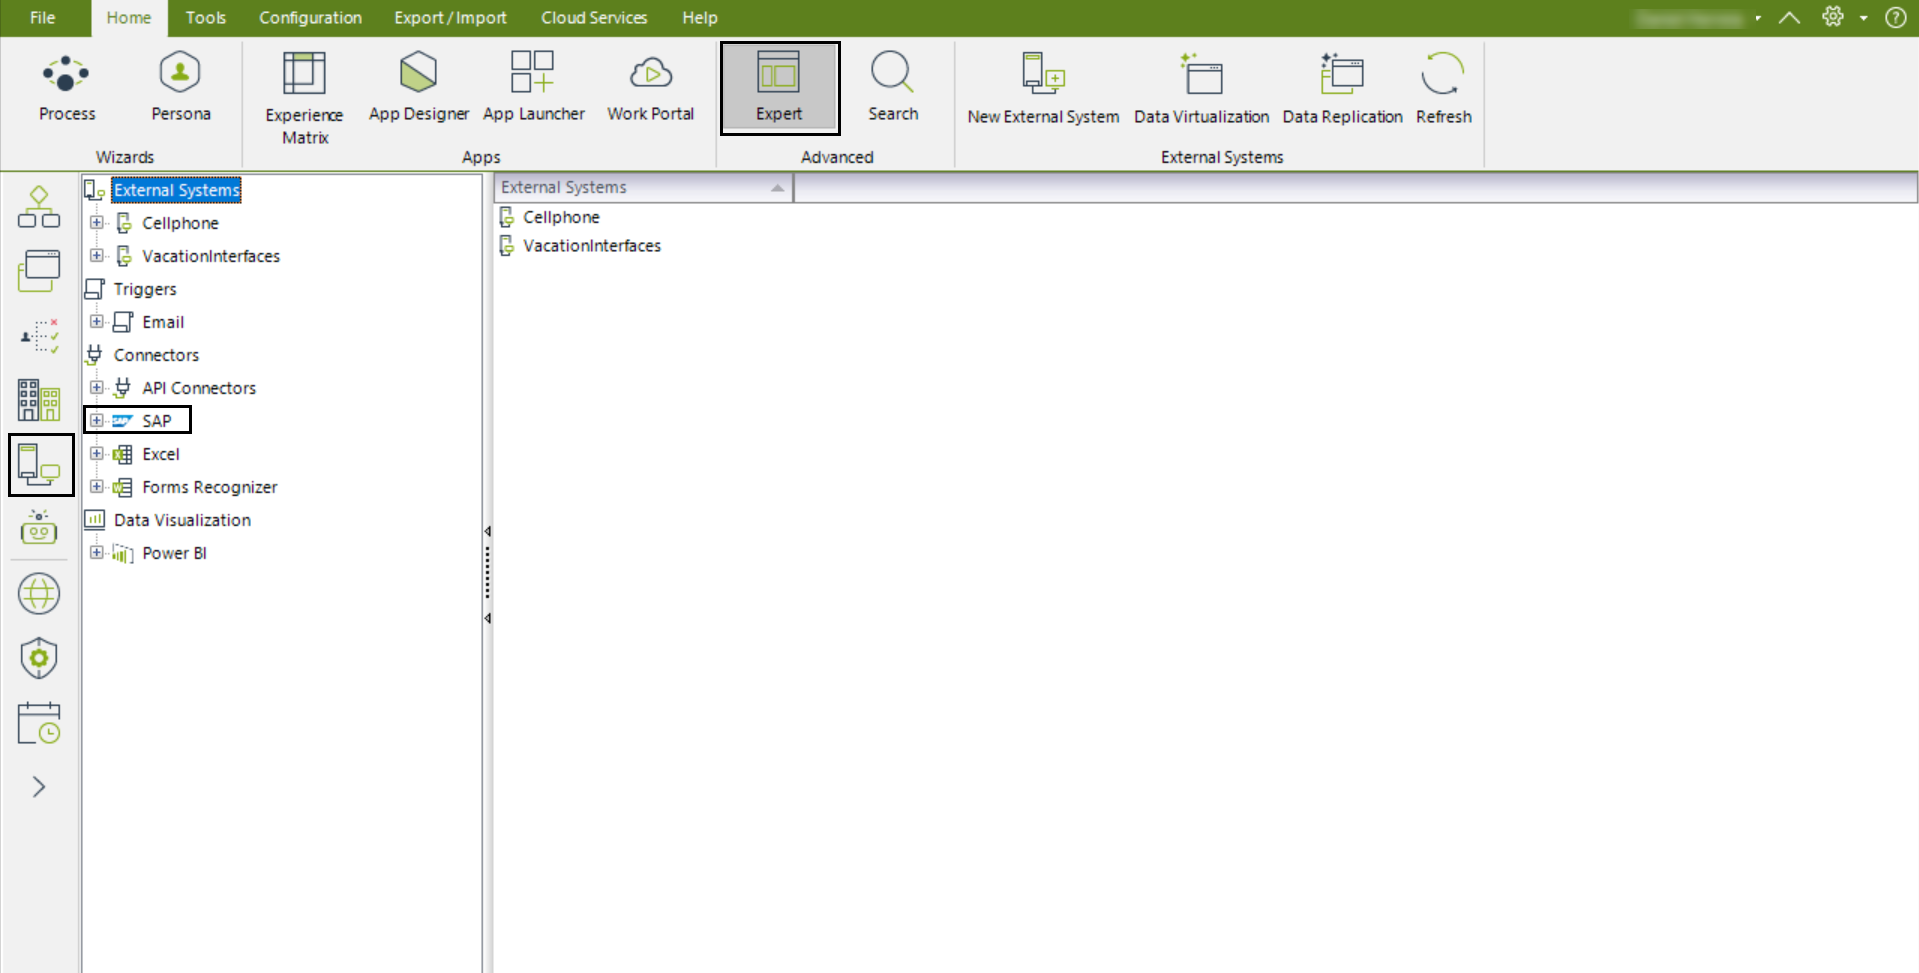
1. Open the Expert view and select the External Systems module. Then, open the SAP main node, where you find two SAP connectors:
•SAP Legacy: SAP connector R/3 and ECC systems using BAPIs.
•SAP BT Platform: SAP connector using OData services.
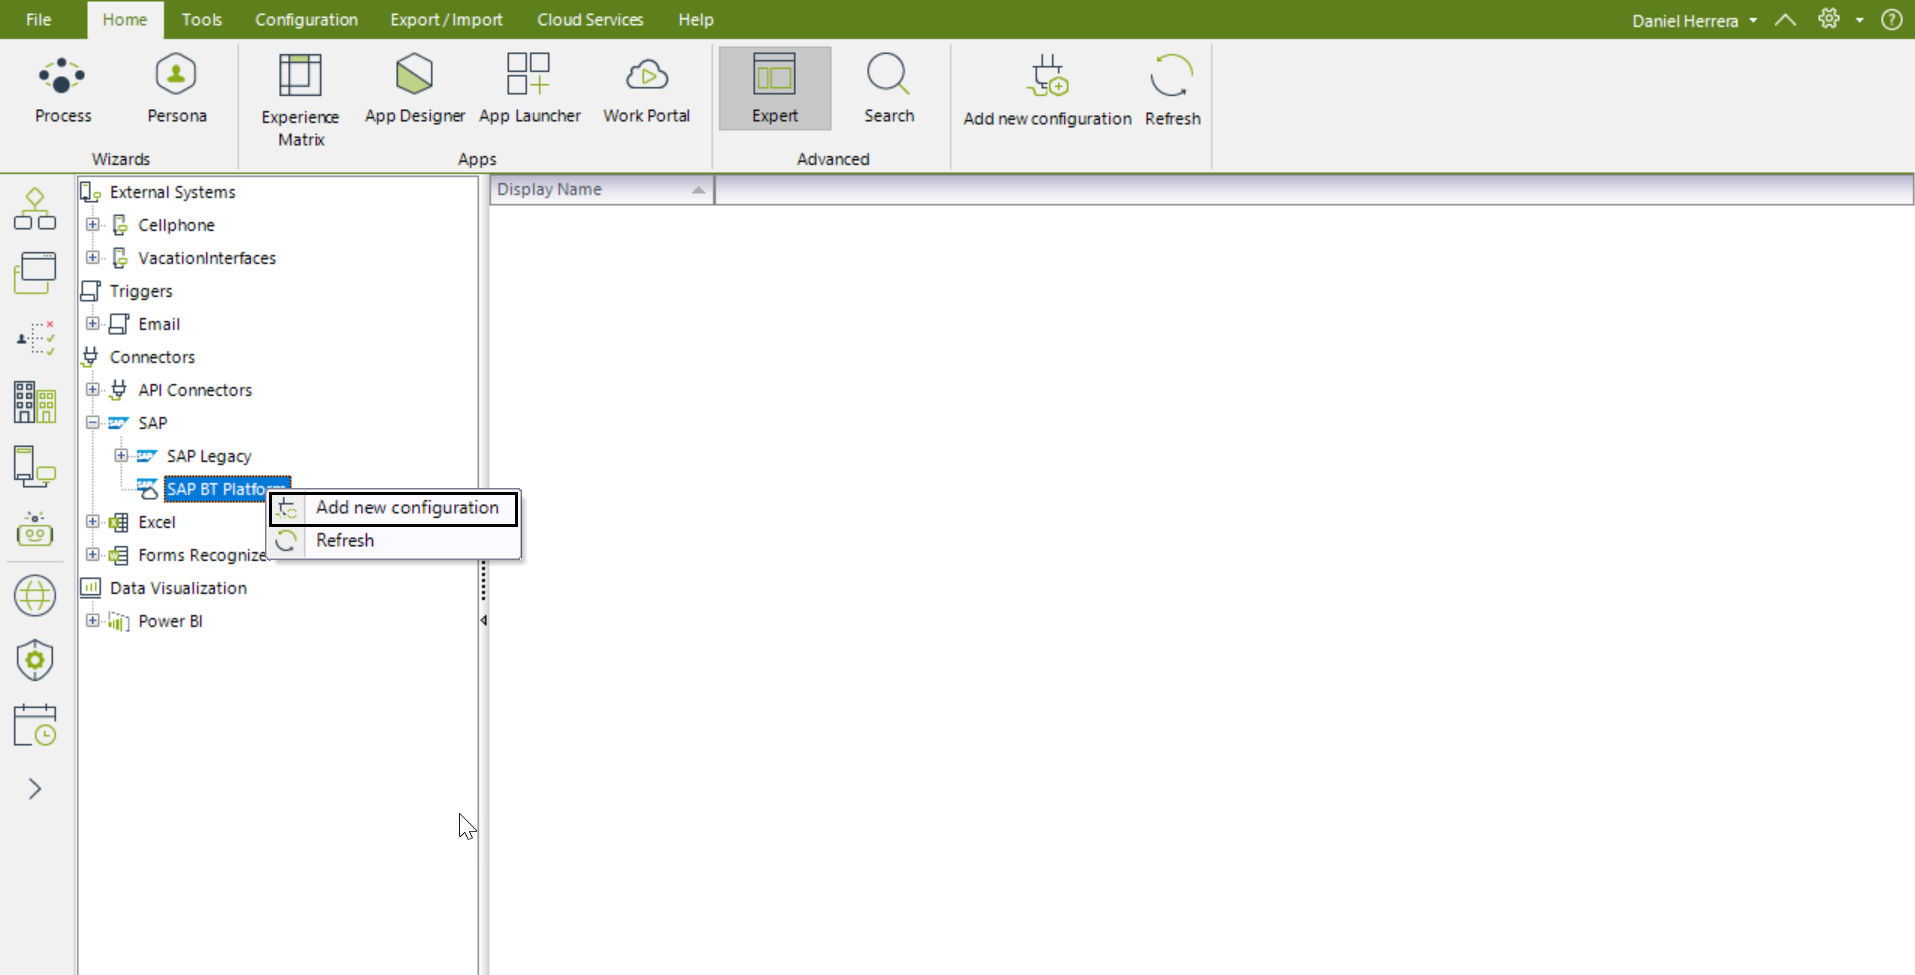
Right-click the SAP BT Platform node and select Add new configuration.
2. When loading a new configuration, the following form is displayed:
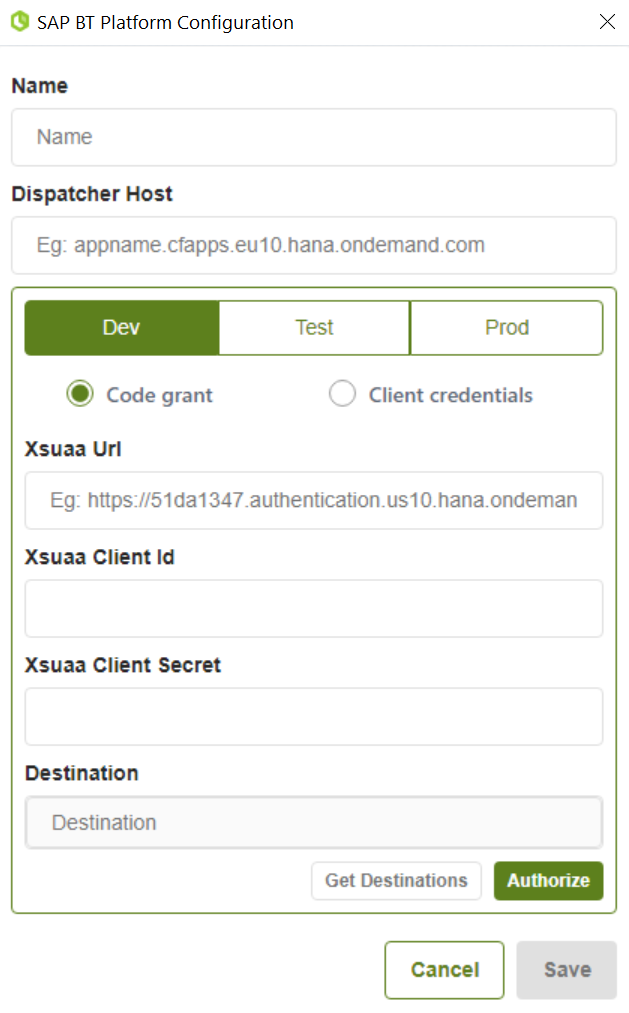
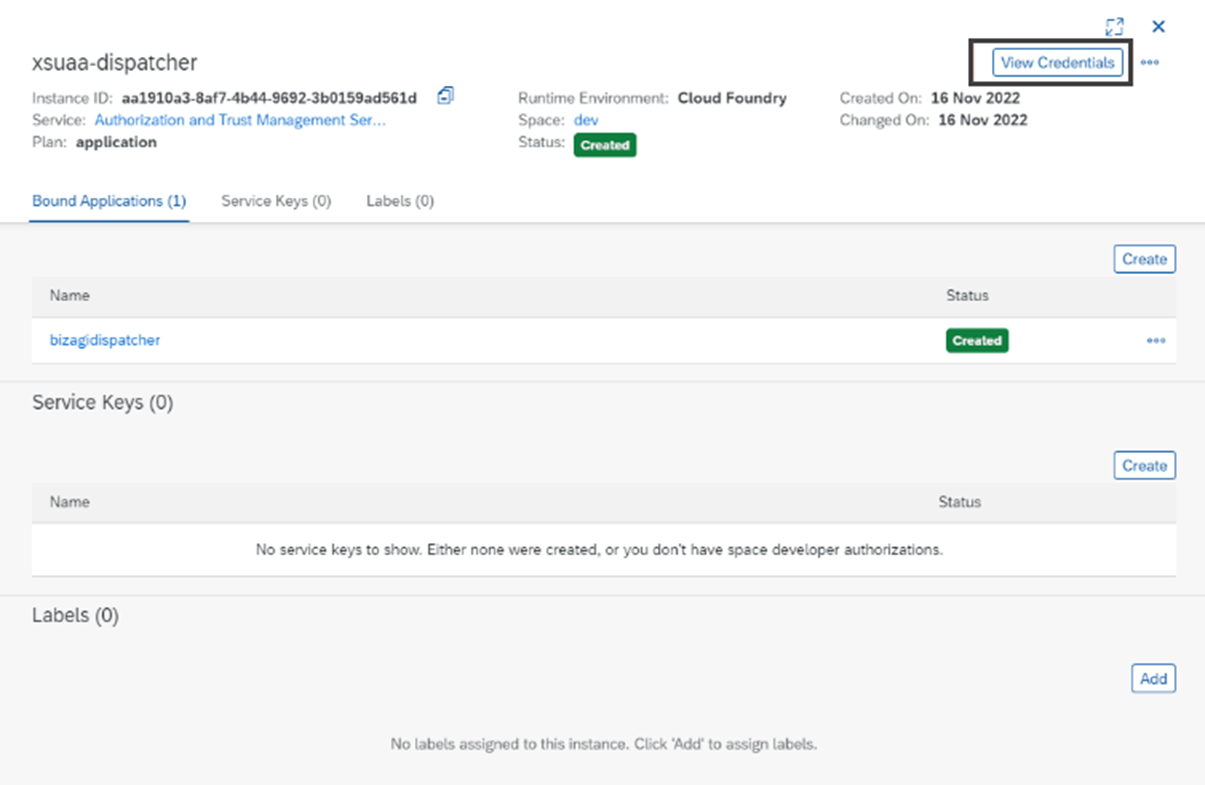
The Xsuaa Url, Xsuaa Client Id and Xsuaa Client Secret data are required for OAuth2 code grant authentication. These can be located within SAP BTP in the xsuaa-dispatcher service instance, as shown in the following images:
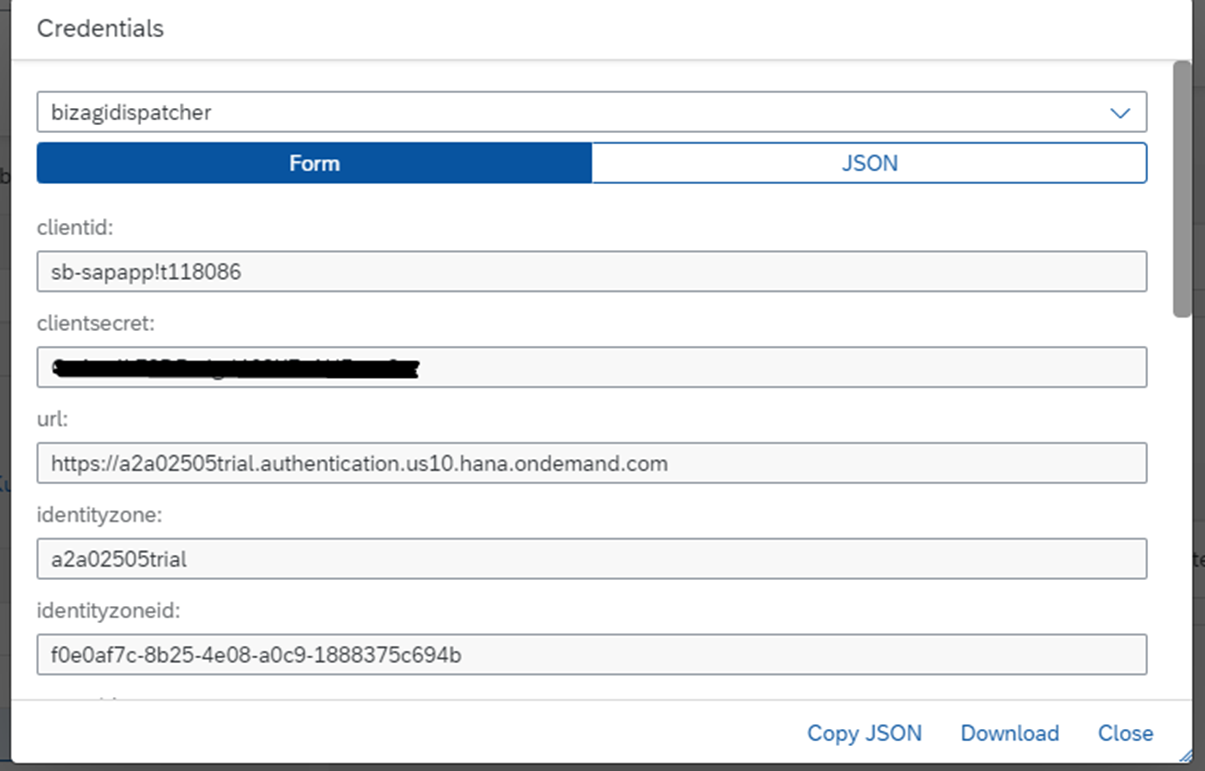
•The value of the Redirect URI is another input required for OAuth2 code grant authentication. It is not shown on the form and by default is always: https://build.bizagi.com/redirectOauth2.html
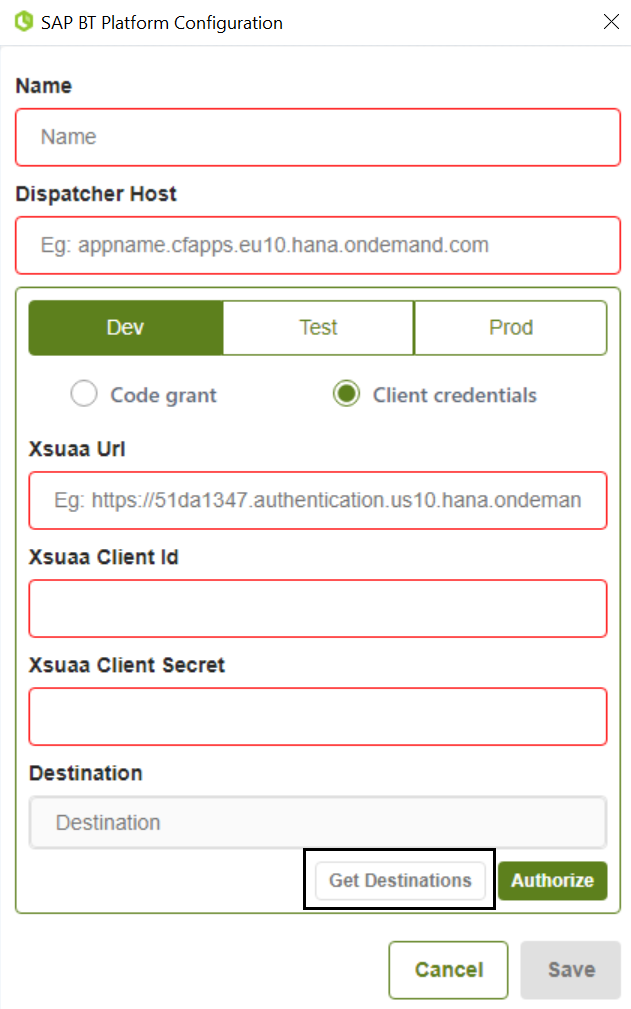
•In order to obtain the destinations, the token must be valid or a new one must be generated. The button Get destinations is enabled after the token validation.
•The access token obtained has a default expiration of 12 hours. Bizagi validates the token time and if it has expired, obtains a new token automatically through the Refresh token (which does not expire).
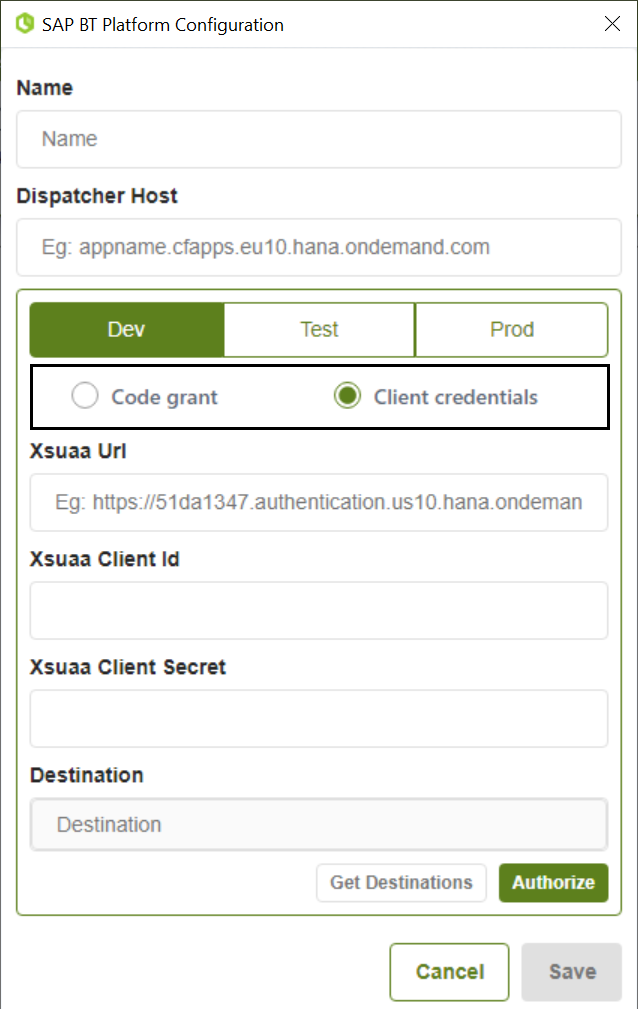
You can login with Client Credentials or with Code Grant.
|
Bear in mind that the SAP Legacy option works for on premises versions of SAP. Nevertheless, for better performance in the Cloud version use the SAP BT Platform option. |
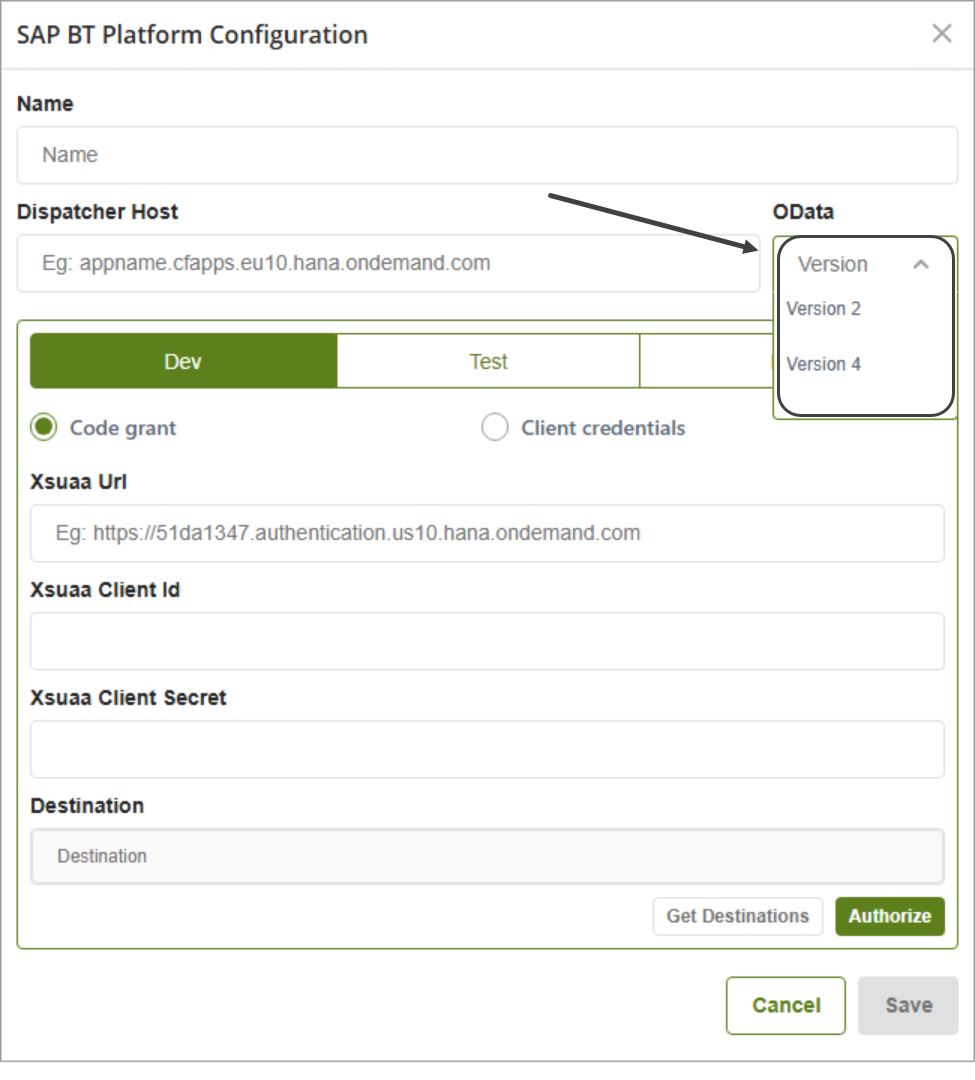
OData
Bizagi’s SAP BTP Connector supports integrations using both OData V2 and OData V4. It enables connections to SAP S/4HANA Public Cloud Edition through the “Internet” proxy type with Basic authentication. This ensures compatibility with existing OData V2 configurations while also supporting modern OData V4 services.
You can read more about the differences between OData V2 and OData V4 in the SAP documentation.
Bizagi enables complete connectivity with SAP S/4HANA Public Cloud Edition through:
•Selection of SAP destinations that use the Internet proxy type and Basic authentication in both Bizagi Studio and the Management Console.
•End-to-end configuration support (destination reading, selection, and execution) through the Bizagi SAP Cloud Dispatcher.
|
Keep in mind that existing connector configurations cannot change the OData version of previously defined actions. |
Client Credentials Authentication Flow
The Client Credential Flow uses the Xsuaa service (Extended Services for User Account Authentication) to connect to SAP. This can be configured in the SAP BT Platform Connector Configuration window.
|
When filling in the Dispatcher Host field, do not include the https:// protocol. ✅ Correct: appname.cfapps.eu10.hana.ondemand.com ❌ Incorrect: https://appname.cfapps.eu10.hana.ondemand.com |
Fill out the form that appears.
Click Authorize.
After this, the Get Destinations button is activated and if you click on it, a drop-down list with possible destinations is enabled.
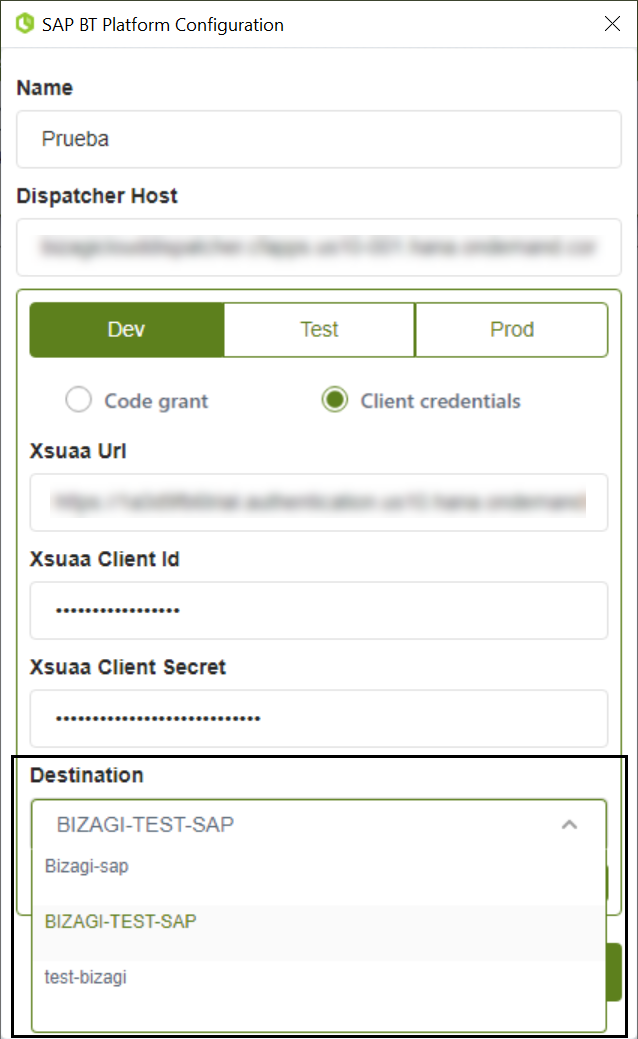
Then click Save.
|
The code grant authentication flow is also available, but will be deprecated. Therefore, it is recommended to use the Client Credentials Flow. |
Client credentials Authentication in the MC
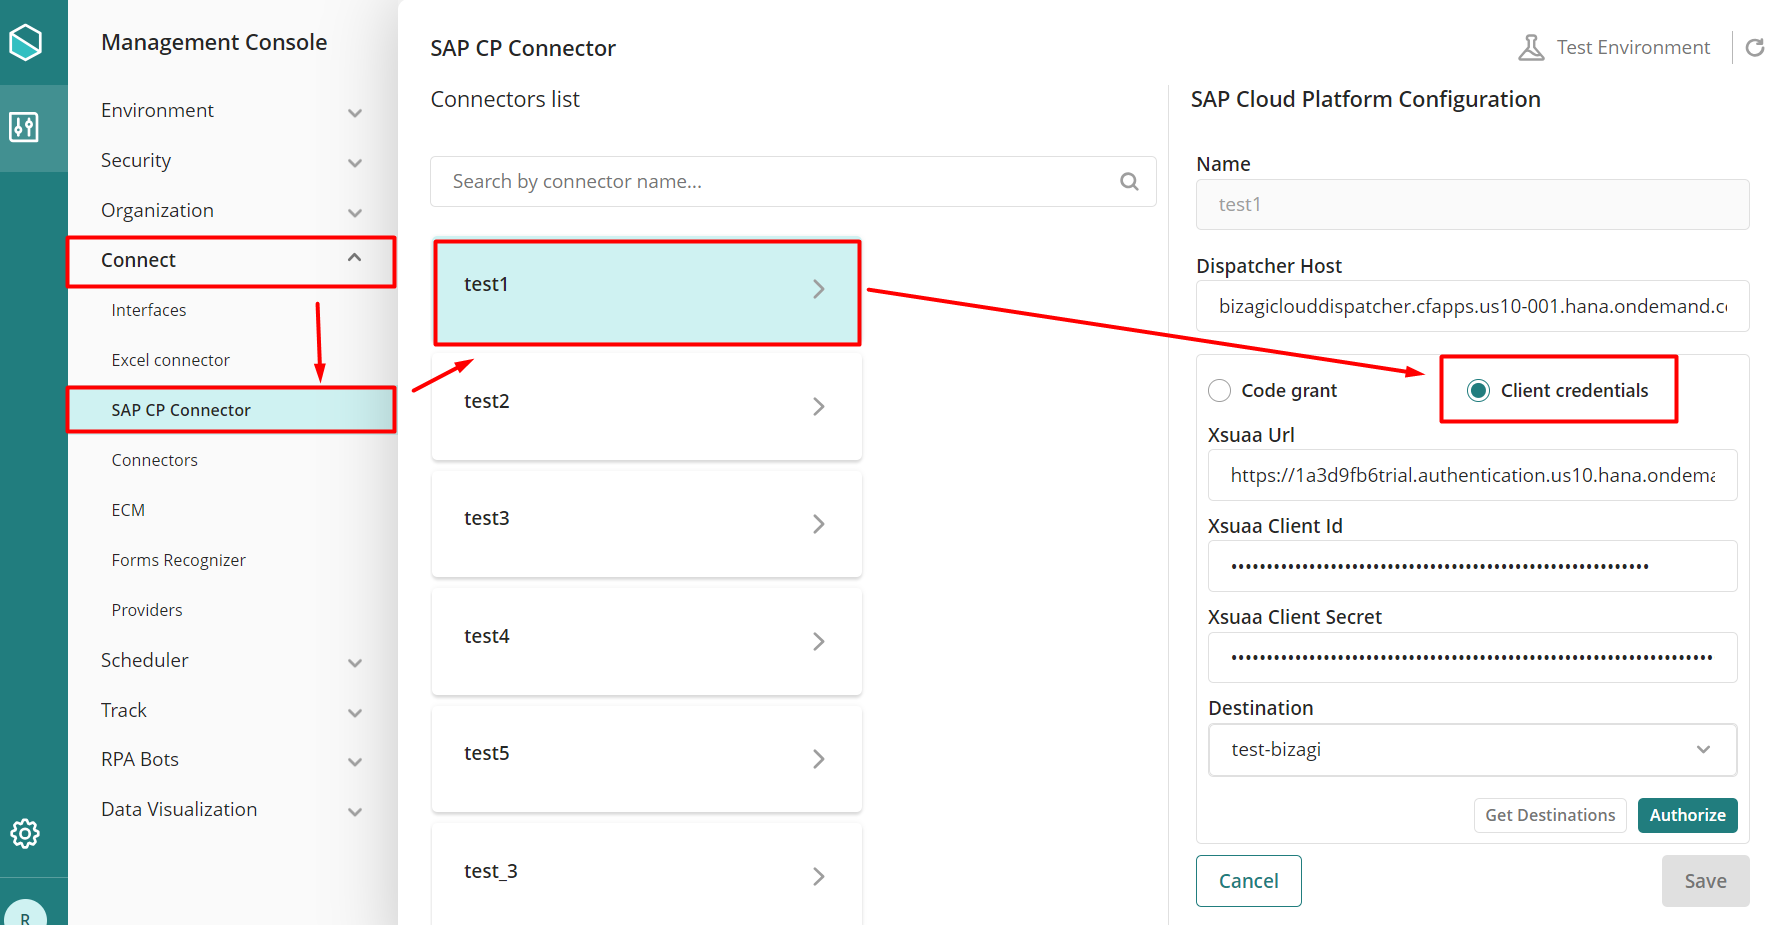
You can also configure the Client Credentials Authentication Flow in the Management Console (MC).
The configuration is the same as for the Client Credentials Flow for Studio, explained in the section above. What changes is how you access to the configuration window.
To open the Client Credentials Configuration Window, log in to the Management Console. To do so, go to the Connect tab and select the SAP BT Platform option. Then, click the connector you are interested in and configure the Client Credentials Flow as explained above.
Code Grant
You must fill in all the required data and then click the Authorize button:
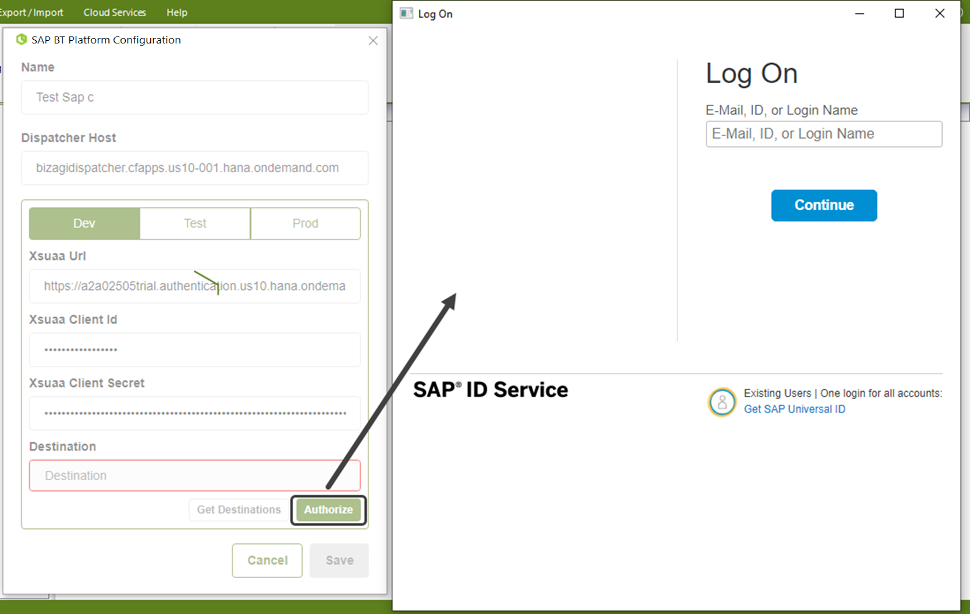
Once the credentials have been entered, a pop-up window appears indicating that the credentials have been successfully accepted, and the button to Get Destinations is enabled, as in the Client Credentials Authentication Flow process.
When you click the Get Destinations button, the list of available destinations is displayed:
Click Save without modifying any data entry fields (except the destinations) closes the SAP BT Platform Configuration window:
To create actions, the token created in the configuration is used:
Validations
•In the SAP BT Platform configuration form, all fields are required and the input outline is shown red if an error exists:
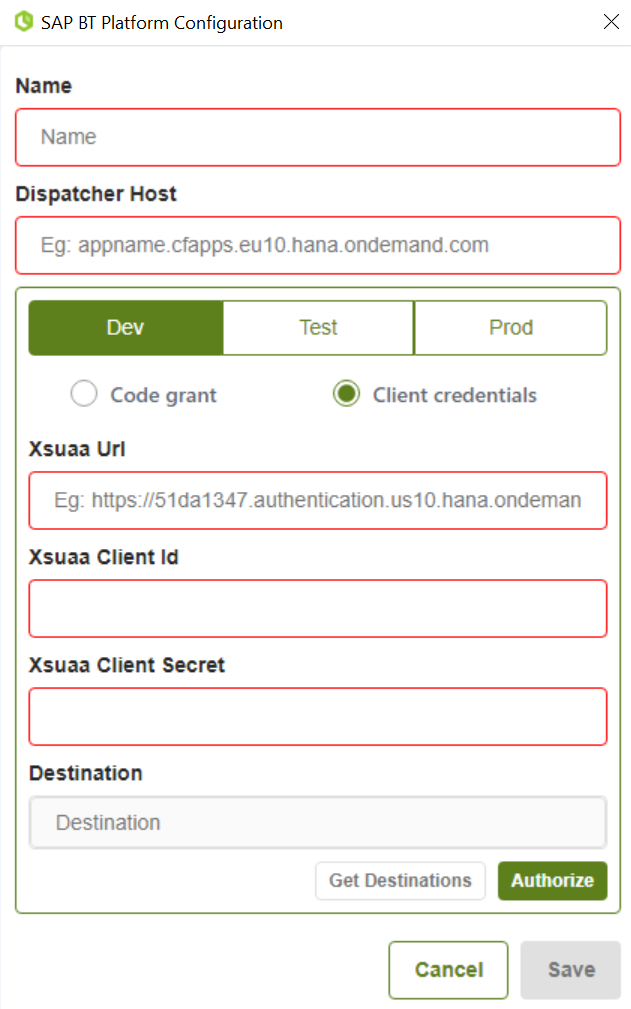
•The Get Destinations button is enabled if a valid token is generated with the Authorize button:
•When you edit an input field after authorizing the SAP BT Platform configuration, the Save button is disabled. To enable it it is necessary to authorize and get the destinations again.
•If the SAP BT Platform connection is edited after 12 hours, it is possible that the token may have expired. The following error message appears:

Therefore, you must authenticate again.
Configuring the SAP BT Platform connector in the Management Console
The configuration of the SAP BT Platform connector in the Management Console follows the same logic as explained in this article. To perform this configuration, see the Configure the SAP BT Platform connector section of the Connectors article.
Bizagi Studio Use Cases
1.Enter the configuration of the SAP BT Platform connector that you want to edit.
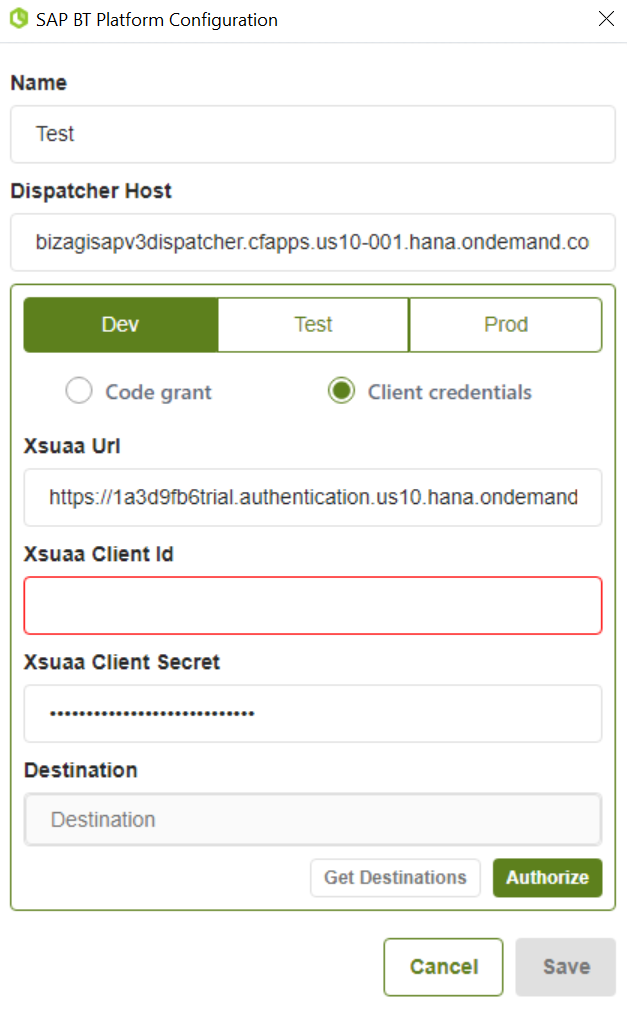
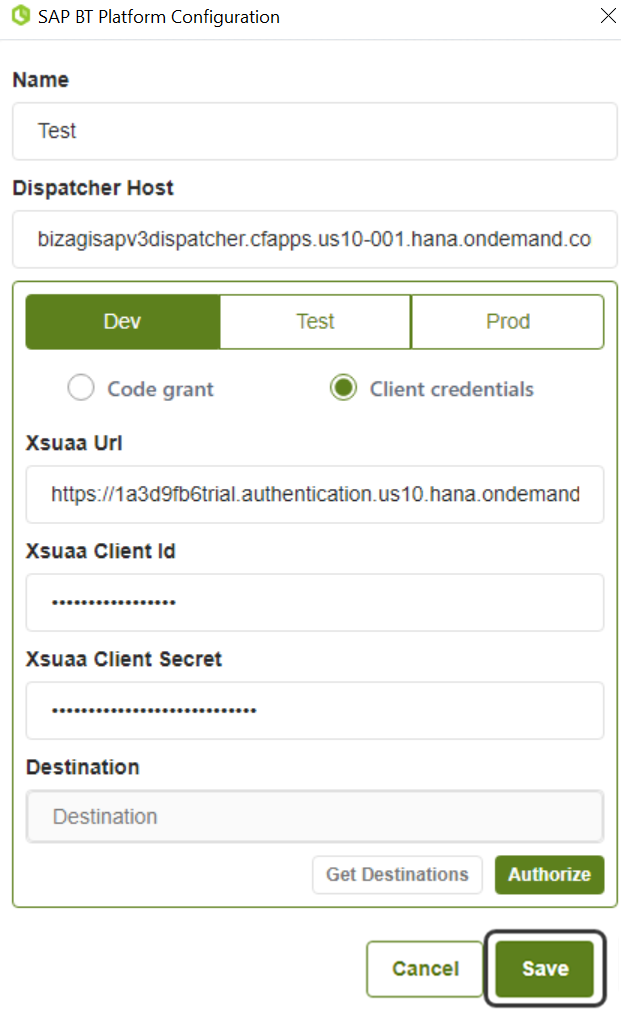
2.Define the correct settings to enable the Save button.
Define SAP actions available for Bizagi processes
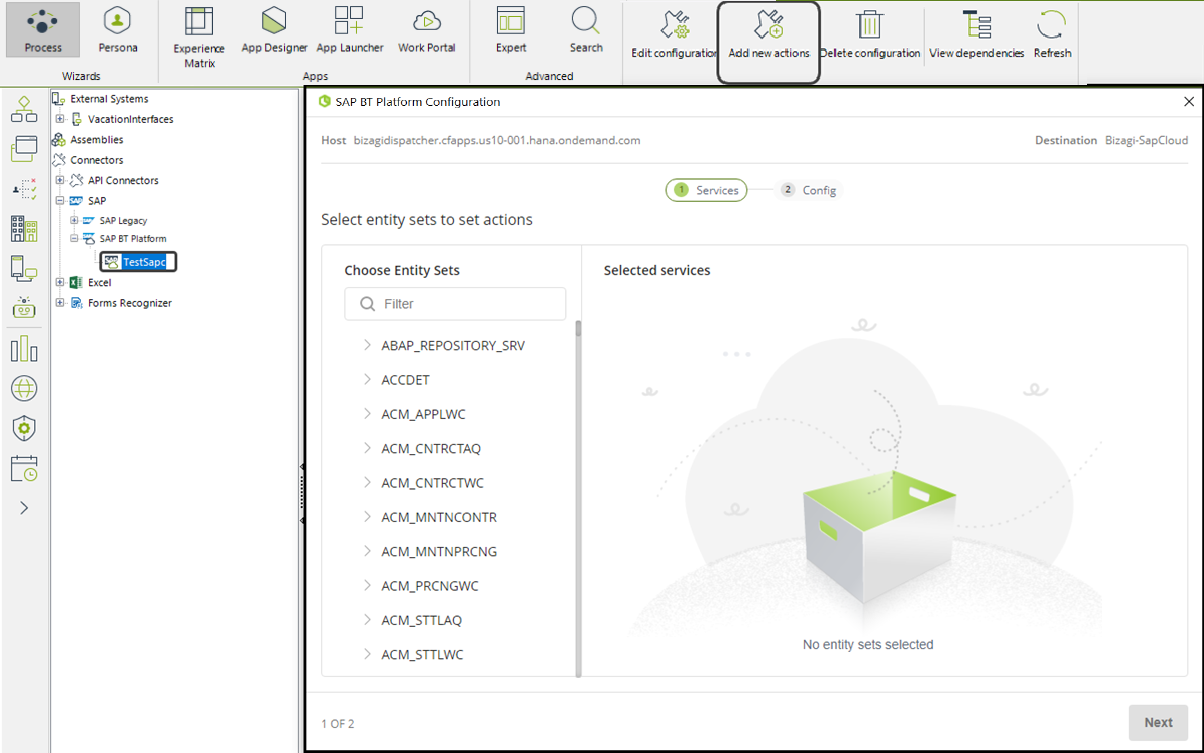
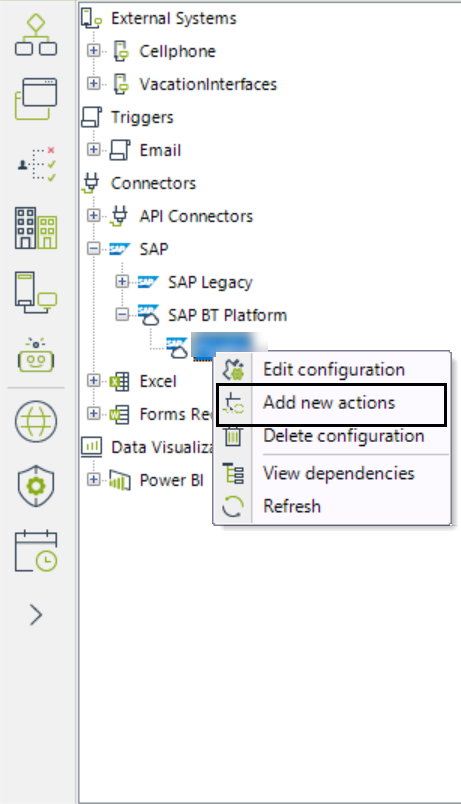
Your SAP system can expose multiple OData endpoints. Each endpoint can contain multiple actions that you can define in your connector and Bizagi processes can invoke. To do so, right click the name of your SAP configuration, and select Add new actions.
Bizagi displays the endpoints available through the OData layer of your SAP system. Each endpoint contains entity sets, which have actions that you can use in your Bizagi processes. You can search for endpoints using the filter text box.
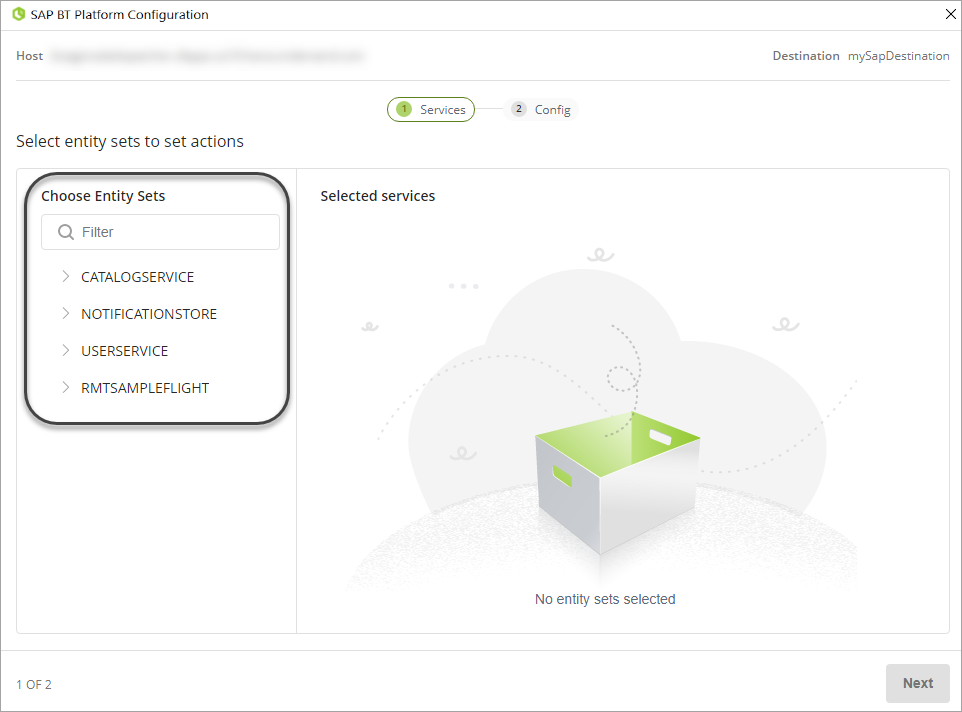
Open the endpoint to view the different entity sets. You can select each entity set by clicking the USERSERVICE check box.

If you want to take out a service from the list, you can click the X icon next to each service name. After you review all the services, click Next.
|
If there is an error displaying the services after selecting them, it may be that the service is exposed as metadata but the entity set is not available. |
Configure actions
SAP exposes actions within entity sets. One entity set can have different HTTP or HTTPS actions that you can enable. Each entity set is configurable in the following aspects:
•Delete duplicated entity sets.
•Define the action type and attributes.
Clicking the pencil icon, you can edit the entity set name. This name is displayed when you set the action in a process.
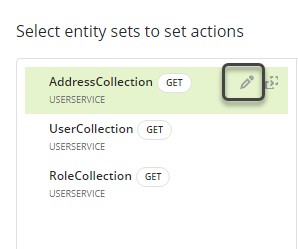
After changing the name, click the check icon to save it.

In the entity set list located on the left, you can see the duplicate icon next to each entity set. When you click this icon, all actions configured in that entity set are duplicated.
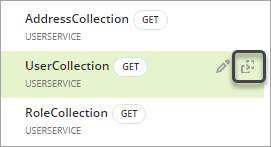
Next to a duplicated entity set, you can see the delete icon. Click this icon to delete the duplicated entity set.

You can undo the deletion in the message box located at the bottom-right corner.

Define the action type and attributes
Similar to HTTP or HTTPS requests, each action has a set of possible execution types that let either consult, update, or delete records associated with the entity set. For example, you can consult (GET) the information of SAP users.
Bizagi lets use the following action types:
•GET
•GET ALL
•CREATE
•UPDATE
•DELETE
•PATCH
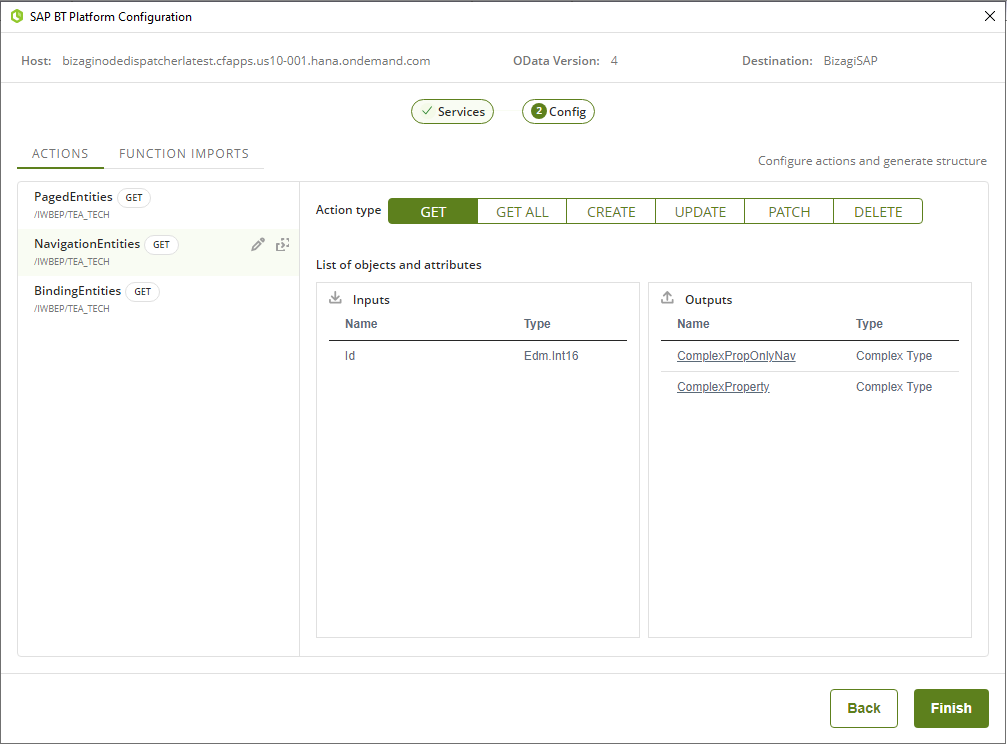
When you click each action, Bizagi displays all the action types available for that entity set. You can select ONE of the available action types. If you want different action types related to the same entity set, you can duplicate it.
|
An action type can be disabled due to SAP BTP restrictions. Disabled action types are displayed in gray. |
When you click each action type (e.g. GET), Bizagi displays two lists of attributes. These lists are attributes that can be obtained in the invocation of an action.
1. Optional attributes: These attributes can be added by the Bizagi user configuring the action. They can be added or deleted in the configuration phase.
2. Fixed attributes: Bizagi displays these attributes as read-only, showing the name and type of each attribute.
You can add optional attributes by clicking the plus symbol + next to the name of the attribute. When added, Bizagi displays them at the end of the attributes list. You can remove the attribute with the delete icon on the right.
|
You can add or delete optional attributes. Other attributes are displayed as read-only. |
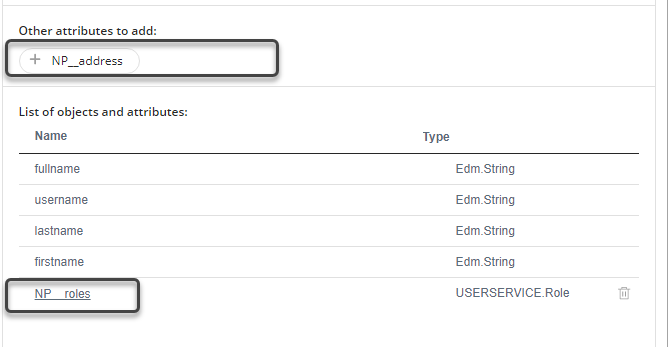
Optional attributes are usually an object, containing single attributes. When you click the optional attribute hyperlink, Bizagi displays the list of single attributes contained.
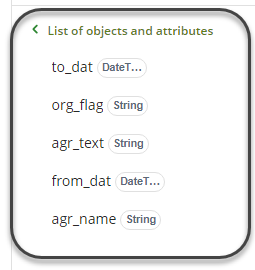
When you finish defining optional attributes for each action type, click Finish.
Type of Function Import
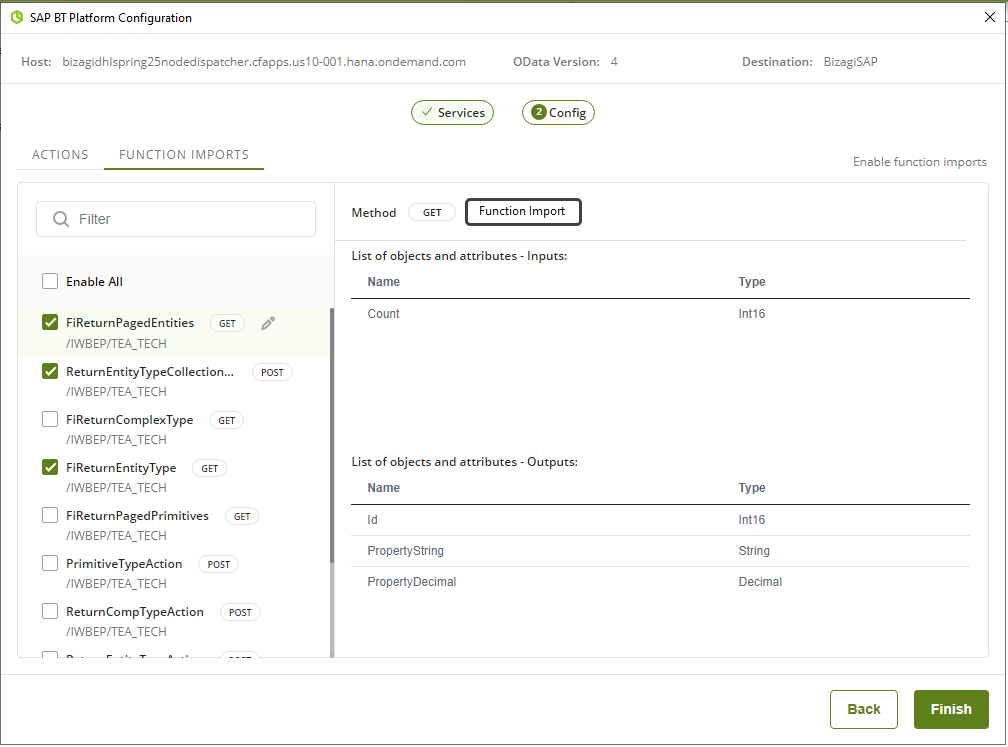
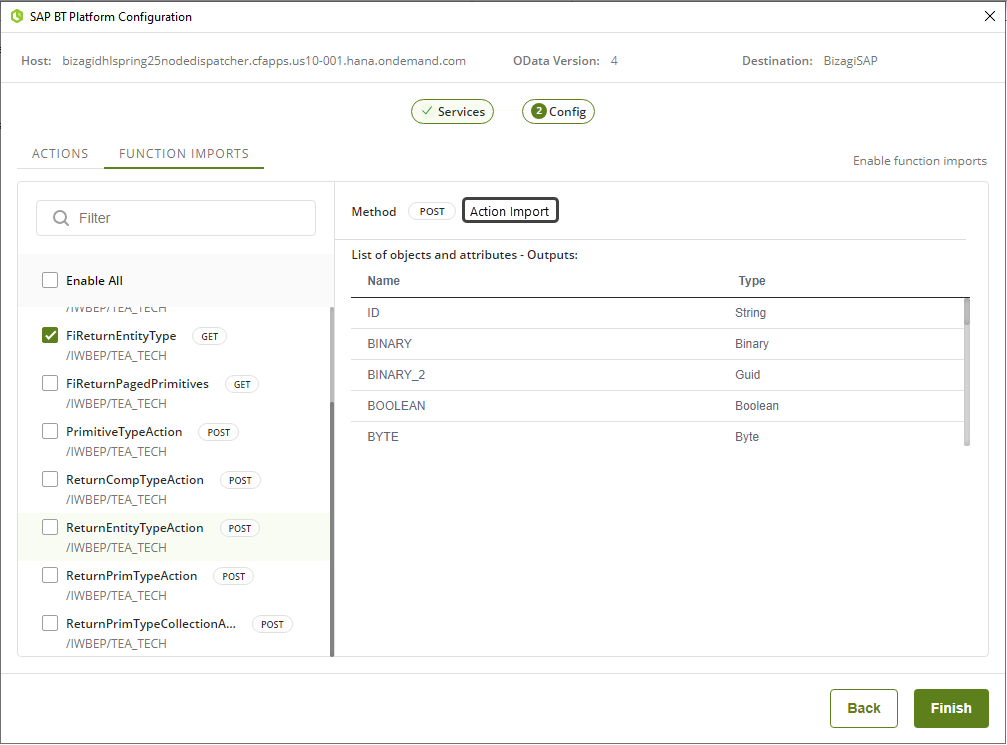
The type of Function Import used in an OData service is clearly identified in the configuration for OData V4 for SAP S/4HANA:
•Function Imports correspond to GET operations.
•Action Imports correspond to POST operations.
Complex Type attributes configuration
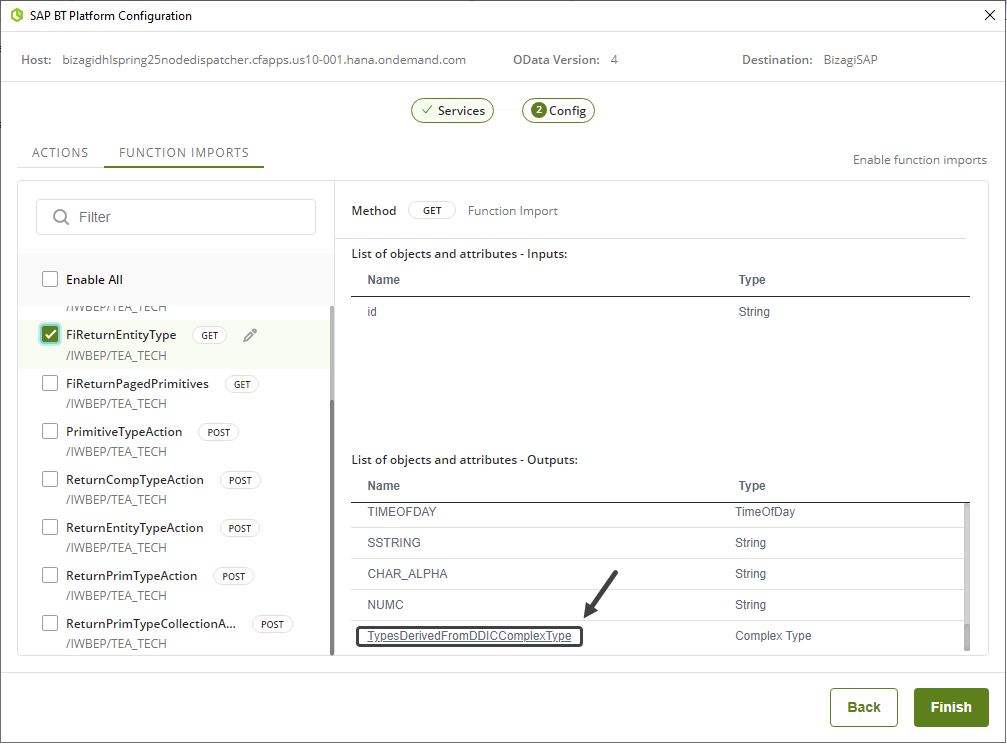
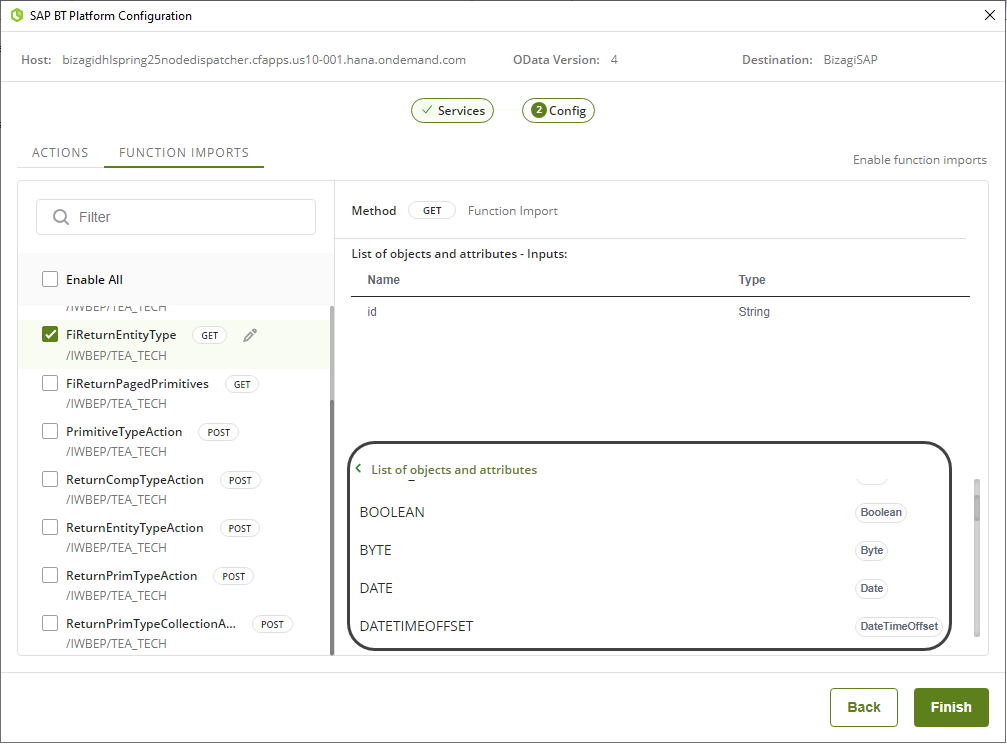
You can configure Complex Type attributes displayed or those that are included inside Function Imports.
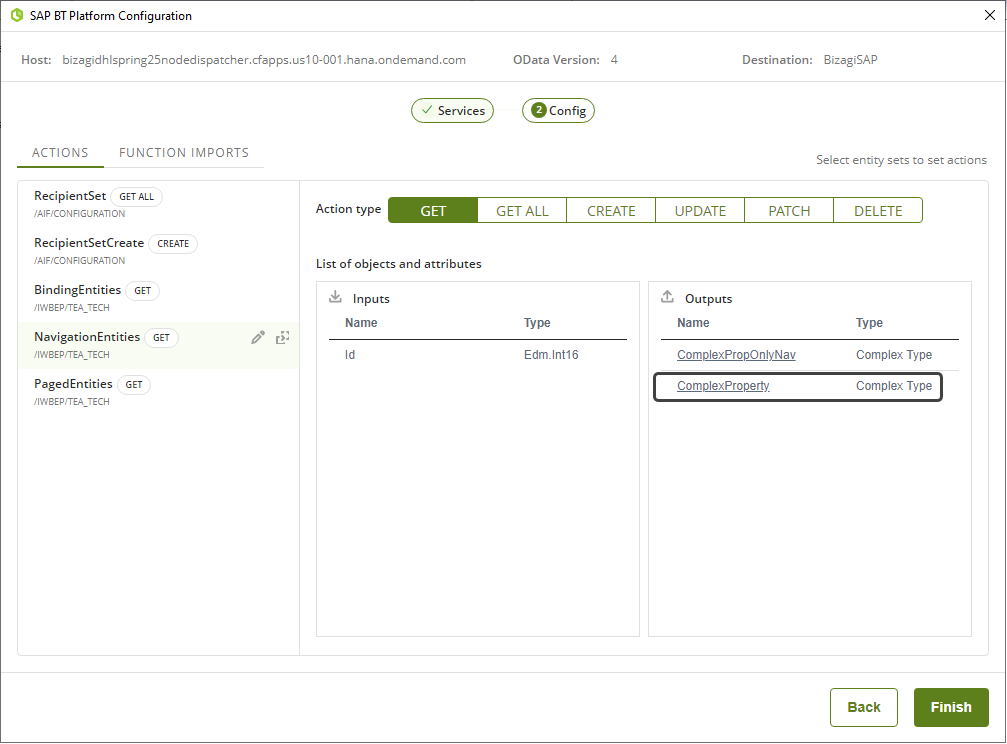
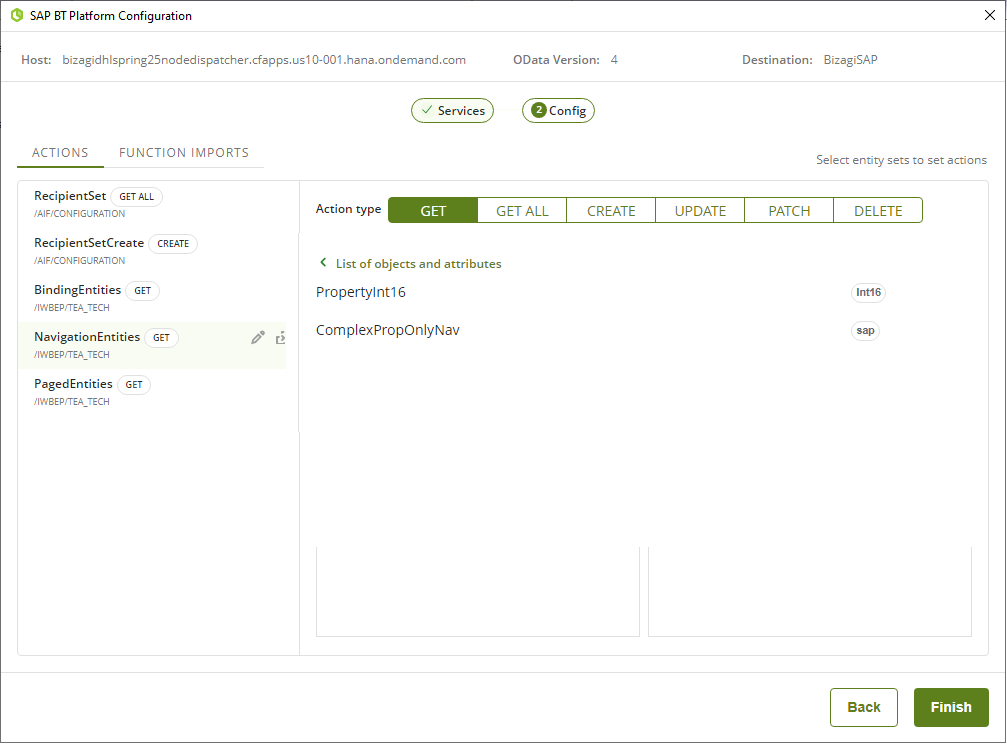
In Function Imports this is the way you will see them.
|
Note that Complex Types in OData V4 for SAP S/4HANA allow nesting of multiple related fields under a single entity, improving clarity and reusability in both read and write operations. Proper modeling of these types is essential to maintain data consistency when interacting with SAP. |
Last Updated 1/14/2026 2:57:04 PM