Overview
After configuring your cloud portals, you are ready to start your development journey on Bizagi Studio. To do so, follow these steps:
1.Invite developers to your Studio Cloud subscription
3.Open your project in Bizagi Studio
4.Invite collaborators to your project
Invite developers to your Studio Cloud subscription
To invite users to join your Studio Cloud subscription, they must first be a part of your company. To add users to your company, you need to have a Company Owner role and add these users through the Customer Portal. For additional information, refer to Manage Company users.
To add users to your Studio Cloud subscription, you can do so with either a Company Owner or Studio Subscription Owner role. Follow these steps to add a user to your subscription:
1.Navigate to Studio Cloud Services in the Customer Portal.
2.Select your subscription.
3.Select the Users tab.
4.Click the Assign License button.
Make sure that you have enough user licenses to invite users to your subscription. The number of available licenses is displayed on the top left of the Users panel, as displayed below.
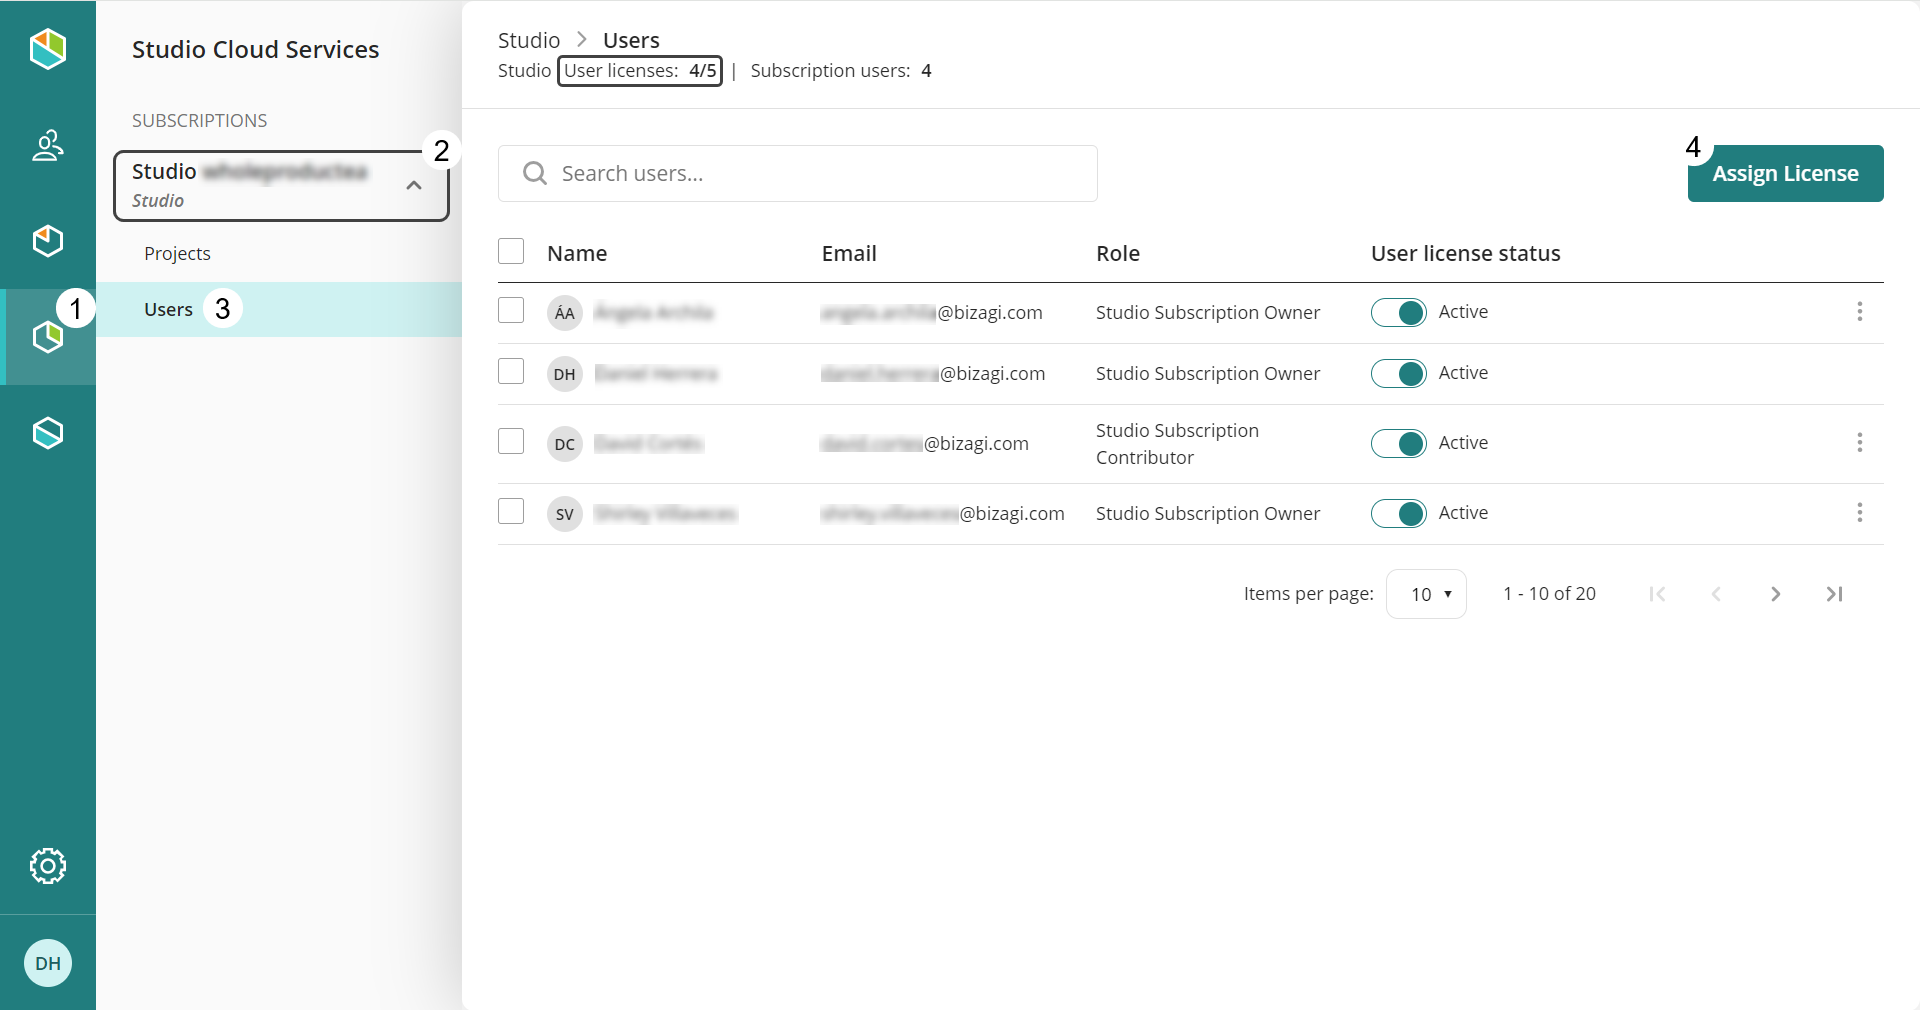
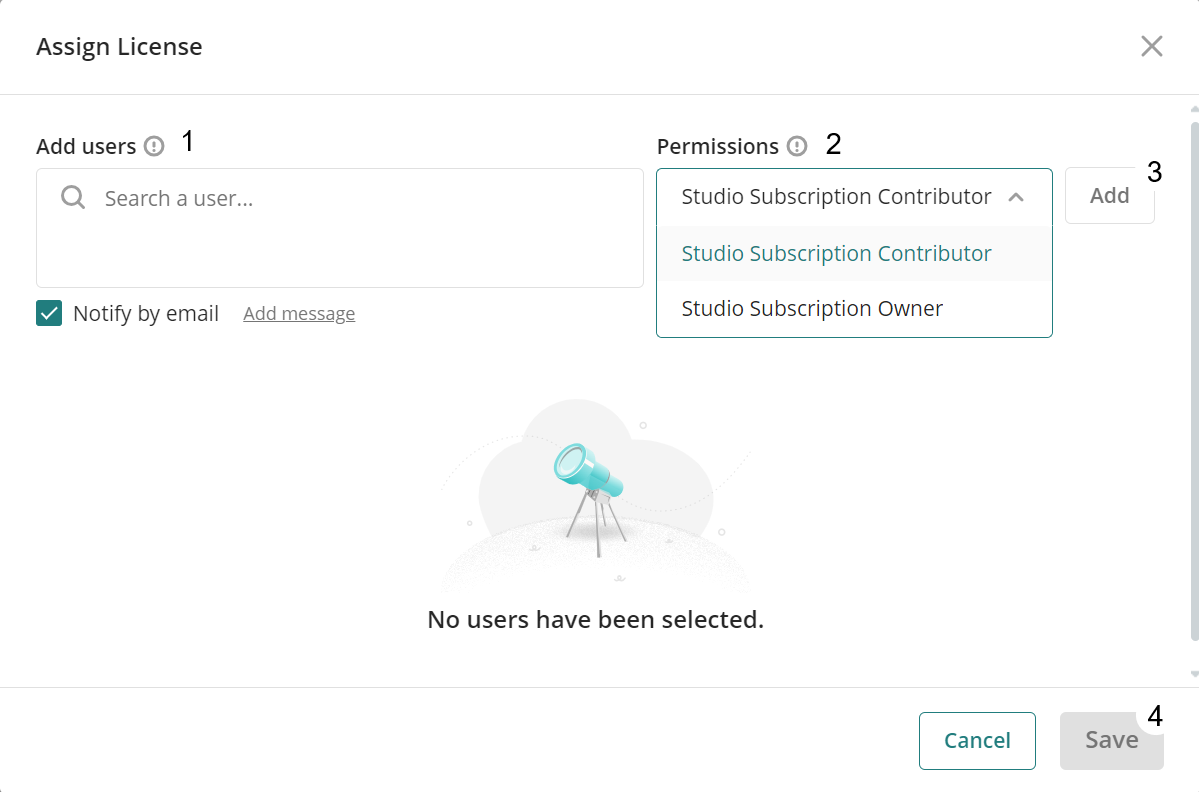
5.Use the search box under Add users to find a user. The Permissions drop-down menu allows you to assign the role for the user you are inviting. Once you have selected the user you want to invite, click the Add button. Save your configurations by clicking the Save button.
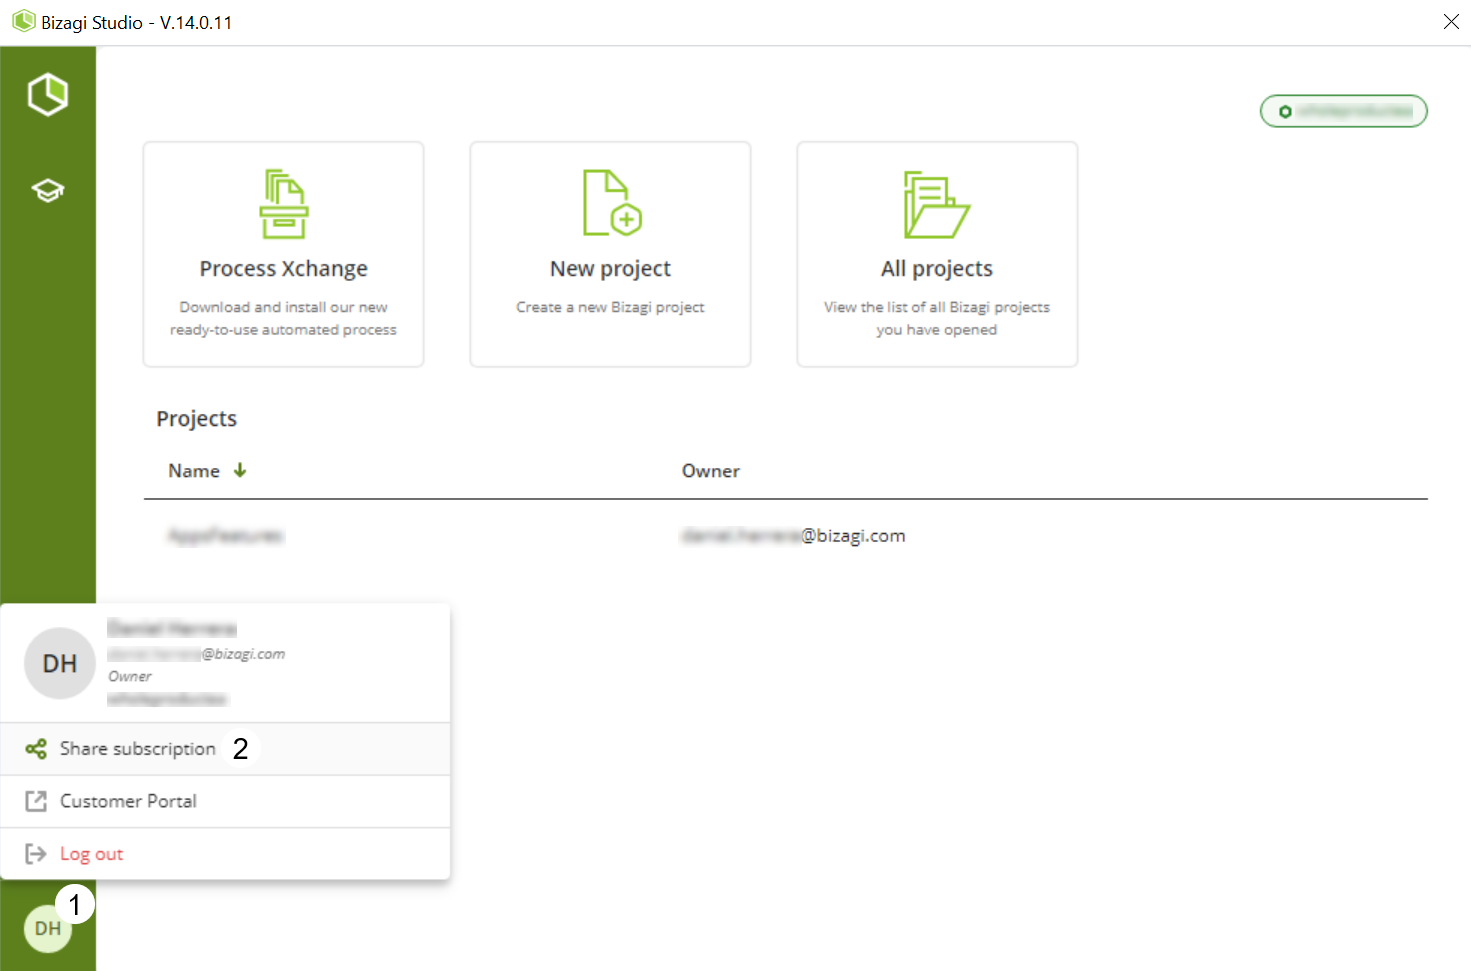
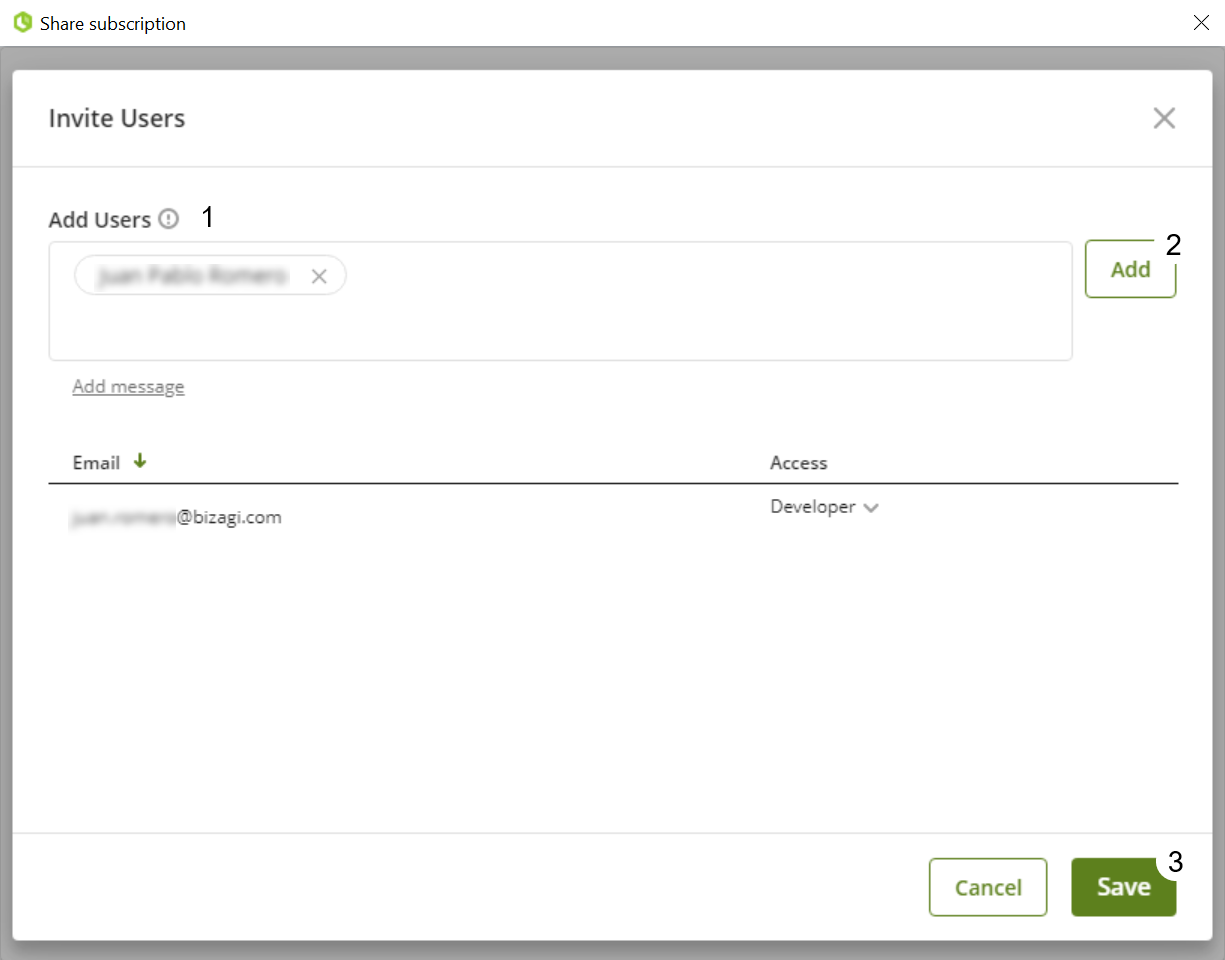
You can also invite users to your subscription directly from Bizagi Studio. As a Studio Subscription Owner, navigate to the Home page in Bizagi Studio, click the user icon, and then select the Share subscription option.
A window appears, displaying details about the users in the subscription.
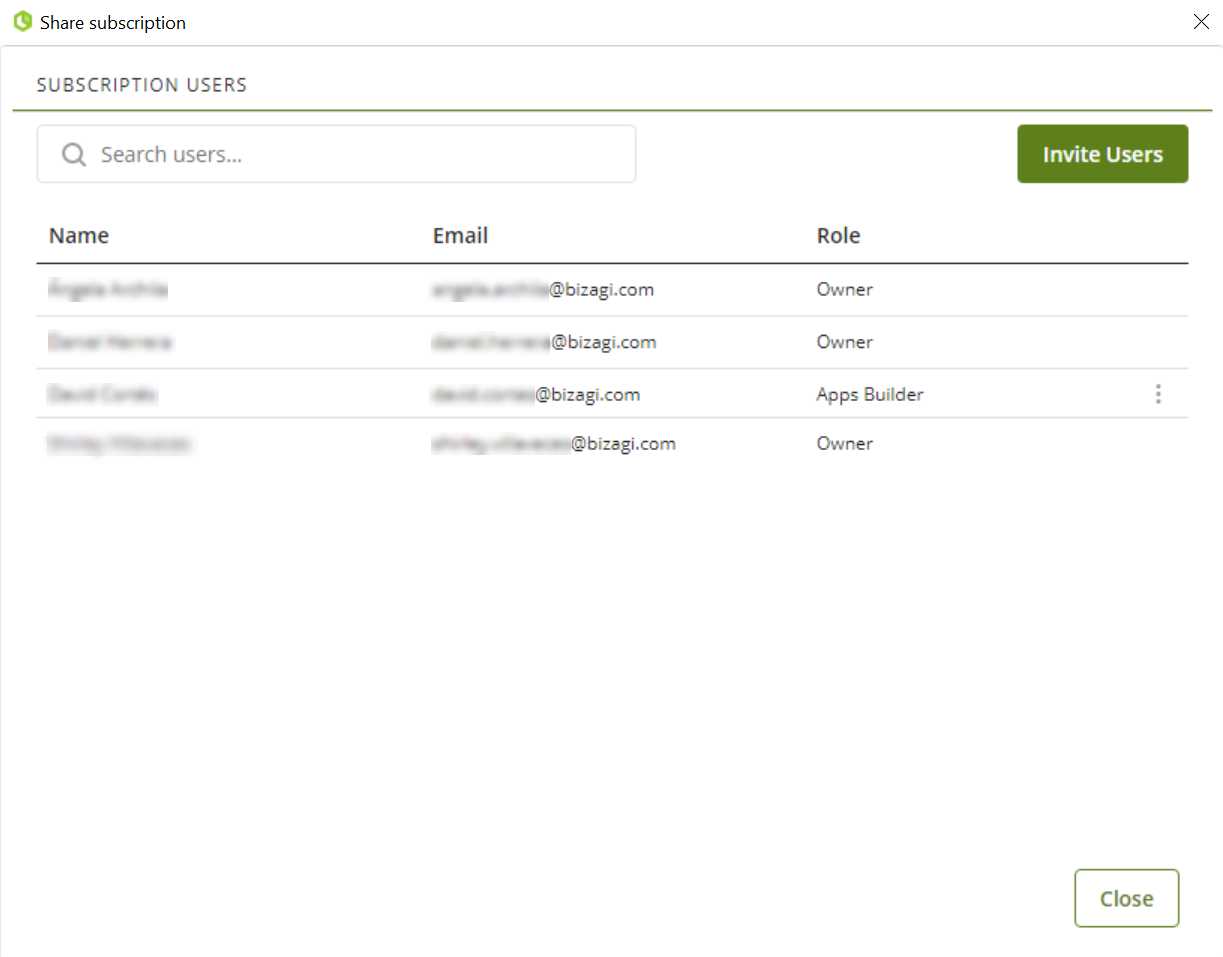
Here, you can invite users to your subscription by clicking the Invite Users button.
In the window that appears, use the search box under Add Users to find a user. Click the Add button to include the user for an invitation to your subscription. You can invite multiple users in a single invitation by repeating this process.
After adding all the users you want to invite to your subscription, click the Save button.
|
The Project Owner is not included in the five-user package, which means you can have the Project Owner along with five additional users. Pending invitations (awaiting user confirmation) are counted within the five-user package. For instance, if two users have already accepted the invitation and you have three pending invitations, you cannot invite more users. |
Each user receives the invitation from accounts@bizagi.com. Verify that this email is not in your spam folder.

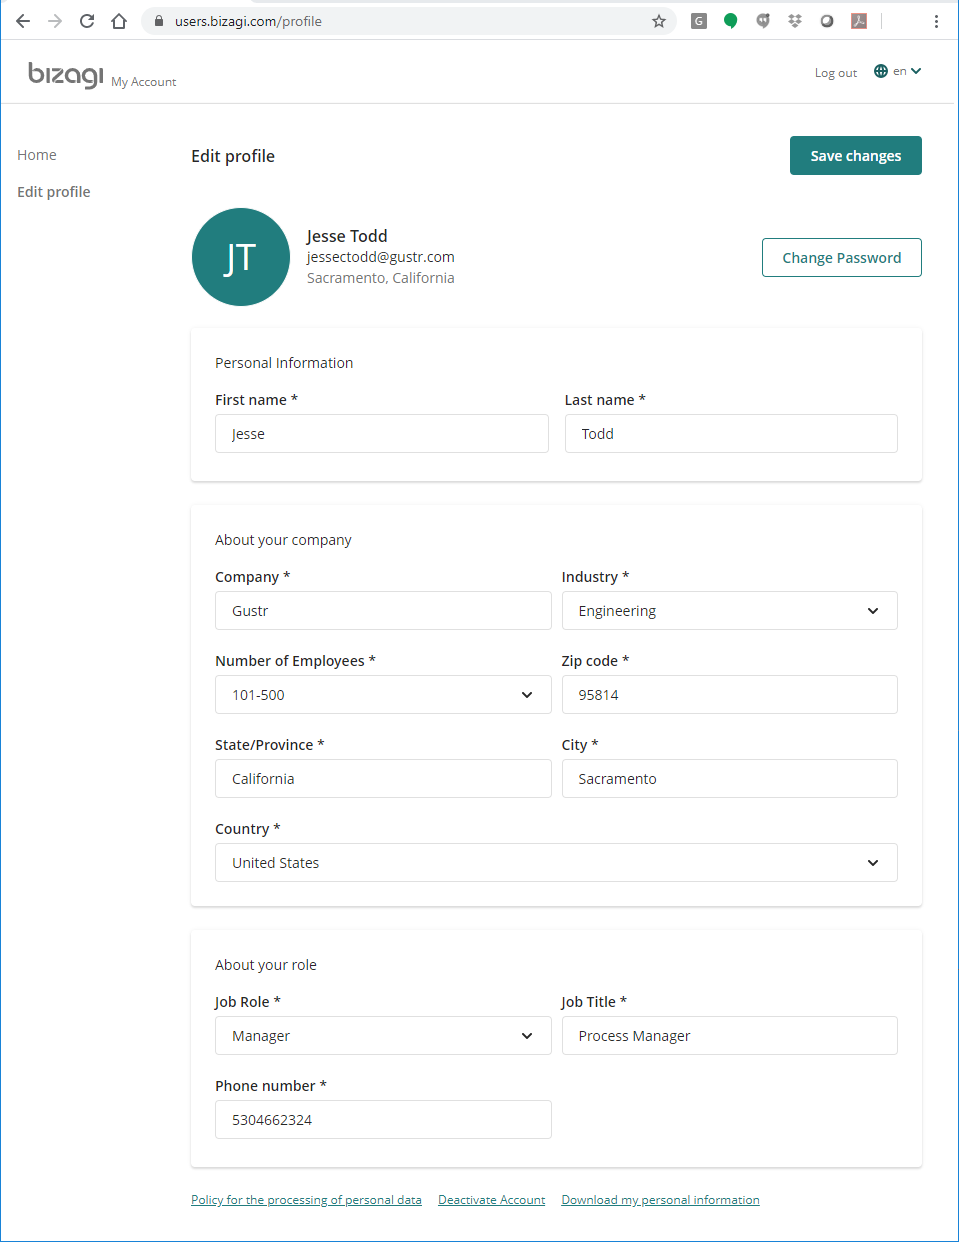
When a user signs in for the first time, they see their account profile.
Download Bizagi Studio
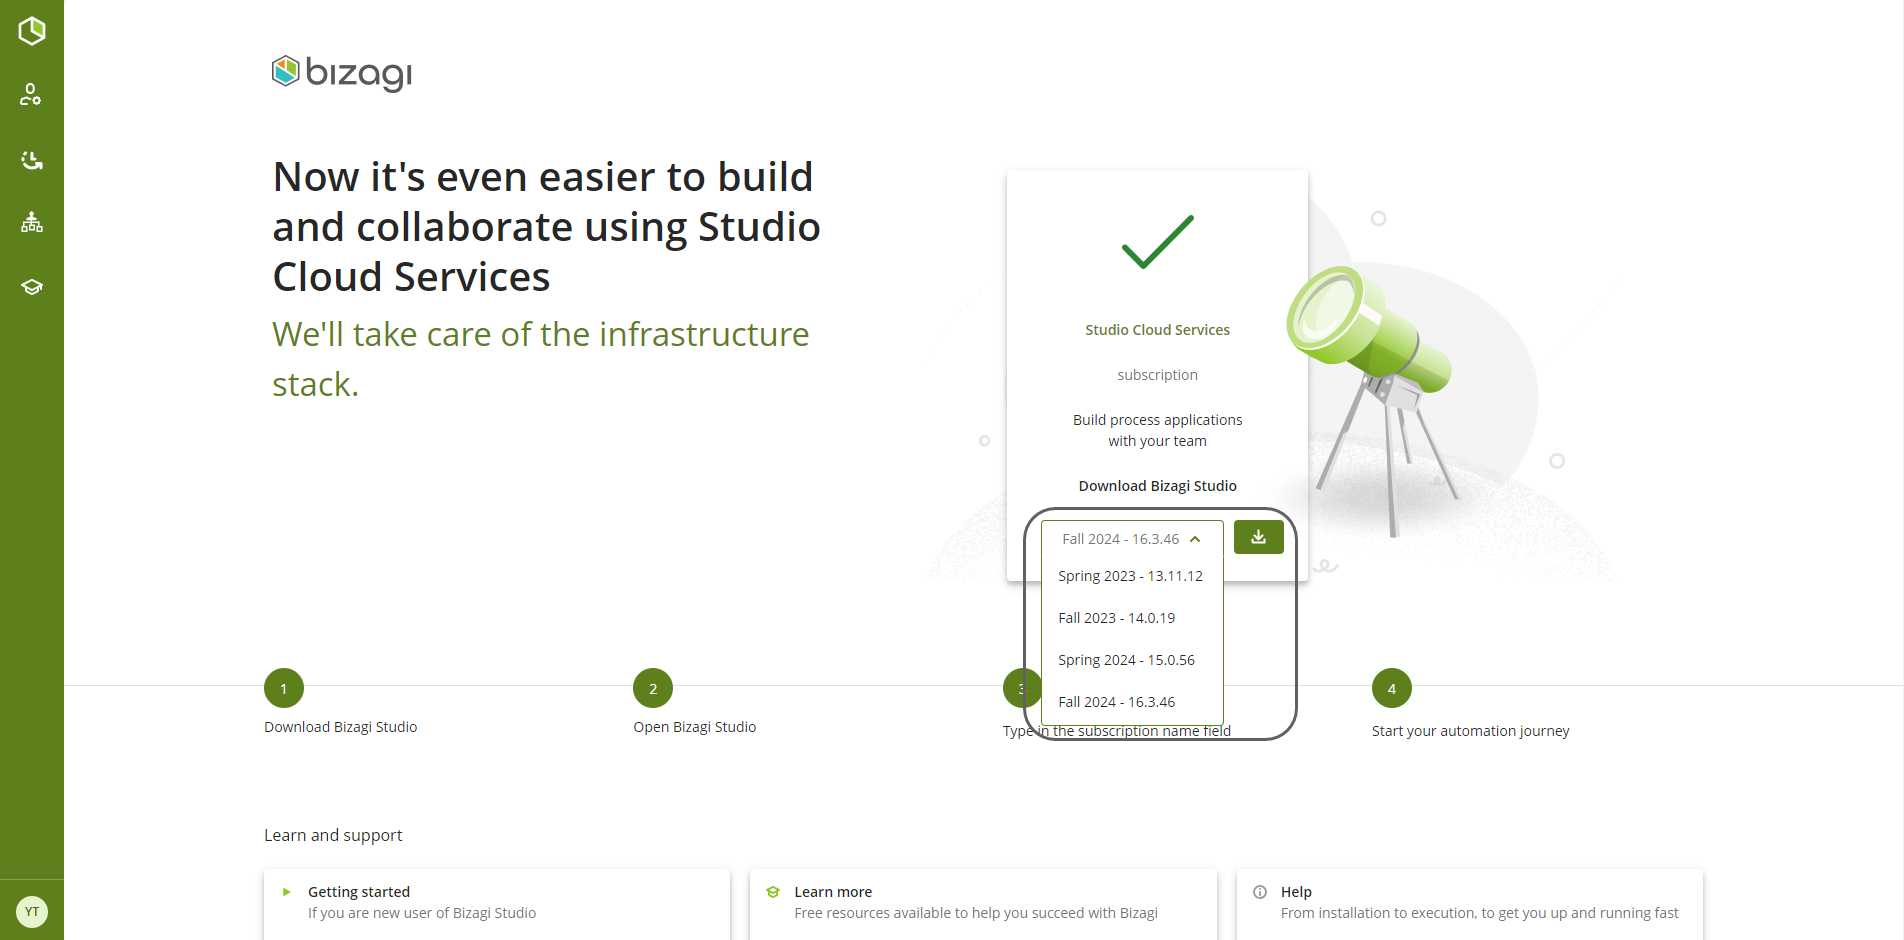
You can download Bizagi Studio directly from the Build page of your Studio Cloud subscription. Note that to access the Build page and download Bizagi Studio, you need to be a member of a Studio Cloud subscription and have a role assigned.
To get the latest version, click the Download Bizagi Studio button. This enables you to download an .exe file that contains the most current version of Studio for your subscription.
For additional details on how to download Bizagi Studio, refer to Downloading Studio.
Open your project in Bizagi Studio
The user designated as the Project Owner should accept the invitation to join both the company and the subscription. The Project Owner is responsible for opening your Studio Cloud subscription project.
To proceed, enter the subscription name, which corresponds to the company name specified in the purchase agreement.

Click Sign In. Keep in mind that your collaborators must have accounts registered in the subscription. Ensure that they are linked to your company account. Register your credentials:
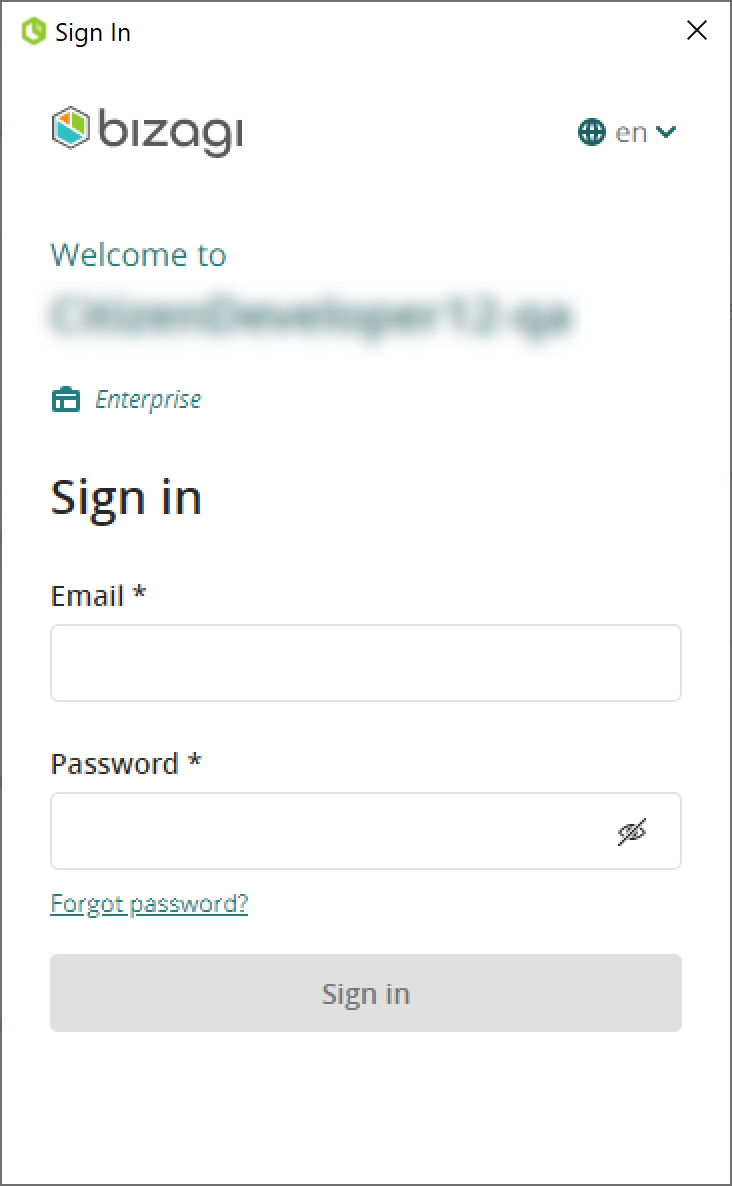
After a successful login, you are directed to Bizagi Studio's Home page. Here, you can view the subscription project, along with the email of the user assigned as the Project Owner. Click the project to open it.
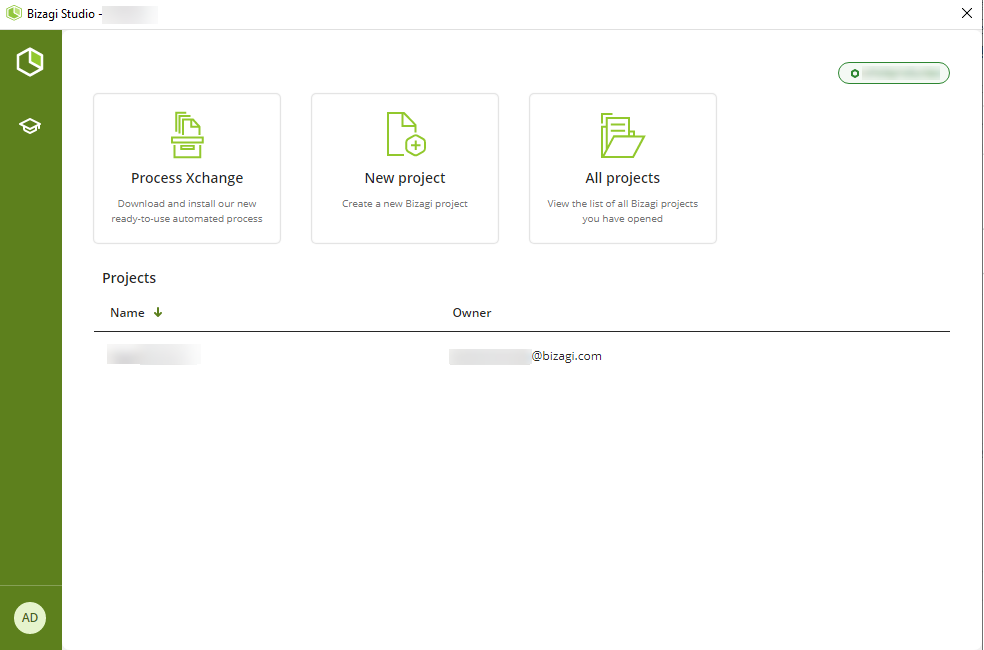
Invite collaborators to your project
Any Subscription Owner or the Project Owner are authorized to invite users to join the project. Users invited to the project should already be part of the company and the subscription.
Open Bizagi Studio and access the project. Navigate to the Cloud Services tab.
The Project Owner can manage all project users by clicking the Project button. This action opens a window listing all collaborators in the project:

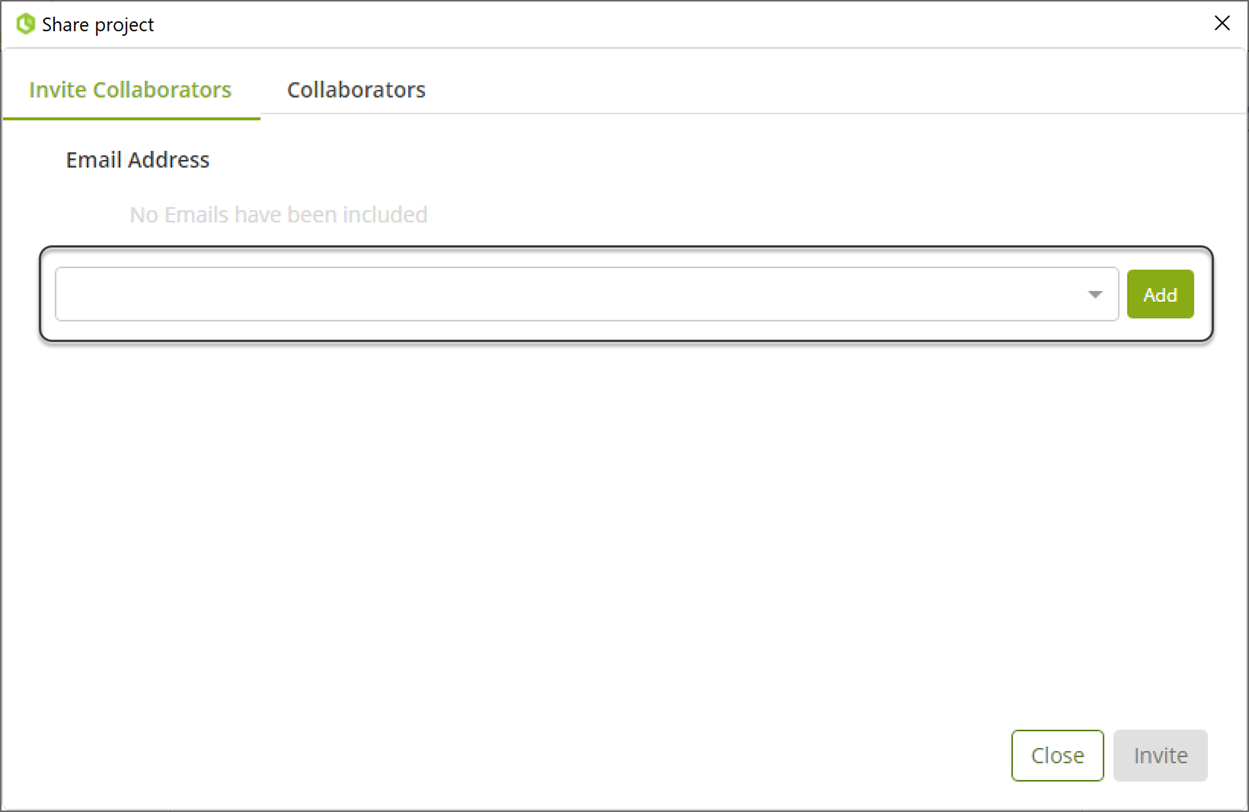
To invite collaborators to the project, navigate to the Invite Collaborators tab.
The drop-down list shows all users in the subscription. Choose the user you want to invite as a collaborator and click Add.
If desired, enter an invitation message and click Invite.
The Project Owner can manage all project users from the Collaborators tab.
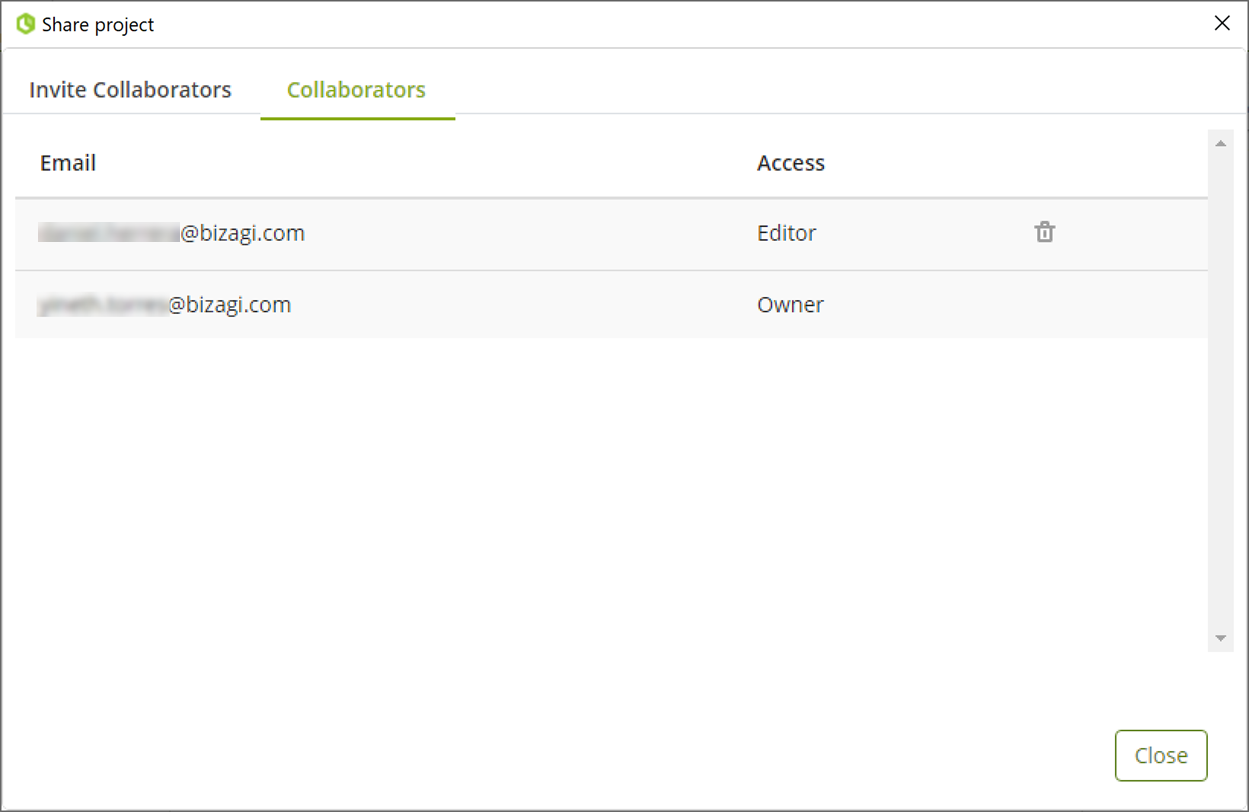
Your collaborators can access the project using your Studio Cloud subscription.
You can also invite users to your project from the Customer Portal. To learn about this process, refer to Manage users in your project.
Now you are ready to start development on your intelligent process automation platform using Bizagi Studio Cloud Services.
Run the Work Portal
When you purchase a Studio Cloud subscription package, you can run the Work Portal associated to the project included in the package. This means that you can run as many projects as the number of packages you purchase with the environment option.
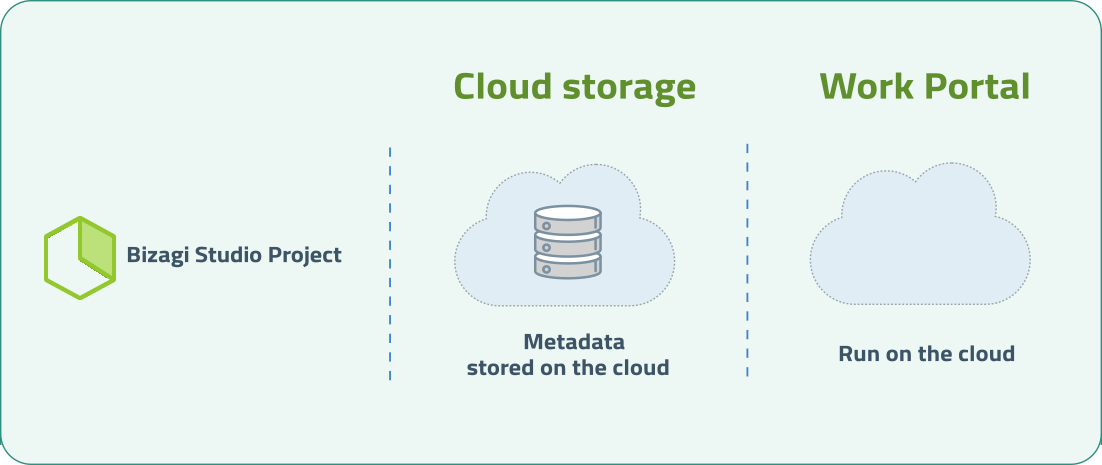
To run the project, click the Work Portal button located in the Home tab.

Next steps
Read the Development considerations.
Last Updated 12/10/2025 4:22:56 PM