Overview
The Auto Testing tool is a resource kit designed to test Bizagi processes automatically in development and testing environments, in order to validate that all paths in a process workflow behave as expected.
For basic information on this feature, refer to Automatic testing.
This section illustrates how to execute and interpret results when running a recorded scenario with the Auto Testing tool.
Before you start
This example focuses on how to execute record a scenario and execute it, while focusing on how to interpret results and logs.
The starting point of this example is having already the Auto testing tool configured, and this example will not elaborate on configuration (mainly due to the fact that such configuration will depend on your environment details).
What you need to do
When carrying out this example, the described steps will consider:
1. Recording the scenario
Recording of the scenario will consider the tasks while using a single user (domain\admon).
2. Modifying the scenario
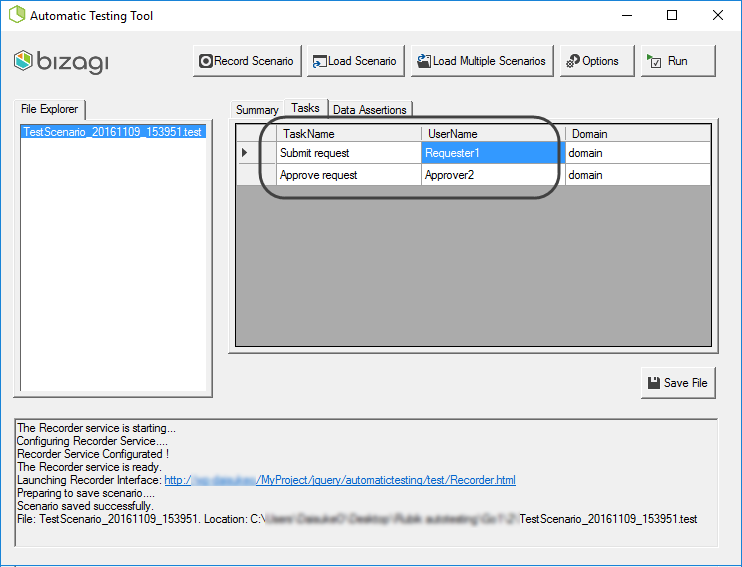
Modifications will be made in order to introduce the different performers for each of the tasks.
3. Executing the scenario
Running the scenario will be done a preset number of times.
Example
The sample process used for this purpose is an over-simplified process, in which there is a request of any type that needs approval.
The following image illustrates the activities and participants in such My process process:
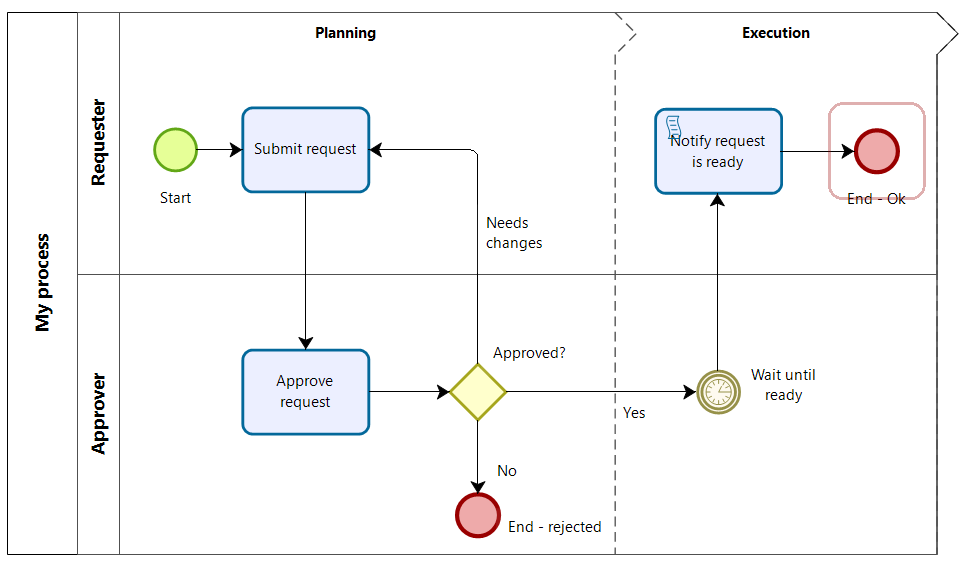
Recall that the example used for this purpose is an over-simplified generic process, in which there is user (a requester) which basically starts a new instance of this process.
When done filling out the details of the request, another user reviews it (an approver) and decides to approve it, reject it or send it back for modifications.
What happens next is not as relevant, mainly because for the sake of this example, we will be recording a test scenario up until that point where the approver will complete his/her task.
1. Recording the scenario
In order to record the scenario, we launch the Auto testing tool and click the Record scenario option.
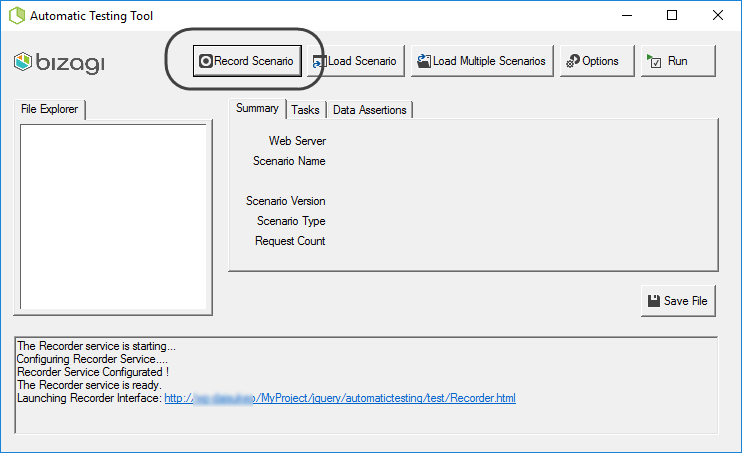
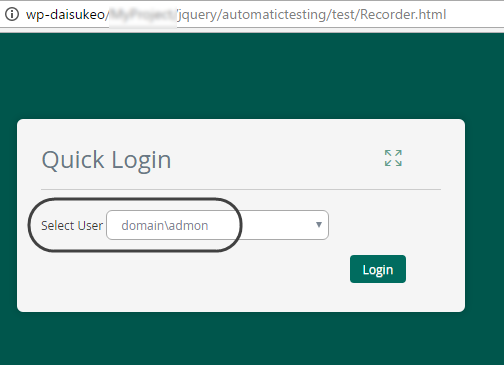
Once the recording service starts, we login with the domain\admon user.
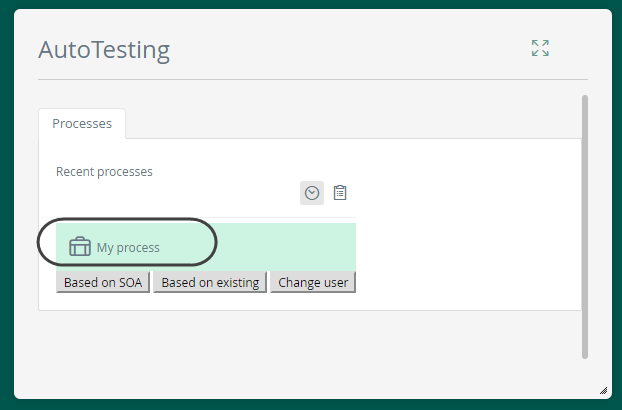
We start a new case of the My process process and work on its first task.
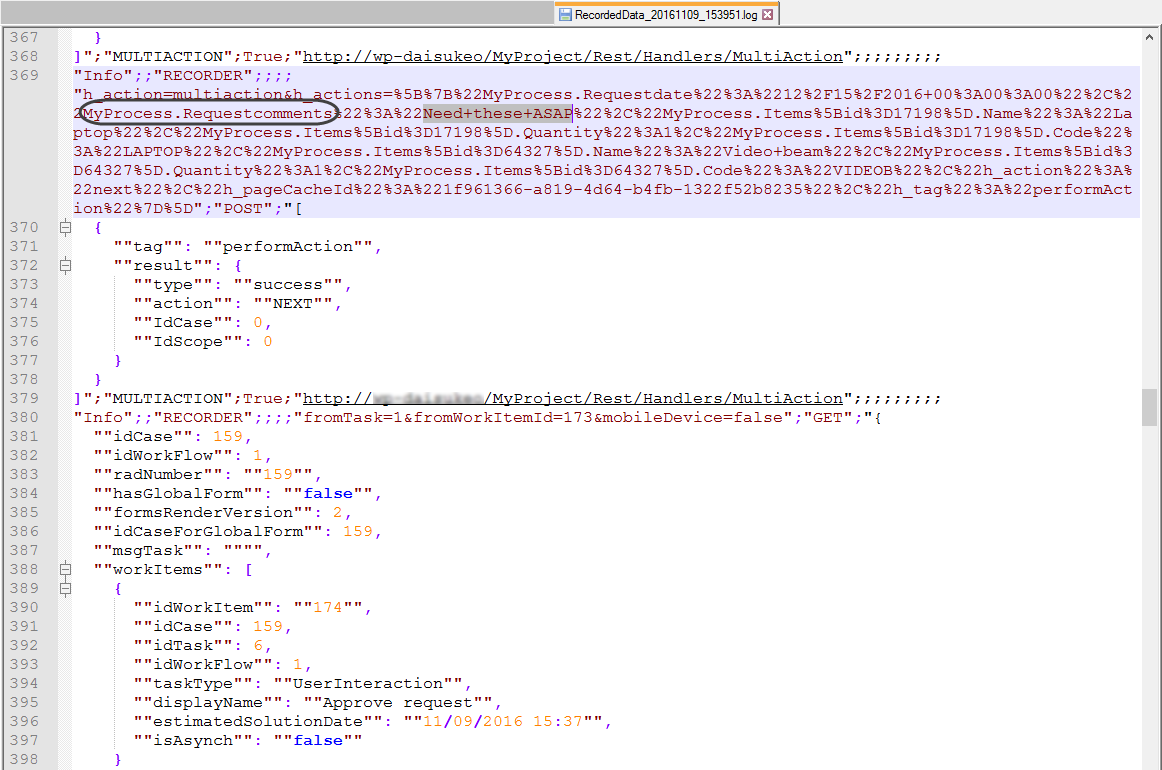
Notice that the first task is called Submit request, and we will be using a Request date set to 15/12/2016, Request comments specifying "Need these ASAP", and 2 items in the collection: one laptop (code-named as LAPTOP) and one video beam (code-named as VIDEOB).
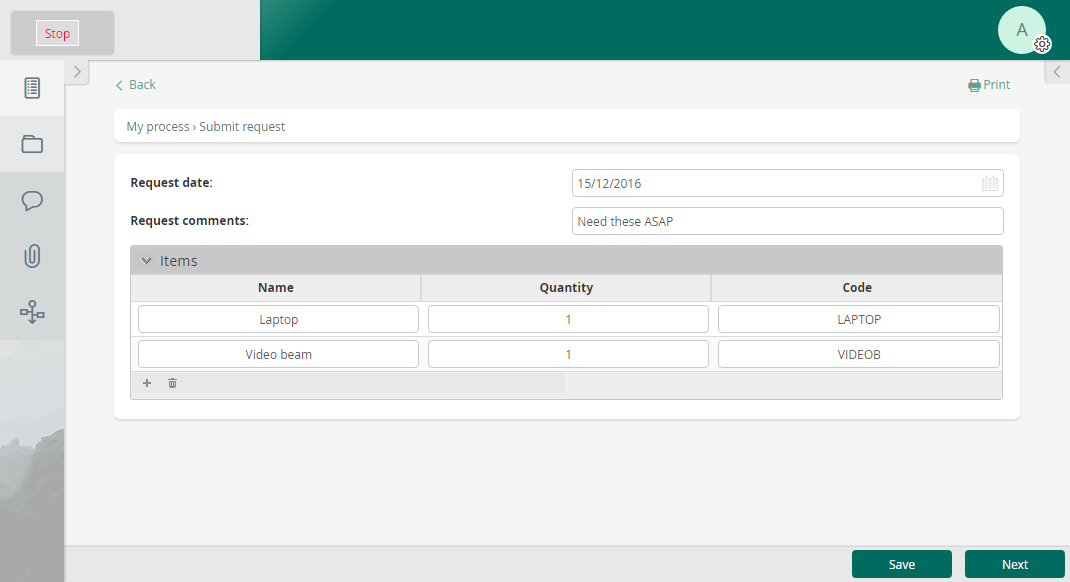
Once this task is completed (upon clicking Next), we work in the next one called Approve request.
We set the Approved? field as Approved, specify "None" as Review comments and click Next.
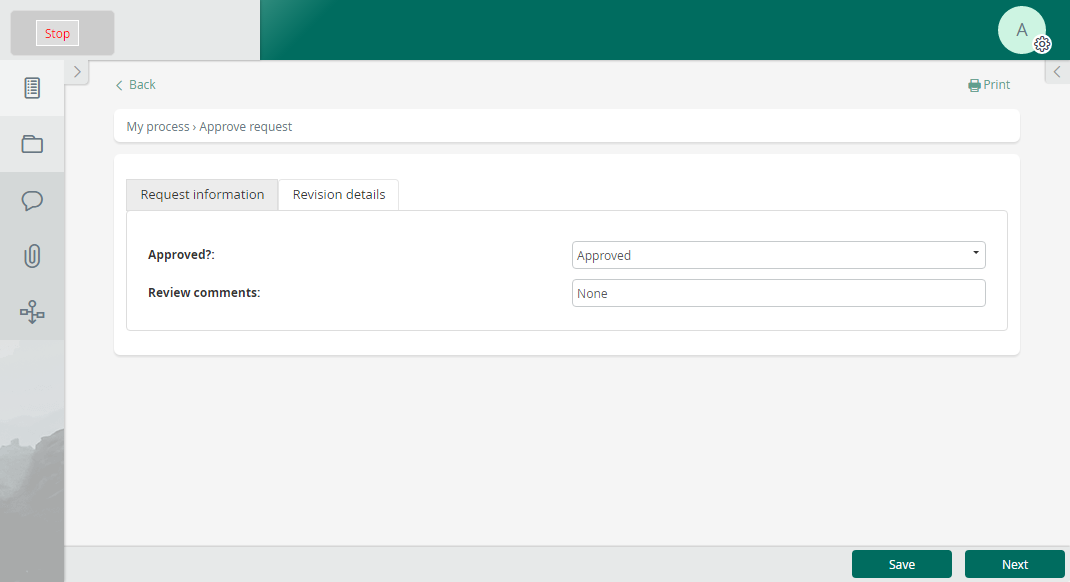
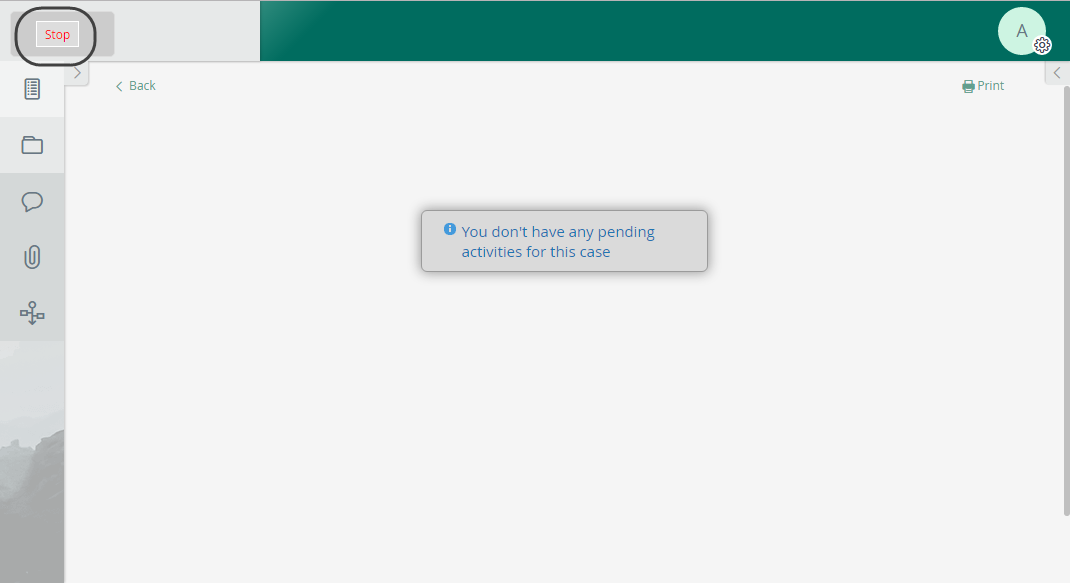
Finally, we click Stop to end the recording.
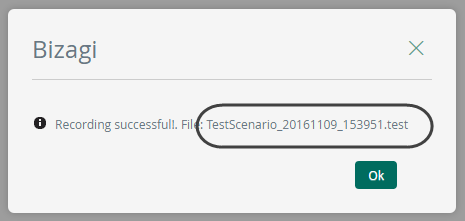
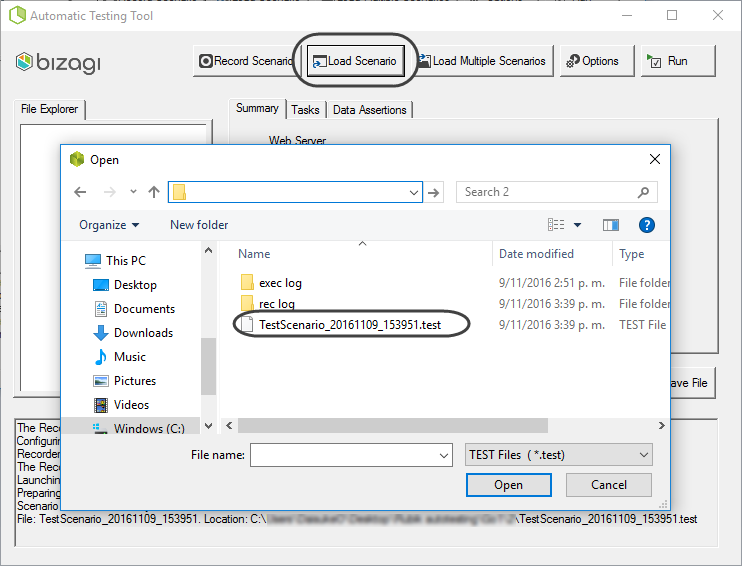
Our saved test scenario file is TestScenario_20161109_153951.test.
If we browse for the log of this recorded scenario (according to its matching timestamp), we find initial details such as the number of the case:
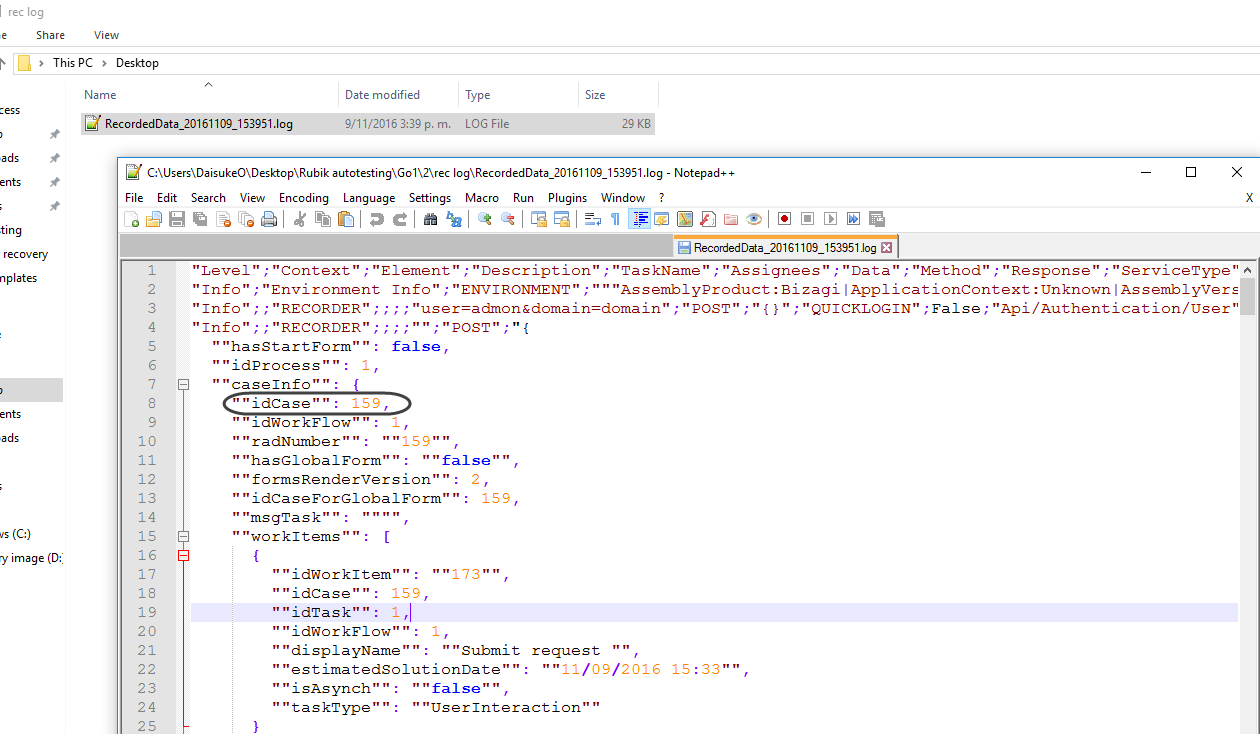
Notice that additional data can be found in the recorded scenario (along with metadata):
2. Modifying the scenario
In order to include performers to the recorded scenario, we load the one we just recorded by using the Load scenario option and browsing for it.
Once it loads, browse to the Tasks tab and edit the assigned users.
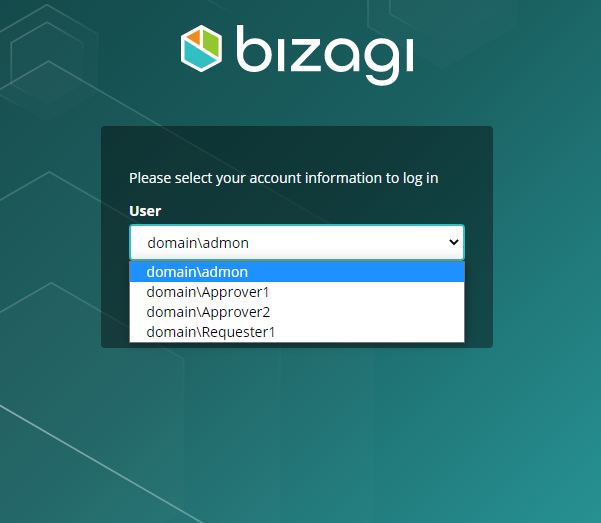
Notice you may verify the exact userName and Domain (case sensitive) of your users through the quick login feature:
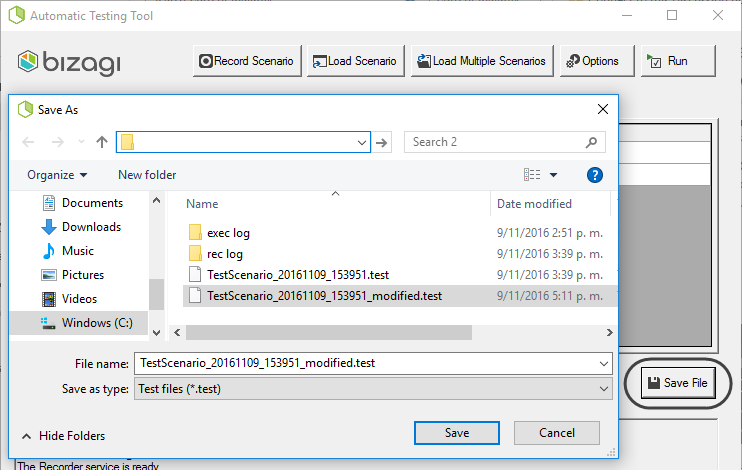
When done, click Save and name the test modified scenario file.
3. Executing the scenario
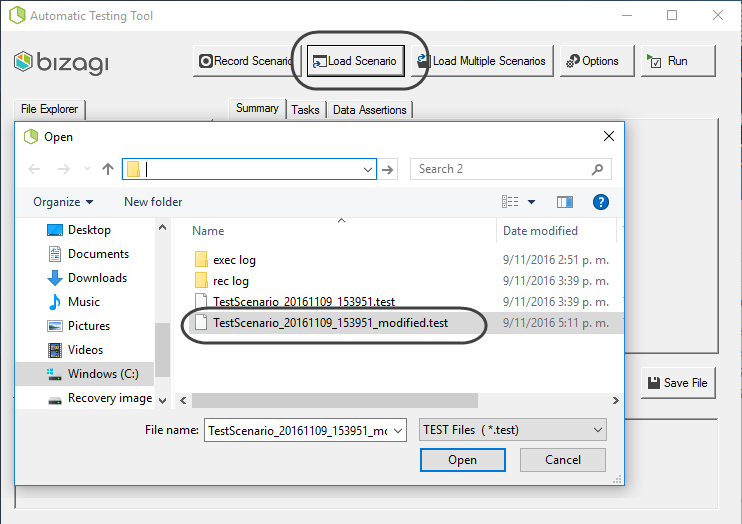
Make sure you load the recently staved scenario by clicking Load scenario, so that you can also verify that the scenario's configuration is accurate according to the recent modifications done in the previous step.
Click on Options and define the execution parameters to run this particular automatic test:
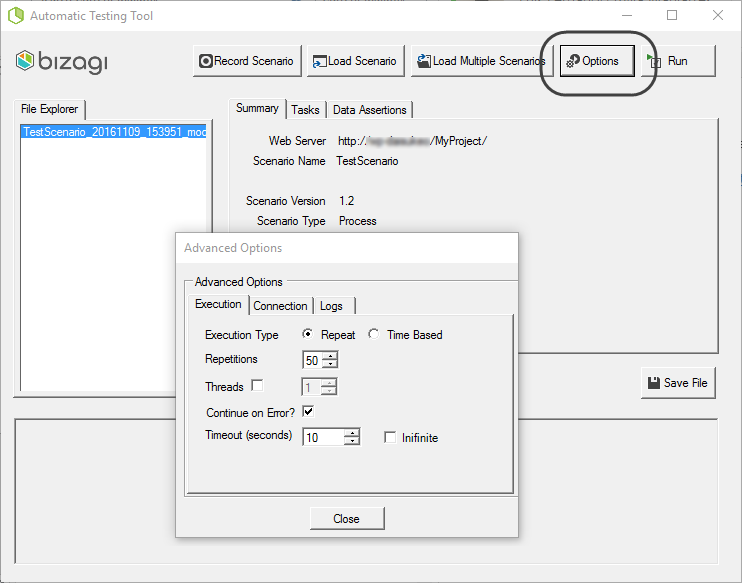
Notice for the sake of this example, we will be repeating the execution 50 times while using a single thread.
Click Close and then on Run.
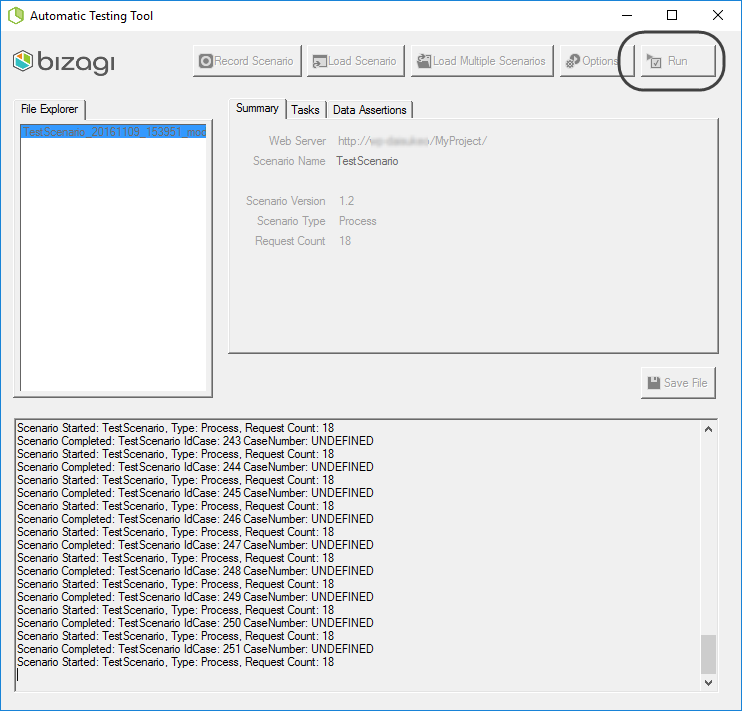
When done, the panel will display a TEST RUN FINISHED message; and you may close the tool and head for the execution logs.
Interpreting the results
The run example will produce an execution log identifiable as TestRunLog_[timestamp].log:
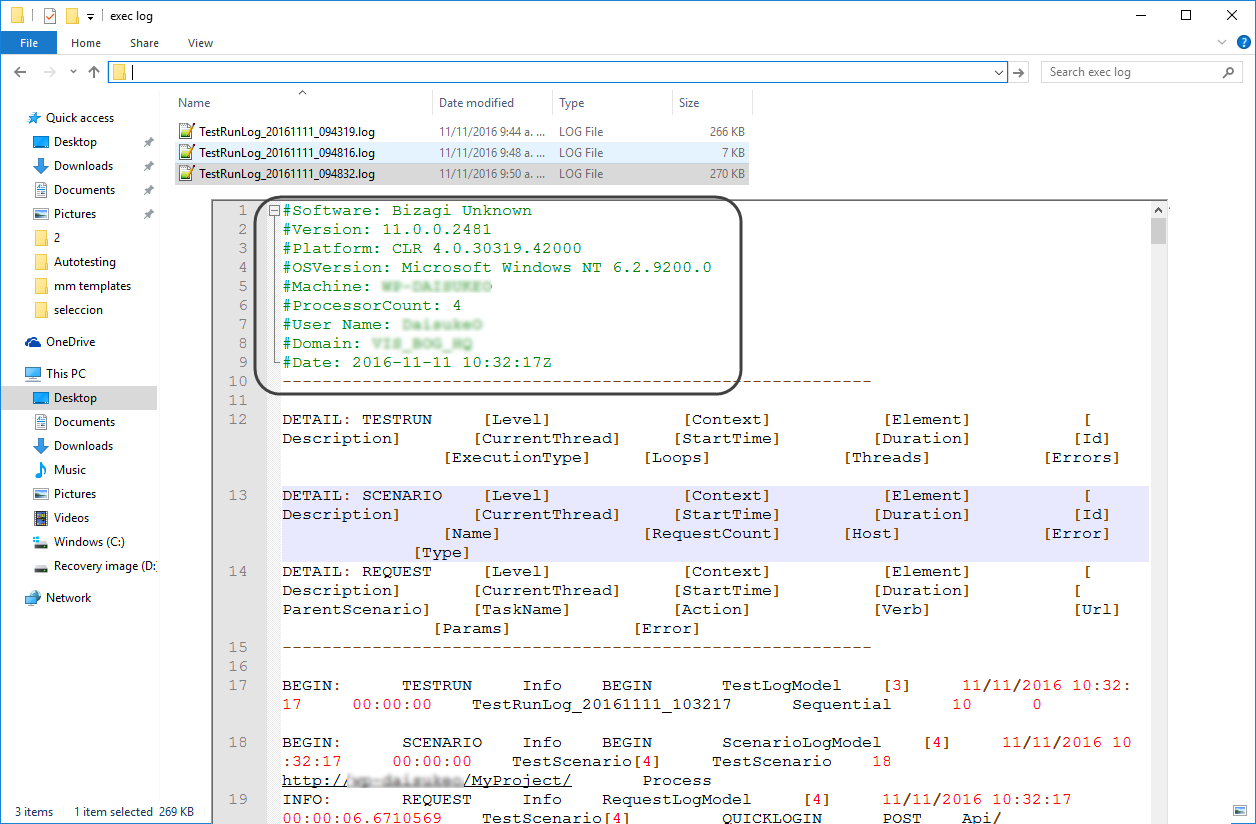
Notice that the second line of this log shows handy information of the run scenario, regarding the client machine on which the tool was launched.
It displays for instance, the name of the machine and its number of processors, the logged windows user and Windows operating system, .NET framework, among others.
Further below, you will find line occurrences for each of the different requests made in the scenario (recall that a single case or a single activity from one case may involve more than 1 HTTP request), and other informative messages.
Taking as an example line#19, you will notice that it indicates the timestamp when it was processed and the case identifier, and most importantly if there was an error or if the line is informative, among others.
Recall that you may also choose to save execution logs as csv files, in which case you will need to change the AutoTesting.Log.Type parameter in the XML configuration file, and finally rename the .log file as a .csv (for instance, so that you can directly open it with Excel):
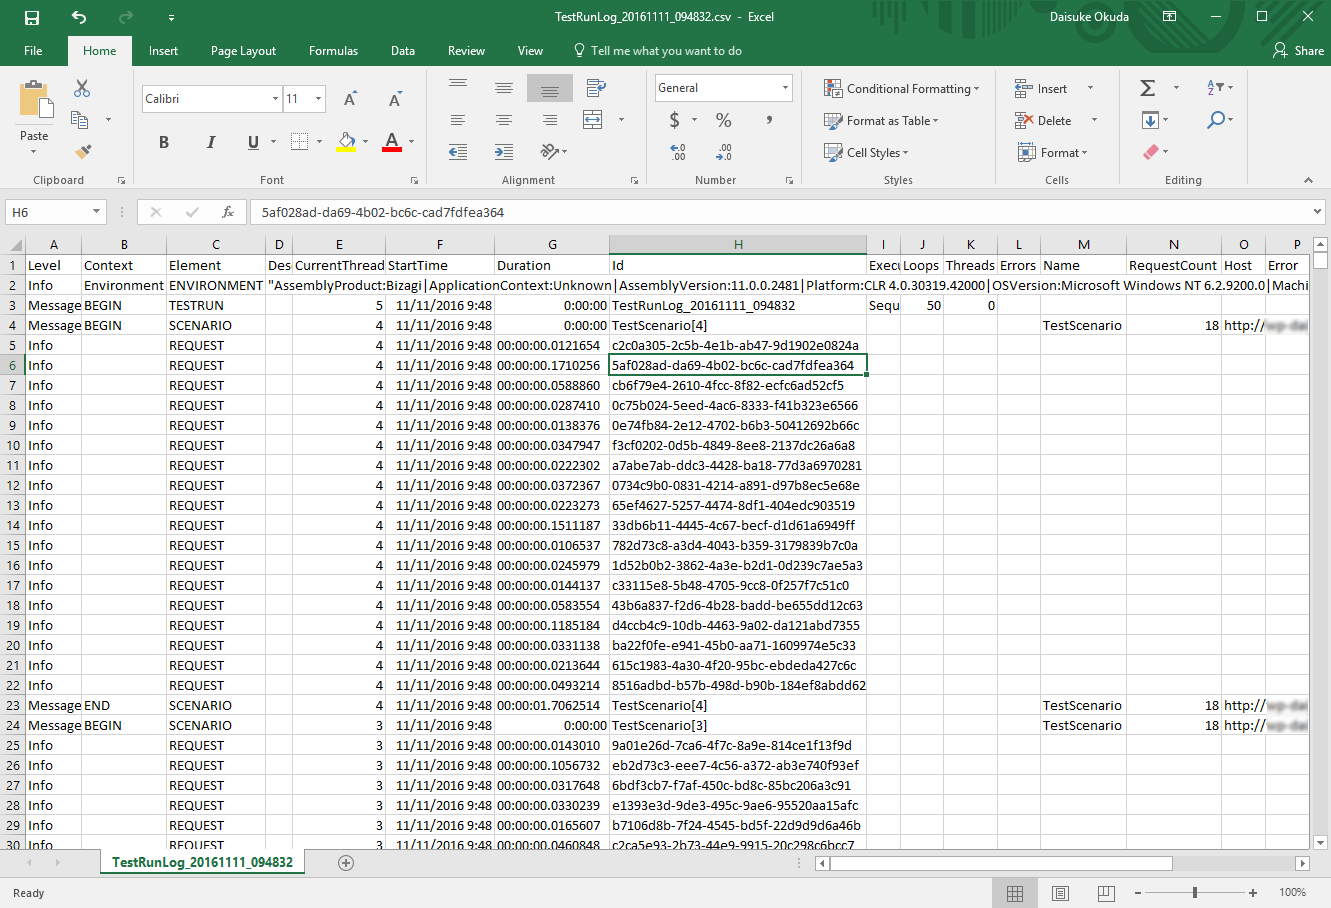
Notice you get similar information (along with duration, current scenario, etc) in csv format but displayed in a different presentation.
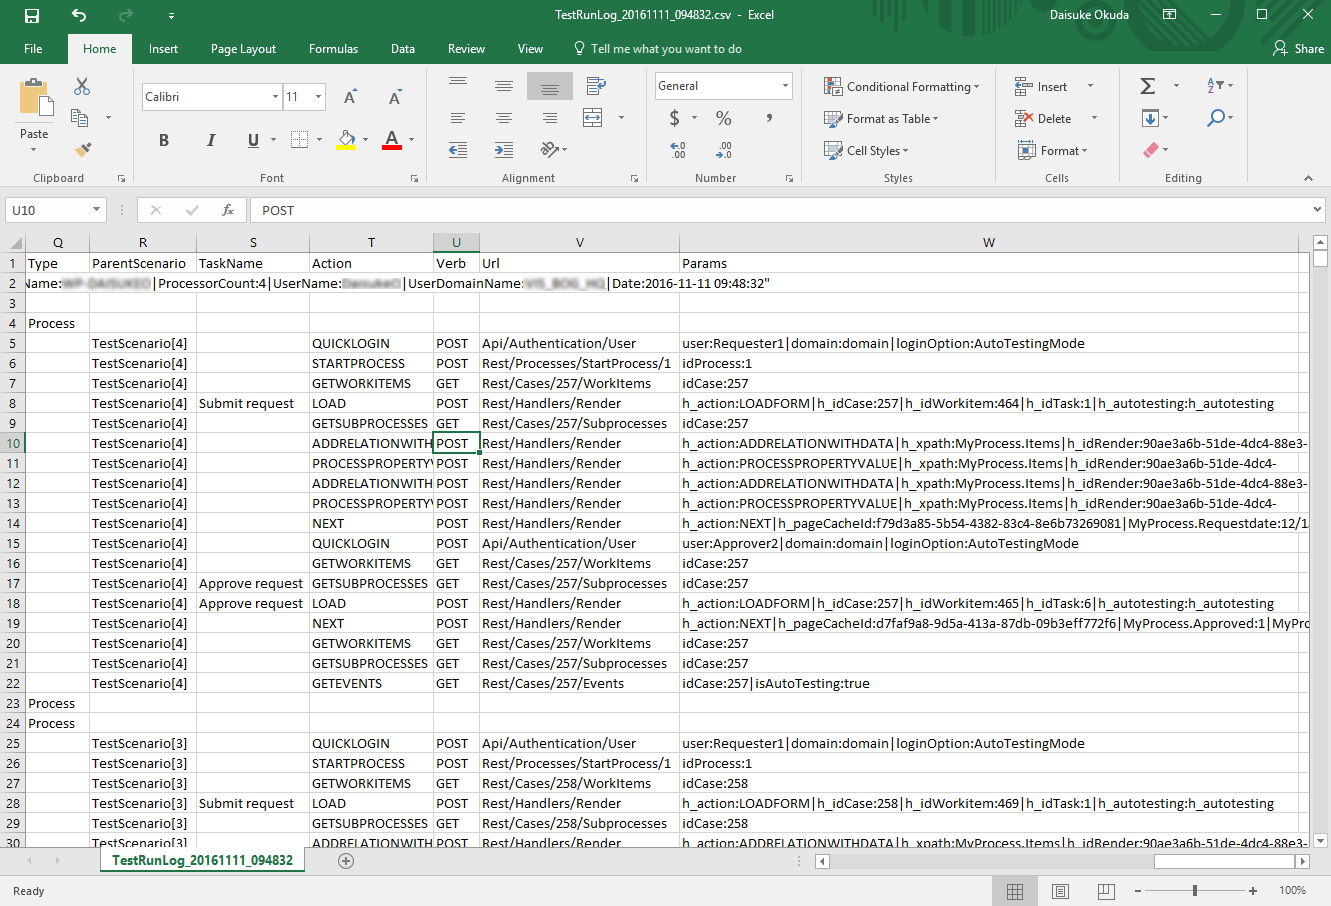
Among this information you will find details as described in the table below.
COLUMN |
DESCRIPTION |
|---|---|
Level |
The message type indicating if the particular line of the log is informative or contains an error. |
Context |
Provides contextualized information regarding the execution so that you consider that not all lines in the log belong to a request. |
Element |
The parent object to which the context refers to. |
Description |
Additional descriptive detail. |
CurrentThread |
The number of the thread running and recording that particular line. |
StartTime |
The timestamp referencing when the tool started processing this particular |
Duration |
The total time in a HH:mm:ss format, including milliseconds. |
Loops |
The number of repetitions applicable to a scenario as defined for the execution options. |
Threads |
The number of threads as defined for the execution options. |
Errors |
Detail on the error if applicable. |
Name |
Name of the scenario (applicable to scenario logged lines). |
RequestCount |
Number of total request a scenario has (applicable to scenario logged lines). |
Host |
URL of the project (applicable to scenario logged lines). |
ParentScenario |
The linked previous scenario (applicable when recording while using the based on existing scenario option). |
TaskName |
The name of the task where an HTTP request is made. |
Action |
The name of the Bizagi action that describes an overall objective of the HTTP request. |
Verb |
Defines whether the action is a POST, GET, PUT or DELETE action. |
URL |
Specific URL (suffix) of a RESTFul service where the HTTP request is made. |
Params |
Additional parameters sent to the specific RESTful service. |
At this point you have run automatic tests for your scenario, and you may make sure that these different workflow paths are error-free or watch after the duration that each request averages in order to review your implementation's performance.
Last Updated 10/9/2023 11:49:00 AM