Overview
The assignment element allows assigning values to attributes in a data model or to a variable, using a very simple interface.
The following values can be assigned:
•A fixed value: the value will adjust to match the attribute type. (i.e. Yes/No will be displayed for Boolean types)
•The value of a XPath: you can navigate the whole data model, including collections.
•An expression (open code).
•A vocabulary: choose any vocabulary (Constant or XPath definitions) that belongs to the process or the application.
•A value from an entity (master or parameter)
For a more in depth look at assigning values, please refer to: Assignment element example
Example: assigning an XPath
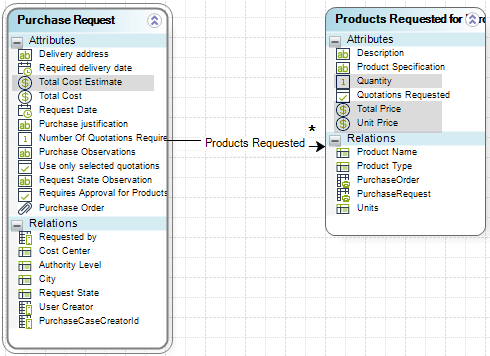
To illustrate how you can use the assignment element consider the Purchase Request process. When the end user has entered all the desired products including quantities and unit prices, we are able to calculate and save the total price for each product in the attribute TotalPrice (unit price times quantity).
Thereafter, we can calculate the total price of the whole purchase save the value in the attribute named TotalCostEstimate.
We will use an Assignment element to perform this purchase price calculation and assignment.
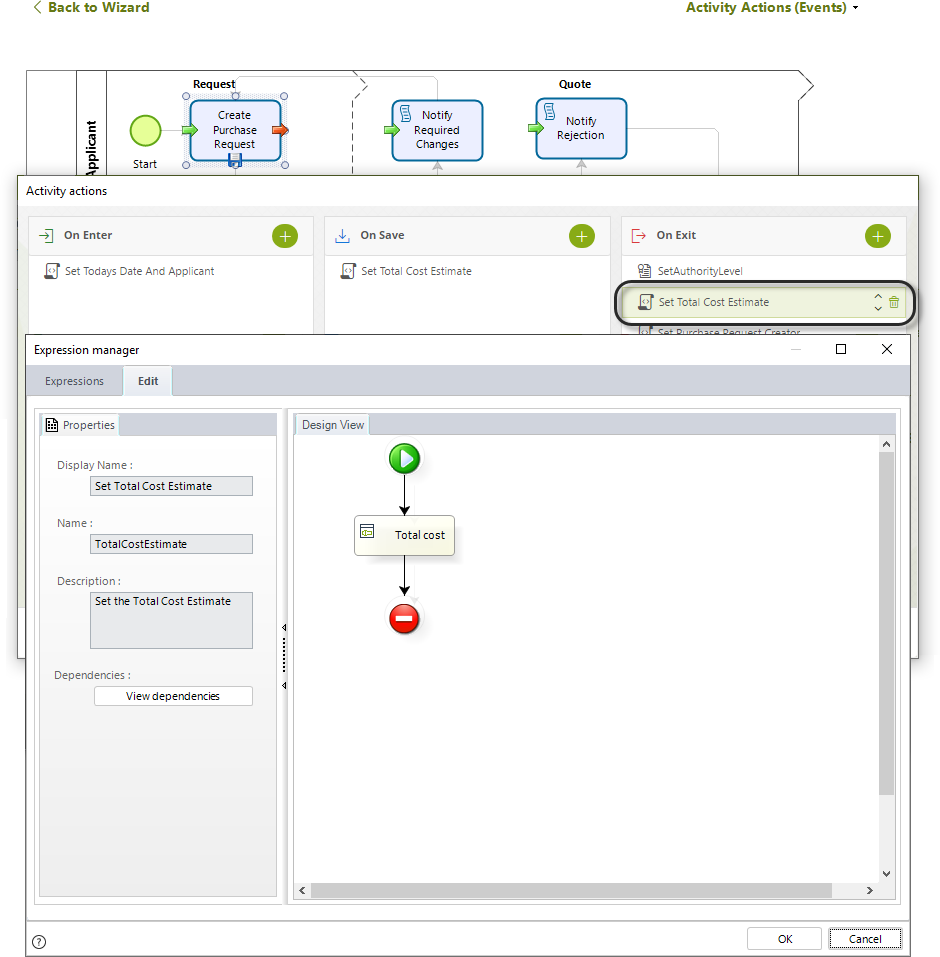
Include an On Save action on the first Activity of the process. Consequently, when the user clicks on the Save button in the Work Portal, the calculation will be performed.
Add an assignment element and give it the name, TotalCostEstimate.
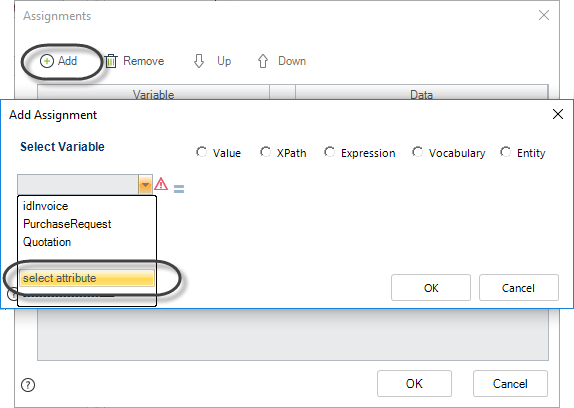
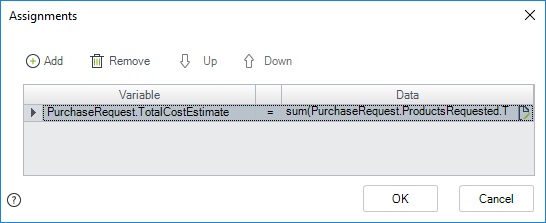
Click the Add button to add an assignment.
To set the variable on the left side of the assignment declaration, select the relevant attribute of the data model. Click the drop-down list and then select attribute.
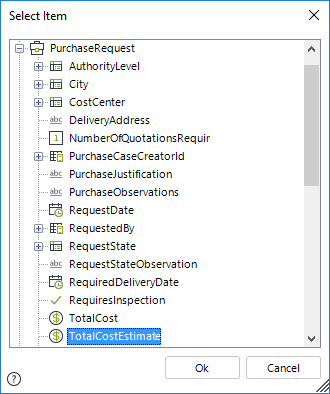
Navigate the data model until you reach the desired attribute, in this case Total Cost Estimate. Click OK.
Note the attribute has been placed in the variable placeholder on the left of the assignment statement.
To set the value on the right side of the assignment declaration, we select the data to assign.
We select an XPath expression since we will calculate the sum of all the TotalPrices of each product.
Note you can view the XPath expression on the bottom of the window bit by bit whilst you are building it. Click OK when the XPath expression is complete.

You can add as many assignments as you need.
You can also remove an assignment associated with an element by clicking on the Remove button.
Example: assigning an Entity value
Using the image below, imagine that you have a Help Desk process that handles reports of incidents (or Tickets) in order to minimize disruptions in Information Technology Services.
According to how the ticket evolves in the process it will change its Status. There is an entity-related relationship between the Process Entity called Ticket and the parameter entity called Status. The values are shown below.
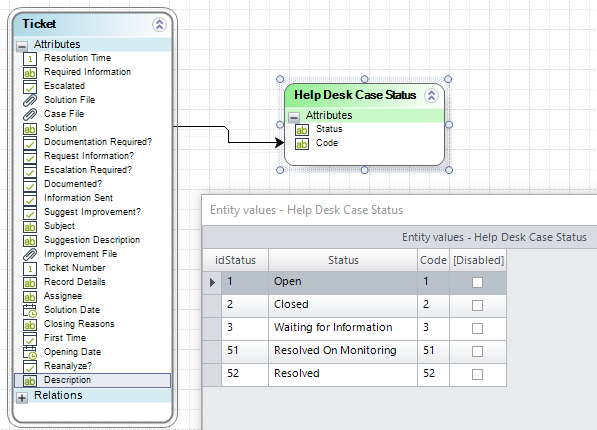
We use an assignment element to set the status of the Ticket.
As the ticket is received by the Help Desk department, its status will be set to Open.
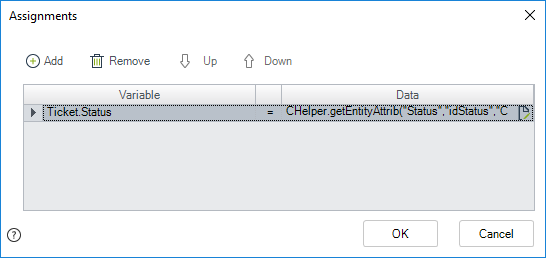
Include an Assignment element and select the XPath to be assigned: Ticket.Status.
Then select the Entity option.
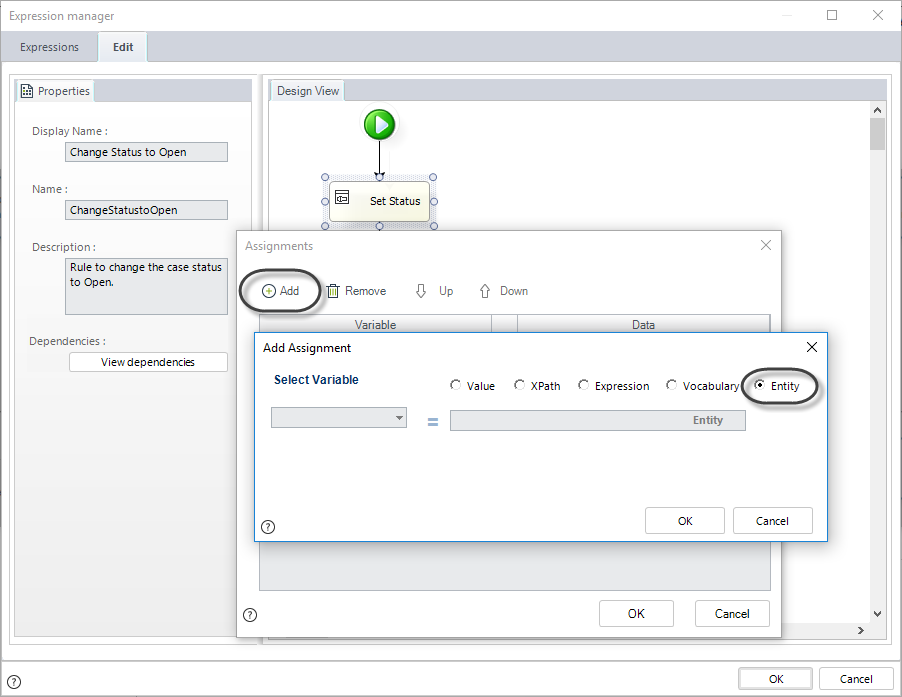
A new window will display all the Parameter and Master entities created in the entire project.
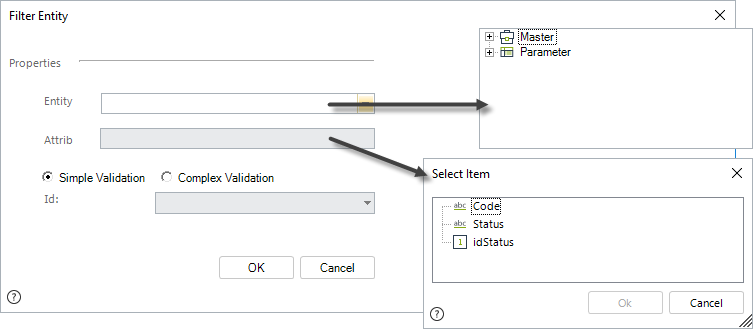
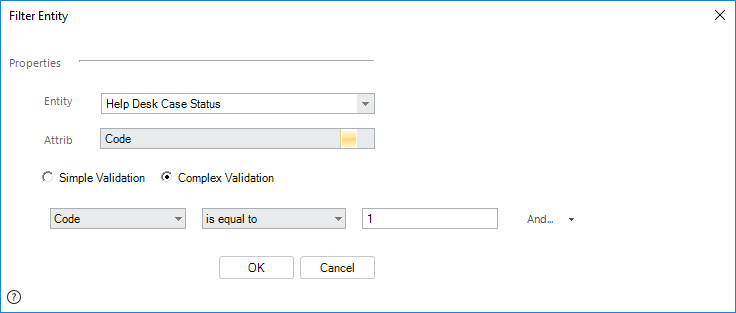
In this case we will select the parameter entity, Help Desk Case Status, and its attribute Code.
If the Identifier of an entity record is known (the id), it should be selected in the Simple Validation option.
The Complex Validation (i.e. not a direct association) option allows the user to filter the entity and return the value that complies with the condition.
In this case the Status entity has an attribute Code, that gives an individual code to each record of the entity. The code of desired status is known, so we can build a condition, as shown in the image below.
Click OK.
The assignment will be finished. Click OK to save the rule.
|
We recommend to always use an attribute Code in parameter entities so you can easily identify and manage their values, instead of using the IDs that might change when performing deployments, or managing elements in Production. |
Last Updated 1/6/2022 11:36:08 AM