Overview
During the development stages of a project, or in the Production environment, there are situations where errors need to be traced, or debugged.
Bizagi offers the possibility to trace errors in the Processes Workflows (to control and diagnose potential errors) so that administrators can ascertain if the business rules, validations, interfaces invocations, or the Process itself needs to be modified.
This is a powerful functionality for Business Rules in particular to aid in the understanding and detection of those behaviors that require adjustment.
Traces in Business Rules
For Business Rules, in addition to activating the corresponding trace option and levels, it is also necessary to include a trace command line in the Business Rule's code in order to define what exactly (the detail level) needs to traced.
This command line will record in a separate log (a .txt file), any customized information that the user wants to trace within the rule.
Traces are built using the trace function. The syntax of the function is:
CHelper.trace("FileName","Trace text" + Attribute/Variable)
The parameters of this function are:
•File Name: refers to the name of the .txt file where the traces are stored.
|
When the File Name contains a non-alphanumeric character (#, ?, &, $, %, *), Bizagi automatically replaces that character with an underscore (_) to prevent system errors or exceptions. For example, if your File Name is c#test, the .txt trace file is named c_test_log. |
•Object to be traced: the trace text identifies the trace object (attribute or variable) in the log file (.txt trace file). The object to be traced can be an attribute selected by a navigational XPath expression, a function, or a variable. The text in the quotes can be any text, it doesn't have to be the actual name of the attribute in the data model.
You can find this function in the Tracing category.

Example
Suppose a Transportation and Logistics company has defined a process called Shipping Process, to manage and monitor international shipments. The first task of this Process allows the customers to calculate the cost of their shipments. The customer must provide the dimensions and weight of the package to be sent. The estimated cost of the shipment is automatically calculated based on its volumetric weight, real weight and the cost per pound, which varies according to the destination country.
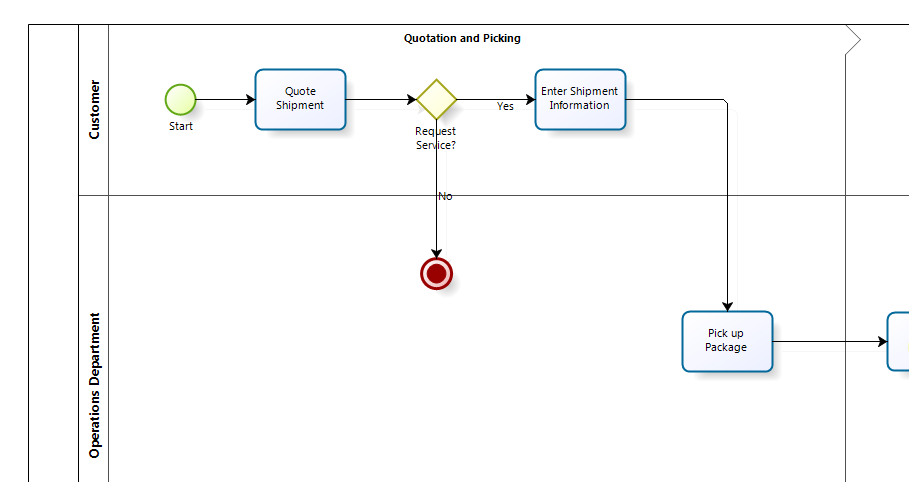
The volumetric weight reflects the density of a package. A less compact item generally occupies more volume of space, in comparison to its actual weight. The volumetric or dimensional weight is calculated and compared with the actual weight of the shipment to determine which is greater; the higher weight is used to calculate the shipment cost.
The volumetric weight is calculated by using a conversion factor (in order to be comparable to the real weight) which we will assume is always the same and is equal to "4000", so the volumetric weight is obtained by using the following formula:
Length*Width*Height/4000
You might want to verify every step of the cost calculation to make sure its correct execution.
To configure the Business Rule's traces follow the next steps:
1. Create the expression.
In this example we will define an expression associated with a button in the Form of the Quote Shipment Task.
Add the Button and associate an Action.
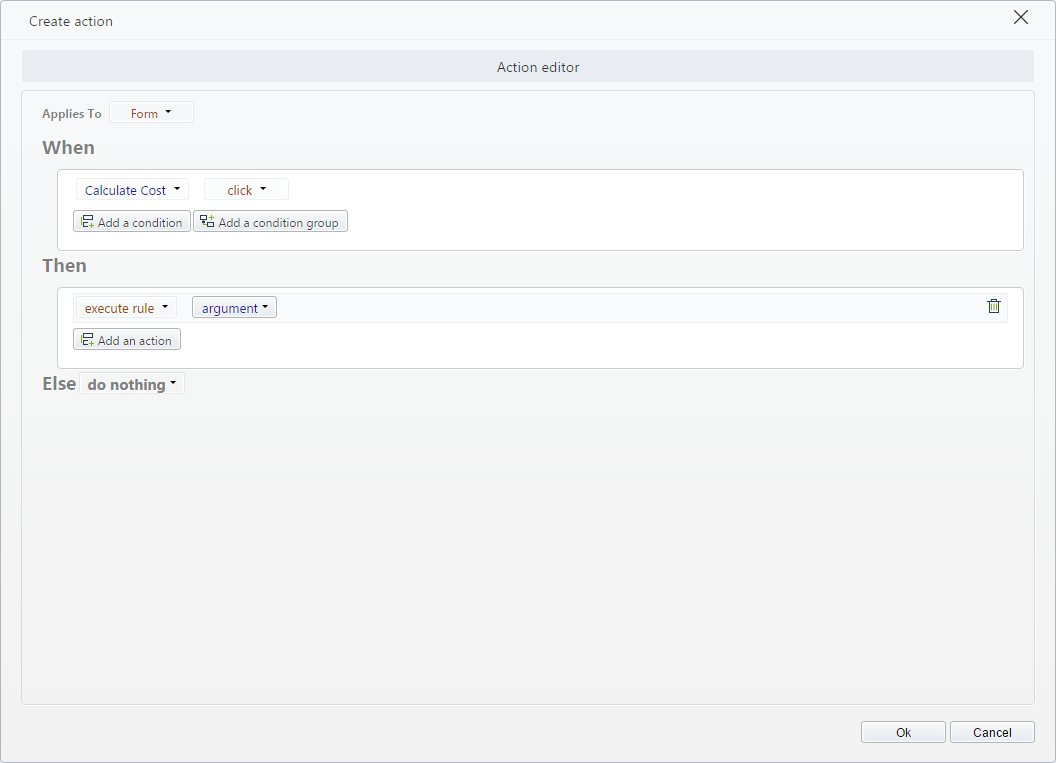
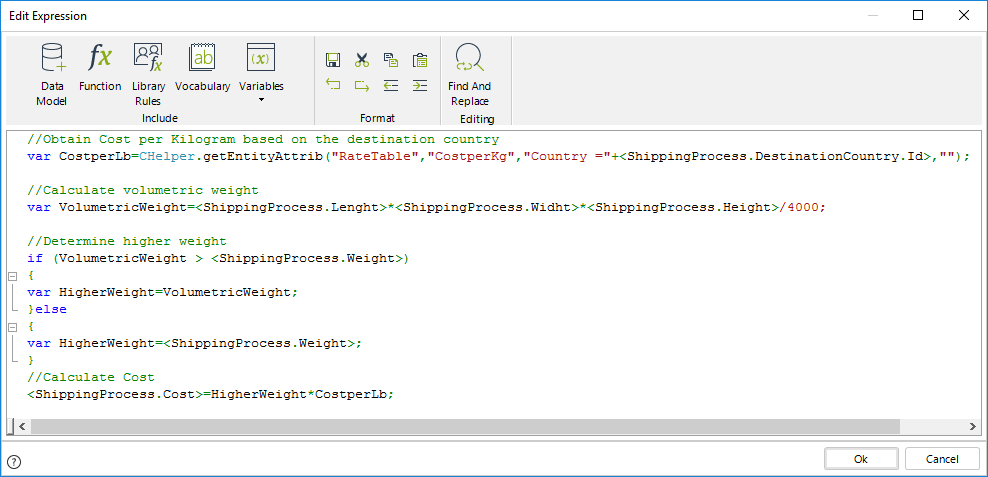
2. Include the code shown in the image below in an Expression module.
Obtain from the RateTable Entity the Cost per Pound based on the destination country.
Then calculate the volumetric weight and compare it with the real weight to obtain the Higher weight.
Finally obtain the total cost by multiplying the Cost per Pound by the Higher weight.
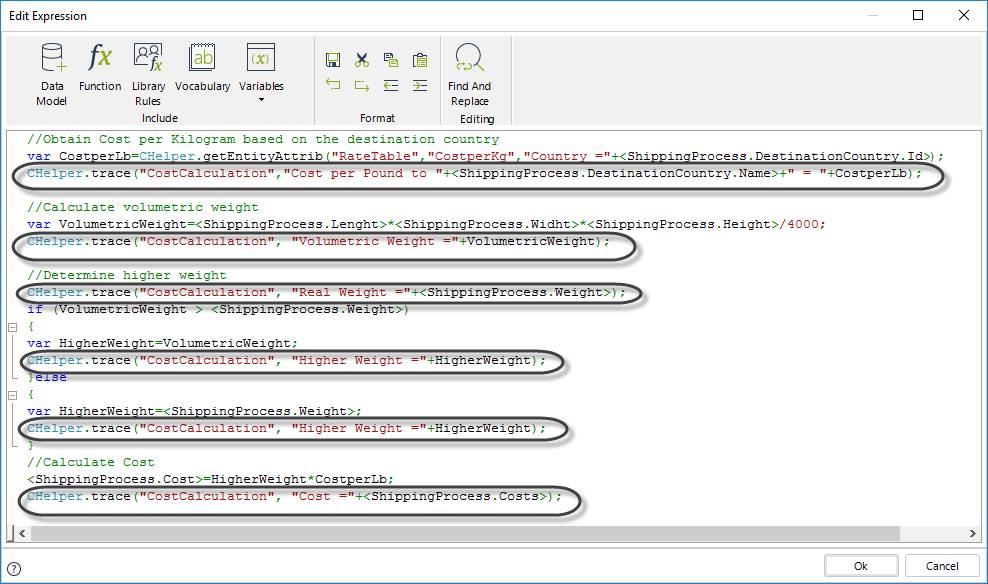
3. To include several traces use the Trace function found in the Trace category.
Define CostCalculation as the name of the file where the traces will be stored.
We will trace Cost per pound, the Volumetric Weight and the Real Weight, Higher Weight and the Shipping Cost.
We will use variables and XPath expressions in the traces to make sure the values are retrieved correctly.
Traces using variables will be written as:
CHelper.trace("CostCalculation", "Volumetric Weight ="+VolumetricWeight);
Traces using XPath expression will be written as:
CHelper.trace("CostCalculation", "Cost ="+<ShippingProcess.Costs>);
Compound traces using both variables and XPath expressions will be:
CHelper.trace("CostCalculation","Cost per Pound to "+<ShippingProcess.DestinationCountry.Name>+" = "+CostperLb);
Note that the plus sign (+) concatenates several items in the sentence.
//Obtain Cost per Kilogram based on the destination country
var parameters = new FilterParameters();
parameters.AddParameter("@Country", <ShippingProcess.DestinationCountry.Id>);
var CostperLb=CHelper.getEntityAttrib("RateTable","CostperKg","Country=@Country",parameters);
CHelper.trace("CostCalculation","Cost per Pound to "+<ShippingProcess.DestinationCountry.Name>+" = "+CostperLb);
//Calculate volumetric weight
var VolumetricWeight=<ShippingProcess.Lenght>*<ShippingProcess.Widht>*<ShippingProcess.Height>/4000;
CHelper.trace("CostCalculation", "Volumetric Weight ="+VolumetricWeight);
//Determine higher weight
CHelper.trace("CostCalculation", "Real Weight ="+<ShippingProcess.Weight>);
if (VolumetricWeight > <ShippingProcess.Weight>)
{
var HigherWeight=VolumetricWeight;
CHelper.trace("CostCalculation", "Higher Weight ="+HigherWeight);
}else
{
var HigherWeight=<ShippingProcess.Weight>;
CHelper.trace("CostCalculation", "Higher Weight ="+HigherWeight);
}
//Calculate Cost
<ShippingProcess.Cost>=HigherWeight*CostperLb;
CHelper.trace("CostCalculation", "Cost ="+<ShippingProcess.Costs>);
Save the expression.
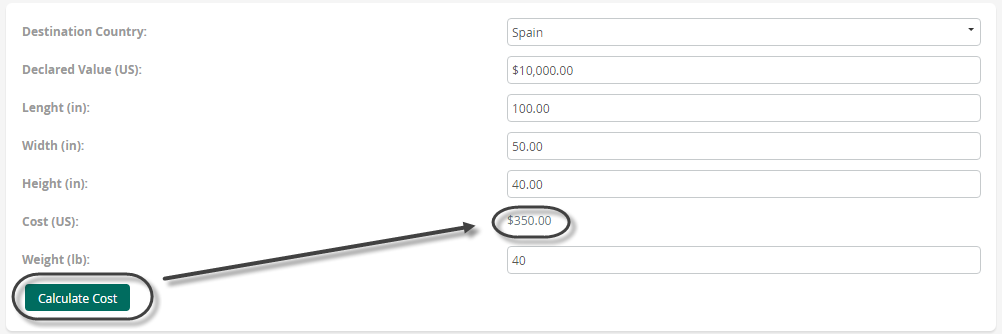
4. Run the Process and type values in the required fields. Click the button to execute the expression.
5. Go to the trace menu of the Management Console and open the .txt file with the name you defined as parameter in the CHelper.trace function
Last Updated 12/12/2022 12:16:28 PM