Overview
To configure the integration of a bot with a Bizagi process, you first need to develop your bot and publish it into the Automation Anywhere Control room. Make sure that you have access to the control room and permissions to add workitems to queues.
|
Take into account that you have to configure the Automation Anywhere bot for all your environments (Development, Test and Production); you can do so from Studio in a Development environment first. After deployment you can use MC to configure the bot connection data in Test and Production environments. You won't be able to select a bot from the MC, because of that you need to previously configure all the environments in Studio. |
Supported Versions:
•Automation Anywhere 11.3
•Automation Anywhere 360 on premise and cloud (AA 2019)
Once you have taken care of the Automation Anywhere setup of the robot, head to Bizagi Studio and go to the Expert view.

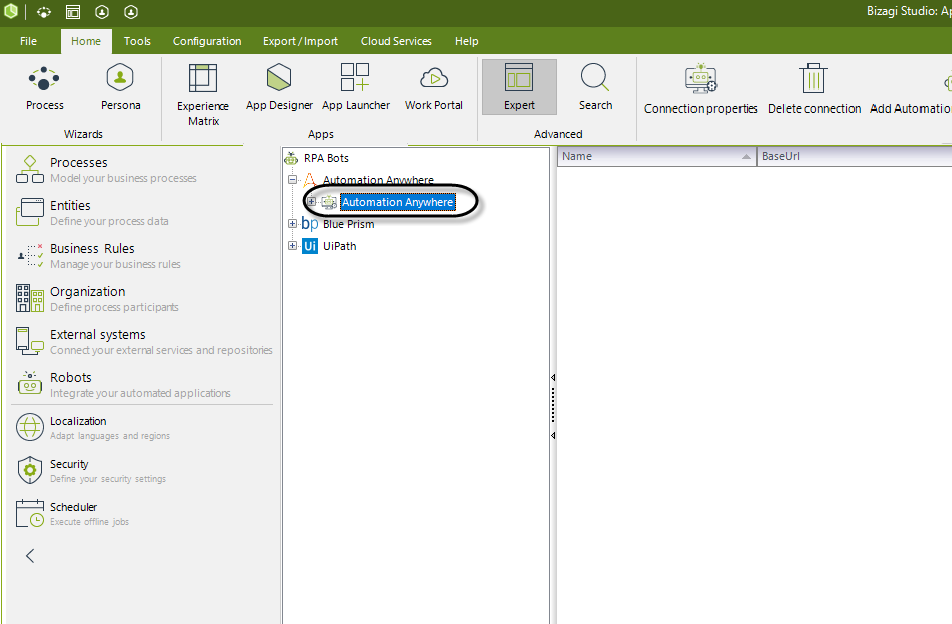
Click the Bots option and locate the Automation Anywhere branch under RPA bots.
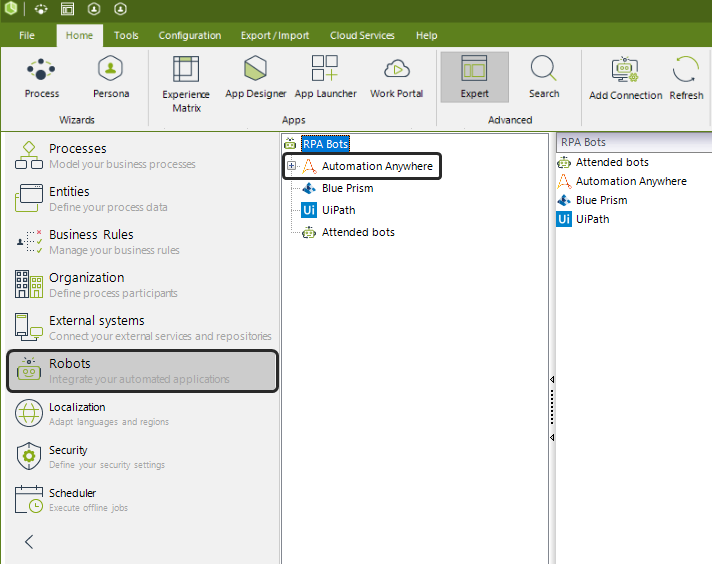
Click Automation Anywhere and then select Add Connection.
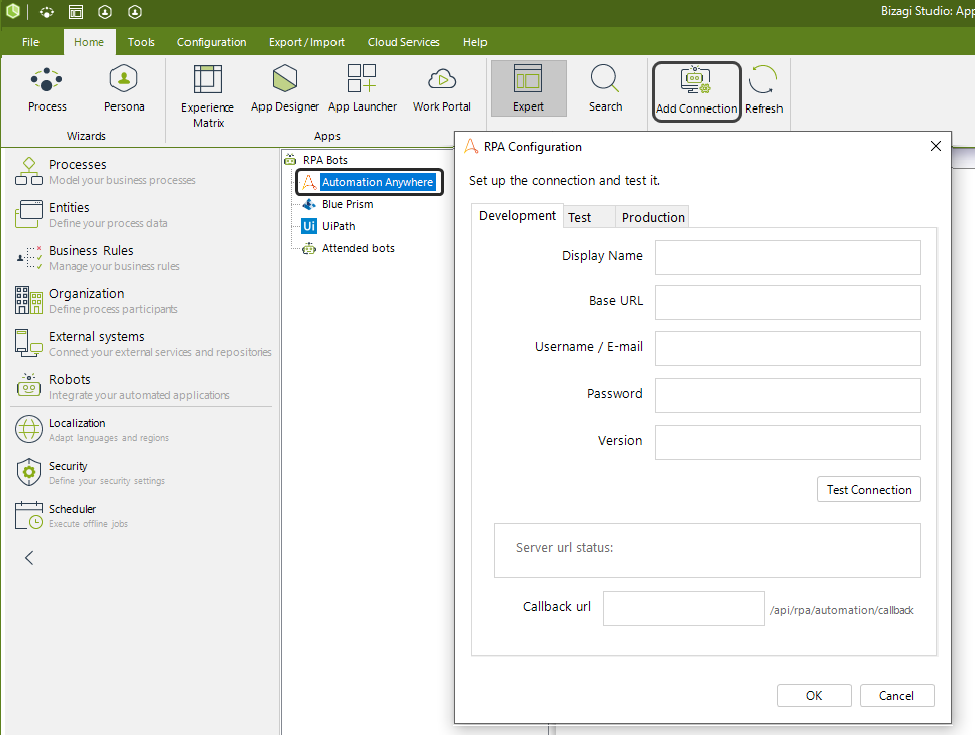
At this point, the Automation Anywhere RPA configuration wizard appears. The following list, explains the parameters you need to configure in order to assure a successful connection to your server, which hosts the process you want to trigger from Bizagi.
•Display Name: A name for the connection to let you identify it in later steps. It can be any name you want.
•Base URL: The URL associated with your Automation Anywhere server along with the port used to established the connection.
•Username/e-mail: The username you use to access the server.
•Password: Password of the user introduced in the previous field.
You don't have to configure a Callback URL unless you are using Automation Anywhere Callbacks.
To build your callback URL, use the following format:
[Work Portal URL]/api/rpa/automation/callback
Where your Work Portal URL is the URL used to access your work portal. Usually it is built using the following pattern
[http or https]://[Machine name]/[Project name]
|
The project URL configured for the callback must be the same configured in the Control Room in Automation Anywhere. For example, if your Work Portal is configured with https, the URL configured in the Control Room and in Bizagi Studio must be with https. If your Work Portal is configured with http, the URLS in the Control Room and in Bizagi Studio must be configured with http.. |
Once you are finished filling in the form fields, click the Test connection button. If the connection status is successful, the resulting connection status in the text field below, as well as the Automation Anywhere Version are automatically filled.
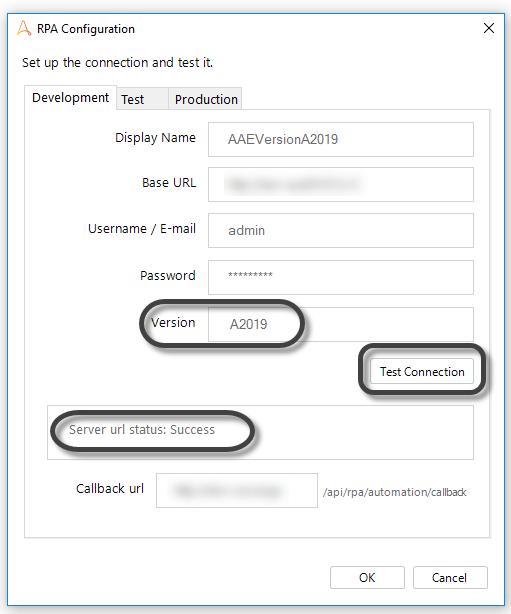
If a message indicating otherwise appears, review the inputted information or your server configuration, and try again. Once your connection is successful, click OK.
|
Bizagi Studio is compatible with Automation Anywhere V.11.3 and Automation Anywhere 360. |
You can configure a different connection for each of your Environments by creating a new configuration in their respective tab. You can change these connections for your Test or Production environment from the Management Console.
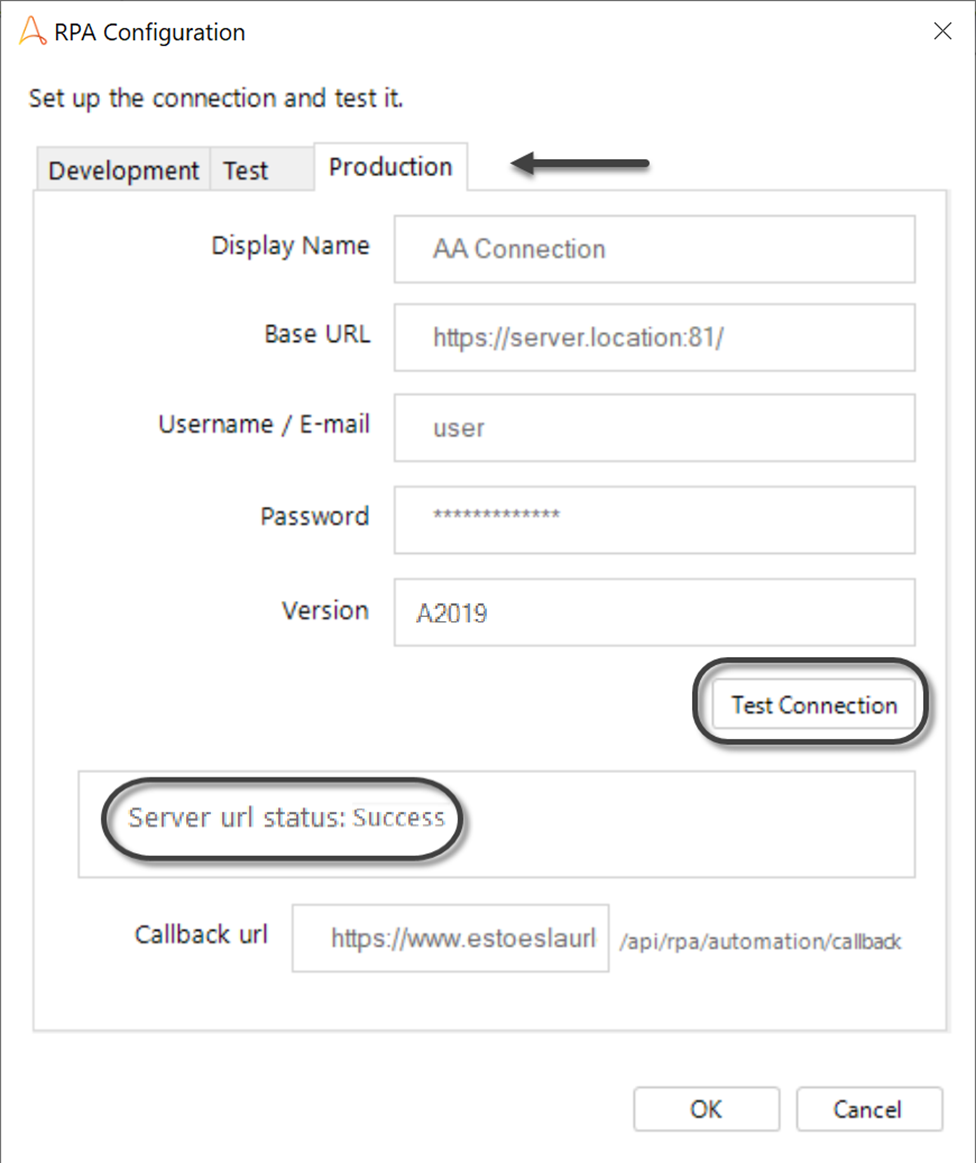
Under the Automation Anywhere branch, the new connection appears. Its name is the same as the Display Name.
Last Updated 12/10/2024 12:29:50 PM